

Aloe Vera plants are great to have around the house as they are easy to care for and are medicinal too! But the best thing about them is just how easy they are to propagate!
In this post, you’ll find everything you need to know to successfully multiply your Aloe Vera, including a step by step process, what tools you’ll need and all of our top tips to help you along the way.
Why propagate Aloe Vera plants?
Aloe Veras are great to have around as not only are they extremely low maintenance, but they clean the air and are also medicinal for cuts, scrapes and burns. And if you have too many plants in your home, then the pups can also make great gifts for friends and family!
The other reason why you might actually need to propagate your plant is if part of the plant is looking pretty unhealthy. We always recommend you try and diagnose and fix the issue, but if things aren’t getting any better, your best option is to take part the healthy part of the plant to try and save it.
What tools will I need to propagate my Aloe Vera?
This is the easy part! It’s always best to know exactly what you’ll need before taking the first cut!
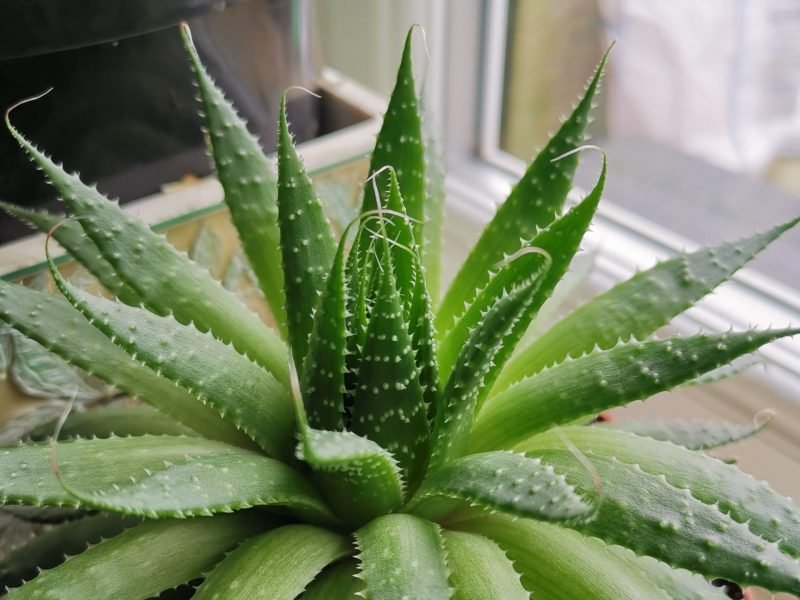
Healthy and mature Aloe Vera
Sharp scissors/shears
Spare pot(s)
Fresh succulent soil
Fresh water
Kitchen towel if you’re using the leaf cutting method
Newspaper or a plastic sheet if propagating indoors
What methods can I use to propagate my Aloe Vera?
There are two different methods and they each come with their own list of pros and cons. Propagating through offsets (pups) that naturally grow out of the mother plant is the most successful method but it requires your plant to be mature enough to grow these pups. The second method is through leaf cuttings. Whilst you can take a leaf cutting from any Aloe Vera, the success rate is much lower.
In this post, we will go through a step by step process of each method.
How to propagate an Aloe Vera through pups
Locate healthy pups to propagate
Once your plant is several years old it will start to produce lots of little Aloe Vera plants which grow out from the main mother plant. These are called offsets, offshoots or pups. You will notice them popping up around the main plant during spring and summer.
Choose how many of the pups you want to remove and make sure that they all look healthy. Avoid using any pups that are mushy, brown or very small.
Remove the pup from the mother plant
Remove your mother plant from its pot and start to shake off the potting mix around the pup. You should then see where it is attached to the main plant.
You want to use clean scissors/ shears or a knife to make the cut to avoid passing on dirt or any infection to the cuttings. Use your tools to make a clean cut across the stem. Try to make the cut as close to the mother plant as possible. Avoid breaking it off or tugging at the pup as this can damage the main stem.
Fill your spare pot with fresh potting mix
With most houseplants, you would grow them in water for several weeks before potting into soil. However, as Aloe Veras are very sensitive to root and leaf rot, they wouldn’t survive in water for that long. Your pup should also have some roots attached so will survive just fine in potting mix.
Find the right spot to grow your new Aloe Vera pup
It’ll need a spot with amble sunlight to thrive so make sure your pup is in the right place in your home.
Be patient
Now that your new pup is happily in its new home, all that’s left to do is be patient. Continue your usual Aloe Vera care but keep a close eye on it over the next few weeks to spot any issues early. With the right care and environment, your new plant should thrive and may even grow some new pups of its own over time!
How to propagate an Aloe Vera using leaf cuttings
Propagating through single leaf cuttings can be done, but it’s not as successful as using offsets. This is because the leaves are very sensitive to leaf rot and can quickly go mushy and limp. But if you’re a seasoned plant propagator, after a challenge or a leaf has naturally fallen off and you want to give it a shot, then this method is for you!
Locate a healthy leaf
When taking a leaf cutting you want to make sure that the part of the plant you are cutting is healthy to give you any chance of success. Avoid any sign of disease or pests as they will be transferred onto your new cuttings.
If one of the leaves has naturally fallen off and still looks luscious and green, you should also be able to use this.
Make the cut
Use your clean scissors to cut off one or several leaves. Make sure your tools are clean to avoid passing on any bacteria to your cutting. We recommend making a slightly diagonal cutting to increase the surface area which will help with root growth.
Leave your cutting to callous
Next, you want to leave your Aloe Vera cutting lying on some kitchen towel in a warm but dry place for a few days. This will mean your cutting will callous over which will prevent any bacteria from getting into the cutting. It also slightly reduces the risk of leaf rot too so is a really important step to propagate the leaf successfully.
Pot in fresh potting mix
You want to put your cuttings facing down into fresh potting mix. Make sure you use a succulent potting mix which is well-draining. Ingredients like perlite will help with drainage and soil aeration which helps to prevent root rot.
Be patient
Now all there is left to do is wait and occasionally add water and check in on your Aloe Vera cuttings. It will take several weeks or even months for roots to start to grow. The most important thing is that you don’t try and check root growth every few days by pulling the cutting out to inspect it. This can damage the cutting and stop any future growth.
Check on your cuttings
After about 4-5 weeks, it’s time to check how growth is going. Carefully pull out your leaf to see how the roots are getting on. If there is no growth at all, you may choose to use rooting powder to help speed up root growth.
Enjoy your new plants
After a few months, you may start to see new leaves growing out from your leaf cutting. This is a great sign and shows that your efforts have been a success. Continue caring for your new plants as you would any other Aloe Vera and in no time you should start to see even more new growth appearing.
Aloe Vera Propagation FAQs
Below you’ll find all the answers to your propagation questions, from time of year to equipment you can use to aid success.
What’s the best time of year to propagate an Aloe Vera?
We always recommend starting in spring. They take a long time to root and grow new leaves if you are using the leaf cutting method. Propagating in spring then gives quite a few months of sunshine and a warm environment which will encourage new roots and leaves to grow. It will also allow the mother plant to recover quicker from the shock.
Starting the process in autumn or winter will mean that your new plants will be trying to grow in the dormant period and you won’t see much growth. Cold temperatures can lead to an increased risk of root rot which can kill your Aloe Vera cuttings very quickly as their root system is delicate and they are technically a type of succulent.
Should I use a grow light?
If your home has quite low natural light levels then it’s a really good idea to invest in an LED grow light. They help to speed up root growth by providing the ideal environment without burning your plants.
Grow lights are also a great investment beyond just propagation. If you don’t get much natural sunlight in your home then you can use these to help all of your plants grow stronger. We use them during autumn and winter when the days are a lot shorter and darker.
Can I propagate an Aloe Vera from a single leaf?
Yes, you can propagate Aloe Vera plants by just taking a single leaf cutting! It means that if you accidentally damage the plant and a leaf falls off you can use it to create more plants instead of throwing them away.
It is a lot harder than using pups but a great challenge to see if you can make it work.
Do I need to fertilise my Aloe Vera cuttings?
We never recommend fertilising your cuttings until they are around 1 year old. It can cause a lot of shock to immature plants and cause a whole range of issues; from stunted growth to yellow leaves and more!
Common problems when propagating Aloe Vera
Propagating plants is not an exact science and there is no guarantee that it’ll work, even if you follow all of the right steps. But luckily for you, we have learnt the hard way to bring you all the different problems that might arise as well as how you can try to solve them.
Why isn’t my new Aloe Vera growing any new roots?
If you are propagating through the removal of pups, it may take a few weeks for you to see new growth. If nothing is happening we recommend using root hormone to help stimulate growth.
However, if you are propagating through the leaf cuttings method, don’t expect to see anything for several weeks/months. This method will go one of two ways; either the cutting will take root and slowly will develop a mature root system which will lead to a whole new plant. Or it’ll wilt after a month and die.
If you are trying to propagate in autumn or winter then cool temperatures may be the cause of the lack of growth. You can help to speed up root growth by using a heat pad that you place underneath your plant. This warms up the area and provides an ideal environment for new growth.
Why is my Aloe Vera leaf cutting turning mushy?
If your cutting is turning brown and mushy then unfortunately this isn’t a good sign. This is usually due to overwatering of the leaf cutting. If growing in a plastic bag, it should create enough of a humid environment so that you don’t have to water very much at all.
Trim away the mushy parts of the leaf and see if there is anything left to start the process again. Hopefully, the healthy part of the leaf can still recover and grow roots.
Why are the new leaves on my new Aloe Vera plants small?
This is completely natural and simply due to the root system being less mature than that of the larger plant so it can’t support the growth of really big leaves as they require a lot of energy, moisture and nutrients. Give it time and slowly the new leaves will start to get bigger and you can trim away the smaller leaves to encourage new healthy growth.
Hopefully, this should answer all of your propagation needs and questions. With the right methods, care and environment you should have plenty of new plants in no time! And in a year or two, they will be producing pups of their own.
Check out our Aloe Vera care guide for all the information on how to care for your new plants after propagation.


