Below you’ll find our complete Raindrop Peperomia propagation guide, with a step by step guide to the different methods, a list of tools and equipment that you’ll need as well as our top tips to help you along the way. Oh and we’ve also included a list of common problems to help you identify any problems and solve them fast!
Why propagate a Raindrop Peperomia?
Firstly, simply getting new houseplants for free; this is a great way to make gifts for friends and family without having to spend more money on plants (although we love doing that too of course!)
Another reason why you might choose to propagate your Raindrop Peperomia is to shape your plant and curb any leggy growth. Pruning your plant can help to encourage bushier growth and instead of simply throwing away those beautiful cutting, this gives you the perfect opportunity to grow new plants.
You may also need to take some plant cuttings if you notice any bad signs such as brown or yellow leaves, loss of leaves or signs of pests. If you think your plant is starting to die, it might be a good idea to take some cuttings from the healthy part of your plant and propagate it whilst also trying to revive your mother plant.
The tools/equipment you will need
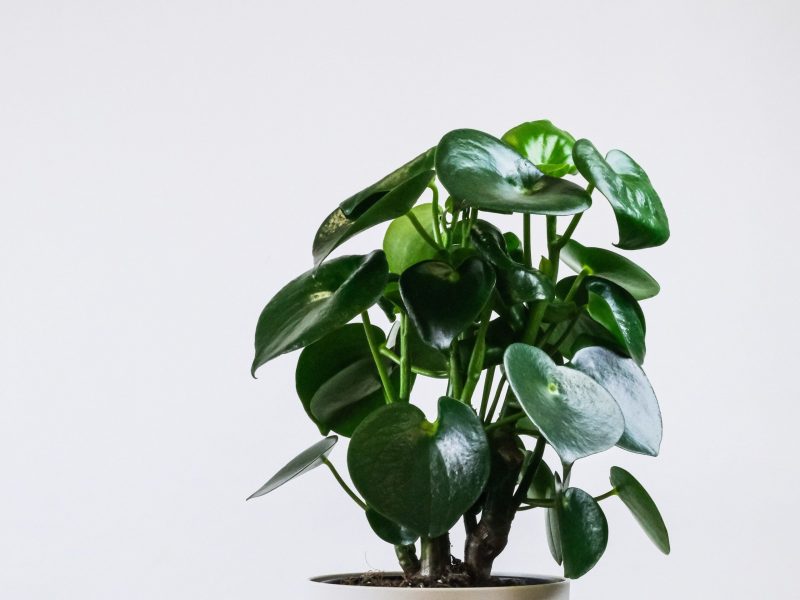
A healthy and mature Raindrop Peperomia
Sharp scissors/shears
Spare pot(s)
Fresh soil and water
Sealable plastic bag (if propagating through the leaf-cutting method)
What are the different methods that can be used to propagate a Raindrop Peperomia?
One of the greatest things about these plants is that there are several ways to propagate them. Each method comes, of course, with its own set of advantages, challenges and barriers.
You can also just use one whole leaf of your Raindrop Peperomia and roots will form from the leaf stem but you can also cut the leaf and place the sections in potting mix to grow new roots. Another method you can use is dividing cutlets and growing those in water or directly in potting soil depending on the maturity of the root system.
Propagating a Raindrop Peperomia
How to propagate a Raindrop Peperomia using leaf cuttings
Unlike a lot of other houseplants, you can use just a single leaf, rather than needing a node or stem cutting!
Locate a healthy leaf
When taking a leaf cutting you want to make sure that the part of the plant you are cutting is healthy to give you any chance of success. Avoid using any leaves that are showing signs of disease or pests as any problems will be transferred onto your new cuttings.
You can try to use leaves that have naturally fallen off (as you’ve got nothing to lose) but you will have more success with healthy leaves.
Make the cut
Use your clean scissors to cut off one or several leaves. Make sure your tools are clean to avoid passing on any bad bacteria to your cutting. Cut fairly close to the stem to as this helps if you choose to grow it in water.
Choose how to grow your leaf cutting
It’s at this stage you need to decide between the two main methods of growing leaf cuttings. The first method is where you place the stalk attached to the leaf in fresh water. After several weeks, roots will begin to grow.
For the second method you need to cut the leaf in half horizontally. Place both parts of the leaf into the potting mix with the cut side facing down. Push the leaf section with the stem further into the soil than the other as this is where the roots will form. With this method, you should see multiple Peperomia plants grow out across the edge of the leaf that was cut.
Place in a sealable clear plastic bag
If you’ve pot your cuttings in fresh mix, you want to create a little greenhouse with a plastic bag to make the environment warm and humid. Keep the bag a little open to have some air circulation. The humidity that will build up in the bag means you won’t have to water as much. Just a little each week or slightly more if you notice the potting mix is very dry.
Be patient
Now all there is left to do is wait and occasionally water and check in on your Raindrop Peperomia cuttings. It will take several weeks or even months for roots to start to grow. The most important thing is that you don’t try and check root growth every few days by pulling the cutting out to inspect it. This can damage the cutting and stop any future growth.
Check on your cuttings
After about 4-5 weeks, it’s time to check how growth is progressing. If roots are still very small and delicate then maybe grow in the ‘greenhouse’ for a few more weeks. If roots are quite established then you can start to grow the cutting outside of the plastic bag. If you’re growing the cuttings in water, then transfer to potting mix once the roots are more than a few centimetres in length.
Enjoy your new plants
After a few months, you may start to see new leaves growing out from your leaf cutting. This is a great sign and shows that your propagation efforts have been a success. Continue caring for your new plants as you would any other Raindrop Peperomia and in no time you should start to see even more new healthy growth appearing.
How to propagate a Raindrop Peperomia plant through the stem cutting method
Locate your stem cutting
Like with the method above, you need to make sure that the plant is healthy. You also need to make sure this section has at least one node (stem joints). You will pick the top of one of the stems for the first cutting, but you can then also take stem cuttings lower down to have a few shots at success.
Make the cut
This is the scary part! Now that you have located the section of the stem, you need to cut it off! Use clean scissors/ shears or a knife to make the cut to avoid passing on dirt or any infection to the plant. Use your tools to make a clean cut across your plant in a diagonal way. This increases the surface area of the cutting which allows for faster root growth.
Take off any lower leaves
As you will be placing your cutting in water for several weeks you want to carefully remove any leaves on the lower part of the cutting that may end up sitting in the water. They will rot if they are sat in water for a long period of time so best to cut them off now. If your Raindrop Peperomia cutting only has a few leaves then skip this step and make sure the water level isn’t super high.
Place your cuttings in water
Make sure that the node(s) on the stem cutting is sat in the water so that the roots will start to grow out from there. Place your glass in bright but indirect sunlight away from any temperature extremes.
Change out the water regularly
Refresh the water every few days to keep it free from bacteria and stop it from stagnating. Stagnant water will not only harm your plant but it will smell pretty bad too!
Be patient
This is the point at which things can get a little boring. There is nothing left to do other than change out the water and wait for roots to grow. Don’t worry if this process takes several weeks or months as that is totally normal! Raindrop Peperomia propagation is very unpredictable and depends on a lot of things so just make sure your cutting is healthy and you should start to see new roots soon.
Plant your cuttings into potting mix
Once the roots have matured well growing in water you can pot your cutting into soil. We recommend using a high-quality potting mix to aid with drainage and aeration. Carefully place your cutting into the mix making sure not to damage the delicate newly formed roots and continue regular plant care.
Propagating a Raindrop Peperomia is easy!
Raindrop Peperomia Propagation FAQs
Propagating these plants can be a little trickier than other plants (especially when using single leaves) so it’s really important to understand the various steps, the best time of year, equipment needed and fertiliser needs.
What’s the best time of year to do this?
We always recommend starting in early spring. They take a long time to root and grow new leaves, especially if you’re propagating through single leaves rather than stem cuttings. Starting in spring gives your plant plenty of sunshine and a warm environment which will encourage new roots and leaves to grow.
If you do choose to do it in autumn or winter will mean that your new plants will be trying to grow in the dormant period and you won’t see much growth. Cold temperatures can lead to an increased risk of root rot or leaf rot.
Can I use single leaf?
Yes! One of the greatest things about Raindrop Peperomia plants is that you can propagate them from just a single leaf. This is quite rare though as with most houseplants you’ll need a node or rhizome!
Do I need to fertilise my cuttings?
We never recommend fertilising your cuttings until they are around 1 year old.
If using the division method you can get away with it much sooner but with these plants, it’s best to leave it for a while as your cuttings mature.
Common problems you might run into
Growing new houseplants from cuttings will never always be successful (even for plant experts) and you will probably run into some issues from time to time. But luckily for you, we have learnt the hard way to bring you all the different problems that might arise.
Why isn’t my new Raindrop Peperomia growing any new roots?
Using leaf cuttings, and even stem cuttings, is a long game and it can take a month or two for any signs of new growth at all. As long as the environment and care are right for your Raindrop Peperomia leaf or stem cuttings then you should start to see new roots and leaves growing.
If you’re trying to propagate in autumn or winter then cool temperatures may be the cause of the lack of growth. You can help to speed up root growth by using a heat pad that you place underneath your plant to provide a nice warm environment.
Why is my leaf cutting turning mushy?
If your cutting is turning brown and mushy then unfortunately this isn’t a good sign as it means the cutting is rotting. The cause could be low temperatures, too much water or stagnant water.
Trim away the mushy parts of the leaf and see if there is anything left to start the prcess again. Hopefully, the healthy part of the leaf can still recover and grow roots.
How to care for your Raindrop Peperomia after propagation
Peperomia Raindrop plants need quite a bit of sunlight to thrive but you want to make sure that your new plants aren’t getting too much direct light. Intense light can be particularly damaging to young plants so monitor the light level closely.
You also want to make sure that you are getting the right level of moisture in the soil. Not too much but not too little to keep an even moisture level. The roots on your new Raindrop Peperomia will be very delicate and particularly sensitive.
But it’s not just water and lighting that you need to monitor when it comes to caring for your new Raindrop Peperomia plants. They need warm temperatures and higher humidity levels to thrive. You want to make sure that you keep your new plants away from any cold drafts. This includes being near external windows or doors that are drafty but it also means away from air conditioning vents. Although the cool air might be refreshing for you, it can be really damaging to your plants. We recommend picking up a digital thermometer to keep track of any changes in temperature. It’s a small investment to make to ensure your new Raindrop Peperomia plants are in the right spot to aid root growth.
And when it comes to humidity, that’s pretty easy to take care of too. Whilst we can’t create a tropical paradise in our homes, misting every few days, using a pebble tray and buying a humidifier will go a long way to keeping your Raindrop Peperomia plants happy. It will prevent the leaves from drying out so it’s not something you want to forget about and hope for the best!
We hope you have found this complete guide to Raindrop Peperomia propagation useful. It’s never an exact science and some cuttings will take longer to grow than others.
Check out our Raindrop Peperomia care guide for more information on how to care for your new plants once they start to mature!


