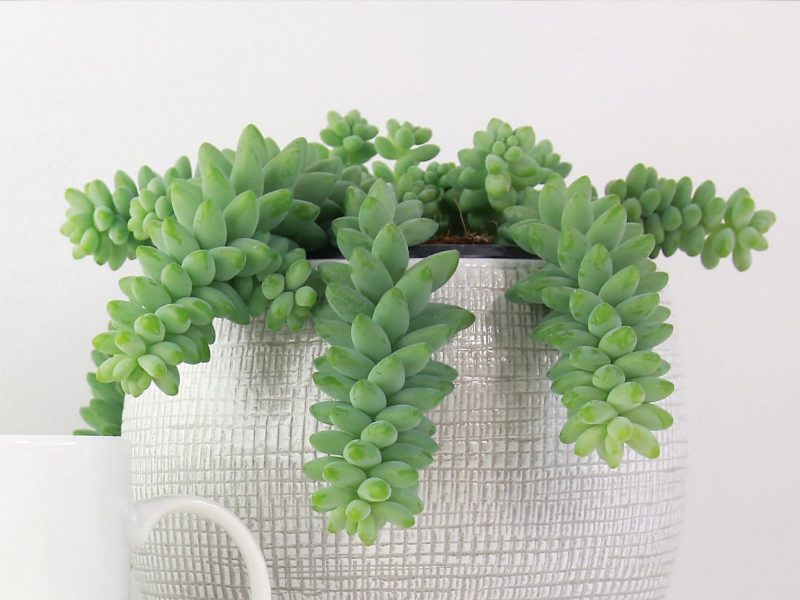
Burro’s Tail plants are one of the easiest plants to propagate so are great for beginner plant parents and you’ll have plenty of new plants before you know it. The other great thing about is you can propagate your plant no matter how big, small, young or old it is.
In this post, we’ll go through each of the methods to help you choose which is right for you and your plant. You’ll also find a list of tools you’ll need as well as how to diagnose and fix any issues you might come across along the way.
Why propagate a Burro’s Tail plant?
Before we get into the step by steps of all the different methods, we thought it’s important to go through the different reasons why plant parents choose to propagate their plant.
Burro’s Tail plants are quite delicate so you’ll notice that they often drop leaves. This is totally normal and nothing to worry about if the number of new leaves is more than the number they are losing. It can also happen that full stems fall off the plant, either because they are knocked or simply due to natural ageing. Instead of throwing away these incredible leaves and stems, why not use them and create new plants.
Another reason is to reshape your plant. During the dark winter months, growth can become quite leggy and uneven. Pruning your plant can help encourage bushier growth and also help your plant fit into the space better (sometimes they can grow too long and hit the floor or other furniture). Like with the stems that fall off naturally, it’s a waste to throw them away.
The other reason a lot of plant parents are actually forced into propagation is if it sadly starts to develop brown, yellow, mushy or dry leaves. At Fiddle and Thorn, we are strong believers in always diagnosing the issue and attempting to fix it before taking cuttings or giving up on your plant. But if things don’t start to improve you might need to take a section of the healthy part of the plant to keep it alive. When doing this you need to make absolutely sure that the stem(s) you are using are still completely healthy. Any issues with the cutting will actually affect the cutting a lot more as they are more sensitive than mother plants.
What tools will I need?
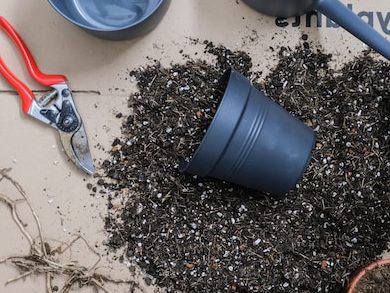
It’s important to make sure you have all the right things before you start propagating your Burro’s Tail.
Healthy Burro’s Tail plant
Sharp scissors/shears
Spare pot(s)
Fresh soil and water
Newspaper or plastic sheet if you’re propagating indoors
What different methods of propagation can I use?
There are two main methods for Burro’s Tail plants; stem cuttings or leaf cuttings. Stem cuttings is the main method which not only has quicker results but is also slightly more successful in our experience. But as your plant will often lose a few leaves, it’s a great experiment to try and propagate these as you have nothing to lose. Leaf cuttings are probably the preferred method for plant parents with quite a young plant, as they might not want to take off a whole stem.
We will go over each different method in detail below so you can figure out which is the best for you and your plant!
How to propagate a Burro’s Tail plant using stem cuttings
This is the main method as it’s quicker than growing individual leaves and is also more successful.
Locate a healthy stem
When taking a stem cutting you want to make sure that the part you are cutting is healthy to give you any chance of success. Avoid using stems that show any sign of disease or pests as they will be transferred onto your new cuttings and very quickly take over your new plant.
Make the cut
Using sharp scissors or a knife make the cut across the stem. Make sure your tools are clean as you don’t want to pass on any direct, bacteria or pests to the wound in your cutting. We recommend cutting diagonally across the stem to increase the surface area for root growth.
Remove the lower leaves
You want to carefully remove the leaves at the lower third of the cutting. You will be growing it directly in potting mix to this ensures there is plenty of space for root growth. The lower leaves will also start to rot if they are growing in often damp potting mix so best to remove them.
Let the stem cutting callous over
Before placing in potting mix, you want to leave your stem cutting out in a warm but dry place for a few days. This will ensure the cutting wound callouses over and will help prevent any bacteria from getting into your plant.
Pot your cutting in soil
Now that your Burro’s Tail stem cutting has calloused over, it’s time to pot it into soil. Use a fresh high-quality potting mix that is designed for succulent plants. This will not only ensure that your cutting gets the right balance of nutrients, but it also means the mix will contain perlite and other ingredients to help with drainage. Without these, the risks of overwatering and root rot are much higher.
Sometimes when the cuttings are quite long and heavy, you’ll have a difficult time keeping it in the soil. If this happens then you just need to use plant ties to keep it in the soil.
Resume normal care
That’s it – your Burro’s Tail propagation is complete. Now all you need to do is resume usual care and keep an eye on your new plant to spot any signs of unhappiness. With the right care and environment, your new plant will soon be long enough to take cuttings from!
How to propagate a Burro’s Tail using single leaf cutting
Whilst this method can take quite a while to actually create new plants, it’s a great one to try as you can do it with just a few single leaves. We recommend trying about 5-10 individual leaves at the same time to give you the best chance of success.
Remove the leaves from your Burro’s Tail
You’ll want to start by collecting a few leaves from your healthy plant. You can simply snap these off with your fingers, but if you want to be a little more accurate we advise using some small scissors or shears. It can often happen that leaves naturally fall off your Burro’s Tail. You can use these leaves if they look healthy, just avoid any that are dry, shrivelled or faded in colour.
Let the leaves callous
Lay your single leaves on a piece of paper towel to dry out. Over time the leaves will slowly callous over the cut end which helps to avoid bacteria getting into the leaf cutting. This should take about 3-5 days.
Lay your Burro’s Tail on potting mix
Gently lay your individual leaves on top of fresh succulent soil. Press them in ever so slightly but you don’t want them to be dug into the soil.
Mist your leaves occasionally
Leaf cuttings really don’t need much water as they will rot and wilt. However, giving them the occasional mist will help the potting mix retain some moisture which will encourage root growth.
Be patient
Now all you have to do is wait. With the right care and environment, you should start to see the individual leaves grow some roots and eventually even new leaves. It looks pretty cool when this starts to happen, so it is 100% worth the wait.
Resume usual care
Now that your individual leaf cuttings have taken root and have started to develop their own leaves, your propagation process is complete! Continue your usual Burro’s Tail care routine and you’ll have plenty of new healthy stems in no time!
Burro’s Tail Propagation FAQs
Propagating your plant can sometimes feel a bit daunting because the process is slightly different to a lot of other houseplants. But don’t worry, we have all of the answers to your questions below to make sure it’s is a success and you come away with plenty of new healthy and happy Burro’s Tail plants.
When is the best time of year to propagate my Burro’s Tail?
Startings in spring will give you the best chances of success. It means that you will have plenty of warm and bright months ahead which will aid the growth of new roots and leaves.
Growing cuttings in colder and darker months increases the risk of leaf and root rot as growth will take much longer as your plants will be dormant for a lot of that period. It can be quite a shock for your plant so giving it the ideal conditions to recover will help avoid problems with the mother plant.
Is it a good idea to use root gel for Burro’s Tail propagation?
Whilst it is not essential, you can have a lot of success with rooting hormone. You can choose between rooting powder, gel or liquid. We recommend using powder as you can dip your leaves and stems into it before placing them in soil.
Should I use a grow light for my cuttings?
Grow lights are great to use when you’re propagating without much natural sunlight. They help to stimulate both root and leaf growth and can be used to speed up the process too.
LED grow lights are also great for mature houseplants over autumn and winter as they help to prevent leggy growth and other issues caused by a lack of sunlight.
Can I propagate a Burro’s Tail from a single leaf?
Yes, you can! Leaf cuttings are one of the best methods to propagate as they root pretty easily when placed directly on potting mix.
How do you take care of a young Burro’s Tail plant?
Caring for young plants is pretty much the same as mature mother plants! Lots of bright light and little water will keep your young plant growing and thriving.
Common problems when propagating a Burro’s Tail
We always recommend keeping a close eye on your cuttings to help you spot any issues early as this will give you the best chance at bringing your plant back to full health.
Why isn’t my cutting growing any roots?
Growth on cuttings, especially individual leaf cuttings, is so unpredictable so there is no right or wrong time for them to grow roots. Make sure your cutting looks healthy, has ample light (but no harsh direct light), enough warmth and the occasional watering and you should see roots develop soon.
If your cuttings are growing in quite cool temperatures then this might be why there isn’t much root growth. You can help to speed up the process by using a heat pad that you place underneath your cuttings. This warms up the area and provides an ideal environment for new growth.
Why is my cutting turning mushy?
If your cutting is turning brown and mushy then unfortunately this isn’t a good sign at all. This is usually due to overwatering.
Burro’s Tail plants are very sensitive to overwatering so make sure you are using a well-draining succulent specific potting mix as well as leaving the soil to dry out completely between waterings.
Why is my Burro’s Tail cutting turning white?
If your cutting is fading and losing its colour then this is often a sign that it’s getting too much direct light. Move your plant to a slightly shadier spot in your home and remove the worst affected leaves.
How to care for your Burro’s Tail cuttings after propagation
Now that the difficult part of propagation is over, and you have come away with plenty of new Burro’s Tail plants, it’s important to continue the right care to help them thrive. All new plants and cuttings are quite sensitive after propagation so it’s especially crucial that they are in the right environment.
One of the most important factors to monitor is sunlight. They love sunshine and can really struggle in the darker areas of your home. However, it’s important not to expose your young Burro’s Tail cuttings to too much direct sunlight, especially in summer. This can very quickly burn the leaves and dry out the plant.
Second to sunlight, it’s not a surprise that watering habits need to be closely monitored for Burro’s Tail plants. As they are a type of succulent, it’s crucial that you don’t let the potting mix become too soggy. Mature Burro’s Tail plants have very sensitive and delicate root systems, and it is even more so with younger plants that have just been propagated. Even the slightest waterlogged soil can start to rot the roots and cause serious damage.
Other important environmental factors to consider when caring for your Burro’s Tail after propagation are temperature and humidity. Whilst they require warm temperatures to really thrive and grow, humidity is something you don’t need to consider. They will thrive in the natural humidity level of your home and can even start to rot if you boost the humidity.
Hopefully, this guide has given you all the information you need to create plenty of new happy and healthy plants. It will require a bit of patience though so it’s not something that will happen overnight.
Check out our detailed Burro’s Tail care guide for more information on how to continue to care for your new plants once they have matured.


