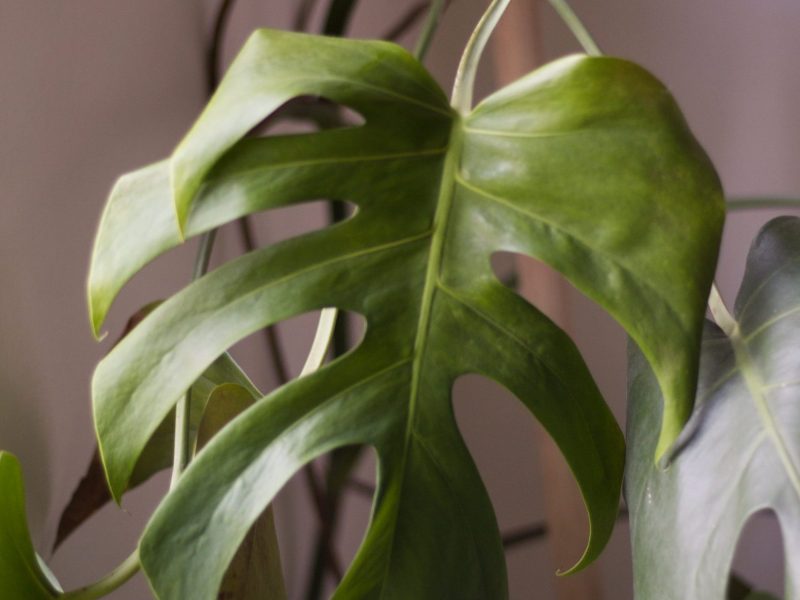
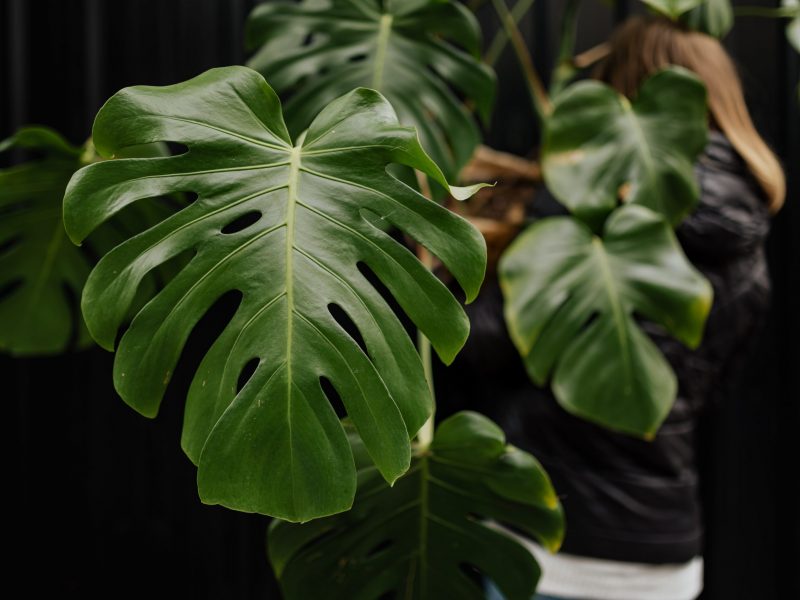
Monstera Deliciosa, also commonly known as Swiss Cheese Plants, is one of the most unique, popular and striking houseplants. Originating from the tropical rainforests, they are loved for their large heart-shaped split leaves which dominate the room. Propagating your Monstera may feel a little daunting at first but if you have a strong and healthy mother plant it can be a really simple process. Luckily they also grow fairly fast and they are quite resilient so are a great plant to propagate.
In this post we will guide you through the complete propagation process; the various ways you can propagate a Monstera, the dos and don’ts, what tools you’ll need to propagate and things to look out for to ensure a successful propagation.
Why propagate a Monstera plant?
There are several reasons why you might choose to propagate your plant. Firstly, they don’t always grow how we want them to! They sometimes grow sideways, too leggy or tall. Propagating can help to keep your beloved plant in the right shape for your space.
If you notice that your plant is dying then sometimes the only option is to propagate the healthy part of the plant and give up on the rest. Although we never like this option, sometimes it’s the only way to keep at least some of the plant alive.
And lastly, our favourite reason to propagate Monstera plants; get free plants! Propagating is a great way to multiply the amount of greenery in your home without actually having to spend any more money on plants. Cuttings also make great gifts for friends and family so the reasons you might want to propagate one are almost endless…
What tools you will need
Let’s start off with the easy part. It’s important to make sure you have all the right things before taking your first cutting!
Healthy and mature Monstera Deliciosa plant
Spare pot
Fresh soil and water
Newspaper or plastic sheet
Toothpick, plastic wrap and peat moss (if you are using the air layering method)
What methods can I use to propagate my Monstera Deliciosa?
There are three main methods are stem cuttings, air layering and division. Stem cuttings and division are definitely the more common propagation methods used and the ones we would recommend if you are fairly new to propagating houseplants. But you can have really great success with the air layering method and is perfect for plant parents wanting to do something a little different. Below you will find a step by step guide to each method.
How to propagate a Monstera through stem cutting
This is probably the most straight forward method of propagation, it’s likely this is the route you’ll take for the first time.
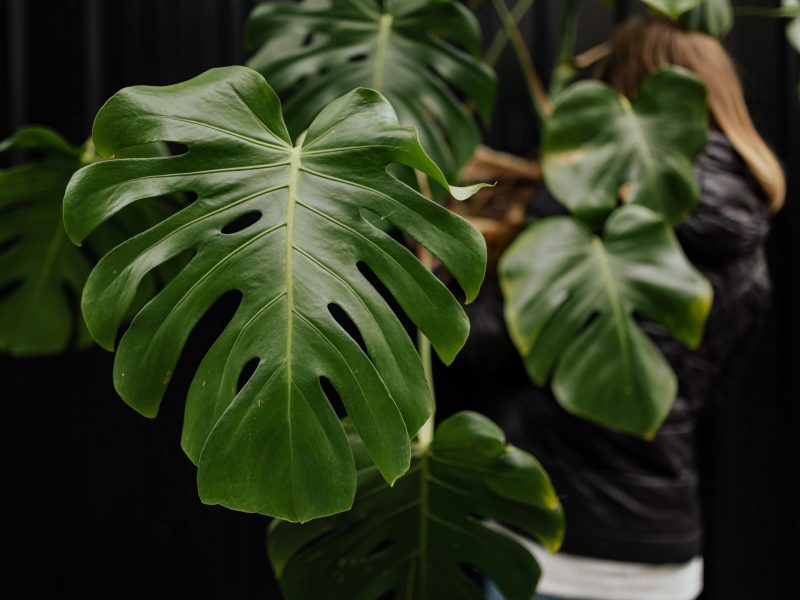
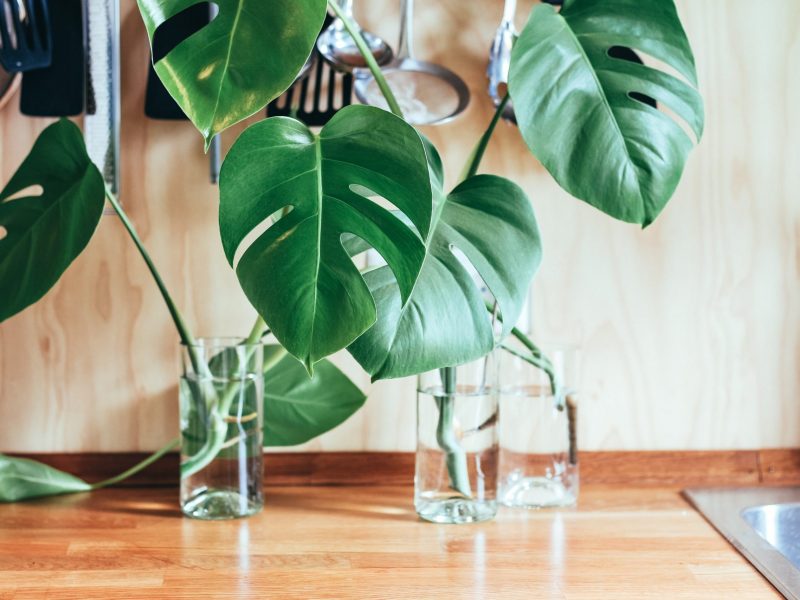
Propagating a Monstera through stem cuttings
Locate your stem cutting
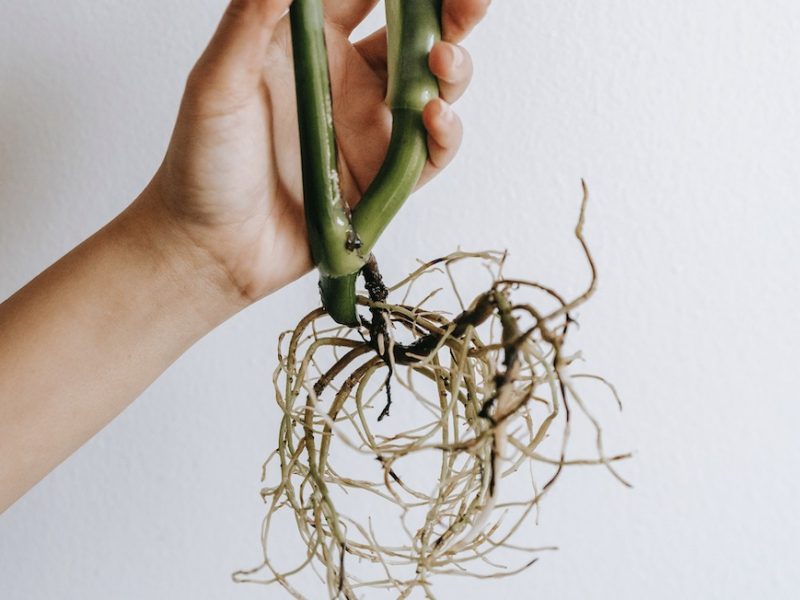
When taking a Monstera stem cutting you want to make sure that the part of the plant you are cutting is healthy to give you any chance of success. You also need to make sure this section has at least one node. Nodes are stem joints where the ariel roots grow out from. They are really easy to spot as they are just below each leaf on the main stem. Most nodes on your plant will have a long ariel root attached but it may happen that some of the newer parts of the plant just have a bump and no root yet.
If you can, try to choose a section of the plant that contains a few nodes, one or more of which have mature aerial roots as this will help speed up the propagation process a little.
Make the cut
This is the scary part! Now that you have located the section of the stem, you need to cut it off! Use clean scissors/ shears or a knife to make the cut to avoid passing on dirt or any infection to the plant. Use your tools to make a clean cut across your plant in a diagonal way. This increases the surface area of the cutting.
Take off any lower leaves
As you will be placing your cutting in water for several weeks you want to carefully remove any leaves on the lower part of the cutting that may end up sitting in the water. They will rot if they are sat in water for a long period of time so best to cut them off now. If your cutting only has a few leaves then skip this step and make sure the water level isn’t super high.
Fill up your container with water
Next, you want to fill up a glass with fresh temperate water to place your cutting into. Make sure the water isn’t super cold or hot as this will shock or burn the cutting and cause it to die. It is best to use purified water so the levels of chlorine and fluoride aren’t as high as in the water straight out of the tap. Monstera plants aren’t super sensitive to this compared to other houseplants but if you can use filtered water or rainwater then go for it!
Place your Monstera cutting in water
Make sure that the node(s) on the stem cutting is sat in the water so that the roots will start to grow out from there. Place your glass in bright but indirect sunlight. Intense light will damage the cutting and might mean your propagation isn’t successful.
You can use a light monitor to figure out if your Monstera cuttings are getting the right amount of sunlight. You can also supplement sunlight levels by using an LED grow light which are great at encouraging growth in cuttings. We love this one which is available on Amazon here.
It’s at this stage that you might choose to use rooting hormone. This will help to speed up root growth on the new cuttings. We have always found this rooting gel to be successful – you can buy it on Amazon here.
Change out the water regularly
It’s super important that you keep the water in your Monstera propagation station fresh so we recommend switching it out every couple of days. This keeps it free from bacteria and stops it from stagnating and smelling. Some parents believe that the water shouldn’t be switched out as this can remove nutrients from the cutting but we always recommend keeping it fresh as stagnant water breeds bacteria which can harm your cutting.
Be patient
This is the point at which things can get a little boring. There is nothing left to do other than change out the water and wait for roots to grow. Don’t worry if this process takes several weeks or months as that is totally normal! Growth on your cuttings is very unpredictable and depends on a lot of things so just make sure your cutting is healthy and you should start to see new roots soon.
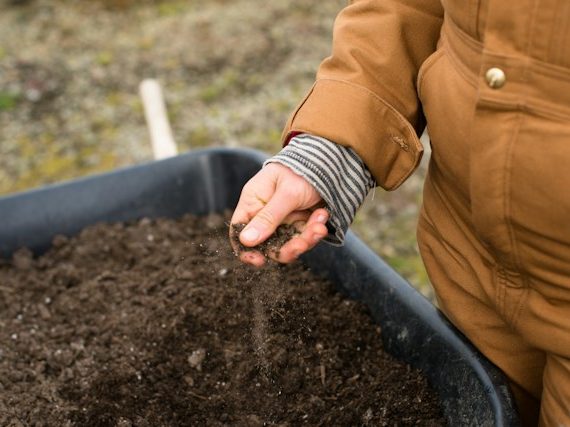
Plant your Monstera cuttings into potting mix
Once the roots on your cutting have matured well growing in water you can pot your cutting into soil. We recommend using a high-quality potting mix to aid with drainage and aeration. Our top choice for soil would be this potting mix from Miracle Gro. Carefully place your cutting into the mix making sure not to damage the delicate newly formed roots and continue regular care.
Propagating a Monstera can be easy!
How to propagate a Monstera through air layering
This method of propagation can be a little trickier and fiddlier so we only recommend it if you are a slightly more experienced plant propagator!
Locate a healthy stem
When choosing the air layering method you want to make sure you are using a healthy and strong part of the stem. Avoid any part of the plant that is yellow, brown or showing signs of pests/sunburn etc. This will impact how successful your propagation is so choosing the right part of the stem is key to this method of Monstera propagation.
Make a vertical incision into the stem
Using a clean knife make a vertical cut into the stem that is a couple of inches long. You want it to go about halfway through the stem. When making the cut it’s important you don’t slice all the way through to the other side of the stem.
Open up the incision
We recommend inserting a toothpick into the centre of the incision to hold it open. This can be a little fiddly as you don’t want to poke through the stem.
Attach damp peat moss to the side of the incision
You want to tie the peat moss around the stem with the cutting in making sure it stays damp but not soggy at all times. Use brown string, plant ties or garden wire to secure the peat moss to the stem.
Wrap up the peat moss
You want to wrap a piece of plastic wrap around the peat moss and stem. Wrap it firmly around the stem but still leaving some air pockets around the peat moss.
Once you see a new root you can cut off the stem
After several weeks you should start to see new roots growing out of the peat moss. Once you see this you can slice the cutting off your plant, remove the film and pot the cutting into fresh potting mix. Handle your new Monstera cutting with care as the fresh roots will be delicate and easily damaged.
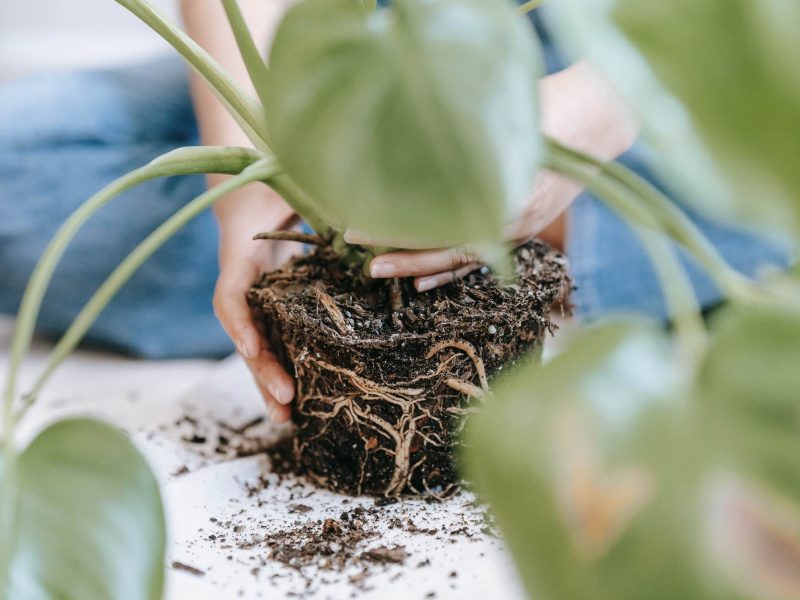
How to propagate a Monstera plant through division
You can only use this method if your plant has several stems growing in the same pot. If your plant is only one offshoot then you must use either the stem cutting or air layering methods.
Propagating a Monstera plant through division
Locate the various offshoots of your Monstera
When looking how to divide your plant, it will become very obvious if there are various offshoots/stems. They will be completely separate and leaves will grow out from each of the stems.
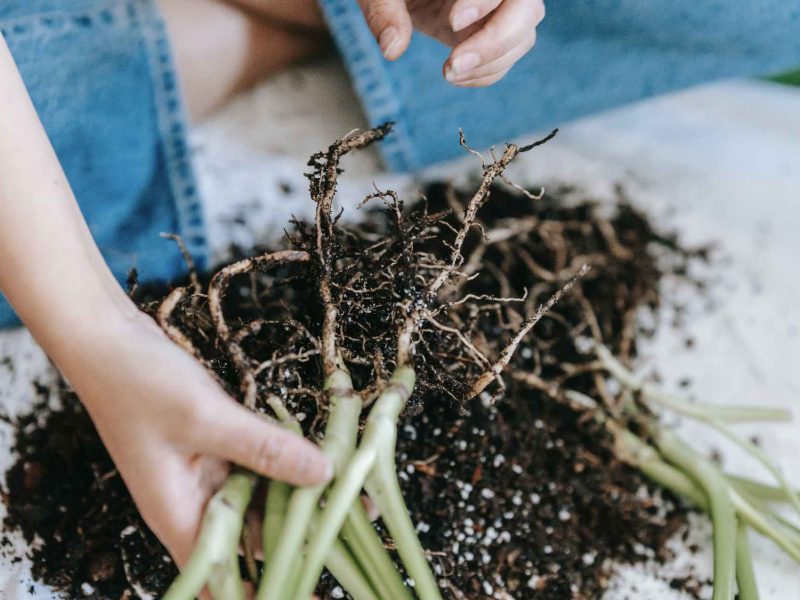
Take your Monstera out of the pot
Whilst the other methods of propagation you can do without even needing to get your hands dirty, with the division method you need to divide the root system so you’ll need to remove your plant from its pot. Carefully lift the plant out and shake off the potting mix around the roots. A good way to loosen the soil is to run your fingers through the roots to start to separate them.
Be careful not to damage the roots. Monstera plants have fewer but thicker roots in comparison to many other houseplants so damage to the root system can impact the plant’s health and future growth.
Separate the sections
You may have to trim off the odd root if they aren’t detangling easily but you should be able to carefully pull the sections apart from each other. It’s ok if you have to slice around the plant a little to separate them but just make sure that each part of the plant has a substantial amount of the root system to aid a successful propagation.
Place in water or fresh potting mix
Pot the main mother plant back into its pot (or downsize if you have taken a lot away from the plant) and decide whether you want to place the new plant in water first or straight into potting mix. This depends on the size of the cutting and the maturity of the root system. If the divided section has quite mature roots then it will be fine growing in potting mix straight away.
Continue normal care
Now that your new plant is happily in its new home with plenty of fresh potting mix, your propagation is complete! You can now care for your new plant like you would the other one, making sure it gets the right amount of light, warmth, water and humidity to thrive!
Monstera Deliciosa Propagation FAQs
Here are some answers to the most common questions we get on this subject, hopefully, something here can help!
What’s the best time of year to propagate a Monstera plant?
Ideally, you want to propagate at the beginning of spring for the best chance at a successful propagation. Make sure that any wintery cold weather is behind you so that your cuttings are growing in warmer brighter months. Monstera propagation can be a little slower than other houseplants so make sure you don’t leave it too late as they will struggle to grow once autumn arrives.
Propagating in autumn or winter will mean that your cuttings will be trying to grow at a time where the plant is usually dormant. So you won’t really see much happening at all and the risk of leaf and root rot is a lot higher due to the cold temperatures. Propagating in spring also means the mother plant has the ideal conditions to recover as sometimes propagation can be a little stressful for plants.
Do I need to use a rooting gel or powder when propagating a Monstera plant?
Whilst it is not essential, you can definitely use rooting gel or powder to speed up the propagation process a little. Rooting hormone stimulates root growth and produces stronger roots which is really important for Monstera plants.
You can buy rooting hormone in 3 types: powder, liquid or gel. When using a powder you dip the end of the cutting (including the node) into water and then into the powder before planting directly into fresh potting mix. The moisture helps the powder to stick to the cutting. Gel and liquid forms work in a similar way but are great when choosing to propagate in water first. We recommend this rooting gel which is available from Amazon.
Should I use a grow light for my Monstera cuttings?
Grow lights are great to use when propagating houseplants as they provide ideal light conditions for young seeds and cuttings. They can avoid problems caused by a lack of sunlight and help to stimulate growth. Grow lights are also great to use more generally on your houseplants if they don’t get enough light in autumn and winter so are a great investment for any plant parent. This is a great one from Amazon which we have always found works really well on our Philodendron Birkin cuttings.
What is a node?
It’s important that you are able to identify the different parts of the plant so you know where to make the cut. A node is where the stem and leaf joints meet. You will often see aerial roots grow from these nodes. If there isn’t a root there yet, you may feel a little bump in the stem which indicates a node.
When propagating plants through stem cuttings, you need to include at least one node. Without it, you won’t have any chance of a successful propagation as there is nowhere for the roots to form and the leaf will die relatively quickly.
Can I propagate a Monstera from a single leaf?
Unfortunately, you aren’t able to propagate a Monstera from a single leaf cutting. There needs to be at least one node so that roots can start to form. Often you’ll see on Instagram that people put individual leaves in a container for decoration but this won’t actually lead to successful propagation. Often individual Monstera leaves can survive on their own in water for a while but won’t actually ever grow into a new plant.
How many nodes do I need on my cutting?
Whilst you can have plenty of success propagating with just one node, try to choose a cutting with 2 or 3 nodes. It will help growth and we have had more success than with a single leaf. It also means that the cutting immediately feels like a new plant, rather than just one lonesome leaf.
Should I fertilise my Monstera cutting?
We always recommend staying away from fertiliser until your new plant is around 1 year old. Fertilising too early can have the opposite effect as it provides nutrients straight to the plant which discourages root growth. Fertilising such young plants can also shock them and cause various issues such as yellow leaves and small growth so hold off the feed for a while.
After about a year you will want to start introducing fertiliser using this liquid feed as you can easily regulate how much you are fertilising your new plant compared to plant food spikes.
How do I propagate a Monstera without a node?
Unfortunately, it’s not possible to propagate a Monstera if you have a cutting without a node. You will need to either divide your Monstera or use a stem cutting that has at least one node. As the growth tissue exists in the node, without it it’s not possible for new growth to grow without it.
If you do try propagating a Monstera without a node, the leaf will likely survive on its own for a while, but after a few weeks will wilt and die.
Be careful when removing your Monstera from its pot
Common problems when propagating a Monstera Deliciosa plant
Propagating plants won’t always be successful and you’re more than likely to come across some issues along the way. But if you catch the problem early, and know how to fix it properly, you should be able to revive your cutting and propagate it successfully.
Why isn’t my Monstera cutting growing roots?
Propagating Monstera plants isn’t as quick as a lot of other houseplants and can take many weeks and sometimes even months for roots to appear. Make sure you are changing out the water regularly and keeping the plant in a nice warm environment and you should start to see new roots growing eventually.
If you want to try and speed up the process you can use rooting hormone (either a gel, powder or liquid) which encourages faster root growth but it’s not always a guarantee and comes with risks of its own.
If you are trying to propagate your plant when the temperatures aren’t super high in your home then this may be the cause of the lack of growth. Remember, these plants are native to the rainforests so won’t like cold or dry environments. You can help to speed up root growth by using a heat pad that you place underneath your cuttings. This warms up the area and provides an ideal environment for new growth.
Why is my Monstera cutting turning mushy?
If your cutting is turning brown and mushy then unfortunately this isn’t a good sign. This is usually due to the cutting rotting in stagnant water. You want to make sure you are regularly refreshing the water every few days so that it doesn’t encourage the growth of bacteria. We recommend trimming away the mushy part of your Monstera and hopefully, there is still at least one node on the cutting so that it can still recover and grow roots.
Why are the new leaves on my Monstera cutting small?
If your cutting is starting to grow new leaves but they are much smaller than the leaves on the mother plant don’t worry at all. This is completely natural and simply due to the root system being less mature than that of the larger plant. Mature Monstera plants have really large leaves but you shouldn’t expect that on the new plants straight away. Give it time and slowly the new leaves will start to get bigger and you can trim away the smaller leaves to encourage new healthy growth.
You can help growth a long a little by using an LED grow light to make sure your new plant is in the ideal environment. We have found this one from Amazon to work really well on new cuttings and plants.
Why is my Monstera cutting turning yellow?
If the leaves on your cutting are turning yellow then it may be due to too much direct sunlight which has burnt or scorched the leaves. Using a light monitor can help you figure out how much light your plant is getting throughout the day.
If you have recently moved your cutting from water to potting mix take it out of the pot and see if you can spot a problem with the roots as yellow leaves can be caused by overwatering. As your new plant will be a lot smaller than your mother plant, adjust your watering habits accordingly. One way we make sure to water our cuttings the right amount is by using a moisture meter. You just pop them into the soil and it’ll do the work for you!
There is a weird film on my cuttings in water?
It’s totally normal for a weird layer to form around your cutting and its roots in water. This is totally normal and just comes from the water. You don’t need to worry about this at all as it shouldn’t harm your chance of a successful propagation. We recommend giving your cutting a quick rinse each time you change out the water to remove this layer.
Check out our full Monstera Care Guide that has all the information on how to continue care for your cutting once it has matured.