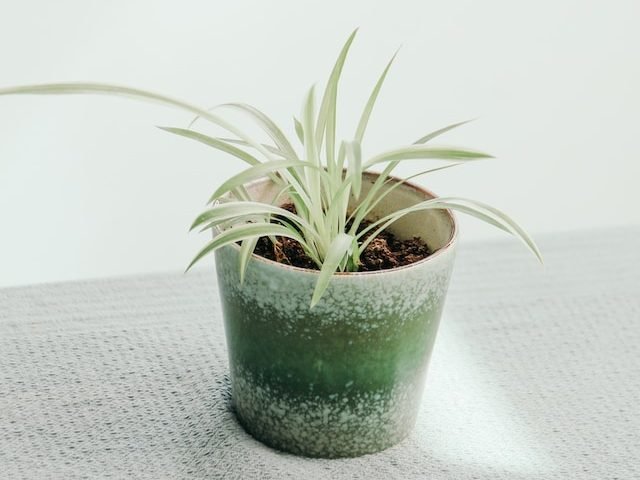
Worm Plant

Introduction: Meet the Worm Plant
This charming succulent, with its distinctive worm-like appearance and attractive jade-green colour, is an incredibly easy-going and resilient houseplant. We recommend it as a great choice for both novice and experienced plant enthusiasts alike.
Native to South Africa, the Crassula Marnieriana has adapted to thrive in dry, rocky terrains, making it hardy and adaptable. Its plump, oval leaves are densely packed around a slender, trailing stem, resembling a string of tiny green worms – hence its common name. As a bonus, mature plants may even produce clusters of star-shaped flowers but these can be unpredictable.
In our comprehensive care guide, we will walk you through everything you need to know to keep your Worm Plant thriving. From light requirements and watering tips to potential problems and propagation methods, we’ve got you covered.
Lighting Requirements: How to Make Sure Your Worm Plant Gets the Right Amount of Sunlight
When it comes to lighting, the Crassula Marnieriana loves sunshine. This does not mean it needs constant direct sunlight but good amounts of indirect bright light (and direct sunlight in winter) will keep this one thriving.
A spot near a window where it will receive plenty of indirect light for at least 6 hours a day is ideal. If your home doesn’t get much bright light then you’ll be happy to know that the Worm Plant is quite adaptable. It can tolerate lower light conditions, although growth may slow and be a little smaller than with ample sunlight.
To supplement light levels you may also choose to use a grow light. If you’re using artificial light, opt for a fluorescent light setup as this will encourage strong and healthy growth and can be a real life saver in winter for many plants.
Make sure you are monitoring your plant and adjusting the light intensity based on the plant’s response. If the leaves start to stretch out or lose their colour, it may be a sign that the plant needs more light.
Watering: How Often and How Much Water Does the Worm Plant Need?
The Worm Plant is a robust succulent that requires a careful watering regimen to thrive. Despite its hardy nature, overwatering can quickly lead to root rot, a common ailment among succulents so it’s important to be monitoring soil moisture regularly.
Frequency of Watering
A good rule of thumb for watering your Worm Plant is to do so only when the soil has completely dried out from the previous watering. Typically, this translates to watering once every two weeks during the warmer months and less frequently, around once a month, during the cooler months.
Amount of Water
The amount of water required by your Worm Plant will vary based on factors such as the size of the plant and the ambient temperature. However, a useful guideline to follow is the “soak and dry” method. This involves watering the soil thoroughly until water runs out of the drainage holes at the bottom of the pot, then waiting until the soil has completely dried out before watering again.
Signs of Overwatering
Overwatering is a common pitfall for many succulent owners. It’s important to keep an eye out for signs such as yellowing leaves, a mushy trunk, or a rotten smell, which could indicate that your Worm Plant is getting too much water. If you notice any of these symptoms, reduce the frequency of watering immediately.
Water Quality
Lastly, while the Worm Plant isn’t particularly picky about water quality, it’s always best to provide it with clean, filtered water free from harmful chemicals. Tap water that has been left to stand overnight is a suitable option.
The Best Soil for Worm Plants
This succulent plant is hardy and adaptable but thrives best in well-draining soil, either pre-mixed or created by you!
Pre-Mixed Cactus Soil:
- This is an excellent choice as it is formulated to mimic the natural sandy and gritty conditions that succulents love.
- It provides exceptional drainage, which is crucial for preventing root rot, a common problem with succulents.
DIY Soil Mix:
- Alternatively, you can create your own mix. A popular blend is one-third regular potting soil, one-third coarse sand, and one-third perlite or pumice.
- This allows you to customise the soil to your plant’s specific needs and ensure excellent drainage.
Temperature Requirements
Indoor Climate
Indoors, the Worm Plant prefers a temperature range of 59-80°F (15-27°C). It’s a forgiving plant, tolerating minor fluctuations, but major temperature drops or spikes can lead to stress.
Outdoor Climate
When kept outdoors, the Worm Plant can withstand temperatures down to 30°F (-1°C) but it won’t be too happy about any lower than that. Prolonged exposure to frosty conditions can be detrimental, so consider moving your plant inside during the coldest months.
Temperature Transitions
When transitioning your plant between different temperatures, it’s important to do so gradually. Quick changes can cause shock, potentially damaging your Worm Plant and it may start to cause a few issues such as brown leaves and leaf drop for a week or two.
Humidity Requirements
Native to South Africa, it thrives in arid environments typical of its homeland, but it can actually also adjust well to more humid conditions. However, keep in mind like any succulent, it is predisposed to rot if the humidity becomes too high.
Optimal Conditions
Typically, a Worm Plant prefers lower humidity levels, closer to what you’d find in a desert environment, around 30-40% humidity. This is often the standard indoor humidity in many homes but it can tolerate higher humidity if it’s given proper ventilation and drainage.
High Humidity
If you’re growing your Worm Plant in a high humidity environment, take extra care to ensure it’s not sitting in water as this can make the issue worst. Make sure you’re using a well-draining soil and pot with drainage holes. It’s also a good idea to place it in an area with good airflow to help dissipate excess moisture.
Low Humidity
While it can handle dry air, it may need a bit more water than usual during the hottest, driest months. But remember, it’s always better to underwater than overwater when it comes to succulents.
Fertilizing your Worm Plant
Like other succulents, the Crassula Marnieriana does not require heavy fertilisation. However, a small boost during its growing season can help keep it thriving and help it maintain healthy new growth levels.
When to Fertilize
Typically, the growing season for the Worm Plant falls between spring and early autumn. During this period, a monthly application of a water-soluble or liquid succulent fertiliser will suffice.
Fertilizer Choices
When it comes to choosing a fertiliser, opt for one specifically designed for succulents and cacti. These fertilisers typically have a lower nitrogen content and a higher phosphorus and potassium content to support root growth and flowering.
How to Apply
- Dilute the fertiliser according to the instructions on the package. To be on the safe side, we often recommend diluting it a little bit more than suggested, particularly for smaller and less mature succulents.
- Water your plant as usual.
- Then, apply the diluted fertiliser to the soil, avoiding direct contact with the plant to prevent fertiliser burn.
Fertilizing in Non-Growing Season
During the non-growing season (late autumn and winter), it’s best to withhold fertiliser completely. The plant’s metabolism slows down during this period, and excess nutrients can cause harm.
Pruning a Worm Plant: Why, How and When
Regular pruning not only promotes new plant growth but also helps in controlling pests and diseases. Let’s delve into the details of why, how, and when to prune your Crassula Marnieriana.
Why Prune Your Worm Plant?
Pruning mainly serves three purposes: it encourages fuller growth, maintains plant shape, and keeps diseases at bay. By eliminating overgrown or unhealthy branches, your Worm Plant can focus its energy on producing new, healthy growth.
How to Prune Your Worm Plant?
- Start by sterilising your pruning shears to prevent the spread of potential diseases between plants.
- Identify the parts of the plant that need to be pruned: these include dead or yellowing leaves, leggy branches or any part that seems unhealthy.
- Cut the identified parts at a 45-degree angle, which will facilitate quicker healing and prevent water accumulation.
- After pruning, dispose of the cut parts responsibly to keep pests and diseases away from your plant. If you are only pruning to keep a desired shape, you may choose to propagate the healthy pruned cuttings (more on that below).
When to Prune Your Worm Plant?
The best time to prune your Crassula Marnieriana is during its active growth phase, which typically occurs in spring or early summer. This gives the plant ample time to heal before the dormant winter period. However, if there’s a pest infestation or the plant is overgrown, don’t hesitate to prune, irrespective of the season.
How to Successfully Propagate a Worm Plant
Propagation is the process of creating new plants from an existing one, and it is surprisingly simple with the Crassula Marnieriana. Below is our simple step-by-step guide to ensure you know what do to and when to do it.
Step 1: Choosing the Right Time
The best time to propagate a worm plant is during the warmer months. This is when the plant’s growth is most vigorous, making it more likely for the cuttings to take root and grow. However, bear in mind that propagation can be attempted at any time of the year if the environment is right.
Step 2: Taking a Cutting
Using a clean, sharp knife or scissors, cut a healthy-looking stem or leaf from your worm plant. Ensure that the cutting is 3-5 cm in length. Remember, the cleaner the cut, the better the chances of successful propagation and it reduces the risk of harming your mother plant.
Step 3: Let it Dry
Once you have your cutting, let it dry out for a few days. This process, known as ‘callousing’, helps to prevent infection and encourages healthier root development.
Step 4: Plant Your Cutting
After the cutting has dried, place it in a pot filled with well-draining succulent soil. Water it sparingly until it begins to establish roots. Within a few weeks, your cutting will begin to sprout new growth and you should care for it as you would the mother plant.
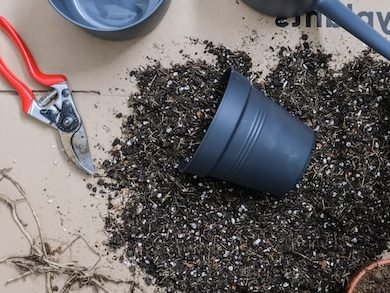
Repotting your Worm Plant: Step-by-Step Method
What You’ll Need:
- Pot: Choose a pot that is a few inches larger than the current one as Crassula Marnieriana enjoys a bit of extra room to grow. Make sure that it’s not too much larger as this can cause instability and increases the risk of root rot.
- Drainage Material: A layer of pebbles or broken pottery at the bottom of the pot is perfect for preventing water stagnation.
- Well-draining Soil: This plant prefers soil that drains well to avoid waterlogging.
- Gloves: Always wear gloves to protect your hands from any potential toxic sap.
Step-by-Step Guide:
- Prepare the new pot: Place a layer of drainage material at the bottom of the new pot and fill it halfway with soil.
- Remove the mother plant: Gently remove the Worm Plant from its current pot, taking care not to damage the roots.
- Place the plant: Position the plant in the new pot and slowly add soil, making sure it encases the roots fully.
- Water thoroughly: After repotting, water the plant thoroughly and let it drain.
Flowers on a Worm Plant
Occasionally a Worm Plant can bloom small charming flowers. This occurrence is relatively rare and typically occurs in the cooler months which is the opposite to most other houseplant types.
Identifying the Flowers
Flowers of a Worm Plant are small, star-shaped and exhibit a brilliant white or pale pink hue. Often, they cluster together, creating a fascinating contrast against the plant’s thick green leaves.
Encouraging Flower Growth
As a Worm Plant owner, you might naturally aspire for your plant to produce these beautiful blooms. However, achieving this isn’t always straightforward. It requires specific care and conditions of bright, indirect light, avoiding overwatering and slightly cooler temperatures over winter. However, even if all these things align, there’s no guarantee that your Worm Plant will flower.
Note that young plants won’t produce blooms so it’s only possible in plants older than a few years.
Cleaning your Worm Plant
Keeping your Worm Plant free from dust and dust is an essential part of its care routine. Not only does it enhance the plant’s aesthetic appeal, but it also contributes to its overall health.
The Cleaning Process
If your plant has been neglected for a while, you might notice a layer of dust on the leaves. This dust can hinder the plant’s photosynthesis process, so it’s crucial to keep the leaves clean. Start by gently dusting the leaves with a soft brush to remove any dust and loose dirt.
For a thorough cleaning, use a damp cloth to wipe each leaf. Make sure the cloth is not too wet to avoid causing the leaves to rot (this can happen if they are damp in cold environments). This process can be time-consuming, especially for larger plants, but it’s worth the effort to keep your Crassula Marnieriana looking its best.
Avoiding Common Cleaning Mistakes
While cleaning, it’s important to avoid common mistakes that could potentially harm your plant. Never use harsh cleaning products or detergents, as these can damage the plant’s leaves. Instead, stick to water or a mild, organic leaf cleaner.
Lastly, ensure you’re gentle when cleaning. Being too rough can cause the leaves to break or bruise, which is not good for the plant’s health or appearance. Take your time and handle the plant with care.
Worm Plant Toxicity to Pets and Humans
One crucial aspect to consider when choosing houseplants is their toxicity to pets and humans.
Good news! The Worm Plant is generally considered non-toxic to humans and pets. However, it’s always wise to discourage children and pets from eating any houseplants as ingestion may cause minor discomfort, such as a mild upset stomach.
While the Crassula Marnieriana is not listed as toxic to cats and dogs by the American Society for the Prevention of Cruelty to Animals (ASPCA), individual animals may react differently. If your pet has a tendency to nibble on your greenery, it’s best to keep this plant out of their reach.
In case of accidental ingestion by pets, observe them closely for any signs of discomfort, like vomiting or diarrhoea. If they exhibit any of these symptoms, take them to a veterinarian immediately.
Pests and Diseases: Common Issues and How to Fix Them
Despite its overall hardiness, the Worm Plant isn’t immune to pests and diseases. There are some common issues that this resilient plant may encounter over time.
1. Mealybugs
Mealybugs are tiny white bugs that feed on the sap of the Worm Plant. They often hide in hard-to-reach areas, making them somewhat difficult to spot. If left untreated, the infestation can grow rapidly and it can cause the leaves of your plant to yellow and drop.
Fix: Wipe the plant with an alcohol-soaked cotton swab. For severe infestations, consider using an insecticidal soap or neem oil spray. Regular inspections can help catch these pests early.
2. Root Rot
Root rot is a common disease that can affect Worm Plants, particularly if they’re overwatered. The roots start to decay, turning black and mushy. The leaves may also become discoloured or drop off.
Fix: If you spot this, immediately stop watering and remove the plant from its current soil. Trim off any affected roots and repot in fresh, well-draining soil. Going forward, water only when the top inch of soil is dry to prevent recurrence.
3. Aphids
Aphids are tiny green or black insects that suck the sap from the Worm Plant. They leave a sticky residue known as honeydew, which can attract other pests and cause a sooty mould to grow.
Fix: Spray the plant with a mild soapy water solution. For severe infestations, consider using an insecticidal soap spray. Regularly check the underside of leaves where they often hide.
4. Scale Insects
Scale insects are small bugs that attach to the plant and feed on its sap. They can cause the leaves to yellow and drop, and stunt the growth of the Worm Plant.
Fix: Scrape off the bugs using a soft brush or cloth. If the infestation persists, consider using a horticultural oil or insecticidal soap.
Armed with this information, you’re now well-prepared to keep your Worm Plant healthy and thriving, preventing any pest or disease that dares to threaten its wellbeing.
Why are my Worm Plant’s leaves wrinkling?
Wrinkled leaves on a Worm Plant signal your plant needs more water. Check the moisture in the soil and adjust your watering schedule accordingly.
Why do my Worm Plant’s leaves look burnt?
Scorched leaves on a Worm Plant can be due to direct sunlight. Make sure your plant is sat in a spot where it receives bright indirect light.
There are pests on my Worm Plant
Worm Plants are susceptible to mealybug infestation. Move your infected plant away from other houseplants and treat it with an insecticide.
Why does my Worm Plant have brown leaves?
Brown leaves on your Worm Plant indicate issues with watering; either too much or too little. Underwatering will often cause light brown crispy leaves whilst overwatering will turn your Worm Plant dark brown and soft.
Check the moisture levels in the potting mix and adjust your watering schedule moving forward to prevent more brown leaves on your Worm Plant.
Why does my Worm Plant have yellow leaves?
Yellow leaves on a Worm Plant can be caused by a variety of factors, most commonly overwatering. However, if you have checked the potting mix and it’s not waterlogged and the roots haven’t started to rot then the yellow leaves might also be caused by heat stress, pests or overfertilization.
Why is my Worm Plant drooping?
A drooping Worm Plant indicates watering problems. Both underwatering and overwatering damage the root system which deprives your plant of needed oxygen, moisture and nutrients which causes it to droop.
Measure the moisture levels in the soil before adjusting your watering schedule moving forward to prevent your Worm Plant from drooping again.
Why is my Worm Plant dying?
There are several reasons that might lead to your Worm Plant dying but the most common one is overwatering. They have sensitive thin roots which are very susceptible to rot if given too much water. Outside of watering, your Worm Plant might be dying due to too much direct sunlight or a pest infestation.


