Anthurium Clarinervium
Introduction to Anthurium Clarinervium Plants
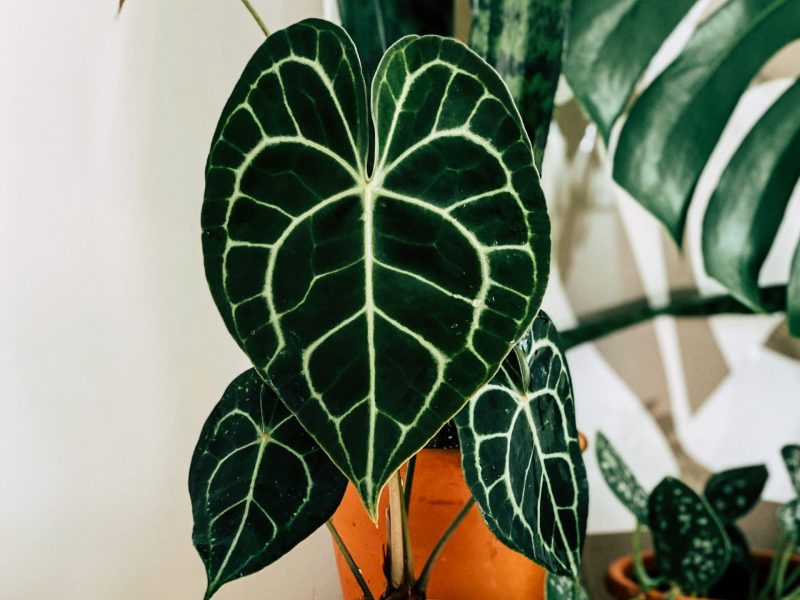
Anthurium Clarinervium, a captivating houseplant native to the Mexican rainforests, is renowned for its striking, heart-shaped foliage. The plant’s unique characteristic is its velvety, dark green leaves marked by a beautiful pattern of bright, prominent veins that appear almost painted on.
Nicknamed ‘Velvet Cardboard Anthurium’, this plant originates from the rainforests of southern Mexico. It belongs to the Araceae family and is part of the larger Anthurium genus, which is comprised of more than 800 species. Despite their exotic origins and seemingly intricate appearance, Anthurium Clarinervium plants are surprisingly easy to care for, making them a favorite among both novice and experienced plant enthusiasts.
Anthurium Clarinervium: Plant Characteristics
Appearance
The most captivating characteristic of the Anthurium Clarinervium is undoubtedly its large, heart-shaped leaves. These leaves, reaching up to 9 inches in length, are intricately patterned with veins that are a brilliant white, creating a striking contrast against the dark green of the leaf surface. The leaf texture is often compared to velvet or cardboard due to its thick and stiff nature
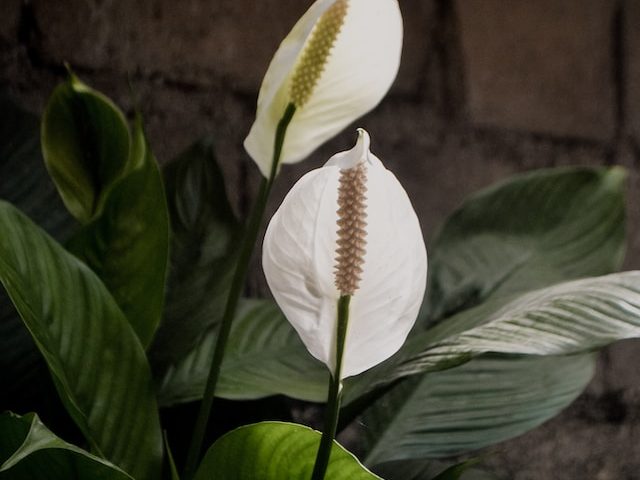
Flowering
While the Anthurium Clarinervium does flower, it’s the leaves that will always be the main focus of this plant. The flowers tend to be small and less visually impressive compared to the dramatic leaves. They are typically a pale green hue and emerge from a spathe, similar to other Anthurium species.
Size and Growth
This plant’s growth pattern is relatively slow, especially when grown indoors. It usually achieves a mature height of around 1 to 2 feet. However, with the right care, Anthurium Clarinervium can live for many many years.
Watering Your Anthurium Clarinervium: Best Practices
Proper watering can greatly impact the overall health and appearance of your Anthurium Clarinervium. Too little water can lead to wilting and browning leaves, whereas excessive watering can result in root rot, a common issue for houseplants so finding the right balance is important.
When to Water
Keeping a loose watering schedule will help ensure that your Anthurium Clarinervium plant gets the right amount of water. A good rule of thumb is to let the top inch of the soil dry out between watering.
Typically, this will mean watering your plant every 1-2 weeks, depending on the humidity and temperature of your home. Use this as a general base and adjust as needed depending on your individual home and plant.
How to Water
When watering, do so thoroughly, ensuring the water runs through the drainage hole at the bottom of the pot. This will encourage a deeper and more robust root system, contributing to the overall resilience of your plant. Avoid letting the plant sit in water as this can cause root rot so remove any excess water from the saucer or planter about 15 minutes after watering.
Using room temperature water is recommended as cold water could shock the plant roots, causing them stress. You also need to avoid getting water on the leaves as this can cause spots and damage to the leaf surface.
Water Quality
The plant prefers rainwater or distilled water to tap water if you live in a hard water area, as the latter often contains chlorine and other minerals that can harm the plant. If you must use tap water, let it sit out overnight to allow the chlorine to evaporate.
Anthurium Clarinervium Lighting Needs
The Anthurium Clarinervium is a tropical plant that thrives best under indirect, bright light. It’s a common misconception that because these plants come from tropical environments, they require direct sunlight. In fact, the canopy of the rainforest often diffuses the harsh sunlight, providing these plants with filtered, indirect light.
Artificial Light: If you do not have a suitable spot near a window, you can also grow your Anthurium Clarinervium under artificial light. Fluorescent lighting is a great option, as it can simulate the bright but diffused light that the plant requires. Ideally, the plant should be placed about 2 feet away from the light source.
Low light: If the Anthurium Clarinervium is not getting enough light, its leaves will become darker and it may stop producing new leaves.
Lighting Tips for Anthurium Clarinervium
- Rotate your plant every few weeks to ensure all sides get equal exposure to light.
- Use sheer curtains or blinds to filter the sunlight if your plant is near a window.
- Consider using a grow light during the darker winter months to supplement natural light.
Humidity and Temperature Requirements
Temperature:
The Anthurium Clarinervium prefers a temperature range between 65°F (18°C) and 75°F (24°C). While it can tolerate a bit cooler or warmer, it’s important to avoid sudden temperature changes, which can shock the plant and cause leaf drop.
Be careful not to place your plant near air vents, heaters, or draughty windows where temperature fluctuations and extremes are common.
Humidity:
This tropical plant loves high humidity levels. Ideally, the Anthurium Clarinervium should be kept in an environment where the humidity is between 60% and 80%. In low humidity environments, leaves may brown and wilt.
To increase humidity, you can mist your plant regularly, set up a pebble tray or invest in a humidifier to keep a nice stable humidity level.
Pruning Your Anthurium Clarinervium: A Step-by-Step Guide
Pruning your Anthurium Clarinervium not only maintains its aesthetic appeal but also helps the plant stay healthy. If you’re a beginner, the idea of pruning might seem daunting, but it’s actually really a simple process. Let’s break it down step-by-step.
Step 1: Gather Your Tools
First, ensure you have the right tools on hand. A clean, sharp pair of pruning shears or scissors should do the trick. Remember, cleanliness is crucial as dirty tools can spread disease to your plant.
Step 2: Identify the Parts to Prune
Start by examining your Anthurium Clarinervium carefully. Look for leaves that are yellow, brown, or wilted. These are the parts of the plant that need to be removed first. Then make note of any overgrown or leggy stems that may need to be trimmed back.
Step 3: Make the Cut
Once you’ve identified the parts to prune, it’s time to make the cut. Hold the leaf or stem near the base and make a clean, swift cut. Ensure you are cutting at an angle and as close to the main stem as possible. Avoid tearing or crushing the plant tissue as this can cause damage to the plant.
Step 4: Dispose of the Pruned Material
After pruning, promptly dispose of the removed plant material. Leaving it around can attract pests or lead to disease development.
Step 5: Clean Your Tools
Finally, clean your tools after each pruning session. This helps prevent the spread of diseases and keeps your tools in good shape.
Repotting Your Plant: When and How to Do It
Identifying the Need for Repotting
The first step in repotting an Anthurium Clarinervium involves determining whether your plant would actually benefit from a larger pot. There are a few clear signs that your plant may be outgrowing its current home. These include:
- Roots appearing on the surface: If you see roots growing above the soil or coming out of the drainage holes, it’s a clear sign that your plant needs more room.
- Faster water drainage: If water runs straight through the pot without being absorbed by the soil, it may be due to a lack of space for the roots to grow.
- Slowed growth: If the plant’s growth seems to have slowed down or stopped entirely, it could be a sign that the plant is too cramped.
Choosing the Right Pot
Once you’ve determined that your Anthurium Clarinervium needs repotting, the next step is choosing the right pot. A ceramic or terracotta pot that’s only slightly larger than the current one is a good choice. This material absorbs excess moisture and allows the roots to breathe, thus promoting healthy growth.
Steps to Repot Anthurium Clarinervium
- Preparation: Fill the new pot one third full with an appropriate well-draining potting mix.
- Removal: Carefully remove the Anthurium Clarinervium from its current pot, shaking off excess soil from the roots.
- Placement: Position the plant in the new pot, spreading the roots out gently.
- Final touches: Fill the rest of the pot with the potting mix, lightly pressing down to ensure the plant is secure. Leave a small space at the top for watering.
Remember to water thoroughly after repotting and place the plant in a bright, indirect light area to help it settle into its new home and get over the initial shock of repotting (yes moving house is stressful for plants too!)
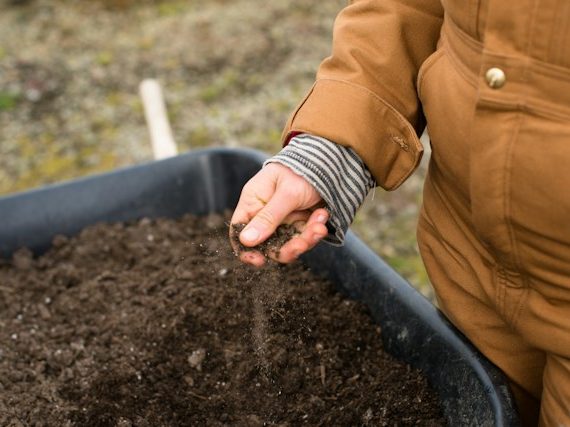
The Right Soil for your Anthurium Clarinervium
The Anthurium Clarinervium prefers soil that is rich in organic matter and has good aeration. This ensures that the roots get enough oxygen and minimizes the risk of root rot, a common problem when the soil is too heavy or waterlogged. Therefore, the soil should be light and fluffy, yet able to retain the right amount of moisture without becoming soggy.
A good starting point is a high-quality, well-draining potting mix. To this, you can add components to increase drainage and aeration. Here’s a simple recipe:
- 50% high-quality potting soil
- 25% perlite or pumice for increased drainage
- 25% orchid bark or coco coir to improve aeration and mimic the plant’s natural environment
Fertilizing Your Anthurium Clarinervium: What You Need to Know
The Importance of Fertilizer
While Anthurium Clarinervium plants can survive without it, incorporating a good fertilizer into your plant care routine will help it thrive. An appropriate fertilizer ensures that your plant has access to all the essential elements it needs to generate new, healthy foliage, and maintain its unique glossy and veined look.
Choosing the Right Fertilizer
Look for a balanced, water-soluble or liquid fertilizer, typically labeled as 20-20-20 (indicating an equal ratio of Nitrogen, Phosphorus, and Potassium). This type of fertilizer ensures that your plant gets a balanced spectrum of macro-nutrients.
Fertilizing Schedule
Fertilizing your Anthurium Clarinervium should ideally be done on a monthly basis during the growing season (spring to early fall) and not at all during the colder winter months.
Important: Over-fertilization can lead to salt buildup in the soil which can harm your Anthurium Clarinervium so it’s better to be on the safe side and not over do it.
Fertilizing Process
To fertilize your Anthurium Clarinervium, mix the fertilizer with water according to the package instructions (or dilute it even further), then water your plant as usual. Be sure to thoroughly wet the soil, but avoid waterlogging it.
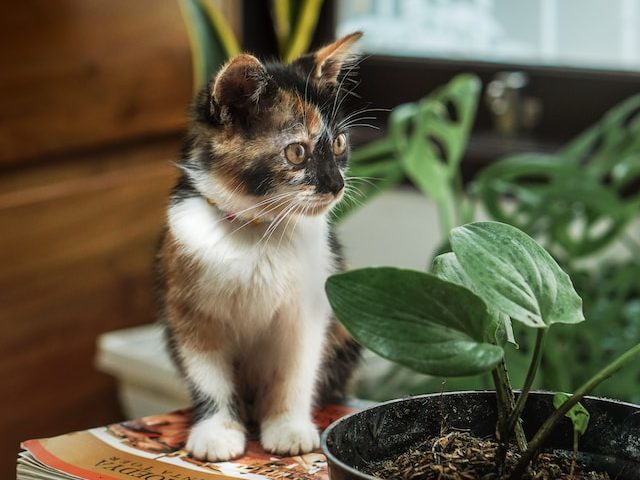
Anthurium Clarinervium Toxicity
The Anthurium Clarinervium is toxic to humans and pets due to the presence of calcium oxalate crystals, which are found throughout the plant.
When ingested by pets or humans, the Anthurium Clarinervium can cause a range of unpleasant symptoms. These can include:
- Mouth and throat irritation – The calcium oxalate crystals can irritate the soft tissues of the mouth and throat, leading to pain, swelling, and difficulty swallowing.
- Stomach upset – Ingestion of the plant can also cause nausea, vomiting, and diarrhea.
- Eye irritation – Contact with the plant’s sap can lead to eye irritation and, in some severe cases, temporary blindness.
If your pet or a family member has ingested part of the plant or is experiencing these symptoms, it’s essential to seek immediate medical attention.
Safe Practices Around Anthurium Clarinervium
- Placement – Keep the plant in a location that is out of reach of children and pets.
- Handling – Always wear gloves when handling the plant to prevent skin irritation.
- Cleaning Up – Dispose of any fallen leaves or plant trimmings immediately to prevent accidental ingestion.
Flowers on an Anthurium Clarinervium
The flowers of the Anthurium Clarinervium are not the typical kind that you would imagine. They are technically spathes, not petals. The actual flowers are minuscule, packed along a fleshy spike called a spadix.
These spathes are a pale, greenish-white color and take a long, slender form that extends from the base of a leaf. The spadix is a darker shade of green, providing a subtle contrast. Together, the spathe and spadix create a flower that is unique and understated compared to the plant’s foliage.
- Color: The spathe is typically a pale, greenish-white color.
- Shape: The spathe takes a long, slender form, while the spadix is a tiny, tight cluster of flowers.
- Size: The size of the flower can vary, but the spathe typically grows up to 6 inches long on a mature Anthurium Clarinervium.
- Blooming Time: Anthurium Clarinervium typically flowers during the spring and summer months, but under ideal conditions, it can produce flowers sporadically throughout the year.
- Frequency: Flowering frequency is directly influenced by the plant’s care. Proper light, humidity, and nutrition can encourage more frequent blooming.
The Risk of Pests
Common pests that may plague Anthurium Clarinervium include:
- Aphids: These tiny insects can rapidly multiply and infest your plant, causing curling, yellowing, and wilting of leaves. Aphids feed on the plant’s sap and can cause significant damage if left unchecked.
- Spider Mites: These pests are often difficult to spot due to their tiny size so using a magnifying glass is recommended when checking up on your plant. Spider mites feed on the underside of leaves, causing yellow spots or speckles. A fine webbing on the plant may also indicate a spider mite infestation.
- Mealybugs: Mealybugs pests appear as small, white fuzzy spots on the plant. They feed on plant juices and can cause stunted growth and leaf drop.
Preventing and treating pest infestations involves several steps:
- Regular Inspection: Regularly inspect your Anthurium Clarinervium, particularly the underside of leaves and the stem. Early detection is key to controlling an infestation.
- Proper Watering: Overwatering can create an environment conducive to pest infestations. Ensure your plant has adequate drainage and avoid waterlogged soil.
- Use of Pesticides: If an infestation occurs, consider using a gentle pesticide. Be sure to follow the manufacturer’s instructions to ensure safe and effective use.
- Isolation: If a pest infestation is confirmed, isolate the affected plant to prevent the pests from spreading to your other plants.
Anthurium Clarinervium FAQs
Is the Anthurium Clarinervium easy to care for?
We don’t ever recommend these plants for beginner plant parents or in an environment where they aren’t being tended to such as offices. Whilst they can be fairly fuss-free once their needs are met, they are prone to drying out easily so you must be prepared to boost the humidity and keep the temperatures around your plant warm.
How much water does an Anthurium Clarinervium need?
You want to make sure that the soil does have a chance to dry out between waterings. Whilst it’s difficult to find a one-fits-all watering schedule (as size and environment play such a big role), it’s best to monitor the moisture levels in the soil so you can find what’s right for your plant. You will want to water slightly more in summer though as the soil will dry out much quicker and the plant will be in its growth period.
Can the Anthurium Clarinervium tolerate direct light?
Not at all. You want to keep your Anthurium Clarinervium well away from any harsh direct light as the leaves are very prone to drying out and burning.
Do Anthurium Clarinervium plants grow quickly?
Anthurium Clarinervium plants are slow growers so don’t expect too many leaves to pop out each year. The one benefit to that is that you won’t need to repot that often as they won’t become root-bound for a while.
Is the Anthurium Clarinervium toxic?
Yes the Anthurium Clarinervium is a toxic houseplant so you want to keep them away from children and pets.
Common Problems with your Anthurium Clarinervium
Why are my Anthurium Clarinervium's leaves turning yellow?
This can be quite a concern for plant parents as yellow leaves is mostly a sign that something isn’t quite right. The most common causes of yellow leaves on an Anthurium Clarinervium is too much sunlight, overwatering or pests.
Why does my Anthurium Clarinervium have brown leaf tips?
A lack of humidity is the most common reason why your Anthurium Clarinervium may have developed brown leaf tips. Make sure you are frequently misting as well as using other techniques such as showers or pebble trays.
Why isn't my Anthurium Clarinervium growing?
Stunted growth on your Anthurium Clarinervium can be caused simply by the season. There will be a lack of growth in winter as there isn’t as much sunlight or warmth. This is totally normal and nothing to worry about.
If your plant is still not growing in spring and summer then it might not be getting enough light. Move your Anthurium Clarinervium to a slightly sunnier spot in your home (but keep it away from any direct sunlight in summer).
Why is my Anthurium Clarinervium losing leaves?
Improper watering can cause your Anthurium Clarinervium to lose some of its leaves. This can be both overwatering and underwatering as once the root system is damaged, it will be unable to keep the foliage alive. Check the moisture in the soil and inspect the root system to see whether your Anthurium Clarinervium is suffering from too much or too little moisture.
Your Anthurium Clarinervium might also be losing leaves due to natural ageing, which is perfectly normal! As your Anthurium Clarinervium matures, it will lose some of its oldest leaves to conserve its energy for new larger growth.
Why is my Anthurium Clarinervium drooping?
If your Anthurium Clarinervium is drooping then it can be due to several factors. Temperature extremes, low humidity and a lack of water can lead your Anthurium Clarinervium to droop down and look quite sad. Droopy leaves are often the first sign of unhappiness so if there are no other issues, then you might have caught the problem early which would be great!
To diagnose the droopy leaves properly, inspect the potting mix and root system to see if its crispy and shriveled as this signals underwatering. Then you want to make sure your Anthurium Clarinervium isn’t near any drafty windows, or AC vents as the cool air can cause your plant to droop.
Why does my Anthurium Clarinervium have curling leaves?
The leaves on your Anthurium Clarinervium are most probably curling due to a lack of water. If your Anthurium Clarinervium is lacking moisture, it will curl the leaves to reduce the surface area for moisture loss.
Before you change anything about how often you water your Anthurium Clarinervium, check the moisture levels in the soil to make sure this is the issue.
Moving forward, to prevent your Anthurium Clarinervium from developing any more curling leaves, increase the frequency of watering so there is more even moisture in the soil.