

Whether you’re a seasoned plant parent or have newly received your Pilea (also known as a Chinese Money Plant), our repotting guide will help you through the entire process. Not only will we go through the 5 simple steps to successfully repot your plant, but we will ensure that you know what to look for to suggest your plant is rootbound, as well as how to care for your plant after repotting.
Repotting any houseplant can feel daunting and a lot of plant parents put it off. However, this can be damaging to its health and prevent any new leaves or Pilea pups from developing.
Why repotting your Pilea is important
Repotting isn’t just a cool thing to do; it’s an essential step to keep your plant happy and healthy.
Repotting gives your Pilea the chance to stretch its roots and grow new ones too. This allows your plant to grow new stems and leaves and have the root system to support it. Also, fresh soil is a treat for your Pilea as all houseplants exhaust the nutrients in their soil over time, meaning repotting provides new nutrient-rich soil.
Lastly, repotting is a really good chance to inspect the health of your plant. You can check for pests, root rot or any other ‘unwanted guests’ making a home in your plant’s pot. Problems tend to start in the root system so by the time they are showing up on your plant, it can make solving them a lot trickier.
When to repot a Pilea Peperomioides
Rootbound: If your Pilea’s roots are poking out of the drainage holes, it’s time to size up. Likewise, if the plant has grown taller but not wider, it may be in need of a larger pot to balance its top-heavy nature. Your Pilea will likely grow out of its current pot every 2-3 years depending on how quickly it’s growing.
Time of year: Generally, the best time of the year to repot is in the spring or early summer. This is the period when plants are in their growth phase and can recover quickly from the stress of repotting. However, if you notice your plant showing signs of needing a bigger pot outside this period, don’t panic. Pileas are a hardy plant and can handle repotting at other times, too. Just ensure it has plenty of indirect light and a bit of extra TLC post-move (more on that later).
Choosing the right size pot for your Pilea
Pot Size: When it comes to repotting your Pilea, you don’t want a pot that’s a lot larger than the one it’s currently in. A too-big pot can lead to over-watering and root rot! This is because there will be a lot more soil compared to root system and it will take longer to dry out. This combined with the ability to now absorb more water can be a big problem. Instead, opt for a pot that’s just 1-2 inches (2.5-5 cm) larger than its current pot.
Drainage is Key: Make sure to choose a pot with adequate drainage holes. These are essential to prevent water from pooling at the bottom of the soil, which can cause the roots of your Pilea to become waterlogged and eventually rot.
Material Considerations: Whether you choose a ceramic, plastic, or terracotta pot, make sure it fits your Pilea’s needs and not just your aesthetic. Each material has its pros and cons, so weigh these up before making your choice.
| Material | Pros | Cons |
|---|---|---|
| Ceramic | Stylish | Can be heavy, may not have drainage holes |
| Plastic | Lightweight, affordable | Can look cheap, is not permeable |
| Terracotta | Classic look, good moisture control | Can be heavy, fragile and more expensive |
Choosing the right type of soil for your Pilea
What’s the perfect Pilea soil mix? Well, your Pilea prefers a well-draining, and well-balanced (in terms of nutrients) potting mix.
- Peat Moss: It’s light, retains moisture perfectly, and allows for good aeration. However, peat moss isn’t the most environmentally friendly option so you may prefer to go for a peat-free potting mix.
- Perlite: Perlite is the small white spots that you often see in soil mixes. It helps enhance drainage and keeps the soil light. This is a must-have for your Pilea soil mix!
- Coarse Sand: A bit of coarse sand can improve the soil’s texture and drainage but don’t go too heavy on this.
You should also consider adding a slow-release fertiliser to the mix. It will provide a steady supply of nutrients to your plant, keeping it healthy and happy and will aid new healthy growth.
Tools needed for repotting your Pilea
- Pot: The new home for your Pilea, it should be no more than 2 inches larger in diameter than the current pot to avoid issues such as waterlogged soil and root rot.
- Potting mix: Your Pilea craves well-draining soil so ensure that the mix contains perlite.
- Gardening gloves: To protect your hands from soil. Although the Pilea doesn’t have toxic sap, some other houseplants do so it’s just a good habit to get into.
- Watering can: You’ll need to moisten the new soil once your Pilea has been repotted.
- Pruning shears: These come in handy to trim any unhealthy roots. Keep them sharp and clean to avoid plant damage or disease.
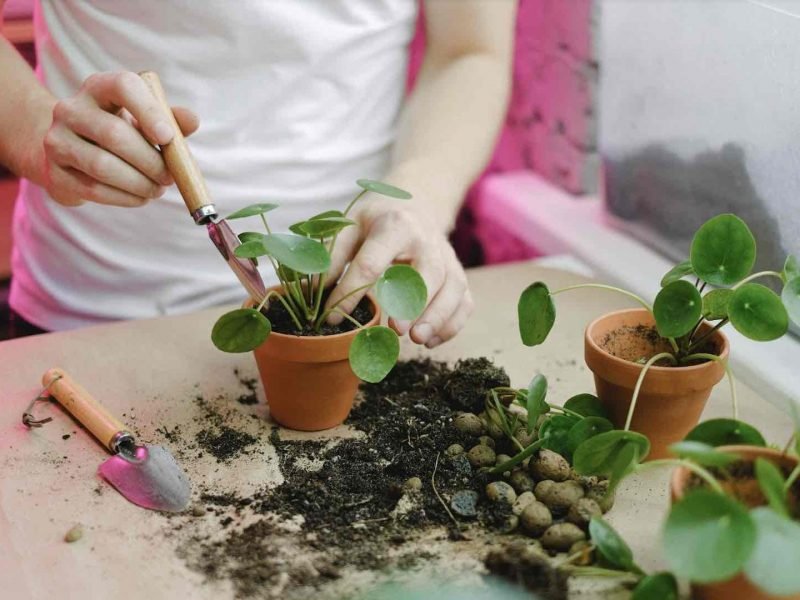
Steps for repotting your Pilea
The actual process of repotting your Pilea plant is pretty simple, but it’s important to do everything carefully and in the right order.
- Remove the Pilea: Gently remove your Pilea from its current home, being careful not to damage its roots. If the roots are growing out of the drainage holes, make sure to untangle these as they will snap if you simply pull your plant out.
- Inspect the roots: Look for any signs of rot or damage and remove any dead or dying roots.
- Shake out the root system: Remove some of the soil from the root system so that you can replace it with your fresh mix.
- Prepare the new pot: Place some potting mix at the bottom of the pot, then position your Pilea in the centre.
- Fill the pot: Add more potting mix, ensuring the Pilea’s root ball is entirely covered. Pat the soil lightly to keep the plant in place.
- Water the Pilea: Thoroughly water your Pilea, but be sure not to overwater. Your Pilea likes to be moist, not drenched.
How to care for your newly repotted Pilea
1. Light and location: Your Pilea Peperomioides loves a bright, indirect light spot. Make sure to avoid any direct sunlight as that can burn the leaves.
2. Watering: Wait until the top inch of the soil is dry before watering again. Remember, your plant prefers to stay slightly dry rather than too wet. Pro tip: Use your finger to test the soil’s dryness. If it comes out clean, your Pilea is ready to be watered.
3. Temperature and Humidity: Room temperatures of 59- 75°F (15-24°C) are ideal for your Pilea. It’s not a fan of drafts or heating vents. Luckily they don’t need a large boost to the humidity so just keep it away from dry air sources, and it’ll do just fine.
4. Fertilising: During the growing season (spring and summer), feed your Pilea a balanced houseplant fertiliser every two weeks. In the colder months, the plant is dormant and doesn’t need feeding.
5. Pruning: Prune your Pilea to keep it in shape. Remove old leaves from the bottom as they yellow and die off. This encourages the growth of new leaves on top.
Common mistakes to avoid when repotting Pilea Peperomioides
1. Neglecting the right size of pot
If the pot is too big your Pilea’s roots may drown in excess water; too small, and your plant could become root-bound. Aim for a pot that’s about 2-3cm larger in diameter than the current one.
2. Ignoring the drainage
Drainage holes are essential to prevent waterlogging. Ensure your new pot has them so that any excess water can flow out of them rather than pooling at the bottom, causing root rot.
3. Using the wrong soil
Pilea Peperomioides love well-draining soil, so don’t just use any soil. You want to make sure that there is some perlite in there to aid drainage.
4. Forgetting to water after repotting
Your pilea will be thirsty after repotting. Don’t forget to give it a drink once it’s settled into its new pot. Just don’t overdo it – remember, we’re aiming for moist, not drenched.
5. Repotting at the wrong time
Timing is everything! The best time to repot is during the growing season, typically spring or early summer. Your plant will have plenty of time to adjust before winter slumber. If your Pilea is severely rootbound during other times of the year then you can get away with repotting at this time but just make sure the environment is as ideal as possible to help your plant bounce back quickly.
FAQS
What is the best time to repot my Pilea Peperomioides plant?
Typically, early spring is the best time. Look for signs of new growth or roots showing through the soil surface. Keep in mind, every Pilea is unique and may need repotting at different times. Pay attention to your individual plant’s needs.
What size pot should I use to repot my Pilea Peperomioides?
Choosing the right pot for your Pilea Peperomioides is crucial. The size should prevent root binding and root rot. Don’t worry, figuring out the perfect pot size is not complex. Select a pot that’s 1-2 inches larger than the current one. This provides enough room for your Pilea without overwhelming it.
How often should I repot my Pilea Peperomioides?
As a rule of thumb, most Pilea owners find themselves repotting every 2-3 years. But remember, this isn’t a hard and fast rule. Keep a regular eye out for when roots start growing out of the top of the pot, or out of the bottom of the drainage holes and this will help you know when to upsize.
How do I remove my Pilea Peperomioides from its current pot?
First things first, water your Pilea a day before the big move. This little step makes the rootball easier to handle and less prone to damage.
Then when it’s time to repot your Pilea, turn your current pot sideways. Hold your Pilea gently at the base and tug slowly. If it’s being a bit stubborn, don’t panic! That’s completely normal.
Here’s an insider tip: give the pot a good squeeze on different sides or tap the bottom of the pot to loosen the rootball. This can make it easier to remove.
What should I do if my Pilea Peperomioides suffers from transplant shock after repotting?
This is a common issue many Pilea Peperomioides parents face after repotting their plants. But what is transplant shock exactly? Well, it’s a state of upset and disorientation that plants can experience after a change in their environment, like moving them to a new pot. Indicators can include wilting, leaf drop, or a general slump in growth.
Don’t panic, though! Your Pilea can recover from this with a little TLC. Here’s how to help your Pilea bounce back:
- Keep it shady: Just like us, plants need a bit of time to adjust to new surroundings. Keep your plant in a shady, cool spot for the first few days post-repotting.
- Don’t overwater: Resist the urge to overwater. Too much water can lead to root rot which can exacerbate the shock.
- Be patient: Remember, it can take a few weeks for your plant to fully recover. In plant time, that’s just a short nap!
Conclusion
So, there you have it, our complete guide to repotting your Pilea. Although it can be nerve-wracking, there isn’t anything to be afraid of once you know when to do it and how. Just be careful with your plant and don’t choose a pot that’s much too big! Each of your houseplants will need repotting at a different time so make sure to regularly check in with your plants’ root systems to see when they need more space!


