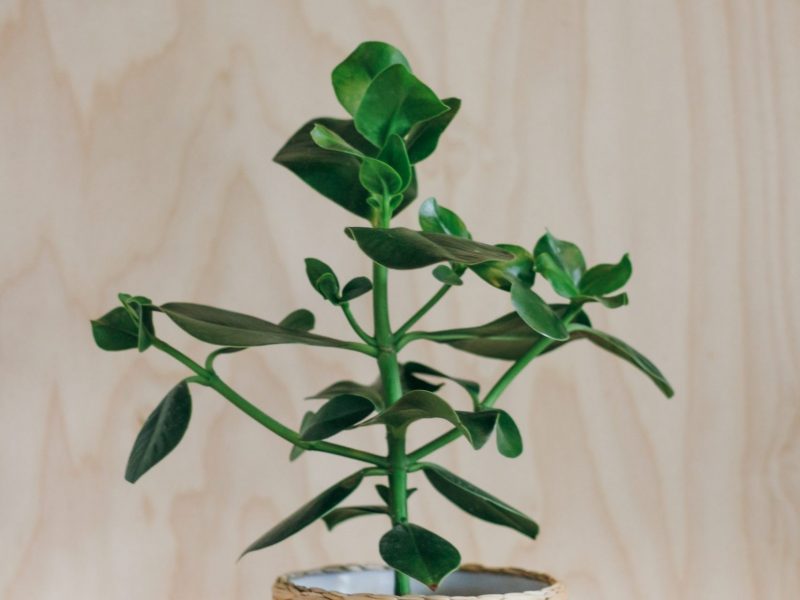
Autograph Trees (Clusia rosea), are beautiful houseplants that originate from Central America but adapt well to homes across the world due to their hardy foliage and low maintenance needs. But Clusia rosea plants are just easy to care for, but they are really simple to propagate too! As long as you know exactly how to take the cuttings and what you have to do to make them thrive, you’ll have plenty of new Autograph Trees before you know it.
In this post we’ll guide you through the complete Autograph Tree propagation process; from the best way to propagate, as well as tools and equipment you’ll need and our top tips for a successful Autograph Tree propagation.
Why propagate an Autograph Tree?
Before we get into the detailed process, we thought it would be useful to cover off the different reasons you might choose to, or be forced to propagate your Autograph Tree. First of all, they don’t always grow how we want them to! They can sometimes end up quite leggy, or sideways or even just too big for your space. If this happens, pruning is the best way to keep your Autograph Tree in the desired shape but instead of just throwing away those incredible cuttings, why not propagate them and create new plants.
You may also have no other option but to propagate your Autograph Tree out of necessity if it’s starting to die. We recommend trying to diagnose the issue and fixing it first but if things just get worse you might need to propagate it to keep even some of it alive. If this happens, you need to make sure that you’re propagating only the healthy part of the tree. Any issues or pests will transfer onto your new cutting and most likely lead to an unsuccessful propagation.
And lastly, our favourite reason to propagate your Autograph Tree; get free plants! Propagation is the best way to multiply the number of plants in your home without actually having to spend any more money. Autograph Tree cuttings also make great gifts for friends and family if you already have enough plants.
What tools and equipment you’ll need when propagating an Autograph Tree:
Healthy and mature Autograph Tree
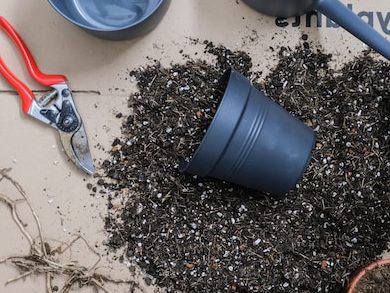
Sharp scissors/shears
Spare pot
Fresh soil and water
Newspaper or plastic sheet if propagating indoors
What methods can be used to propagate an Autograph Tree?
The best way to propagate your Autograph Tree is through stem cuttings. Whilst you can grow Autograph Trees from seeds, the success rate is incredibly low when not grown by professionals. Stem cuttings are super easy to do but work best if you have a mature Autograph Tree.
Below you’ll find a step by step process to make sure you’re taking the stem cuttings in the right way when propagating your Autograph Tree.
How to propagate an Autograph Tree through the stem cutting method
Locate the healthy stems on your Autograph Tree
Only ever take stem cuttings from healthy parts of your Autograph Tree. If you try to propagate a part of the plant that’s looking a little wilted, yellow or dry, your chances at a successful propagation are much lower.
You can choose whether to take one or more stem cuttings from your plant, it doesn’t impact the process at all but just depends on the maturity of your plant and personal preference.
Make the cut(s)
This is the scary part and the reason why a lot of plant parents shy away from propagating their Autograph Trees! Now that you’ve located the section of the stem that you want to propagate, you need to cut it off! Use clean scissors/ shears or a knife to make the cut diagonally across the stem. This increases the surface area and encourages more root growth.
Choose to grow your cuttings in water or soil
The simple thing about Autograph Tree propagation is that you can actually grow them directly into potting mix if you want as they grow roots fairly fast. We still recommend growing them in water for a couple of weeks as a middle step but if you prefer not to you can skip to step 9.
Remove any lower leaves
As you’ll be placing your stem cutting in water for several weeks you want to carefully remove any leaves on the lower part of the cutting that may end up sitting in the water. This is because they will start to rot and release bacteria into the water which can harm your cutting. If your Autograph Tree cutting only has a few leaves then skip this step and just make sure the water level isn’t super high.
Fill up a clear container with water
Next, you want to fill up a glass with fresh temperate water to place your Autograph Tree cutting into. Extreme temperatures will shock or burn your cutting which can kill it quickly.
We like to use a transparent container so that we can see the roots growing and spot any issues early.
Place your Autograph Tree cutting in water
Make sure that the lower part of your cutting is sat in water. Avoid placing too much of it in as it can increase your chances of stem rot.
Change out the water frequently
It’s important that you keep the water fresh so we recommend refreshing it every couple of days. This keeps it free from bacteria and will help stop it from stagnating and smelling.
Be patient
Now that your Autograph Tree cutting is happily in the water, there’s nothing left to do but continue to switch out the water and be patient.
Don’t worry if this process takes several weeks before you start to see roots. Keep your Autograph Tree cutting in the water until the roots are several centimetres in length.
Plant your Autograph Tree cuttings into potting mix
Use a high-quality potting mix to make sure your plant is getting the right balance of nutrients. For Autograph Trees, we also recommend getting a well-draining mix including perlite to help avoid issues caused by accidental overwatering.
Resume usual Autograph Tree care
Now you can continue to care for your new Autograph Tree plant as you would the mother plant. Soon enough, it’ll be mature enough for you to propagate it all over again.
Autograph Tree Propagation FAQs
Although Autograph Tree propagation isn’t too difficult, it’s still really important to understand the basics as these can really impact how strong the roots grow and how quickly you’ll see new foliage. Below you’ll find all the answers to your Autograph Tree propagation questions.
When is the best time to propagate an Autograph Tree?
Ideally, when propagating through stem cuttings, spring is the best time to make the cut. This is because it takes a while for your cutting to grow a whole new root system of its own, as well as start to grow new leaves too. By doing it in spring/early summer, you’re giving your plant a good few months of sunny, warm weather to help it through the propagation.
Propagating in springtime also means your mother plant has the ideal conditions to recover as sometimes propagation can be a little stressful for plants.
Can I use rooting hormone when propagating my Autograph Tree?
Rooting hormone is optional and you can still have plenty of new healthy root growth without it. However, rooting powder will help speed up the process and make the roots stronger at the same time.
You can buy rooting hormone in 3 types: powder, liquid or gel. When using a powder you dip the end of the cutting into water and then into the powder before planting directly into fresh potting mix. Gel and liquid forms work in a similar way but are great when choosing to propagate in water first so it depends how you choose to grow your Autograph Tree cutting(s).
Is it safe to use a grow light for my Autograph Tree cuttings?
Grow lights help supplement light levels if your home doesn’t get much natural sunlight. They are great for Autograph Tree propagation and can be used for most other houseplants too. LED grow lights can also be used beyond propagation to help some of your mature plants thrive in the darker months of winter. It can be a real life-saver when it comes to preventing leggy and stunted growth so are a good investment for every plant lover.
Heat pads are also a great buy for propagation lovers as they create a nice warm environment that helps speed up root growth. Cool temperatures are damaging to young Autograph Tree plants so are worth it if you live in a fairly cool climate.
Can I propagate my Autograph Tree from just one single leaf?
Unfortunately, it’s not possible to propagate an Autograph Tree from a single leaf cutting as roots aren’t able to grow out of them. Your leaf cutting will very quickly wilt and die.
Can I fertilise my Autograph Tree cutting straight after propagating it?
It’s important that you stay away from fertiliser for about a year propagating your cutting. You need to wait until it has a strong root system of its own otherwise it can cause various issues from yellow leaves, stunted growth and a range of other issues.
You also want to hold off fertilising the mother plant for a few weeks after taking your cuttings to allow it some time to recover.
Common issues when propagating an Autograph Tree, and how to fix them!
Propagating houseplants won’t always be a simple problem-free process and it may happen that from time to time you come across some issues in the process. We recommend keeping an eye on your cutting(s) daily for the first few weeks after propagation as this will help you spot any warning signs early. Fixing the issue at the early stages will give you the best chance at fixing it and getting your cutting back to full health.
How long will it take for my Autograph Tree cutting to grow new roots?
Propagating Autograph Tree plants can be fairly speedy and you can expect to see some roots growing after just a few weeks. But don’t think that just because it’s taking a little longer that it won’t be a success. Root growth on stem cuttings is unpredictable but just make sure you’re changing out the water regularly and keeping your Autograph Tree in a nice warm environment and you should start to see new roots growing soon!
If you want to try and speed up the process you can use rooting gel or use a heat pad to ensure your cuttings are in the ideal environment for root growth.
What’s causing my Autograph Tree cutting to turn soft?
If your Autograph Tree cutting is starting to turn soft then this means it’s starting to rot. This can be caused by bacteria building up in the water or too much of the cutting being submerged. Try to cut away the soft part of your cutting and see if there is enough left to continue the propagation.
In future, make sure you are switching out the water every few days, and only putting the bottom section of the cutting in water to avoid this happening again.
Why are the new leaves on my Autograph Tree cutting much smaller than my mother plant?
It’s great news that your new Autograph Tree cutting is finally growing some new leaves. But you might be left wondering why they are so small? This is totally normal and is because the root system is less mature so it can’t support such large growth.
Why are the leaves on my Autograph Tree cutting turning yellow?
Yellow leaves on your new Autograph Tree plant are usually caused by watering issues. This should only start to happen once it’s growing in soil so take your plant out and inspect the root system to see if you need to water more frequently or cut back.
We hope you’ve found this complete guide to Autograph Tree propagation useful. It can be a little scary cutting the beautiful stems off your mother plant to propagate but the end result is definitely worth it, trust us!
Check out our full Autograph Tree Care Guide for more information on how to look after your stem cuttings once they have matured.


