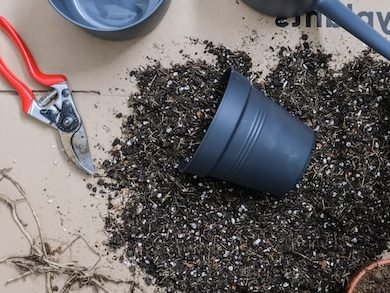
Native to the tropics of Central and South America, the Arrowhead plant is not only easy to care for, but can be pretty easily propagated too. It may feel a little daunting at first but if you have a strong and healthy mother plant it can be a really simple process. They are quite resilient plants with strong stems so can deal with some stress quite easily.
In this post we will guide you through the complete process; the various methods you can use, the dos and don’ts, what tools you’ll need and things to look out for to ensure it’s a success!
Why propagate an Arrowhead Plant in the first place?
There are several reasons why plant parents might choose to propagate their Arrowhead plants. Firstly, houseplants don’t always grow how we want them to! They can sometimes grow sideways, too leggy or can sometimes even outgrow the space in your home. Pruning these plants is a great way to keep them in shape and looking healthy. But instead of throwing away those incredible cuttings, why not use them and create new plants.
If you notice that your plant is dying then sometimes the only option is to take a cutting of the healthy part of the plant and give up on the rest.
We always recommend that you first diagnose the issue and try to fix it before taking cuttings but sometimes if there is no positive change, it might be your only option.
But it doesn’t have to be all gloom and doom, you may also choose to propagate your plant to simply make new ones. It’s a great way to multiply the amount of greenery in your home without actually having to spend any more money on plants. Arrowhead cuttings also make great gifts for friends and family!
What tools will I need for Arrowhead propagation?
Let’s start off with the easy part. It’s important to make sure you have all the right things before taking your first cutting!
Healthy and mature Arrowhead Plant
Sharp scissors/shears
Spare pot
Fresh soil and water
Newspaper or plastic sheet if propagating indoors
What methods can I use to propagate my Arrowhead Plant?
There are two main methods; stem cuttings and division of the mother plant. We have had a lot of success with both methods but there are some pros and cons to each of the methods.
The stem cutting method does take a lot longer to grow into new plants but it’s also a lot of fun to see the roots growing and the brand new leaves emerging.
The other great thing about the stem cutting method is that it can be done without taking too much away from the mother plant making it ideal for less mature or bushy plants where you might not want to, or be able to, split up various sections to create new plants.
Below you will find a step by step guide to each method so you can figure out what’s best for you and your plant.
How to propagate an Arrowhead plant through stem cuttings
Locate a healthy and mature stem
When taking an Arrowhead stem cutting you want to make sure that the part of the plant you are cutting is healthy.
Another thing to look out for when choosing what section of the stem to cut is nodes. Nodes are stem joints where the ariel roots grow out from. They are really easy to spot as they are just below each leaf on the main stem.
If you can, try to choose a section of the plant that contains a few nodes as this will help speed up the process a little. The ideal number is 2-3 nodes as any more will mean your cutting requires a lot of energy to keep it alive.
Make the cut
This is the scary part of the process! Now that you’ve picked the perfect section of the stem, you need to cut it off.
Use clean scissors/ shears or a knife to make a diagonal cut across the stem. This increases the surface area which helps with root growth.
Clean your shears before and after you make the cut. This avoids passing on any bacteria or pests to your other houseplants. It also gets you into the habit of cleaning your tools which is super important when handling toxic plants.
Fill up your container with fresh water
Next, you want to fill up a container with fresh water to place your cutting into. Make sure the water is temperate and not hot or cold as this will very quickly shock or burn your cutting which can cause it to die.
Place your Arrowhead cutting in water
Make sure that the node(s) on the stem cutting is sat in the water so that the roots will start to grow out from there.
Try to only submerge the part of the plant that needs to be in the water. Placing too much of the cutting in water for weeks on end increases the risk of leaf rot which will harm your chances of a successful propagation.
Place your cutting in bright but indirect sunlight. Intense light will damage and burn your cutting. Too little light however will mean root growth is very very slow.
Change out the water regularly
This is one of the most important steps in the entire process and can often be forgotten.
You might think that your hard work is over once you’ve cut the stem and put it in water but now you need to make sure that the water doesn’t stagnant. Switching it out every couple of days will help to keep it free.
Be patient
There is nothing left to do other than change out the water and wait for roots to grow. Don’t worry if this process takes several weeks or months as that is totally normal!
It can be quite unpredictable and the whole process depends on a lot of things so just make sure your cutting is healthy and you should start to see new roots soon.
Plant your cuttings into potting mix
Once the roots on your cutting have matured and are about 10 centimetres long, you can pot your cutting into soil.
Make sure you are using a high-quality potting mix to aid with drainage and aeration. Carefully place your cutting into the mix, making sure not to damage the delicate newly formed roots and continue regular care.
Propagating an Arrowhead Plant can be easy!

How to propagate an Arrowhead through division
You can only use this method if your plant has several stems growing in the same pot. If your plant is only one offshoot then you must use the stem cutting method.
Locate the various offshoots
When looking for a part of the Arrowhead to divide it will become very obvious if there are various offshoots/stems.
They will be completely separate and leaves will grow out from each of the stems. A good way to determine how many offshoots you have is to follow each of the stems down to the soil.
Take your plant out of its pot
Whilst the other methods of propagation you can do without really getting your hands dirty at all, this method is a little more hands-on. In order to divide up the plant, you need to pull the various sections of the root system apart.
Carefully lift the plant out and shake off the potting mix around the roots. An easy way to loosen the potting mix is to gently run your fingers through the roots to start to separate them. This also helps stop too much damage to the root system.
Separate the sections
You may have to trim off the odd root if they aren’t detangling easily but you should be able to carefully pull the sections apart from each other.
It’s ok if you have to slice around the plant a little to separate them but just make sure that each part of the plant has a good amount of the root system as this will help them grow new leaves in no time.
Place in water or fresh potting mix
Pot the main mother plant back into its pot and decide whether you want to place your new plant(s) in water or potting mix.
If the roots on your new plant are still quite small then you may want to pop it in water for a few weeks to help them mature. However, if the roots look strong then you can pot your new plant in fresh potting mix straight away.
Use a high-quality potting mix to make sure that your new plant gets the right balance of nutrients. It can be quite a shock for plants to be separated and moved into a new pot so you want to give it the best shot at thriving!
Continue normal Arrowhead care
Now that your new plant is happily in its new home with plenty of fresh potting mix, your propagation is complete!
You can now care for your new baby plants like you would the other one, making sure it gets the right amount of light, warmth, water and humidity to thrive!
Arrowhead Plant Propagation FAQs
What’s the best time of year to propagate my Arrowhead plant?
Ideally, you want to propagate at the beginning of spring for the best chance of successful.
Make sure that any frost is behind you so that your cuttings are growing their new roots and leaves in warmer brighter months.
Should I use a grow light for my Arrowhead cuttings?
Grow lights are great when propagating Arrowhead plants if your home doesn’t get a lot of natural sunlight. LED grow lights help to provide an ideal environment for strong and healthy leaves and roots.
Grow lights can also be really beneficial to all of your houseplants during autumn and winter, where the lack of sunlight can often lead to stunted or leggy growth.
So they are a great investment for every plant parent.
What is a node?
It’s important that you are able to identify the different parts of the plant so you know where to make the cut.
A node is where the stem and leaf joints meet. You’ll feel a little bump in the stem or even see a small ariel root trying to break through.
When using stem cuttings, you need to include at least one node. Without it, there is nowhere for the roots to form and the leaf will wilt and die pretty quickly.
Can I propagate an Arrowhead from a single leaf?
Unfortunately, you aren’t able to use a single leaf cutting.
There needs to be at least one node so that roots can start to form. If you try to propagate just a leaf cutting it might survive for a week or so in the water but will then wilt and die.
Common problems when propagating an Arrowhead Plant
Below we have all of the answers to how to fix any common problems you might run into.
Why is my Arrowhead cutting turning mushy?
If your cutting is turning brown and mushy then unfortunately this is quite a serious problem.
A soft leaf usually indicates that it has started to rot in stagnant water or that too much of the cutting has been submerged. Cut off the soft part of the cutting and if there is still at least one node left then you might still have a successful propagation.
In future, you want to make sure you are frequently switching out the water to avoid it stagnating.
Another top tip is to only submerge the necessary parts of the cutting. This will prevent too much of it from becoming soggy and rotting.
Why are the new leaves on my Arrowhead cutting small?
Great news! Your cutting is growing new leaves… but why are they so small?
Don’t worry, this is totally natural and is simply due to the root system being less mature than that of the larger plant. This means that it can’t support the growth of such large leaves as they require a lot of energy and nutrients.
Be patient and slowly the new leaves will start to get bigger and you can trim away the smaller leaves to encourage new healthy growth.
Why is my Arrowhead cutting turning yellow?
If the leaves on your cutting are turning yellow then it may be due to too much direct sunlight which has scorched the leaves.
If this has occurred after you’ve pot your new plant in soil then we also recommend taking your plant out of its pot to inspect the root system as this can also be caused by overwatering.
As your new plant will be a lot smaller than your mother plant, it won’t need as much water so adjust your watering habits accordingly.
It can feel a little scary to chop parts of your beloved plant off but trust us when we say it’s totally worth it as soon enough you’ll have loads of new plants all around! With the right care, processes and the ideal environment, you shouldn’t have too many problems.
Check out our full Arrowhead Care Guide which has all the information on how to continue caring for your cutting once it has matured.


