Aluminium Plants are popping up more and more in plant shops around the world and we are all slowly falling in love with their incredible leaves. Luckily for us plant parents, Aluminium Plants are really easy to propagate!
In this post, we will guide you through the whole process of propagating your Aluminium Plant, from tools needed to step by step methods as well as issues you might face along the way.
What tools will I need to propagate my Aluminium Plant?
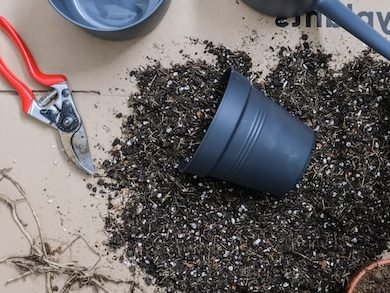
Let’s start off with the easy part. It’s important to make sure you have all the things you need before taking that first cutting.
Healthy and mature Aluminium Plant
Clean, sharp scissors/shears
Spare pot(s) with and without drainage holes
Fresh soil and water
Newspaper or plastic sheet if propagating indoors
Rooting hormone (optional)
Gardening gloves (recommended)
Propagate an Aluminium Plant using stem cuttings
This is the main method of propagating Aluminium Plants as it’s suitable for all sizes of plant. It’s also pretty easy to do and slightly more exciting than the division method.
Locate a healthy stem
When taking a stem cutting from your Aluminium Plant you want to make sure that the part of the plant you are cutting is healthy. Avoid taking a cutting if you see potential signs of disease or pests (yellow or brown leaves, holes in the leaves or visible pests) as they will be transferred onto your new cuttings which will decrease your chances of a successful propagation.
Ideally, you want to locate a stem that has several healthy nodes and leaves. A node is the joint in the stem where the root would grow out from.
Make the cut
Make sure that the scissors/ shears/ knife you use is clean as you don’t to pass any dirt or infection into the open wound of your cutting. Take a clean, sharp cut across your plant, slicing diagonally if possible to increase the surface area for more root growth.
Fill a glass with water
Next, you want to fill up a glass with fresh temperate water to place your Aluminium Plant cuttings into. It’s important that the water isn’t really hot or cold as this will shock and burn the delicate cutting. We also recommend using purified water as the levels of chlorine and fluoride aren’t as high as in the water straight out of the tap so you’ll avoid any sensitivity.
A great way to do this naturally (and for free) is to leave the water sitting out for 24 hours as the chemicals will start to evaporate. You can also use filtered water or collected rainwater.
Remove the lowest leaves
Before placing your cuttings into water you want to remove any lower leaves that may be submerged. Those leaves won’t survive sat in water for weeks on end and will rot pretty quickly so it’s best to just remove them at this stage.
Place your cuttings in water
Make sure that the nodes on your Aluminium Plant cutting are sat in the water so that the roots will start to grow out from them. But you want to avoid covering too much of the cutting as this can cause it to rot.
Place your glass in bright but indirect sunlight. Intense light will damage the cutting and prevent a successful propagation.
Change out the water regularly
One of the most important steps in the propagation process of your Aluminium Plant cuttings is to regularly replace the water. You want to be doing this every 2 to 3 days to keep it from stagnating. Stagnant water will not only start to smell but it will encourage bacteria which is harmful to your cutting.
Be patient
Now all you can really do is wait. It may take several weeks until you start to see any roots popping out of your cuttings. Luckily Aluminium Plants aren’t the slowest at growing roots so after 2-3 weeks there should be some growth. Make sure your cuttings are getting enough light, warmth and fresh water and you shouldn’t have too many issues here.
Plant your cuttings into fresh potting mix
Once the roots on your Aluminium Plant cuttings are a few inches long, it’s time to pot them into soil! It’s better to wait a bit longer to make sure the roots are mature enough to grow in soil rather than taking them out too early. Cuttings can live in water for years so there’s no risk of leaving them in there for too long.
Always use a high-quality potting mix to make sure your cuttings are getting enough nutrients and there will be enough drainage and aeration in the soil. Carefully place your cuttings a few centimetres into the soil, making sure not to damage the newly formed roots as they can be quite delicate.
Resume your normal Aluminium Plant care routine
Try to keep the soil a little more moist than normal for the first few weeks as your cuttings will be used to growing in water and need some time to adapt. But after that, you can go back to how you would usually care for an Aluminium Plant!
Positives of propagating your Aluminium Plant in water
- It’s really easy and you should have a good chance of success with this method!
- If you use a clear vessel, you get to see the roots growing on your cutting which is always really cool!
Negatives of propagating your Aluminium Plant in water
- It can take a while for roots to start growing on your cutting and this can take several weeks and even months sometimes!
Propagate an Aluminium Plant through division of the mother plant
This method of propagation only really works if your Aluminium Plant is quite bushy and you don’t mind taking part of it to form a new plant. But if you do have a big enough Aluminium Plant, then this method is great for anyone who doesn’t want to wait for weeks/months for roots and new leaves to grow. With this method of division, you get new plants instantly!!
Take your plant out of the pot
To propagate your Aluminium Plant through division, you need to be able to locate the various offshoots of the plant and separate them out. The first step is to carefully lift your plant out of its pot, trying not to damage the leaves or root system.
Locate the various natural divisions
When looking for a part of the plant to divide it will become very obvious that there are various different offshoots that make up your Aluminium Plant. Carefully shake the root system to loosen the soil so you can see the root system clearly. A good method to do this is to run your fingers through to separate the roots. This usually doesn’t cause too much damage if you do it gently but don’t worry if a few roots break as it won’t harm your plant.
Separate out into sections
You may have to trim off the odd root to detangle the plant but with a little gentle tugging, you should be able to pull the sections apart to form individual plants. All you have to decide now is how many sections you want, we usually divide by either 2 or 3 but it all depends on the size of your Aluminium Plant.
You need to make sure that each section ends up with a good amount of roots to ensure your propagation is successful.
Place each section in fresh potting mix
Pop your mother plant back into its original pot (or downsize slightly if you have taken away a substantial amount of the original plant). Then pot your new Aluminium Plant(s) into fresh potting mix. Never reuse old potting mix from other plants as this can transfer pets or bacteria without you even realising!
If the roots aren’t very mature on one or more of your sections you may want to grow them in water for a few weeks.
Continue normal care
Your Aluminium Plant propagation is complete!! Now your plants are safely in their new homes you want to resume normal Aluminium Plant care. For a few weeks, you might notice the plants need a little extra water as they are used to growing in water but they should adjust after 2-3 weeks.
Positives of propagating your Aluminium Plant in water
- It’s a fool-proof method of propagation and has a much higher success rate!
- You don’t need to wait months on end for it to form a new mother plant, this method is instant and requires no patience.
Negatives of propagating your Aluminium Plant in water
- This method only works for plant parents with really big and bushy plants so won’t be suitable for everyone.
Aluminium Plant propagation FAQs
Here’s some answers to the most common questions we get on this subject, hopefully something here can help!
How long does it take for cuttings to grow roots?
Aluminium Plant cuttings should start to grow roots after only several weeks. But it can be unpredictable and depends a lot on how big the cutting it, the environment and the care it is receiving.
If you don’t see any roots growing after several weeks we recommend investing in a heat pad to stimulate growth.
What’s the best time of year to propagate my Aluminium Plant?
Always start propagating an Aluminium Plant in spring time, after the last winter frost as this will give your plant plenty of warm summer months to grow.
What soil should I use?
When propagating Aluminium Plant, always use a well-draining potting mix. You also want it to be fresh and high quality to prevent the spread of diseases and make sure that your cuttings are getting enough nutrients.
Do I need to use a rooting gel or powder when propagating an Aluminium Plant?
Using rooting hormone in the form of gel or powder is completely optional. They work to stimulate root growth on new cuttings, not only speeding up the process but also producing stronger roots.
Should I use a grow light for my Aluminium Plant cuttings?
Grow lights are great to use when propagating houseplants as they provide ideal light conditions for young seeds and cuttings to boost healthy growth. If you don’t have bright light in your home then this is definitely the best option for you. You can also use them on mature houseplants over autumn and winter when they don’t get as much light so are a great investment for any plant parent!
Do I need to fertilise my Aluminium Plant cuttings?
Fertiliser and cuttings is a big no-no! Fertiliser can actually slow down growth as you are providing nutrients straight to the plant which discourages root growth. We recommend always waiting at least a year before fertilising your Aluminium Plant cuttings as doing it too early can cause various health issues for your new plants.
How do I know what method of propagation to use?
Choosing how to propagate your Aluminium Plant can be tricky because you obviously want the best chance of success. It all depends on how mature your plant is as you will struggle to divide smaller, less mature plants. Each plant is different so you just have to go through the advantages and disadvantages we listed above to see which works for you.
Common problems when propagating Aluminium Plants
Propagating plants doesn’t always have a 100% success rate and you may encounter some problems along the way. But don’t worry, below we have all the main problems you may face when propagating your Aluminium Plants so you can figure out what is causing these problems to arise and hopefully solve them before it kills your plant cuttings.
Why isn’t my Aluminium Plant cutting growing roots?
Patience is the number one thing you need when propagating an Aluminium Plant as there isn’t a fixed date at which you should expect to see growth. It is totally normal for it to take weeks and sometimes even months for anything to actually happen so as long as your cutting looks healthy and isn’t yellow, brown or mushy, then it should still grow roots at some point.
Why is my cutting turning mushy?
If your Aluminium Plant cutting has started to turn soft and mushy then chances are it is rotting. This can happen if the water isn’t regularly changed out or water has gotten in through the cut. The best thing to do is to remove the mushy part of the cutting and leave it to dry for a day or two before placing it in water. This allows the cutting to callous over a little and reduces the risk of leaf rot.
Why is there a weird film on my cuttings in water?
It’s totally normal for a slightly slimy layer to form around your cutting and its roots in water. This is totally normal and you shouldn’t worry. We recommend giving your cutting a quick rinse each time you change out the water to remove this.
Propagating Aluminium Plant isn’t super difficult once you have chosen your preferred method and you should have a good chance of success. With the right care and the right environment, your Aluminium Plant should start to grow roots and new leaves soon and it will be well worth the wait in the end.


