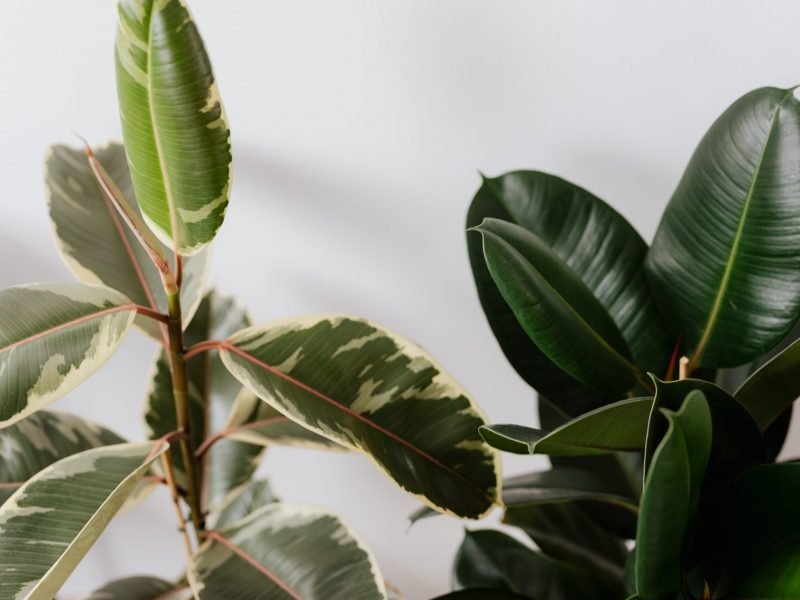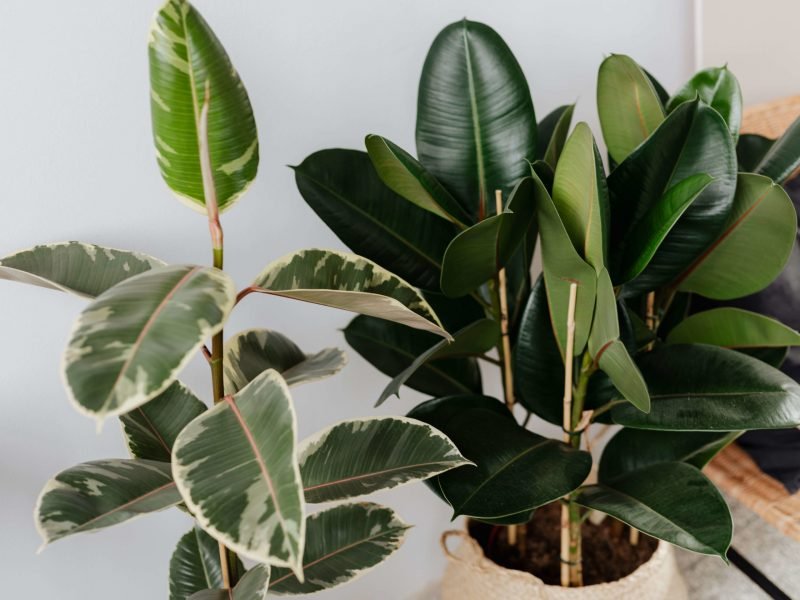
Rubber Plants (Ficus elastica) is one of the houseplant classics! With their elegant leaves and easy care routine, it’s no surprise why these plants are so loved. If you’ve been thinking about expanding your urban jungle, then propagating your plant is a great way to go. They aren’t always the easiest plant to use though but we hope this guide will guide you through everything. From step by step methods, to what tools you’ll need and common problems you might face in the process.
Why propagate a Rubber Plant?
Before we get into the details, you might be wondering why it’s beneficial to propagate your plant in the first place? Well here are some of the main reasons:
Create more plants for free!
This is often the most common reason as it’s a great way to expand your plant collection without needing to spend any more money! They also make great gifts for friends and family if you already have enough houseplants.
Save a dying plant
If you’ve accidentally overwatered (which is easy to do), over-fertilised or simply forgotten about your plant for too long and it has started to die, sometimes the best way to save it is by taking the healthy stems and using them to create new healthy plants before it’s too late.
If it has outgrown the spot in your home
Giving them a trim is a great way to cut back some of the growth. This is a great way to make use of those cuttings.
What tools/equipment will I need to propagate my Rubber Plant?
Let’s start off with the easy part, here’s everything you’ll need:
Healthy and mature Rubber Plant
Clean, sharp scissors/shears
Spare pot(s)
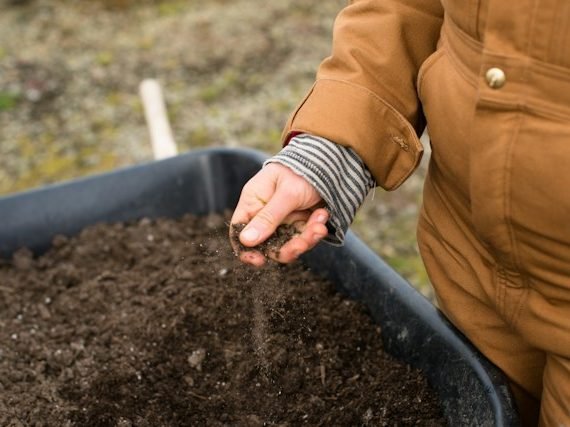
Fresh potting mix and water
Newspaper or plastic sheet (if propagating indoors)
Rooting hormone (optional)
Gardening gloves (optional)
Toothpick, peat moss, plant tie and plastic wrap (if using the air layering method)
What methods of propagation can be used?
There are two main methods; stem cuttings and air layering. The first method is definitely the easiest and can be done using top cuttings or stem cuttings (more on that later). Stem cutting method is great for not only all maturities, but it’s also a lot easier so you don’t have to be a pro to get this one right.
The air layering method can be a bit of a challenge, and the success rate is lower. However, if you are pretty experienced at the other propagation methods and want a bit of a challenge, this method can be a lot of fun!
How to propagate a Rubber Plant through stem cuttings
Locate healthy stem(s)
It’s really important when choosing which bit to propagate, that the section of the plant is healthy. Avoid using any stems or leaves that show signs of disease or pests, most commonly brown or yellow patches on the leaves. You also need to make sure that the part of the stem has at least one node.
Nodes are stem joints where the leaves come out from. You will pick the top of one of the stems for the first cutting, but you can then also take stem cuttings lower down to have a few shots at success. The process is exactly the same whether you choose the top cutting, or stem cuttings further down as well.
Make the cut(s)
This can be the scary bit – especially with Rubber Plants that don’t have many stems so one cut feels like quite a big deal! Now that you have located the section of stem that you want to propagate, you need to cut it off! We recommend wearing gloves in this stage as the sap can be quite toxic if ingested.
Take off any lower leaves
As you’ll be placing your cutting in water for several weeks you want to carefully remove any leaves on the lower part of the cutting that may end up sitting in the water. They will rot if they are sat in water for a long period of time so best to cut them off now. If your cutting only has a few leaves then skip this step and make sure the water level isn’t super high (this will mean you will have to top up the water more often as there is an increased risk that the cutting will dry out).
Fill up a tall container with water
Next, you want to fill up a glass with fresh water to place your cutting into.
Use temperate water as extremes will harm your cutting and decrease your chances of a successful propagation. We like to use a transparent container, not only to see the roots grow which can be pretty cool but to keep an eye out for any signs of unhappiness. Spotting issues on your cuttings early is the secret to solving them quickly!
Place your Rubber Plant cutting in water
Make sure that the node(s) of your stem cutting is sat in the water so that the roots will start to grow out from there. Place your glass in bright but indirect sunlight (direct sunlight can be too intense for new cuttings) and away from any temperature extremes.
Change out the water regularly
Make sure you are switching out the water in the glass every couple of days. This will stop it from stagnating and keep it free from bad bacteria that can really damage your cutting. Stagnant water will also smell quite bad so it’s something you really want to avoid.
Now just wait
Once you’ve gotten into the routine of regularly switching out the water, the rest can be a little boring
You might not see anything for several weeks and sometimes even months but this is normal and not a sign that it won’t work. Rubber Plants grow slowly and the same is for the cuttings.
As long as your cutting is getting the right care and environment, you should see roots pop out soon, followed by new leaves!
Plant your cuttings into fresh potting mix
Once the roots on your cutting have matured, you can now pot into fresh potting mix. Always use a fresh, high-quality mix to ensure your new plant is getting the right balance of nutrients as well as reducing the risk of pests that comes from reusing potting mix.
Carefully place your cutting into the mix making sure not to damage the delicate newly formed roots and continue regular Rubber Plant care.
How to propagate a Rubber Plant through air layering
This method can be a little trickier and fiddlier so we only recommend it if you are slightly more experienced (or you want a little bit of a challenge).
Locate a healthy stem
When choosing the air layering method you want to make sure you are using a healthy and strong plant. With stem cuttings, you could get away with using the healthy part of the plant but as you won’t be removing anything from the plant for a while, it’s important that your entire plant looks healthy.
Make a vertical incision into the stem
Using a clean knife make a vertical cut into your Rubber Plant’s stem that is a couple of inches long. You want it to go about halfway through the stem. When making the cut it’s important you don’t slice all the way through to the other side of the stem.
Open up the incision in the stem
Insert a toothpick into the centre of the incision to hold it slightly open. This can be a little fiddly as you don’t want to poke all the way through the stem so take your time when doing this.
Attach damp peat moss to the side of the incision
You want to tie the peat moss around the stem with the cutting in making sure it stays damp but not soggy at all times. Use brown string, plant ties or garden wire to secure the peat moss to your plant’s stem.
Wrap up the incision using peat moss
Wrap a piece of plastic wrap around the peat moss and stem. Wrap it firmly around the stem but still leaving some air pockets around the peat moss.
Once you see a new root you can cut off the stem
After several weeks you should start to see new roots growing out of the peat moss. Once you see this you can slice the cutting off your plant, remove the film and pot the cutting into fresh potting mix. Handle your new cutting with care as the fresh roots will be delicate and easily damaged.
Rubber Plant Propagation FAQs
What’s the best time of year start the process?
Ideally, you want to propagate at the beginning of spring for the best chance of success. It can be a little slower than other houseplants as they just grow a lot slower so make sure you don’t leave it too late as they will struggle to grow once autumn arrives. Starting in spring also means your mother plant has the ideal conditions to recover as sometimes propagation can be a little stressful for plants (it’s like moving house for humans!)
Any cold, wintery weather will impact your cuttings and can often mean they will die before they grow any new roots/leaves as the risk of leaf and root rot is a lot higher. If you do need to propagate in less than ideal temperatures, heat pads and LED grow lights are great tools to help simulate better conditions.
Should I use a rooting gel or powder?
Whilst it is not essential, you can definitely use rooting gel or powder to speed up the process a little. Rooting hormone stimulates root growth and produces stronger roots which is really important for these plants as they are vertical growers.
You can buy rooting hormone in 3 types: powder, liquid or gel. When using a powder you dip the end of the cutting (including the node) into water and then into the powder before planting directly into fresh potting mix. The moisture helps the powder to stick to the cutting. Gel and liquid forms work in a similar way but are great when choosing to propagate in water first.
Rooting hormone does have some drawbacks though as it can sometimes shock young cuttings and prevent them from growing if they are given too much. It doesn’t happen often but it’s still a risk.
Should I use a grow light for my Rubber Plant cuttings?
LED grow lights are great when propagating Rubber Plants (or any houseplants for that matter) in lower light as they can help stimulate growth by creating the ideal environment. Grow lights are also great to use more generally on your more mature houseplants, cuttings or seeds if they don’t get enough light in autumn/winter so are a great investment for any plant parent.
Can I propagate a Rubber Plant from a single leaf?
Unfortunately, there needs to be at least one node so that roots can start to form. It’s quite rare that you can use just one leaf and if you do try, it’ll go soft and wilt in a few days.
How many nodes do I need on my cutting?
Whilst you can have plenty of success with just one node, try to choose a cutting with 2 or 3 nodes. It will help growth and we have had more success than with a single node. It also means that the cutting immediately feels like a new plant, rather than just one lonesome leaf.
Should I fertilise my cutting?
It’s not a good idea to fertilise your plant when using the stem cutting method, or the air layering method. Plants are quite sensitive after they’ve been propagated and new stem cuttings should mature for at least one year before you start thinking about fertilising.
Fertilising too early can have the opposite effect to what you’d expect as it provides nutrients straight to the plant which discourages root growth. Fertilising such young plants can also shock them and cause various issues such as yellow leaves and small growth so hold off the feed for a while.
Common problems when propagating a Rubber Plant
It won’t always be successful and you’re more than likely to come across some issues along the way. Spotting the problems early and knowing how to solve them will give you the best chance at getting your cutting back to full health.
Why isn’t my cutting growing roots?
Propagating Rubber Plant plants isn’t as quick as a lot of other houseplants (as they are quite slow growers generally). It’s not unusual for many weeks and months to go by without much root growth. As long as you are switching out the water every few days, and are growing your cutting somewhere warm with indirect bright sunlight, you should start to see new roots growing eventually.
If you want to try and speed up the process you can use rooting hormone (either a gel, powder or liquid) which encourages faster root growth but it’s not always a guarantee and comes with risks of its own (see the FAQ above).
If you are trying to propagate your Rubber Plant in colder temperatures then this might be why you aren’t seeing much growth. Rubber Plants are native to the rainforests so need a warm and humid environment to properly thrive. You can help to speed up root growth by using a heat pad that you place underneath your Rubber Plant cuttings. This warms up the area and provides an ideal environment for new growth.
Why is my cutting turning mushy?
If your cutting is turning brown and feels soft and mushy to touch, then unfortunately this isn’t a good sign. It suggests that your cutting is rotting in stagnant water. Remove the mushy part of the cutting and hopefully, there is still enough for you to restart the process with. In future, to avoid mushy stems, make sure that you’re not putting more of the stem in the water than necessary and are refreshing it every few days.
Why are the new leaves on my Rubber Plant cutting small?
If your cutting is starting to grow new leaves but they are much smaller than the leaves on the mother plant don’t worry at all. This is completely natural and simply due to the root system being less mature than that of the larger plant. Mature Rubber Plants have really large leaves but you shouldn’t expect that on the new plants straight away. Give it time and slowly the new leaves will start to get bigger and you can trim away the smaller leaves to encourage new healthy growth.
What’s causing my Rubber Plant cutting to turn yellow?
If the leaves on your cutting are turning yellow then it may be due to too much direct sunlight which has burnt or scorched the leaves. If you’ve moved your cutting from water to potting mix in the last few weeks, take your plant out of the pot and see if you can spot a problem with the roots. Yellow leaves on a Rubber Plant can be caused by overwatering so inspect the root system closely and adjust your watering schedule accordingly.
Where is the node on a Rubber Plant?
Locating the node on your Rubber Plant is crucial to successful propagation as you’ll know where to make the cut. Without a node, it’s impossible to propagate your Rubber Plant with just a single leaf. Rubber Plants have nodes at each stem joint where a leaf is growing out from.
Nodes can be a little hard to feel on the stem of a Rubber Plant as there isn’t often a bulge like you’ll find on other plants.
How to care for your Rubber Plant cuttings after propagation
After your propagation is complete, now all of your attention will be focused on caring for your new plants and ensuring they mature properly. Although they have a reputation for being easy to care for, there are a few things you need to do and monitor that will help your plant thrive.
When it comes to sunlight, make sure that your Rubber Plant is getting enough sunlight but stay away from direct light. Mature Rubber Plants don’t do well with intense light and you need to be especially careful with less mature plants as they are more sensitive to the extremes.
You also need to make sure that your new plants receive enough warmth after the propagation process is over. make sure they are away from any cold drafts as this will stunt growth and increases the risk of root rot. Misting and using a humidifier will also go a long way to keeping those edges and leaf tips from drying out.
Check out our full Rubber Plant care guide to find all the information on how to continue to care for your cuttings once they have matured.
We hope you have found this guide useful. It is always an unpredictable process so things won’t happen like clockwork. You just have to sit back and wait with one eye on your cutting! But with the right care and the ideal environment, you shouldn’t have too many problems.
Check out our full Rubber Plant Care Guide for all the information on how to continue care for your cutting once it has matured.


