Healthy Polka Dot Plants

Polka Dot Plants (Hypoestes phyllostachya) are some of the most colourful and unique houseplants out there. You can find them in a variety of colours, from pink, white and even red and are named simply because of their incredible dotty leaves!
Polka Dot Plants can be easy to care for but are even easier to propagate. This post will guide you through everything you need to propagate your Polka Dot Plant, including a step by step process, tools required, how to spot and solve problems that creep up and answers to all of your propagation FAQs.
Contents
- Introduction: Understanding Polka Dot Plant Propagation
- Why propagate a Polka Dot Plant?
- What tools will I need to propagate my Polka Dot Plant?
- How to propagate a Polka Dot Plant using stem cuttings
- How to propagate a Polka Dot Plant through division
- Rooting the Polka Dot Plant Cuttings
- Potting the Newly Propagated Polka Dot Plant
- Polka Dot Plant Propagation FAQs
- Common problems when propagating Polka Dot Plants
Introduction: Understanding Polka Dot Plant Propagation
This vivacious perennial is revered for its lively, speckled foliage that brings a splash of joy to any indoor garden. But what if you could multiply that joy? You’re in luck! Propagating a Polka Dot Plant is a simple and rewarding process.
With patience and a little know-how, you can turn one plant into many and fill your home with these delightful dots!
Propagation is the process of creating new plants from the parts of existing ones. This can be done in a variety of ways, but for Polka Dot Plants, the easiest and most common methods are via stem cuttings and division of the mother plant.
Stem cuttings involve taking a small piece of the stem, encouraging it to grow roots, and then planting it. Alternatively, the division of the mother plant means separating the plant into several smaller plants, each with its own root system.
Don’t worry, we’ll guide you through each of these methods step by step!
By the end of this article, you’ll be a Polka Dot Plant propagating pro, ready to spread the love and share these enchanting plants with your fellow plant enthusiasts.
Why propagate a Polka Dot Plant?
Before we get into the nitty-gritty of Polka Dot Plant propagation, you might be wondering why it’s beneficial to propagate a Polka Dot Plant in the first place? Well here are some of the main reasons:
- Create more Polka Dot Plants for free!
Propagating your Polka Dot Plant will multiply your plant collection without needing to spend any more money! They also make great gifts for friends and family if you already have enough houseplants.
- Save a dying Polka Dot Plant.
If you accidentally overwatered (which is easy to do), over-fertilised or mistreated your Polka Dot Plants and it has started to die, sometimes the best way to save it is by taking the healthy stems and propagating them to create new healthy plants before it’s too late.
- To make your Polka Dot Plants fit their environment.
Polka Dot Plants can grow pretty quickly if in the right environment and they can slowly outgrow their pot or spot in your home. Giving them a trim is a great way to cut back some of the growth and propagating those Polka Dot plant stems is a great way to stop them from going to waste.
White Polka Dot Plant

What tools will I need to propagate my Polka Dot Plant?
Let’s start off with the easy part, what you need to propagate a Polka Dot Plant. It’s important to make sure you have everything ready before taking any cuttings.
- Healthy and mature Polka Dot Plant
- Clean, sharp scissors/shears
- Spare pot(s) with and without drainage holes
- Fresh soil and water
- Newspaper or plastic sheet if you are propagating indoors
- Rooting hormone (optional)
- Gardening gloves (optional)
How to propagate a Polka Dot Plant using stem cuttings
This is the main method of propagating Polka Dot Plants as it’s suitable for all maturities. It’s also really easy to get right as you can create several new Polka Dot Plants just by taking a few small cuttings.
Locate some healthy Polka Dot stems
When taking a vine cutting you want to make sure that the part of the plant you are cutting is healthy to give you any chance of success. Avoid any sign of disease or pests as they will be transferred onto your new cuttings and may make it harder for the cuttings to grow into proper plants.
When taking cuttings to propagate your Polka Dot Plant, you need to check for one important thing; a node. Without it, you will have a very slim chance of a successful propagation. A node is where a leaf has grown from the stem.
Make the cut
Use your clean scissors to cut off one or more stems. You want to make sure that you have at least 2-3 leaves on your cutting as this ensures you have a few good nodes from which roots can grow out from.
Keeping your tools clean avoids passing on bacteria or pests to your plant and also is important when dealing with toxic plants. (Although Polka Dot Plants are largely non-toxic, it’s a good habit to get yourself into)
Fill up a transparent container with water
Now that you have taken your cuttings, you need to grow them in something. You can pot them directly into soil as Polka Dot Plants grow roots very quickly but we always recommend water as a middle step. It just has a better success rate.
Fill up your container with temperate water (so as not to shock your delicate cuttings) and place your cuttings in so that the lowest third is covered by the water. Covering any more of the cutting increases the chance it will rot. If any leaves will be in contact with the water then remove them at this step as they will start to rot after being submerged for a few days.
We always prefer to use a clear container when propagating as you can see everything a little clearer.
Place your cuttings in bright but indirect light
Place your glass in bright but indirect sunlight. Intense light will damage the cutting and prevent a successful propagation. You can use a light monitor to figure out if you’re Polka Dot Plant cuttings are getting the right amount of sunlight. You can also supplement sunlight levels by using an LED grow light which are great at encouraging growth in cuttings. We love this one which is available on Amazon here.
It’s at this stage that you might choose to use rooting hormone. This will help to speed up root growth on the new cuttings. We have always found this rooting gel to be successful – you can buy it on Amazon here.
Change out the water regularly
One of the most important steps in the Polka Dot Plant propagation process is to refresh the water regularly (every 2-3 days is optimal). This keeps the water free from bacteria and stops it from stagnating which is harmful to your cutting. Stagnant water will also start to smell so it’s best to avoid this!
Be patient
Luckily Polka Dot Plant cuttings grow roots pretty quickly so you should start to see two delicate roots pop out from the node after only a few days. It can be a little unpredictable though and some cuttings will be a lot faster than others. But the process is definitely a lot quicker than with some other common houseplants, where you can be waiting months for anything to happen.
The benefit of Polka Dot Plants growing roots so quickly is that there is less time for something to go wrong and the risk of root rot is significantly reduced.
Plant your Polka Dot cuttings into fresh potting mix
Once the roots on your Polka Dot cuttings are a few centimetres long it’s time to pot them into soil. Don’t worry if the roots are still very delicate, this is normal for Polka Dot plants so just be a little careful when potting them to make sure they don’t break.
We recommend using a high-quality potting mix to make sure your cuttings are getting the right mix of nutrients. Our top choice for soil would be this potting mix from Miracle Gro. Carefully place your cuttings a few centimetres into the soil. You can also pop the cuttings back into the mother plant so it becomes a little fuller – it’s up to you!
Resume usual Polka Dot Plant care
Now that your cuttings are pot nicely into soil, you can go back to your usual Polka Dot Plant care routine and soon those plants will be big enough to propagate again and you’ll end up with way more Polka Dot Plants than you could ever need…
How to propagate a Polka Dot Plant through division
This method of propagation only really works if your Polka Dot Plant is quite bushy, otherwise, they can be left looking a little straggly. If you do have a big enough Polka Dot Plant that you don’t mind dividing then this method is great for those who don’t want to wait for new roots and leaves to grow – instead, you get new plants instantly!
Take your Polka Dot Plant out of its pot
To be able to propagate your Polka Dot Plant through the division method, you need to separate the different offshoots/stems. This is particularly easy to do with Polka Dot Plants compared to some other plants as they separate easily.
The first step is to carefully lift your plant out of its pot. Don’t tug too hard at the leaves as they are quite delicate but slowly shimmy the plant out of the pot.
Separate out the plant
You may have to trim off the odd root to detangle the plant but you should be able to pull the various parts of the plant apart. Each section should have some roots attached so inspect these carefully to make sure there aren’t any obvious problems (mushy rotted roots is the main one you are looking out for here).
How many new plants you want to create is completely up to you and totally depends on your mother plant. When separating parts of the plant, make sure to always use shears rather than pulling the plant apart as this can damage it quite easily!
Place each new plant in fresh potting mix
Pop your mother Polka Dot Plant back into its original pot (or downsize slightly if you have taken away a substantial amount of the original plant). Then pot your new plant(s) into fresh potting mix. This is our favourite potting mix from Miracle Gro.
Make sure not to reuse old potting mix from other plants as there may be bad bacteria or pests lingering in it that will start to impact the health of your new plants.
Continue normal Polka Dot Plant care
That’s all there is to the division propagation method of Polka Dot Plants. Now that your plants are safely in their new homes, continue with your normal Polka Dot Plant care routine!
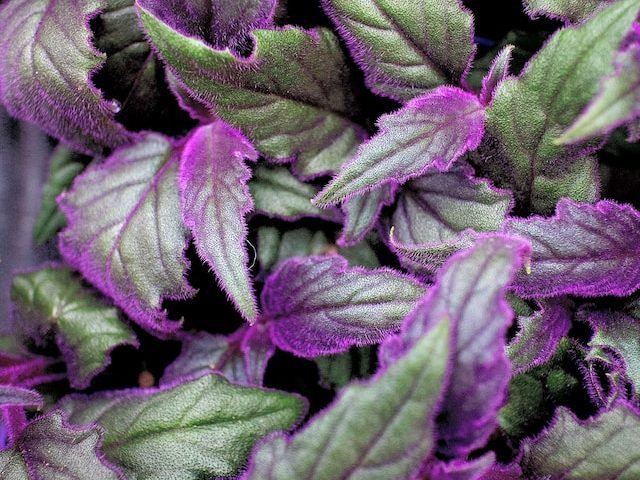
Pink Polka Dot Plant Leaves

Rooting the Polka Dot Plant Cuttings
Now that you’ve successfully taken your Polka Dot Plant cuttings, it’s time to root them! This is where the true magic begins: turning a stem into a whole new plant. Isn’t that exciting?
Step 1: First, you’ll need to prepare a pot with moist, well-draining soil. Ideally, the soil should be a blend of peat moss, perlite, and compost. This will provide the perfect environment for your cuttings to establish their roots.
Step 2: Next, make a small hole in the center of the soil using a pencil or your finger. It should be deep enough to cover the node of your cutting.
Step 3: Carefully place your cutting into the hole, ensuring that the node is well-covered by soil. This is crucial as the node is where the roots will sprout from.
Step 4: After planting, gently firm the soil around the base of the cutting. It’s important to provide stability for your young plant.
Step 5: Finally, water the cutting lightly and place the pot in a bright, warm location. Avoid direct sunlight, which can scorch the delicate cuttings. Instead, choose a location with dappled sunlight or indirect light.
Once you’ve completed these steps, the waiting game begins! You’ll need to be patient, as it can take several weeks for the cuttings to establish roots. While waiting, keep the soil moist, but not soggy, and make sure the cuttings receive enough light.
After about two to four weeks, you can gently tug on the stem. If you feel resistance, congratulations! This means the cutting has successfully rooted.
From here, you can continue to care for your Polka Dot Plant as you would a fully grown one: watering when the top inch of soil is dry, providing bright, indirect light, and feeding with a balanced liquid fertilizer every two weeks during the growing season.
Potting the Newly Propagated Polka Dot Plant
Now that’s what I call fantastic news! You’ve successfully rooted your Polka Dot Plant cuttings. It’s time to introduce them to their new homes – a pot! However, there are a few crucial steps you need to follow, to ensure your young plants thrive.
Selecting the Right Pot
Firstly, the pot you choose must have good drainage. The Polka Dot Plant isn’t a fan of waterlogged soil, so go for a pot with one or more holes in the bottom. It’s also essential to consider pot size. Your baby plant doesn’t need a mansion yet; a small pot, 3 to 4 inches in diameter, should suffice. As the plant grows, you can move it to a larger pot.
Preparing the Pot
Before potting, clean your selected pot with soap and warm water. This ensures any lurking harmful bacteria or fungi are eradicated. Then, place a piece of mesh or a coffee filter at the bottom of the pot to prevent soil from escaping through the drainage hole.
Potting Mix
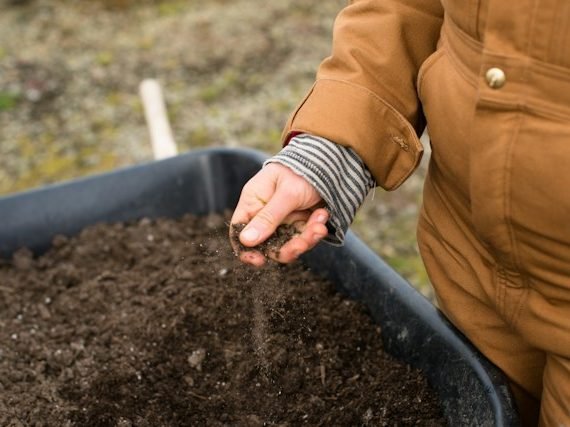
A Polka Dot Plant requires well-draining soil. A mixture of two parts peat moss to one part perlite or sand should do the trick. Avoid using garden soil, as it tends to compact in pots, reducing aeration and draining abilities.
Planting the Cutting
Fill your pot halfway with the prepared potting mix. Create a hole in the center, place your rooted cutting into it, and gently cover the roots with soil. Be careful not to damage the tender roots!
Aftercare
Once potted, water your newly planted Polka Dot Plant until water seeps out of the drainage hole. Place the pot in a bright, indirect light
Polka Dot Plant Propagation FAQs
Here’s a few of the most common questions we find people have when looking to propagate their Polka Dot Plants.
How long will it take for my Polka Dot Plant cuttings to grow roots?
Luckily, Polka Dot Plant cuttings grow roots way quicker than most other houseplants and you should start to see some growth after only a few days. But propagation is never an exact science and sometimes things take longer than expected to prepared to be a little patient and make sure you are caring for your cuttings properly.
What’s the best time of year to propagate Polka Dot Plants?
We always recommend propagating houseplants in spring (after the last of the cold weather) as this means they are growing in the sunniest and warmest months of the year. However, with Polka Dot Plants as they grow roots very quickly you can sometimes get away with propagating at any time of the year. Using a heat pad, or LED grow light can help provide ideal conditions all year round.
What soil should I use when propagating a Polka Dot Plant?
When propagating Polka Dot Plants, we recommend always using a high-quality potting mix to make sure your plants get the right amount and mix of nutrients. Try to choose a mix that contains perlite as this aids drainage and aeration of the soil, helping to avoid common problems such as overwatering.
Can I use a rooting hormone when propagating a Polka Dot Plant?
Using rooting hormone in the form of gel or powder is completely optional when propagating Polka Dot Plants. What they do is help speed up root growth as well as promote the growth of stronger roots. But you can still have plenty of success without using any rooting hormone at all so it’s completely your choice.
Should I use a grow light for my Polka Dot Plant cuttings?
Grow lights are great to use when propagating any kind of houseplant as they help to provide ideal light conditions for young seeds and cuttings to boost healthy growth. If you don’t have ample light in your home then this is definitely the way to go. You can also use LED grow lights on more mature houseplants over autumn and winter when they don’t get as much light so we recommend them as a great investment for any plant parent!
Do I need to fertilise my Polka Dot Plant cuttings?
We recommend staying away from fertiliser until the cuttings are at least 1 year old. Fertilising Polka Dot Plants when they are young can actually hinder the growth of the main root system.
Can I propagate a Polka Dot Plant from a single leaf?
Unfortunately, you can’t propagate Polka Dot Plants from just one leaf. There needs to be at least one node so that roots can form.
What is a node?
A node is where the leaf and stems meet. It is where roots will grow out from when you propagate. In Polka Dot Plants, it’s crucial to have at least one node when propagating.
Common problems when propagating Polka Dot Plants
Propagating plants doesn’t always have 100% success and you may encounter some problems along the way. But don’t worry, below you can figure out what is causing these problems to arise and hopefully solve them before it kills your plant cuttings.
Why isn’t my Polka Dot Plant cutting growing roots?
Patience is the number one thing you need when propagating Polka Dot Plant as there won’t ever be a fixed timeline at which you should expect to see certain levels of growth and roots. Although growth tends to happen after the first week with Polka Dot Plant propagation, as long as you are giving your cuttings the right care and they are in the right environment then it is just a waiting game.
Why is my cutting turning mushy?
If your Polka Dot Plant cutting has started to turn soft and mushy then chances are it is rotting. This can happen if too much of the cutting is placed in water. Unfortunately, this means propagation won’t be successful for this cutting. If there is more than one node on the cutting which isn’t mushy yet, cut this off and start the propagation process again with the healthy part of the cutting.
Why are the new leaves on my cutting pale?
If the new leaves forming on your Polka Dot Plant cutting are pale it suggests your cutting is receiving too much direct sunlight. Move your cutting to somewhere with bright but indirect light and remove the most damaged leaves.
We hope you have found this guide to Polka Dot Plant propagation useful. It can sometimes be a little unpredictable whether or not it will be a success but this is definitely easier than propagating some other houseplant types so we are sure you will have Polka Dot Plants growing left, right and centre in no time at all!!
Check out our full Polka Dot Plant Care Guide that has all the information on how to continue care for your cuttings once it has matured.


