

Potted Roses
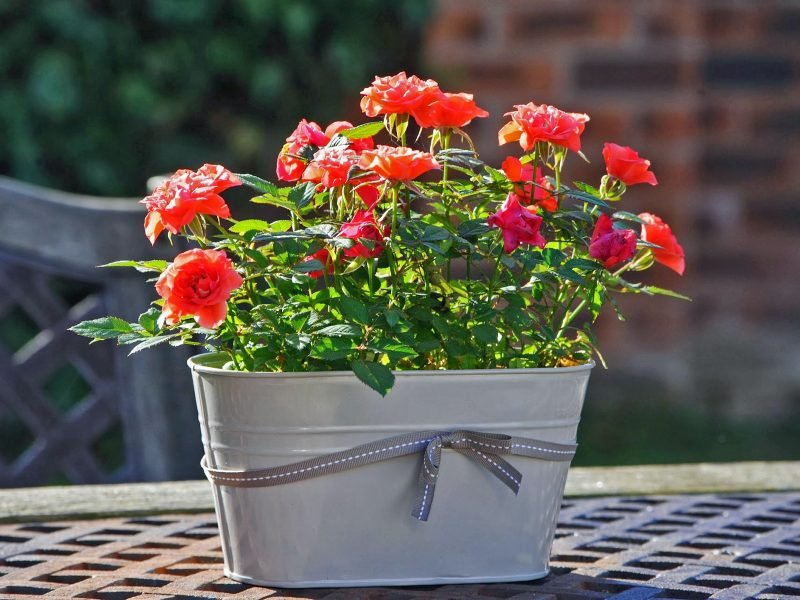
Today, we’re diving headfirst into the splendid world of growing roses in pots.
Whether you’re a seasoned gardener looking for a new challenge or a novice just starting your botanic adventure, you’re in the right place. Roses are a delightful addition to any home, bringing a splash of colour and a waft of fragrance.
Ready to get your hands dirty? Let’s roll up our sleeves and plunge into the world of potted roses.
The Benefits of Growing Roses in Pots: Advantages and Disadvantages
Why grow roses in pots, you ask? Well the answer is as colourful as a well-tended rose garden itself. The practice is bursting with benefits; let’s dive in and explore them together!
The Advantages:
- Flexibility: Potted roses are the ultimate nomads of the plant world. Growing in containers means being able to move your roses around and create a different look at a moment’s notice.
- Control: Growing roses in pots allows you to control their environment completely. You become the master of soil, sunlight and watering conditions.
- Less Disease: Roses are a bit like royalty – beautiful, but prone to disease. Growing them in pots can help control common problems like blackspot and rust.
- Variety: Pots let you experiment with growing different types of roses that might not thrive in your garden soil.
The Disadvantages:
- More Maintenance: Everything is more intense in a pot, including maintenance. You have to water and feed your roses more frequently.
- Winter Woes: Potted roses are more vulnerable to harsh winters. You might need to move them inside or keep them insulated.
Choosing the Right Container for Your Roses
Size matters! That’s right, your rose plant isn’t too fussed about minimalism. It needs space. A pot that’s at least 12 to 15 inches deep is ideal. This ensures there’s plenty of room for root growth.
It’s also important to consider what kind of material you want for you pots. Each has its pros and cons. Terracotta and wooden pots are heavy and stable, but they lose moisture quickly. Plastic pots, on the other hand, are and light retain moisture well, but they can be unstable and less durable.
Here’s a quick guide to help you pick:
MaterialProsConsTerracottaHeavy, StableDries out quicklyWoodenHeavy, Organic LookDries out quickly, Can RotPlasticLight, Retains MoistureUnstable, Less Durable
Lastly, don’t forget aesthetics. Choose a pot that complements your space and fits your plans.
Selecting the Right Soil for Your Potted Roses
Ingredients for the Perfect Soil Mix
So what makes the perfect soil mix for your potted roses? Here’s the scoop:
- Loam: Loam is the Goldilocks of soils, not too sandy, not too clay-ey, it’s just right. It has excellent drainage capacity while holding onto the right amount of moisture and nutrients. It forms the base of our perfect soil mix.
- Compost: This is the magic ingredient that gives your roses their nutrition. It is rich in organic matter, supplying all the essential nutrients for your rose to grow and bloom.
- Coarse Sand: This aids in drainage, ensuring your roses are never “over-watered”. It’s all about balance, my friends.
- Perlite: These little white pebbles increase aeration in the soil, giving your roses roots the room to breathe and grow.
The Perfect Soil Mix Recipe
Now you’ve got your ingredients, let’s whip up the perfect soil mix:
- Mix two parts loam, one part compost, one part coarse sand and half a part perlite.
- Give it a good stir to ensure the elements are evenly distributed.
- Fill your pot leaving about 2 inches from the top.
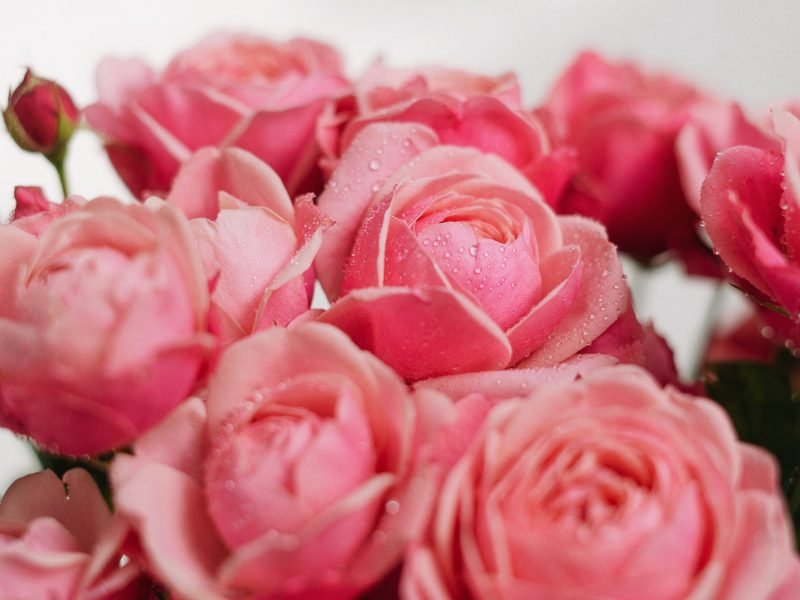
What are the Best Rose Varieties for Container Gardening?
With over 300 species it’s not easy to pick which variety will work for you, not all of those species word particularly well in pots either…
Let’s cut to the chase:
- ‘Petit Pink’: A compact floribunda rose. It’s resistant to disease, blooms all season and doesn’t need much pampering.
- ‘Blue for You’: Don’t let the name fool you, it’s more of a mauve colour.
- ‘Star Performer’: True to its name, this floribunda rose is a showstopper. With vibrantly pink blooms and a moderate fragrance, it’s a pot-friendly pick.
- ‘All a’Twitter’: This hybrid tea rose is a beauty. Orange, fragrant, and perfect for pots.
- ‘Diamond Eyes’: Petite yet dramatic, this miniature rose variety offers deep purple blooms with a white centre.
- ‘Sweet Drift’: Groundcover roses can also thrive in pots, and ‘Sweet Drift’ is proof. It’s disease-resistant, low-growing, and covered with dainty pink flowers throughout the season.
Remember, the best rose variety for you depends on your specific needs and location. So do a bit of research before you get started.
Picking the Perfect Location for Your Potted Roses
It’s got to be just right. Size, light, and temperature all play a part in selecting the best spot for your potted roses.
Light: Roses require a minimum of six hours of direct sunlight each day. So, selecting a sunny spot is crucial. Do keep an eye on scorching midday temperatures in the summer though, nobody wants their roses to wilt!
Temperature: Roses are not fans of extreme weather. They prefer a Goldilocks climate— not too hot, not too cold. So, avoid placing your pots in areas prone to freezing winds or intense heat.
Size: Remember, your roses will grow. So make sure you’ve got a spot that allows for expansion, like a roomy patio or wide window sill. Your roses will thank you for the extra leg room!

Watering Your Potted Roses: How Often and How Much?
The ‘when’
You’re looking for that sweet spot where the top inch of soil in the pot is dry to touch. In the peak of summer, this might mean a daily routine, while in cooler months, your roses may only need watering every 2-3 days.
The ‘how much’
You want to hydrate the soil thoroughly, but without water standing on the surface. Remember, roses aren’t fond of soggy feet – excessive water can lead to root rot which is difficult to come back from. Always water early in the day to give your roses a good start, and to allow any excess to evaporate before temperatures drop at night.
- Observe the dryness of the top inch of soil to determine when to water.
- Hydrate the soil thoroughly, but without leaving standing water.
- Adjust watering frequency with the seasons and the plant’s signs.
- Avoid waterlogging to prevent root rot.
Fertilizing Your Potted Roses: Tips and Tricks
Roses have an insatiable appetite and need a regular dose of nutrients to flourish. So, if you’re wondering why your roses are looking a bit ‘meh’, it’s probably time for some fertiliser.
Picking the Right Fertiliser
Choosing the right food for your roses can feel like walking through a labyrinth. There’s an overwhelming array of fertilisers out there, all promising to give your roses that ‘va-va-voom’. But don’t fret, we’ve got your back!
- Organic fertilisers: Made from natural materials (e.g., bone meal, fish emulsion), these slow-release options are the preferred choice for many. They not only feed your roses but also improve the soil’s health over time.
- Chemical fertilisers: These offer a quick nutrient boost, perfect for roses that look like they’ve lost their mojo. Look for a balanced blend, such as a 10-10-10 (N-P-K) ratio.
- Speciality rose fertilisers: Specifically designed for roses, these contain all the essential nutrients your roses crave. A great ‘no-brainer’ option.
How Often to Fertilise
Roses aren’t shy about wanting a regular feeding. Most will appreciate a good feed every 4-6 weeks during the growing season (spring through early autumn).
Tip: Don’t fertilise your roses just before they go dormant in winter. They’re having a nap, not looking for a midnight snack.
How to Apply Fertiliser
When it’s time, sprinkle the fertiliser around the base of the plant, but make sure you avoid the stems. Then, give your rose a good water to help the nutrients soak in.
And voila! You’re now a certified rose-fertilising guru. Remember, happy roses are well-fed roses!
Pruning Your Potted Roses: When and How to Do It
One of the essential steps you need to keep your roses vibrant and blooming is pruning. Pruning is essential for your roses — it may seem harsh, but it’s for their own good.
When to Prune?
Timing is key when it comes to pruning. The best time to prune your potted roses is late winter or early spring, just before they start to bud. This period allows the plant to recover and bloom beautifully.
How to Prune?
- Start by visualising your plant. Before you make a cut, step back and look at your rose bush. Imagine how you want it to look after the prune.
- Remove the dead and diseased wood first. These can be identified by the black, shrivelled, or discoloured parts on your plant. Simply cut them off.
- Open up the centre of the bush. This step is crucial for good air circulation and to prevent diseases. Aerate your rose bush by removing the branches growing towards the centre.
- Prune back to an outward-facing bud. This encourages growth in the right direction. Also, keep an eye on the angle of the cut. It should be sloping downwards to prevent water from collecting at the cut site.
Pruning your roses can feel a bit daunting at first, but with time, you’ll be a pro. Remember, it’s all about helping your roses to grow and bloom in their best possible form. So, don’t be scared to make that cut!
Dealing with Common Pests and Diseases in Potted Roses
When it comes to dealing with pests and diseases in potted roses, it’s all about observation, deduction, and swift action.
The Usual Suspects: Common Pests
First and foremost, let’s talk about the range of pests that can trouble your roses. From aphids to black spot, these tiny critters can wreak havoc if left unchecked.
- Aphids: These are tiny green or black insects that love to suck the sap from your rose plants. If you spot them, a blast of water or an organic insecticidal soap should do the trick.
- Black Spot: Not a creature, but a fungus. It looks exactly as the name suggests – black spots on the leaves. Remove affected leaves and use a fungicide to prevent it from spreading.
- Japanese Beetles: This pest chews on the leaves and flowers. Hand picking them off or using traps are effective ways to control their population.
Unwelcome Illnesses: Common Diseases
Just like people, roses can also fall ill. Here are a few of the common diseases that can affect your potted roses, along with some remedies.
- Powdery Mildew: This makes your rose leaves look like they’ve been dusted with flour. Increase air circulation, reduce overhead watering, and apply a fungicide if necessary.
- Rose Mosaic: Yellow patterns or mottling on leaves are the telltale sign. There’s no cure, but keeping the rose healthy can help manage the disease.
- Botrytis Blight: If you see brown, rotting buds or flowers, it may be this fungus. Remove and discard affected parts and apply a fungicide.
In the world of roses, prevention is often the best cure. Regularly inspect your roses, keep them well-fed and watered, and provide plenty of sunlight and air circulation. Remember, a healthy rose is a happy rose!
Overwintering Your Potted Roses: Preparing for the Cold Months
There’s a few key steps to making sure that your roses safely make it through the winter. It’s nothing to drastic, but these simple checks will ensure the long term health and bring them back to bloom when spring comes around again.
Step 1: Watering and Fertilising
Before the first frost hits, keep your roses happy. Water them thoroughly and give a final feeding. But hold on, don’t overdo it! We want them to slow down and prepare for their winter slumber.
Step 2: Prune for Protection
Next, it’s time to give your roses a good prune. This isn’t just to keep them looking smart. It also helps prevent wind damage by reducing the drag on the plant.
Step 3: Moving to aSheltered Spot
If possible, move your pots to a sheltered spot. It could be against a warming wall or even in an unheated greenhouse. The aim is to give them a bit of protection from the worst of the winter weather.
Step 4: Wrapping Up Warm
Lastly, it’s time to wrap up your roses. You can use bubble wrap, hessian, or even a purpose-made rose cosy. Whatever you use, make sure it covers the pot and the lower stems. But, keep the upper stems exposed to allow air circulation.
In the end, overwintering is all about giving your roses a little extra love during the cold months. Follow these steps and look forward to a spectacular show come spring.
Troubleshooting Common Problems with Your Potted Roses
What type of soil is best for growing roses in pots?
When it comes to the perfect soil for rose pot cultivation, the gold standard is a well-draining, fertile mix. Too much clay will be dense and water-logged, whereas too sandy a soil will drain too quickly.
- Loam: An ideal balance of sand, silt, and clay.
- Compost: Rich in organic matter, improves soil structure.
- Coco Peat: Excellent water retention and aeration.
Remember, a happy rose is all about balance, even in its soil!
What size pot should I use for growing roses?
A good rule of thumb is to select pots that are at least 30-45cm (12-18 inches) in diameter and depth. This gives your roses ample room for root growth, ensuring they stay healthy and blooming beautifully.
How often should I water my potted roses?
Water your roses deeply about 2-3 times a week during warmer months. In cooler months, a weekly watering should suffice. Always ensure the top two inches of soil have dried before watering again.
Can I grow roses in pots indoors?
Indeed, you can! Roses can thrive in pots indoors, as long as they get enough light and care. Just make sure you choose a variety that’s suitable for indoor growth, such as miniature roses.
What are the best rose varieties to grow in pots?
From charming miniatures to larger hybrid teas, many roses adapt well to container gardening.
- Miniature Roses: Compact and disease-resistant, perfect for small containers.
- Floribunda Roses: Produces clusters of flowers, ideal for big pots.
- Hybrid Tea: Large, colourful blooms that require larger pots.
Do I need to fertilize my potted roses?
Yes you should, feeding your potted roses is crucial. They deplete their soil nutrients faster than garden-planted counterparts. To keep them blooming brilliantly, regular fertilization is a must.
How much sunlight do potted roses need?
Like all roses, those in pots crave sunlight. In fact, they need a minimum of 6 hours of direct sunlight per day to grow well and bloom beautifully. So, place your pots in the brightest spot you can find.


