Diagnosing issues with Rattlesnake Plants can be tricky as most of the time, several completely different factors can have the same impact on your plant. This can leave you wondering what’s really wrong with your plant and are the changes you’re making really the right ones. On top of this, Rattlesnake Plants can be a little fussy so it’s not abnormal for issues to be popping up from time to time when just the slightest thing is off.
Luckily, if your Rattlesnake Plant is displaying issues, you’ve come to the right place as below we will be going through each of the different factors for some of the most common problems that you’ll find with these plants. We will also cover the different ways to diagnose the issue as well as how to treat it properly and effectively so that your beloved Rattlesnake Plant can begin to thrive again!
Causes of yellow Rattlesnake Plant leaves
Overwatering.
If the leaves on your Rattlesnake Plant have turned yellow you are most probably overwatering. This is one of the main problems all plant parents face with their houseplants because the issue is often hidden in the soil until it has progressed enough to show up on the leaves and stems. If your Rattlesnake Plant is suffering from root rot then won’t be able to take up water or nutrients from the soil and the plant will start to become unstable and die.
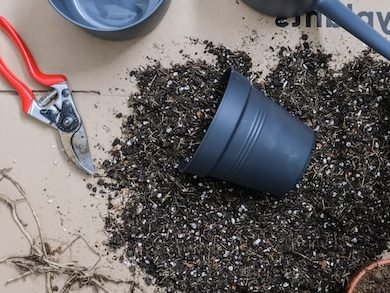
To diagnose the problem, check if the soil is waterlogged and if the roots have started to turn black and mushy. To solve the issue, cut back on your watering to give the potting mix time to dry out. We also recommend replacing the potting soil straight away (rather than waiting for it to naturally dry out). This will mean the root system can start to recover straight away.
Sunburn.
Intense, direct sunlight can also be a common reason why Rattlesnake Plant plants start to develop yellow leaves. Though a lack of light can also cause several issues for them, they don’t do well in harsh direct sunlight as they have quite thin delicate leaves. Direct sunlight will very quickly scorch and burn the leaves of your Rattlesnake Plant which is, unfortunately, irreversible.
If you think that direct sunlight is the cause of the yellow leaves on your Rattlesnake Plant, remove the worst affected leaves and move your plant to a slightly shadier spot in your home. If you are unsure how much light your plant is getting throughout the day/year, it can be useful to use a light meter to keep track.
Pests.
Whilst rarer than some of the other factors, your Rattlesnake Plant’s leaves may be turning yellow due to a pest infestation. Insects like spider mites damage your plants and leave behind yellow patches or holes in the leaves. Get up close to your plants using a magnifying glass and inspect the tops and undersides of the leaves to see if you can spot any insects.
There are a few ways to get rid of spider mites and other pests, including showering, neem oil and insecticide sprays. It’s also important to isolate your plant so that the pests don’t spread onto your other houseplants.
Natural ageing.
This is one factor that causes yellow leaves that you don’t actually have to be worried about. As your plant matures, it will start to lose the occasional leaf to prioritise new bigger growth. The leaves will often be the oldest and smallest and will turn yellow before dropping off your plant.
There are a few things to monitor when it comes to checking for natural ageing. Firstly, that the rate of yellowing does not increase and secondly that the rate of yellowing isn’t faster than your plant is growing new healthy leaves.
Rattlesnake Plants lose leaves for a variety of reasons
Shock/stress.
If your Rattlesnake Plant is losing leaves from the bottom up, and you are sure that watering and lighting issues are not the cause, then it may be due to temporary shock. This can be caused by a sudden change in environment (moving house etc).
Luckily, as long as the care/environmental factors are right, your Rattlesnake Plant should recover from this quickly and shouldn’t lose more than a few leaves over a few days.
Cold temperatures.
Another common reason why Rattlesnake Plants lose their leaves is due to inconsistent temperatures, particularly cold temperatures and drafts. If your plant is exposed to low temperatures (the ideal temperature for Rattlesnake Plant is between 18°C – 24°C), it can often cause them to go into shock and some leaves will drop from the plant. Cold drafts can be caused by a range of things but doors or windows with small cracks are your plant’s worst enemy.
But it’s not just in winter that you have to be careful about cold drafts; Rattlesnake Plants will struggle if too close to any AC vents so move them at least 1m away to prevent your Rattlesnake Plant from losing leaves. We really recommend buying a digital thermometer to check the temperature around your Rattlesnake Plant. They are great investments for all plant parents and can go a long way to spotting fluctuations in temperature before they impact your plant.
Natural shedding.
As we mentioned above with yellow leaves, your Rattlesnake Plant matures, it may occasionally lose a lower leaf as a natural sign of ageing. This is absolutely nothing to worry about but make sure that you keep track of how many leaves have dropped and how often this is occurring.
If you feel it is losing too many leaves, more than a few each month, double-check the environment around your Rattlesnake Plant as it could be a sign of one of the issues detailed above. There is no harm in giving the soil and roots a once-over to check for signs of root rot and keep an eye on any changes in light or temperature that may be affecting its health.
Why is my Rattlesnake Plant drooping?
Overwatering.
If the drooping leaves are paired with dark brown spots but the leaves aren’t crispy to touch, then overwatering is the most probable cause. Whilst a one-time overwatering won’t kill your plant instantly, over time it will mean their leaves will start to droop as their roots begin to rot and turn mushy.
Rattlesnake Plants need to be watered no more than once a week in the hottest months of the year, and less frequently in autumn and winter. If you think that you may have overwatered your Rattlesnake Plant it is best to replace the soil straight away rather than just sit and wait for it to dry up over time. But be careful when removing the soil from the roots as you don’t want to cause any further damage to a sensitive root system. Moving forward, make sure to check the moisture in the soil before you water your Rattlesnake Plant to avoid this happening again.
Underwatering.
Funnily enough too little water can also harm your Rattlesnake Plant plant in more ways than one. It can cause dry leaves, lack of growth and nutrient deficiency. But one of the earlier signs of underwatering is drooping stems and leaves. Your plant will start to look quite sad and limp as a result.
Your first instinct might be to give your plant loads of water straight away to compensate for the lack of it. However, it can actually be harmful to your Rattlesnake Plant if the soil goes from one extreme to the other. Instead, you want to reintroduce frequent watering for a week or two and this should solve the problem.
Over time keep an eye on how much you are watering your Rattlesnake Plant by checking the moisture in the soil frequently.
Why does my Rattlesnake Plant have curling leaves?
Natural praying.
Before we go any further you just need to confirm that the curling you are seeing on your Rattlesnake Plant’s leaves is not natural praying. Part of the Prayer Plant family, Rattlesnake Plants occasionally fold their leaves up at night and uncurl them during the day.
This is a natural part of the plant’s cycle and nothing to worry about. However, if the leaves aren’t uncurling, then read on…
Underwatering.
The first port of call when you discover your Rattlesnake Plant’s leaves are permanently curled is underwatering. This is because it is a natural response from all plants to curl their leaves to retain moisture. Check the moisture levels in the soil and look for crispy roots to confirm the issue. To fix the problem, reintroduce water slowly so that you don’t shock the plant.
Low humidity.
This ties a little bit with underwatering because it might be a lack of humidity that is causing your Rattlesnake Plant to curl its leaves to retain moisture. The best thing to do here is to use a humidity monitor because it’s a difficult thing for us to measure without it. This will let you know if the humidity is in the right range for your Rattlesnake Plant.
Heat stress.
If your Rattlesnake Plant is placed near a window during summer or is close to a radiator, heating vent or cooker, then it might be heat stress that is causing the leaves to start curling. The ideal temperature range for your Rattlesnake Plant is 18-24 degrees Celcius so anything above that can start to cause your plant to dry out.
This causes the leaves to curl up to reduce moisture loss. This is quite an easy one to fix as you just need to find a slightly cooler spot for your plant and as long as no permanent damage has been done (most commonly brown leaves) then the issue should resolve itself fairly quickly.
The key to treating and overcoming all of the issues we mentioned above is timing. The longer the issue goes unnoticed and undiagnosed, the harder it will be to get your Rattlesnake Plant back to full health. This is why we cannot stress enough how important it is to check in on your plants regularly so that you notice any early warning signs straight away.
To find out more about how to take the best care of your plant, check out our Rattlesnake Plant care guide.


