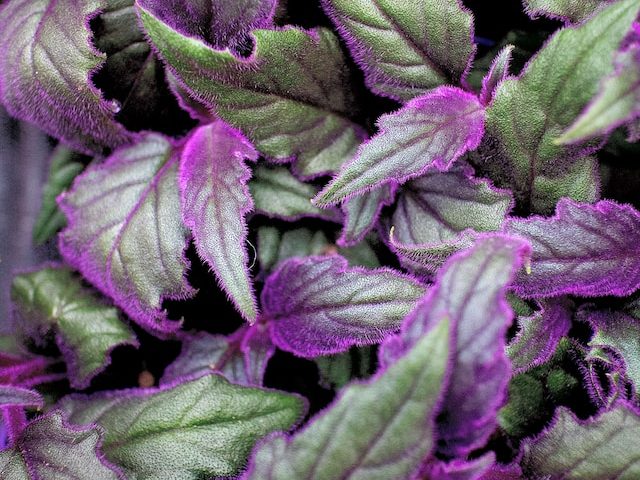
These genetically unstable plants are super unique in the houseplant world as no two will ever really look the same. This is why we are all obsessed with propagating these plants, we are never really sure how they will turn out! The whole process can actually be very simple if you have the right method and tools. It’s worth noting here that their sap is toxic and will cause skin and stomach irritation if you come into contact with it. This is why you should always wear gardening gloves, clean your tools after use and keep any children and pets away from your plant.
In this post, we will guide you through the entire process so that you’re fully equipped with the knowledge you need to create new plants. Below we will cover the tools you’ll need, what method is the best one to use as well as a guide to diagnosing and solving any issues you come across.
Why propagate your Croton Plant?
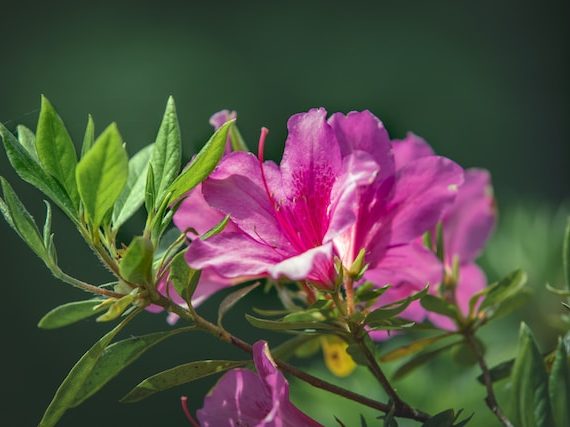
Before we get into the step by step of each method, we thought it would be useful to go over the various reasons plant parents choose to or are forced to, propagate their plants. The main reason is the ability to just wanting to multiply the number of plants you have without having to shell out any more money! Cuttings make great gifts for friends and family as they are loved for their unique and colourful foliage.
Another reason is that often these plants don’t always grow how we would want them to. They can very quickly become too long or very leggy. Pruning will encourage bushier growth and is a great way to cut back that straggly and small winter growth. But instead of letting them go to waste and throwing away those incredible cuttings, why not start a whole new mother plant!
It can also happen that you notice your plant is starting to look a little ill and is dying. If you’ve tried to fix the issue but nothing seems to work then the best thing to do is cut off the healthy stems to create new Croton Plants.
What tools/ equipment do I need?
A healthy and mature Croton Plant
Sharp scissors/shears
Cleaning cloth
Gardening gloves (they are toxic)
Spare pot(s) with drainage holes
Fresh soil and water
Newspaper or plastic sheet if propagating indoors
Toothpick and peat moss (if using the air layering method)
What are the different methods I can use to propagate my Croton Plant plant?
Stem cuttings are the most common method. This works best for slightly more mature plants as you’ll be taking a fairly long stem cutting to make sure it’s a success.
The second method is through air layering. It’s a slightly more complex method that isn’t always a success. We recommend this for more experienced plant parents, or those who are looking for a challenge. Below you’ll find a detailed step by step process of each propagation method so you can figure out what’s best for you and your plant.
How to propagate a Croton Plant through the stem cutting method
Locate a healthy stem
Only ever take stem cuttings from healthy parts of your plant. If you try to use a part of the plant that’s looking a little wilted, yellow or dry, the problem will just get worse once you’ve taken the cutting as they are much more susceptible to disease. You want to choose a stem cutting with at least 5 leaves on it.
How many stem cuttings you take is totally up to you. It doesn’t impact the process at all but just depends on the maturity of your plant and personal preference.
Make the cut(s)
This is the scary part and the reason why a lot of plant parents shy away from propagating their Croton Plants! Now that you’ve located the section of the stem that you want to use, you need to cut it off! Use your scissors or shears to cut off the stem. Make sure you clean your tools after making the cut as the sap can cause skin and stomach irritation.
Remove any lower leaves
As you’ll be growing your cuttings in water for several weeks you want to carefully remove any leaves on the lower part of the cutting that may end up sitting in the water. This is because they will start to rot and release bacteria into the water which can harm your cutting.
Let the cutting callous over
Now that you’ve taken off the lower leaves, you want to leave your cutting(s) out in a warm but dry place for a day or two. This will allow the cutting to callous over which helps to prevent your cutting from rotting.
Fill up a container with water
Next, you want to fill up a container with fresh water to place your Croton Plant cutting(s) into. Make sure the water is temperate to avoid shocking or burning your cutting. We prefer to use a transparent container when growing the cuttings. Not only can you see the roots starting to grow, but it’ll also allow you to spot any issues early, giving you the best chance at solving them.
Change out the water frequently
Make sure you are refreshing the water every other day. This will help keep it free from bacteria and stop it from stagnating. Stagnant water also smells pretty awful so you really want to avoid this.
Now all that’s left to do is be patient
As long as you are frequently refreshing the water, you just need to wait and be patient. As long as your cutting looks healthy, you’ll see roots in no time at all!
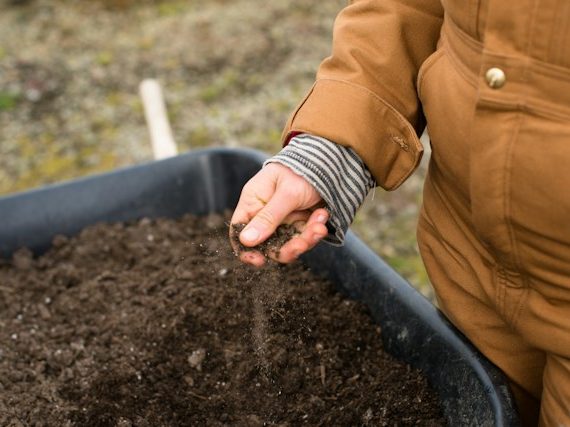
Plant your Croton Plant cuttings into potting mix
Once the roots on your Croton Plant have grown to about 5 centimetres, it’s time for you to pot in into soil. Use a high-quality potting mix to make sure your plant is getting the right balance of nutrients.
Resume your usual Croton Plant care routine
You can now continue to care for your new plant as you would the mother plant.
How to propagate a Croton Plant plant through the air layering method
This method can be a little trickier and fiddlier so we only recommend it if you are slightly more experienced! The success rate is also lower than the stem cutting method which is important to keep in mind.
Locate a strong healthy stem
When propagating through the air layering method you want to make sure you’re using a healthy and strong part of the stem. Avoid using any part of the plant that is discoloured or showing signs of pests/sunburn etc.
Make a vertical incision into the stem of your Croton Plant
Whilst wearing gardening gloves, use a knife make a vertical cut into the stem that is a couple of centimetres long. You want it to go about halfway through the stem rather than slicing all the way through. Make sure you clean the knife after making the slice as the sap is toxic to humans and pets.
Open up the incision
Isert a toothpick into the centre of the incision to hold it open. This can be a little fiddly as you don’t want to poke through the stem of your Croton Plant so do this slowly and carefully.
Attach damp peat moss to the stem
Tie a handful of peat moss around the stem covering up the incision. Use brown string, plant ties or garden wire to secure the peat moss to your Croton Plant stem.
Wrap up the peat moss
Use a piece of plastic wrap around the peat moss and stem. Wrap it firmly around the stem whilst still leaving some air pockets around the peat moss. This will allow you to occasionally mist the peat moss to keep it a little moist at times.
Occasionally mist your stem
Every now and again use a spray bottle to moisten the peat moss. This will give some moisture to the stem and encourage roots to grow from the incision.
Once you see a new root you can cut off the stem
After several weeks you should start to see new roots growing out of the peat moss. Once you see this you can slice the stem off your Croton Plant, remove the film and pot the cutting into fresh potting mix. Handle your new cutting with care as the fresh roots will be delicate and easily damaged.
Croton Plant Propagation FAQs
What’s the best time of year to propagate a Croton Plant?
We recommend starting at the beginning of spring for both the stem cutting and air layering methods take a while for roots to start growing so they’ll need several months of sunny warm weather,
Starting in autumn or winter will mean your Croton Plant cuttings will be trying to grow at a time where the plant is usually dormant. This not only slows down growth but it increases the risk of leaf and root rot.
When should I use a grow light for my cuttings?
Grow lights are really useful when propagating in low light.
Heat mats are also a great buy for propagation lovers as they create a nice warm environment that helps speed up root growth.
Can I propagate a Croton Plant from a single leaf?
Unfortunately, you aren’t able to use a single leaf cutting. Whilst the leaves often will grow their own roots, they’ll never actually turn into a proper plant. This is called a blind cutting. It means that the leaves can survive for a while in water but will eventually wilt and die.
When can I start fertilising my cutting?
It’s important that you stay away from fertiliser until your plant is around 1 year old. Fertilising young cuttings can also shock them and cause various issues such as yellow leaves and small growth so hold off the feed for a while.
Common problems when propagating a Croton Plant
It may happen that you come across some issues but if you catch the problem early, and know how to fix it properly, you should be able to revive your cutting and still propagate it successfully.
Why isn’t my Croton Plant cutting growing any roots?
It can take many weeks and sometimes even months for roots to appear. Make sure you are changing out the water regularly and keeping the plant in a nice warm environment and you should start to see new roots growing eventually.
If you want to speed up and strengthen the root growth you might choose to use rooting hormone.
What’s causing my Croton Plant cutting to turn soft and mushy?
If your cutting is turning soft then this isn’t a good sign as it means your cutting is rotting. This can be caused by stagnant water so make sure you are refreshing it regularly.
So that’s it, that’s everything you could ever know about propagating Croton Plants. It is never an exact science and sometimes you have to just sit back and wait for a while. But with the right care and the ideal environment, you shouldn’t have too many problems along the way. The end result is definitely worth it in the end.
Check out our full Croton Plant Care Guide for all the information on how to continue care for your cuttings once they have matured.