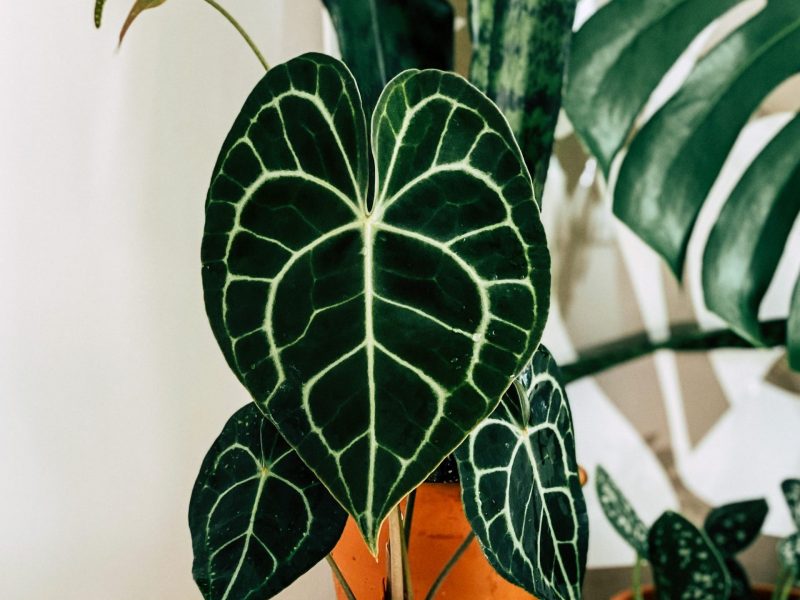
The once rare Anthurium Clarinervium is now a staple in most houseplant shops around the world. Their incredible large flat leaves with strong white veins mean they really stand out amongst other plants! Propagating these plants is relatively easy to do but there is only really one method that is successful. In this post, we will cover a step by step guide, as well as what tools you will need and how to solve any common problems you may encounter!
Why propagate an Anthurium Clarinervium?
Firstly, it’s the best way to get new plants for free! These can make great gifts for friends and family or simply just help expand your urban jungle!
You may also want to take a cutting if you notice that part of it is starting to look a little unhealthy or starting to die. If you are unable to revive your plant, then removing the healthy parts of it is a great way to save your plant.
Make sure that you only use the healthy parts of your Anthurium Clarinervium though, as trying to propagate leaves that are rotting or have pests will just transfer these problems onto your new plant.
What tools will I need to propagate my Anthurium Clarinervium?
Let’s start off with the easy part – knowing what equipment you’ll need to propagate an Anthurium Clarinervium. It’s important to make sure you have all the right things before you start the process.
Healthy and mature Anthurium Clarinervium plant
Spare pot(s)
Fresh soil and water
Newspaper or plastic sheet if you’re propagating indoors
What are the different methods I can use to propagate my Anthurium Clarinervium?
The only downside to these plants is that there is only really one successful method; division of the mother plant. This is because they grow from a central part rather than growing nodes along a main stem like you’ll find on Monstera or Pothos plants.
This does mean that you will have to have a fairly mature Anthurium Clarinervium plant to be able to divide it nicely into two or more plants.
How to propagate an Anthurium Clarinervium through division
Take your Anthurium Clarinervium out of its pot
To propagate your plant through division, you’ll need to find what natural offshoots there are on your mother plant. The first step is to carefully take your plant out of its pot. Hold on to the strongest stems whilst you slowly pull out the plant. You may find that the roots are getting stuck on the drainage holes so gently detangle them rather than tugging at them as they will snap.
Loosen the soil
Once your plant is safely out of its pot, you’ll need to loosen the potting mix around the root system to make the division easier. A good way to do this is to run your fingers through the roots to start to separate them.
Locate the various offshoots
When looking for a part of the plant to divide it will become very obvious if there are various offshoots on your Anthurium Clarinervium. They will be completely separate and growth will stem from the middle of each section. These are called rhizomes.
Separate the sections of your plant
You may have to trim off the odd root if the sections aren’t detangling easily but you should be able to carefully pull them apart. If there is only one central section on your plant then you will need to slice this in half making sure that each part has a good amount of the overall root system as this will help it be a success.
Place the section(s) in water or fresh potting mix
Pot the main mother plant back into its original pot (or downsize if you have taken a substantial amount off the plant). You will then need to decide whether you want to pot the sections in water or potting mix.
If the section has quite mature roots then it will be totally fine growing straight in potting mix already. You’ll need to use fresh high-quality potting mix to ensure your new plants get all the nutrients they need. Never reuse old soil as this can transfer bacteria and pests to your new plant. If you feel the roots on your new Anthurium Clarinervium need to grow a little more then we recommend placing the cutting into water as a middle step.
You can use a light monitor to figure out if your cuttings are getting the right amount of sunlight. You can also supplement sunlight levels by using an LED grow light which are great at encouraging growth in cuttings. We love this one which is available on Amazon here.
Refresh the water regularly
If you chose to pop your cutting into water first you need to make sure you are changing it out regularly (every 2-3 days). This will prevent the water from stagnating and breeding bacteria which can harm your plant’s health, especially if it isn’t very mature yet.
Continue normal Anthurium Clarinervium care
Once your new plant is in fresh potting mix you can resume your usual care routine. Make sure the new plants don’t get any intense direct sunlight as this can damage both the mature leaves as well as any new growth.
Top tip: If your new sections grew in water then you will need to keep the potting mix slightly more moist for a few weeks. This is just to ease your new Anthurium Clarinervium plant into growing in potting mix and avoiding too much shock.
Anthurium Clarinervium Plant Propagation FAQs
Propagating these plants is definitely easier than some other plants as the main method is simply division of the main plant but that doesn’t mean it doesn’t come with its own set of problems, questions and difficulties.
It’s really important that you understand the basics, such as time of year, equipment and fertiliser needs.
What’s the best time of year to propagate an Anthurium Clarinervium?
We always recommend starting in spring. Make sure that any wintery frosty, cold weather is gone so that your new plants are growing in the warmer brighter months. This will encourage healthier and stronger roots as well as actually speed up the whole process.
Propagating your Anthurium Clarinervium in either autumn or winter will result in really slow growth (if any) and you risk an increased chance of root rot or leaf rot. This is because the plants will need a lot less water and if the leaves get wet the water won’t evaporate as quickly as it would in summer.
Do I need to use rooting gel or powder when propagating my Anthurium Clarinervium?
Rooting hormone helps your cuttings grow strong and healthy roots. However, this is optional and you can have plenty of healthy growth without it.
When propagating Anthurium Clarinervium plants, rooting hormone isn’t as necessary as the various sections will probably have their own established root system. Rooting hormone is more commonly used on cuttings to help those initial roots come through.
Should I use a grow light when propagating my Anthurium Clarinervium?
Grow lights are great to use when propagating all houseplants. They help to provide the ideal light condition which stimulates faster and stronger growth.
LED lights are also beneficial for mature houseplants if your home doesn’t get much sunlight. They can help avoid problems such as slow and leggy growth so are a great investment for all plant parents.
Why is it important to use clean tools when propagating?
It’s important to clean all of your tools before and after contact with any plant to stop cross-contamination between your houseplants. Scissors and shears can transfer pests and diseases across plants without you realising.
Another crucial reason to clean your tools after touching the plant is that quite a few houseplants are toxic, including the Anthurium Clarinervium. Cleaning the tools makes sure there is no trace of the plant which could be harmful to you and anyone else who uses them.
Can I propagate an Anthurium Clarinervium from a single leaf?
Unfortunately, you can’t propagate an Anthurium Clarinervium from just a single leaf. This is because of the anatomy of the plant as roots grow from the central rhizomes. This means that division is the only good method to use.
Should I fertilise my Anthurium Clarinervium cuttings?
When using the division method you can start fertilising a lot sooner than with cuttings. This is because fertiliser can actually stop the growth of roots as you are giving them the nutrients directly.
But if your divisions have mature roots you can fertilise a month or so after. You want to give the new plant(s) a chance to recover from the initial shock.
How many divisions can I make from one Anthurium Clarinervium?
The amount of new plants you can make from your mother plant depends on how big your plant is!
When dividing, you need to make sure that each section has a good amount of the overall root system. This will help speed up the growth of healthy new leaves.
Problems that may occur when propagating an Anthurium Clarinervium
Propagating houseplants will never have a 100% success rate and you may encounter some problems along the way. But don’t worry, we have learnt these things the hard way so that we can bring you all the different problems that might arise, what this means and how to solve the problems!
Why isn’t my new Anthurium Clarinervium growing any new roots?
After dividing up your Anthurium Clarinervium into several new plants, it’s totally normal for them to show signs of shock. This includes a lack of (or slow) growth. Think of it as though this plant has just moved house – pretty stressful right. So don’t be too worried if growth doesn’t happen straight away; as long as the environment and care are right for your plant, then new roots and leaves should start to grow soon.
Cooler temperatures can also be a reason why your new plant isn’t growing new roots or leaves. Here we would recommend using an LED light or heat pad can help your plant thrive.
Why are the new leaves on my new Anthurium Clarinervium small?
After dividing your Anthurium Clarinervium it’s totally normal for the growth to start out slow, smaller and less developed.
This is because the root system is less mature than that of the larger plant. After time, the new leaves on your plant will get bigger and you can prune away the smaller leaves to encourage new healthy growth.
So there you have it; a complete guide to Anthurium Clarinervium propagation! Don’t expect it to be 100% successful all of the time, that’s just the reality with the houseplant world – you can never be sure what will happen and when. Sometimes new leaves will grow straight away, other times you might have to wait a few months for the new plant to show any signs of growth. But with the right methods, care and environment you shouldn’t have too many issues…
Check out our Anthurium Clarinervium care guide for more information on how to care for your new plants after you’ve propagated them. There you can find all the basic care needs, as well as ways to spot and solve common problems with your plant.
You can also check out our Plant Index page for care guides for over 100 houseplants!


