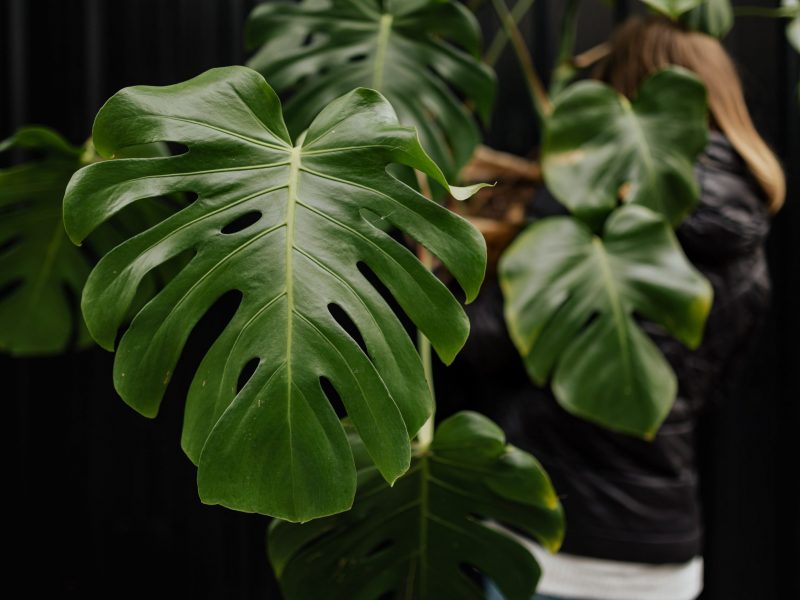
One of the most iconic houseplants around, the Monstera Deliciosa is definitely one of our favourites. The split heart-shaped leaves make this plant so unique and the centrepiece of every room. There’s a lot of information on how to care for your Monstera through lighting and watering but one thing that’s often forgotten is repotting.
Most of the time, plant parents will keep their houseplants in the same pot that they bought them in for years and years. This not only stilts the growth potential but can also lead to your plant developing some health issues too.
In this article, we will be covering everything you need to know about successfully repotting your Monstera. This will include signs your plant needs repotting, when and how to do it and then the aftercare you need to give your plant to make sure it recovers quickly.
Before we get into it, it’s important to know that there are two types of repotting. Firstly, the one where you are upsizing the pot that your Monstera is going into but the second can also simply be refreshing the soil. We’ll cover both of these below as well as how to know when to do each.
Signs that your Monstera needs repotting
When your Monstera becomes root bound, it can start to mean the rate of new growth slows down and your plant might actually develop issues such as yellow or brown leaves.
root bound means that the root system has become too big for the pot and there is no longer space for it to grow. This requires your Monstera to be repot into a larger pot.
Your Monstera isn’t growing in summer
When your Monstera becomes root bound, it will slow down the rate of new growth and eventually stagnate altogether. One thing you need to be careful of though is that during winter, your plant usually won’t grow any (or many) new leaves. Don’t mistake this for your plant being root bound.
If you aren’t seeing any new growth in summer, however, one cause may be that it needs a bigger pot. Take a look through the other signs below and check over your plant to help confirm that diagnosis.
Roots are showing at the top of the pot
Another sign that your Monstera needs to be repotted is if roots are starting to show out of the top of the pot. This usually means that the soil has compacted as well as the root system has outgrown the pot.
You may find that when it comes to taking the plant out of its pot, it’s not actually root bound, but overly focused at the top of the pot. This isn’t always a bad thing as the roots will grow downwards but you may just want to add an extra layer of soil over the top of the roots.
Roots are coming out of the drainage holes
This is one of the easiest ways to confirm if your Monstera is root bound and needs to be repotted. However, checking this with a Monstera can be difficult because they grow so large and can be quite heavy.
If your Monstera is quite mature, you may want to get the help of a friend to do this but essentially you need to lift your plant up and check the drainage holes to see if roots are growing out of them.
If there are some small roots peeking out, then your Monstera will need repotting sometime soon. However, if they are snaking their way out of the pot in circles, then this needs to be done immediately.
The soil level has decreased
If you’ve noticed that the amount of soil has decreased and is no longer reaching near the top of the pot, then it’s likely the soil has compacted. This happens naturally over time but can increase if you’re only watering from the top down.
If your Monstera isn’t showing signs of being root bound, but the soil has compacted, this is where refreshing the soil comes into it. Instead of repotting your Monstera into something bigger, refresh with new potting mix or aerate the current soil to give the roots more breathing room.
When to repot your Monstera
Apart from the above-mentioned signs that your Monstera needs to be repot, there are also a few general good practices that we recommend you follow. We like to repot our Monstera every 2 years at a minimum. This will increase if it’s showing signs of being root bound but ideally, you want to upsize the pot slightly just before it’s reached that stage.
It’s also important to refresh the soil around the one year mark (but doing it every two years won’t tend to cause huge issues).
The other thing to think about when it comes to when to repot is the time of year. Most commonly we will repot at the start of spring. There are quite a few reasons for this but the main one is that you will be slowly heading into the growth period so it’s important that your Monstera’s root system has the space to grow. If it’s already root bound coming into the warmer months, you will likely see very stagnant growth.
The other reason why we tend to only increase the pot size in spring is that if you are doing it in winter, the root system won’t likely grow very much over the first few months. This means that there will be a lot more soil which can absorb a lot more water.
But why is that a bad thing I hear you ask? Well, the more soil there is, the more water it will take in and during winter it can take a long time to dry out because it’s so cold and your plant is dormant. This means that the soil will be pretty soggy for extended periods of time which increases the risk of root rot.
But when you repot in spring, not only will your plant need more water, but the root system will be growing and the soil-to-root ratio will decrease. This is also an important element when it comes to the stability of your plant, but more on that in a little bit.
How to repot a Monstera Deliciosa
Selecting the right pot
When it comes to choosing a new pot for your Monstera, it’s really important that you don’t go too big. It’s best to choose one that is only a few inches larger in diameter and height than your previous pot.
If you choose a pot much bigger than the last it not only increases the risk of root rot as we covered above but it can lead to stability issues. Monstera plants are upwards-growing, climbing plants and can become very tall. This height requires a very stable root system. If the new pot is too large, the roots can become quite unstable and lead to your plant drooping over and even falling over in some cases.
You also want to choose a pot that has a good amount of drainage holes. This is key to avoiding watering issues.
Removing your plant from its original pot
Once you’ve selected your new pot, carefully remove your Monstera from its original pot. If the roots are peeking out of the drainage holes, make sure to detangle these first so that they don’t rip when you remove your plant.
When removing your plant, use the stems to pull gently and not the leaves. This can very easily rip the leaves and cause a lot of damage to your plant. If your Monstera is in a plastic pot, squeezing the edges can help free your plant and make it easier to remove.
Then the next thing you need to do is carefully remove the old potting mix from the roots. Use your fingers to slowly detangle the root system and shake them slightly to remove the old potting mix.
Transferring your Monstera
Add a good few handfuls of soil to the bottom of the new pot to give your Monstera some space to grow into. Then carefully place your plant into the new pot, filling in the soil around the edges.
It’s a good idea to remove as much of the old soil as you can and replace it with fresh soil as this just gives a boost to the nutrient level of the potting mix. Over time, your plant will take the nutrients from the soil so refreshing it every year or two is always a good idea.
You want to pat down the soil gently but make sure not to press down too hard. This can compact the soil which can be damaging to the roots. It’s important there is some oxygen in the soil.
To aerate the soil even further, it can be a good idea to poke some holes into the soil.
Water your newly repotted Monstera
Return your plant to its usual spot and give it a good watering. This helps your plant recover from the shock of transplantation.
How to care for a Monstera after repotting
Now that the stressful part is done, it’s time to switch your attention to the aftercare. Transplanting a Monstera can be quite stressful for your plant so it’s important that you pay attention to the environment and care routine over the next few weeks.
Make sure your Monstera has plenty of bright but indirect sunlight over the next few days. You also want to be watering enough to prevent the roots from crisping up (but not enough to cause them to rot).
When it comes to fertilizing, hold off for a while. The fresh potting mix will contain lots of nutrients for your Monstera and feeding even more can cause over-fertilization.
It’s also really important that you keep an even closer eye on your Monstera compared to normal. You want to watch out for any signs of stress or unhappiness. It can sometimes happen that plants lose a leaf or two after repotting but this isn’t too common with Monsteras.
Our top tips for repotting a Monstera
Only use fresh potting mix
It’s crucial when you are repotting your Monstera or even just refreshing the soil that you don’t use potting mix from other plants. Soil can contain pests and bad bacteria without you even knowing it so you don’t want to give these issues to your Monstera.
Use a high-quality new potting mix to help avoid these issues. Of course, it’s always a good idea to take a close look at the potting mix regardless to ensure there’s nothing harmful like fungal growth in there.
Select a well-draining potting mix
When choosing the new potting mix to add to your Monstera’s new pot, make sure that you select a well draining one. Ingredients such as perlite can really help the water flow through the pot which helps to avoid waterlogged soil and root rot.
Perlite is also great at aerating the soil so that’s definitely one to look out for in the ingredients list. Alternatively, you can buy it separately and add it to the potting mix yourself.
Use it as an opportunity to inspect the roots
Whenever you repot your Monstera, make sure to give the roots a thorough inspection. You don’t often get many opportunities to take a look at the roots to use this one!
You want to look out for any signs of the roots crisping up or rotting. This can help you figure out if there might be some watering issues developing. These will always start at the roots before becoming visible on your plant so it’s a good way to catch any issues early.
It’s natural however for some of the roots to die occasionally so prune off any dead ones now and this can help the root system to regenerate.
Use a repotting mat
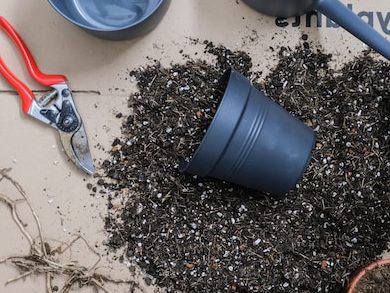
Investing in a good repotting mat will make this a lot easier. Repotting houseplants is messy business and ideally, you probably want to avoid getting soil everywhere.
Whilst you can easily just use a plastic sheet, there are also some really great repotting mats that are made specifically for this purpose. The great thing about them is that they have raised edges so it minimises soil getting onto the floor and is easy to clean up at the end. A real lifesaver!
Frequently Asked Questions
How often should I repot my Monstera plant?
Ideally, you want to repot your Monstera every 1-2 years. This avoids it from becoming root bound which can lead to stagnant growth and even brown or yellow leaves. You will start to be able to tell if your Monstera needs repotting if the roots are coming out of the top of the pot or are coming through the drainage holes at the bottom.
When should I repot my Monstera?
If your Monstera’s roots are starting to grow out of the drainage holes then it is time to repot your plant. It’s best to wait until spring if you can as your plant is likely to recover quicker and can use the new space to develop new roots, stems and leaves during the growth period.
Are Monstera plants sensitive to being repot?
If your Monstera is healthy and showing no signs of issues then they tend to cope with being repot pretty well. Just make sure to water your plant after repotting and make sure it gets ample sunlight.
If your plant is suffering from watering issues or other problems then it may be more sensitive to repotting. Occasionally, it may lose a lower leaf due to stress and shock but this isn’t too common.
Is repotting damaging to Monsteras?
As long as you carefully remove the plant from its pot by pulling from the stems rather than the leaves, then you should cause minimal damage to your plant. It’s normal for the odd root to break here and there but ensure that any growing out of the potting mix are untangled before you remove the plant otherwise they will rip.
What will happen if I don’t repot my Monstera?
If you don’t repot your Monstera for several years it will become root bound. This means that there is no more space for the root system to grow into and this will result in stagnant growth. Alongside seeing no new leaves, some of the current ones may turn brown or yellow if the issue persists.
What size pot should I choose for my Monstera plant?
When repotting your Monstera, it’s important to choose a pot that is only a few inches wider in diameter and in height compared to your old one. You may be tempted to repot into a much larger pot to avoid having to do it again for a while but this can cause issues with overwatering and the stability of your plant.
Can I repot my Monstera at any time of year?
Spring and summer are the best times to repot your Monstera. However, if your plant is healthy you can do it successfully all year around. It may just take a bit longer for your plant to adjust to its new home during autumn and winter.
How do I know if my Monstera plant needs repotting?
The best way of knowing if you need to repot your Monstera is to check if the roots are growing out of the drainage holes. This indicates that your plant is root bound and doesn’t have any space left to grow. Other signs that your Monstera needs repotting is if it’s not growing new leaves in summer and if the roots are starting to grow out of the top of the plant.
Should I water my Monstera plant before repotting it?
We recommend watering your Monstera a few days before repotting but we avoid watering too close to the day. This makes the whole process a lot messier and it can be tricker and more time-consuming to shake off some of the old soil from your plant.
So that’s everything you need to know to successfully repot your Monstera. It’s a really beneficial part of plant care but is so often forgotten. Without space to grow, your Monstera won’t produce any new leaves, no matter the amazing environment or precise watering routine.


