Mini Monstera
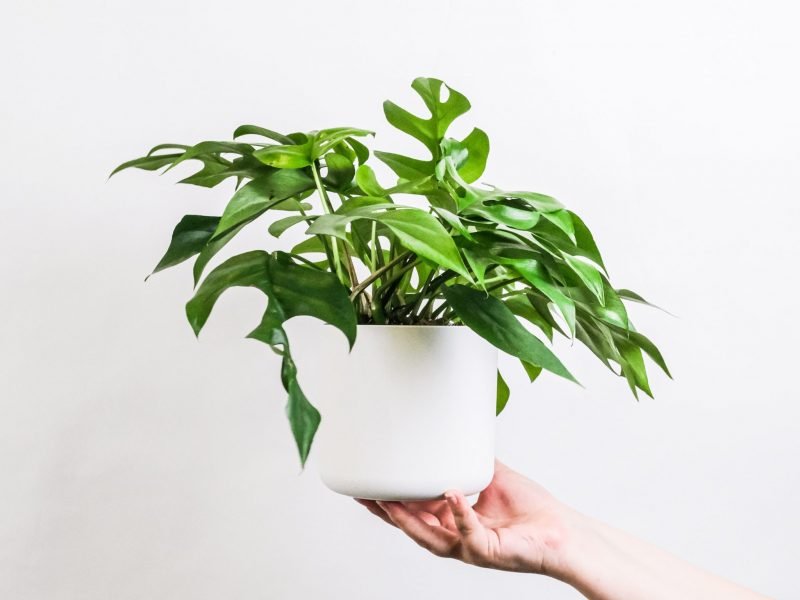
Introduction to Mini Monstera: What is Rhaphidophora tetrasperma?
If you’re a plant enthusiast, you’ve likely come across the Mini Monstera, also known as the Rhaphidophora tetrasperma. This plant, despite its common name, is not a true Monstera. It’s actually a different species entirely, although it shares some similarities with its namesake.
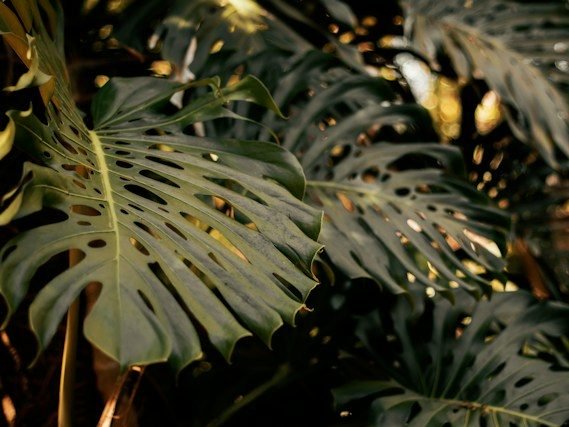
One of the distinguishing features of the Rhaphidophora tetrasperma is its leaves. As the plant matures, its leaves develop distinctive fenestrations or natural holes, similar to those of a Monstera deliciosa. However, the leaves of a Rhaphidophora tetrasperma are smaller and more delicate, hence the nickname ‘Mini Monstera’.
Origin of the Rhaphidophora tetrasperma
The Rhaphidophora tetrasperma originates from the rainforests of Southern Thailand and Malaysia. Its nickname derives from its striking resemblance to the Monstera deliciosa, a much larger plant.
In its native habitat, the Mini Monstera is a fast-growing climber, using the towering trees of the rainforest to support its growth. However, despite its tropical origins, it can adapt well to the indoor environment, making it a favourite among houseplant enthusiasts.
Interestingly, the plant’s name – Rhaphidophora tetrasperma – provides some insight into its characteristics. Rhaphidophora, in Greek, means ‘needle-bearing’, a nod to this plant’s numerous aerial roots. Tetrasperma refers to the four seeds in each fruit it produces.
Rhaphidophora tetrasperma Height and Size
Despite having ‘mini’ in its name, this plant can grow quite impressively in the right conditions. On average, a well-cared-for Mini Monstera can reach a height of around 1 to 2 metres (3 to 6 feet) when grown indoors.
The leaves themselves, with their distinctive split design, can grow up to 25cm (9.8 inches) long and 15cm (5.9 inches) wide.
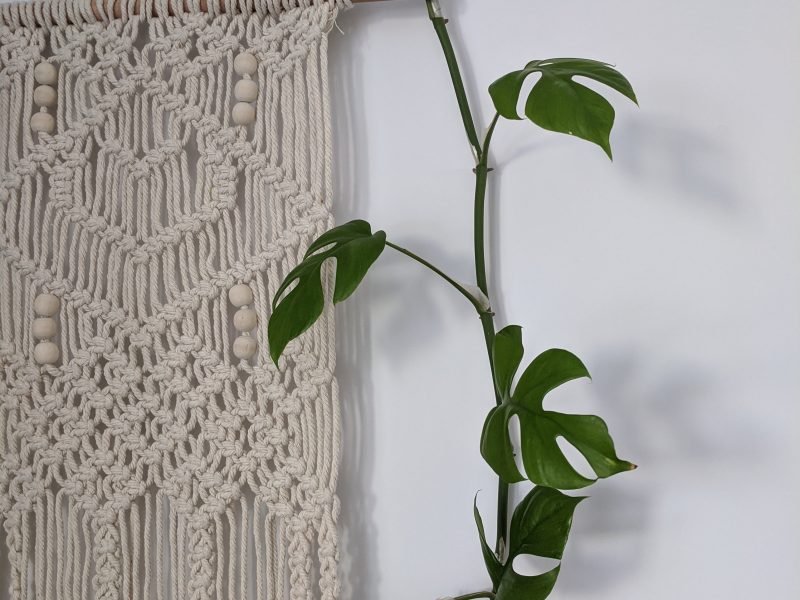
Remember: The Mini Monstera is a climber by nature. Providing it with a moss pole or similar support can help it grow tall and strong, providing a beautiful green focal point in your home.
Mini Monstera Climbing
Mini Monstera Light Requirements
Indirect Light
The Mini Monstera thrives best in bright, indirect light. Direct sunlight can scorch the leaves in warm environments, resulting in dried-out burnt yellow and brown leaves. Therefore, it’s essential to place your Rhaphidophora tetrasperma in a location where it will receive plenty of indirect sunlight.
Artificial Light
Artificial light can also suffice for this plant. If you don’t have sufficient natural light in your home or office, fluorescent lights or LED grow lights can fill in for natural sunlight. Generally, 12 hours of artificial light each day will suffice.
Low Light
While the Mini Monstera can tolerate low light conditions, it won’t thrive. If you notice your plant’s growth slowing, or the leaves becoming leggy and stretched out, it can be an indication that it needs more light.
Watering your Mini Monstera: Methods, How Often and How Much?
When it comes to watering your Mini Monstera, or Rhaphidophora tetrasperma, it’s crucial to strike a balance. This tropical plant enjoys moist soil but doesn’t appreciate being waterlogged.
Best Watering Methods
There are two primary methods you can use to water your Mini Monstera: top watering and bottom watering. Both have their benefits, so let’s break them down:
- Top Watering: This is the traditional method where you water the plant from the top until water drains out of the bottom. It’s a quick and easy method, but be careful not to splash water on the leaves as this can cause leaf rot.
- Bottom Watering: This method involves placing the pot in a tray of water and allowing the plant to soak up water from the drainage holes. It encourages deep root growth (which helps with plant stability and height) and ensures the entire root ball gets thoroughly moistened.
How Often to Water
Your Mini Monstera’s watering schedule will largely depend on the time of year and the environment it’s in – we never set rigid watering schedules as it will always be changing. As a general rule of thumb, you should:
- Water once a week during the growing season (spring and summer).
- Reduce watering to once every two weeks during the dormant season (autumn and winter).
Mini Monstera Temperature Requirements
When it comes to the optimal temperature for your Mini Monstera, it’s important to remember that it’s a tropical plant. This means it thrives in temperatures that mimic its natural habitat, which is warm and humid.
Typically, the Mini Monstera prefers a temperature range of 59-86°F (15-30°C). Anything outside of this range can result in the plant becoming stressed, and this can lead to problems such as leaf drop or stunted growth.
Here are a few key temperature-related points to remember when caring for your Mini Monstera:
- While the plant can survive in lower temperatures, it will not thrive. Keep your Mini Monstera in a room where the temperature is consistently above 59°F (15°C).
- The Mini Monstera is not frost tolerant. If you live in an area that experiences frost, it’s advisable to keep the plant indoors.
- Avoid placing your Mini Monstera next to heat vents or air conditioning units as these can create hot or cold drafts that can harm the plant.
- If you notice that the leaves of your Mini Monstera are turning yellow or brown, this may be a sign that the plant is not in the right temperature conditions.
Rhaphidophora tetrasperma Humidity Needs
The Mini Monstera has a preference for higher humidity levels. Generally, the Rhaphidophora tetrasperma prefers humidity levels of 50% to 60%. However, it can tolerate levels as low as 40% and as high as 80% if needed.
Now, you might be wondering how to maintain these high humidity levels, especially if you live in a dry climate. Here are a few simple ways:
- Use a Humidifier: A easy and effective way to increase indoor humidity. It’s an especially good option if your home’s air tends to be dry.
- Misting: Lightly spray your Rhaphidophora tetrasperma with water using a spray bottle.
- Grouping Plants: Group your Mini Monstera with other plants. This can create a microclimate with higher humidity, as plants release moisture into the air.
- Water Tray: Place a tray of water near your plant. As the water evaporates, it will increase the humidity in the surrounding air.
Fertilizing a Mini Monstera Plant: The Ultimate Guide
The Right Fertilizer
Not all fertilizers are created equal, and your Mini Monstera prefers certain nutrients more than others. A balanced, water-soluble houseplant fertilizer with equal ratio (10-10-10) of nitrogen, phosphorus, and potassium (often labelled as NPK) is generally a good choice. Avoid fertilizers high in boron or fluoride, as these can cause leaf burn.
Fertilizing Schedule
The frequency of fertilization depends on the growing season. During spring and summer, when your Mini Monstera is in its active growth phase, fertilize once a month. In autumn and winter, when growth slows, you don’t want to be fertilizing at all as it can do more harm than good.
Application Technique
Apply the liquid fertilizer by diluting it with water, following the instructions on the fertilizer package. Water your Mini Monstera first, then apply the fertilizer mixture. This will help to prevent the fertilizer from burning the plant’s roots.
Rinse Off Excess Fertilizer
Over time, salts from the fertilizer can build up in the soil. To prevent this, rinse the soil with plain water every few months. This will wash away any excess salts and keep your Mini Monstera’s roots happy and healthy.
Choosing the Right Soil and Pot for your Mini Monstera
Soil Selection
The Mini Monstera prefers a well-draining soil mix that’s rich in organic matter. A soil mix that retains some moisture but doesn’t keep the roots waterlogged is ideal. Here’s an example soil breakdown:
- 50% regular potting soil
- 20% perlite
- 20% orchid bark
- 10% activated charcoal
The perlite aids drainage, the orchid bark introduces organic matter, and the charcoal helps keep the soil fresh and prevents rot.
Choosing the Right Pot
Equally crucial is the choice of pot. A pot that’s too small can restrict the growth of your Mini Monstera, while a pot that’s too large can hold excess water and heighten the risk of root rot.
The pot should lsoa have adequate drainage holes, which serve to prevent water from pooling at the bottom, causing the roots to become waterlogged.
In terms of material, ceramic or terracotta pots are a good option as they allow the soil to dry out a bit between waterings, which reduces the risk of overwatering compared to plastic pots.
Mini Monstera Leaves
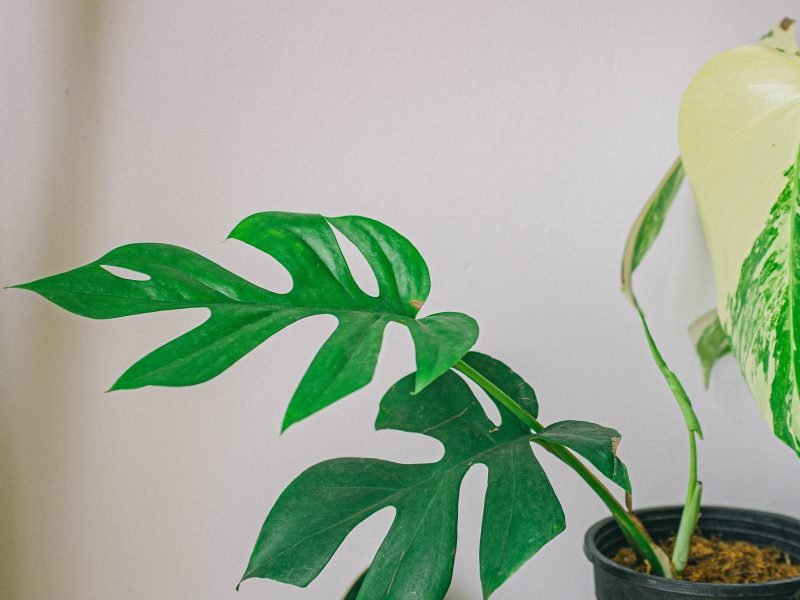
Repotting a Mini Monstera Plant
You should repot your Rhaphidophora tetrasperma every one to two years, or when you notice it’s becoming root-bound. Here’s a step-by-step guide to help you through the process:
When to Repot
Generally, it’s best to repot your Mini Monstera in the spring or early summer. During these seasons, the plant is in its active growth phase and can handle the stress of repotting better. However, if your plant is showing signs of being root-bound (like roots growing out of the bottom of the pot or stunted growth) you may need to repot outside of this ideal timeframe.
Materials Needed
- A new pot: Choose a container that’s one to two sizes larger than the current one. If the new pot is too big it can lead to an unstable plant and a very soggy potting mix. Ensure it also has ample drainage to prevent waterlogging.
- Quality potting mix: Use a well-draining soil mix that’s high in organic matter. You can create your own by combining equal parts peat moss, perlite, and bark.
- Pruning shears: Clean, sharp shears for any necessary root trimming.
- Gloves: To protect your hands during the process.
Steps to Repot
- Prepare the new pot by filling it one-third full with the potting mix.
- Turn the current pot sideways, hold your Mini Monstera close to the base and gently pull out the plant.
- Examine the root system. If it’s root-bound, make a few vertical cuts through the root ball to encourage new growth.
- Place the plant in the new pot and fill with soil, ensuring the plant is at the same depth it was in the previous pot.
- Water the plant thoroughly and place it in a spot that provides indirect light.
Propagation: How to Multiply Your Mini Monstera Plant
By following these steps, you will be able to multiply your plant and share it with friends or simply expand your personal collection.
Step 1: Identifying the Node
The first step in propagation is identifying the node on your Mini Monstera. This is a small, swollen area on the stem where new growth emerges. Look for a node with a leaf and an aerial root, if possible, as this will improve your chance of successful propagation.
Step 2: Making the Cut
Once you have identified the node, use a clean, sharp knife or pair of scissors to cut just below it. Make sure to include at least one leaf and one aerial root in your cutting if possible, as these will support new growth.
Step 3: Water Propagation
Next, place the cutting in a jar of room-temperature water, ensuring the node is submerged but the leaf is not (as it will start to rot if kept in water). The water should be changed every few days to keep it fresh and prevent the growth of bacteria.
Step 4: Monitoring Growth
Over the next few weeks, keep a close eye on your cutting. New roots should start to grow from the node, and once they reach a length of about two inches, your cutting is ready to be planted. Be patient, as this process can take several weeks or even months if conditions aren’t ideal.
Step 5: Planting the Cutting
When your cutting is ready, plant it in well-draining soil. Make sure to water it thoroughly, then allow the top inch of soil to dry out before watering again. Your propagated Mini Monstera should start to show new growth within a few weeks.
Pruning your Mini Monstera: How, Why and When
The ‘Why’ of Pruning
By removing old or yellow leaves, you are allowing your plant to direct its energy into producing new growth. Pruning is also important to keep the desired size and shape of your plant as they can quite quickly outgrow the room.
The ‘How’ of Pruning
You’ll need a clean, sharp pair of scissors or pruning shears. Here’s a step-by-step guide:
- Sanitise your tools: Always start by cleaning your scissors or shears. This helps prevent the spread of diseases.
- Identify the parts to prune: Look for yellow or brown leaves, or any that appear diseased or damaged. Also, consider pruning if the plant is becoming too large or unruly for its space.
- Make the cut: Cut the undesirable parts off at the stem. Aim to make a clean, swift cut to minimise damage.
The ‘When’ of Pruning
The best time to prune your Mini Monstera is during the active growing season, typically spring and summer. This is when the plant is most capable of recovering and producing new growth post-pruning.
However, if you notice diseased or dying leaves at any time of the year, it’s better to remove them immediately to prevent further issues.
Rhaphidophora tetrasperma Toxicity
The Rhaphidophora tetrasperma is toxic to humans and pets and can cause discomfort if ingested. The plant contains insoluble calcium oxalates, which are common in the Araceae family.
These Insoluble calcium oxalates can cause oral irritation, excessive drooling, vomiting, difficulty in swallowing, and intense burning and irritation of the mouth, lips, and tongue in pets or people who ingest it.
Flowers on a Mini Monstera Plant
If you’re lucky, your Rhaphidophora tetrasperma may surprise you with a few flowers. This is quite a rare occurrence for most indoor Mini Monstera owners, but certainly not impossible.
Triggering Flowering
There is no guaranteed method of encouraging your Mini Monstera to flower. It is, however, widely known that these plants are more likely to bloom in optimal conditions. Ensuring your plant has the right light, temperature, humidity, and proper feeding might increase the chance of seeing those rare flowers.
Flower Appearance
When your Rhaphidophora tetrasperma does decide to flower, you’ll observe a spadix and spathe structure typical of aroids. The spathe, a large white leaf-like structure, wraps around the spadix, a spike covered in tiny flowers.
Flower Lifespan
Each Mini Monstera flower only lasts for a few days before it begins to wilt and eventually falls off. However, if the plant is healthy and happy, it may continue to produce new flowers over a period of several weeks but nothing is guaranteed.
Cleaning your Mini Monstera
Just like any other houseplant, your Mini Monstera also needs regular cleaning to keep it looking its best and to ensure it can photosynthesise efficiently. Neglected leaves can also become a breeding ground for pests and diseases so you’ll want to avoid that!
Regular Dusting
Regular dusting is essential to keep your Mini Monstera’s leaves clean and healthy. You can use a soft, damp cloth to gently wipe each leaf. Be careful not to apply too much pressure as this can damage the leaves.
Deep Cleaning
Every few months, your Mini Monstera may benefit from a deeper clean. Here’s a quick step by step of the process:
- Fill a basin with lukewarm water and a small amount of mild soap.
- Gently dip each leaf in the soapy water, taking care not to submerge the entire plant.
- After washing, rinse the leaves carefully with clean water to remove any soap residue.
- Allow the plant to air dry in a place with good air circulation.
Inspecting for Pests
Whilst cleaning, it’s the perfect opportunity to inspect your Mini Monstera for any signs of pests. Look out for tiny spots, discolouration or little critters on the underside of the leaves. If you spot any, treat your plant promptly to prevent further infestation.
Mini Monstera FAQs
How often do I need to repot my Mini Monstera?
You want to think about repotting your Mini Monstera once a year, though you might not need to do it as often. Check to see if the roots are growing out of the drainage holes, or out of the top of the pot. This is a sign that your Mini Monstera needs more room. Another tell is if growth slows down during summer.
Are Mini Monstera plants toxic?
Mini Monstera plants have calcium oxalate which is toxic when ingested. If you have any pets or small children that might try to eat the leaves, then keep this one well out of reach.
How much water does a Mini Monstera need?
Mini Monstera plants do like frequent watering and can shrivel up if the potting mix is dry for too long. However, you also need to make sure that the soil isn’t consistently damp as this will cause the roots to rot and can lead to some serious issues such as brown or yellow leaves or a drooping plant.
Each plant is different (due to size and location) so you’ll have to see what suits its specific needs but on average you want to be watering your Mini Monstera once a week during summer and twice a month during winter.
Can Mini Monstera plants tolerate low light?
Mini Monstera plants can adapt to lower light levels. Just be aware that growth will be slower and the leaves might not be as large.
Are Mini Monstera fast-growing plants?
Yes, when grown in the right environment, Mini Monstera plants are quite fast growing and you’ll see them grow a couple of feet each growth period.
Common Problems with your Mini Monstera
Here are some common issues that you might run into. It’s important to diagnose any issues early to give your plant the best chance of bouncing back.
Why does my Mini Monstera have yellow leaves?
Yellow leaves on a Mini Monstera plants suggests it has either been overwatered or receiving too much direct sunlight. Check the spot your plant is in as well as the moisture levels in the soil and adjust the environment or watering schedule accordingly.
Why does my Mini Monstera have brown leaves?
Brown dry crispy leaves suggest your plant has been underwater. Check the soil to confirm before slowly reintroducing more frequent watering.
Why does my Mini Monstera have brown leaf tips?
Brown leaf tips on Mini Monstera plants is often caused by a lack of humidity. Mist your plant’s leaves several times a week as well as using a humidifier to increase the humidity around your plant.


