Originating from Asia, you can choose to grow Lucky Bamboo in either a vase filled with water or in well-draining soil, they will thrive in both!
Lucky Bamboo plants are great low-maintenance options to bring a little bit of greenery into your space. They don’t need constant tending to like most other houseplants and will happily thrive in their water for several weeks at a time without you needing to lift a finger. This makes them the perfect plant for busy or novice plant parents.
Below you will find out the complete Lucky Bamboo care guide with everything you need to know!
About the Lucky Bamboo
Believed to bring good luck, the Lucky Bamboo is the ideal houseplant for those wanting to bring a little bit of greenery indoors, but who just don’t have the time or skill to give it much attention. The Lucky Bamboo thrives off being neglected and as long as they have enough sunlight and some warmth, they’ll happily live for a very long time. You can choose to grow them in either well-draining soil or a vase filled with water. The latter is great for forgetful waterers as there’s no risk of them drying out!
You can continue the gorgeous swirls on your Lucky Bamboo plants by simply rotating them every once in a while. The plant naturally grows towards the sunlight so you can use this to create the twists.
Detailed Lucky Bamboo Care
Lucky Bamboo thrives in anything but direct sunlight
The ideal amount of sunlight for a Lucky Bamboo is bright but indirect but they can also adjust to medium levels of light too! The number 1 rule is just to keep them away from too much direct sunlight (especially in summer).
Lucky Bamboo grow in water and soil!
The great thing about Lucky Bamboo is that they grow really well in either a vase filled with water or a pot with well-draining soil. So it’s up to you how you grow it. This is what makes them quite unique in comparison to pretty much all other houseplant types.
Water well and keep it fresh
If growing your Lucky Bamboo in water, keep the potting mix somewhat moist by watering little but often. If you are growing your Lucky Bamboo in water only make sure to change out the water weekly to avoid it stagnating.
Use filtered water for your Lucky Bamboo
Lucky Bamboo can be quite sensitive to the amount of fluoride and other chemicals found in tap water. If you live in a particularly hard water area then we recommend using rain water or purified filtered water to avoid any issues.
Lucky Bamboo like warm temperatures
When caring for Lucky Bamboo it’s important you keep them in the warmest rooms in your home. They don’t like to be near drafty windows or doors as the cold air from outside can shock the plant and damage its health in the long term.
Propagate using a stem cutting
It’s super easy to propagate Lucky Bamboo as you just need to take a stem cutting and place it in water. Change out the water every week as you usually would and roots will start to grow.
Lucky Bamboo are toxic to pets and humans
You want to keep your Lucky Bamboo away from pets and children as they are mildly toxic if ingested so you don’t want anyone nibbling on them whilst you aren’t looking!
Lucky Bamboo FAQs
Are Lucky Bamboo plants easy to care for?
Yes, you’ll be pleased to know that Lucky Bamboo plants are one of the easiest houseplants to look after as they can adapt to a wide range of environments and don’t need much tending to.
Where is the best placement for my Lucky Bamboo?
The great thing about Lucky Bamboo plants is that they thrive in and adapt to a real range of environments. So anywhere from a sunny windowsill or a shady shelf will make a great spot for your Lucky Bamboo.
How long do Lucky Bamboo plants live for?
Most commonly Lucky Bamboo plants live for about 3-5 years if grown in the ideal environment.
Does the Lucky Bamboo need soil?
No, Lucky Bamboo plants can grow in a vase filled with water too. This makes them one of the most unique houseplants!
Common Problems with Lucky Bamboo
Even though Lucky Bamboo plants are often pretty fuss-free, this doesn’t mean that they won’t come with a few issues every now and again. But don’t worry, we will help you spot the warning signs and help you treat the issue to bring your plant back to full health again.
Why does my Lucky Bamboo have red roots?
It is totally natural for your Lucky Bamboo to have red roots. In fact this is a sign that they are healthy roots so you don’t need to worry about this one bit!
Why does my Lucky Bamboo have black roots?
Black roots on a Lucky Bamboo means that the root system is unhealthy and the roots are rotting. This has happened because the water hasn’t been changed for a while or there is too much chlorine in the water you are using. Trim away the black roots and refresh the plant with filtered water which is changed out weekly.
Why does my Lucky Bamboo have yellow leaves?
Yellow leaves on a Lucky Bamboo plant are a sign that your plant is getting too much direct light. Move your plant to a shadier spot in your home and trim off the worst affected leaves.
Why is my Lucky Bamboo turning brown?
A lack of humidity is the main reason why your Lucky Bamboo might have brown leaves. Make sure to mist the plant several times each week and invest in a humidifier to keep a constant level in your home. Your other plants will love the boost too!
Although you might be thinking it’s difficult to keep such a tropical plant in your home, the Ponytail Palm is actually one of the lowest maintenance houseplants out there. They love sunshine which makes them one of the only window-sill plants during summer and they don’t require much water so that’s one more thing to strike off your to-do list.
The only negative of the Ponytail Palm is that they are slow growing so don’t expect to see lots of new growth popping out all of the time. But on the bright side, it means your plant won’t outgrow the space any time soon!
DetailedPonytail PalmCare Information
Ponytail Palms love full sunlight
Ponytail Palms can deal with full sun for the entire day so are great for those empty windowsills that are too bright for other plants. But the best thing about Ponytail Palms is that they also survive in lower light areas.
Water your Ponytail Palm infequently
Ponytail Palms are a type of succulent meaning they don’t need a lot of water. We recommend watering fortnightly in summer but dropping back to once a month in winter. Too much water can very quickly lead to root rot which can kill your Ponytail Palm.
Ponytail Palms don’t like high humidity
Ponytail Palms thrive in dry air and really won’t do well if you try to increase the humidity.
Average room temperature is best
Keep your Ponytail Palm away from cold temperatures (drafty windows, AC vents etc). Room temperature and a little above is best for your Ponytail Palm.
Don’t fertilise a Ponytail Palm often
Ponytail Palms don’t require regular fertilisation. Instead, you want to fertilise once at the start of spring and leave it for the rest of the year. Ponytail Palms are susceptible to fertiliser burn so you want to be careful.
Use well-draining soil
Ponytail Palms require well-draining soil to prevent root rot. You want to use a specific cactus or succulent mix as these contain ingredients such as perlite that help with aeration and drainage.
Propagate using offshoots
Sometimes Ponytail Palm product small offshoots from the base of the main stem. Wait until these grow several centimetres in height before cutting them off the mother plant.
Ponytail Palms are non-toxic
Another reason we love Ponytail Palms is that they are completely non-toxic and safe for pets and humans!
Ponytail Palm FAQs
Can Ponytail Palms grow indoors?
Yes, Ponytail Palms make great indoor houseplants as they can thrive in a range of environments. You might think that tropical houseplants couldn’t survive in colder climates but these palms are great!
How quickly do Ponytail Palms grow?
Ponytail Palms are quite slow growing so don’t expect to see new leaves popping out all of the time.
The benefit to this is that they are great for smaller spaces and won’t outgrow your home anytime soon.
How tall do Ponytail Palms get?
When grown indoors as houseplants Ponytail Palms can reach about 4 feet. However, when grown outdoors in their natural environment they can reach about 25-30 feet!
How long do Ponytail Palms live?
With the right care and in a good environment, a Ponytail Palm can live for several decades.
Are Ponytail Palms air-purifying?
It is thought that Ponytail Palms do cleanse the air and rid it of toxins. In NASA’s list of the best air purifying houseplants, Ponytail Palms came in pretty high up. Just another reason to love having them around.
Common Problems with yourPonytail Palm
Here are some common issues that you might run into. It’s important to diagnose any issues early to give your plant the best chance of bouncing back.
Why does my Ponytail Palm have yellow leaves?
Yellow leaves on a Ponytail Palm can indicate overwatering. Check the soil to see how much moisture it contains (you want the potting mix to feel dry) and replace if necessary.
Why does my Ponytail Palm have a mushy stem?
A mushy stem can indicate that your Ponytail Palm has been overwatered. This can be easy to do because they really don’t require much water at all.
Why does my Ponytail Palm have brown tips?
Brown leaf tips on a Ponytail Palm can be a difficult one to diagnose because there are several causes. We recommend going through each one to eliminate it. Causes of brown tips include: overfertilisation, underwatering or too much direct light.
Known and loved for their easy care requirements and sharp spikes,
the Cactus is probably one of the most famous plant types in the
world. There are probably more Cactus types than we could possibly
count in the world, which makes them one of the most unique and popular
houseplant types.
There are a few key things to remember when caring for Cacti;
firstly, they need a good amount of sunlight so are perfect for that
sunny warm spot in your home that might be too intense for your other
houseplants. When it comes to watering, it’s important that the soil
dries out fully between waterings so you want to give a good but
infrequent soak.
Below you’ll find all the detailed information you need to care for
your Cactus. You can apply this generally to most of your Cacti types.
Detailed Cactus Care
Keep your Cactus in a bright spot
As you can imagine, being native to deserts across the world, cacti
love sunlight. They will really struggle in low light areas of your home
so make sure these are kept close to windows to make the most of the
sunshine each day.
Adjust your watering across seasons
In the hotter months of spring and summer, it is important that your
cacti receive sufficient watering. We usually go for once a month but it
does depend on the size and drainage of each specific cactus. In
winter, hold back almost completely from watering as it will cause root
rot very quickly.
You must use a fast-draining potting mix
Your Cactus will rot pretty quickly if the soil retains moisture for
too long. We recommend using succulent/ cactus specific soil as this
will contain agents such as perlite which increases drainage in the pot.
Cacti prefer warmer environments
Although they can survive in slightly cooler homes, Cacti thrive in
warmer environments. Nearer windows will tend to give them a little more
warmth in summer but can be a little drafty in winter so be aware of
this.
Dry air is best for your Cactus
This can be a little tricky especially if you have other
humidity-loving houseplants in your home. Don’t worry too much about
changing the humidity levels in your home but prevent placing your
Cactus in the kitchen or bathroom where steam from cooking or showering
naturally increases the humidity.
Use Cactus-specific fertiliser
If you wish to feed your Cactus during the growing months, we
recommend using Cactus-specific fertiliser as they tend to be a little
more tailored than generic houseplant fertiliser.
Keep away from pets and children
Due to the sharp thorns found on a lot of Cactus types, as well as
some that produce sap that can be irritable to your skin and stomach, we
recommend as a rule to keep your pets and children away from the Cacti
in your home.
Don’t worry about repotting
You usually won’t have to repot your Cactus for a few years as they
are quite slow growers and have shallow roots. If you do think it is
time to repot, make sure you wear thick gloves to protect from their
sharp pricks.
Propagate your Cactus using segment cuttings
Propagating a Cactus is usually quite easy and can be done by
snipping of a healthy stem/pad or individual head. Place the cutting in
the sun for a few days for it to harden before placing it in fresh
cactus potting mix. Water every week or so and after a month or two it
should start to form roots.
Cactus Care FAQs
Can a Cactus tolerate low light?
Cacti
need bright light to thrive and will struggle in low light
environments. Whilst they might not die, you will notice stunted and
slow growth.
How often should I water my Cactus?
Cacti
really don’t need much water and thrive in dry potttng mix. On average,
you want to water your Cactus every other week and once a month during
winter.
Are Cacti toxic?
Due
to the sharp thorns found on a lot of Cactus types, as well as some
that produce sap that can be irritable to your skin and stomach, we
recommend as a rule to keep your pets and children away from the Cacti
in your home.
Do Cacti make good houseplants?
Cacti
are great houseplants for plant beginners or those that don’t have the
time to constantly be fussing about humidity levels or watering
routines.
How long do Cacti live for?
When
grown outdoors, Cacti can live for a few hundred years. However, indoor
Cacti have a lifespan of about 10-20 years with the right care routine
and environmental requirements.
Common Issues for Cacti
Growing and caring a Cactus in your home
can sometimes be difficult so it is important to know what to look out
for that suggests your cactus isn’t doing so well.
Why are there are brown edges / markings on my Cactus?
If
the brown parts are dry rather than soft and mushy, this will have been
caused by underwatering. Be careful when rectifying this problem as you
can very easily go the other way and overwater.
Why is my cactus droopy?
If
you notice that your cactus is drooping down, this is probably caused
by overwatering. We recommend carefully inspecting the moisture in the
soil, replacing it if necessary and adjusting your watering schedule.
Why has my cactus turned brown at the base?
If
your Cactus is turning brown and mushy from the base up, you have been
overwatering it. Carefully inspect the moisture levels in the soil and
replace if necessary. Then adjust your watering schedule and check the
soil before watering each time.
Why is my cactus is starting to become unstable?
If
your cactus is unable to keep itself upright, you have probably been
giving it too much water – don’t worry as that is super easy to do. Hold
off on the watering for a while and remove the damaged part if
necessary.
Loved
for their colourful heart-shaped leaves, Caladium plants are actually a
bit of a pain to take care of. They are sensitive to nearly every
environmental factor which means they can develop issues, such as brown
leaves if even the slightest thing is off. Below we will cover each of
the main causes of brown leaves on Caladium plants so you can diagnose
the issue, treat it and prevent it from harming your plant
anymore.
Overwatering is a common cause of brown leaves in Caladium Plants
Overwatering is probably the most
damaging of houseplant issues as it can be harder to revive your plant
once the issue has taken hold and caused brown leaves. Caladiums don’t
like sitting in waterlogged soil at all, they prefer their potting mix
to just be lightly moist. Too much water will cause damage to the root
system and mean your plant will often develop brown leaves as well as
droop down and turn soft.To figure out if overwatering is the reason your Caladium is turning brown,check the moisture levels
in the soil immediately. Overwatering is a serious concern but you have
the best chance at solving the issue if it is caught early. So don’t
waste any time after spotting the brown leaves. If the potting mix is waterlogged and
the roots have begun to turn soft and black in colour, then this means
too much water is most probably the cause of the brown leaves on your
Caladium. To stop the issue progressing any further, replace the soil
with fresh dry mix. Top tip: never reuse soil from another plant as this
can spread diseases and pests without you noticing. You also want to
trim away any roots that have started to rot as these won’t be serving
your plant anymore. Due to the damage caused to the root
system, your Caladium may take a little while to fully recover and start
to grow new healthy leaves. But be patient and with the right care and a
bit of extra TLC you should start to see your Caladium starting to grow
new healthy leaves soon.
It could also be drainage problems
Sometimes it may not be how often you
water your Caladium the is resulting in brown leaves, but actually the
poor drainage of the soil and pot. You want to make sure that any excess
water is able to flow out of the pot and away from the roots. This will
help to prevent them rotting and brown leaves developing on your
Caladium. Luckily, there are a few really easy ways to increase drainage. Firstly, mixing a small amount ofperlite
into the potting mix will allow for not only better drainage, but
better aeration of the soil too. You also want to make sure that your
pot has enough drainage holes and that these are not clogged up by
anything. Placing some small stones at the bottom of your pot can help
make sure they are always clear. You should also think about investing
in some terracotta pots for your Caladium as these allow some of the
excess moisture to evaporate out of the pot.
Low temperatures can result in brown leaves
Make sure that you draft proof any
windows/ doors that are close to your Caladium (and other tropical or
heat-loving houseplants) as well as move them at least one meter from
any air conditioning vents. This is because cold air can be really
damaging to Caladiums as they have absolutely no tolerance for it. They
are a lot more sensitive to this than pretty much any other houseplant,
so what might be fine for others, might cause brown leaves on your
Caladium. It can mean that the potting mix dries out slower, leading to
problems we have discussed above but it can also freeze the cells in
your plant and slow down enzyme activity. The best thing to do is use a a
digital thermometer to monitor the temperature in your home and allow
you to check for any cold drafts or fluctuations in temperature.
Intense direct sunlight
Lighting is always important to your
houseplants and Caladiums are no different. If your Caladium is getting
too much bright light you’ll start to notice some brown patches emerging
on the leaves of your plant. As Caladiums have quite delicate leaves,
this can happen relatively quickly. To check whether sunlight is the
issue, you should notice that more brown patches have developed on the
side of the plant that is facing the sun. Try moving it into a slightly shadier
place, ensuring that is doesn’t get any direct light. If you aren’t
sure how much light your Caladium is getting in its current spot (or any
alternative spots in your home) then we highly recommend using a light
meter. They’ll tell you what level of light is in your home throughout
the day and you’ll be able to monitor how it varies across the year.
Underwatering can cause light brown leaves
If you notice that your Caladium is developing brown spots
or leaf edges that are quite light brown in colour then it might be a
lack of water that is the cause.
Although we have established above that Caladiums don’t
like too much moisture, they can also struggle with dry soil and this
can result in the leaves drying out quite fast.
The easiest way to tell is again just by checking the moisture in the soil using a moisture meter
and adjusting your watering schedule accordingly. You will need to
either water your Caladium more frequently, or give it a little bit more
water each time you do .
It may just be the natural life cycle
If your Caladium is suddenly losing a
lot of their leaves at the beginning of winter, then this is most
probably just part of the natural Caladium life cycle. Every year,
Caladium plants shed all of their leaves over winter before growing new
ones in spring. These leaves will often turn brown before they fall off
the plant. It’s totally normal for your Caladium to do this so don’t
worry about it and with the right care, you should see plenty of new
growth in spring. Those are the most common reasons why
Caladiums develop brown leaves, brown spots or brown leaf tips.
Problems develop on Caladiums pretty quickly so it’s very important that
you act as soon as you spot the first sign of trouble. We also
recommend keeping a closer eye on these plants compared to a lot of your
other houseplant types to see if you can spot problems before they have
an impact on your plant. Monitoring temperature, moisture and sunlight
can go a long way to preventing the issue in the first place. Check out our Caladium care guide to learn more about what your plant needs.
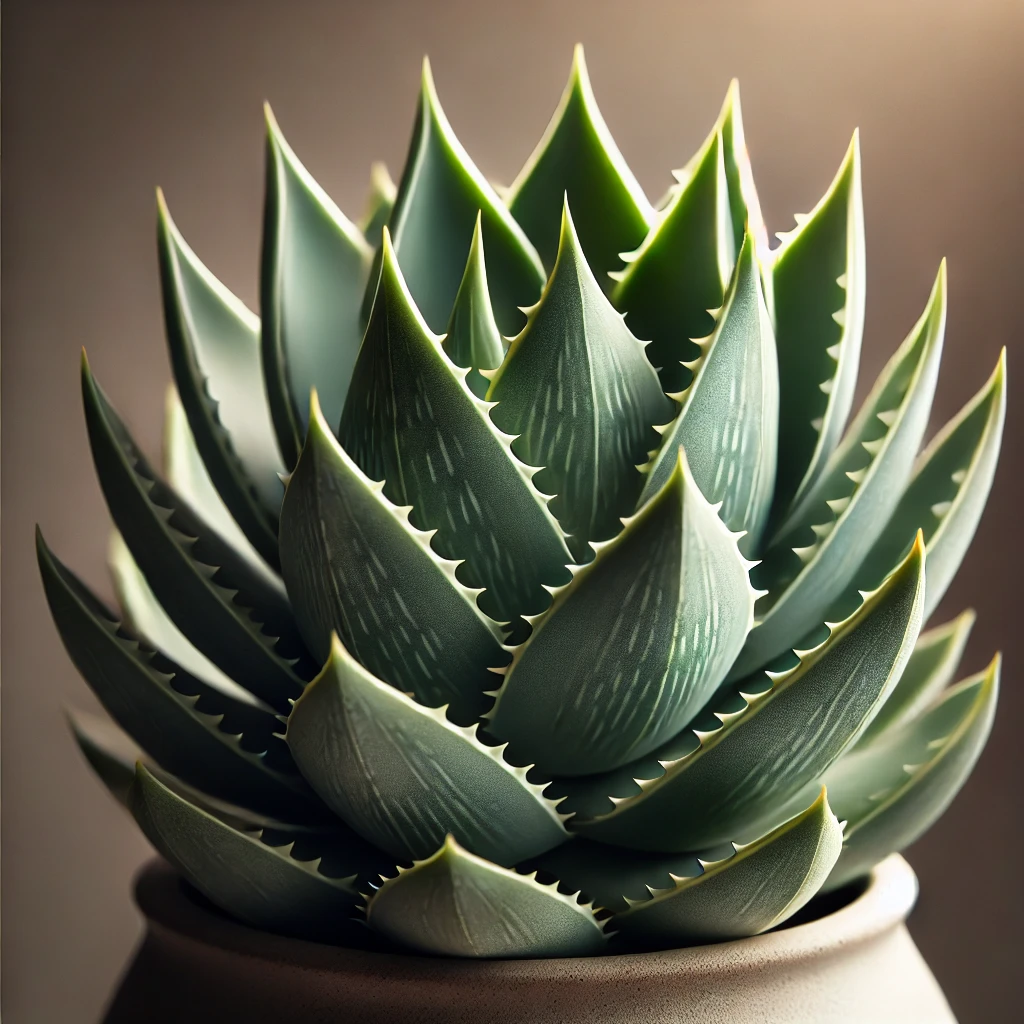
The Aloe Vera is often the first plant endeavour for many plant parents as their easy care routine and luscious green leaves make them the perfect beginner plant.
There are a few important things to note when it comes to keeping your Aloe Vera thriving. Firstly, they need a well-draining potting mix as their roots are very sensitive to root rot. A succulent or cacti mix should work well as it should include perlite which helps not only with drainage but also with aeration of the soil. The second thing to remember when it comes to Aloe Vera care is that they need bright but indirect light. If grown in low light areas they can become straggly but will scorch in intense direct sunlight during summer. It might be a case of moving your Aloe Vera around depending on the season to get the light level right.
Below is our full Aloe Vera Care Guide with all the information you need to best look after your Aloe.
Detailed Aloe Vera Care
Aloe Vera love bright, indirect sunlight
Make sure your home has enough natural light to keep these ones happy. Whilst they can sustain some direct light, after a while too much sunlight will dry our your Aloe Vera’s leaves. It is all about finding the right spot your for Aloe and it’ll thrive!
Be careful not to overwater your Aloe Vera
Aloe Veras are quite sensitive plants when it comes to watering. The less the better really. They really dislike sitting in water so make sure they dry out fully between waterings. If you think you may have overwatered your Alow Vera, replace the soil immediately and adjust your watering schedule.
Use a well-draining potting mix
A good potting mix for your Aloe Vera should contain perlite, lava rock or coarse sand to help water drainage. This will protect the roots from rotting which is the most common issue with Aloe Veras as it can happen quite quickly if you accidentally overwater them a few times.
Aloe Vera can be toxic if ingested
Although the gel can be used on skin to reduce pain, you should never ingest any part of an Aloe Vera as it can cause nausea and can even be toxic in large quantities.
It’s easy to propagate your Aloe Vera
Aloe Vera grow little pups from the main root system that pop up next to the mother plant. Simply cut the pup off with a couple of cm stem and repot them in succulent soil.
They don’t need to be fertilised
Fertilising your Aloe Vera won’t harm it but it isn’t really necessary. They should be fertilised no more than once a year and we recommend using a water-soluble fertiliser if you do choose that you want to.
Warmer temperatures are best for your Aloe Vera
Although they aren’t as fussy as some other houseplants, warmer temperatures do encourage more growth in your Aloe Vera. Make sure they aren’t placed near an air vent or drafty window as the cooler temperatures will affect your Aloe Vera’s health.
You don’t need to increase the humidity
One great thing about Aloe Vera plants is that they do well in the natural humidity of your home. In fact they don’t mind if the air is a little dry which means you don’t need to worry about misting or trying to increase humidity levels.
Aloe Vera Care FAQs
Can Aloe Vera tolerate full sun?
Whilst they can sustain some direct light, if exposed to too much it will dry out and scorch the leaves of your Aloe Vera. Bright but indirect light is best.
Is Aloe Vera toxic to pets?
Yes, the Aloe Vera is toxic to pets when ingested so keep your furry friends away from it if you worry they might be tempted to chew at the leaves.
Is Aloe Vera easy to care for?
Aloe Vera plants are pretty low maintenance as they don’t require much water and can thrive in light levels that most other plants can’t. You also don’t need to worry about boosting the humidity so we strongly recommend these to beginner plant parents.
How often should I water my Aloe Vera?
Aloe Vera plants are very sensitive to overwatering and consequent root rot so you want to water them sparingly. Cut back watering during winter so that you are only watering once a month.
Can Aloe Vera survive in low light?
Unfortunately, Aloe Vera plants don’t do very well in low light areas. It will cause stunted growth, discolouration of the leaves and even cause your plant to wilt and die.
Common Issues for Aloe Vera
Although Aloe Vera plants are seemingly very low maintenance, they can sometimes be a little fussy about their environment and care so it’s important to look out for the warning signs.
Why has my Aloe Vera developed yellow leaves?
Yellowing on your Aloe Vera is often caused by too much direct sunlight. Try to move your Aloe Vera to a spot with indirect sunshine during summer and this should help to avoid any more yellow leaves from developing on your Aloe Vera.
Why has my Aloe Vera developed brown leaves?
Brown Aloe Vera leaves are usually a symptom of incorrect watering, both underwatering and overwatering. Both issues will damage the root system and result in your plant being unable t maintain the level of healthy growth, meaning it will develop brown leaves. Have a feel of the soil to determine whether the brown leaves are caused by too much or too little moisture and adjust your watering habits accordingly. You can find out more about why your Aloe Vera is turning brown in our helpful guide.
What shall I do if my Aloe Vera’s soil is waterlogged?
It can be an easy mistake to overwater your aloe vera. In this instance it is best to replace the potting mix entirely as the water will be causing damage to your aloe’s root system. You can find out more about root rot fixes and prevention in our complete root rot guide.
Why has My Aloe Vera turned soft and mushy?
Soft or mushy leaves on your Aloe Vera is usually consequence of overwatering. Try replacing the soil with new dry potting mix and hope that it is not too late!
Why is my Aloe Vera becoming straggily and leggy?
Leggy and straggly growth on an Aloe Vera is most often caused by insufficient light levels. Try moving your Aloe Vera closer to the window and the new growth should start to look healthier.
Help, I think my Aloe Vera is dying!
Most commonly Aloe Vera plants die because of light or watering issues. Check the moisture in the soil to determine if you have been overwatering it. We have written a detailed guide to help you figure out why your Aloe Vera might be dying.
Why is my Aloe Vera losing leaves?
There are two common causes of Aloe Vera plants losing their leaves, firstly overwatering and secondly a lack of sunlight. If the leaves that are falling off your Aloe Vera feel soft, and the potting mix is waterlogged, then too much water is causing your Aloe Vera to lose leaves. However, if the plant looks quite leggy as well as losing leaves, then it can mean that your Aloe Vera isn’t getting enough light. Move your Aloe Vera to a slightly sunnier spot and monitor any changes.
Why is my Aloe Vera drooping?
There are quite a few causes of droopy Aloe Vera leaves so it can be a bit trickier to properly diagnose. Watering issues such as too much or too little moisture can cause your Aloe Vera to droop, alongside temperature issues, lack of sunlight and more worryingly pests. In order to find out what is causing your Aloe Vera to droop, inspect the potting mix, take a close look at the leaves and monitor the sunlight and temperature levels around your Aloe Vera.
Why does my Aloe Vera have curling leaves?
The most common reason why Aloe Vera plants start to curl their leaves is in response to a lack of moisture. If your Aloe Vera isn’t given enough water it will start to use the conserves it keeps in its leaves, which then causes them to curl. Check the moisture levels in the potting mix before slowly giving your Aloe Vera some more water. This should help revive your plant and stop any more of your Aloe Vera’s leaves curling.
Fiddle and Thorn is a participant in the Amazon Services LLC Associates Program, an affiliate advertising program designed to provide a means for sites to earn advertising fees by advertising and linking to Amazon.com


 Loved
for their colourful heart-shaped leaves, Caladium plants are actually a
bit of a pain to take care of. They are sensitive to nearly every
environmental factor which means they can develop issues, such as brown
leaves if even the slightest thing is off. Below we will cover each of
the main causes of brown leaves on Caladium plants so you can diagnose
the issue, treat it and prevent it from harming your plant
anymore.
Loved
for their colourful heart-shaped leaves, Caladium plants are actually a
bit of a pain to take care of. They are sensitive to nearly every
environmental factor which means they can develop issues, such as brown
leaves if even the slightest thing is off. Below we will cover each of
the main causes of brown leaves on Caladium plants so you can diagnose
the issue, treat it and prevent it from harming your plant
anymore.