Why is my Prayer Plant dying?

Last Updated: April 1, 2022

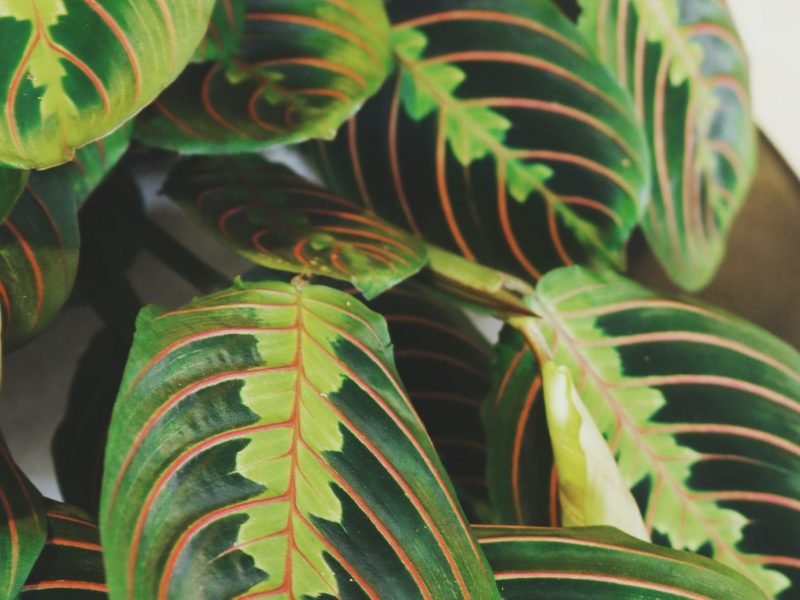
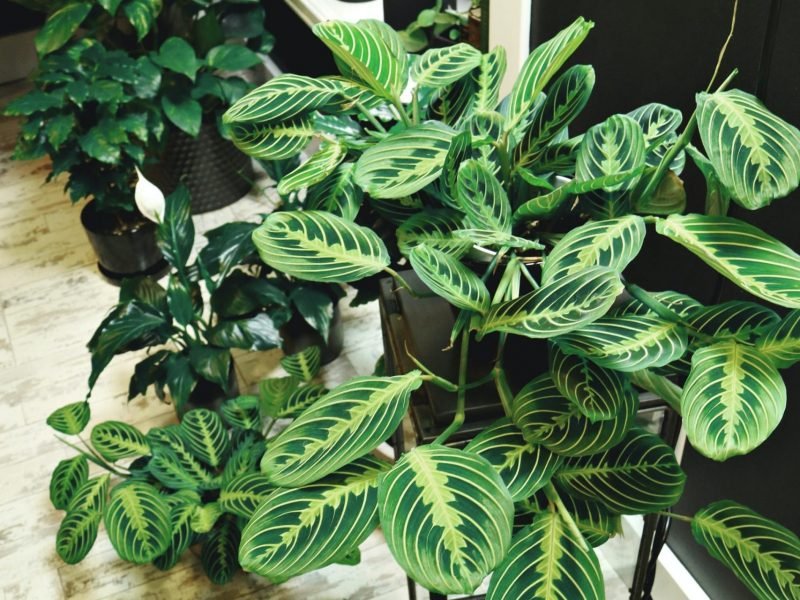
There are many ways a Prayer Plant might look as though it is dying. It may be that the leaves are turning yellow or brown, the plant is losing leaves at a rapid rate or even just the plant has stopped curling in at night (praying). In this post we will go over some of the main reasons why your Prayer Plant might be dying and hopefully you will be able to bring it back to full health.

Overwatering

Overwatering is the main cause of problems across all houseplant types. Which is why we always start with it as the first port of call when looking for a problem. Prayer Plants don’t like sitting in puddles of water for long periods of time. This will cause damage to the root system and mean your plant will lose leaves, become droopy and soft.

To figure out if overwatering is the reason your Prayer Plant is dying, check the moisture levels in the soil immediately. If the soil is quite waterlogged and clumpy then replace it with fresh dry mix which will allow the plant to start to recover. Trim away the rotten roots and hold off on watering as much as you did before.

Due to the damage to the root system, your Prayer Plant may take a little while to fully recover and grow new healthy leaves. But be patient and you should start to see your Prayer Plant looking fresher in a few weeks.

Underwatering

Too little water can also cause a lot of problems for your Prayer Plant and it will start to develop dry crispy leaves and the whole plant will shrivel up.

If you suspect it is underwatering then you must again check the moisture levels in the soil before making any changes to your care routine. When watering your underwatered Prayer Plant it’s super important you do it gradually. Like humans, houseplants sometimes get shocked by a sudden change of environment. Therefore, instead of drowning your plant and hoping for the best, try to stagger your waterings and give a little bit of water each time. Then make sure you adjust your schedule going forward so you are watering more than you were before.

Top tip: always check the moisture in the soil of any houseplant before watering using either the finger, chopstick or lifting method. It happens a lot that plant parents will actually overwater their plants to compensate for underwatering them. And this just leads to a whole new list of problems!

Too much light

Sunlight is another factor that can cause Prayer Plants to die. Although they will struggle in really dark rooms, this is pretty clear to most plant parents. Where the main problem lies is with direct sunlight. There is often a misconception that there is no such thing as too much light for a houseplant. But this couldn’t be further from the truth.

Direct sunlight will very quickly scorch and burn the leaves of your Prayer Plant which is irreversible. It will leave yellowy brown patches on the leaves which make the plant look as though it is dying – and over time it will!

If this has already happened to your Prayer Plant, trim away the scorched leaves and move your plant to an area of your home with indirect light.

Cold temperatures

Prayer Plants don’t really like winter very much because they struggle in cold temperatures. Not only does the cold weather cause them to stop growing, but it can also mean the leaves, stems and roots freeze.

During the winter months, your plant will also become more susceptible to root and leaf rot. This can happen if there is moisture on the plant when the temperatures drop (often at night when we don’t have the heating on).

To avoid this, make sure your plants are in the warmest rooms in your home throughout winter and always water in the morning so there is enough time for the water to be soaked up or evaporate before it gets dark.

Pest Infestation

Although fairly rare, Prayer Plants can begin to die if they are infested with pests. Insects such as mealybugs or spider mites can take hold of the plant and suck on their nutrients which will cause leaf damage. Over time these leaves will begin to fall off the plant.

Most of the time you can spot the pests crawling on the leaves which makes confirming the problem fairly easy. We also recommend using a magnifying glass to try and spot the pests on the plant if you can’t see any with the naked eye. They like to hang out on the undersides of leaves or near the leaf and stem joints so look extra carefully there.

Although spotting pests isn’t always difficult, treating them can be a bit of a pain. Check out this post to find out how to get rid of and prevent spider mites on your Prayer Plant.

Lack of humidity

Another reason why your Prayer Plant is dying could be a lack of humidity as they struggle in homes with dry air. This can be especially damaging during the winter months when we often have the heating on. Dry air will cause the leaves to go crispy, become limp and droop down. But if you have caught the problem early then this is quite an easy fix and you should be able to revive your Prayer Plant in only a few days. Here are a few ways you can increase the humidity:

Misting the leaves

One of the simplest ways to increase the humidity for your Prayer Plant is to mist it with a spray bottle a couple of times a week. Make sure to only do this in the morning though as if the leaves are wet overnight they may start to rot.

Pebble tray

Place your Prayer Plant over a tray of pebbles with fresh water over the top. Over the day water from the tray will evaporate giving your plant exactly what it’s looking for.

Give your Prayer Plant a shower

One easy method which will instantly increase the humidity if giving your plant a shower. It is also a great way to remove dust and pests from your plant which is a bonus! Simply pop them in the shower and wash them down with lukewarm water. You want to keep the water pressure of the shower very low though so you don’t damage the leaves or stems.

Move your Prayer Plant to the bathroom

If you’re lucky enough to have great lighting in your bathroom you can move your Prayer Plant in there to increase the humidity. The running water from your showers means your bathroom is naturally one of the most humid in your home. Another great room for high humidity is the kitchen due to the steam from cooking. Just be sure not to put your plant too close to the cooker or it’ll burn.

Buy a humidifier

They’re relatively affordable little devices which keep a consistent humidity level in your home. This is the long term solution (showering your plant will only increase the humidity for a little while). Some humidifiers have features built-in that mean you can put it on a schedule or make it automatically turn off once it has reached a certain level.

Want to know more about how to raise the humidity for your Prayer Plant and other houseplants? Check out of detailed humidity guide.

These are the most common reasons why Prayer Plants will start to die so we recommend going through the causes one by one to see which fits with the care routine and environment of your plant. If you want to learn more about caring for your plant check out our Prayer Plant care guide or download the How to Care for your Houseplants ebook.

Complete Houseplant Care eBook

Our comprehensive (and rather good looking) eBook that will teach you everything you need to know to successfully care for, and maintain your houseplants!

Buy on

Fiddle and Thorn is a participant in the Amazon Services LLC Associates Program, an affiliate advertising program designed to provide a means for sites to earn advertising fees by advertising and linking to Amazon.com

Take our houseplant survey!

Quickly respond to our 30 second houseplant survey and get 75% off our Complete Houseplant Care eBook!

Take the Survey

No thanks…

Why is my Prayer Plant drooping?

Last Updated: May 3, 2022

If your Prayer Plant’s leaves are drooping down then it may be due to one of two things: either it is simply natural praying or it’s being underwatered and the dry soil is causing your Prayer Plant to droop. If you have caught the problem early and there are no other major problems (including brown dry crispy leaves) then you should be able to fix the issue fairly easily. But if the problem has progressed quite far then it may take a little bit more to revive your plant. But either way, don’t worry as below you’ll find all the answers you need.

Natural praying can be confused for drooping leaves

Prayer Plants get their name from the way their leaves curl up at night time and uncurl during the day. It sort of looks like they are praying. Aside from the curling, Prayer Plants also generally just move their leaves around a lot. If you were to take a timelapse of your plant over 24 hours you would be shocked at how much they move!

If your Prayer Plant’s leaves look a little droopy then we always recommend monitoring their position a little for a few days before making any changes to their care or environment. You don’t want to disrupt anything without knowing for sure there is a problem.

If you notice your Prayer Plant’s leaves are moving around a lot over the days you are monitoring them then that is completely normal and the drooping was simply part of that natural praying and moving. However, if the leaves do not move much and are continuing to droop down and look quite limp then this is probably a sign your plant is unhappy. We cover this next part below…

Underwatering causes Prayer Plants’ leaves to droop

The most common reason Prayer Plants’ leaves droop down is consistent underwatering. Whilst your Prayer Plant can tolerate the occasional missed watering, over time if it doesn’t receive enough water then the plant will droop, turn brown/yellow and lose leaves. Drooping leaves are the first sign of trouble and mean you can very easily reverse it if you notice the problem relatively quickly.

There are a few simple and quick ways to find out if your Prayer Plant’s soil is dry and your plant needs watering:

Finger/Chopstick Method

Firstly, the finger trick where you stick a finger into the soil to see if there is any moisture in the soil. If yes, you’ll notice soil sticking to your finger when you take it out. If the soil is bone dry then it will just be like dust which will fall off your finger. If you don’t want to get your hands dirty then you can also use a chopstick where the same rule applies. If the chopstick comes out clean then it’s time for a water.

But won’t I damage the root system if I stick my finger in the soil?

As long as you are careful and don’t prod around too much, then you shouldn’t cause too many issues. If you notice a large root in your way, try and pick a different spot rather than forcing the chopstick in as this will break the root.

Picking up your Prayer Plant

Another way you can check the moisture levels in the soil is by regularly picking up your plant. This is a great method to get to know your plants and soon you’ll have a really clear gauge as to when they need more water and you can stop your plant’s leaves from drooping down. The lighter the plant is, the less water is in the soil – pretty simple! Luckily, Prayer Plants are quite light houseplants as they don’t have thick stems which means picking them up shouldn’t be too difficult but don’t try this with bigger plants as you don’t want to hurt your back.

Use a moisture meter

If you want to take the guess work out of knowing when to water your Prayer Plant (and prevent more drooping leaves) you can use a moisture meter. You simply pop it in the soil as you would say a thermometer and it will give you a reading of the moisture in the soil. They are super affordable little gadgets which are a great investment for every budding plant parent! We love this one from Amazon.

How do I fix my Prayer Plant’s drooping leaves?

Now that you have established what is causing your Prayer Plant’s leaves to droop, you want to make sure what you do next actually solves the problem and doesn’t make anything worse.

If the drooping is just part of the natural praying, movement of your Prayer Plant then you don’t need to do anything at all as this is totally normal and actually a sign of a healthy Prayer Plant.

Reintroduce watering slowly

But if your Prayer Plant’s leaves are drooping due to consistent underwatering then you need to make sure to reintroduce watering in the right way. Your first instinct might be to give your drooping Prayer Plant lots of water straight away but this can actually be harmful to your Plant if the soil goes from one extreme to the other. Instead, you want to reintroduce watering little but often for a week or two and this should solve the problem. The last thing you want to do is go the other way and overwater your plant so be careful when reintroducing watering as this will cause a whole range of more serious issues than drooping leaves. Using a moisture meter is a great way to regulate your watering.

Use the right potting mix

Prayer Plants aren’t super fussy about their potting mix and should grow well in a variety of mixes. One thing to make sure of is that it is a high-quality mix as this will ensure it has all the right nutrients and pH level for your plant. Whilst you do want the mix to be well-draining (as this will help to avoid the dreaded overwatering), if you find that your Prayer Plant is often drooping due to underwatering, you may want to add some peat moss to the mix. This helps to retain a little bit of that moisture and slowly releases it to the plant. We recommend this potting mix from Miracle Gro which is available on Amazon.

Use a self-watering pot

If you find yourself often forgetting to water your Prayer Plant, or you travel a lot and can’t always be home and stick to a regular routine, there are ways to water your plants without you needing to remember or even be there to do it.

The best thing to do is invest in a self-watering pot. They are relatively affordable and make sure that your plants get the right amount of water at exactly the right time! They help to avoid both under and overwatering and are definitely worth it to stop your drooping Prayer Plant leaves turn into something more serious.

Whilst there are a few DIY tips and tricks that you can use to create a self-watering system yourself (plastic bottle or damp string techniques), we don’t often recommend them as they are not as reliable as self-watering pots. And we don’t like to take any chances when it comes to caring for our houseplants!

Propagate your plant

If you can’t seem to save your Prayer Plant and all efforts at reviving it aren’t working then you may want to think about propagating it to save some of the healthy stems. The best way to do this is by taking a stem cutting or dividing the plant and growing some of the healthiest bits in water until you see roots forming. Then pot into fresh mix and enjoy your new plants!

If you notice your Prayer Plant’s drooping leaves quickly and there are no other signs of serious problems then you should be able to bring your Prayer Plant back to top health pretty quickly by following our tips above!

Check out our full Prayer Plant Care Guide for more information on care, common problems and propagation.

Fiddle and Thorn is a participant in the Amazon Services LLC Associates Program, an affiliate advertising program designed to provide a means for sites to earn advertising fees by advertising and linking to Amazon.com

Take our houseplant survey!

Quickly respond to our 30 second houseplant survey and get 75% off our Complete Houseplant Care eBook!

Take the Survey

No thanks…

Why is my Polka Dot Plant turning yellow? Causes and Solutions

Last Updated: March 26, 2022

Polka Dot Plants come in a huge variety of colours, but one thing you don’t want to see is your Polka Dot Plant turning yellow. Whether your plant has leaves that have completely turned yellow, or if you have yellow patches or spots across the foliage, these are all signs that something isn’t right and your plant is suffering. But don’t worry, whilst you won’t be able to reverse the yellowing, there are plenty of things you can do to treat the issue and stop any more of your plant turning yellow.

In this post, we will go through each of the main causes of yellow Polka Dot Plant leaves to help you identify the problem and revive your plant.

Direct sunlight can cause yellow spots

Intense, direct sunlight can be quite a common reason why Polka Dot Plant plants start to develop yellow leaves. Though a lack of light can also cause several issues for them, they don’t do well in harsh direct sunlight.

If exposed to several hours of direct sunlight each day, it can very quickly scorch and burn the leaves of your Polka Dot Plant which is, unfortunately, irreversible. It will dry out and burn the leaves, causing yellow patches or spots throughout the affected areas. The yellowing will mostly occur on the side of the plant facing the window, so that’s a good way to see if direct light is the cause.

To solve the issue, you want to first remove the worst affected leaves as this stops your Polka Dot Plant from wasting valuable energy trying to keep these alive. Then you want to move your plant to a slightly shadier spot in your home. If you are unsure how much light your plant is getting throughout the day/year, it can be useful to use a light meter to keep track.

Yellow Polka Dot Plant leaves can indicate overwatering

If you notice that your Polka Dot Plant is developing yellow patches on its leaves, starting from the leaves closest to the potting mix, then the problem may be too much water. This is quite a common issue for Polka Dot Plant plants as it can be difficult to know until the problem has really developed. When watering your plants, always check back 30 minutes after watering and pour away any excess water that is in the saucer or at the bottom of the planter. This will stop your Polka Dot Plant’s roots sitting in a puddle of water for days and developing yellow leaves.

The reason why overwatering is so dangerous for a Polka Dot Plant is that it can very quickly lead to root rot. Not only can the leaves turn yellow but it can also mean the plant becomes droopy and unstable. If not caught quickly, it can mean your Polka Dot Plant will not be able to survive.

To confirm that overwatering is the cause of the yellow leaves on your Polka Dot Plant, it’s important to check the soil right away and replace it if it is waterlogged. The easiest way to check the moisture level is by digging your finger into the top two centimetres of the soil to see how damp it is. If the potting mix is waterlogged, replace it straight away and adjust your watering schedule in future.

Natural yellowing can occur on Polka Dot Plants

If it’s only the oldest and smallest leaves on your Polka Dot Plant that are turning yellow then this may be

natural ageing. Over time, your Polka Dot Plant will drop some of its oldest leaves in favour of growing bigger healthier new ones at the end of the stem. These leaves will often turn yellow before falling off your plant.

This is a completely natural process and isn’t caused by something you did wrong. It’s important here to keep track of how many yellow leaves are forming. The rate of natural ageing should be about 1 or 2 of the oldest leaves every few months and should be a lot less than the rate of new growth during spring and summer.

Yellow leaves can also mean a pest infestation

A rarer but more worrying cause of yellow leaves on a Polka Dot Plant is a pest infestation. Spider mites, mealybugs and scale insects can make your plant their home and dehydrate the leaves, turning them yellow. Although it’s rare for pests to find their way onto plants that don’t spend any time outdoors, it can happen!.

Most pests you can spot just by closely inspecting the leaves so use a magnifying glass to inspect the undersides of the leaves. If you do spot pests on your plant, make sure to move them away from any of your other houseplants. Pests can spread between plants if they are close enough so isolate your infected plant immediately.

Each type of pest needs to be treated slightly differently but the first steps are always to wash your Polka Dot Plant down in the shower before treating with an insecticidal spray or soap. There are other treatments such as neem oil that are also quite successful in curbing the infestations and preventing more yellow leaves. If you have caught the problem before it has turned the whole plant yellow then you should be able to get rid of the infestation.

Nutrient deficiency can also cause yellow leaves

Another reason your Polka Dot Plant may be developing yellow leaves is a lack of nutrients. This is quite a slow process so only really consider this option if the leaves on your Polka Dot Plant have very gradually turned yellow, rather than the entire leaf turning yellow in just a few days. This can happen if you haven’t switched out the potting soil in over a year or you don’t fertilise during the growth months.

We recommend using a diluted water-soluble fertiliser during spring and summer to make sure your Polka Dot Plant is getting the right nutrient balance.

Those are the 5 top causes of yellow Polka Dot Plant leaves. A few of these causes such as pests and overwatering can rapidly harm your plant so it’s super important that you start treating the issue as soon as you spot the first signs of trouble. If you have caught the problem early enough then you have a great chance at getting your Polka Dot Plant back to full health. However, if the problem has progressed quite far, then we probably recommend taking some stem cuttings from the healthy areas of your plant to propagate. This will allow you to continue growing your plant even you aren’t able to save the mother plant.

To learn more about how to propagate your plant, as well as our general care top tips, check out our Polka Dot Plant care guide.

Fiddle and Thorn is a participant in the Amazon Services LLC Associates Program, an affiliate advertising program designed to provide a means for sites to earn advertising fees by advertising and linking to Amazon.com

Take our houseplant survey!

Quickly respond to our 30 second houseplant survey and get 75% off our Complete Houseplant Care eBook!

Take the Survey

No thanks…

Why is my Polka Dot Plant losing leaves?

Last Updated: June 26, 2022

Adored for their incredible dotted leaves, the Polka Dot Plant brings that dash of colour and vibrancy to every room. Whether your variety is pink, red or white, it’s always frustrating and upsetting to see your plant start losing some of its leaves. Whilst some leaf shedding is normal, there are also a few concerning factors that can have this effect. In this post, we will go through each of these reasons, as well as how to know if it’s simply the natural ageing process, so you can begin to help your plant recover and revive itself.

Overwatering is a common cause for losing leaves

Too much water tends to be the main reason why houseplants begin losing their leaves, and this applies to Polka Dot Plants too. The reason for this is because the roots will start to turn soft and mushy and your plant won’t be able to get all the nutrients, moisture and oxygen it needs. As a result, your Polka Dot Plant will need to conserve energy and shed some of its leaves.

To figure out if overwatering is the reason your Polka Dot Plant is losing some of its leaves, check the moisture levels in the soil immediately using a moisture meter. If the potting mix is very soggy and clumpy then replace it with fresh dry mix. You might be tempted to wait for the potting mix to naturally dry out but this just risks even more damage to your Polka Dot Plant so it’s best to switch out the soil!

To push your plant to recover quickly, trim away the soft, rotten roots and then adjust your watering schedule moving forward, so you aren’t watering your Polka Dot Plant as much or as often as you were before.

Underwatering could also be causing leaf drop

Funnily enough both over- and underwatering can lead to your Polka Dot Plant losing leaves, which makes it super important that you figure out which it is. The thing you don’t want to be doing is watering an overwatered Polka Dot Plant and vice versa.

Luckily, there are a few really easy ways to see if your plant is being underwatered:

  • The leaves are dry and crispy

    If the leaves that are falling off your Polka Dot Plant feel very dry, crispy, shrivelled and look dehydrated, then the problem is probably consistent underwatering.

  • The potting mix is dry

    Like with overwatering, it’s important you measure the moisture in the soil of your Polka Dot Plant. If the soil feels very dry to touch, almost like dust, then your Polka Dot Plant needs more water to prevent it from losing more leaves.

  • The soil is coming away from the sides of the pot

    This is a great method to be able to tell if your Polka Dot Plant is losing leaves due to being underwatered just by looking at it. It will also apply to other houseplants so a nice little tip for you to remember. If you notice that the soil has compacted and is actually coming away from the sides of your pot, then it indicates that you need to increase watering and this may be the cause of your Polka Dot Plant losing leaves.

  • Use a moisture meter

    Getting into the habit of using a moisture meter will help figure out how dry the potting mix is and if you need to water more to stop your plant from losing any more leaves.

How do I go about fixing an underwatered Polka Dot Plant that is losing leaves?

Once you can attribute the leaf drop on your Polka Dot Plant to underwatering, you need to make sure to solve the issue in the right way. You might think that drowning your plant in water will help reverse the issue but this can actually cause your Polka Dot Plant to go into shock, which will lead them to start losing more leaves! Instead, the right way to solve the issue of underwatering is to slowly reintroduce water by giving your plant a little bit once a day for a week. This will slowly dampen the potting mix and hopefully, stop your Polka Dot Plant from losing more leaves.

It might just be natural shedding

If it’s only the oldest leaves that your Polka Dot Plant is losing, then this may be natural ageing. As your plant matures, your Polka Dot Plant will lose some of its oldest, lowest leaves to focus its energy on growing new healthy and often bigger growth.

This is completely natural so you don’t need to worry about this at all. The only thing you should be doing here is monitor the number of leaves that your plant is losing. As long as only 1 or 2 leaves are falling off every few months then this shouldn’t be anything to worry about. If the rate of leaves dropping speeds up then go over the causes above to see if you can figure out what is causing it.

Those are the main reasons why Polka Dot Plants can begin losing their leaves. We recommend always erring on the side of caution when it comes to leaf loss. Assume that it is not natural ageing until proven otherwise as if there is a problem with the care or environment of your plant that is causing leaves to fall, it can also soon cause your plant to die.

Check out our Polka Dot Plant care guide for everything you need to know to help your plant thrive (and not lose any more leaves!)

Fiddle and Thorn is a participant in the Amazon Services LLC Associates Program, an affiliate advertising program designed to provide a means for sites to earn advertising fees by advertising and linking to Amazon.com

Take our houseplant survey!

Quickly respond to our 30 second houseplant survey and get 75% off our Complete Houseplant Care eBook!

Take the Survey

No thanks…

Why is my Polka Dot Plant dying? Causes and Solutions

Last Updated: April 1, 2022

Loved for their speckled leaves, Polka Dot Plants can be a little fussy if the environment or care routine isn’t quite right. There are several reasons that your Polka Dot Plant might look as though it’s dying. Luckily, we have done the research to find out exactly what symptoms are caused by what problem so you can solve the issue and hopefully bring your plant back to full health.

Overwatering is the most common reasons why Polka Dot Plants die

This is because they don’t like super moist soil at all. Too much water will cause the roots to rot and this prevents the plant from getting the needed moisture and nutrients. The most common signs of overwatering are yellow leaves, soft leaves and stems, drooping leaves.

If you think that your plant is suffering from overwatering and root rot, the best thing to do is to take your plant out of its pot immediately and inspect the root system. Carefully trim away any rotten roots as these won’t come back to life and cutting them off encourages new healthy roots to grow. If the potting mix is still quite soggy and waterlogged, replace it immediately instead of waiting for it to naturally dry out as this risks causing more harm to your Polka Dot Plant. This will help to revive your dying plant and help it look a little perkier.

Over the next few weeks, to help your plant recover, adjust your watering schedule so you are only watering once the soil has dried out. You want to also make sure you are removing any excess water that has run out of the drainage holes so that your plant isn’t sat in water.

Using a moisture meter is a great way to know when it’s time for more water. You will also want to adjust your watering schedule depending on the seasons, to ensure that you are cutting down on watering over the colder, darker months of autumn and winter where there is a higher risk of root rot.

Your Polka Dot Plant might be dying due to underwatering

Another common reason that your Polka Dot Plant is dying is a lack of water. Although the plant will forgive you for occasionally forgetting to water, consistent underwatering can lead to a variety of serious issues if not solved in time. The most common signs of an underwatered Polka Dot Plant are dry leaves, light brown spots on the leaves and drooping stems.

Before you start watering your plant more frequently, it’s important to be sure that underwatering is the cause. Take your plant out of its pot to see how dry the potting mix feels. The worst thing would be assuming that your Polka Dot Plant is dying because it needs more water but it’s actually the opposite, or even caused by the wrong light level or temperature.

When lifting up your plant, if it feels quite light and the potting mix is bone dry, then underwatering is the most likely culprit. Your first instinct to reverse this and revive your dying plant might be to drown your Polka Dot Plant to make up for the lack of water, but this can actually cause more damage and shock your plant.

Instead, we recommend watering your plant a little bit once a day for a full week. This will help to moisten the soil without shocking the plant (which can happen if their environment changes suddenly). A moisture meter can help with knowing when to water here too!

A dying Polka Dot Plant can indicate low light levels

If your plant looks very leggy and as if it’s going to die slowly, then a lack of sunlight might be behind it. Especially during winter where the sun is weaker and out for less of the day, Polka Dot Plants can become quite leggy when not receiving enough sunlight. This also can show up with slow or stunted growth.

If you suspect that a lack of natural sunlight is the cause, start by placing your plant nearer to a window to help revive it. If this happens during winter, you can get away with placing it right by the window as the direct sun rays won’t be as intense as in summer. However, if this is happening during the height of summer, you’ll want to be a little more cautious as to how much extra sunlight you give your plant as too much light can also bring a range of issues as we explain next!

The issue can also be too much sunlight

As with a lot of things in the houseplant world, too much or too little of something can cause your Polka Dot Plant to pack it in and die if the problem persists. If the leaves on your plant look quite faded and scorched, then we suspect your plant is getting too much direct sunlight. This is especially a problem during summer where the sun is much stronger.

Try to move your plant a little bit further away from the window so that it doesn’t receive any direct sun. Unfortunately, once the leaves have burnt, there’s no going back so we recommend trimming off the worst affected leaves to encourage new healthy growth and help revive your plant.

A dying Polka Dot Plant can also indicate low temperatures

Another potential factor that may be causing your Polka Dot Plant to die is extreme temperatures, in particular cool air and drafts. They need warm environments to really thrive and can get quite shocked and damaged by drafts coming in from outside or air conditioning vents.

Whilst you might never feel the cold air coming through cracks in doors and windows, if your plant is right next to a small stream of cold air it can really shock and damage the plant during winter, causing it to freeze and die.

Make sure that you draft-proof any windows or doors that are close to your Polka Dot Plants (as well as any heat-loving tropical plants) and trim off any dry or damaged leaves.

Check for pests that might be killing your plant

A slightly rarer issue that might be causing your Polka Dot Plant to die is a pest infestation. Pests suck on the plant’s leaves, exhausting them and causing them to turn yellow and eventually fall off!

Whilst an infestation is more common in a plant that is struggling due to the wrong environment or care, it can happen to a plant in good health too if you’re unlucky so it’s an important one to rule out if your Polka Dot Plant looks like its dying.

Most pests are visible to the human eye if we look closely or use a magnifying glass so we can catch the problem by properly and regularly inspecting the leaves. You want to particularly check the undersides of the leaves as this is where pests often like to hang out! If you spot pests lurking on your plant the first thing to do is isolate your plant from all of your other houseplants to prevent the infestation from spreading. Inspect your other plants too to make sure they aren’t also suffering from pests. The next step is to trim off the worst affected leaves to curb the growth of the infestation. Then give your plant a wash down in the sink and treat with an insecticide/neem oil.

A pest infestation isn’t always a death sentence if you have caught the problem early. But if you are struggling to stop the infestation after treating it several times with an insecticide, then it may be best to say goodbye to your plant. As much as this can be heartbreaking, it prevents the problem from spreading to your other beloved houseplants so is often better in the long run.

Polka Dot Plants can be dying due to overfertilisation

If none of the other causes seem to match up with what your plant is suffering from, then it may be due to over-fertilisation. Whilst Polka Dot Plant love regular feeding during the months of spring and summer to aid healthy growth, too much fertiliser can cause scorched leaves and yellow patches.

Make sure you aren’t fertilising at all during autumn and winter as this is a more dormant growth period so your Polka Dot Plant won’t need any feed. When you are fertilising during spring and summer, make sure you are using less than the recommended amount on the bottle. Every houseplant is different, not just the type of plant, but also the size and maturity which means there is no one-fits-all recommended amount and you’ll need to adjust for each plant.

If you have been using slow-release fertiliser within the soil then remove the spikes or replace the potting mix if you’ve used pellets in the soil. If you have been using a water-soluble fertiliser then it’s easier to solve as you just have to stop. Trim away any yellow leaves and give your Polka Dot Plant a shower so the potting mix gets a proper rinse through. Wait a few months before fertilising again!

So those are the most common reasons why Polka Dot Plants start to die. There are several quite different reasons so it’s important you diagnose the correct problem and rectify it as soon as possible. We are strong believers in trying to bring your plants back to life, even if they look completely dead, so don’t give up on it unless you really have to!

If you want to find out more about caring for your plant, as well as other common issues that might crop up, check out our Polka Dot Plant care guide.

Fiddle and Thorn is a participant in the Amazon Services LLC Associates Program, an affiliate advertising program designed to provide a means for sites to earn advertising fees by advertising and linking to Amazon.com

Take our houseplant survey!

Quickly respond to our 30 second houseplant survey and get 75% off our Complete Houseplant Care eBook!

Take the Survey

No thanks…

Why is my Polka Dot Plant drooping?

Last Updated: April 1, 2022

Adored for their colourful dotted leaves, if your Polka Dot Plant has started to look a little limp, lifeless and droopy, then it means that something in either your plant’s environment or the care it is receiving isn’t quite right. If the issue has progressed quite far, then droopy leaves are often accompanied by other visible issues. However, if your Polka Dot Plant has only started to droop and shows no other signs of unhappiness then this often means you have caught the issue fairly early. This is great in terms of being able to quickly and successfully solve the issue and get your colourful Polka Dot Plant looking healthier again.

In this post, we will guide you through the most common causes of a droopy Polka Dot Plant so you can diagnose the issue and take all the needed steps to get your plant back to its normal self again in no time.

Underwatering is the most common cause of drooping Polka Dot Plant leaves

Consistent underwatering can lead to a variety of serious issues if not solved in time, but the first thing that tends to happen is your Polka Dot Plant will start to droop down. This is usually an early warning sign so if there are no other visible problems, you have probably caught the issue pretty early which is ideal and will really help when it comes to getting your plant back on track.

How do I know if underwatering is the cause of the droopy leaves?

Before you start watering more frequently, it’s crucial that you are 100% sure underwatering is the cause. Giving a plant more water when it doesn’t need it can lead to some large problems, most worrying of all, plant death. To know if your Polka Dot Plant is drooping due to a lack of moisture, remove it from its pot and inspect the potting mix and root system.

If the potting mix feels very dry to touch, almost like sand that falls through your fingers, then this is a sign your Polka Dot Plant needs more water. You should also give the roots a check as shriveled, dry and crispy roots means the issue has been going on for some time.

How do I fix an underwatered Polka Dot Plant?

Your first instinct to solve the issue might be to drown your Polka Dot Plant to overcompensate for the lack of water, but this can actually cause more damage and shock your plant. If this happens, your plant can actually lose leaves as a result.

Instead, the best way to bring your underwatered Polka Dot Plant back to full health is to water your Polka Dot Plant plant a little once a day for a few days. After a week you want to go back to a more normal care routine, making sure that you don’t forget any of your routine waterings, of course!

A lack of sunlight can also cause droopy Polka Dot Plant leaves

Although a lack of water tends to be the most common reason why Polka Dot Plants become droopy, not enough sunlight may also be a factor. Polka Dot Plants need a good amount of bright but indirect light to thrive.

If your Polka Dot Plant is in a spot that is too shady, then it may start to droop its leaves as a result. This can happen more in winter when the sun is weaker and out for less of the day. What was once a good place for your Polka Dot Plant in summer, may not be giving it enough light in winter. Drooping leaves is one of the early signs but if the problem develops you’ll also notice discolouration of the leaves, stunted growth and your plant shedding leaves.

If you suspect a lack of sunlight is causing drooping leaves on your Polka Dot Plant, then move it to a slightly sunnier spot in your home. Keep it away from too much direct sunlight (especially in summer) as this can scorch the delicate leaves. If you are unable to give it more natural sunlight, then investing in an LED grow light is a great way of supplementing light levels!

A drooping Polka Dot Plant can also be caused by cold temperatures

If you have inspected the potting mix of your Polka Dot Plant, analysed your watering schedule and are certain that your plant is getting enough light, then you might want to take a look into the temperature around your plant and how this fluctuates.

If your Polka Dot Plant is near any drafty windows, or close to an AC vent, this cold air can be quite harmful to your plant and can cause it to droop as a result. Cold temperatures can also cause brown leaves and stunted growth so look out for these other causes too.

Using a digital thermometer will be your best friend here as it’s the only way to really know how the temperature changes around your Polka Dot Plant. Cold air also increases the risk of root rot as it takes longer for the potting mix to dry out. This is the perfect mix for problems such as root rot to occur which is why you should be extra cautious when it comes to caring for your plants in winter or in colder rooms in your home.

Those are the three main reasons why a Polka Dot Plant has started to droop. All three of these factors can cause real damage to your Polka Dot Plant if not solved and you will start to see other causes beyond only a drooping plant. It’s important to act quickly after spotting signs of unhappiness on all of your plants and the Polka Dot Plant is no different. Their delicate leaves and stems make them quite susceptible to problems but as long as you take the right steps to solve the issue, then you should be able to bring your Polka Dot Plant back to full health, with no drooping leaves in sight.

Check out our Polka Dot Plant care guide to learn more about how to properly take care of your plant.

Fiddle and Thorn is a participant in the Amazon Services LLC Associates Program, an affiliate advertising program designed to provide a means for sites to earn advertising fees by advertising and linking to Amazon.com

Take our houseplant survey!

Quickly respond to our 30 second houseplant survey and get 75% off our Complete Houseplant Care eBook!

Take the Survey

No thanks…

Why is my Pilea losing leaves?

Last Updated: April 1, 2022

Pilea, also known as Chinese Money plants (because of their round leaves), can be quite sensitive plants. They are a little fussy when it comes to their environment which can mean they begin to drop leaves quite often. There are quite a few reasons why your pilea might be losing its leaves, the main ones being overwatering, not enough light, stress, dry air, nutrient deficiency, and pest infestation.

Overwatering could cause leaf drop in Pileas

As with a lot of things in the houseplant world, proper watering can be one of the biggest issues. Overwatering is a key concern when it comes to Pilea, and it can be a major reason why leaves may be dropping off.

We always tend to go for a little and often view towards watering and this is especially the case with Pilea. They don’t like their soil to be too dry but hate it even more if they are sat in water for too long. This can very quickly cause root rot which will mean leaves start to drop and the whole plant becomes quite unstable. If you think your Pilea might be suffering from root rot, it’s important to check right away and change out the soil if needed.

We recommend picking up your Pilea before and after watering. This should give you a feel for when your Pilea might need a little more water, simply by giving them a lift. You can also use a moisture meter to see when your Pilea needs watering. You just pop them into the soil and it’ll show you how damp or dry the potting mix is.

Another thing you can do to avoid overwatering is use a self-watering pot or self-watering globes. They release water to your Pilea only when it needs it and will help to avoid waterlogged soil and root rot.

Lack of sunlight could be the problem

Pilea thrive in bright, indirect sunlight and can really struggle with anything less. Make sure you place them somewhere they receive several hours of bright sunshine but keep them away from any direct sunlight as this can very quickly burn their leaves (and there is no going back from that, unfortunately). If your Pilea is getting too little sunshine, they will often shed some of the older leaves to keep their energy reserves for the new healthy growth. So make sure to move your Pilea somewhere brighter and it should stop shedding its leaves.

Using a light meter can be really handy to figure out if your Pilea is in the right place and getting the right amount of sunlight. Light levels can really differ throughout the day and throughout the year as well so it’s important to keep an eye on it as a lack of sunlight (and too much) can cause a lot of issues. We love this light meter which you can pick up from Amazon.

Complete Houseplant Care eBook

Our comprehensive (and rather good looking) eBook that will teach you everything you need to know to successfully care for, and maintain your houseplants!

Buy on

Your Pilea could be stressed

Much like humans, pilea can get pretty stressed out if any changes occur. Things like repotting, propagating or moving to a new spot can cause your plant to get a little shocked and drop a few leaves. It is nothing to worry about and it will just take some time for your pilea to return to normal and for healthy growth to continue.

One thing to make sure of if you have moved your pilea to a new spot is that the conditions are the same, if not better than the one it was previously in. Your plant will struggle with worse light conditions so just keep a close eye on it for a while to see how it is coping in its new spot. Using a light meter and digital thermometers are a great way to check the environment.

The air is too dry for your Pilea

Pilea prefer a more humid environment, so if your home tends to have dry air it’s worth your time to try and increase the humidity a little as this can often be a reason why your plant is dropping its leaves.

There are few really simple techniques to keep the humidity higher than normal for your Pilea; you can mist the leaves with a spray bottle every few days (we love these amber glass bottles from Amazon) or maybe sit your plant in a tray with water and some pebbles. The most consistent way to increase the humidity is to use a humidifier near your Pilea.

You can also always pick up a good humidity monitor to keep track of everything if you’re more concerned. Make sure to also move your Pilea away from any air conditioning units as these create very dry air!

Lack of nutrients in the soil

Your pilea may be dropping leaves because of nutrient issues. It’s a safe bet to swap out some of the soil in the pot (that isn’t filled with roots) with a good rich potting mix or compost. We also use a liquid fertiliser during summer to help with growth.

From there it’s good to consider the water you’re giving to your Pilea. If you’re from an area with particularly hard water, your pilea could be getting too much calcium. It’s rare that this causes any real issues, but if you’re concerned, make sure you replace the soil a little bit more often as calcium toxicity can reduce the uptake of other nutrients.

Your Pilea could be in the wrong temperature

As you know by now, Pilea are very sensitive to their environments and this includes temperature. If your pilea is getting too much sunlight, it will also cause it to overheat which can cause it to lose some leaves. The perfect spot for your plant is just a touch further inside a bright room, potentially an east-facing window if there’s a good spot free.

If you’re not already, make sure to open your windows every now and then to make sure that the air in your room is circulating properly. This reduces the risk of hotspots forming in the room where your Pilea is sat. The ideal temperature for Pilea is between 18°C – 24°C, so it shouldn’t be too difficult to keep in a good range. You can always pick up a digital thermometer to check the spot your Pilea is sat for piece of mind.

Your Pilea could have become pot bound

With the possibility of causing multiple other issues, apart from a loss of leaves, root crowding in your Pilea is worth checking every so often. Let your plant dry out for a couple of days after watering and then gently lift it from its pot, if all you can see are roots then it seems like overcrowding could be the reason why your pilea is losing leaves.

Find a pot that is no more than a few centimetres bigger in diameter than the one before. If you repot your pilea into a pot much bigger than before, the roots will struggle to keep the plant stable. Repot with some more nutrient-rich soil and gently dig through the roots with your fingers to separate them out a little before repotting your plant with a little bit more room to grow.

If you find that when you take your Pilea from its pot that some of the roots have turned brown and soft then you could be in for the far bigger problem of root rot. In this case make sure to repot as soon as you can, removing as many of the infected (brown) roots as possible. You can read all about how to prevent, spot and fix root rot in our guide.

Pest infestation could be harming your Pilea

It is good to check the underside of the leaves that have fallen off, as well as the healthy leaves for signs of pests. If you find bugs, wipe each leaf with warm soapy water to try and remove as many as possible. We tend to recommend giving your plants a shower but pilea are quite sensitive plants so the water pressure can easily damage the delicate stems.

It is also good to treat your pilea with neem oil to fight the infestation. Make sure to check over your other plants in the room to see if any other plants have pests. Make sure to keep your pilea (and other infected plants) a good distance away from any of your other houseplants as you don’t want the infection to spread.

There is quite a range of reasons why your pilea may be losing leaves. It is good to go through the list and eliminate the ones that you think are definitely not the cause and go from there. Once you have diagnosed the problem, make sure to keep a close eye on your pilea to check that no other problems are developing. Even though pilea are quite demanding and sensitive plants, they are one of the most beautiful and will repay you for taking good care of it!

Fiddle and Thorn is a participant in the Amazon Services LLC Associates Program, an affiliate advertising program designed to provide a means for sites to earn advertising fees by advertising and linking to Amazon.com

Take our houseplant survey!

Quickly respond to our 30 second houseplant survey and get 75% off our Complete Houseplant Care eBook!

Take the Survey

No thanks…

Why is my Pilea drooping? Causes and Solutions

Last Updated: May 4, 2022

If you start to notice that your Pilea’s leaves are drooping down then this might be a sign of unhappiness or shock. The good news, however, is that drooping leaves are often one of the earlier signs of distress which means it is a little easier to fix before it causes irreversible damage. It’s important to check over your plant for other signs that might help you figure out the cause of the drooping leaves.

In this article, we will go through each of the causes of a drooping Pilea, starting with the most common issue of watering problems as well as shock, low light and environmental shock.

Underwatering can cause droopy Pilea leaves

One cause of drooping Pilea leaves is a lack of water. Although Pilea plants don’t like to be sitting in a lot of moisture, they will struggle if their soil is too dry for long periods of time. It is always important to keep an eye on the moisture levels in your Pilea’s soil so you know when your plant is ready for watering.

Before you change anything about how you water your Pilea, it’s important to check the soil and root system to confirm if underwatering is causing your plant to droop. You can either take your Pilea out of its pot to check the moisture or use the chopstick/finger method. However, if you’re struggling to know when to water your Pilea, then the best bet is to invest in a moisture meter. These take all of the guesswork out of watering and will tell you when the soil is too dry.

Another telltale sign that your Pilea is being underwatered is if the root system has started to crisp up. This usually means that the issue has been going on for a while so you might spot some other issues popping up too.

If you find that your Pilea’s soil is very dry, water it a little every other day for a week to help revive it. Your first instinct might be to give your plant lots of water straight away but this can actually be harmful to your plant if the soil goes from one extreme to the other. Yes, plants can get shocked too by a sudden change in their environment. So instead you want to reintroduce frequent watering for a week or two and this should solve the problem.

Hopefully, with a bit of water your Pilea’s leaves should stop drooping and there shouldn’t be anything else you need to do to solve the issue. To prevent the problem from occurring again and harming your Pilea, it’s important to get to adjust your watering to your plant’s needs as well as seasonal changes that impact how much water you need to give your Pilea.

A drooping Pilea can also indicate overwatering

What is strange about drooping Pilea plants is that they can be caused by both overwatering and underwatering. This is because both problems cause damage to the root system, depriving your Pilea of needed nutrients and moisture, causing it to droop.

Overwatering is one of the biggest problems in the houseplant world as it can cause a whole range of issues that some plants can not recover from. However, if the leaves are drooping but are still quite green and healthy then the problem should not be so advanced luckily. The reason why overwatering is so damaging to your Pilea is that it can very quickly cause root rot. Once this occurs, you will very quickly see your plant deteriorate and develop issues from brown leaves to droopy stems. It means your plant can become very unstable as the roots aren’t able to support it.

As with underwatering, it’s very important that you confirm the issue before changing anything about how much or how often you water your Pilea. Holding back water from a plant that isn’t being overwatered will start to cause a whole range of issues beyond the initial drooping problem. Use a moisture meter or simply take your plant out of its pot to see if the soil is waterlogged. Another sign is if the roots are starting to feel soft and have become very dark in colour.

If you have confirmed that your Pilea is suffering from overwatering, replace the soggy potting mix right away and trim away any rotten roots. Don’t wait for the soil to dry out naturally as even a few more days in soggy soil can cause some real issues for your Pilea and can make the problem a lot harder to solve.

Adjust your watering schedule to avoid repeating the problem and over the next few weeks, you should start to see your Pilea improve. Moving forward, make sure to either cut back how much water you give your plant, or how frequently you water to allow time for the potting mix to dry out.

It takes a little longer for the plant to recover from overwatering than some other issues due to the damage to the root system so don’t give up!

Drainage issues might be to blame

Drooping leaves on your Pilea can also be caused by drainage issues in your pot, rather than actually the amount of water you are giving it.

Although you could be watering the correct amount, if your pot isn’t draining the water in the right way, it could cause the soil to become waterlogged. This will cause the same issues as overwatering as the roots will begin to rot and your plant will become starved of what it needs to properly thrive. The first sign of this will be drooping leaves but it can escalate to more irreversible problems if not solved quickly.

You can very easily increase the amount of drainage in the soil by mixing in a small amount of perlite. This not only aids drainage out of the drainage holes (you should also check to make sure your pots have drainage holes) but perlite can also help with aeration of the soil which is an added bonus.

Another easy step is to add a few small stones or pebbles to the bottom of your pots, this helps in making sure that the drainage holes are never blocked by soil or any loose debris.

If your Pilea is in a plastic pot, we also recommend switching this out to a terracotta or clay pot. These allow some of the excess water to evaporate out of the sides of the pot whereas plastic pots hold in every single drop of moisture. We love these terracotta pots from Amazon. Although they tend to be a little more expensive than plastic pots, they are definitely cheaper than having to buy new plants!

Drooping leaves might also be due to shock

If you have recently moved house or moved your Pilea to a new spot, then this change may be causing the leaves to droop. Plants can get quite stressed if their environment changes from one day to another and will show this in a variety of ways. One of which is drooping their stems and leaves.

Shock can also be caused after repotting or propagating as those things can be quite stressful for plants. Luckily, the drooping should be temporary and as long as the environment and care is what your Pilea needs, then there should be no reason why your Pilea won’t return to normal after a few days/weeks. If your Pilea doesn’t seem to be undrooping, then this indicates that there might be a hidden problem so take a look through the other causes to see what is happening with your Pilea.

Cold temperatures can also cause a drooping Pilea

If you have inspected the potting mix of your plant, analysed your watering schedule and not made any changes to your Pilea’s environment, then it may be extreme temperature fluctuations that are causing the drooping leaves on your plant.

Pilea plants struggle if exposed to cold drafts and can begin to droop down as a result of this stress. You may not notice the cold air coming through cracks in doors and windows but if your plant is right next to any cold air streams then this can over time be a real issue.

Make sure that you draft proof any windows or doors that are close to your Pilea as well as move it away from any air conditioning vents as these can be quite damaging to your plants during summer. Although you might find the cool air a refreshing break from the heat, your Pilea might not always feel the same.

Using a digital thermometer is an easy way to monitor the temperature in your home and allows you to check for any cold drafts. They’ll also help you to avoid the other extreme as well as hotspots that can cause real havoc with your plants if they go unnoticed.

If your Pilea is living in a cool room, it’s also more at risk from overwatering and root rot. Your plant won’t need as much water as the soil will take a lot longer to dry out. This is the perfect mix for problems such as root rot to occur which is why you should be extra cautious when it comes to caring for your plants in winter or in colder rooms in your home.

Low light can also cause a droopy Pilea

Pilea plants like bright, indirect light and if they spend too long in a shady spot, they might start to droop and lose a few leaves. Lower light levels can also mean that your Pilea begins searching for the light by leaning into the light source. This can often mean they become wonky and droopy as a result.

You might also need to think about moving your Pilea around depending on the seasons. In the winter months, when the sun isn’t as strong (and out for less of the day) it might be necessary to move your plant a little closer to the window to make use of the limited sunlight as best as possible.

If you aren’t able to find a sunnier spot for your Pilea then you should consider getting yourself an LED light like this one. These help to supplement light and keep your plants thriving through the darker months. They are also great to use when propagating plants so a great investment all around.

Your Pilea might just need a support stake

There is one final cause of a drooping Pilea that we need to mention and that is natural drooping. Pilea plants grow in weird and wonderful ways and because they have such a long thin main stalk, it can be quite natural for them to lean, fall and droop as they mature. You might be mistaking this natural drooping for an issue when in fact it is nothing to worry about at all.

Check over your Pilea and its environment and cross-check it with all of the above-mentioned factors to ensure that there is nothing wrong with your plant. Monitoring the soil moisture, temperature and changes in the environment will help you rule out any more serious factors.

If your Pilea is simply drooping due to natural causes then you might choose to support it so that it grows upwards. Whilst you can let it continue as it is, there is a small risk that the stem can break if it falls too much. This is why we like to use a support stake to tie our Pilea to which helps it grow straight upwards.

Those are the most common causes of a drooping Pilea plant! It’s important that you diagnose the issue as soon as you spot the problem as this gives you the best chance of fixing it (provided it’s not simply natural drooping). The longer the issue goes on, the more likely it is that it’s causing more serious damage to the root system and your plant and reviving it becomes a little more tricky. You also risk more permanent issues occurring such as brown or yellow leaves or leaves falling off your Pilea.

If the issue doesn’t seem to be getting better or you’re struggling to diagnose it, then you might want to think about propagating part of your plant to save at least some of it. Propagating any healthy pups or even some main stem cuttings mean that you don’t have to say goodbye to your plant completely if the worst should happen. Check out our Pilea propagation guide for more information.

If you want to learn more about how to best care for your plant and avoid any more issues occurring in future, check out our Pilea care guide.

Fiddle and Thorn is a participant in the Amazon Services LLC Associates Program, an affiliate advertising program designed to provide a means for sites to earn advertising fees by advertising and linking to Amazon.com

Take our houseplant survey!

Quickly respond to our 30 second houseplant survey and get 75% off our Complete Houseplant Care eBook!

Take the Survey

No thanks…

Why is my Philodendron Birkin losing leaves? Causes and Solutions

Last Updated: April 1, 2022

One of the best white and green striped leaves, the Philodendron Birkin isn’t a super hardy plant and can be sensitive to changes in its environment. If something isn’t as your Birkin might want it, you may notice your plant losing a few leaves. This might simply be caused by natural ageing (more on that below) but it’s important that you rule out other issues as if things progress, and more leaves are falling off your plant than are growing new, then soon your plant will die.

Below we will go through each of the different causes of leaf drop on Philodendron Birkin plants so you can diagnose the issue as well as treat it and prevent it from harming your plant in future.

Direct sunlight

If your Philodendron Birkin is receiving a high level of intense direct sunlight, it can cause the leaves to become quite burnt. However, beyond that, it will mean that your plant requires a lot more water than normal and will dry out quickly. If you aren’t adjusting the water enough to compensate for the increase in light (and often temperature), then your plant might start to lose leaves as it can’t maintain that much healthy growth.

If you think that direct light might be causing issues for your Philodendron Birkin, then it’s a super easy fix. Simply move your plant to a slightly shadier spot in your home. When choosing a new spot, remember that your plant won’t do so well in dark areas of your home so find a nice balance. During winter, you tend to be able to get away with moving your Philodendron Birkin closer to the window as the sun is weaker and the days are shorter so the risk of lead burn and your plant drying out enough to lose leaves is a lot lower.

Overwatering

Too much water can also lead to your Philodendron Birkin losing leaves. If you notice the stems and leaves have become softer than usual this may be because the roots are beginning to rot. This means that the plant isn’t able to get all the nutrients it needs. When this happens you’ll notice your Philodendron Birkin not only losing leaves but also drooping down quite dramatically.

To figure out if overwatering is the cause of the loss of leaves, we recommend checking the moisture levels in the soil immediately and replacing it if waterlogged. Don’t let it dry out on its own as you risk more damage to the root system and it might be too late to save your Birkin.

If the root system has started to rot, trim away the worst affected areas and adjust your watering schedule so you allow time for the potting mix to dry out. Using a moisture metre can really help you know what it’s time to water.

Underwatering

Another common cause of leaf drop in Philodendron Birkins is insufficient watering and dry soil. Although yes, as you’ll have read above, too much water causes these issues, well underwatering can also cause them. This is also because the root system will become damaged and crispy and your Philodendron Birkin won’t be able to take up what it needs to maintain healthy growth.

The best way to check whether or not you are overwatering is the ‘finger test’. Dig a finger a few centimetres into the soil to feel if it is too dry. You can also use a moisture meter to ensure you are watering your Philodendron Birkin properly.

Aside from checking the potting mix and inspecting the root system, you can tell if your plant is too dry by looking at the way in which the dry parts have developed on the leaf. If the brown spots are at the edge of the leaf, rather than in the middle, this is a sign of a dry plant. Another thing to look out for is which leaves are turning brown. If you find there are dry spots on leaves throughout the plant, from top to bottom, this also points to dry soil.

Once you have figured out that underwatering is the cause of the leaves falling off your Philodendron Birkin, it’s crucial that you reintroduce water slowly. Dumping a watering can full of water on your plant won’t do it any favours and can actually cause it to go into shock. Philodendron Birkin plants don’t like a sudden change in environment so water it a little each day for a week.

Pests

Another possible but rarer cause of Philodendron Birkins dropping their leaves is a pest infestation. This is more common on plants that spend time outside but it can still happen to your indoor plants if you’re unlucky! Insects such as mealybugs or spider mites can take hold of the plant and suck on their nutrients which will cause leaf damage. Over time these leaves will begin to fall off your Philodendron Birkin.

Use a magnifying glass to try and spot the pests on the plant. They like to hang out on the undersides of leaves or near the leaf and stem joints. Spotting pests is, however, the easy part – treating them is a bit trickier. First, isolate your plant to ensure that pests don’t jump onto any of your other beloved houseplants. Then cut away the worst affected leaves to curb the initial growth of the infestation. Shower your plant down and treat with an insecticide. There have been times where we have been unable to save a plant due to pests so be prepared for this.

Natural shedding

Luckily, there is a totally normal reason why your Philodendron Birkin is losing leaves and it doesn’t indicate there is a problem at all. In fact, it signals that your plant is maturing well.

Philodendron Birkin plants occasionally lose a lower leaf as a natural sign of ageing. This is absolutely nothing to worry about but make sure that you keep track of how many leaves have dropped and how often this is occurring. If you feel it is losing too many leaves, double-check the environment around your Philodendron Birkin as it could be a sign of one of the issues detailed above. There is no harm in giving the soil and roots a once over to check for signs of root rot and keep an eye on any changes in light or temperature that may be affecting its health.

Those are the most common reasons why Philodendron Birkin lose some of their leaves. It’s important to first establish whether or not it is natural ageing that is causing leaves to fall off. If you are able to rule that out, then you must act quickly to establish what the cause is. Leaf drop is not far away from your plant dying on your entirely, so once you’ve spotted the problem it’s a race against time to treat it and save your Philodendron Birkin.

To find out more about how to best care for your plant, as well as how to spot and treat other problems that you might face with your plant, check out our Philodendron Birkin care guide.

Fiddle and Thorn is a participant in the Amazon Services LLC Associates Program, an affiliate advertising program designed to provide a means for sites to earn advertising fees by advertising and linking to Amazon.com

Take our houseplant survey!

Quickly respond to our 30 second houseplant survey and get 75% off our Complete Houseplant Care eBook!

Take the Survey

No thanks…

Why is my Philodendron Birkin drooping?

Last Updated: July 27, 2022

With its incredible white striped leaves, there’s no question as to why the Philodendron Birkin plant has very quickly become one of the most popular plants. Although they aren’t the most difficult to look after or sensitive plants out there, it can often happen that the leaves or stems on your Philodendron Birkin start to droop down. If you do notice your Philodendron Birkin plant is drooping, it’s not the end of the world and can be fixed pretty easily.

If there are no other issues other than the drooping leaves, then it actually means you’ve caught the problem fairly early which gives you the best chance at getting it back to full health. Below you’ll find the most common reasons why your Philodendron Birkin may have drooping leaves as well as how to fix the issue and prevent it from happening again in future.

Overwatering is the most common cause of Philodendron Birkin’s Drooping

It’s super easy to do accidentally and can cause quite severe problems fairly quickly that plants find it hard to recover from. If drooping leaves is the only sign of unhappiness, then hopefully the problem shouldn’t be too advanced yet. You may find that the drooping leaves are fairly soft which is another sign of overwatering.

The problem with overwatering is that it causes waterlogged soil which then causes the roots of your Philodendron Birkin to rot. Once the root system starts to become damaged, it can’t take in the vital nutrients it needs to thrive. It also means that the roots can’t physically support the plant anymore and it’ll start to hang and droop down. The combination of these two issues is why overwatering causes your plant to droop.

If you think your Philodendron Birkin might be suffering from overwatering and root rot take your plant out of its pot immediately and inspect the root system. If the potting mix feels soggy and clumpy replace it straight away after trimming off any rotten roots. Don’t wait for the potting mix to naturally dry out as this risks causing more harm to your plant.

Over the next few weeks, only water your Philodendron Birkin when the potting mix feels dry and hopefully your plant can begin to recover. To avoid the problem from reoccurring, get into the habit of checking the moisture in the potting mix before watering your Philodendron Birkin. We recommend buying a moisture meter to make sure you are only watering your plant when it needs it.

Underwatering can also cause drooping leaves

The strange thing about drooping leaves on a Philodendron Birkin is that as well as too much water, they can also be caused by not enough water. Consistent underwatering can lead to a variety of issues and sometimes plant death if not solved in time, but even just the occasional underwatering can result in drooping leaves.

If the leaves are quite dry and are drooping down then we suspect that a lack of water is the culprit. However, before you start watering more frequently, we recommend taking your plant out of the pot and seeing how dry the potting mix feels. The worst thing would be assuming that your Philodendron Birkin is drooping because it needs more water but it’s actually the opposite, or even caused by temperature fluctuations.

Once you are sure that the soil is bone dry and it’s underwatering that is causing your Philodendron Birkin to droop, then slowly reintroduce watering. Your first instinct might be to drown the plant in water but this can actually cause more damage and more brown leaves. This is because plants get shocked by a sudden change in environment.

Instead, the best way to treat underwatering is to water your Philodendron Birkin plant a little bit once a day for a week. After a week you want to go back to a more normal care routine, making sure to check the moisture in the soil frequently to avoid the leaves drooping again.

Picking up a moisture meter like this one will make this easier to monitor, but investing in a nice self-watering pot will take out all of the guesswork and guarantee a great result. We recommend this one from Amazon all the time and love it!

Cold temperatures could cause your Birkin’s leaves to droop

If you have inspected the potting mix of your Philodendron Birkin, and analysed your watering schedule and just can’t be sure that watering issues is the cause of the drooping leaves, then it may be cold temperatures that is the reason.

Philodendron Birkin plants are native to the tropics so thrive in warm temperature meaning they’ll struggle in homes with cold drafts. You may not notice the cold air coming through cracks in doors and windows but if your Philodendron Birkin is right next to them then the constant stream of cold air from outside can really shock and damage the plant.

Make sure that you draft proof any windows or doors that are close to your Philodendron Birkin (and other heat-loving houseplants) as well as moving them away from any air conditioning vents as these can be quite damaging to your plants during summer.

If your Philodendron Birkin is living in a cool room, it’s also more at risk from overwatering and root rot. Your plant won’t need as much water as the soil will take a lot longer to dry out.

This is the perfect mix for problems such as root rot to occur which is why you should be extra cautious when it comes to caring for your plants in winter or in colder rooms in your home. If warming the room isn’t an option, try out a heat pad like this one through the colder months to mitigate the risk of root rot entirely.

Those are the most common reasons why Philodendron Birkin plants might start to droop down. The problem should fix itself a couple of days or weeks after working to solve the issue and as long as you aren’t spotting any other issues like brown or yellow leaves, then this is a good sign. Keep a close eye on your Philodendron Birkin after changing the environment or watering routine just to see how it gets on as plants can be a little fussy when things change.

If you want to find out more about caring for your Philodendron Birkin, as well as how to diagnose and fix other common issues, check out our Philodendron Birkin care guide.

Fiddle and Thorn is a participant in the Amazon Services LLC Associates Program, an affiliate advertising program designed to provide a means for sites to earn advertising fees by advertising and linking to Amazon.com

Take our houseplant survey!

Quickly respond to our 30 second houseplant survey and get 75% off our Complete Houseplant Care eBook!

Take the Survey

No thanks…