The Best Houseplants with Pink Flowers

Last Updated: November 6, 2023

Azalea Flower

Azalea Flower

We’re in love with any houseplant, flowers or no flowers but there’s something truly special about plants with pink blooms. They instantly transform your space and become a real focal point of the room.

Throughout this article, we will embark on a botanical journey exploring ten of the best houseplants with pink flowers.

Why Choose Houseplants with Pink Flowers?

Why would you opt for houseplants with pink flowers? Well, there are plenty of reasons, and here are some of the top ones:

  • Aesthetics: The beauty of pink blossoms liven up any living space, adding an unmatched splash of color and visual interest. Whether pastel or vibrant, the pinks flowers are somethind special!
  • Mood Enhancing: Studies suggest that pink flowers can induce a calming effect, reducing feelings of anger and anxiety. Having them around is a simple yet effective way to enhance your mood and brighten your day.
  • Variety: From delicate roses to exotic orchids, the assortment of houseplants with pink flowers is pretty big, giving you ample choices to choose from to find the perfect plant for your space.
  • Interior Design Appeal: Pink flowers are incredibly versatile when it comes to interior design. They can stand as practical additions to a sleek, modern space or add a soft, romantic touch to a traditional setting.

Top 10 Houseplants with Pink Flowers

1. The Polka Dot Plant

First on our list is the Polka Dot Plant, or Hypoestes phyllostachya. This plant demands attention with its vibrant leaves speckled in pink. But it’s not just the leaves that come in a shade of pink, as they can grow small pink flowers too.

Native to Madagascar, this plant adapts well to indoor conditions, making it a favorite among houseplant enthusiasts.

What makes it even more appealing is its ability to thrive under a variety of light conditions, from medium to bright indirect light. However, strive to give it plenty of light to maintain its vibrant color. Under insufficient lighting, the leaves may lose their distinctive spots and will not grow flowers.

As for water, the Polka Dot Plant prefers the soil slightly moist, but not waterlogged. You need to strike the right balance – too much water may cause root rot, while too little can lead to wilting.

An added bonus is that Polka Dot Plants are non-toxic to animals. So, if you have curious pets who like to nibble on plants, this is an excellent choice.

2. The Vibrant Hibiscus: A Tropical Pink Flowering Houseplant

Known for their large, dramatic blooms, Hibiscuses are a perfect way to inject a dash of paradise into your surroundings.

Their luscious, velvety flowers can vary from lighter shades of pastel pink to richer, deeper hues.

  • Light Requirements: Hibiscus thrives under bright, indirect sunlight. A spot near an east or west-facing window is ideal for this houseplant and will encourage their pink flowers to grow.
  • Watering: They prefer evenly moist soil, but don’t allow the plant to sit in water. Allow the top inch of soil to dry out before watering again. Overwatering could lead to root rot, which, believe us, you don’t want.
  • Temperature and Humidity: This tropical gem loves warm temperatures and higher humidity levels. You can use a pebble tray filled with water nearby or mist your plant frequently.

In typical indoor conditions, a hibiscus plant can reach a modest height of 2-3 feet. While outside in nature, they can expand up to a staggering 8 feet.

3. The Azalea: A Dainty Pink Flowering Houseplant

With its bursting pom-pom-like buds, vibrant pink blossoms, and lush foliage, the Azalea is a spectacle of spring in your living room.

Native to Asia, North America, and Europe, Azaleas are part of the Rhododendron family. But what sets the Azalea apart from its relatives? It’s the clusters of pink dainty flowers.

Caring for Your Azalea

Azaleas appreciate a cool, bright location, but not in the path of direct sunlight.

These pink bloomers prefer their soil moist and well-drained, with a pH level on the acidic side if you want to get technical.

When it comes to feeding, Azaleas prefer a bit of a feast during their blooming period. Use a slow-release fertilizer designed for acid-loving plants. Slow-release fertilizers provide a steady supply of nutrients, ensuring a healthy bloom.

Well, the best time to prune your Azalea is just after its blossoming season. This allows the plant to focus energy on new growth and future pink flowers.

4. The Orchid: A Sophisticated Pink Flowering Houseplant

These plants have a reputation for being finicky, but their care is relatively straightforward once you understand their needs.

The Orchid family, or Orchidaceae, offers numerous options for pink blooming varieties. From the intricate Phalaenopsis, known as the ‘Moth Orchid,’ to the flamboyant Cattleya, often used in corsages.

Orchids typically bloom in the most alluring shades of pink, from delicate pastels to vibrant hot pink hues. Their blossoms not only add a pop of color but also bring an exotic and sophisticated touch to your indoors.

Care and Maintenance of Pink Flowering Orchids

Orchids may seem daunting to care for due to their unique aesthetic, but these lovely houseplants are not as high maintenance as you might think. They require specific conditions to thrive, but nothing you can’t achieve with a bit of knowledge and attention.

  • Light: Orchids need plenty of indirect light. Placing them by an east or south-facing window would be ideal. Be watchful of their leaves; if they turn dark green, it may indicate that your orchid is not getting enough light and this will impact their ability to grow new pink flowers.
  • Water: Overwatering is a common mistake when taking care of orchids. Aim for a good soaking every seven to ten days and ensure they’re thoroughly dried out in between to avoid root rot.
  • Humidity: These tropical plants love high humidity. Consider placing them in a well-lit bathroom, or create a humidity tray by placing the pot on a tray of pebbles filled with water.
  • Temperature: Orchids prefer stable temperatures between 60 to 75 degrees Fahrenheit. Avoid sudden temperature changes, which can shock the plant and potentially affect its blossoms.
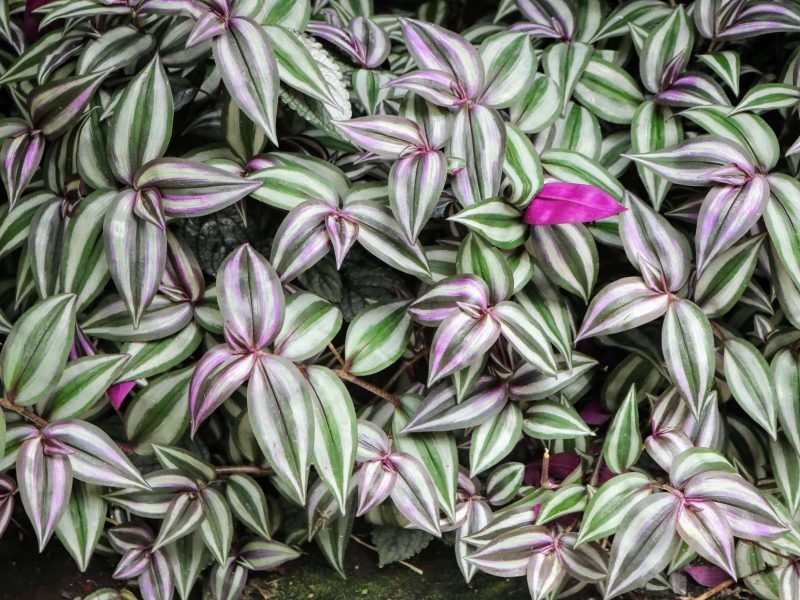
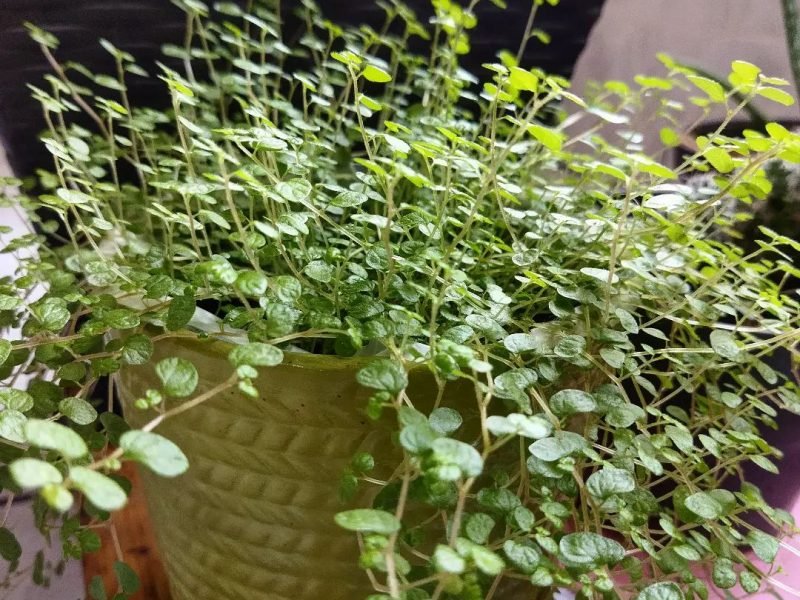
5. The Inchplant

The Inchplant, or Tradescantia zebrina is famed for its striking foliage, featuring elliptical leaves streaked with shades of silver, purple, and of course, pink.

Care Requirements

When it comes to light, the Inchplant is rather flexible. It thrives best in a bright location with indirect sunlight, but can also manage reasonably well in lower light conditions. However, be aware that its vibrant colors may fade and the flowers might wilt if it receives too much or too little light.

As for watering, the Inchplant prefers moderately moist soil. Water thoroughly when the top inch of soil dries out, but be careful not to overwater.

The Inchplant appreciates occasional feeding with a balanced liquid houseplant fertilizer during the growing season.As for pruning, regular trimming will help maintain its gorgeous bushy appearance and promote more pink flowers.

6. Anthurium ‘Pink Champion’ Plant

Famously known for its glossy heart-shaped leaves and pink blooms, the Anthurium Pink Champion is a rarer plant but one that’s worth seeking out.

A standout feature of this plant is its hardiness. Despite its tropical origin, the Anthurium is a robust houseplant tolerant to varying indoor conditions.

The Anthurium thrives best in indirect but bright light. It requires a warm environment too, ideally between 60 – 70 degrees Fahrenheit (15 – 21 degrees Celsius).

Overwatering is a common pitfall with the Anthurium. To make your plant happy, water moderately and allow the top layer of soil to dry out before the next watering session.

For an Anthurium Pink Champion, a balanced houseplant fertilizer every two weeks during the growing season should do the trick. Pruning is also beneficial. Regularly removing dead leaves and flowers helps your Anthurium to focus its energy on new growth.

7. The Pink Princess Philodendron

This houseplant is a showstopper with its unique blend of dark green and vibrant pink foliage. It truly lives up to its royal name, offering a resplendently colourful addition to your indoor garden.

Originating from Colombia, the Pink Princess Philodendron is a climbing plant in nature, and you will often find it winding its way up trees. It`s not uncommon for it to reach up to 3-feet indoors.

The Pink Princess prefers bright, indirect light for the best leaf coloration and pink flower growth. Keep in mind that too much direct sunlight can scorch the leaves, while too little light can lead to leggy growth and reduced variegation.

The Pink Princess enjoys higher humidity levels, around 60-75%, similar to its tropical roots. If your indoor air is dry, consider incorporating a humidifier, pebble tray, or frequent misting.

Feeding and Pruning for aHealthy Pink Princess

The Pink Princess craves nutrient-rich soil so fertilize with a balanced, liquid plant food, every month during the growing season, provides the required nutrients. This will help encourage strong pink flowers to develop.

Pruning is essential in controlling the plant size and promoting bushier growth. Always prune after the growing season and remove any wilting flowers and dead leaves.

8. The Pink Bromeliad

The Pink Bromeliad as incredible rosette-forming leaves and vibrant pink inflorescence flowers that really stand out in a sea of other houseplants.

As a general rule, Bromeliads grow around 10-18 inches tall and wide. However, the pink variety typically falls on the larger side.

Like other Bromeliad types, the pink variety thrives in bright, indirectly lit spaces. When it comes to temperature, stick with moderate conditions between 60-80 degrees Fahrenheit but the Pink Bromeliad can tolerate slightly lower temperatures, making it a good choice for cooler rooms.

Potting, Pruning, and Feeding your Pink Bromeliad

When it comes to potting, always opt for a well-draining mix to avoid watering issues. Occasional pruning to remove dead leaves and flowers can help your plant focus on new rgowth.

When it comes to promoting flowers with fertilizer, try a monthly routine during the warmer months, using a diluted regular houseplant fertilizer.

9. The Kalanchoe

These tough, succulent plants are native to Madagascar and are well-known for their vivid clusters of flowers that range from vibrant reds to the beautiful pinks. The colorful blossoms, combined with the plant’s hardiness, make it one of the best houseplants with pink flowers.

Kalanchoe plants typically reach a height of 1 to 1.5 feet, making them an excellent choice for an indoor tabletop centerpiece. Their leaves are plump and glossy, with jagged edges that add to their dramatic appeal.

But the real show-stopper is the clusters of pink blossoms that sit atop long stems, creating a beautiful contrast against the dark leaves.

Although it’s a sun-loving plant, ensure to protect your Kalanchoe from scorching midday rays which can harm the foliage.

Temperatures, Potting, and Pruning

Kalanchoe is a hardy plant and can withstand varying temperatures, although it prefers a warm, dry climate.

For potting, choose a well-draining soil mixture and a pot with ample drainage holes and repotting only needs to be done only when the plant outgrows its pot or the soil becomes depleted, usually every 2 years.

When it comes to pruning, cut back the faded flowers to encourage new growth and keep your Kalanchoe looking neat and compact.

Nutrient Needs

Lastly, for the feeding aspect, fertilize your Kalanchoe during the growing season with a balanced houseplant fertilizer to promote healthy growth and flowering. A monthly feeding schedule will suffice.

Remember to follow the fertilizer instructions to avoid over-fertilizing which can lead to excessive leaf growth and fewer flowers.

10. The Christmas Cactus

Ending our list with a bang we present the Christmas Cactus. Scientifically known as Schlumbergera, this refreshingly unique flowering plant is not your conventional spikey desert cactus, but it belongs to a completely different category of cacti.

A Christmas Cactus can reach a height of 10 to 12 inches, displaying a beautiful cascading form. Unlike most cacti, Schlumbergera is a jungle cactus originating from the humid Brazilian rainforest. Therefore, it prefers indirect light and a humid environment.

Watering your Christmas Cactus

The Christmas Cactus dislikes waterlogged soil; therefore, overwatering can be detrimental and can stop your plant from growing any new pink flowers.

In warmer months, water regularly but let the surface soil dry out between waterings. In cooler months, you can reduce the frequency of watering. Keeping the humidity high can do wonders for this plant’s health and flowering.

Potting, Repotting, and Pruning

Choose a well-draining potting mix for your Christmas Cactus to ensure optimal growth and re-pot only after a few years or if the plant outgrows its pot. You can also prune after blooming, typically in spring, to encourage bushiness, but also keep the beautiful cascading form intact.

Feeding Needs

During the growing season, a balanced houseplant fertilizer can do magic for its growth and blossoming. However, come September, hold off fertilizer application to prepare the plant for its winter bloom.

Tips on Caring for Houseplants with Pink Flowers

Here are some general tips to keep your pink flowering houseplants looking their best:

  • Provide Sufficient Light: Most pink flowering plants prefer lots of indirect light. Be sure to place them near a bright window or under artificial light. Remember, some plants can tolerate lower light conditions, so it’s essential to research your plant’s specific needs.
  • Maintain Proper Watering Techniques: Overwatering can be as damaging as under-watering. It’s crucial to know when and how much to water your plants. As a general rule, allow the topsoil to dry out between watering.
  • Keep an eye on Temperature and Humidity: Most houseplants prefer temperatures between 60 to 75 degrees Fahrenheit and a relative humidity between 40% to 50%. However, this can vary among different plant species.
  • Regular Feeding: Feeding your plant with a balanced plant food during the growing season, generally spring through fall, can stimulate blooming.
  • Prune Regularly: Tidy up your plant by removing any yellow or brown leaves and spent blooms. This not only keeps your plant looking healthy but also encourages new growth.

Fertilizing Strategies for Healthy Pink Flowering Houseplants

Firstly, it’s crucial to understand that not all fertilizers are created equal. There are numerous types out there, each with its own unique nutrient composition.

To thrive (and grow nice vibrant pink flowers) your houseplants need a balanced combination of macro and micronutrients such as Nitrogen (N), Phosphorus (P), and Potassium (K), intricately combined with other elements such as Iron, Magnesium, and Calcium.

Understand Your Fertilizer

Whether you opt for organic or synthetic fertilizers, always check the Nitrogen-Phosphorus-Potassium ratio, often denoted as “N-P-K” on packaging.

With a ratio like 20-20-20, the equal proportion implies it’s a balanced fertilizer, typically great for most indoor plants.

But remember, flowering plants—and especially those blooming in pink—often appreciate a slightly higher Phosphorus ratio than Nitrogen and Potassium. Phosphorus is vital for healthy root development and vibrant blooms.

The Importance of Consistency

Consistency is key when fertilizing your pink-flowering houseplants. Plants tend to benefit more from regular, light feedings compared to infrequent, heavy doses.

Most indoor plants, for instance, do well with a monthly feeding, but this can slightly change with the seasons.

During spring and summer—your plants’ active growth periods—maintaining the monthly regimen is pivotal, but as fall and winter approach, you’d want to scale back to every other month.

Water Before You Fertilize

By watering your plant just before fertilizing, you prime the roots to better absorb nutrients. More importantly, you minimize the risk of root burn—a common problem when dry roots come into contact with concentrated fertilizers.

However, be careful not to overwater your plants. Too much water can cause the roots to become waterlogged and oxygen-starved. Over time, overwatering can cause your plant to develop root rot, a serious condition that can kill your plant.

The best approach is to water your plant thoroughly and then let it drain completely.

Fiddle and Thorn is a participant in the Amazon Services LLC Associates Program, an affiliate advertising program designed to provide a means for sites to earn advertising fees by advertising and linking to Amazon.com

Take our houseplant survey!

Quickly respond to our 30 second houseplant survey and get 75% off our Complete Houseplant Care eBook!

Take the Survey

No thanks…

Top 10 Best Houseplants for Cold Rooms

Last Updated: November 2, 2023

If your indoor space is a little chilly, that doesn’t mean you have to hold back from being surrounded by houseplants! Truth be told, a variety of houseplants can handle – and even prefer – cooler temperatures.

We’ve compiled a list of the top 10 houseplants that can, to a certain extent, resist the cold. We’ll also go through some helpful tips and a few must-knows about these sturdy indoor plants.

Understanding the Challenges of Cold Rooms for Houseplants

Not every plant is built to withstand lower temperatures, which is why some of your houseplants might start to look a bit unhappy if they’re spending a lot of time in cold environments.

The Plant’s Origin

Plants from tropical climates, like ferns and orchids, are used to constant and consistent temperatures year-round, usually on the warmer side. As a result, they might struggle when exposed to cold, fluctuating conditions in your home.

Effects of Cold

You might notice a plant’s growth rate slowing down, its leaves wilting or turning yellow, and the appearance of brown, dry spots on its leaves.

Ice crystals might even form within the plant’s cells, damaging them and preventing the plant from performing its essential processes, like photosynthesis and respiration.

What temperature range is considered cold for houseplants?

Well, most indoor houseplants originate from tropical or subtropical regions, meaning they’re adapted to conditions warmer and more humid than what they might find in your average home.

Especially in winters or in rooms with less insulation, the temperature can drop significantly, which isn’t a delight for most tropical plants.

The average comfortable temperature range for houseplants sits between 15 Degrees Celsius and 25 Degrees Celsius. However, once the temperature takes a downward plunge below 12 Degrees Celsius, it can begin to stress most plants.

For the hardy plants we’ve highlighted on our list, they can tolerate temperatures as low as 4-5 Degrees Celsius.

It’s important, though, to remember that while these plants can tolerate colder temperatures, it doesn’t necessarily mean they prefer them or will particularly thrive in them.

When placed in cold rooms, growth might be slower and the plant might enter a state of dormancy, where all growth ceases entirely.

The 10 Best Houseplants for Cold Rooms

Snake Plant (Sanseviera)

Native to West Africa, the Snake Plant is famed for its ability to survive in less than ideal conditions. Not only can it handle lower temperatures but it also thrives in low light conditions.

  • Light requirements: Low to bright, indirect light.
  • Water requirements: Let the soil dry between waterings. Overwatering can cause root rot.
  • Temperature resistance: Can tolerate temperatures as low as 10°C.

A bonus to this plant is its air purifying abilities. It’s known to filter out toxins from the air, contributing to a healthier environment in your home.

ZZ Plant

Known scientifically as Zamioculcas zamiifolia, the ZZ plant is a striking houseplant offering glossy, dark green leaves that can thrive even in chillier living spaces.

It’s adaptable, robust, and doesn’t require a tonne of maintenance.

Originating from East Africa, the ZZ plant has developed a resilient nature suited for survival in harsh conditions, such as cold rooms.

  • Light: : The ZZ plant is not fussy. Although it appreciates bright indirect light, it can also do well in minimal light conditions.
  • Water: It’s a ‘better under than over water’ situation here. Wait until the soil is completely dry before giving this plant a sip.
  • Temperature: Can tolerate temperatures as low as 45 degrees Fahrenheit (7 degrees Celsius).

Peace Lily

Standing out with its luscious, dark green leaves and aesthetically pleasing white blooms, the Peace Lily is quite lenient towards less-than-ideal temperatures.

Over years of evolution, this particular species of flora has adapted wonderfully to survive in the understory of rain forests, which are typically colder and receive less sunlight.

However, the Peace Lily, like any other houseplant, thrives best in warmer indoor environments. It will, however, pretty decently endure colder rooms down to about 12°C.

When it comes to watering your Peace Lily, don’t go overboard. A common issue for these plants is overwatering, leading to rotting roots. Wait until the top inch of soil is dry before giving your plant a drink. The trick is to keep the soil moist but not overly saturated.

Spider Plant

The Spider Plant (Chlorophytum comosum) is a classic go-to for cooler homes and holds a reputation for being practically indestructible.

The Spider Plant, with its elongated, arching leaves, brings a touch of drama and intrigue to cold rooms. The leaves, characteristically striped green and white, grow outward in a rosette form that brings to mind, you guessed it, a spider’s web.

The Spider Plant is also a great air purifier. It removes pollutants such as formaldehyde and xylene from the air, contributing to a healthier home environment.

Chinese Evergreen

The Chinese Evergreen has a hardy temperament, able to withstand colder temperatures than many other popular houseplants.

It originates from the tropical and subtropical regions of Asia, where it frequently encounters temperature drops at night which is why this plant has naturally adapted to survive in cooler environments.

  1. Light: Prefers low to medium light conditions, but can adjust to bright, indirect light too.
  2. Water: It likes its soil to be moist. However, overwatering should be avoided. Pour water whenever you feel the top inch of soil getting dry.
  3. Humidity: Though it’s a hardy plant, the Chinese Evergreen appreciates humidity. Therefore, it’s suggested to mist it regularly or place it on a tray of pebbles filled with water.

Cast Iron Plant

This sturdy, nearly indestructible plant is the perfect choice for those chilly spaces in your home. Native to Japan, the plant gets its name from its ability to survive under the harshest of conditions.

The Cast Iron plant thrives in temperatures down to 7°C, and while it enjoys a darker, cooler environment, it can tolerate a fair bit of neglect too.

  1. Watering: Only water when the soil feels dry to the touch.
  2. Lighting: Keep it in low to medium light, if possible.
  3. Feeding: Fertilise the plant infrequently with a slow-release fertiliser for best results.

Aspidistra elatior, as the Cast Iron plant is known scientifically, will be a reliable, unassuming housemate, occupying those chilly corners and adding a touch of greenery without demanding much time or effort from you.

Dragon Plant (Dracaena marginata)

The Dragon Plant is one of those rare breeds that can tough it out in cooler rooms. Preferring temperatures from 16°C to 24°C, it’s entirely forgiving when living in colder areas long-term.

  • Lighting: This plant thrives in a spot with lots of bright, indirect light. However, it can tolerate lower light levels if needed.
  • Watering: Despite its resilience, your Dragon Plant dislikes wet feet. Always allow the soil to dry out thoroughly before bestowing another drink.

Dracaena marginata can be a real showpiece, growing up to 2 metres tall if cared for properly. So, not only does it deal well with cooler temperatures, but it could also fill that empty corner you’ve been wondering what to do with.

Jade Plant

Notoriously durable, the Jade Plant, scientifically known as Crassula ovata, adapts to cold conditions pretty well. Originally from South Africa, it can endure temperatures as low as 10 degrees Celsius for extended periods of time.

Jade Plants are perfect for those wishing to add some greenery to their cold, dimly lit rooms. The squat, woody stems and oval-shaped, dark green leaves give this plant an attractive and sturdy outward appearance.

  1. Light: Despite being able to survive in dim conditions, Jade Plants do prefer bright light. However, they can survive without direct light.
  2. Water: They should be watered sparingly, especially in cold temperature conditions, as they’re susceptible to root rot. The soil should be allowed to dry out completely between each watering session.
  3. Soil: Jade Plants thrive in well-draining soil. They prefer a mix of half potting soil and half sand.

Aloe Vera

Yes, this sun-loving Mediterranean native can tough it out in cooler conditions too.

Known globally for its soothing gel inside the green, fleshy leaves, the Aloe Vera is not just a medicinal powerhouse, but an extremely adaptable houseplant that will happily soak up the chills of your room.

An Aloe Vera plant prefers a nice bright spot but can adjust to less light too. However, while it can handle the cold, it won’t appreciate the frost, so anything below freezing may start to impact your plant.

Also note that during winter, watering should be limited as the plant naturally goes into a state of dormancy.

  • Light Requirements: Bright to medium light
  • Watering: Infrequently; don’t let it sit in water
  • Temperature Tolerance: Down to 5°C

Anthurium Andraeanum

Rounding off our list is the vibrant Anthurium Andraeanum, otherwise known as the Flamingo Flower. Capable of enduring temperatures as low as 15°C, Anthurium Andraeanum is as resilient as it’s colourful.

Its unique aesthetic, defined by glossy heart-shaped leaves and bright red flowers, can add a much-needed pop of colour to any cold and dim room.

However, caring for an Anthurium Andraeanum does require a dedicated approach. For it to flourish, water the plant thoroughly and allow the top inch of the soil to dry out between watering.

On top of this, high humidity is key to keeping your Anthurium Andraeanum healthy. Daily misting can help replicate its preferred humid environment.

Mix in some regular feeding with an all-purpose houseplant fertiliser and your Anthurium Andraeanum will reward you with stunning blooms and lush leaves.

Caring for Houseplants in Cold Rooms: Top Tips

Though your new houseplants are sturdy, they might need a bit of extra TLC during the chillier months. But don’t worry! We’ve got you covered with a list of top tips to keep your plants happy and healthy.

The Right Spot: First and foremost, location is key! Plants should be moved away from drafty windows and doors. If your home has central heating, be mindful of its drying effect on plants and try to find a spot out of its direct path.

Water Wisely: Overwatering can become a big issue in cooler conditions. Always remember, it’s easier for plants to recover from being a little parched than being waterlogged.

Provide Light: During winter, daylight hours are few. Taking this into account, make sure your plants get enough exposure to light. Use a grow light if necessary.

Humidity Can Help: Most houseplants are tropical and appreciate humidity. If you can’t increase room humidity, use a pebble tray filled with water under the pot or a room humidifier.

Hold Off On Fertilising: It’s not the best idea to fertilise your plants in cold weather. Most houseplants go dormant in the colder months, so they won’t be able to absorb all the nutrients which can lead to fertiliser build up.

Frequently Asked Questions

Do houseplants in cold rooms need more water or less?

Often cold rooms are also dry rooms, especially during the winter when heating systems can suck the moisture out of the air.

As a dry environment can make most plants lose water through transpiration, you might think this would mean watering more often.

However, the decrease in light and temperature during the winter months means plants aren’t growing as quickly and their water needs are actually less.

Therefore, avoid overwatering and make sure your plant pots have good drainage.

What’s the lowest temperature each of these houseplants can tolerate?

While different plants have different tolerances, most of the plants listed above can handle temperatures as low as 10°C, with some like the Snake Plant and ZZ Plant able to cope with a bit colder. However, prolonged exposure to temperatures below 10°C can damage most houseplants.

Do these plants also do well in dark corners of cold rooms?

Whilst these plants are selected for their hardiness in cold rooms, not all of them can be tucked away in the dark corners of a room. For instance, the Jade Plant and Aloe Vera crave ample light, whereas the Peace Lily and Chinese Evergreen can thrive in low-light conditions.

Fiddle and Thorn is a participant in the Amazon Services LLC Associates Program, an affiliate advertising program designed to provide a means for sites to earn advertising fees by advertising and linking to Amazon.com

Take our houseplant survey!

Quickly respond to our 30 second houseplant survey and get 75% off our Complete Houseplant Care eBook!

Take the Survey

No thanks…

The 10 Best Bunny Rabbit Safe Houseplants

Last Updated: September 28, 2023

The Best Rabbit Safe Houseplants

Our furry friends are one of the most important things to us and we do everything we can to care for them. For those with house bunnies, a lot of time has been spent getting your home ready and bunny-proofed. But you might not realise that a lot of houseplants are actually toxic to bunnies, other pets and humans. For a lot of other pets, it might not be such a big deal as they aren’t always prone to eating things but a lot of bunnies have a tendency to nibble on the leaves of your plants. This is why we have made sure that these plants below won’t cause any harm to your rabbit if it happens to take a bite!


1

Jade Plant

Crassula ovata

Believed to bring luck, Jade Plants are one of the most popular succulent varieties. They are best known for their oval-shaped leaves and strong stems which become quite woody as they mature. These are totally bunny safe as well so you don’t need to worry about having these on low tables or surfaces where your bunny rabbit might be able to reach.

When it comes to caring for your Jade Plants, the top two things to remember is to give it a spot that gets ample sunshine throughout the day as well as making sure the potting mix has fully dried out before watering again as they are susceptible to root rot if you’re not careful. Jade Plants are quite slow growers though, so even if the environment and care routine are perfect, they may only grow a few inches per year.

Find out more in our Jade Plant care guide.

2

Polka Dot Plant

Hypoestes phyllostachya

Polka Dot Plants come in all kinds of colours, from pink to green, white and red. Although they have super delicate leaves, they aren’t actually too difficult to care for so long as they don’t receive any direct light (this fades and burns the leaves) and don’t have to sit in any waterlogged soil.

One great thing about Polka Dot Plants is that they can very happily adapt to a range of light levels, so if you’re looking for something to fill that shady corner of the room, you might have just found the perfect plant! They are non-toxic too which means as long as your bunny rabbit doesn’t consume a really large quantity of this plant (which it would be very hard for them to do), they’ll be absolutely fine.

If we had to sum up this plant in just one sentence it would be they are the perfect fit for someone who is looking for a little special something but who doesn’t want all the faff that can come with a lot of other houseplants!

Find out more in our Polka Dot Plant care guide.

3

Spider Plant

Chlorophytum comosum

Spider Plants are the perfect plant for a houseplant beginner as they are super easy to care for, grow pretty quickly, and produce an abundance of spider babies which can be propagated in seconds.

The best thing about Spider Plants (other than the face they are bunny rabbit safe of course) is that you would really have to try to kill them as they adapt to and survive in most environments and don’t mind being a little neglected. They even show you when they need more water by going quite light green. But after a little bit of water, they spring back to full health in minutes.

As your plant matures, you’ll start to see it sprouting little spiderettes which you can choose to remove from the plant to create new Spider Plants. They really are the gift that keeps on giving.

Find out more in our Spider Plant care guide.

4

Prayer Plant

Maranta leuconeura

Native to the tropical rainforests of Brazil, the Prayer Plant is loved for its variegated leaves with intricate vein patterns. You can easily spot a Prayer Plant by its leaf undersides as shades of deep red are revealed when the plant’s leaves curl up at night, bringing a splash of colour to your home.

There are several varieties of Prayer Plants that all look ever so slightly different but all are bunny friendly. The most common is the tri-colour which has red-veined leaves but you’ll sometimes see varieties with silver patches or dark green splashes. Prayer Plants are a little fussy though with light conditions, soil moisture and humidity levels though so we don’t recommend this as a starter plant, unfortunately.

Find out more in our Prayer Plant care guide.

5

Money Tree

pachira aquatica

The Money Tree is a great tropical looking houseplant, that is actually super easy to care for and can live for 10-15 years if properly maintained. They originate from Mexico but are very common throughout the world due to their ease of care, in their natural habitats they can grow all the way to 18 meters tall!

One of the great things about the Money Tree is that they can adapt to fluorescent lighting, this makes them great for offices or other commercial spaces. With them also being safe for bunnies and simple to keep happy, we think they are a greater starter plant for budding plant parents.

Find out more in our Money Tree care guide.

6

Rattlesnake Plant

Calathea Lancifolia

Over the past few years, Rattlesnake Plants have gone from being quite rare to being one of the most popular Calathea plants around… and we totally understand why! Not only do they have über-cool markings on their long thin leaves, but they are quite an easy plant to take care of (as well as being rabbit friendly).

Native to the Brazilian rainforests, Rattlesnake Plants can adapt to a range of light levels, making them a great choice for those looking for a low-light plant. They also don’t need that much water as their roots absolutely hate sitting in waterlogged soil. The one thing you do need to make sure you do when caring for a Rattlesnake Plant is to boost the humidity either by misting the leaves or by using a humidifier. Even though the name sounds quite dangerous, rattlesnake Plants are completely safe for bunnies, other pets and humans too, so that’s just another reason to love them!

Find out more in our Rattlesnake Plant care guide.

7

Calathea Jungle Velvet

Calathea warscewiczii

Part of the Prayer Plant family, the Jungle Velvet Calathea will really bring something special to your home! They have long elegant two-tone dark green leaves with gorgeous purple undersides. The Jungle Velvet Calathea gets its name from the soft and velvety texture of their leaves which is something very unique to this variety.

Native to Costa Rica, it can be a little tricky to replicate the native environment in your home but warm temperatures and a boost to the humidity will go a long way! And if you needed more reasons to love this plant, they are air-purifying and completely safe for bunnies and rabbits too so are great to have around the home.

Find out more in our Calathea Jungle Velvet care guide.

8

Watermelon Peperomia

Peperomia argyreia

There aren’t really many leaves that are more beautiful and striking than those of the Watermelon Peperomia. It’s not difficult to know where they got their name from, as their silvery stripes steal the hearts of plant parents everywhere.

They are quite a delicate plant though, as their large heavy leaves are held up by relatively weak stems so be prepared to lose a few leaves here and there. Another thing to be prepared for when owning this plant is all of your friends wanting a cutting, but luckily this plant is super easy to propagate so no problems there!

Native to South Africa, the bunny-friendly Watermelon Peperomia prefers mid-light levels, as they are used to the dappled conditions of the jungle floor. Oh, and as they are a semi-succulent, it’s important you don’t water this one too much or the stems can give up and the whole plant will droop and wilt.

Find out more in our Watermelon Peperomia care guide.

9

Ponytail Palm

Beaucarnea recurvata

This is a Palm with a personality! The Ponytail Palm is loved for its long curly leaves which instantly bring the tropical beach vibes whilst still being completely safe for your bunny to be around and eat if it likes.

Interestingly, the Ponytail Palm is neither a palm nor a tree, it’s actually a succulent which is why they are super low maintenance. All they need is a spot with ample light and warmth and they’ll be happy. They don’t need much water either as they are able to store it in their trunk. The only drawback of the Ponytail Palm is that it’s quite slow-growing so don’t expect it to be constantly growing new leaves.

Find out more in our Ponytail Palm care guide.

10

Lucky Bamboo

Dracaena sanderiana

Believed to bring good luck, the Lucky Bamboo is the ideal houseplant for those wanting to bring a little bit of greenery indoors, but who just don’t have the time or skill to give it much attention. The Lucky Bamboo thrives off being neglected and as long as they have enough sunlight and some warmth, they’ll happily live for a very long time. You can choose to grow them in either well-draining soil or a vase filled with water. The latter is great for forgetful waterers as there’s no risk of them drying out!

You can continue the gorgeous swirls on your Lucky Bamboo plants by simply rotating them every once in a while. The plant naturally grows towards the sunlight so you can use this to create the twists.

Find out more in our Lucky Bamboo care guide.

Fiddle and Thorn is a participant in the Amazon Services LLC Associates Program, an affiliate advertising program designed to provide a means for sites to earn advertising fees by advertising and linking to Amazon.com

Take our houseplant survey!

Quickly respond to our 30 second houseplant survey and get 75% off our Complete Houseplant Care eBook!

Take the Survey

No thanks…

10 Best Air Purifying Houseplants

Last Updated: December 31, 2021

Why choose Air Purifying Houseplants?

Having houseplants around your space has a wide variety or benefits. Not only do all of the plants on this list look great, they also help massively in purifying and cleaning the air in your home. You will need quite a few plants in your spaces to really make a big difference – but we’re definitely not going to complain about that!

We’re always looking for new reasons and excuses to buy houseplants but this is actually a very valid one, with studies from the likes of NASA confirming that houseplants do indeed scrub volatile compounds like formaldehyde and benzene from the air.

1

Snake Plant

Sansevieria Trifasciata

The bold and striking leaves of the Snake Plant make it stand out wherever you put it! Not only are they slow-growing, but they transcend upwards so are great for small spaces or that corner you never know what to do with. They have some of the sturdiest leaves or any houseplant, and their sharp leaf tips have given the plant the nickname of mother-in-laws-tongue!

When it comes to care, Snake Plant are super easy to look after, they can adapt to a range of light levels (are great low light plants), prefer dry soil and don’t need much attention in the way of misting or repotting etc. So if you want a low maintenance, sturdy houseplant, then the Snake Plant is your perfect match!

Find out more in our Snake Plant care guide.

2

Devil’s Ivy

Epipremnum aureum

These are pretty unique houseplants because they actually prefer lower-light conditions over anything else! That’s where the name comes from, as they are well acquainted with the darkness. If you have a variegated variety, it will actually start to lose its pattern if placed in too much sunlight. So you don’t need to feel guilty about putting a Devil’s Ivy in a shady spot because it will actually love you for it.

They are also pretty hardy plants in terms of their other care requirements. They don’t need complicated watering schedules or specific pruning so are perfect for any new plant parents. You can’t really go wrong with these at all!

When it comes to styling the Devil’s Ivy plant, shelving is where they thrive as it gives it room to cascade dramatically out of the pot. They can be trained to grow upwards by a wall or moss pole so the option is yours.

Find out more in our Devil’s Ivy care guide.

3

Peace Lily

Spathiphyllum wallisii

There’s a reason that Peace Lilies are so popular, and it’s not just because of their incredible white flowers. They are super low maintenance plants that can adapt and thrive in most homes. They can tolerate all light levels which is super rare for houseplants.

Our favourite thing about the Peace Lily is that it really helps us plant parents out by drooping its leaves when it really needs water. This can help you spot underwatering before it’s really a problem. Within minutes of watering, the leaves will perk up – it’s pretty cool! And if we haven’t sold you on the Peace Lily yet, then you should probably know that they are also one of the best plants at purifying the air and removing chemicals from your home!

Find out more in our Peace Lily care guide.

4

Spider Plant

Chlorophytum comosum

Spider Plants are the perfect plant for a houseplant beginner as they are super easy to care for, grow pretty quickly, and produce an abundance of spider babies which can be propagated in seconds.

The best thing about Spider Plants is that you would really have to try to kill them as they adapt to and survive in most environments and don’t mind being a little neglected. They even show you when they need more water by going quite light green. But after a little bit of water, they spring back to full health in minutes.

As your plant matures, you’ll start to see it sprouting little spiderettes which you can choose to remove from the plant to create new Spider Plants. They really are the gift that keeps on giving.

Find out more in our Spider Plant care guide.

5

Aloe Vera

Aloe Barbadensis Miller

Although Aloe Vera plants are commonly loved for their gel, they are much more than just their health and beauty benefits, as they make for a super minimalist and forgiving houseplant! Like most other succulents, Aloe Vera plants don’t need much tending to as they thrive in dry coarse potting mix. But it is important that they get a good amount of bright light or will become quite straggly.

As they mature a little, you’ll see lots of little Aloe pups popping up which can be very easily removed from the mother plant and propagated! Aloe plants are super affordable and you can pick them up basically anywhere that sells plants, even supermarkets will often sell them in the summer months.

Find out more in our Aloe Vera care guide.

6

Boston Fern

Nephrolepis exaltata

If you want to bring some jungle indoors, then the lush Boston Fern is the go-to! However, looking after them isn’t always easy as they can be a little fussy when grown indoors. There are two main things that your Boston Fern needs; bright sunshine and high humidity. This means you need to be prepared to mist your Fern daily to avoid crispy leaves.

The one downside we find to owning Boston Ferns is that they do shed a lot of leaves so you’ll find yourself tidying up after it quite a lot. But with the right care, they’ll reward you with luscious green wilderness.

Another great thing about Boston Ferns is they are pretty cheap and you shouldn’t run into too much trouble finding them in plant shops around the world.

Find out more in our Boston Fern care guide.

7

Dragon Tree

Dracaena draco

The Dragon Tree was actually our first ever houseplant and ignited our initial love for caring for indoor plants many years ago. Native to Madagascar, it’s a timeless plant that brings elegance and style to every room. They are also super easy to care for and are great at purifying the air which makes them the perfect entry-level houseplant.

You’ll have a hard time trying to kill a Dragon Tree as they are pretty drought-tolerant and forgiving when it comes to light, temperature levels and humidity so it’ll adapt well to every spot in your home.

Although they can reach up to 6 metres in their natural outdoor habitat, they’ll only ever get to about 1.5/2 metres when grown indoors (and even this will take years and years) so you don’t need to worry about it getting too big to handle.

Find out more in our Dragon Tree care guide.

8

Rubber Plant

Ficus elastica

The name Rubber Plant comes from the latex in the leaves, which was once used to actually make rubber! They are a great plant to bring a little bit of that rainforest feel right into your home. And whilst they can reach about 30 metres in their native environment, when potted in your home they’ll be much smaller don’t worry!

Caring for your Rubber Plant doesn’t have to be difficult. Good light levels and not too much water are the basics to remember. As they are native to Southern Asia, they love humidity and will really struggle with dry air so regularly misting will keep your plant happy and healthy.

Find out more in our Rubber Plant care guide.

9

Weeping Fig

ficus benjamina

Hardy and easy to care for, that is why Weeping Figs are loved all around the world! They’re happy in bright, indirect light levels and don’t have any special watering requirements at all – making them great for beginner houseplant parents. The only major quirk to note is that they don’t care to be moved around, this can actually cause a quite serious shock to the plant and cause some damage. If you want to make sure that your Weeping Fig (ficus) is going to thrive we’d recommend investing in a humidifier, keeping the humidity up will keep your plant happier and much healthier too!

It’s also good to know that Weeping Figs are completely non-toxic, meaning they’re pet and child friendly!

Find out more in our Weeping Fig care guide.

Fiddle and Thorn is a participant in the Amazon Services LLC Associates Program, an affiliate advertising program designed to provide a means for sites to earn advertising fees by advertising and linking to Amazon.com

Take our houseplant survey!

Quickly respond to our 30 second houseplant survey and get 75% off our Complete Houseplant Care eBook!

Take the Survey

No thanks…

14 Beautiful Houseplants with Striped Leaves

Last Updated: December 31, 2021

Our favourite houseplants with striped leaves

There’s a lot of incredible foilage out there, but not much beats a stripey leaf! They bring something a little different to a collection of plants and the stripes make each of these plants really stand out in a room. We have curated a list of our favourite striped houseplants which we hope you’ll fall in love with as much as we have! Some have dark moody stripes, others white, silver and even pink!

We have also included a little bio for each of the plants, with important information as well as care tips so you can figure out which is best for you and your home.

1

Pinstripe Calathea

Calathea ornata

This is probably one of our favourite houseplants here at Fiddle and Thorn. Whilst they are a little fussier than a lot of other plants, their stunning pink striped leaves really make up for it. Their dark green glossy leaves can reach up to around 30cm when your plant starts to mature, so they really stand out in a room of plants.

Native to South America, these plants need high humidity or you’ll very quickly see dry leaf edges appear. You also want to keep them away from intense light or the pink stripes will start to fade which is always devastating. Oh, and if you needed another reason to love the Pinstripe Calathea, they are safe for pets and humans so you don’t need to worry about having them around your home.

Find out more in our Pinstripe Calathea care guide.

2

Spider Plant

Chlorophytum comosum

Spider Plants are the perfect plant for a houseplant beginner as they are super easy to care for, grow pretty quickly, and produce an abundance of spider babies which can be propagated in seconds.

The best thing about Spider Plants is that you would really have to try to kill them as they adapt to and survive in most environments and don’t mind being a little neglected. They even show you when they need more water by going quite light green. But after a little bit of water, they spring back to full health in minutes.

As your plant matures, you’ll start to see it sprouting little spiderettes which you can choose to remove from the plant to create new Spider Plants. They really are the gift that keeps on giving.

Find out more in our Spider Plant care guide.

3

Zebra Cactus

Haworthiopsis attenuata

Named after their white striped leaves, Zebra Cacti are super easy to care for and pretty much thrive from being forgotten about. Native to South Africa, this small succulent needs a good amount of sunshine and warmth to thrive but humidity is something you really don’t need to worry about with these plants. As with a lot of other succulents, water your Zebra Cactus sparingly as they are quite sensitive to overwatering and leaf rot.

With the right care and environment, you should expect to see your Zebra Cactus bloom but don’t get too excited as the flowers can be quite underwhelming. But to make up for it, these plants are non-toxic so safe for children and pets that might be tempted to nibble on the leaves.

Find out more in our Zebra Cactus care guide.

4

Inch Plant

Tradescantia zebrina

Also known as the Inch Plant, we haven’t yet come across a faster-growing or easier to propagate houseplant. Native to the tropics of Mexico and South America, these plants offer something different with their purple and silvery leaves that transcend out of the pot.

Growing these indoors helps keep their growth more contained whilst still giving that wilderness feel which we love. Caring for these plants is also super easy as all they need is ample light and moderate water. They are quite forgiving though so won’t give up straight away if something’s a little off.

These plants are great for hanging planters or when placed on shelving so you can really make the most of those incredible vines. They can be mildly toxic though so you’ll want to keep them away from pets.

Find out more in our Inch Plant care guide.

5

Snake Plant

Sansevieria Trifasciata

The bold and striking leaves of the Snake Plant make it stand out wherever you put it! Not only are they slow-growing, but they transcend upwards so are great for small spaces or that corner you never know what to do with. They have some of the sturdiest leaves or any houseplant, and their sharp leaf tips have given the plant the nickname of mother-in-laws-tongue!

When it comes to care, Snake Plant are super easy to look after, they can adapt to a range of light levels (are great low light plants), prefer dry soil and don’t need much attention in the way of misting or repotting etc. So if you want a low maintenance, sturdy houseplant, then the Snake Plant is your perfect match!

Find out more in our Snake Plant care guide.

6

African Mask Plant

Alocasia amazonica

If there is one plant that has risen up the popularity ranks recently, it’s the African Mask Plant! You can now buy these at basically every plant shop, market and superstore globally as they are definitely the most popular of the Alocasia family. And we totally understand why they have become so popular, their intense glossy shield-like leaves are adorned with strong white veins which really make them something special.

They aren’t a great plant for beginners, however, as they do require decent light levels, as well as warm temperatures and a consistent high humidity level. Misting this plant is really crucial or it’ll start to develop some issues.

If in the right environment, your African Mask Plant can grow well above 1 metre but this will take many years as they don’t produce that many new leaves each year. This is why it’s crucial you take good care of the leaves your plant does have by regularly dusting and inspecting for issues.

Find out more in our African Mask Plant care guide.

7

Zebra Plant

Aphelandra squarrosa

We’re seeing this plant pop up more and more which makes us super happy! Known and adored for their dark green leaves with striking white veins, the Zebra Plant is pretty slow growing but can reach up to a couple of feet when grown indoors.

Native to Brazil, these plants need high humidity, warm temperatures and bright but indirect light. When it comes to watering, they like their potting mix to be consistently moist but not soggy which can be a bit of a challenge for more novice plant parents.

Zebra Plants are also non-toxic so you don’t need to worry about having them around your family or furry friends.

Find out more in our Zebra Plant care guide.

8

Calathea Orbifolia

Calathea Orbifolia

With their striking green and silver striped leaves, the Calathea Obifolia is the perfect plant for those looking for a little something different as they transport you straight to the tropics! There are a few things to look out for when caring for a Calathea Obifolia, firstly, avoid direct sunshine as this will burn their beautiful leaves. They also like some moisture in the soil but hate sitting in soggy soil, so finding the right balance is key.

Another thing we love about Calathea Obifolia plants is that they are safe for pets and humans, so you don’t need to worry about bringing them into your home. Although it was once slightly rare, you should now be able to get your hands on one of these pretty easily in nurseries and larger plant shops around the world.

Find out more in our Calathea Orbifolia care guide.

9

Moses in the Cradle

Tradescantia spathacea

This slightly rarer houseplant is an incredible find and is also a really low maintenance houseplant. It’s the perfect addition for those looking for something a little different but may not be looking for a challenging plant. It gets its name from the small white flowers that grow in small boat-shaped bracts nestled in the leaves.

There are a few things to note before deciding that the Moses-in-the-Cradle is the plant for you. Firstly, they love a higher humidity level so it’s important that you mist your plant a few times a week, or buy a humidifier that will keep a consistent level. Moses-in-the-Cradle plants are also toxic to humans and pets so keep them away from those who might be tempted to nibble on their incredible pink leaves.

Find out more in our Moses in the Cradle care guide.

10

Peacock Plant

Calathea makoyana

The Calathea makoyana is known and loved for the bold and unique markings on the leaves, as well as their red undersides, a classic trademark of many Calathea plants. Peacock plants don’t grow very tall so are perfect for smaller homes and spaces.

When it comes to care, it’s important to note that the Peacock Plant can be a little temperamental sometimes, so we don’t always recommend this one to plant beginners. You must keep them away from direct light, mist them to boost the humidity and never let them fully dry out for long periods of time. They also need quite warm temperatures to really thrive, so drafts and AC vents are a no-go for Peacock Plants.

Peacock Plants can grow very small white flowers sometimes, but don’t think you aren’t caring for your plant properly if it doesn’t bloom. Flowers are quite rare and unpredictable, but a nice surprise when it does happen!

Find out more in our Peacock Plant care guide.

11

Philodendron Birkin

Philodendron Birkin

This used to be an extremely rare and unknown plant but over the past few years, it’s definitely gained a place in the houseplant walk of fame! Unlike a lot of its Philodendron relatives, the Birkin is a non-vining plant that stays pretty compact, making it great for windowsills and smaller spaces.

Loved for their green and cream striped leaves, the Philodendron Birkin needs a humid environment to really thrive. This is because they are native to the rainforests of Brazil so be prepared for regularly misting (or just buy a humidifier), as otherwise, you’ll see brown leaves appear pretty quickly. With the right care and environment, the Birkin can be a pretty quick grower so it’s definitely worth a little bit of extra hassle.

Find out more in our Philodendron Birkin care guide.

12

Croton Plant

Codiaeum variegatum

If you’re looking to bring a splash of colour into your home, then the Croton Plant is the perfect choice. Native to India and Indonesia, the unusual thing about Croton Plants is that they are genetically unstable which means every single plant will look slightly unique. Even when propagated, the new plants can look different to the mother plant.

There are so many types of Croton Plants showcasing red, yellow, pink, purple, orange and white leaves but luckily they all have the same care requirements. Like most other tropical plants, they need ample light, a moderate amount of water and a nice warm room to really thrive. It’s best to keep this one away from pets though as although it’s not the most toxic plant, it can cause some irritation when ingested.

Find out more in our Croton Plant care guide.

13

Prayer Plant

Maranta leuconeura

Native to the tropical rainforests of Brazil, the Prayer Plant is loved for its variegated leaves with intricate vein patterns. You can easily spot a Prayer Plant by its leaf undersides as shades of deep red are revealed when the plant’s leaves curl up at night, bringing a splash of colour to your home.

There are several varieties of Prayer Plants that all look ever so slightly different. The most common is the tri-colour which has red-veined leaves but you’ll sometimes see varieties with silver patches or dark green splashes. Prayer Plants are a little fussy though with light conditions, soil moisture and humidity levels though so we don’t recommend this as a starter plant, unfortunately.

Find out more in our Prayer Plant care guide.

14

Watermelon Peperomia

Peperomia argyreia

There aren’t really many leaves that are more beautiful and striking than those of the Watermelon Peperomia. It’s not difficult to know where they got their name from, as their silvery stripes steal the hearts of plant parents everywhere.

They are quite a delicate plant though, as their large heavy leaves are held up by relatively weak stems so be prepared to lose a few leaves here and there. Another thing to be prepared for when owning this plant is all of your friends wanting a cutting, but luckily this plant is super easy to propagate so no problems there!

Native to South Africa, the Watermelon Peperomia prefers mid-light levels, as they are used to the dappled conditions of the jungle floor. Oh, and as they are a semi-succulent, it’s important you don’t water this one too much or the stems can give up and the whole plant will droop and wilt.

Find out more in our Watermelon Peperomia care guide.

Fiddle and Thorn is a participant in the Amazon Services LLC Associates Program, an affiliate advertising program designed to provide a means for sites to earn advertising fees by advertising and linking to Amazon.com

Take our houseplant survey!

Quickly respond to our 30 second houseplant survey and get 75% off our Complete Houseplant Care eBook!

Take the Survey

No thanks…

How to Care for a Baby’s Tears Plant

Last Updated: October 16, 2023

Baby’s Tears Plant

Baby's Tears Plant

Also often grown outdoors, Baby’s Tears plants are great indoor potted plants for houseplant beginners as they are pretty easy to care for, are fast growers and couldn’t be simpler to propagate.

Native to western areas of the Mediterranean region, Baby’s Tears plants are small bushy plants with tiny round leaves. They are known by a large variety of common names including Mind-Your-Own-Business, Corsican Creeper, Baby Tears Plant, Angel’s Tears and Corsican Carpet and are rarely referred to by their Latin name of Soleirolia soleirolii.

In this article, we will go through everything you need to know to successfully grow and care for a Baby’s Tears plant, from basic environmental requirements to propagation methods and how to revive your plant if it’s dying.

How to Care for a Baby’s Tears Plant

There are a few main things to consider to best care for your Baby’s Tears. They can adapt to a wider range of environments compared to some fussy plant types but you’ll see the healthiest and fastest growth when things are just how they like it.

When it comes to sunlight, avoid intense direct sun rays during summer as this can very quickly dry out, scorch and burn the delicate leaves on your Baby’s Tears plant. Instead, find somewhere with bright but indirect sunlight.

A little but often watering technique is best when caring for a Baby’s Tears plant as they really don’t like their soil to become fully dried out for long periods of time. They have delicate roots, stems and leaves which doesn’t leave much space for water storage and makes them very susceptible to drying out quickly.

Below you’ll find a brief overview as well as more detailed instructions on how to care for a Baby’s Tears plant, prevent it from dying and keep it happy, healthy and thriving!

Baby’s Tears Plant Overview

Origin: Western Mediterranean

Latin Name: Soleirolia soleirolii

Common Name(s): Mind-Your-Own-Business, Corsican Creeper, Baby Tears Plant, Angel’s Tears, Corsican Carpet.

Plant Family: Nettle family

Difficulty Level: Easy

Height and Size: 4 inches tall (10 centimeters), 36 inches wide (90 centimeters)

Growth Rate: Fast

Flowering: Produce small white flowers in spring and summer.

Pruning: Only to remove dying/dead leaves or to shape your plant.

Cleaning: Use a feather duster to remove dust.

Light Requirements: Bright but indirect light.

Water Requirements: Moderate to frequent watering.

Best Soil: A standard potting mix but with additional humus or compost.

Ideal temperature: 60-80F (15-27C)

Fertilizing Routine: Apply a well-balanced fertilizer at half strength once a month during spring and summer.

Ideal Humidity Level: Over 60% humidity.

Propagation: Stem cuttings

Repotting Frequency: Once a year, in spring.

Toxicity: Non-toxic and safe for pets and humans.

Risk of Pests: Rare but risk of aphids, whiteflies and scale insects.

Common Problems: Leggy, yellow or brown foliage.

Baby’s Tears Plant Family

Part of the Nettle family, Baby’s Tears plants is a flowering plant that’s fast-growing and spreads quickly when not grown in a pot.

Baby’s Tears Plant Appearance

Compact and bushy, the Baby’s Tears plant is known for its small and delicate round leaves. If grown in a pot, it will eventually hang over it and cascade downwards to become a trailing plant. If grown on a large bed outside, they will spread evenly and quickly.

Care Difficulty Level

Although they do need tending to fairly often, the Baby’s Tears plant can still make a good plant for beginners. They grow relatively quickly and can adapt to a range of environments and homes.

Baby’s Tears Plant Height and Size

When mature, a Baby’s Tears plant can reach a height of 4 inches (10 centimeters) and a width of around 36 inches (90 centimeters). They will start to cascade down your pot if it outgrows the width.

Growth Rate of a Baby’s Tears Plant

Baby’s Tears plants are fast-growing houseplants and will grow rapidly. They will quickly become root bound and need repotting to continue healthy growth. Prune back regularly if you want to control growth.

Flowers on a Baby’s Tears Plant

As your plant matures, it can begin to grow tiny white flowers during spring and summer. However, they aren’t anything special and are quite insignificant in appearance and smell. They will wilt and die quickly.

We actually often prune these off our plant so it can focus its energy on growing new healthy leaves.

Pruning your Baby’s Tears Plant

If you spot any issues on your plant such as brown or yellow leaves, then prune these from your plant so that no energy is wasted trying to revive them. Once the foliage has discoloured, there is no way for it to return to the luscious green colour, unfortunately.

Other than pruning dead or dying leaves from your Baby’s Tears plant, you may also choose to prune your plant during spring and summer to maintain the shape and size that you want. They are fast-growing plants so may need to be pruned more regularly than your other plants.

Cleaning your Baby’s Tears Plant

Cleaning and general maintenance can be a little trickier with these plants as they have such thin, small, delicate and highly breakable leaves and stems. The best way to clean them is to use a feather duster that is soft and light and brush it over your plant.

If the leaves are dirty or the dust doesn’t go away with a feather duster, then we recommend submerging your plant in water to clean it. Don’t use running water over your plant as the water pressure can break and damage the leaves and stems but submerging it removes this danger and is a great way to keep the leaves looking and feeling fresh.

Baby’s Tears (Soleirolia soleirolii)

Baby's Tears (Soleirolia soleirolii)

Light Requirements for a Baby’s Tears Plant

Bright indirect light is best for your plant and they don’t do so well with bright direct light as this can damage their delicate leaves. Not only can the intense direct sunlight dry out the leaves quickly, but it can also scorch and burn your plant, causing the leaves to turn yellow. You can get away with some direct sunlight during winter though as the sun is a lot weaker but just make sure to relocate your plant in spring.

While Baby’s Tears plants can grow and survive in low light areas it’s important to note that growth will be slower and smaller. It can happen that your plant becomes leggy when growing in low-light areas which is why you’ll often see this happen in winter.

One great thing about this plant though is that they technically can survive under just artificial lighting so can be a great option for offices.

Water Requirements for a Baby’s Tears Plant

Baby’s Tears plants don’t like their potting mix to dry out so need regular watering to keep the soil moist. Cut back on watering slightly over winter but less than you would other houseplants as they don’t become fully dormant over winter and can still suffer from dried out foliage if their potting mix is dry for too long.

Best Soil for a Baby’s Tears Plant

A standard houseplant potting mix will work well for your Baby’s Tears Plant but any added humus or compost will aid growth. If growing outdoors, added manure will really help your plant.

The ideal temperature for your Baby’s Tears Plant

Baby’s Tears plants thrive in the average temperatures of your home so try to avoid extremes caused by radiators, AC vents or drafty windows. The best thing to do is invest in a digital thermometer if you don’t already have one as this will help you to spot any fluctuations early before they cause any damage to your plant.

Baby’s Tears Plant Fertilizer Requirements

Apply a well-balanced fertilizer at half the recommended strength once a month during spring and summer. It’s best to use a water-soluble fertilizer so that you can monitor and control the strength and regularity of feeding to avoid over-fertilization and yellow leaves.

Do not fertilize during fall and winter as these are the more dormant periods where you will see a lot less growth and feeding during this time can damage your plant’s health.

Ideal Humidity Level for your Baby’s Tears Plant

Another really important thing to take into account when caring for a Baby’s Tears plant is humidity. They like a high level of humidity in the air so mist regularly and invest in a humidifier to keep them happy. Ideally, you want to grow your Baby’s Tears Plant in a humidity of over 50%.

If you have a well-lit bathroom, this can be a great place for your Baby’s Tears Plant as the natural steam from showering means this is often one of the most humid rooms of your home.

@erdmanharder on Instagram

Soleirolia soleirolii plant

Propagating your Baby’s Tears Plant

Baby’s Tears plants actually form roots wherever stems touch soil which is why they grow so quickly. So all you need to do to propagate them is take cuttings and place them in soil. It really is that easy!

Mist and lightly water the cuttings and after a few weeks you should start to see a root system developing under the soil and new leaves may even be growing!

Repotting your Baby’s Tears Plant

As these plants are very fast-growing, they will need repotting once a year to avoid them becoming rootbound. They have quite small thin roots though so you shouldn’t need to repot any more than this.

Look out for signs that your plant is rootbound which include roots growing out of the drainage holes at the bottom, growing out of the top of the pot or your plant not producing any new growth in spring and summer. There are a few other causes of stagnant growth, however, so do check over your plant and its environment before assuming that it’s rootbound.

If you want to limit the growth of these fast-growing plants, you can stop repotting your plant and allow it to become rootbound. The level of new growth will slow and it won’t outgrow the space very fast.

Baby’s Tears Plant Toxicity to Humans and Pets

Luckily Baby’s Tears plants are completely non-toxic and pet friendly so you don’t need to worry about having them around your beloved furry friends or young children.

Treating and Preventing Pests

If your plant is growing outdoors for even some of the year, then there is an increased risk of pests. But even if it’s only growing indoors, it can happen that your Baby’s Tears Plant starts to suffer from aphids, whiteflies and scale insects.

Check over your plant regularly to help you spot any potential infestations early as this gives you the best chance of a successful treatment.

If you do spot pests, isolate your plant and thoroughly check over all other houseplants in the same room. The next step is to start a rigorous treatment of both neem oil and an insecticide to fight the infestation.

Baby’s Tears Plant Common Problems

Fiddle and Thorn is a participant in the Amazon Services LLC Associates Program, an affiliate advertising program designed to provide a means for sites to earn advertising fees by advertising and linking to Amazon.com

Take our houseplant survey!

Quickly respond to our 30 second houseplant survey and get 75% off our Complete Houseplant Care eBook!

Take the Survey

No thanks…

Autograph Tree Turning Yellow | Causes and How to Fix it!

Last Updated: January 25, 2022

As a plant parent, it can be pretty upsetting to see that your plant has developed yellow leaves, even the sight of a few yellow spots or patches can mean that something isn’t right with your plant. If you notice that the foliage on your Autograph Tree has developed some yellowing, then it’s important you establish what is causing it so you know if you need to take action. The occasional yellow leaf can be quite harmless as it could be natural ageing (more on that below) but there are also some other more worrying and harmful causes that result in yellow Autograph Tree leaves.

In this post, we will be going through all of the most common reasons why Autograph Trees develop yellow leaves, spots or patches. We recommend grabbing your plant and having it alongside you as you go through each reason so you can take a close look and figure out what the cause is.

Overwatering is a common cause of yellow leaves

If the leaves on your Autograph Tree have turned yellow and are quite droopy and even soft to touch then you are likely overwatering. Another thing to look out for that often signals overwatering is that the yellow leaves start to fall off the plant.

Overwatering is one of the main killers of Autograph Trees (and a lot of other houseplant types too) as you often won’t be able to tell until the problem has progressed quite far. Autograph Trees don’t like to be sitting in really waterlogged soil for long periods of time as this can lead to root rot meaning the plant becomes unstable and also cannot get needed nutrients from its root system.

If you think that your Autograph Tree is waterlogged and this is the cause of the yellow leaves, check the moisture level in the potting mix using a moisture meter or just your finger and adjust your watering habits accordingly. We also recommend replacing the potting soil straight away (rather than waiting for it to naturally dry out) so that the roots on your Autograph Tree can begin to recover. Cut away the rotten roots and dead leaves so that your plant focuses on growing new healthy roots and leaves.

Nutrient issues could also be to blame

Some yellowing can occur on your Autograph Tree because of nutrient issues, more commonly a lack of or an imbalance! It’s a good idea to swap out some of the soil in the pot with a nutrient-rich potting mix to ensure your Autograph Tree is getting the right level of nutrients.

After doing this, it’s good to review how much you are fertilising your plant as too much or too little can cause yellow patches across the plant. Make sure that if you are feeding your plant that it’s no more than once or twice a month during spring and summer. Oh and make sure to dilute all fertiliser as you shouldn’t trust the dosage on the bottles. Each plant is unique, so there’s no one-fits-all dosage when it comes to feeding your plants.

Intense direct sunlight can scorch the leaves

Another cause of yellow leaves in Autograph Trees is sunburn. This can happen if the plant is exposed to a lot of bright direct sunlight. Sunburn will show itself in patches of yellow across the leaves that are facing the window. Unfortunately, these yellow patches are irreversible so you are best trimming the worst affected leaves off the plant.

To prevent the issue from causing any more yellow leaves on your Autograph Tree, make sure to move your plant away from the direct light to a shadier spot in your home.

Low light levels

As with a lot of things in the houseplant world, too much and too little of something can have a very similar effect. This can make diagnosing the issue a little tricky. In the case of sunlight, too much as well as too little can cause your Autograph Tree to develop yellow leaves.

Autograph Trees don’t grow very well in low light areas and will start to produce yellow leaves if they aren’t getting enough light. You might also notice some stunted or leggy growth on the plant which also indicates a lack of sunlight. Try and move your plant to a spot with more natural light (making sure it’s indirect) and your Autograph Tree should start to produce healthier green growth.

The yellow leaves may simply be due to natural ageing

If you have gone through all of the above but still can’t seem to find the right cause for the yellow leaves on your Autograph Tree, then it might just be down to the natural ageing process. It’s totally natural for your Autograph Tree to drop some of its oldest leaves as it focuses on new bigger growth. These old leaves will first turn yellow before falling off the plant. This process happens with most houseplant types so you don’t always have to be alarmed at the sight of a yellow leaves.

If the rate of yellowing is quite slow (1 or 2 of the oldest leaves every few months) then it probably is nothing to worry about and is simply part of the natural shedding process. Do keep an eye on how often they are turning yellow though as if the rate speeds up then it is worth checking the plant over again for the problems we outlined above.

Those are the main causes of yellow leaves on Autograph Trees. We are often asked whether or not it is a good idea to remove the yellow leaves or let them naturally fall off your plant. We tend to recommend carefully trimming away the worst affected areas so that your plant can focus its energy and nutrients on growing new healthy leaves. If some areas only have a few yellow patches then these can stay on as it becomes more of a question of aesthetic.

To learn more about how to care for your plant, as well as propagation advice and our secret top tips, check out our Autograph Tree care guide.

Fiddle and Thorn is a participant in the Amazon Services LLC Associates Program, an affiliate advertising program designed to provide a means for sites to earn advertising fees by advertising and linking to Amazon.com

Take our houseplant survey!

Quickly respond to our 30 second houseplant survey and get 75% off our Complete Houseplant Care eBook!

Take the Survey

No thanks…

The Ultimate Autograph Tree Care Guide

Last Updated: October 16, 2023

Autograph Tree

Autograph Tree

Introducing the Autograph Tree

The Autograph Tree, scientifically known as Clusia rosea, is a striking evergreen plant that is native to the tropical regions of the Americas. Known for its glossy, dark green leaves, the Autograph Tree gets its name from its thick leaves which you can carve your name into.

Its popularity as a houseplant has soared in recent years so these are becoming easier to find across the world. While the Autograph Tree is durable and relatively low-maintenance, it does require specific care to thrive (which we will cover below).

Distinctive Features

One of the most distinguishing features of the Autograph Tree is its leaves. Thick and leathery, their texture is perfect for etching names or messages – hence the plant’s unique common name. It’s worth noting, however, that excessive ‘autographing’ can damage the plant, so it’s not something we actually recommend doing.

Size and Growth

As a houseplant, the Autograph Tree typically reaches a height of 1 metre maximum. However, in its natural habitat, it can grow several metres tall. Despite its potential size, this plant is relatively slow-growing, adding just a few new leaves each year so patience is important.

Flowering and Fragrance

The Autograph Tree produces beautiful, star-shaped flowers that typically bloom in the summer months. These white blossoms have a pleasant, subtle fragrance and will often attract bees and butterflies if the plant is kept outdoors.

There are several varieties of Autograph Trees available, each with its own unique characteristics. The most popular is the Clusia rosea ‘Variegata’, known for its stunning variegated foliage. However, others prefer the Clusia rosea ‘Nana’, a dwarf variety that is perfect for smaller spaces.

Autograph Tree Lighting Requirements

The Autograph Tree thrives in bright, indirect sunlight but it can tolerate less light, making it a versatile and adaptable houseplant. However, too much direct sunlight can cause the leaves to scorch and drop.

Artificial Lighting:

Autograph Trees can also flourish under fluorescent light. This makes it an ideal choice for office environments or areas in your home without natural light.

Note: Despite being a low-light tolerant plant, your Autograph Tree will grow more slowly in these conditions. It’s important to monitor your plant’s health and adjust its location if needed.

Lighting Changes Across Seasons

Remember, the intensity of sunlight changes with the seasons. During the brighter summer months, you may need to move your Autograph Tree further away from the window to avoid sunburn.

Signs of Incorrect Lighting:

  • Leaf Scorch: This is often a sign of too much direct sunlight. The leaves may become brown and crispy.
  • Leggy Growth: If your plant is stretching towards the light and the space between leaves is increasing, it may not be getting enough light.

Watering an Autograph Tree: When, How and How Much

When to Water your Autograph Tree

Watering frequency for the Autograph Tree depends on the season and the plant’s living conditions. During the growing season (spring and summer), the plant requires more frequent watering (roughly once a week). In autumn and winter, the plant enters a dormant phase, needing less water (roughly every two weeks).

How to Water your Autograph Tree

To water your Autograph Tree, begin by thoroughly soaking the soil until water starts to drain from the bottom. This method ensures every part of the root system gets adequate moisture. Nevertheless, avoid water stagnation in the saucer as it can lead to root rot.

How Much Water to Give your Autograph Tree

The amount of water your Autograph Tree needs depends on its size and the pot’s size. As a rule of thumb, water until it begins to drain from the bottom. Then after 15 minutes, remove any excess water that is still at the bottom of the pot or saucer to avoid overwatering your plant.

Temperature Requirements of an Autograph Tree

Daytime Temperatures: The Autograph Tree flourishes in temperatures ranging from 32-86°F (20-30°C) during the day. As a tropical plant, it is used to warmer climates and thrives in these conditions.

Night-time Temperatures: At night, the temperature should ideally be a little cooler but not below 61°F (16°C). Sudden and prolonged temperature drops below this can be harmful to the plant.

If you live in a colder climate, consider keeping your Autograph Tree indoors or in a greenhouse where the temperature can be regulated. If the temperature falls below the recommended range, the leaves may become discoloured or even fall off. We highly recommend investing in a thermometer to keep track of any temperature changes.

Humidity Needs of an Autograph Tree

Known for its tropical origins, the Autograph Tree likes a humid environment. Aim for between 45-65% humidity as anything above this for long periods of time can cause the leaves to rot.

Maintaining Optimal Humidity

  • Regularly mist your Autograph Tree, especially during drier months.
  • Consider placing a humidifier nearby or grouping it with other plants to increase humidity.
  • Placing your plant on a tray of pebbles filled with water can also enhance humidity levels.

Humidity Issues

Curled or brown leaf tips or small yellow/brown spots on the leaves can indicate a humidity problem. If you notice these signs, check the humidity level around your plant and adjust your plant’s environment accordingly and monitor any changes.

Fertilizing the Autograph Tree

Although it doesn’t require extensive fertilising, a bit of nutritional boost can certainly aid in its overall growth and development. Proper fertilisation can help maintain the tree’s vigorous growth and vibrant green foliage.

When to fertilise: The only time you should be fertilizing an Autograph Tree is during its active growth period which usually falls between spring and early autumn. During the dormant winter months, you should stop fertilizing.

What to use: A balanced, slow-release fertiliser with an NPK ratio of 10-10-10 is generally recommended.

Steps for Fertilising the Autograph Tree

  1. Step 1: Before applying the fertiliser, ensure the soil is damp. This helps the roots to absorb the nutrients effectively.
  2. Step 2: Spread the fertiliser evenly around the base of the tree, keeping it a few inches away from the stem to prevent root burn.
  3. Step 3: After applying the fertiliser at slightly less than the recommended strength, water the plant thoroughly to help distribute the nutrients throughout the soil.

Choosing the Right Pot and Soil

Pot Selection

When choosing a pot, consider one that is approximately 2-3 inches larger in diameter than the root ball of your Autograph Tree.

The pot should also have several drainage holes to prevent water accumulation, which can cause root rot. Terracotta pots are a popular choice due to their porous nature and excellent drainage capabilities but the downside is that they are breakable.

Soil Selection

Autograph Trees thrive in well-draining, fertile soil. A high-quality, peat-based potting mix is generally a good choice. Alternatively, you can create your own mix by combining equal parts peat moss, sharp sand, and loamy garden soil.

Note: Autograph Trees prefer slightly acidic to neutral pH levels, so if you are having issues with your plant and you can’t seem to diagnose the problem, it’s best to test your soil’s pH and amend it if necessary.

Repotting an Autograph Tree: A step-by-step guide

What you’ll need:

  • A new pot that is 2 inches larger in diameter than the current one
  • High-quality potting soil, preferably one designed for tropical plants
  • Gardening gloves
  • A gardening trowel

Procedure:

  1. Preparation: Begin by moistening the potting soil in a separate container. It should be damp, but not waterlogged. Put on your gardening gloves to protect your hands.
  2. Removing the tree: Carefully take the Autograph Tree out of its current pot. Loosen the root ball using your fingers, with a gentle touch to reduce the risk of damage. Don’t worry too much if you damage the odd root as your plant will recover quickly.
  3. Placement: Place a layer of the damp soil at the bottom of the new pot. Position your Autograph Tree in the centre of the pot.
  4. Replanting: Add the remaining soil around the tree, pressing down gently to remove any air pockets. The soil surface should be at the same level it was in the previous pot.
  5. Post-repotting care: Water the plant thoroughly after repotting and place it in a spot with indirect light. Refrain from fertilising for about a month to allow the tree to recover.

Pruning the Autograph Tree

Pruning your Autograph tree is a vital aspect of its overall care but it is so often forgotten (or shied away from). When done correctly, it can enhance the health and aesthetic appeal of your plant so should be something you are putting into your care routine.

When to Prune

The best time to prune your Autograph tree is during the early spring or summer months. This is the plant’s active growing period, and it can recover more swiftly from any stress related to pruning.

Tools Required

For the pruning process, you would need a pair of clean, sharp pruning shears or scissors. It’s crucial to ensure that your tools are clean to prevent the spread of any plant diseases.

Pruning Procedure

While pruning, your goal should be to maintain the shape of the plant and to remove any dead or diseased branches. Here’s a simple, step-by-step guide:

  1. Identify the branches that need to be pruned. These can be dead, diseased or simply overgrowing branches that you want to remove to reshape your plant.
  2. Using your shears, make a cut at a 45-degree angle about 1/4 inch above a leaf node. This encourages new growth.
  3. Make sure not to prune more than one-third of the plant at a time as this can stress the plant.

Post Pruning Care

After pruning, ensure to give your Autograph tree some additional TLC. Water it thoroughly and consider applying a balanced, water-soluble fertiliser to support its recovery and new growth.

Flowers on an Autograph Tree

The tree produces blooms that have a colour palette ranging from pale pink to deep, rosy hues, making them a beautiful contrast against the dark green leaves. This will happen a lot more frequently when the plant is grown outdoors so don’t expect any on your houseplant.

Flowering Cycle

Autograph Trees typically bloom in the warmer months, with the flowering season extending from late spring to early autumn.

Care for the Blooms

To ensure a hearty and healthy flowering, certain care practices should be followed. These include providing ample sunlight, maintaining a warm temperature, and regular watering.

  1. Sunlight: Autograph Trees thrive in bright, indirect light. Make sure your tree is placed near a window where it can receive plentiful light, but shielded from direct, harsh sunlight.
  2. Temperature: These trees prefer warm conditions, similar to their native tropical habitat. Aim for temperatures between 60-85°F (15-29°C) for optimal growth.
  3. Water: Water generously during the flowering season, ensuring the soil is moist but not waterlogged.

Autograph Tree Toxicity to Pets and Humans

Toxicity to Humans

The Autograph Tree is toxic to humans when ingested and can cause gastrointestinal upset. It’s always a good idea to keep the plant out of reach of curious children who may be tempted to taste its interesting leaves.

Toxicity to Pets

All parts of the Autograph Tree are toxic to pets if ingested. Symptoms can include vomiting, loss of appetite, and depression.

What to do in case of ingestion

  • If a human has ingested parts of the plant, monitor them for any signs of discomfort. Although unlikely, if severe symptoms occur, contact a medical professional immediately.
  • In the case of pets, it’s advisable to contact your vet promptly if you suspect your pet has ingested any part of the Autograph Tree.

How to Clean an Autograph Tree

Keeping your Autograph Tree in tip-top condition means more than just watering and feeding it – regular cleaning is key to maintaining its health. Here are some simple steps you can follow to clean your Autograph Tree:

  1. Prepare Your Tools: Gather a soft, clean cloth or sponge, a bowl of lukewarm water, and a mild soap. It’s important not to use harsh cleaning agents as they can damage the natural coating on leaves which can leave them dull and damaged.
  2. Wipe the Leaves: Gently wipe each leaf and be sure to clean the underside as well, as this is where pests often hide.
  3. Rinse and Dry: Once all the leaves are clean, wip them with a bit of clean lukewarm water and dry gently to prevent water spots or leaf rot from forming.

Remember, cleaning your Autograph Tree isn’t just about aesthetics. A clean plant is less likely to fall prey to pests and diseases. Plus, clean leaves can photosynthesise more efficiently as even a thin layer of dust can block quite a lot of sunlight, enabling your plant to grow stronger and healthier.

Managing Pests and Diseases

Common Pests

Autograph Trees may attract a variety of pests, including mealybugs, spider mites, and aphids. These pests can cause discolouration (small brown or yellow spots), leaf curling, and overall decreased plant vitality (your plant will start to look a little limp and sad).

Control Measures

When dealing with pests, begin by spraying your plant with a mild, soapy water solution. If the infestation persists, you may need to use an insecticidal soap or a neem oil spray. Always follow the manufacturer’s instructions when using these products and make sure to isolate your infected plant to stop the spread to other houseplants.

Common Diseases

Overwatering your Autograph Tree can lead to root rot, a serious disease. Signs of root rot include yellowing leaves and a soggy, dark base. If you suspect root rot, you may need to repot your plant into fresh, well-draining soil. Never wait for the soil to naturally dry out on its own if it is waterlogged as this just risks more damage.

Autograph Tree Care FAQs

Common Problems with your Autograph Tree

Here are some common issues that you might run into. It’s important to diagnose any issues early to give your plant the best chance of bouncing back.

Fiddle and Thorn is a participant in the Amazon Services LLC Associates Program, an affiliate advertising program designed to provide a means for sites to earn advertising fees by advertising and linking to Amazon.com

Take our houseplant survey!

Quickly respond to our 30 second houseplant survey and get 75% off our Complete Houseplant Care eBook!

Take the Survey

No thanks…

Asparagus Fern Care

Last Updated: September 2, 2022

Basic Asparagus Fern Care

We don’t often recommend the Asparagus Fern to more inexperienced plant parents because they can be quite sensitive to their environment and care and their delicate leaves can all turn brown even if the slightest thing is wrong.

Light is the most important thing to consider when caring for an Asparagus Fern. If they receive too much, it can burn the leaves and dry out the plant. Even just a day or two of too much light and you’ll have a very dry Asparagus Fern on your hands. The good news is that they can OK with most other light levels and although you may see slower growth in lower light areas, the risk of leaf burn is minimized.

Below you’ll find our complete Asparagus Fern care guide with everything you need to know to keep your Fern happy and healthy.

Detailed Asparagus Fern Care

Keep them out of direct light

Asparagus Ferns are happy in most lighting conditions, which is great news. One thing to note though is that it’s best if you keep your Asparagus Fern out of direct sunlight though as they can be prone to burning.

Be careful not to overwater your Asparagus Fern

Asparagus Ferns prefer a little and often way of watering, this keeps the soil moist but never wet and soggy. They can be prone to root rot so it’s important that you get the drainage right. Check out our guide to watering for more detailed information.

Asparagus Ferns love humidity

Being from the forest, Asparagus Ferns are happiest when there’s a little higher humidity than in the average home. Be sure to give your Asparagus Fern a mist every few days, or consider a pebble tray to keep things more consistent. You can find out more in our Humidity Guide.

Asparagus Ferns are poisonous to pets

Watch out if you have have a cat or dog around! Pets that ingest the leaves can develop digestive issues and struggle with breathing, so give this one a miss if you have a pet in the house.

Asparagus Ferns like slightly higher temperatures

Although it is possible for your Asparagus Fern to survive well in slightly cooler homes, they will thrive if the temperature is slightly warmer. Avoid placing them next to drafty windows and doors as the cool air from outside can be quite harmful over time.

Propagate your Asparagus Fern by division

The easiest way to propagate your Asparagus Fern is by dividing the plant. Make sure that you equally divide up the root system so that each plant has the best survival chance. We also recommend propagating your Asparagus Fern in spring ahead of the warmer growth months.

Asparagus Fern Care FAQs

Common Issues for Asparagus Ferns

Although Asparagus Fern care can be quite easy, there are several common issues that happen if your plant isn’t fully happy with its care or environment. It is important to spot the warning signs so you know how to help nurture your plant back to full health.

Fiddle and Thorn is a participant in the Amazon Services LLC Associates Program, an affiliate advertising program designed to provide a means for sites to earn advertising fees by advertising and linking to Amazon.com

Take our houseplant survey!

Quickly respond to our 30 second houseplant survey and get 75% off our Complete Houseplant Care eBook!

Take the Survey

No thanks…

Arrowhead Plant Care: The Complete Guide

Last Updated: October 16, 2023

Arrowhead Plant

Arrowhead Plant

Introduction to Arrowhead Plant Care

Known scientifically as Syngonium podophyllum, this perennial favorite is a member of the Araceae family that brings a touch of tropical charm to any indoor space. In terms of care difficulty, they fall somewhere in the middle. While they can adapt to a range of environments, they can be picky about certain things such as humidity.

Understanding Arrowhead Plant Varieties

This intriguing plant, native to Latin America, boasts numerous varieties each with their own distinctive features. Understanding these varieties can significantly enhance your plant care routine and consequently your plant’s health!

Primarily, Syngonium podophyllum varieties vary based on leaf color, shape, and size. Some popular varieties include the stunning ‘White Butterfly’, the vibrant ‘Neon Robusta’, and the uniquely patterned ‘Berry Allusion’.

1. White Butterfly

As the name suggests, the ‘White Butterfly’ variety features delicate ivory-colored leaves, reminiscent of a butterfly in flight.

2. Neon Robusta

If you’re drawn to bold, bright colors, the ‘Neon Robusta’ variety could be an excellent choice for you. With its leaves boasting an eye-catching neon green color, this variety is sure to stand out in any indoor jungle.

3. Berry Allusion

Those who appreciate unique patterns and textures might find themselves captivated by ‘Berry Allusion’. This variety boasts leaves with a beautiful pinkish hue and intricate venation patterns that add depth and interest.

Watering Your Arrowhead Plant: A Comprehensive Guide

Understand Your Arrowhead’s Needs

The Arrowhead plant is native to tropical rainforests, and it loves moisture—however, this does not mean it requires constant watering. Overwatering can actually be more damaging than underwatering.

When and How to Water

Watering your plant isn’t a one-size-fits-all task; it’s something that depends on various factors, such as the size of the pot, the quality of the soil, and the overall health of the plant.

  • When: As a rule of thumb, water your Arrowhead plant when the top inch of soil becomes dry. This usually means watering approximately once a week during the growing season (spring and summer) and reducing watering to every other week during the dormant season (fall and winter).
  • How: When watering, do so thoroughly until water starts to drain from the bottom of the pot. This ensures the roots receive enough hydration. Remember to discard any excess water sitting in the drainage tray to avoid waterlogging.

Signs of Incorrect Watering

Like any plant, your Syngonium podophyllum will display specific signs if it’s not being watered correctly. Here are some common symptoms to watch out for:

  • Brown leaf tips: This could be a sign of underwatering or low humidity.
  • Yellowing leaves: This is often a sign of overwatering.
  • Wilting: This can be caused by both overwatering and underwatering—check the soil to determine the issue.

The Perfect Lighting Conditions

The Arrowhead plant is often classified as a low light tolerant plant, but it’s essential to understand what this really means. It doesn’t necessarily mean that it thrives in the dark or in the absence of light. Rather, it refers to the plant’s ability to tolerate and survive in less-than-optimal light conditions if needed.

Indirect Lighting

The Arrowhead plant thrives best in bright, indirect light (but can adapt to lower). Direct sunlight can scorch its leaves, causing them to turn yellow and fall off so be wary of direct sunshine during summer.

Artificial Lighting

If natural light is insufficient or inconsistent in your home, artificial lighting can be a good alternative. Fluorescent lights, for instance, can provide the necessary light spectrum for your plant. However, remember to keep the light source a few feet away from the plant to prevent leaf burn as Arrowheads can have very thin delicate leaves.

Low Light

While your Syngonium podophyllum can tolerate low light conditions, growth may be slower and the vibrant leaf colors may fade. Therefore, if you choose to keep your plant in low light, expect a less vigorous plant with muted colors.

Humidity and Temperature Control for Arrowhead Plants

The Syngonium podophyllum is a tropical plant that thrives in warm, humid environments. However, it also adapts fairly well to average home conditions which is why they can easily be kept as houseplants.

When it comes to temperature, Arrowhead plants prefer a range between 60-75°F (15-24°C). They are somewhat tolerant of lower temperatures, but any sudden temperature drops or exposure to cold drafts can harm the plant, causing leaf yellowing or even plant death.

Therefore, it is advisable to keep your plant away from external doors, windows, or other sources of cold drafts during the winter months.

As for humidity, Arrowhead plants love high humidity levels as it mimics their natural tropical habitat. A humidity level of 50% or higher is ideal.

If you notice that the leaves are turning brown on the edges, it could be a sign that your plant needs more humidity. To increase humidity you can mist your plant, use a humidifier or a pebble tray.

Tips for Fertilizing Your Syngonium

Understanding the Fertilizer Needs of the Arrowhead Plant

Arrowhead plants are not heavy feeders, so they don’t require an excessive amount of fertilizer. Instead, these plants thrive best with a light, balanced fertilizer applied every 4 weeks during the growing season (spring and summer). During the fall and winter, remove fertilizer from your to-do list as these plants enter a dormant phase and fertilizing during this time will cause damage.

Choosing the Right Fertilizer

A balanced, water-soluble houseplant fertilizer, such as a 20-20-20 (N-P-K) mix, works well. This type of fertilizer contains equal parts nitrogen, phosphorus and potassium, the three main nutrients that plants require. These are pretty easy to find in plant shops and garden centers.

Applying the Fertilizer

Dilute the fertilizer in water according to the package instructions and then water the plant with this solution. Always apply the fertilizer to damp soil to avoid burning the roots. If the leaves of your plant start to yellow or brown at the tips, this could potentially be a sign of over-fertilization.

Consider Organic Options

If you prefer a more natural approach to plant care, there are several organic options available. Compost, worm castings, and seaweed extract are all excellent sources of nutrients that can help your Arrowhead plant grow. Remember to always follow the manufacturer’s instructions when using these products.

Repotting an Arrowhead Plant

Arrowhead plants need some occasional repotting to provide them with fresh soil filled with essential nutrients and a bit more space for them to grow. It doesn’t have to be a daunting process though as long as you handle your plant with care the whole way through.

When to Repot?

The best time to repot an Arrowhead plant is during the late winter or early spring, just before the start of the growing season. This gives the plant an opportunity to grow in fresh, nutritious soil and a bit more space. On average, an Syngonium podophyllum should be repotted approximately every two years but sooner if you spot signs your plant is rootbound.

Steps to Repot an Arrowhead Plant

  1. Prepare the New Pot: Choose a new pot that is 2-3 inches larger in diameter than the current one. Make sure the new pot has drainage holes to prevent water logging.
  2. Prepare the Plant: Water your Arrowhead plant one day before repotting. This ensures that the roots are hydrated and flexible, making the transition easier.
  3. Remove the Plant: Carefully remove the plant from its current pot. Try to keep the root ball intact to minimize stress to the plant.
  4. Place the Plant: Add a layer of fresh potting soil to the new pot and gently place the Arrowhead plant inside. The top of the root ball should be level with the rim of the pot.
  5. Fill With Soil: Fill the rest of the pot with soil, firming it gently around the base of the plant. Ensure that the plant is secure but not packed too tightly.
  6. Water the Plant: Thoroughly water the plant after repotting to help settle the soil around the roots.

Common Pests and Diseases and How to Prevent Them

Arrowhead plants, while generally robust and easy to care for, are not immune to certain common pests and diseases that can adversely affect their health and growth. Early detection, regular maintenance, and appropriate preventative measures can significantly reduce the risk of these problems. Below we delve into some of the common pests and diseases to help you diagnose any issues.

Common Pests

  1. Spider Mites: These tiny pests can cause significant damage by sucking the sap from the plant. Indications of infestation include yellowing leaves and fine webbing. Regularly misting your Arrowhead plant can prevent these mites, as they prefer dry conditions.
  2. Mealybugs: Mealybugs appear as small, white fluffy insects on the plant. They harm the arrowhead plant by feeding on its sap and excreting a sticky substance called honeydew. Wiping the leaves with a solution of mild soap and water can keep mealybugs at bay.
  3. Scale Insects: Scale insects are small, round pests that attach to the plant and feed on its sap. They can be controlled by regularly wiping the leaves with neem oil or an insecticidal soap.

Common Diseases

  1. Root Rot: Overwatering can lead to a condition known as root rot. This can be prevented by ensuring your plant has well-drained soil and is not left sitting in water.
  2. Leaf Spot: Leaf spot disease causes brown or yellow spots on the leaves, often surrounded by a yellow halo. To prevent this, avoid getting the leaves wet when watering and ensure your plant has good air circulation.
  3. Bacterial Blight: This is a serious disease that can cause wilting, yellowing of leaves, and stem rot. Prevention includes avoiding overhead watering, ensuring good air circulation, and removing and disposing of any diseased parts immediately.

Prevention is always so much better than a cure. Regularly inspect your Arrowhead plant for any signs of pests or diseases and start treatment as soon as you spot the signs.

Arrowhead Plant Toxicity

Human and Pet Toxicity

Arrowhead plants are classified as toxic to both humans and pets. The plant’s sap contains calcium oxalate crystals, which can cause skin irritation. If ingested, the effects can be more serious, leading to a burning sensation in the mouth, difficulty swallowing, and nausea.

First Aid Measures

If you or a family member come into contact with the sap of an Syngonium podophyllum, it’s important to take immediate action. Here are some initial steps to follow but we recommend you seek professional medical advice:

  1. For skin exposure: Wash the affected skin thoroughly with mild soap and water. If irritation persists, seek medical attention.
  2. For eye exposure: Rinse the eyes with lukewarm water for a few minutes, and then seek medical advice.
  3. If ingested: Do not induce vomiting. Rinse the mouth with water and consult a medical professional immediately.

Flowers on an Arrowhead Plant

While not all varieties of Arrowhead plants will bloom in indoor conditions, those that do can grow beautiful small flowers that are very aromatic.

Timing and Conditions:

Flowering in Arrowhead plants typically occurs during the warmer months, particularly in summer and early autumn. However, the blooming cycle isn’t always predictable, and the exact timing may vary. The plant’s bloom often depends on specific conditions being met, such as ample sunlight, well-drained soil, and appropriate humidity levels.

Appearance:

When your Arrowhead plant decides to flower, you’ll notice small, spherical inflorescences appearing, covered in a multitude of tiny, cream-colored blossoms. These clusters, although not as showy as some other houseplant flowers, are still very pretty and smell great!

Post-Bloom Care:

Once the flowers have faded, it’s essential to trim off the spent blooms to encourage new growth. This practice, known as “deadheading,” not only keeps your plant looking tidy but also redirects energy towards leaf production and overall health.

Cleaning your Arrowhead Plant

Keeping your Syngonium podophyllum clean is not just a matter of aesthetics; it is a crucial aspect of plant health. Plants with clean leaves are generally healthier as they can effectively photosynthesize and breathe. Here are some steps to help keep your plant in tip-top shape:

  1. Prepare your cleaning solution: You can use a mild, soapy water solution for cleaning. Avoid using any harsh chemicals that may damage the plant. Mix a few drops of mild dish soap in lukewarm water to remove tough dirt.
  2. Wipe the leaves: Using a soft, damp cloth, gently wipe the upper and lower surfaces of each leaf. Be careful not to damage the leaves while wiping.
  3. Rinse the leaves: After wiping, gently rinse the leaves with lukewarm water to remove any soap residue. Avoid using cold or hot water as it can shock the plant.
  4. Let the plant air dry: Once you have cleaned and rinsed the leaves, let the plant air dry.

Arrowhead Plant FAQs


Common Problems with your Arrowhead Plant

Fiddle and Thorn is a participant in the Amazon Services LLC Associates Program, an affiliate advertising program designed to provide a means for sites to earn advertising fees by advertising and linking to Amazon.com

Take our houseplant survey!

Quickly respond to our 30 second houseplant survey and get 75% off our Complete Houseplant Care eBook!

Take the Survey

No thanks…