Brown Croton Plant Leaves – Causes and Solutions

Last Updated: May 30, 2022

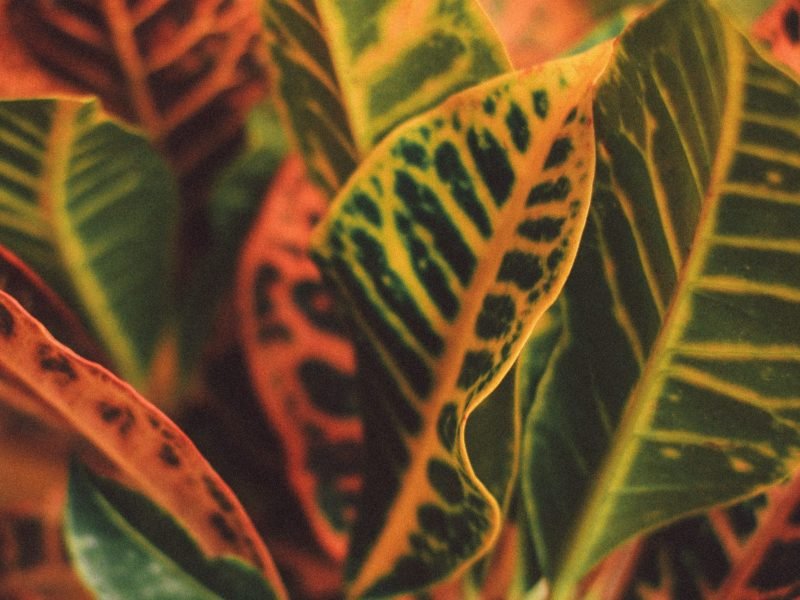
If there’s one thing that Croton Plants are loved and known for is their incredible unique colourful leaves. In fact, every Croton Plant is unique as they are genetically unstable so their colour and patterns are different for each and every plant. Croton Plant’s incredible foliage just makes brown leaves that little bit more frustrating and it’s important that you diagnose the issue and get to fixing it straight away before the problem gets more severe.

In this post, we will be outlining the different reasons why Croton Plant’s develop brown leaves, as well as how to fix the issue and prevent it from happening in future

Brown leaves can indicate underwatering

If your Croton Plant’s leaves have become brown as well as dry and crispy (beginning from the tips inwards) it may be because you have underwatered your plant over the past few weeks.

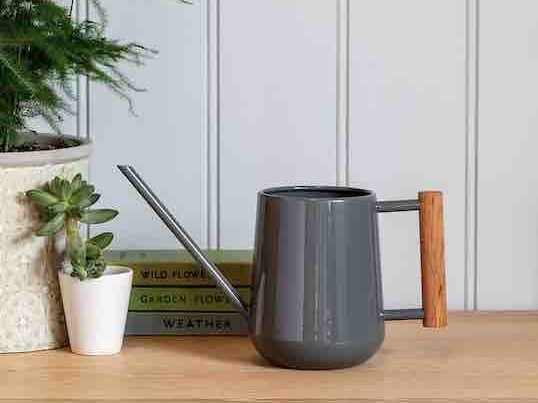
Too little water can cause quite a bit of damage to your Croton Plant (not only brown leaves) so it’s important you keep a close eye on how much moisture is in the soil. Make sure to regularly water your Croton Plant, a little and often approach can ensure the soil is always slightly damp and will prevent the roots from shrivelling up. Croton Plants don’t like to be swimming in water, but they don’t like to have dry soil for too long either so it’s a fine balance to strike.

Luckily underwatering won’t instantly kill your Croton Plant so if you spot a few dry brown patches on the leaves, adjusting your watering schedule should fix this issue pretty quickly. Trim away the brown parts and any new growth should hopefully be healthy and colourful!

Overwatering can also cause brown leaves

Too much water can also cause your Croton Plant to develop brown leaves (you want to avoid extremes when it comes to watering your plant). But instead of the leaves being light brown and crispy as they would be when underwatered, they are soft to touch and darker brown in colour. You might also see yellowing on the leaves of your Croton Plant as well if it has been overwatered. Check your Croton Plant’s soil straight away to see if it is waterlogged. If it is, then replace it with fresh potting mix to allow the roots to recover.

To avoid any more brown leaves on your Croton Plant, make sure you are checking the moisture levels in the soil before you water. You can do this by putting a finger into the top two centimetres of the soil to see how damp it is. Another method is to lift up your Croton Plant before and after watering. After a few weeks, you should get a feel for how heavy your plant is when it needs water.

Top tip: It’s always a good habit to get into to check back half an hour after watering your Croton Plant to see if there is any water left in the sauces or at the bottom of the planter. If there is, pour it away so that your plant isn’t sitting in water. 30 minutes is usually enough for the plant to soak up as much water as it needs.

Brown leaves can be caused by drainage issues

Sometimes it may not be your watering schedule that is causing your Croton Plant’s leaves to turn brown but the poor water drainage of the soil and pot. This can be quite an easy issue to fix though as you can easily increase the amount of drainage in the pot by mixing in a small amount of perlite. This makes it easier for the water to flow through and out of the drainage holes of your pots (you should also check to make sure your pots have drainage holes). Another easy step to avoid waterlogged soil causing brown leaves is to add a few small stones or pebbles to the bottom of your pots, this helps in making sure that the drainage holes don’t get blocked by soil or any loose debris.

Although clay or terracotta pots can be a little bit more expensive and are breakable compared to plastic pots, their upsides are much more than just the good look. The clay they’re made of is permeable which means that some of the water in your soil can evaporate through the sides of the pot. This isn’t the case for the plastic pots that our plants often come in, which instead hold in every drop of moisture. So sometimes it is worth investing a little more to make sure that the roots of your Croton Plant are not sitting in too much moisture as this can very quickly cause brown leaves.

Low temperatures are another factor to consider

Hotspots or cold drafts can also cause your Croton Plant to develop brown leaves so it’s important to monitor this throughout the year. It can also cause your Croton Plant to lose leaves so you want to solve this one before it gets that extreme. Hotspots can occur when your plant is too close to the window and is receiving a lot of direct light or if it’s near a radiator/ heating vent. It can be difficult to notice hotspots because the heat disperses around the room and it’ll feel like a normal temperature to you. Make sure you are ventilating the room well and avoid putting your Croton Plant within 1 metre of any radiators.

Cold drafts are also your Croton Plant’s worst enemy and can quickly lead to brown drooping leaves. A consistent stream of cold air coming in from outside through cracks in doors and windows can be quite harmful to your plant. This is especially dangerous during winter when temperatures can really drop. Make sure you draft proof any doors or windows that any of your houseplants are close to. (Draft proofing will also save you on heating bills so it’s a win-win!!)

Brown leaves can mean low humidity levels

Humidity is often forgotten when it comes to caring for your plants but it can be the number 1 cause of dry brown leaves. The problem tends to be worse during winter as the heating and lack of ventilation really dries out the air. However, there are some really easy ways you can up the humidity in your home:

Mist the leaves

One of the easiest methods for increasing humidity and preventing more brown leaves is misting your Croton Plant with a spray bottle. We recommend you get into the habit of doing this a couple of times a week. Misting also gets rid of dust on the leaves which is an added bonus.

Our top tip when it comes to misting is to never do it in the evenings. This doesn’t leave enough time for the water to evaporate before it gets dark and the cold nighttime temperatures leave damp leaves susceptible to rotting and they’ll turn very dark brown and soggy.

Use a pebble tray

This one requires a little bit more set-up work but is a great method for preventing brown leaves. Fill a tray with small stones and fill it two-thirds of the way up with water. Make sure the top of the stones are dry. Then place your Croton Plant on top and the water will evaporate around it over the course of the day.

One thing you must be careful of is that the roots and the pot are not touching the water in the tray as this will cause waterlogged soil and probably root rot.

Give your plant a wash down

Another way to instantly raise the humidity for your Croton Plant and prevent any more brown leaf edges and tips is to give it a wash down. Just pop your Croton Plant in the shower or sink and give the leaves a good soaking. You want to keep the water lukewarm so you don’t shock or damage the leaves. We also recommend keeping the water pressure fairly low so you don’t break any of the leaves or stems

Showering your plant is also a great way to get rid of any pests that might be secretly living on your Croton Plant. So it’s a great thing to do every once in a while, brown leaves or not.

Invest in a humidifier

Humidifiers are a real game-changer when it comes to increasing the humidity for your plants and avoiding brown leaves. They are portable and affordable devices that keep a consistent humidity level in your home. We recommend this humidifier from Amazon. We’ve been using it for a few years now and all of our houseplants love it!

Pests are a worrying cause of brown Corton Plant leaves

A less common but more serious reason why your Croton Plant’s leaves are turning brown is a pest infestation. It can happen that pests such as mealybugs, spider mites and scale insects start to call your plant home. They suck on the nutrients which is what causes the leaves to turn brown, die and eventually fall off.

If you find pests on your lant there are a few steps you need to take immediately. Firstly, isolate the infected plant away from all of your other houseplants to stop the pests from spreading to your other beloved plants. Then you need to check over your other plants to see if any others are showing signs of a pest infestation.

To treat the pests on your Croton Plant, and prevent more brown leaves, we recommend giving the whole plant a shower. They have quite hardy leaves so can withstand the shower better than some other more delicate plants. Make sure the shower isn’t on full pressure and you should be fine. You should also treat your plant with an organic insecticide to fight the infestation.

Those are the top reasons why Croton Plants develop brown leaves and we recommend going through each of them one by one whilst inspecting your plant, your care routine and its environment to figure out which factor is the cause of the brown leaves. If there are no other signs other than a few brown leaves, you should have caught the issue early which makes bringing your plant back to full health a little easier.

Check out our full Croton Plant care guide for more information about spotting and treating common problems as well as propagation advice and general top tips.

Fiddle and Thorn is a participant in the Amazon Services LLC Associates Program, an affiliate advertising program designed to provide a means for sites to earn advertising fees by advertising and linking to Amazon.com

Take our houseplant survey!

Quickly respond to our 30 second houseplant survey and get 75% off our Complete Houseplant Care eBook!

Take the Survey

No thanks…

Brown Bird’s Nest Fern Leaves | Causes and Solutions

Last Updated: January 16, 2022

Getting their name from the way they grow on top of other plants in the wild, the Bird’s Nest Fern brings a little bit of the wilderness into your home. However, if you notice that your plant has started to develop brown leaves (or even just brown leaf tips) then it suggests something isn’t quite right with either the care your plant is receiving or the environment your Bird’s Nest Fern is in.

Below we will be going through each of the reasons why Bird’s Nest Ferns develop brown leaves so you can correctly diagnose the issue, as well as treat it and prevent it from happening again in the future.

Low humidity levels cause brown leaf tips

If your Bird’s Nest Fern has developed light brown leaf tips that are dry to touch, then it might be caused by low humidity in the room. This will dry out the tips and edges of the leaves which is unfortunately irreversible. However, there are quite a few really easy steps you can take to increase the humidity for your Bird’s Nest Ferns, some of which are free and others that take nearly no effort at all:

  1. Mist the leaves on your Bird’s Nest Fern

    This is a really good habit to get into for all of your humidity-loving plants. Use a spray bottle to mist the leaves at least a few times per week to boost the humidity.

    We recommend only misting your Bird’s Nest Fern in the mornings though. Bird’s Nest Ferns are quite susceptible to leaf rot if the leaves are damp when the temperatures drop at night. So by doing it in the morning, you leave enough time for the water droplets to evaporate off the plant.

  2. Build a pebble tray

    This requires a little DIY but it’s a great solution for Bird’s Nest Ferns that have developed brown leaves due to a lack of humidity. Fill up a tray or bowl with small stones and fill it up halfway with fresh water. Place your Bird’s Nest Fern on top of the stones and the water will evaporate around your plant throughout the day.

    The most important thing when making a pebble tray for your Bird’s Nest Fern is that the water doesn’t reach high enough so that the roots are sitting in water which will risk root rot.

  3. Move to a humid room

    If you have good lighting in your bathroom then we recommend moving your Bird’s Nest Fern in there. The humidity level tends to naturally be a little higher than the other rooms in your home because of the steam released from showering.

  4. Buy a humidifier to keep a stable humidity level

    If you’re worried about the lack of humidity becoming a real problem, then buying a humidifier is definitely the best option. They help to keep a nice consistent level of humidity and are super affordable too!

Underwatering can dry out the leaves

Another cause of dry brown leaves on Bird’s Nest Ferns is a lack of water. These ferns need a consistent level of moisture or they will start to dry out. As the leaves are fairly delicate in comparison to a lot of other plants, Ferns can react quite quickly to underwatering so it’s important to stay on top of your watering routine.

Take your Bird’s Nest Fern out of the pot and see how dry the potting mix feels. If it’s bone dry and the roots look crispy and wrinkled, then underwatering is the most likely culprit of the brown leaves. The best way to fix your underwatered Bird’s Nest Fern is to water your plant a little bit once a day for about a week. This will help to gradually reintroduce water without shocking your plant by changing the environment too rapidly.

We recommend investing in a moisture meter so you can make sure that the potting mix doesn’t dry out too much (it also helps with overwatering too, which we go through a little later on in this post).

Hotspots can dry out your Fern

Bird’s Nest Ferns are quite sensitive to extreme temperatures and really hot environments will dry out your Fern and cause brown leaves. Hotspots can occur next to windows that get a high level of intense direct sunshine but they can also be near radiators or heating vents. So you need to watch out for them in summer and in winter.

Make sure you are ventilating the room well and avoid putting your Bird’s Nest Fern within 1 metre of any radiators to prevent hotspots. Brown leaves won’t develop suddenly, but over time it can begin to damage your Fern.

Overwatering can also cause brown leaves

As we’ve been through before, Bird’s Nest Ferns like a nice consistent moisture level in their soil. They can deal with quite a lot more moisture than most other plant types, but will still suffer from root rot if the soil is soggy for long periods of time. This is especially common during winter, where it will take longer for the potting mix to dry out.

If your Bird’s Nest Fern has been overwatered your it’s best to replace the potting mix straight away rather than just sit and wait for it to dry up over time. This prevents any more damage from being done to your plant’s root system and allows your Bird’s Nest Fern to start the recovery process. Make sure to replace it with something fresh and nutrient-rich, like this one from Miracle Gro.

Going forward, make sure to keep an eye on the moisture levels in the soil to prevent more waterlogged soil from rotting the roots. Using a moisture meter will help you to do this. You could also invest in self-watering pots, like these ones from Amazon, that make sure your Bird’s Nest Fern is getting just what it needs.

Those are the 4 main factors why Bird’s Nest Ferns develop brown leaves or brown leaf tips. It’s important that you act quickly to determine what is causing the brown leaves on your Bird’s Nest Fern. The earlier that you spot and treat the problem, the more chance you have at getting your plant back to full health. A lot of people ask us whether it’s best to trim away the brown leaves or to let them fall off naturally. We always recommend trimming off the leaves that are fully brown, as this prevents your plant from wasting valuable energy on leaves that are basically dead. Trimming them away means your Bird’s Nest Fern can focus all its energy on new growth.

Check out our Bird’s Nest Fern care guide for all the information on how to best care for your plant!

Fiddle and Thorn is a participant in the Amazon Services LLC Associates Program, an affiliate advertising program designed to provide a means for sites to earn advertising fees by advertising and linking to Amazon.com

Take our houseplant survey!

Quickly respond to our 30 second houseplant survey and get 75% off our Complete Houseplant Care eBook!

Take the Survey

No thanks…

Brown Autograph Tree Leaves | Causes and Solutions

Last Updated: June 21, 2022

Autograph Trees have such sturdy stems that you can actually carve things into them (which is where the name comes from). They can be fairly easy to care for once you’ve nailed down the right care routine, but this doesn’t mean that they won’t come with their own set of issues. Brown leaves can often develop on Autograph Trees if their environment isn’t quite right. But don’t fret, we will go through each of the common causes of brown leaves on Autograph Tree so you can diagnose and fix the problem right away.

Overwatering often causes brown leaves

If you notice that your Autograph Tree’s leaves are turning brown and mushy, it is most likely due to overwatering. Too much water can very quickly lead to root rot which is very harmful to your Autograph Tree. Not only does it cause the leaves to turn brown, but it will also mean that the plant is unable to take up water or nutrients meaning your plant may also begin to die pretty quickly. If you think that you may have overwatered your Autograph Tree it is best to replace the soil straight away rather than just sit and wait for it to dry up over time as this risks more damage to your plant.

There are two really easy ways to make sure that your Autograph Tree definitely needs water. First, check the moisture at the top of the soil and you can also lift up your Autograph Tree plant to check the weight of the plant before and after watering. You will then start to be able to gauge how heavy the soil is when it is in need of water and hopefully avoid any more brown leaves in future.

You also need to make sure you are adjusting your watering schedule depending on the seasons. Autograph Trees really don’t need much water at all during autumn and winter, once every month should be plenty!

Underwatering can also cause brown leaves on an Autograph Tree

If the leaves are turning quite brown dry and crispy then it may also be due to consistent underwatering. Autograph Trees like to have moist soil and although they can deal will a little bit of drought, a constant lack of water for weeks on end during the growth period can often result in brown dry leaves.

If you think your Autograph Tree has been underwatered then check the soil before you change anything about your watering routine. You want to be 100% sure that the soil is dry before watering your plant again as you don’t want to cause any more serious issues. If you have confirmed that the problem is a lack of water then slowly reintroduce water to your Autograph Tree. Like humans, plants can get shocked by a sudden and extreme change of environment so don’t drown your plant as it can cause more problems than just brown leaves.

Water your Autograph Tree a little once a day for a week. Then you can go back to a more normal care routine, making sure to check the moisture in the soil frequently to avoid any more brown leaves developing.


Brown leaves can suggest temperature issues

Hotspots or cold drafts can also cause your Autograph Tree to develop brown leaves. Hotspots can occur when your plant is too close to the window which is being hit by a lot of direct light. It can also happen if your Autograph Tree is near a radiator or heating vent. It can be difficult to notice hotspots because the heat disperses around the room and it’ll probably feel like a comfortable temperature to you. Make sure you are ventilating the room well and avoid putting your Autograph Tree within 1 metre of any radiators.

Cold drafts are also your Autograph Tree’s worst enemy. A consistent stream of cold air coming in from outside through cracks in doors and windows can be quite harmful to your plant over time. They won’t drop dead after being exposed to a little bit of cold air but if the problem persists for weeks and months, then your Autograph Tree may develop brown leaves. This is especially dangerous during winter when temperatures can really drop. Make sure you draft proof any doors or windows that your Autograph Tree (and other houseplants) are close to.

Low humidity can also lead to brown leaves

Autograph Trees can deal with an average level of humidity but will struggle in really dry air and the leaves can start to turn brown from the tips and edges inwards.

There are a few really simple techniques to keep the humidity higher than normal for your Autograph Tree; you can spray down the leaves with a mist bottle every few days, sit your plant in a tray with water and some pebbles, put your Autograph Tree in the bathroom as the humidity level is higher due to showering. But the quickest and the easiest solution you could invest in is a humidifier to keep the levels perfect year-round.

You can also pick up a good humidity monitor to keep track of everything if you’re more concerned.

Those are the most common reasons why Autograph Trees develop brown leaves or brown leaf tips. After changing anything about your care routine, or your plant’s environment, make sure to keep a close eye on your plant for the weeks after to make sure that it’s solving the brown leaves issue and not causing any more problems for your plant.

To find out more about caring for your plant, as well as propagation tips and advice to spot and solve any other common problems, check out our Autograph Tree care guide.

Fiddle and Thorn is a participant in the Amazon Services LLC Associates Program, an affiliate advertising program designed to provide a means for sites to earn advertising fees by advertising and linking to Amazon.com

Take our houseplant survey!

Quickly respond to our 30 second houseplant survey and get 75% off our Complete Houseplant Care eBook!

Take the Survey

No thanks…

Brown African Milk Tree Leaves – Causes and Solutions

Last Updated: May 18, 2022

Before you start caring for your African Milk Tree like a cactus, it’s important to remember that these incredible plants are actually succulents. This means there are subtleties in how you care for it and how you spot any common problems that might crop up. If you notice that the leaves or stem on your African Milk Tree has turned brown, then this can often mean there is something wrong. In this post, we will be going through the different causes of brown leaves on an African Milk Tree to help you determine what’s happening and how to fix it.

Too little water can cause brown leaves

Underwatering can also be a common cause of brown African Milk Tree leaves. Although they are succulent plants which means they won’t die on you instantly if they have to go a little longer without water, consistent underwatering will dry out your African Milk Tree and the leaves causing them to turn brown.

You want to be 100% confident that there is an issue with how much or how often you are watering your African Milk Tree before you change anything about your routine. If you switch to giving your plant too much water when it didn’t need it, this can cause a whole range of further issues. Always check the soil moisture before altering your watering routine. If the soil is really dry and feels like sand when you take your African Milk Tree out of its pot then this could be the issue.

You want to slowly reintroduce watering by giving your African Milk Tree a bit of water once a day for a week and your plant should slowly begin to recover. Underwatering causes less damage to the root system than overwatering for succulents so your African Milk Tree should begin to bounce back after a few weeks. Keep an eye on how moist the soil is so you don’t go the other way and overwater accidentally.

Too much water can also cause brown leaves

If the leaves on your African Milk Tree have turned dark brown and a little mushy you are most probably overwatering. Another sign of this is if some of the brown leaves are starting to droop down.

Overwatering is one of the main killers of African Milk Trees as you might not always be able to tell before it is too late. African Milk Trees don’t like to be sitting in a lot of water for long periods of time as this can lead to root rot meaning the plant becomes unstable and also cannot get needed nutrients from its root system. Waterlogged soil also gives off quite a damp and musty smell so get up close to your plants every so often to check on this.

If you think that the brown leaves on your African Milk Tree are a consequence of overwatering, check the moisture of the soil immediately and adjust watering accordingly. The most reliable way to do this is by using a moisture meter which will tell you how damp or dry the soil is.

We also recommend replacing the potting soil straight away (rather than waiting for it to naturally dry out) so that the roots on your African Milk Tree can begin to recover. Cut away the rotten roots and brown leaves so that your African Milk Tree focuses all of its energy on regenerating healthy growth. You’ll want to use a high-quality potting mix such as this one from Miracle Gro to make sure your African Milk Tree gets the right balance of nutrients.

Drainage Issues

Sometimes it may not be your watering schedule that is causing your African Milk Tree to turn brown, but the poor draining of the soil and pot. You can very easily increase the amount of drainage in the pot by mixing in a small amount of perlite into the soil. This will make it far easier for water to flow through and out of the drainage holes of your pots (oh also, you should also check to make sure your pots have drainage holes). Another really simple method is to add a few small stones or pebbles to the bottom of your pots, this helps in making sure that the drainage holes are never blocked by any clogged up soil or loose debris.

Although clay or terracotta pots can be a little bit more expensive or breakable, their upsides are much more than just the aesthetic. The clay they’re made of is permeable which means that some of the water in your soil can evaporate through the sides of the pot. This isn’t the case for the plastic pots that most use, which instead hold in all of that moisture. So sometimes it is worth investing a little more to make sure that the roots of your African Milk Tree are not sitting in too much moisture.

Too much sunlight

If your African Milk Tree is getting too much bright direct sunlight each day you may start to notice brown patches appearing on the leaves. This is because the plant is being scorched by the intense sunlight. Although African Milk Trees are succulents, they can also be damaged by really intense light.

Although this problem is irreversible once it has happened, it’s pretty simple to fix for the future. Move your African Milk Tree to a place in your home with less light and it should begin to recover. Monitor the sunlight levels in your home across the year because you might be able to move your plant closer to the window over winter when the sun isn’t as strong. If you prefer you can carefully trim away the burnt patches on your African Milk Tree’s leaves so your plant looks healthier and can focus on producing new healthy growth.

You can use a light monitor to figure out if your plants are getting the right amount of sunlight. We love this one which is available on Amazon here.

Corking

If none of the methods above seem to explain why your African Milk Tree is turning brown, then corking might be the reason. Corking is a completely natural process that happens as African Milk Trees age. If the base of your plant has turned quite thick and light brown in colour, then it’s most definitely corking. You don’t need to worry about this happening or change a thing about your care or your African Milk Tree’s environment.

Those are the 5 most common reasons why African Milk Trees develop brown leaves. Some issues are more serious than others but it’s important you react quickly and diagnose the problem before it’s too late. If the problem is caused by watering or lighting issues, but you have caught the problem early, then you shouldn’t have too much trouble getting your African Milk Tree back to full health.

To find out more about caring for your plant, as well as other common issues check out our African Milk Tree care guide.

If you are struggling to save your plant and the issue seems to be getting worse, then you might want to consider propagating your African Milk Tree to save some of the healthy parts.

Fiddle and Thorn is a participant in the Amazon Services LLC Associates Program, an affiliate advertising program designed to provide a means for sites to earn advertising fees by advertising and linking to Amazon.com

Take our houseplant survey!

Quickly respond to our 30 second houseplant survey and get 75% off our Complete Houseplant Care eBook!

Take the Survey

No thanks…

Bottom Watering your Houseplants: Methods and Benefits

Last Updated: March 12, 2023

Struggling to know how best to water your houseplants? Want to know more about how, why and when to water from the bottom up? Well, you’ve come to the right place! In this article, we will be going through when you should choose the bottom watering method, how to do it and what to look out for along the way.

Before we get into the how part, it’s important to understand what bottom watering is and how it can be beneficial. Bottom watering is when you add water to the saucer or planter that your plant is in rather than watering from the top of the soil downwards.

You might not think that the way in which you add the water has much of an impact on your plant but it can actually rapidly change root growth and play a part in issues such as over or underwatering. This is why it’s super important to understand how you should be using the different watering methods to your advantage.

Although you can bottom water pretty much all of your houseplants, there are several which benefit from it more. We strongly recommend bottom watering tall plants as this encourages their roots to grow downwards, towards the moisture. This increases the overall stability of your plant.

What you need to be able to bottom water your houseplants

Pot with drainage holes

It’s really important that you pot your houseplants using pots with drainage holes at the bottom. This allows your plant to not only take up water from the saucer, but it allows excess water to flow out of the holes if you are top watering. This prevents a build-up of excess water in the soil which is the number one cause of overwatering and root rot.


Tray or saucer

Make sure you use a tray or saucer that is slightly wider than your pot. It’s not ideal to use a really big saucer as that could lead to accidental overwatering if filled up.


Temperate water

You shouldn’t be using really cold or really hot water to water your plants as this can cause shock or even burn the roots. Instead, use room-temperature water.

How to successfully bottom water your houseplants


  1. Check that your plant needs more water

    To avoid overwatering and rotting the roots, it’s crucial that you only water your plants when they actually need it. This is why we refrain from using calendars and strict watering schedules because your plants don’t work on a schedule like that.

    The most reliable method is to use a moisture meter to check the soil moisture but you can also lift up your plant (if it’s not huge) or use the chopstick test to determine if your plant needs water.

  2. Add water to your plant’s saucer

    Depending on the size of the saucer compared to the pot, it may be easier to remove the plant whilst you do this. However, if you’re using a watering can with a narrow spout, then this should work without having to move your plant. How much water you give depends on a lot of factors such as the size of your plant, temperature and seasonality.

  3. Let your plant sit for 10-20 minutes

    This gives your plant enough time to absorb as much water as it needs but isn’t enough time for the soil to become waterlogged.

  4. Remove any excess water

    About 10-20 minutes after watering, we recommend removing any excess water that is in the saucer. This prevents waterlogged soil and root rot.

What are the benefits of the bottom-watering method?

It helps to prevent overwatering and root rot

As you are removing excess water about 10 to 20 minutes after watering, it prevents the roots from sitting in a pool of water for days on end. Instead, the plant is able to absorb only what it needs.

The plant will absorb water more evenly

Often when we use the top watering method, we fall into the habit of only watering in one spot. This can lead to only one half of the pot receiving moisture which in turn means the roots grow more on one side. This can lead to an unstable and uneven plant. Instead, the bottom watering technique means the plant absorbs moisture a lot more evenly spread across the pot diameter.

It encourages deeper root growth

When the bottom of the pot receives more moisture, the roots are more likely to grow downwards to reach it. This is really beneficial when it comes to the stability of your plants, making it especially important for tall plants. Having deeper root growth means the leaves are less likely to fall over.

Things to be cautious of when bottom watering

Make sure to remove the excess water

To avoid damaging issues caused by overwatering and root rot, it’s important to remove any excess water at the latest, half an hour after watering. It can be easy to forget but don’t tick water plants off your list until you’ve removed anything left in the saucers. Doing this can also prevent stagnant water from starting to smell, so it’s beneficial for both you and your plants!

Don’t add too much water

If your plant is sitting in a really large saucer or a deep tray, it can be easy to just fill it up. However, this can be giving your plant way too much water and if you aren’t removing the excess, then this can very quickly cause serious issues for your plant. Every plant is different in terms of how much water it needs so monitor how much it usually takes up. Checking moisture levels before you water can also help to give you an indication of how much it needs.

This method might benefit plants with shallow roots

If you have a fairly new plant or one with very thin short roots, then bottom watering might not be the best method. It can mean that the roots don’t actually get to any moisture and might dry out over time.

Frequently Answers Questions

We hope that this guide to bottom watering your houseplants has been useful. There are lots of benefits to this method and it’s especially great for tall plants such as Snake Plants and Scheffleras. There are a few things that you need to be careful of though and removing excess water will be crucial to keeping the roots healthy and fresh.

Fiddle and Thorn is a participant in the Amazon Services LLC Associates Program, an affiliate advertising program designed to provide a means for sites to earn advertising fees by advertising and linking to Amazon.com

Take our houseplant survey!

Quickly respond to our 30 second houseplant survey and get 75% off our Complete Houseplant Care eBook!

Take the Survey

No thanks…

Bird’s Nest Fern Care

Last Updated: August 14, 2022

Basic Bird’s Nest Fern Care

Whilst they won’t be crowned for being the easiest houseplant to care for anytime soon, the Bird’s Nest Fern isn’t super fussy and once you’ve found a good spot in your home for it, they will become fairly low maintenance (ish). They get their names from their ability to grow on top of other plants, just like a Bird’s Nest!

So if you’re looking to bring a bit of the tropics into your home, then a Bird’s Nest Fern is a great way to do that! Below you will find everything you need to know to care for a Bird’s Nest Fern and keep it happy and healthy!

Detailed Bird’s Nest Fern Care

They can survive in most light conditions

One great thing about Bird’s Nest Ferns is that they can deal with anything from medium light to bright indirect light. The only thing you want to avoid is direct light as this can scorch the leaves on your fern.

Let the soil dry out between waterings

You want to make sure the soil has enough time to dry out between waterings. This will be about once a week during summer but less during the colder months.

Bird’s Nest Ferns like high humidity

As they are native to tropical areas, Bird’s Nest Ferns thrive in high humidity. We recommend using a humidifier to help boost humidity around your fern. They will grow in the average humidity in your home but won’t like particularly dry air.

Average room temperature is fine

You don’t need to worry too much about temperature and your Bird’s Nest Fern as it will be happy in normal room temperature.

Don’t water directly onto the plant

When watering your Bird’s Nest Fern try not to water directly onto the leaves, but instead into the soil. This prevents harming any new leaves that are emerging as they are super delicate. It also prevents any leaf rot.

Fertilise once a month during the growth period

We recommend fertilising your Bird’s Nest Fern once a month during spring and summer using a water soluble fertiliser. Weaken it more than it says on the label to prevent fertiliser burn.

Only repot when the fern is unstable

Bird’s Nest Ferns don’t tend to become rootbound so the only reason you will want to repot your fern is if it becomes unstable and starts leaning or falling over.

Propagating your Bird’s Nest Fern is a little different

You might be used to the main propagation methods of other houseplants but it is different for Bird’s Nest Ferns. These use spores which you propagate in a moist environment such as peat moss.

Bird’s Nest Fern are safe for pets and humans

If you have a pet or child in your home then you don’t need to worry about having them around your Bird’s Nest Fern as they are completely safe.

Bird’s Nest Fern Care FAQs

Common Problems with Bird’s Nest Ferns

Ferns do have a bit of a reputation of being sensitive to change and fussy about their environment and whilst the Bird’s Nest Fern isn’t the hardest fern to care for, it’s definitely worth noting down some of these warning signs so that you can diagnose any issues that might pop up.

Fiddle and Thorn is a participant in the Amazon Services LLC Associates Program, an affiliate advertising program designed to provide a means for sites to earn advertising fees by advertising and linking to Amazon.com

Take our houseplant survey!

Quickly respond to our 30 second houseplant survey and get 75% off our Complete Houseplant Care eBook!

Take the Survey

No thanks…

The Ultimate Bird of Paradise Care Guide

Last Updated: October 16, 2023

Bird of Paradise Leaves

Bird of Paradise Leaves

Overview of the Bird of Paradise Plant

The Bird of Paradise (Latin name: Strelitzia Reginae) is a striking houseplant, famed for its distinctive, vibrant blooms that mirror the appearance of tropical birds in flight. Native to South Africa, this plant has found its way into homes worldwide, thanks to its unique aesthetic, large bold leaves and adaptability to indoor environments.

Characteristics:

  • Evergreen, large and glossy leaves
  • Known and loved for its dramatic flowers that resemble a bird in flight (hence the name).
  • Can grow up to 6 feet indoors, though it typically remains around 3-4 feet in domestic environments.

Botanical Name: Strelitzia Reginae

Common Name: Bird of Paradise, Crane Flower

Species Varieties

While the most commonly encountered variety is the Strelitzia Reginae, there are in fact five distinct species of Bird of Paradise plants.

  1. Strelitzia Reginae: This is the most common variety, with orange and blue flowers.
  2. Strelitzia Nicolai: Known as the Giant Bird of Paradise, this variety can reach up to 30 feet in height in its natural habitat.
  3. Strelitzia Alba: This species sports pure white flowers, a rarity in the Bird of Paradise family.
  4. Strelitzia Juncea: This variety has leafless stems, giving it a more desert-like appearance.
  5. Strelitzia Caudata: Known as the Mountain Strelitzia, this variety can be found in the eastern parts of South Africa.

Lighting Requirements for the Bird of Paradise Plant

The Bird of Paradise, with its lush, tropical foliage, is a plant that relishes bright, indirect sunlight. Natives to South Africa, these exotic beauties are accustomed to receiving plenty of light. However, too much direct sunlight can damage their leaves, causing them to dry out, turn brown and yellow or even burn (you’ll notice scorched patches if this happens).

Ideal conditions for your Bird of Paradise is when it receives plenty of bright but indirect light. While the Bird of Paradise can handle some direct sunlight, it’s best to limit this, especially during hot summer months as the sun can be quite strong and harsh.

If your home struggles to get enough natural light, don’t worry as this plant is relatively hardy and can tolerate lower light levels, although this may slow its growth. You can also supplement light levels with an LED grow light during winter to ensure your plant is still getting enough light.

Top tip: Rotate the plant every couple of weeks. This simple action ensures all sides get an equal amount of light and promotes more balanced growth.

Watering your Bird of Paradise Correctly

When to Water:

  1. Your Bird of Paradise will thrive with consistent watering but make sure the top inch of soil is dry before watering again.
  2. Avoid letting the plant sit in water. If you notice standing water in the saucer after watering, be sure to drain it.
  3. Keep in mind, however, that your plant’s watering schedule will also depend on the season, its pot size, the amount of light it receives, and the humidity levels in your home.
  4. On average you want to be watering once a week in summer and once every two weeks in winter but adjust this to fit your individual plant.

How to Water:

  1. When watering, do so thoroughly, making sure the water reaches the entire root ball. This ensures all roots have access to moisture.
  2. Use lukewarm or room temperature water, as cold water can shock the plant.
  3. Water directly into the soil, avoiding the leaves and crown of the plant to prevent potential disease issues.

Humidity Needs of the Bird of Paradise Plant

The Bird of Paradise thrives in a humid environment, reflecting its tropical origins. However, it doesn’t mean you need to transform your living room into a rainforest. We recommend aiming for a humidity level around 50-60%. A few simple adjustments can make all the difference and prevent issues such as dry brown leaf tips and edges.

  1. Regular Misting: Use a spray bottle to mist your Bird of Paradise leaves at least once or twice a week. This not only increases humidity but also keeps the leaves dust-free.
  2. Humidity Tray: Another effective method is placing your plant on a tray filled with pebbles and water. As the water evaporates, it creates a microclimate of increased humidity around the plant.
  3. Grouping: Group your Bird of Paradise with other plants. Plants naturally increase humidity by releasing moisture into the air, a process known as transpiration.
  4. Humidifier: Consider investing in a humidifier, especially during the dry winter months as this will keep a nice stable humidity level for you.

Note: Excessive humidity can lead to fungal problems. Therefore, keep a balance and ensure good air circulation around your Bird of Paradise.

Bird of Paradise Temperature Requirements

The Bird of Paradise is a tropical plant that thrives in a warm environment. This stunning houseplant, native to South Africa, is accustomed to a stable climate. Daily temperature fluctuations should be minimal, with an ideal range between 64 to 81°F (18- 27°C).

Winter Care

During winter, the Bird of Paradise can tolerate cooler temperatures, but never below 50°F (10°C). Extended exposure to cold can result in leaf damage.

Summer Care

In the summer, the plant enjoys warmth but is not a fan of excessive heat. Temperatures above 86°F (30°C) can cause wilting. In summer you also want to watch out for damaged caused by air conditioning units as if your plant is positioned too close to the vent, this can cause problems.

Flowering Bird of Paradise

Flowering Bird of Paradise

Fertilizing Your Bird of Paradise Plant

Understanding Fertiliser Types

Not all fertilisers are created equally. For the bird of paradise, a slow-release granular fertiliser with a high phosphorus content is recommended. Phosphorus (the ‘P’ in NPK ratios) encourages blooming which is really important for your Bird of Paradise plant.

The Right Time to Fertilise

Fertilising should occur during the growing season, typically from early spring to early autumn. During this period, applying fertiliser once every two to three weeks is advisable. Then when winter approaches, cut back fertilizing completely as your plant enters the dormant phase.

Top tip: Before you begin, ensure your plant is thoroughly watered. This prevents the roots from being burned by the fertiliser.

Recognising Over-fertilisation

While fertilising your Bird of Paradise is important, overdoing it can lead to damage. Signs of over-fertilisation include wilting, yellowing leaves, and brown leaf tips. If you notice these symptoms, check for other causes before stopping fertilisation and flushing the soil with clean water to remove excess nutrients.

Flowers on a Bird of Paradise

The Bird of Paradise is renowned for its brilliant, uniquely structured flowers. Their resemblance to the flamboyant bird species of the same name has earned this tropical beauty its common name.

The flowering process

The plant typically needs to be at least 4-5 years old before it begins to flower. Even then, patience and optimal growing conditions are key to coaxing it into bloom. This includes enough sunlight (a minimum of 4-6 hours of bright, indirect sunlight each day), warm conditions, regular watering and a regular routine of fertilizing with a balanced, slow-release fertiliser.

Factors impacting blooming

Despite meeting these conditions, there are factors that may prevent your Bird of Paradise from blooming. These include inadequate light, temperature fluctuations, and cramped roots. In such cases, adjust the care conditions accordingly.

Choosing the Right Pot and Soil

Choosing the Right Pot

When selecting a pot for your Bird of Paradise, consider the plant’s robust size and rapid growth. The pot needs to accommodate the roots, providing them with enough room to comfortably spread out. A pot that’s too small will restrict growth, while one that’s too large may lead to waterlogging.

  • Size: A pot with a diameter of about 30-40 cm is a good starting point for young plants. As the plant matures, you may need to upgrade to a larger pot.
  • Material: Ceramic or terracotta pots are recommended for their durability and breathability. They also provide a good balance of weight to prevent the plant from toppling over.
  • Drainage: Ensure your chosen pot has sufficient drainage holes. This will prevent water from pooling at the bottom of the pot and causing root rot.

Selecting the Right Soil

Bird of Paradise plants prefer a well-draining soil mix that can hold moisture without becoming waterlogged. The right soil mix will provide the necessary nutrients and promote healthy root growth.

  • Soil Mix: A high-quality, well-draining potting mix is ideal. Mixes designed for cacti and succulents, which contain perlite, sand, or bark to enhance drainage, can also work well.
  • pH Levels: Bird of Paradises prefer slightly acidic to neutral pH levels, between 6.0 and 7.5. Regularly testing soil pH and adjusting as necessary will help keep your plant healthy.
  • Organic Matter: Adding organic matter such as compost or well-rotted manure will enrich the soil, providing additional nutrients and improving soil structure and moisture retention.

Bird of Paradise

Bird of Paradise

Repotting a Bird of Paradise

When to Repot

The best time to repot a Bird of Paradise is in the spring or early summer. This is when the plant is in its growth phase and can cope with the disturbance. If the roots are visibly cramped or poking out of the drainage holes, you should repot straight away even if it’s not the most ideal time of year.

Choosing the Right Pot

Select a pot that’s slightly larger than the current one, approximately 2 inches wider in diameter. You also want to make sure that it has sufficient drainage holes to prevent the plant from getting waterlogged. A ceramic or terracotta pot is usually the best choice for a Bird of Paradise as it provides excellent drainage and stability.

Repotting Process

  1. Preparation: Fill the new pot with a layer of fresh potting soil, enriched with slow-release fertiliser.
  2. Removal: Carefully remove the plant from its current pot and shake off some of the oil soil from around the roots.
  3. Placement: Place the plant in the centre of the new pot, adding more new fresh soil as necessary to ensure the plant is at the same depth as in its previous pot.
  4. Completion: Fill in around the plant with additional potting soil, firming it gently with your fingers. Water lightly.

Propagation Techniques for the Bird of Paradise Plant

Propagation of the Bird of Paradise plant isn’t a simple task as new growth can be slow and even the logistics of propagating such a large plant can be difficult. However, it can be very successful when done right! Below are the two main methods to propagate your Bird of Paradise plant.

Sowing Seeds

Sowing seeds is the traditional propagation method. It’s a long process that requires patience, but being able to nurture the plant from its earliest stage can be incredibly rewarding.

  1. Begin by soaking Bird of Paradise seeds in warm water for 24 hours.
  2. Next, plant the seeds 1 inch deep in a pot filled with a mix of perlite and peat moss.
  3. Maintain a temperature of around 25°C and ensure the soil is consistently moist.
  4. Wait patiently. Germination can take anywhere from 4 weeks to 3 months.

Division Method

Division is a quicker propagation method but this technique works best with older, mature plants that have become too crowded.

  1. Firstly, remove the plant from its pot and gently separate the root clump into sections. Each section should have at least one leaf.
  2. Once divided, plant each section in a new pot filled with well-draining potting mix.
  3. Water each new plant thoroughly and place it in bright, indirect light.

Cleaning the leaves of your Bird of Paradise

Keeping the Bird of Paradise’s leaves clean is not just a matter of aesthetics, but it’s also crucial for the plant’s health. Dust and grime can clog leaf pores, which reduces the amount of light that the leaves can take in.

Steps to Clean Your Bird of Paradise Leaves

  1. Dampen your cloth – Dip a cloth into warm soapy water and wring it out until it’s just damp.
  2. Wipe each leaf – Gently wipe the top and bottom of each leaf. Be careful not to scrub or apply too much pressure.
  3. Rinse: Use your watering can or spray bottle to gently rinse the soap off the leaves. Avoid wetting the soil if it has recently been watered.
  4. Blot dry: Gently blot dry the leaves with a clean cloth to prevent water spots.

Bird of Paradise Toxicity to Pets and Humans

Toxicity in Pets

Sadly, the Bird of Paradise is toxic to cats and dogs. If ingested, it can cause symptoms such as drooling, vomiting, and lack of appetite.

Toxicity in Humans

While it’s less common for humans to ingest houseplants, accidents can happen, especially with children. If any part of the Bird of Paradise plant is ingested, it can cause mild to moderate symptoms ranging from nausea and vomiting to abdominal pain.

Seek immediate medical or veterinary attention if ingestion occurs.

Treating Pests and Diseases

Even a robust houseplant like the Bird of Paradise is not immune to pests and diseases. It’s essential to regularly inspect your plant for signs of trouble as treating the problem early will give you a higher chance of successfully getting your plant back to full health.

Common Pests

Common pests that may plague your Bird of Paradise include spider mites, scale insects, and mealybugs. These pests suck sap from the plant, causing yellowing, wilting, and stunted growth.

  • Spider Mites: These tiny creatures can be hard to spot but cause considerable damage. If you notice a fine, spiderweb-like substance on your plant, you likely have a spider mite infestation.
  • Mealybugs: Aptly named for their cotton-like covering, mealybugs can quickly spread, so swift action is necessary.
  • Scale Insects: If you see small, bumpy growths on your plant’s stem or the underside of leaves, you’re likely dealing with scale insects.

To treat any of these pests, wipe the leaves with a soft cloth soaked in a mixture of water and mild dish soap and use an insecticide or neem oil with a more serious and larger infestation.

Diseases

Bird of Paradise plants can be susceptible to fungal diseases like root rot and leaf spot. Both these conditions thrive in overly wet conditions and can cause serious damage if left untreated.

  • Root Rot: If your plant’s leaves are yellowing and wilting despite sufficient watering, you may have root rot. This is caused by overwatering and poor drainage.
  • Leaf Spot: Brown spots on your plant’s leaves are often a sign of this fungal disease. High humidity and poor airflow contribute to its development.

The best treatment for these diseases is prevention. Ensure your Bird of Paradise has well-draining soil and is not sitting in water. If you do spot these diseases, remove the affected parts of the plant and adjust your watering schedule.

Bird of Paradise FAQs


Common Problems with your Bird of Paradise

Here are some common issues that you might run into. It’s important to diagnose any issues early to give your plant the best chance of bouncing back.

Fiddle and Thorn is a participant in the Amazon Services LLC Associates Program, an affiliate advertising program designed to provide a means for sites to earn advertising fees by advertising and linking to Amazon.com

Take our houseplant survey!

Quickly respond to our 30 second houseplant survey and get 75% off our Complete Houseplant Care eBook!

Take the Survey

No thanks…

The Best Potting Soil Recipe for Houseplants

Last Updated: October 24, 2023

Potting Soil

Potting Soil

While store-bought potting soil might be convenient, it is certainly not the only option, nor is it always the best. In fact, you can create a much more nutrient-rich, effective potting mix yourself, tailored specifically to the needs of your houseplants.

Choosing the Right Ingredients for Your Potting Soil Recipe

Crafting your own mix allows you to have full control over what goes into your soil, ensuring that it provides the perfect environment for your houseplants to thrive. But what exactly should be included in this mix?

Composted Organic Matter

Your potting soil needs to be rich in nutrients, and one of the best ways to provide this is through composted organic matter.

You can make compost at home using vegetable scraps, coffee grounds, and yard waste, or you can purchase it from a reliable source.

It’s a fantastic way to recycle your organic waste, and it provides essential nutrients, like Nitrogen, Phosphorous, and Potassium, to your plants.

Perlite or Vermiculite

These ingredients are actually quite common in potting soil recipes. Perlite and vermiculite both help to improve the soil’s aeration and drainage capabilities, preventing waterlogging and root rot.

Plus, they’re lightweight and won’t compact down over time, keeping the soil structure intact.

Peat Moss or Coco Coir

Peat moss and coco coir are excellent for retaining moisture while also improving soil aeration. If you prefer a more sustainable option, opt for coco coir, which is a byproduct of the coconut industry.

Optional ‘Add-Ins’

You can customize your potting soil recipe further with other ingredients, such as worm castings for additional nutrients, or sand for improved drainage.

Before you add a new ingredient, always research to ensure it’s safe and beneficial for your specific houseplants.

The key to creating the best potting soil mix is balance. You want a blend that holds enough water to keep your plants hydrated, but drains well enough that it doesn’t cause root rot. Your mix should also be nutrient-rich to feeding your plants, yet light enough to allow roots to breathe.

Understanding the Importance of Drainage in Potting Soil

Inadequate drainage can lead to overwatered plants, which in turn can result in root rot, a harmful condition that can quickly kill your beloved houseplants. With a well-draining soil, excess water can seep out, leaving just the right amount of moisture that your plant roots need to thrive.

Benefits of Good Drainage

Good drainage in your potting mix is not just about controlling water levels. With highly draining soil, nutrients can mix and move freely, ensuring all roots have access to essential nutrients provided in the soil.

It also aids in the control of soilborne diseases, pests, and fungi, promoting healthier growth. Additionally, it encourages robust root growth, making your plants stronger and more stable.

How to Ensure Proper Soil Drainage

You could start by adding perlite, vermiculite, or sand to your potting mix, as these ingredients are known to boost drainage.

Also make sure not to pack your soil too tightly in your pots; giving it some ‘breathing space’ helps with water flow.

And importantly, always use pots with drainage holes to allow any excess water to flow right out o the pot.

What happens if your soil doesn’t drain well?

Poor-drained soil can lead to a number of problems. Overwatering is a common issue, as excess water gets trapped in the pot, leading to soggy soil and leaves your plants vulnerable to root rot and other potential diseases.

Steps to Prepare Your Own Potting Soil Recipe at Home

1. Gathering Your Materials and Tools

You’ll need composted organic matter, perlite or vermiculite, peat moss, or coco coir, as well as any ‘add-ins’ you’ve decided to use.

For tools, a large container or wheelbarrow for mixing, a shovel or trowel, and gloves are essential.

2. Combining Your Ingredients

For a basic recipe, combine one part composted organic matter with one part perlite or vermiculite and one part peat moss or coco coir. Mix these thoroughly.

This classic 1:1:1 ratio provides a balance between moisture retention and drainage, ideal for most houseplants but you can tweak this as per the requirements of your plant.

3. Adding in the Extras

If you’re using optional ‘add-ins’, mix these in now.

As a general rule, add-ins should make up no more than 1/5th of your total mix. Again, make sure everything is mixed well.

4. Testing Your Soil

It’s a good idea to test your soil before potting your plants. This includes testing for drainage (does water drain quickly or pool on the surface?) and pH (is it too acidic, or too alkaline?).

5. Potting Your Plants

Once you’ve tested and adjusted your soil, you’re good to go. Pot your plants using your fresh, homemade soil and observe how they respond in the following days and weeks.

Adding Nutrients: Incorporating Fertilizers into Your Potting Soil Recipe

Plants require a combination of specific nutrients to grow and develop properly, which is where fertilizers come into play.

  • Nitrogen (N): This is an essential nutrient that helps in the growth of the plant’s foliage and gives it its vibrant, green color. Your houseplants love this stuff, so make sure your soil has plenty of it!
  • Phosphorus (P): Known for encouraging root development and early plant maturity, phosphorus is a vital component of DNA and a necessity in your potting soil mix.
  • Potassium (K): This nutrient helps in the development of flowers and fruits, and also plays a significant role in making the plant resistant to diseases and supporting overall plant health.

The ‘big three’ – Nitrogen (N), Phosphorus (P), and Potassium (K) – are macronutrients. However, your plants also require micronutrients (though in lesser quantities) that are crucial for their growth and development. These include:

  1. Calcium: Aids the plant in nutrient absorption.
  2. Magnesium: Plays an essential role in photosynthesis.
  3. Sulfur: Helps in the formation of amino acids and vitamins.

While the ‘big three’ are often provided by many common potting soil ingredients, micronutrients often need to be added separately.

Most local gardening centers will offer pre-mixed fertilizers that contain a good amount of all these nutrients. Just be sure to choose a high-quality fertilizer.

Apply approximately every two weeks during the growing season (spring and summer) should suffice. It is best to reduce or stop fertilizing as plants enter their dormant stage during the colder months.

Tips for Sterilizing and Preparing Your Potting Soil Ingredients

Sterilizing Your Potting Soil Ingredients

Sterilizing potting soil ingredients is not a complex process, but it’s an essential step to ensure your plants grow in a healthy environment. So, how exactly do you go about this?

  1. Composted Organic Matter: This needs to be fully decomposed before use. If you’re making compost at home, it should be ready when it transforms into a rich, dark, crumbly substance with an earthy smell. Store-bought compost is usually ready to use.
  2. Perlite or Vermiculite: These components, purchased from a reputable supplier, don’t require sterilization as they’re heated during production. This process eliminates any potential diseases or pests.
  3. Peat Moss or Coco Coir: Typically these are pest and disease-free too. If you want to be extra careful, you can bake them in the oven at 180°F (82°C) for half an hour.

Preparing the Ingredients

This preparation might include various tasks depending on the ingredient, but here are some general tips:

  • Smaller particles often work better, particularly for seedlings or young plants. If your compost, coco coir, or peat moss is very coarse, consider sieving it.
  • If you’re using compost, make sure it’s well-aged. Compost that’s too fresh can burn tender plant roots.
  • When handling perlite or vermiculite, be careful not to inhale the dust. It can be harmful to your lungs. Moisten it a little to keep the dust levels low.

Testing and Adjusting pH Levels in Your Potting Soil

Understanding the pH level of your potting soil is essential as it affects the availability of nutrients your plants need to thrive.

pH level refers to the measure of acidity or alkalinity in the soil. Most houseplants prefer a pH level between 5.5 and 7.5.

So, how do you test the pH level in your handmade potting soil? It’s easier than you might think.

Testing pH Levels in your DIY Potting Soil

  1. First, you’ll need a soil testing kit. These are readily available online or your local gardening supply store.
  2. Follow the instructions on your kit. This often involves gathering a small soil sample, adding a test solution, and comparing the color change to a reference chart.
  3. Take note of the reading. Remember, the ideal level is somewhere between 5.5 to 7.5.

If your soil comes up too acidic (a low number) or too alkaline (a high number), don’t worry! Adjustments can be made to balance it out.

Adjusting pH Levels

If your soil is too acidic, adding a substance like agricultural lime can increase the pH level. On the other hand, to decrease an overly alkaline pH level, you can introduce organic material like peat moss or sulfur.

Note: The amendments you add take time to react and change the soil’s overall pH. We suggest you wait at least a week before doing another pH test to see if additional modifications are needed.

Common Mistakes to Avoid When Making Your Own Potting Soil

Poor Measurement of Ingredients

Your potting soil recipe should be tailored to support plant growth, and for that, you need the correct proportions of ingredients.

What constitutes “too much” or “too little” may differ based on the plant species, but generally, an equal proportion of all elements affords a good start.

Overusing any component could obstruct aeration or drainage, impacting your houseplants negatively.

Not Considering the Specific Needs of Your Plants

Certain plants thrive in acidic soils, while others prefer alkaline conditions. Similarly, some plants require well-drainage soils, while others prefer water retention.

Always consider the specific needs of your houseplants when making your own potting soil.

Overlooking Sterilization

Not sterilizing your potting soil could invite unwanted pests or diseases that could damage or kill your houseplants. Sterilize soil and any organic matter in your recipe to eliminate potential threats, setting the stage for robust plant growth.

Sacrificing Quality for Price

While saving money is generally great, don’t skimp on potting soil’s quality. Cheap ingredients can lead to poor plant health so invest in quality elements like well-aged compost, high-grade perlite, and top-quality peat moss or coco coir.

Frequently Asked Questions

Can I use garden soil instead of potting soil for my houseplants?

You may be tempted to use garden soil for your houseplants, but it’s not typically the best choice. Garden soil tends to compact heavily in pots, leading to poor drainage.

What can I use if I don’t have perlite or vermiculite?

Perlite and vermiculite are excellent for improving soil aeration and moisture retention, but if you don’t have these handy you can use coarse sand, wood chips, or even rice hulls as substitutes.

However, the effect might not be exactly similar, so keep an eye on your plants to see how they are responding.

What’s the difference between peat moss and coco coir?

While both of these substances serve similar roles in soil mixtures—namely, retaining moisture and providing a good structure—there are differences between them.

Peat moss is a bit more acidic, making it a good choice for acid-loving plants, while coco coir is a more environmentally friendly option because it’s a by-product of the coconut industry and is renewable.

How often should I sterilize my potting soil ingredients?

Generally, it’s a good idea to sterilize your potting soil ingredients each time you plan to make a new batch of your soil mixture. This ensures that any potential pathogens on your materials do not persist and harm your plants.

Why do certain plants need specific pH levels?

The pH level of your potting soil can affect the availability of nutrients to your plants. Each plant species has an optimal pH range where it thrives. That’s why we recommend testing and adjusting pH levels as part of your soil preparation process.

What common mistakes should I avoid when making potting soil?

Overlooking ingredient sterilization, skipping pH testing, not considering the specific needs of your plants, and sacrificing quality for price—these are common pitfalls that you must avoid.

Fiddle and Thorn is a participant in the Amazon Services LLC Associates Program, an affiliate advertising program designed to provide a means for sites to earn advertising fees by advertising and linking to Amazon.com

Take our houseplant survey!

Quickly respond to our 30 second houseplant survey and get 75% off our Complete Houseplant Care eBook!

Take the Survey

No thanks…

10 Best Houseplants with Red Leaves

Last Updated: November 6, 2023

Calathea Triostar

Calathea Triostar

Why settle for green when you can add a vibrant splash of red with your houseplants? These beautiful plants offer a different touch to your houseplant collection, promising not only an aesthetic appeal but also featuring some benefits for your health and well-being.

Whether you’re a beginner houseplant enthusiast or a seasoned green thumb, this list will steer you towards finding the perfect red leaf houseplant that suits your taste and space.

Before you make your choice, consider the plant’s needs regarding light, watering, and temperature. These elements vary from plant to plant, and it’s crucial to know them (as well as what your home can offer) before buying a new plant.

Our Favorite Houseplants with Red Leaves

1. The Croton Plant

Looking to add a tropical touch to your living space? Meet the Croton plant.

Native to Southeast Asia, they’re loved for thier multi-coloured, shiny, wide leaves that command presence.

The Croton Plant comes in a spectrum of shades, encompassing yellow, pink, orange, and our favourite – vibrant red. Though Croton plants are not particularly difficult to maintain, they do love their sunlight.

However, don’t place them in direct sunlight as it may scorch their stunning leaves. Well-drained soil, water sparingly and maintaining proper humidity will keep your Croton looking its finest.

  • Light: Bright, indirect light.
  • Water: Water when top inch of soil is dry. Do not overwater.
  • Humidity: High.
  • Soil: Well-aerated, well-drained, and nutrient-rich soil is perfect.

Another thing to know about the Croton Plant is that they are genetically unstable. This means that when you propagate them, they will grow to look different to the mother plant.

2. The Blushing Bromeliad

Generally, the leaves form a wide rosette, and the centre often blushes red during the blooming period, hence the name.

Below are some essential care tips for your Bromeliad.

  • Light: Bromeliad adores bright, indirect light. A spot near a window where the sun’s rays don’t directly hit should do the trick.
  • Temperature: Being a tropical plant, the Bromeliad prefers warm temperatures, typically between 20°C-25°C. Be wary of temperatures dropping too low, especially in the winter months.
  • Water: Here’s where it gets a little specific. It isn’t really about how much you water Bromeliad, it’s about where you water. Fill the rosette (the cup in the centre of the leaves) with water, and ensure the soil remains lightly moist, not soaking.

3. Caladium ‘Red Flash’

Stepping into the world of Caladiums, we had to mention the ‘Caladium ‘Red Flash’. This vibrant houseplant has flamboyant red leaves marked with variegation. The leaves are sprinkled with freckle-like specks of white.

Caladiums are also celebrated for their impressive size. The leaves of the ‘Red Flash’ can grow as large as 15-35 cm and while it has impressive size, its maintenance demands are fairly manageable.

  • You’ll want to offer your ‘Red Flash’ medium light, but be sure to keep it away from direct afternoon sunlight in summer, which could scorch its delicate leaves.
  • This plant appreciates a good level of humidity, which you can easily provide with a pebble tray or a room humidifier.
  • Irrigation-wise, aim for consistently moist soil during the growing season, while reducing watering in winter.

In terms of potential challenges, you should be aware of the plant’s somewhat sensitive nature. It doesn’t handle the cold well, so be sure to keep your ‘Red Flash’ in temperatures above 15.5°C.

4. Coleus Redhead

Meet the Coleus Redhead. Loved for their striking red leaves, they are a vibrant and eye-catching addition to any home that wants to make a statement.

To keep this plant thriving, keep the soil consistently moist. If you find its leaves look a little droopy, that’s your cue to give it a drink.

Feeding your Coleus Redhead is another must. During the growing season, feed it every two weeks. Use water-soluble, all-purpose plant food and it will reward you with plenty of new red leaves.

5. Rex Begonia

If you’re seeking a houseplant that offers both gorgeous colours and textures, look no further than the Rex Begonia.

With leaves that shimmer in the light, the Rex Begonia is a show-stopping plant. It has spiralled leaves, brushed with streaks of silver on a deep burgundy red leaf.

However, you should note that these plants need a bit more attention than others on this list. They’d prefer a more humid environment, which you can easily create with a pebble tray filled with water or frequent misting.

6. Cordyline Red Star

This striking houseplant has deep, burgundy-red leaves that form a dazzling contrast with its pale, cream-coloured flowers.

  • Cordyline Red Star thrives under bright, indirect sunlight, so a north or east-facing window would be ideal. However, it won’t sulk if subjected to some shade either.
  • Water the plant only when the top two inches of soil dries out completely. Keeping the soil soggy could invite root rot.
  • With respect for its temperature preferences, remember it enjoys a warm surrounding but can survive temperatures as low as -15 degrees centigrade.

7. Chinese Evergreen ‘Red Valentine’

If striking foliage is what you’re after, you won’t be disappointed with the Chinese Evergreen ‘Red Valentine’.

This variety is renowned for its spectacular dark green leaves streaked with shades of red and pink.

The Chinese Evergreen ‘Red Valentine’ is a low-maintenance plant which, like many others on this list, thrives in low to medium light conditions. What’s more, it’s drought-tolerant. This means it doesn’t mind occasional bouts of neglect.

Another great feature of this plant is its air-purifying properties. It not only adds a splash of colour to your area but also helps improve the air quality, making it a perfect addition for those aiming to create a healthier indoor environment.

  • Preferred Light Conditions: Low to medium indirect light
  • Watering Needs: Moderate, allowing the soil to dry between waterings
  • Additional Care Tips: Keep away from direct sunlight as it can burn the leaves

Note: While the Chinese Evergreen ‘Red Valentine’ is a delightful houseplant, it’s important to remember that it can be toxic if ingested. Keep it out of the reach of pets, particularly cats and dogs.

8. Oxalis Purple Shamrock

You might ask, why is a plant named ‘Purple Shamrock’ on a list of red foliage houseplants? Well, the Oxalis Purple Shamrock (Oxalis triangularis) carries a deep, velvety purple tone on the surface but under bright light, it reflects a vibrant burgundy-red hue.

Its leaves also fold up at night and during spring and summer, pink or white trumpet-shaped flowers sprout!

9. Nerve Plant

This plant owes its moniker to the unique and detailed patterns on its leaves, much like a detailed network of nerves. The contrast of vibrant red veins against lush green foliage is pretty cool.

It’s a petite plant, usually reaching up to 6 inches in height which makes it a great choice for desks or windowsills where you might be looking for something more compact.

The Nerve Plant is a fan of humid climates and thrives in temperatures ranging from 16 to 27 degrees Celsius. It enjoys indirect light and should be watered regularly, but be careful as they can be quite susceptible to root rot if overwatered.

  • Light: Indirect, bright light.
  • Temperature: From 16 to 27 degrees Celsius.
  • Water: Keep soil humid but be cautious not to overwater.
  • Size: Petite, usually grows around 6 inches.

10. Red Emerald Ripple Peperomia

Famous for its durable nature and breathtaking, heart-shaped, red-purplish leaves, we’ve really saved the best until last on this list. The Red Emerald Rippler Peperomia is a compact deep red houseplant.

The leaves of Red Emerald Ripple Peperomia are uniquely textured, and its ‘rippling’ effect is where it gets its name. The dark side veins are a lovely contrast to the deep red hue of the leaf, making it visually stunning.

In terms of care requirements, it enjoys moderate to bright indirect light and you should always avoid direct light as it might cause the leaves to lose their vibrant colour.

One thing you don’t need to worry about much with these plants is humidity, as they’ll adapt find to the average humidity in your home.

Additional Tips: Caring for Your Red Leaf Houseplants

Choosing plants with red leaves can really make your interior decor pop. However, to keep them looking their best, you’ll need to ensure you’re providing them with the appropriate care.

Follow these handy tips, and you’ll have happy, healthy red houseplants.

  • Lighting: Most red-leafed houseplants thrive in bright but indirect light. Keep them near a window, but out of direct sunlight to prevent the leaves from getting burnt.
  • Water: While the specific watering needs can vary from plant to plant, a good rule of thumb is to allow the top inch of soil to dry out between waterings. Never let your plant sit in standing water, as this can cause root rot.
  • Humidity: Many red-leafed houseplants come from humid environments. To that end, you might need to mist your plants regularly or use a humidifier, especially during drier months.

Frequently Asked Questions

Q1. How often should I water my red-leaf houseplants?

Most red-leaf houseplants prefer to dry out somewhat between waterings, which can be roughly once a week in many cases.

However, factors such as plant size, pot material, and room climate can affect watering frequency. Perform a simple finger test by sticking a digit into the soil to check moisture levels before watering.

Q2. Where is the best place to put a red-leaf houseplant in my house?

Most of these plants require bright, indirect sunlight. Too much direct sunlight can scorch the leaves, but insufficient light might diminish the vibrancy of the red colours.

An east or north-facing window is often an ideal location to avoid scorching the red leaves.

Q3. What kind of soil is best for my red-leaf houseplants?

A well-draining potting mix is usually a safe choice for most houseplants with red leaves. Remember, soggy soil can lead to root rot, which is detrimental to your plant. Adding in a bit of perlite to the mix is always a good idea.

Q4. How often should I fertilise my red-leaf houseplants?

For most houseplants, fertilising once a month during the growing season (spring and summer) is sufficient. During autumn and winter, a lower feeding frequency is recommended due to reduced growth rates. Before fertilising, make sure to conduct a little research on your specific plant’s needs.

Q5. Are red-leaf houseplants safe for pets and children?

While some red leafed plants are safe, others can be mildly toxic or irritating if ingested or touched. The risk depends on the plant species. Always consider the safety of your plant choices if you have curious kids or pets around the house.

Fiddle and Thorn is a participant in the Amazon Services LLC Associates Program, an affiliate advertising program designed to provide a means for sites to earn advertising fees by advertising and linking to Amazon.com

Take our houseplant survey!

Quickly respond to our 30 second houseplant survey and get 75% off our Complete Houseplant Care eBook!

Take the Survey

No thanks…

The Best Houseplants with Red Flowers

Last Updated: November 5, 2023

Red Bromeliad Flower

Red Bromeliad Flower

Are you searching for a charming red-flowering houseplant to elevate your home’s aesthetic? Well, you’ve come to the right place. Below we will be highlighting some of our favorite houseplants with gorgeous red flowers.

We will also go through the numerous benefits of having red-flowering houseplants, and guide you through selecting the perfect spot for your plants, along with a few decorating tips to help you incorporate these plants seamlessly into your home decor.

Why Choose Houseplants with Red Flowers?

First off, we have to mention the distinct visual appeal. A houseplant with red flowers can easily become a standout piece in your decor, catching the eye of anyone who enters the room.

Apart from aesthetics, there’s substantial science to back the benefits of having plants at home. Indoor plants enhance oxygen levels and humidity, leading to better air quality. And when you choose houseplants with red flowers, you get the added bonus of surrounding yourself with beautiful flowers.

  • Psychological Benefits: Studies have shown that the presence of indoor plants can decrease stress and alleviate mood, making your home a happier and healthier place.
  • Improved Concentration: Plants have been linked to improved concentration and productivity, making them a great addition to any home office or study space.
  • Health Advantages: Houseplants act as natural air purifiers. They absorb toxins and release oxygen, thus improving your home’s air quality. This can make a significant difference for anyone with allergies, asthma, or other respiratory conditions.

Top 10 Houseplants with Red Flowers

If you’re looking for houseplants with stunning red flowers to add a pop of color to your space, here are our top 10 choices. These plants are not only aesthetically pleasing to the eye but also easy to care for, making them ideal home companions.

  1. Aeschynanthus radicans: Commonly referred to as the ‘lipstick plant’. Its glamorous trailing vines bloom bright red flowers that resemble a tube of lipstick, adding a dramatic touch to your indoor space.
  2. Anthirium andraeanum: Also known as ‘Flamingo Flower’, this plant is a classic choice for an indoor setting. It has dark green leaves that contrast beautifully with its glossy, heart-shaped red flowers.
  3. Begonia: These plants boast a variety of vibrant colors, but their red flowers are particularly striking. They prefer ample sunlight and humidity, perfect for a bathroom window sill.
  4. Bromeliads: This colorful tropical plant is your ticket to an instant indoor oasis. Although Bromeliads are available in a spectrum of colors, the varieties with red flowers make a vivid statement.
  5. Guzmania lingulata: Named ‘Scarlet Star’, this plant is part of the Bromeliad family. It’s characterized by its bristly red flowers which sit atop a bed of thin, arching leaves.
  6. Kalanchoe blossfeldiana: These succulent plants are low-maintenance and boast bright, dainty red flowers—ideal for a sunny window ledge or workspace.
  7. Cyclamen: Known for its striking heart-shaped leaves and showy flowers, the cyclamen is a favorite among indoor gardeners. The red flowering Cyclamen is specifically ideal for adding a festive touch during the holiday season!
  8. Clivia miniata: A hardy plant with beautiful, trumpet-shaped red flowers. This is a long-lived plant that is perfect for those without a green thumb.
  9. Impatiens walleriana: Often known as ‘Busy Lizzie’, this plant is an enchanting option for indoor gardening. It produces a profusion of cheerful red flowers year-round.
  10. Geranium: Available in a variety of colors, Geraniums with red flowers are one of the most popular choices for indoor plants. They are easy to grow and provide stunningly bright color.

Choosing the Right Location for Houseplants with Red Flowers

Once you’ve chosen your perfect red-flowered houseplant, the next big question is, where is the best place to display it? There are a few factors to consider when placing these houseplants compared to plants that don’t have flowers.

Light Requirements

All houseplants need light to perform photosynthesis and to flourish but the general rule for houseplants with red leaves is to avoid direct light. This can very quickly dry out the petals on the flowers, leading to a limp and brown plant.

Beyond just avoiding direct light, there are some nuances that depend on the specific variety. While Anthurium and Aeschynanthus Radicans require lots of indirect light, Begonias can flourish in more shady areas.

Make sure you find out the light requirements of your specific red flowering plant so you can find the perfect spot for it in your home.

You may also need to consider moving your plant around a bit depending on the season. A spot that might get enough light in summer may be too dark in winter.

It’s also worth noting that the risk of sunburn is a lot lower in winter as the sun just isn’t as strong, so you can get away with placing your flowering houseplants a little closer to the window in the colder seasons.

Temperature &Humidity

The majority of houseplants with red flowers originate from the tropical regions, hence, they favor a warmer and more humid atmosphere.

However, extreme fluctuations in temperature can stress them out. That’s why positioning them away from areas that experience sudden temperature changes like air conditioners, heaters or drafty windows is vital.

If your plant is in a spot with a lot of heat or humidity, it can lead the flowers to wilt and go soft. This is irreversible so once the damage has been done, there’s nothing more you can do (which is why prevention is the best method here).

We strongly advise buying a digital thermometer with a humidity monitor built in so you can keep tabs on the environment around your plant, and make sure the red flowers bloom!

Space Constraints

Lastly, bear in mind the space constraints. Consider the potential size of the plant when it’s fully grown.

Some, like the Red Agloenema, can reach several feet in height, which might not be feasible in cramped spaces. That’s where smaller alternatives like Cyclamen come in handy. So, think ahead and visualize the space before planting.

Common Issues with Houseplants with Red Flowers

One of the most common issues growing houseplants face is improper watering as both over and under-watering can damage your plants.

Overwatering can lead to root rot and soft limp flowers, a potentially fatal plant disease, while underwatering can lead to crispy flowers and leaves and hindered growth.

Spotting pests and diseases

Pests like aphids, spider mites, and whiteflies can invade your houseplants and suck the energy out of the leaves. The red flowers are often the first thing to show signs of damage as your plant doesn’t have the energy to keep them in bloom.

Fungal diseases, like powdery mildew or root rot, can also pose significant threats to your red-flowering beauties so spotting them early is crucial. Watch for discolored leaves, brown spots, or wilting flowers, as these can all be signs of a disease.

Addressing nutritional deficiencies

Yellowing leaves, slow growth, and small new flowers can all indicate that your plant might be lacking some critical nutrients.

A balanced liquid plant fertilizer could be a quick fix for this but don’t give it too much as over-fertilizing can lead to salt accumulation which can harm the plant.

Top Tips to Keep the Red Flowers Healthy

  • Fertilizing Wisely: Red-flowering houseplants usually benefit from a little boost of nutrients during their growth and blooming phase. But be careful not to over-fertilize, as this can lead to nutrient burn so use a balanced, water-soluble fertilizer diluted to half-strength.
  • Pruning and Deadheading: Occasionally, you may need to give your plant a little trim. Deadhead spent flowers to keep the plant looking tidy and to encourage more blooms. If the plant becomes leggy, don’t be afraid to prune it back. This could lead to a bushier plant with even more stunning red flowers.
  • Maintaining Cleanliness: Regularly wipe the leaves and petals of your flowering houseplant to free it from dust. A clean plant is a healthy plant.
  • Providing Proper Ventilation: Adequate airflow can prevent a myriad of plant diseases so this is a crucial one to remember.

Decorating Tips: Incorporating Houseplants with Red Flowers

Use Houseplants as Focal Points

As you map out your decorating plans, consider using houseplants with red flowers as focal points. A strategically placed Red Anthurium in your living room, for instance, can instantly grab attention and set the tone for the rest of the room.

Don’t be afraid to think big: a mature, flowering Flame of the Woods can act as striking décor in a larger room. With their bold, vibrant blooms, these plants don’t just fade into the background – instead, they become conversation starters!

Incorporate Houseplants in Different Rooms

Whether bathrooms, bedrooms, or kitchens, there’s a houseplant with red flowers for every room in your home. The humidity-loving Red Prayer Plant would love your bathroom, while the cool-climate-loving Christmas Cactus will thrive in your bedroom.

Integrating different plants in various rooms can bring a natural cohesion to your overall home décor.

Create Balance with Other Colors

When incorporating houseplants with red flowers into your décor, sprinkling in a few plants with other colours (either flowers or leaves) can create some contrast.

Using complementary colors – those opposite red on the color wheel, like greens and blues – can make your red flowers pop. However, if you prefer a more harmonious look, try pairing your red blooms with similar shades such as pinks and oranges.

Take Advantage of Vertical Space

Short on floor space? No problem. Consider houseplants that climb or trail like the Bleeding Heart Vine. These can be hung from ceilings, high shelves, or placed on top of bookcases to make use of your vertical space.

Frequently Asked Questions about Houseplants with Red Flowers

Can I grow red-flowering houseplants from seeds?

Yes, many red-flowering houseplants can be grown from seeds. However, the growth rate depends on the particular species of the plant. Certain plants like the Red Salvia can thrive from seeds, while others may require propagation through stem cuttings or division.

2. Do all red-flowering houseplants require lots of sunlight?

No, the sunlight requirement varies widely. While some require plenty of sunlight to bloom, others can still produce vibrant red flowers with minimal sunlight exposure. However, most red-flowering houseplants tend to prefer bright, indirect light.

3. Are all houseplants with red flowers safe for pets?

A vital point to remember is that not all houseplants are pet-friendly. Some plants, like the Red Lily, can be harmful to pets if ingested. As a responsible plant and pet parent, it’s crucial for you to research the toxicity of a plant before bringing it home.

4. How often should Iwater these plants?

The watering needs of houseplants with red flowers are as diverse as their species. Some plants like the Begonia Torch enjoy moist soil, while others such as the Jade plant prefer their soil to dry out between watering. Make sure you understand the specific needs of your chosen plant.

5. When do red-flowering houseplants typically bloom?

Most red-flowering houseplants produce blooms during the spring and summer. However, some varieties can flower at unusual times, like the Christmas Cactus that blooms around Christmastime.

6. Do red-flowering houseplants require any special type of soil?

While a general-purpose houseplant soil usually serves well, some red-colored bloomers have specific soil requirements. For example, succulents and cacti with bright blooms generally perform best in well-draining, gritty soil to avoid root-rot issues.

In conclusion, the world of red-flowering houseplants is undoubtedly mesmerizing but equally diverse. Take time to learn about your chosen plants’ specific needs to enjoy a house full of their brilliant blooms. Happy planting, folks!

Fiddle and Thorn is a participant in the Amazon Services LLC Associates Program, an affiliate advertising program designed to provide a means for sites to earn advertising fees by advertising and linking to Amazon.com

Take our houseplant survey!

Quickly respond to our 30 second houseplant survey and get 75% off our Complete Houseplant Care eBook!

Take the Survey

No thanks…