Brown Staghorn Fern Leaves | Causes and How to Fix it!

Last Updated: February 4, 2022

One of the most unique houseplants, the striking leaves on the Staghorn Fern deserve all the hype! However, it can happen that the leaves on your Staghorn Fern start to turn brown, either from the base upwards or as brown tips/spots across the plant. This can be pretty concerning for every plant parent if the issue starts to progress and spread across your plant. But don’t worry, we have put together this post to help you figure out what the cause of the brown leaves is and how best to treat the issue to revive your Staghorn Fern.

Brown spores

Before we get into the various causes of brown leaves on a Staghorn Fern, we want to make sure that you are able to tell the difference between your Fern’s natural brown spores, and brown leaves that signal something is wrong. Ferns produce spores as their way to reproduce and these appear as small dots on the leaves, usually on the underside. As your Staghorn Fern matures, the spores will turn from a green colour to brown. This is totally normal and is just the process of ageing. It shouldn’t be confused with the actual leaves on your Staghorn Fern turning brown.

Spores will come away from the leaf so make sure that it is the actual leaf that has turned brown before changing anything about how you care for your plant, or where it is placed.

Natural ageing

Similarly to brown spores on your Staghorn Fern, there is one other factor that is nothing to worry about. When your Staghorn Fern matures, the shield fronds (the plate-like leaves that protect the base of the plant) will crisp up and turn brown. This is again totally normal and is just part of the life cycle. So if these leaves have started to turn brown, you haven’t done anything wrong and there is nothing to worry about here.

It’s important to leave these brown leaves on your plant, they will shed them if necessary but we strongly recommend leaving them on the plant.

Overwatering can turn the leaves brown

Although your Staghorn Fern doesn’t grow like a lot of other houseplants, some of the same issues apply when it comes to diagnosing brown leaves. If the roots of your Staghorn Fern are too soggy and have started to rot, then this can cause browning on the leaves. This usually occurs from the base upwards.

Hold off either how often you water your Staghorn Fern, or how much water you give it each time and this should prevent any more brown leaves from developing on your plant.

Underwatering can also cause brown leaves

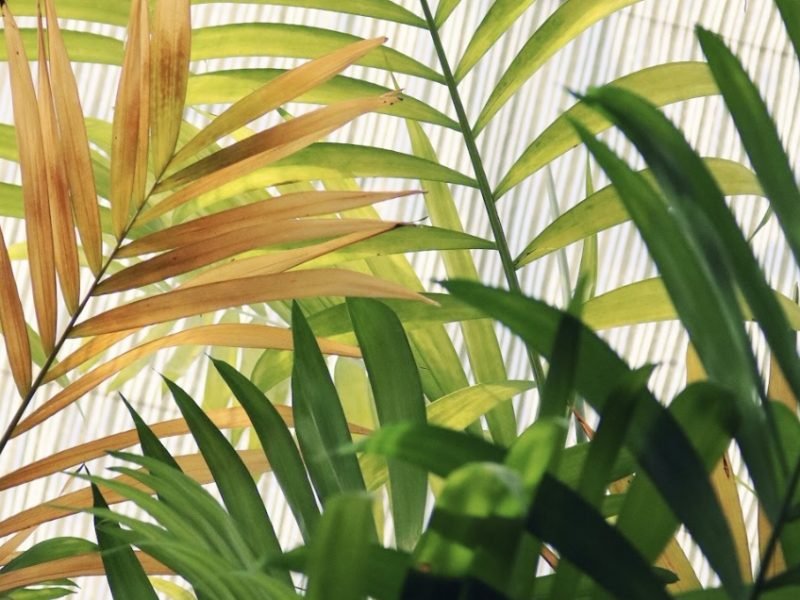
Although it won’t die on you suddenly if you forget to water it every once in a while, or make it go a little longer without water, consistent underwatering will start to have an impact on your Staghorn Fern’s health. If you notice that your Staghorn Fern’s leaves are turning brown and crisping up, it may be due to a lack of water.

Underwatering usually means your Staghorn Fern will start to develop brown leaf tips and leaf edges, and as the problem progresses, this will progress throughout the leaf. The leaves will also look light brown in colour and feel very dry to touch.

Your first instinct when solving the issue of underwatering might be to give it loads of water straight away but this can actually be harmful to your Staghorn Fern as they don’t like sudden and dramatic changes to their environment. Instead, you want to reintroduce frequent watering for a week or two and this should solve the problem.

If you find yourself forgetting to water your Staghorn Fern regularly, try creating a calendar of when all your houseplants need watering. You can then set reminders on your phone on specific days to remind you. That way you can keep track of your watering habits and make sure you don’t under or overwater any of them too often! Just bear in mind seasonal changes when creating your calendar as light levels and temperature can impact how often you need to water your plant.

Low humidity can cause brown leaf tips

Low humidity levels can also cause brown Staghorn Fern leaves so it’s worth paying attention to how dry the air is. Humidity issues tend to cause brown leaf tips first, but can gradually take over more of the leaf if the problem persists and the air is really dry. Staghorn Ferns like a little higher humidity than the average home so you’ll need to boost it every now and again. Here are a few ways to do that:

  1. Mist your Staghorn Fern’s leaves

    Using a spray bottle, mist your plant a few times each week or more if you can. Make sure to do it in the mid-morning though as you want to leave enough time for the water to evaporate before it gets dark as the cold air at night can cause damp leaves to rot.

  2. Wash down your Staghorn Fern

    Wash down the leaves of your Staghorn Fern in the sink or shower every week or two. This is a great quick fix but it’s a fairly short-term solution so you’ll want to be doing other things to boost the humidity as well.

  3. Invest in a humidifier

    This is the best long term solution as they can keep quite a consistent level of humidity around your plants so you don’t need to remember to mist or change out the water in the pebble tray.

    We recommend this humidifier from Amazon – our Ferns and other humidity-loving plants love it!

Direct sun can scorch the leaves

Brown leaves might also be because your Staghorn Fern is getting too much direct sunlight. Intense light can cause the leaves to burn, from which they will not be able to recover. Staghorn Ferns do like areas with bright light, but it needs to be indirect.

You need to also watch out a little more in summer when the sun is a lot stronger and is out for more of the day. To figure out how much light your Staghorn Fern is getting throughout the day, you can use a light meter. It may be that your Staghorn Fern is getting a lot of direct sunlight in the morning, or is in too much shade in the afternoon. A meter will help you track any changes.

Those are the most common causes of brown leaves on a Staghorn Fern. It’s important that you determine whether or not it is simply the natural life cycle of the plant that is causing the brown leaves, or whether there is something more harmful going on. You don’t want to be changing anything about how you water your plant, or how much light/humidity it gets if everything is actually how it should be.

Check out our Staghorn Fern care guide to learn more about how to best take care of your Fern.

Fiddle and Thorn is a participant in the Amazon Services LLC Associates Program, an affiliate advertising program designed to provide a means for sites to earn advertising fees by advertising and linking to Amazon.com

Take our houseplant survey!

Quickly respond to our 30 second houseplant survey and get 75% off our Complete Houseplant Care eBook!

Take the Survey

No thanks…

Why are there Brown Spots on Pothos Leaves?

Last Updated: November 1, 2023

Pothos Plant

Pothos Plant

Brown spots is a common issue for Pothos plants and there are quite a few reasons that might be causing it. In this guide we will go through the possible causes, as well as how to treat the issue and prevent it in future as well.

Just as humans exhibit signs and symptoms when unwell, plants too communicate their distress in their unique way. Brown spots are one of these signs from your Pothos.

Understanding the cause, be it overwatering, underwatering, sunburn, nutrient deficiencies, or pest attacks, is the key to bringing your plant back to full health.

The Main Causes of Brown Spots on Pothos Leaves

Overwatering: The Common Cause

Overwatering, a common issue faced by many indoor plant enthusiasts, often manifests in the form of brown spots on Pothos leaves.

Understanding the Impact

Pothos plants are native to tropical environments, where they have adapted to handle high levels of moisture. However, these adaptable plants have also learned to survive periods of less rainfall, meaning they’re fairly drought-resistant.

When we overwater, we disrupt this balance, leading to some visible distress signals – the most noticeable being the dreaded brown spots.

When you overwater your Pothos, the plant’s roots become suffocated from a lack of oxygen. This results in root rot, a serious condition that can damage your plant’s vital nutrient-absorbing roots.

As the root rot spreads, the plant struggles to transport nutrients and water to its leaves, hence the eventual appearance of brown spots.

  • Early Signs: Look closely – do you notice a slightly yellowing of the leaves’ edges, progressing towards a brownish hue? This is often a significant early warning sign of overwatering.
  • Advanced Stage: As the situation worsens, entire leaves may turn yellow then brown, and the spots often become darker and larger. The leaves and stems may also appear to be soft or even mushy to the touch, indicating a serious condition of root rot caused by overwatering.

Addressing the Issue

The first step is to reduce watering. Allow the plant’s soil to dry out completely before the next watering session. If your plant is suffering from severe root rot, it may be necessary to re-pot your plant intro fresh plants and trim any rotten roots.

Sunburn Can Cause Brown Spots

Pothos plants are popular for their low light tolerance. These tropic natives know how to thrive even in sun-deprived conditions.

So when you expose the pothos to direct sunlight, it’s can cause brown spots to develop on those leaves.

So how does a sunburn look on your pothos? Sunburn usually manifests as pale, bleached areas that gradually turn into crispy brown spots, typically on the leaves directly exposed to the harsh light.

Depending on the intensity of light exposure, these tan spots could be small, scattered across the leaf surface, or combine to form large blotches.

While the current brown spots are irreversible, to protect your Pothos from developing any more brown spots make sure you’re doing the following:

  • Keep your pothos away from direct sunlight. These plants thrive beautifully in low to medium light. While some amount of morning sun is great, intense afternoon sun can be brutal on your plant.
  • Use curtains or blinds as a barrier between your pothos and direct light. Alternatively, you could place your pothos in a spot where it gets filtered or diffused light. Think spots near north or east-facing windows.
  • If you’ve placed your pothos outside, ensure it gets plenty of shade and isn’t baking in the sun. Look for spots that get several hours of indirect light.
  • Keep examining the leaves frequently. Changes in color or texture are the first signs that usually indicate a problem.

Nutrient Deficiencies Can Cause Brown Spots on a Pothos

A lack of certain nutrients, especially Nitrogen (N), Phosphorus (P), Magnesium (Mg), and Potassium (K), can cause your Pothos to develop brown spots.

Each of these nutrients plays a different role for your Pothos.

  1. Nitrogen (N): Nitrogen aids in the overall growth and color of Pothos. If the leaves of your Pothos plant are turning yellow, while the veins remain darker, your plant might be giving you a sign of Nitrogen deficiency.
  2. Phosphorus (P): Phosphorus is essential for energy transfer and storage in Pothos. A deficiency might cause brown spots, usually surrounded by a somewhat dark color.
  3. Potassium (K): Potassium is necessary for the opening and closing of pores (responsible for water regulation). If your Pothos is showing brown spots on the edges and tips of the leaves, it might be indicative of a Potassium deficiency.
  4. Magnesium (Mg): Needed for photosynthesis, a lack of Magnesium would first show up as yellowing between leaf veins, which would later turn brown.

By meeting these deficiencies through appropriate fertilization and care, you can easily prevent your Pothos from developing any more brown spots.

Brown Spots Could Mean Pests

Brown spots across your plant can mean that your pothos is under attack from common pests and diseases.

Spider Mites: These tiny arachnids can be hard to spot but they can cause significant damage to your pothos. Spider mites feed off the liquids in the plant cells, often leading to tiny brown or yellow spots. In severe infestations, you might notice a fine webbing on the underside of the leaves.

Mealybugs: Another common pest, mealybugs look like small white cottony masses on the underside of pothos leaves. They feed on the sap of your plant, leading to wilted, yellowing, and dying leaves with brown spots.

Scale: Recognizable by their scaly brown shells, scale insects have a similar mode of attack as mealybugs. Brown spots on leaves are often a sign of their activity on your pothos.

Treating Brown Spots on Pothos Leaves

Luckily, there’s a host of treatments for you to choose from to help your pothos bounce back to health.

Firstly, modifying the watering routine is essential. If your Pothos has been overwatered, you should let the soil dry out before watering again and in severe situations replace the entire potting mix to prevent any further damage.

Secondly, consider adjusting the light intensity. If the plant suffers from excessive light exposure, you might want to move it to a location with indirect sunlight.

Replenishing nutrients is key. A nutrient-rich environment is crucial to the overall health of your Pothos. Regular feeding with a balanced houseplant fertilizer, typically once a month, should do the trick.

A pest or disease attack can in fact be a major cause of the brown spots on Pothos leaves. As such, applying appropriate insecticides or fungicides, should be considered.

However, remember, it’s essential to first identify the exact pest or disease before you treat it. The wrong application of chemicals might do more harm than good.

Removing the Brown Leaves on your Pothos

Once a leaf has developed brown spots or patches, these are irreversible. The cells in the leaf are dead and there is no getting them back to luscious green.

If a large part of the leaf is now brain, it can be drain on the plant’s resources. As the Pothos strives to save the brown leaf, nutrients and energy that could be channeled to healthy leaves are diverted. Ultimately, this negatively affects overall plant growth.

We always recommend removing a leaf that is more than 50% brown. If there are just a few brown spots on the leaf (and the issue isn’t pests) then this can still be valuable in terms of photosynthesis as long as the issue has been dealt with.

Let’s talk about how to remove brown Pothos leaves properly:

  1. Prepare Your Tools: Ensure that your gardening shears or scissors are clean and sharp. Using a blunt or dirty cutting instrument could cause injury to the plant and could introduce harmful microbes.
  2. Locate the Leaf: Find the leaf stem that connects the brown leaf to the main vine. You’ll want to make a clean and smooth cut here.
  3. Cut Cleanly: Cut the leaf stem as close to the vine as possible, but be sure not to harm the vine itself. Remember, sharp shears make the best cuts.
  4. Discard the Leaf: Throw the leaf away as soon as you’ve cut it off. Leaving it around might invite pests or diseases.

Preventing Brown Spots: Best Practices for Pothos Owners

Overwatering or underwatering can trigger brown spots on Pothos. Hence, ensure that the top one inch of soil is dry before watering. Remember, it’s better to lean towards slight underwatering than overwatering simply because Pothos can cope better with the former.

Next, let’s chat about placement. Pothos plants flourish in bright, indirect light so avoid placing your Pothos next to a south-facing window, as the intense sunlight can scorch the leaves, causing those dreaded brown spots.

The temperature and humidity are other factors to consider. Pothos are tropical plants and prefer warmer temperatures, ideally between 65-85°F (18-29°C). They’re also suckers for a humid environment so mist the leaves lightly every few days or consider placing a humidifier nearby in dry climates.

Moving on to the menace of pests and diseases. Regularly check your plant, particularly beneath the leaves, for pests like aphids, mealybugs, and spider mites. If you find them, nipping the problem in the bud is crucial. A soft cloth with soapy water generally does the trick for minor infestations.

Lastly, always remember that nutrition plays a vital role. Treat your Pothos to a balanced, water-soluble fertilizer every two months during the growing season. This will help keep it healthy and less susceptible to brown spots.

Frequently Asked Questions

Are brown spots on Pothos leaves harmful to the plant?

In many cases, brown spots are indeed harmful and indicative of a problem the plant is experiencing, such as overwatering, sunburn, or pest infestation. However, they’re not a death sentence for your Pothos if you address the issue early! Tailoring your care approach based on the probable cause can help revive your plant.

Can brown spots on Pothos leaves be cured?

First, you need to identify the cause of the brown spots, and quickly as the issue becomes harder to treat if it’s progressed quite far.

Once you know the cause – be it overwatering, sunburn, nutrient deficits, or pests – you can apply targeted care strategies to treat the problem.

It’s worth mentioning here that even once the issue is solved, the brown spots will remain brown. The cells in the leaves have died in these areas and there isn’t a way to get them to turn back to green again unfortunately.

Will the brown spots spread to other leaves on the plant?

Sadly, if left unchecked, the issue causing brown spots can indeed spread to other leaves. It’s essential to identify and address the issue as soon as possible to prevent further harm to your beautiful Pothos.

Can I save a severely brown-spotted Pothos?

Absolutely! In severe cases, you might have to be more aggressive with your treatment, including removing the severely affected leaves and changing your care routine. Remember, patience and persistence are key when rehabilitating a plant.

If the issue is quite severe then we do always recommend taking a cutting from the healthiest section of your Pothos and propagating it. It will just act as a backup if the issue is too severe to save the mother plant.

At least this way you still have a part of the plant to grow and nurture.

Fiddle and Thorn is a participant in the Amazon Services LLC Associates Program, an affiliate advertising program designed to provide a means for sites to earn advertising fees by advertising and linking to Amazon.com

Take our houseplant survey!

Quickly respond to our 30 second houseplant survey and get 75% off our Complete Houseplant Care eBook!

Take the Survey

No thanks…

Brown Rhipsalis (Mistletoe Cactus) Leaves | Causes and Solutions

Last Updated: June 21, 2022

The Rhipsalis, or Mistletoe Cactus as it’s otherwise known, is actually a jungle cactus which makes its care slightly different to what you would expect with Cacti. They need warmth and humidity to really thrive and plant parents who don’t know this might find themselves with a whole load of brown leaves. Don’t worry though, brown leaves don’t mean that your plant will die immediately, and with the right methods, you should be able to get your plant back to full health.

In this post, we will be going over the different causes of brown leaves in Mistletoe Cactus plants to make sure that you diagnose the issue properly, take the right steps to solve that problem and are armed with tips to stop it from happening again.

Too much water can lead to brown leaves for Mistletoe Cacti

If the leaves closest to the base of the plant are turning brown and the whole plant looks as though it’s drooping just a little more than normal, then it might be overwatering that is causing these issues on your Mistletoe Cactus.

Overwatering is one of the main killers of Mistletoe Cacti as the problem can spread pretty rapidly so you need to make sure that you are catching this problem in the early stages. Too much water will lead to the potting mix being super waterlogged, which rots the roots and prevents your Mistletoe Cactus from getting the nutrients it needs. This is what turns the leaves brown as your plant just can’t sustain those leaves anymore.

If you think that your Mistletoe Cacti’s potting mix is waterlogged, check the moisture of the soil immediately and inspect the root system. If the roots are very soft and are almost black in colour, then this means they have started to rot. Switch out the potting mix if it is still waterlogged as this means your Mistletoe Cactus can begin the recovery process immediately and cut off all rotten parts of the root system.

Moving forward, make sure to check the moisture levels in the soil each time you water your plant. Using a moisture meter or the chopstick test can help you avoid overwatering your Mistletoe Cactus and avoid more brown leaves forming.

Brown leaves may also be caused by underwatering

If the leaves on your Mistletoe Cactus have turned quite light brown in colour, and are dry and crispy to touch, then it might be a lack of water that is causing the issue. Mistletoe Cacti are jungle cacti which mean they like to have more moisture than your average cactus.

Again, just like with overwatering above, the best way to properly diagnose the problem is to take your plant out of its pot and inspect the moisture levels and the potting mix. If the root system is dry and shrivelled then you are most likely not giving it enough water.

Your first instinct might be to give it loads of water straight away but this can actually be harmful to your Mistletoe Cactus if the soil goes from one extreme to the other. Instead, you want to reintroduce frequent watering for a week or two and this should solve the problem.\

If you just can’t get on the right watering schedule it could be worth investing in a good quality self watering plant pot, these take all of the trouble out of the process and will make sure that your Mistletoe Cactus isn’t resting in stagnant water – eliminating the risk of root rot or other watering based issues.

Drainage issues can also lead to brown leaves

If there seems to be a lot of moisture in the pot of your Mistletoe Cactus, but you aren’t watering it very often, and not giving it loads of water each time, then it may not be your watering habits that are causing the brown leaves, but a lack of drainage.

It’s crucial that any excess water is able to drain from the pot so that it doesn’t cause waterlogged soil. You can very easily increase the amount of drainage in the pot by mixing in a small amount of perlite, this will make it far easier for water to flow through and out of the drainage holes of your pots (you should also check to make sure your pots have drainage holes).

We also recommend investing in terracotta pots as these allow some of the excess water to evaporate out of the sides of the pot. You will usually buy your houseplants in plastic pots as they are great for nurseries (cheap, light and unbreakable). However, plastic pots aren’t great for your plants as they lock in every single drop of moisture. So sometimes it is worth investing a little more to make sure that the roots of your Mistletoe Cactus are not sitting in too much moisture.

Brown Mistletoe Cactus leaves can be caused by dry air

Humidity is often forgotten when it comes to caring for your plants as it’s not as obvious as light and water. However, it can be a common reason why Mistletoe Cacto develop brown leaves as they are native to the jungle and therefore love a higher humidity level.

Whilst we can’t replicate the jungle environment in our homes, there are a few really easy ways to life the humidity for your Mistletoe Cactus:

  1. Mist the entire plant

    One of the easiest methods for increasing humidity is misting using a spray bottle. It’s a great habit to get into for all of your humidity houseplants. Your Mistletoe Cactus will love a daily misting, or at least a few times a week if you don’t have that much time.

  2. Use a pebble tray

    This one requires a little bit more set up but is definitely worth it! Fill a tray with small stones and fill it two-thirds of the way up with fresh water. Then place your Mistletoe Cactus on top and the water will evaporate around it over the course of the day. One thing you must be careful of is that the roots and the pot are not touching the water in the tray as this will cause waterlogged soil and probably root rot.

  3. Give your Mistletoe Cactus a shower

    Another way to instantly raise the humidity for your Mistletoe Cactus and avoid more brown leaves is to give it a wash down. Just pop your plant in the shower or sink and give the leaves and potting mix a good soaking. You want to keep the water lukewarm so you don’t shock or damage the leaves and we also recommend keeping the water pressure fairly low so you don’t accidentally damage the plant.

  4. Buy a humidifier

    These are a real game-changer when it comes to increasing the humidity for your Mistletoe Cactus (and other plants) and avoiding brown leaves. They are portable and affordable devices that keep a consistent humidity level in your home.

    We recommend this humidifier from Amazon. We’ve been using it for several years and our plants really love it!

Watch out for over-fertilisation as this can cause brown spots

Most generic plant foods and fertilisers will recommend a dosage for your plants, but it’s often far too much for a Mistletoe Cactus and can result in brown leaves. There are a lot of factors that impact how much fertiliser your plant needs, from age, maturity, size and environment to name a few. This makes every plant unique in terms of fertilising so there can never be a one-fits-all amount!

We recommend diluting the fertiliser more than the recommended amount as well as spacing out how often you fertilise to suit each of your plant’s needs. Also remember that you don’t need to fertilise your plant at all if you choose not to, you’ll still get plenty of healthy growth without it.

Those are the four most common reasons why Mistletoe Cacti/ Rhipsalis develop brown leaves. The first port of call is to inspect the soil as more often than not, improper watering is causing the browning. By consistently monitoring the moisture levels in the soil, you’ll get a better idea of when and how much to water your Mistletoe Cactus which will help stop the problem from occurring in future and causing more brown leaves (and other issues!).

To learn more about how to keep your plant thriving, check out our Mistletoe Cactus care guide.

Fiddle and Thorn is a participant in the Amazon Services LLC Associates Program, an affiliate advertising program designed to provide a means for sites to earn advertising fees by advertising and linking to Amazon.com

Take our houseplant survey!

Quickly respond to our 30 second houseplant survey and get 75% off our Complete Houseplant Care eBook!

Take the Survey

No thanks…

Brown Leaves on Iron Cross Begonia (Causes and Solutions)

Last Updated: December 31, 2021

Loved for their beautiful and colourful foliage, the Iron Cross Begonia is quite a rare plant but we are seeing them appear more and more across the world which we couldn’t be happier about. However, if you start to notice that the leaves are starting to develop brown patches or spots, then this is a sign that something might not be quite right.

Below we will go through each of the factors that cause brown leaves so you can figure out what is happening to your Iron Cross Begonia, as well as how to fix and prevent the issue.

Natural Pattern

Before you start worrying about what problems might be slowly killing your plant, it’s important to make sure that something is actually wrong. Some varieties of Iron Cross Begonia naturally have brown patterns on the leaves. This is totally normal and just double-check that you aren’t mistaking the natural brown pattern for a problem causing dry brown leaves.

A Lack of Humidity

Dry air is the most common cause of brown leaves on Iron Cross Begonia plants. This usually causes the leaves to turn brown from the tips and edges inwards. A lack of humidity in the air can cause the leaves to be a little limp, droop down, and turn dry, brown and crispy. It will happen slowly so you have the opportunity to spot the issue early and fix it before it gets too bad.

Although you can’t reverse the brown leaves, there are a few easy things you can do to boost the humidity levels and prevent your Iron Cross Begonia from developing more brown leaves.

Misting the plant

One of the simplest ways to increase the humidity for your Iron Cross Begonia is to mist them with a spray bottle a couple of times a week. Make sure the water is at room temperature as you don’t want to burn the leaves or shock the plant.

Pebble tray

Place your Iron Cross Begonia over a tray of pebbles with fresh water over the top. Over the day water from the tray will evaporate around your plant, boosting the humidity.

Pop your Iron Cross Begonia in the shower

This is quite a quick fix, rather than a long-term solution but it’s a good idea to wash down your plant in the shower. It can also refresh the plant and remove dust so it’s a win-win. You do want to be quite careful when doing this with your Iron Cross Begonia so keep the water pressure low.

Buy a humidifier

If you tend to forget to mist your plant, then the best thing to do is buy a humidifier. They’re relatively affordable little devices that keep a consistent humidity level so it’s a great long-term solution. They are also believed to help us sleep better, so it won’t just be an investment for your houseplants.

Direct Sunlight

Sunlight is another one of the most common factors that can end up in the leaves on your Iron Cross Begonia turning brown. If your plant is getting a high level of direct sunshine during summer, it can dry out and burn the leaves which turns them brown. You won’t need to worry about this so much during winter as the sun is a lot weaker, and the days are a lot shorter.

Trim away the brown leaves (so that your plant can begin to recover) and move your plant to a shadier spot in your home.

Once you have figured out what is causing the brown leaves on your Iron Cross Begonia, it’s important that you change things immediately if they need to be. The more brown leaves that are on your plant, the harder it will be to bring your Iron Cross Begonia back to full health.

You can learn more about how to best care for your plant in our detailed Iron Cross Begonia care guide!

Fiddle and Thorn is a participant in the Amazon Services LLC Associates Program, an affiliate advertising program designed to provide a means for sites to earn advertising fees by advertising and linking to Amazon.com

Take our houseplant survey!

Quickly respond to our 30 second houseplant survey and get 75% off our Complete Houseplant Care eBook!

Take the Survey

No thanks…

Brown Leaves on Elephant Ear Plants – Causes and Solutions

Last Updated: March 17, 2023

Elephant Ear plants really bring the tropics right into your home with their incredible large leaves.

However, if something isn’t how your plant would like it, your Elephant Ear plant might start to develop brown leaves. This can often start as just brown tips or brown edges on the leaves, but if the issue is progressing you might notice larger brown patches or entire leaves turning brown.

It’s important that you try to diagnose the issue as soon as you see it so that you can take the needed steps to resolve the issue before it kills your plant.

In this article, we will cover not only the causes of brown leaves on an Elephant Ear Plant but also how to fix it and prevent it from occurring again in future.

Causes of brown leaves on Elephant Ear Plants

Overwatering is a common cause of brown foliage

Too much water is probably the most damaging of houseplant issues and is quite a common reason why Elephant Ear plants develop brown leaves. Your Elephant Ear plant won’t like it if the soil is waterlogged and it can very quickly mean that the roots will start to rot. Once the root system is damaged, it will cause the leaves to turn brown, as well as droop down and turn soft.

To figure out if overwatering is the reason your Elephant Ear is turning brown, check the moisture levels in the soil immediately. The most reliable way to do this is to use a moisture meter but you can also use the chopstick method or lifting method (if you’re plant is still quite small) to determine if the soil has dried out yet.

Consistent underwatering could also be to blame

Although your plant can deal with a little bit of dry soil and the odd lack of water, it will struggle to go for several weeks or months without any moisture. This will start to dry out the root system, making it go crispy.

The next thing that will happen if the issue continues is the leaves will begin to dry out and turn light brown in colour. It will usually show up as patches across the leaves, or begin at the tips and edges first. However, if the issue isn’t rectified it can start to cause entire leaves to turn brown.

Like with overwatering, check the soil moisture in the soil before adjusting anything about how you are watering.

Check for cold temperatures

Drafts that come through cracks in windows or doors can be pretty damaging to your Elephant Ear and will cause brown leaves among other issues such as leaves falling off.

Whilst cold temperatures won’t cause issues from one day to the next, over time they can start to impact your plant’s health. Although you might think that the temperature is fine, there might be little spots in your home that are too cold (or even too hot if near radiators or in a hotspot formed by sunshine) for your Elephant Ear plant.

Using a digital thermometer to monitor the air around your plant can help you determine if there are any drafts or if the temperature drops too much at night, for example.

Brown tips can be caused by dry air

If your Elephant Ear plant has started to develop brown and crispy leaf tips or edges, it might be caused by dry air.

During winter, the air in your home can become quite dry as we have the heating on for a lot of the day. Paired with less ventilation, it could be drying out your plant, causing brown leaf tips.

It’s important to note that brown leaves as a result of dry air is quite a slow problem to develop. You won’t see a new brown leaf tip pop up every day but it will over time become more visible.

Too much direct sunlight

Your Elephant Ear plant may also be developing brown leaves because it’s receiving a lot of intense direct sunlight. This is only a real issue during summer as the sun is a lot stronger than in winter.

You can tell if your Elephant Ear is receiving too much sunlight if it is showing sights of sunspots. These are brown spots that start to show up across each leaf. THey will mostly form on the side of the plant that is most exposed to the sunlight. This can be a great way to diagnose the issue as most other problems will cause brown leaves across the plant.

Unfortunately, once the leaves have been burnt by the sun, there is no going back so it’s best to remove any leaves that have been significantly damaged.

Solutions for brown leaves on Elephant Ear Plants

Adjust your watering habits

If you have diagnosed the issue as being caused by underwatering or overwatering, then it’s crucial that you adjust your watering schedule accordingly. You either want to change how often you are watering your Elephant Ear Plant, or how deeply you are watering it each time. By adjusting one of these factors, you can avoid over or underwatering your plant moving forward.

If you have underwatered your plant, your first instinct might be to give it loads of water straight away. However, we recommend against this as it can actually be harmful to your Elephant Ear if the soil goes from one extreme to the other. Instead, you want to reintroduce frequent watering for a week or two and this should solve the problem.

Replace any waterlogged soil

If you have been giving your Elephant Ear plant too much water, replace the potting mix if it is still waterlogged. You might want to just wait for it to naturally dry out but this only risks there being more damage in the next few days.

Instead, replace with fresh high-quality well-draining soil so that your plant can begin to recover.

Alongside replacing the soil, it’s also important to cut away any rotten roots. These will appear dark brown or black in colour and will be soft to touch. Once a root has started to rot, there is no reversing this so removing them is the only option.

Mist your plant’s leaves

If humidity is the issue then it’s a good idea to get into the habit of misting your plant’s leaves. Use a spray bottle to mist the leaves at least a few times per week as this will boost the humidity for your plant. It’s best to do this in the morning to allow enough time for the water droplets to evaporate before it gets dark. You want to avoid the leaves still being damp when it gets colder as this increases the risk of leaf rot.

Misting the leaves is also a great way to remove dust from the leaves, which can be a big problem for Elephant Ear plants as their leaves are so big!

Prune any damaged leaves

We recommend pruning off the worst affected leaves. This will allow your Elephant Ear Plant to focus its energy on producing new, healthy leaves rather than wasting energy trying to revive dying ones.

Once a leaf has turned brown, there is unfortunately nothing you can do to make it green again, so pruning away the worst affected leaves is the best option.

Draftproof your home

If cold air is what’s causing the brown leaves on your plant, make sure to draft-proof any windows or doors that are within 1 metre of your Elephant Ear or any other houseplants.

We also recommend getting a thermometer to measure how the temperature changes throughout the day and across the year.

How to prevent brown leaves on an Elephant Ear Plant

Keep adjusting your watering schedule

To prevent the problem from happening again, we recommend continuously monitoring the moisture levels in the soil. This will help you figure out how you need to adapt your watering schedule so that you are not overwatering or underwatering.

Your watering habits need to be adapted throughout the seasons to account for environmental changes as you’ll need to cut back on how much water you give your plant during winter.

Another option is to pick up a self-watering pot, these handy pots take all of the guesswork out of watering and make everything so much easier!

It’s also a good idea to get into the habit of removing any excess water that has run out of the drainage holes (or is still left in the saucer if you are bottom watering) 20 minutes after watering. This allows enough time for your plant to take up as much moisture as it needs and prevents the roots from swimming in water.

Keep up a moderate humidity level

Alongside misting, there are other great ways to increase the humidity for your Elephant Ear Plant. If you have good lighting in your kitchen or bathroom then we recommend moving your Elephant Ear in there. The humidity level in those rooms is naturally higher because of the steam released from showering and cooking.

If you’re worried about the lack of humidity becoming a real problem, then buying a humidifier is the most reliable method of increasing the humidity and keeping it at a stable, consistent level.

They are super affordable devices that also have benefits for us, as well as our plants. They are thought to help to clear our skin as well as improve our quality of sleep. So as well as preventing any more brown leaves from developing on your Elephant Ear, humidifiers are great for our other plants as well as us too!

Frequently Asked Questions

To make sure that you can make the right changes to solve the brown leaves on your Elephant Ear, we recommend going through each of the issues whilst with your plant, so you can check out the soil, the type of brown leaves that are on your plant and other environmental factors.

This will allow you to make the right fixes to ensure no more brown leaves form on your plant.

Check out our Elephant Ear care guide for more information on how to best care for your plant and prevent any more issues from forming in future.

Fiddle and Thorn is a participant in the Amazon Services LLC Associates Program, an affiliate advertising program designed to provide a means for sites to earn advertising fees by advertising and linking to Amazon.com

Take our houseplant survey!

Quickly respond to our 30 second houseplant survey and get 75% off our Complete Houseplant Care eBook!

Take the Survey

No thanks…

Brown Leaves on an Avocado Tree: Causes and Solutions

Last Updated: November 1, 2023

Avocado Tree

Avocado Tree

First things first, don’t panic. Brown leaves on your Avocado Tree are a common issue and can be due to various causes, some serious and others easy to fix.

From necessary nutritional deficiencies, to pesky pests, to favorable weather conditions, many factors can provoke brown leaves. Below we will walk you through these causes and remedies, so you’ll be equipped to revive your Avocado Treee back to normal in no time.

Common Causes of Brown Leaves on Avocado Trees

So, what’s actually causing your Avocado tree’s leaves to turn brown, and how can you find out? Several factors could be at play, and it’s crucial to identify them right to target the problem accurately.

Overwatering or Underwatering

Yes, avocado trees love moisture, but too much or too little of it can cause your leaves to turn brown. Overwatering disrupts the oxygen levels, drowning the roots, while underwatering-starves the roots, causing dehydration.

The hydration balance is, therefore, key to maintaining a healthy Avocado Tree and brown leaves can quickly develop if something isn’t right.

Nutrient Deficiency

The lack of certain nutrients may also lead to your Avocado Tree’s leaves turning brown. For instance, a deficiency of Zinc or Manganese can cause leaf discoloration.

Similarly, inadequate iron supply can lead to iron chlorosis, a condition that causes leaves to turn yellow or brown.

Temperature Stress

Frost damage during cold winters or scorching during hot summer seasons can cause the leaves to brown. Always ensure to provide your tree with a suitable environment, especially if you live in extreme weather conditions.

While temperature stress won’t cause brown leaves from one day to the next, over time it can cause some serious issues if not treated.

Pests or Disease

Watch out for pests and diseases as these can cause a whole range of different issues not just brown leaves.

Some common culprits include the avocado lace bug and root rot disease. The former causes brown, necrotic spots on leaves, while the latter affects the roots and can eventually lead to brown leaves.

Salt Accumulation

Finally, excessive salts in the soil might be the cause. High salt levels can prevent the roots from absorbing water efficiently, leading to dehydration and brown leaves. This often happens when the same water source (rich in salts) is used over time without leaching.

Treating Brown Avocado Tree Leaves

A good place to start is by pinpointing the cause of the browning. Once you know the reason, treatment becomes more straightforward and more successful.

When it’s an issue of drought stress, react quickly. At this point, a deep watering treatment is your best friend. Water your Avocado Tree thoroughly until you’re sure the soil is completely damp. However, remember that overwatering can also be stressful and damaging for your Avocado Tree so it’s about finding that perfect balance.

If salt build-up is causing leaf burn, you’ll need to take a different approach. Flushing the soil to remove excess salts should be the first step. Simply use plenty of water, then wait for the water to drain. It’s something you can do on your own, without the need for professional help.

If you’ve spotted pests (or signs of them) the solution could be as simple as spraying your tree with a gentle water stream to dislodge pests. This will work well if the pest infestation is quite new.

Using natural pest deterrents, or in worse case scenarios, organic pesticides, can help keep your tree’s leaves safe and sound.

If the issue is more severe, then you may need to remove large sections from your plant and consider getting rid of it if things don’t improve, to remove any risk of the pests spreading to your other plants.

If the cause is sunburn, provide shade to protect those delicate leaves from too much direct sun exposure. You could do something as simple as constructing a shade cloth over your tree.

And in the case of cold damage, protective covers and wraps could help or move it to a slightly warmer area of your home. A digital thermometer can help with this.

For those where nutrient deficiency is the problem, worry not. Feeding your tree the correct, balanced nutrients essential for its growth might be all you need.

If you’re not super confident with adding fertilizer, then swapping half of the potting mix out for new fresh mix is a great way to replenish the nutrient levels.

Finally, we have disease. In this case, treatment options might be more specific and dependent on the type of disease.

Often, using a fungicide can help to combat leaf spot diseases, while bacterial diseases may require additional care.

Removing Brown Leaves from your Avocado Tree

It’s important to start with saying that once part of your Avocado Tree has turned brown, there is no going back. These leaf cells have died and there’s nothing you can do to save that bit of leaf.

While we do recommend removing leaves that have over 50% brown cells, we recommend keeping any leaves with just a few brown spots (unless pests is the issue – there you need to take a different approach based on where the pests have spread to).

A few brown spots and patches here and there can still mean that leaf is valuable for photosynthesis so don’t remove every leaf that just has a few brown spots, or brown tips.

  • Inspect the tree: Before you start the pruning process, have a thorough look at the tree. Which leaves are brown? Are there any patterns? This step not only helps you identify which leaves need to go but also further assess the general health of your tree.
  • Prepare your tools: All you will need is a pair of sharp, clean pruning shears or scissors as dirty tools can introduce bacteria and other pathogens to your tree. A quick wipe with rubbing alcohol should be enough to ensure they are sterile.
  • Prune the knowing: Starting from the bottom and working your way up, gently remove the very browned out leaves. Be careful not to strip too many leaves at once – leave enough green leaves for photosynthesis.

A widespread problem may require a more drastic approach. If about half the tree’s leaves are brown, it may be best to remove the entire tree and replace it with a healthy one.

Always ensure to remove the affected tree and surrounding soil to prevent any possible disease or pest spread to the new tree.

Preventing Brown Leaves: Best Practices for Avocado Tree Care

Providing your tree with the right amount of water is key. Too little can lead to a dried out and shrivelled root system, while too much can lead to root rot. Depending on the size and age of the tree, 1 to 1.5 inches of water per week is generally sufficient.

It’s always a good idea to check the soil moisture before watering. If the top inch is dry, it’s time to water.

Ensuring proper nutrition is another key aspect. Apply a balanced slow-release fertilizer specifically designed for citrus and avocado trees. Usually, you should fertilize your avocado tree once in the spring and again in the fall.

Sunlight and shade are equally important for your Avocado Tree. Your tree needs at least 6 hours of sunlight daily. But, intense, direct sunlight can cause sunburn. So, if you live in a hot climate, protect your tree by using a shade cloth during the peak hours of the day.

As for pruning, it’s best to maintain a regular pruning schedule to remove dead or diseased branches and encourage new growth. But be modest in your cuts – pruning too much at one time can stress the tree.

Natural Remedies for Treating Brown Leaves on Avocado Trees

Compost Tea & Mulch: Compost tea, a rich, organic “brew” made up of compost, is like a power-packed superfood for your avocado tree. It can provide the necessary nutrients your tree needs and enhances its overall health.

Mulching is another beneficial practice. Mulch also helps retain moisture, suppresses weeds, and keeps soil temperature stable.

Trimming: Sometimes, the best remedy is preventive care. Make it a habit to regularly prune your avocado trees, removing any dead branches or leaves that could inhibit growth. This can make a big difference in halting the progression of leaf browning before it even starts.

Natural Pesticides: Ditch the chemicals and try a natural solution. Some common household items like vinegar, dish soap, or garlic can be potent organic pesticides. For example, a mixture of vinegar and water can serve as an effective deterrent for pests.

Here’s a simple natural pesticide recipe to get you started:

Combine 1 part white vinegar to 1 part water.

Add a few drops of dish soap (to help the solution stick to plants) and pour the mixture into a spray bottle.

Spray the solution liberally on the leaves of your avocado tree, focusing on areas where pest activity is noticeable.

Note: Ensure to spray in the morning or late evening to avoid sun scorch.

Frequently Asked Questions

Is it normal for Avocado Tree leaves to turn brown?

While a certain amount of leaf browning is normal, especially in older leaves or under stress conditions, persistent or widespread browning can signify an underlying problem, such as poor watering, lack of nutrients, diseases, or pest infestation.

Make sure you are keeping an eye on the rate at which the leaves are browning. If more new healthy leaves are growing out of the top of your tree, than are browning at the bottom, then this suggests the issue is simply natural ageing.

If your Avocado Tree isn’t growing many new leaves, and there are brown patches developing across the entire tree (not just at the bottom), then this does suggest a more serious issue.

If a few avocado tree leaves are browning, should I be worried?

Not necessarily. It’s common for a few leaves to brown naturally, especially if they’re older. However, if the browning is occurring regularly or across a lot of leaves, you might want to investigate further.

Where you don’t need to worry so much is if it’s the lower leaves that are turning brown. This is usually a sign of natural ageing. Monitor the rate of browning and watch out for any other warning signs that suggest the issue is more serious.

How can I prevent my avocado tree leaves from turning brown?

Regular watering, maintaining soil quality, ensuring good lighting, and protecting against pests and diseases are key to preventing brown spots, patches and leaves on your Avocado Tree.

Monitoring and promptly addressing any changes in leaf coloration can also help to prevent or limit leaf browning.

Are brown leaves a sign of a dying avocado tree?

Brown leaves may indicate a stressed or unhealthy tree, but not necessarily a dying one. Immediate and appropriate care can often restore tree health and prevent serious damage or death.

It’s also important to note that as your Avocado Tree ages, it’s normal for the odd older leaf to fall off. These leaves will tend to turn brown or yellow before they fall off the tree but it can be nothing to worry about.

Fiddle and Thorn is a participant in the Amazon Services LLC Associates Program, an affiliate advertising program designed to provide a means for sites to earn advertising fees by advertising and linking to Amazon.com

Take our houseplant survey!

Quickly respond to our 30 second houseplant survey and get 75% off our Complete Houseplant Care eBook!

Take the Survey

No thanks…

Brown Leaves on Alocasia Dragon Scale Plants – Causes and How to Fix It!

Last Updated: June 21, 2022

A few years ago, it was almost impossible to find an Alocasia Dragon Scale in your local plant store, but now they aren’t too difficult to find which makes us incredibly happy! Their moody and striking leaves make them stand out in any urban jungle. However, if something isn’t quite right with the care or environment, your Alocasia Dragon Scale may start to develop brown leaves. There are several reasons for this so we have gone through each of them below so you can determine what’s causing your Alocasia Dragon Scale’s brown leaves.

Overwatering can often cause brown leaves

Although your Alocasia Dragon Scale doesn’t like to have really dry soil, over time consistent overwatering will lead to root rot. This means your Alocasia Dragon Scale isn’t able to get all the nutrients and the leaves will begin to turn brown (the leaves may also droop down too as the stems become weak).

To figure out if overwatering is definitely the cause of your Alocasia Dragon Scale’s brown leaves, check the moisture levels in the soil using a moisture meter. If you find the potting mix is waterlogged and clumpy then replace it with fresh dry mix straight away rather than letting it dry out naturally. This means your Alocasia Dragon Scale can start to recover and this should prevent any more brown leaves.

It’s a good idea to trim off the damaged roots so that your Alocasia Dragon Scale can focus on new healthy growth rather than wasting energy trying to revive the dying roots and leaves. It may take a month or so for your Alocasia Dragon Scale to get back to regular health and green growth because the root system has been damaged.

Top tip: waterlogged soil can give off a nasty, damp and musty smell so get up close to your Alocasia Dragon Scale and other houseplants every once in a while to try and spot any issues before it affects the leaves.

Too much sunlight can also cause brown leaves

Sunlight is another factor that can cause Alocasia Dragon Scale plants to develop brown leaves. Though a lack of light can also cause several issues, the main problem lies is with direct sunlight. There is often a misconception that there is no such thing as too much light for houseplants. But this couldn’t be further from the truth.

Direct sunlight will very quickly scorch and burn the leaves of your Alocasia Dragon Scale which is irreversible. It will dry out and burn the leaves, causing brown/ yellow patches across the leaves. This is a bigger problem in summer as sun is more intense and out for a lot more of the day.

Brown leaves can indicate a lack of humidity

If the issue doesn’t lie in the watering or sunlight, it could be a lack of humidity that is causing your Alocasia Dragon Scale’s leaves to turn brown. You can tell this by looking at the leaf tips and edges as these will start to turn brown with dry air. Alocasia Dragon Scales like quite humid environments and can struggle in homes with dry air. This can be especially damaging in winter months when we often have the heating on for several hours a day. There are several ways you can increase the humidity for your Alocasia Dragon Scale:

Misting the leaves

One of the simplest ways to increase the humidity for your Alocasia Dragon Scale is to mist the leaves with a spray bottle several times a week.

Pebble tray

Place your Alocasia Dragon Scale over a tray of pebbles with fresh water over the top. Over the day water from the tray will evaporate giving your plant above exactly what they’re looking for.

Give your Alocasia Dragon Scale a shower

To quickly raise the humidity and wash down your Alocasia Dragon Scale of any long-standing dust, you can always give them a quick shower. Simply pop them in the shower and wash them down with lukewarm water (keeping the water pressure fairly low so you don’t damage the leaves) this will clean off the leaves and give the soil a good soaking.

Move your Alocasia Dragon Scale to the bathroom

If you’re lucky enough to have great lighting in your bathroom you can move your Alocasia Dragon Scale in there to increase the humidity. The running water from your showers means bathrooms tend to be one of the most humid in every home.

Buy a humidifier

These relatively affordable little devices make keeping a consistent humidity level much easier. Some will allow you to place them on a timer so they run on a fixed schedule, and some will even have a built-in monitor so they automatically turn on and off to keep the humidity exactly where you want it.

Want to know more about how to raise the humidity for your Alocasia Dragon Scale and other houseplants? We have written a whole guide on this.

Temperature extremes can cause brown leaf tips

Alocasia Dragon Scale plants don’t like rapid changes in temperature, so you should make sure you keep them out of areas that are often drafty, for example, drafty doors, windows or air conditioning vents.

You should also keep them away from heating vents and radiators as the hot dry air that is produced can quickly turn your Alocasia Dragon Scale’s leaves brown. Try moving your Alocasia Dragon Scale to a spot with a consistent temperature and keep an eye on any changes for a few weeks.

Watch out for overfertilisation

Another cause of brown Alocasia Dragon Scale leaves is too much fertiliser/ plant food. We recommend fertilising your Alocasia Dragon Scale with a water-soluble feed, making sure that you dilute it more than it says on the bottle. Every plant is unique so having one recommended amount for every plant just doesn’t make sense! Plant type, environment, size and maturity all impact how much fertiliser your houseplants need.

You should be fertilising your Alocasia Dragon Scale once a month during spring and summer and not at all during the colder darker months. This is because your Alocasia Dragon Scale will go dormant during the colder, darker months of autumn and winter so won’t be producing any new growth.

If you are fertilising more often than this, or at the full recommended strength, then this may be causing your Alocasia Dragon Scale to develop brown leaves. If you think this is the case then replace the potting mix and hold off on the fertiliser for a few months (and reduce it when you do reintroduce plant feed). The other alternative is to not fertilise your Alocasia Dragon Scale at all. We don’t always and it doesn’t do any harm. It’s kind of an added extra sometimes.

Those are the top 5 reasons why Alocasia Dragon Scale plants develop brown leaves. We recommend keeping a close eye on your plant so you can spot any warning signs early as this will give you the best chance of bringing your plant back to full health.

To find out more about how to care for your plant, as well as solve any other common issues or learn how to propagate them, check out our Alocasia Dragon Scale care guide.


Fiddle and Thorn is a participant in the Amazon Services LLC Associates Program, an affiliate advertising program designed to provide a means for sites to earn advertising fees by advertising and linking to Amazon.com

Take our houseplant survey!

Quickly respond to our 30 second houseplant survey and get 75% off our Complete Houseplant Care eBook!

Take the Survey

No thanks…

Brown Kentia Palm Leaves – Causes and Solutions

Last Updated: May 30, 2022

Perfect for beginner plant parents, the Kentia Palm is one we recommend to everyone as a stand-out minimalist houseplant but this doesn’t mean that they don’t come with issues every once in a while, such as yellow leaves, a drooping plant, leaf drop and brown leaves! There are quite a few reasons why Kentia Palms develop brown leaves or brown leaf tips, some more worrying than others.

In the post below, we will be going through each of the reasons, so it’s a good idea to inspect your Kentia Palm as we go through each of the factors so that you can determine what is causing the brown leaves on your Kentia Palm.

Too much fertiliser can cause brown leaf tips

When using fertiliser, you’ve probably seen the bottles recommend a certain dosage for your plant. However, each and every plant is different and size, plant type, maturity and environment can impact how much fertiliser your different houseplants need, so a one-fits-all approach doesn’t work with fertiliser. This can mean that you may have given your Kentia Palm too much fertiliser and this is what is causing the brown leaf tips.

We recommend popping your Kentia Palm in the shower and giving the soil a good wash through as this should flush out the excess fertiliser. Then just cut back on how much you fertilise your Palm by diluting the fertiliser more. Our plants have always liked the liquid fertiliser from Miracle Gro which is available on Amazon here.

You might also decide that you don’t want to fertilise or feed your Kentia Palm at all and that’s totally fine. You will see plenty of new healthy growth without using any fertiliser. In fact, we often go years without it. Instead, it can be a really good idea to refresh the soil that your Kentia Palm is growing in. This will ensure that there are still new nutrients available to your Palm without the need for risking brown leaves with fertiliser.

Low humidity levels can also cause brown leaf tips

Kentia Palms prefer slight above average humidity levels of they can start to dry out which shows itself as brown leaf tips and edges. There are a few really simple techniques to keep the humidity higher than normal for your Kentia Palm; a good one is to spray down the leaves with a mist bottle every few days, you can also build a pebbly tray by placing your plant over a bowl filled with water and pebbles. For a quick fix, you can put your Kentia Palm in the bathroom and leave the shower on hot for 5 minutes.

The best way, however, to consistently increase the humidity for your plant and avoid more brown leaves is by using a humidifier. They help to increase the water vapour in the air around your plants and will lead to a lot of happy and healthy plants which will keep the dry brown leaves away. You can also pick up a good humidity monitor to keep track of everything!

Brown leaves can indicate you are underwatering your Kentia Palm

Although it won’t die on you suddenly if you forget to water it every once in a while, consistent underwatering will start to have an impact on your Kentia Palm’s health and can often cause brown dry leaves. If you notice that your Kentia Palm’s leaves are turning try and crispy (usually starting from the tips inwards) it may be due to a consistent lack of water.

It’s a good idea to invest in a moisture meter if you haven’t already as this is the easiest and most reliable way to check the moisture levels in the soil. If your Kentia Palm does need more water your first instinct might be to give it an entire watering can full (or more) but this can actually be harmful to your Kentia Palm. Much like humans, plants get stressed by sudden changes in their environment (more on that below) and if their soil goes from bone dry to really soggy it can cause them to go into shock. This can cause more brown leaves, stagnant growth or can mean your plant loses some leaves. Instead, you want to reintroduce frequent watering for a few weeks and this should solve the problem.

Brown leaves on a Kentia Palm

Brown leaves on a Kentia Palm plant

Stress can also cause brown leaves

If you have ever moved house, you know just how stressful that can be and it turns out that plants find moving difficult too. There are a lot of changes that happen when you move your Kentia Palm, whether that is moving to a new home altogether or even just a different room. Temperature, light and humidity changes can all impact your Kentia Palm’s health and can cause brown leave to develop.

This is quite a temporary thing though so if you have recently moved your Palm, and the light, temperature and humidity levels are perfectly suitable for your palm then you just need to give it time to adjust to the new location. Trim off the brown leaves and be a little patient. If the problem continues longer than a few weeks, then this signals something else is wrong.

Brown leaves can be caused by low light

To properly photosynthesise your Kentia Palm needs a good level of sunlight and if it’s not receiving enough, this can cause brown leaves. A lack of sunlight is often paired with stunted growth or stems that look as though they are reaching for the light. This issue tends to be more common during winter when the sun is weaker and out for less of the day.

If you think that insufficient light levels are causing the brown leaves on your Kentia Palm, the best thing to do is start moving your plant a little closer to the window. You want to make sure that you don’t move it somewhere with too much direct light, especially in summer as this can burn the leaves.

You can also supplement the light your Kentia Palm is getting by using an LED grow light. These are great for plants struggling with a lack of sunlight as they allow you to control the additional light and will go a long way to preventing any more brown leaves from developing on your Kentia Palm. An LED light is also a great investment beyond supplementing light levels during winter to prevent more brown leaves and other issues as they are great for propagating plants too. They ensure that young cuttings or seedlings are growing in a bright environment to stimulate root growth.

Those are the most common reasons why Kentia Palms develop brown leaves or brown leaf tips. We recommend not discounting any of the issues but going through each one and seeing if it matches what is happening with your plant. Using moisture, humidity and light monitors are great tools to make sure that the environment your Kentia Palm is in, is actually giving your plant what it needs.

You can learn more about caring for your plant in our Kentia Palm care guide.

Fiddle and Thorn is a participant in the Amazon Services LLC Associates Program, an affiliate advertising program designed to provide a means for sites to earn advertising fees by advertising and linking to Amazon.com

Take our houseplant survey!

Quickly respond to our 30 second houseplant survey and get 75% off our Complete Houseplant Care eBook!

Take the Survey

No thanks…

Brown Hosta Leaves: Causes and Solutions

Last Updated: November 2, 2023

Healthy Hosta Leaves

Healthy Hosta Leaves

Firstly, let’s get to the root of the problem. Brown leaves on Hosta plants can be attributed to a number of factors. It could be environmental stressors like too much sun, dehydration, or frost damage. Or, it could be down to certain pests or diseases that have made your Hosta their home.

But it doesn’t have to just be worrying factors that are causing brown leaves on your Hosta as it could be simply a sign of natural ageing.

Recognizing the signs and understanding their causes is where it starts. But what’s even more important is knowing what to do about it. Below, we’ll walk you through the possible solutions, and the good news—it’s usually quite simple!

From adjusting your Hosta’s living conditions to incorporating certain preventative measures, you’ll learn everything you need to know below.

Causes and Solutions of Brown Leaves on a Hosta

Improper Watering

Like many houseplants, Hostas are quite sensitive to their watering conditions. Both overwatering and underwatering can result in the leaves turning brown.

If you overwater your plant, it can cause root rot, which makes it difficult for the plant to absorb nutrients and moisture from the soil.

Underwatering, on the other hand, can cause your Hosta to become dehydrated, resulting in brown and crispy leaves.

To diagnose the issue, the best thing to do is gently remove your Hosta from its pot so you can inspect the soil moisture levels and the root system. It should be pretty clear straight away if your roots are damaged as the result of incorrect watering.

If you’ve overwatered, the roots will be very dark in color and quite soft to touch. If underwatering is the issue, the roots will be lighter in color but will be wrinkled and shrivelled.

So what’s the solution? The key is to find a balance, making sure your Hosta receives the right amount of water but does not stand in water. Ensure the soil is well-draining, and check the plant’s dryness levels before watering.

Exposure to Direct Sunlight

Hostas love shady or partially sunny spots. So, if your Hosta is exposed to harsh, direct sunlight for prolonged periods, it can cause the leaves to burn and eventually turning brown.

Direct sunlight will often cause the leaves to turn brown that are facing the sun. So that can be an easy way to diagnose the issue just by looking at the difference in browning across your Hosta.

Fortunately, this is an easy fix. Simply move your Hosta to a more shaded location or consider providing a shelter if it’s planted outside.

Pest Infestation

Pests like slugs and snails love Hostas, and a severe infestation can lead to browning leaves. If you noticed any chewed leaves or slimy trails, you might have a pest problem. There are various solutions available, from slug traps to eco-friendly pest sprays to help you deal with this issue.

Some pests can be visible to the naked eye, whereas others can be trickier to see. This is why we recommend using a magnifying glass to inspect the entire plant closely. Make sure to check the undersides of the leaves as this is where they love to hang out.

Brown Leaf Tips: Causes and How to Fix it

If you’ve been observing your Hosta plant closely, you might’ve noticed that the tips of its leaves are turning brown. It’s crucial to know that this is a common issue and it could be due to various reasons that are different to when the entire leaf turns brown.

First and foremost, it could be under-watering. Hostas need a considerable amount of water to thrive. When they don’t get enough, the tips of their leaves may start to turn brown.

  1. Check the moisture level: You can touch the soil with your finger to check the moisture level. If it’s dry, it might be time to water your hosta plant.
  2. Watering frequency: Make sure to water your hosta deeply and thoroughly, and aim to do so early in the morning.

Besides inadequate watering, over-fertilization can also cause brown Hosta leaf tips. When you give your Hosta too much fertilizer, the excess minerals could cause damage to the leaf edges or tips. Follow the recommended amount of fertilizer, taking into account the plant’s size and age.

  1. Update your fertilizer regimen: Consider adjusting the amount of fertilizer you use or switch to a slow-release type to minimize damage.

Lastly, environmental stressors like high temperatures and low humidity could lead to the browning of leaf tips. Hostas love cooler temperatures and high humidity, so it’s essential to keep your plant away from direct sunlight and, if possible, increase the humidity.

  1. Change the location: If you’ve kept your hosta near a heat source or in direct sunlight, it might be time for a change. Find a cool, shady spot for your plant.
  2. Consider a humidifier: If humidity levels are low in your area, a humidifier might be the perfect solution.

By following these steps, you will hopefully be able to prevent any more brown leaf tips from developing. However, it’s important to know that once a leaf tip has turned brown, there is no reversing that.

Brown leaf tips won’t usually impact the overall health of your Hosta unless other parts of the leaves are brown. This is because your plant can photosynthesize adequately with brown leaf tips. So don’t worry too much about removing it if the rest of the leaf is healthy.

Brown Spots on your Hosta: Issues and Solutions

Are you noticing brown spots slowly appear on your beloved Hosta’s verdant foliage? Are the spots becoming larger over time? It’s likely you are looking at a common problem that plagues Hosta houseplants: fungal or bacterial diseases.

Fungal diseases like Anthracnose and Hosta Virus X, as well as bacterial diseases such as Pseudomonas leaf spot, are familiar culprits behind the onset of these unsightly brown spot formations.

The symptoms typically consist of browning spots surrounded by yellow halos, with gradual discoloration of the leaf tissue. Coupled with this problem, you might find the plant’s overall health deteriorating, affecting its growth and bloom.

How do we tackle these brown spots, though?

  • Keeping your plant clean: Regularly deadheading and removing decaying matter discourages the spread of fungal and bacterial infections.
  • Proper Watering: Overwatering can cause various plant diseases. Ensure the plant’s soil is well-drained.
  • Use of Fungicides: Utilize an appropriate fungicide or bactericide to stop the growth of organisms causing the spot formations.

Anthracnose

This fungal disease can lead to tan or rust-colored spots on your Hosta’s leaves. It thrives in warm, wet conditions, much like a tightly packed plant pot.

Treating Anthracnose involves a combination of stellar hygiene practices and the use of good-quality fungicides. Be sure to also prune away the infected portions gently, without causing further trauma to the plant.

Hosta Virus X

This virus results in mottled and blemished leaves, leading to a distorted growth pattern in your Hosta. Unfortunately, there’s no cure for this virus.

If your Hosta is infected by Hosta Virus X, it’s best to remove and dispose of the plant to prevent it from infecting other houseplants.

Pests

Another cause of brown leaf spots can be pests. However, you will often see other signs alongside the brown spots including holes in the leaves, white webbing or powder, or visible pests.

Check your plant fully to see if you can spot pests or any signs of them and treat accordingly.

Pruning and Trimming Brown Hosta Leaves

Pruning, essentially, is the act of selectively removing certain parts of a plant that are not necessary. This can include dead or diseased leaves, branches, flowers, and other parts of the plant. In the case of the Hosta plants, you’d be focusing on removing the brown leaves.

Here’s what you’ll need:

  • Gardening Gloves: This is to protect your hands against potential harmful insects or sharp parts of the plant or trimming tools.
  • Pruning Shears: Ideally, you need a sharp, clean pair of shears for a clean cut that heals quickly.
  • Disinfectant: You’ll need it to clean your shears before you start cutting to prevent the spread of disease.

Step-by-Step process to removing dead brown leaves:

  1. Start by putting on your gloves and disinfecting the shears.
  2. Identify the brown leaves on your Hosta plant. These are the ones you’ll be removing. We recommend only removing leaves that are more than 50% brown. If there are just a few small brown spots (and the issue is resolved), then these leaves can still be valuable to your Hosta).
  3. With your shears, make a clean cut at the base of the stem of the brown leaf. Be careful not to cut into the crown of the plant.
  4. Dispose of the brown leaves properly. A good rule of thumb is to not let them lie around the plant, as they could be harboring diseases or pests.
  5. Review your plant and repeat as necessary.

Frequently Asked Questions

Why are my Hosta’s leaves turning brown in the summer?

During summer, your Hosta may be exposed to intense sunlight and heat, which can lead to leaf scorch. The sun’s rays can damage the plant’s tissues leading to brown spots. Ensure your Hosta has adequate shade, especially in hotter climates.

What can I do if the leaves of my Hosta are browning rapidly?

Start by identifying the cause. Is it underwatering, overwatering, pests, or disease? Once you’ve identified the problem, apply the appropriate solution as discussed in preceding sections. If the issue persists, you might want to consider seeking professional advice.

Are brown leaves an indicator of a dying Hosta?

Not necessarily. Brown leaves might be an indication of a problem that needs to be corrected, but it doesn’t imply your plant is dying. With the right care, you can nurse your Hosta back to health in no time.

Can Hosta plants recover from brown leaf disease?

Yes! Most diseases that cause brown leaves in Hosta are treatable. Early detection and correct diagnosis is the key to saving your plant. Paying attention to your Hosta’s overall health can speed up its recovery.


Fiddle and Thorn is a participant in the Amazon Services LLC Associates Program, an affiliate advertising program designed to provide a means for sites to earn advertising fees by advertising and linking to Amazon.com

Take our houseplant survey!

Quickly respond to our 30 second houseplant survey and get 75% off our Complete Houseplant Care eBook!

Take the Survey

No thanks…

Brown Devil’s Ivy Leaves – Causes and Solutions

Last Updated: May 29, 2022

These incredible cascading plants can deal with a range of environments but this doesn’t mean that they won’t develop brown leaves if something isn’t right. There are a few different reasons why your Devil’s Ivy might have brown leaves, from humidity issues to watering problems. It’s important that you take a good look over your Devil’s Ivy whilst going through the different reasons so you can see what is causing the brown leaves on your plant. Act quickly to prevent the problem from taking over your plant entirely as if not solved, some of these issues can kill your plant.

Low humidity in the air can cause brown edges and leaf tips

Devil’s Ivy plants like a little boost to the humidity level and can really struggle in homes with particularly dry air. This tends to be especially damaging in the cold dark months of autumn and winter as central heating will really dry out the air in your home.

A lack of humidity will tend to make the leaves on your Devil’s Ivy plant turn light brown, dry and crispy, from the tips and edges inwards. Luckily, there are a few methods you can do to give the humidity a little bit of a boost and prevent more brown leaf tips on your Devil’s Ivy.

Regularly mist the leaves

One of the simplest ways to increase the humidity for your houseplants and reduce the risk of brown leaves is to mist them with a spray bottle a couple of times a week. This will not only lift the humidity level, but it can also get rid of any dust that’s lingering on the leaves, which helps maximise the sunlight and keeps your plant looking clean.

Build a pebble tray

Place your houseplants over a tray of small pebbles with fresh water over the top. Over the day water from the tray will evaporate giving the plants above exactly what they’re looking for. This can help avoid brown leaves in future. Ensure that the water level never reaches over halfway up the pebbles as otherwise, you risk the roots of your Devil’s Ivy sitting in water which will cause root rot and more brown leaves.

Give your Devil’s Ivy a shower

If you’re looking for a short term but instant boost to the humidity level, then showering your Devil’s Ivy is a good way to prevent more brown leaf tips. Just place your Devil’s Ivy in the shower and wash the leaves down with lukewarm water (keeping the water pressure fairly low so you don’t damage the leaves or the vines).

Move your Devil’s Ivy to the bathroom or kitchen

If you’re lucky enough to have great lighting in either your bathroom or kitchen you can move your Devil’s Ivy in there to increase the humidity level. The running water from your showers and the steam from cooking means that these two rooms tend to be the most humid in your home.

Invest in a humidifier

They’re relatively affordable little devices and they make keeping a consistent humidity level so much easier. Your tropical and humidity loving plants will really thrive if you invest in one and this will really reduce the risk of more brown leaves developing on your Devil’s Ivy.

Sunburn from direct light can also cause brown leaves

Your Devil’s Ivy may also be turning brown due to it getting too much direct sunlight. Devil’s Ivys don’t like direct sunshine and south-facing windows can sometimes give your Devil’s Ivy too much direct light which will be causing brown leaves. During winter you can get away with giving your plant more light as the sun is less intense but it’s best to move your plants a little further away from the window in warmer months to avoid any brown leaf burn.

You can tell if your Devil’s Ivy is receiving too much sunlight if it is showing sights of sunspots. These are brown spots that start to show up across the leaves that are getting the most sunlight. Unfortunately, once the leaves on your Devil’s Ivy have been burnt by the intense light, there is no returning to luscious green or variegated growth. Trim away any leaves that are particularly affected to help your plant focus its energy on growing new leaves.

Cold temperatures can also result in brown leaves

Hotspots or cold drafts can also cause your Devil’s Ivy to develop brown leaves, in particular brown spots on the leaves. Hotspots and brown leaves can happen when your Devil’s Ivy plant is too close to the window in summer and is receiving too much direct light or if your plant is within 1 metre of a radiator or heating vent. Make sure you are ventilating the room well and it can be a good idea to buy a digital thermometer to check on the temperature levels near your plant.

Cold drafts can also really affect your Devil’s Ivy and cause brown leaves. A consistent draft of cold air coming in from outside through cracks in doors/windows can be harmful to your Devil’s Ivy. They can deal with the old spot of cold weather but over time this will impact your plant’s health. Make sure you draft proof any doors or windows that your Devil’s Ivy (or any other plants with brown leaves) are close to.


Brown leaves can indicate overwatering

As a plant parent, it can be super easy to want to give your Devil’s Ivy all the care in the world. But too much love (in the form of water) can actually be very harmful to your plant and can often cause brown leaves and other problems.

Consistent overwatering will mean it will start to develop root rot and your Devil’s Ivy will start to develop brown leaves from the base of the plant down the vines. This will cause your Devil’s Ivy to turn brown, droop down and the vines may start to turn soft.

Devil’s Ivy plants need to be watered no more than twice a week in the hottest months of the year, and less frequently in autumn and winter to prevent waterlogged soil and brown leaves.

If you think that overwatering is the cause of the brown leaves on your Devil’s Ivy, it’s best to replace the soil straight away rather than just sit and wait for it to dry up over time. Be careful when removing the potting mix from the roots as you don’t want to cause any further damage. Delicately shaking the roots and running your fingers through them is the best way to remove the potting mix.

Make sure to check the moisture in the soil before you water your Devil’s Ivy. There are two really easy ways to make sure that it definitely needs water. First check the moisture at the top of the pot, if it’s still a little moist then wait a few days before watering again. You can also lift up your Devil’s Ivy to check the weight of the plant before and after watering. You will then start to be able to gauge how heavy the soil is when it is in need of water. (Don’t try this with really large plants as you don’t want to risk hurting yourself).

Underwatering can also lead to brown leaves

Don’t worry if you forget the occasional watering, but consistent underwatering can also cause some real issues, with light brown, crispy leaves being the main one.

Before you start pouring water over your Devil’s Ivy to make up for the lack of it, it’s important that you are sure that it’s the right cause. Remove your plant from the pot and see how dry the potting mix feels. If it’s bone dry and the roots look crispy, then underwatering is the most likely culprit of the brown leaves on your Devil’s Ivy. The best way to fix your underwatered Devil’s Ivy is to water your plant a little bit once a day for about a week. This will help to gradually reintroduce water without shocking your plant by changing the environment too rapidly.

We recommend picking up a moisture meter to help you keep an eye on when your Devil’s Ivy needs more (or less) water which will help to avoid brown leaves in future.

Those are the most common reasons why Devil’s Ivy plants develop brown leaves. When changing anything about your plant’s care or environment, make sure to check in on your plant daily to see if the changes are having a positive or negative impact.

To learn more about how to care for your plant, as well as the different propagation methods you can use and how to spot other common problems, check out our Devil’s Ivy care guide.

Fiddle and Thorn is a participant in the Amazon Services LLC Associates Program, an affiliate advertising program designed to provide a means for sites to earn advertising fees by advertising and linking to Amazon.com

Take our houseplant survey!

Quickly respond to our 30 second houseplant survey and get 75% off our Complete Houseplant Care eBook!

Take the Survey

No thanks…