Calathea Orbifolia

Introduction to the Calathea Orbifolia
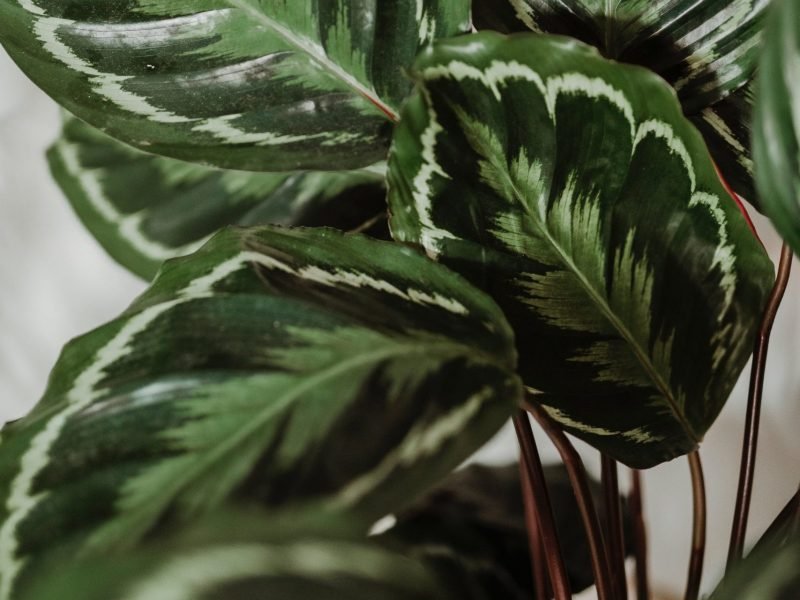
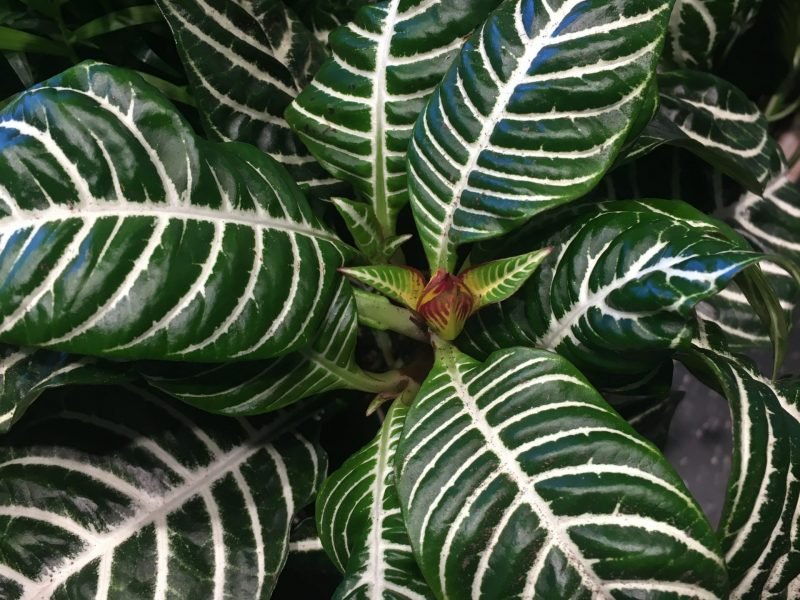
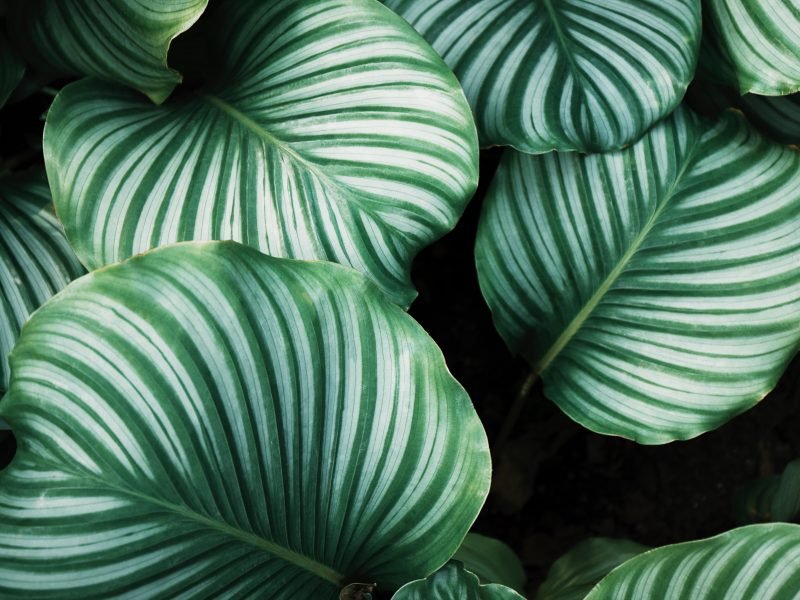
This South American native draws the eye with its large, round leaves, each one patterned with silvery stripes that shimmer in the light.
Aside from its aesthetic, the best thing about the Calathea Orbifolia is that it’s surprisingly easy to maintain; perfect for both beginner plant enthusiasts and seasoned green thumbs. The benefits don’t stop there, as it also has the ability to purify the air, making it a healthy addition to your indoor space.
In this care guide, we will go through the specifics of caring for a Calathea Orbifolia from understanding its light and watering needs to troubleshooting common issues!
The Beauty of Calathea Orbifolia
This plant stands out from the rest with its large circular leaves. These are marked with symmetrical stripes which is very unique to the Calathea Orbifolia.
Why Choose Calathea Orbifolia?
The Calathea Orbifolia is known for its air-purifying capabilities which makes it a great addition to homes and offices.
Another benefit is that Calathea Orbifolia plants are non-toxic, making them safe for households with pets or small children.
Understanding your Calathea Orbifolia
Key Features
- Family: Marantaceae
- Origin: South America
- Size: Can grow up to 2.5 feet in height and width
- Leaf Size: Up to 30cm in diameter
Recognising its distinctive features is paramount to understanding how to care for your Calathea Orbifolia. With a love for warm, humid conditions, this plant is an embodiment of the tropical environment from where is it native to.
Choosing the right location for your Calathea Orbifolia
Choosing the right spot for your Calathea Orbifolia is the first step to ensuring its lush, vibrant growth. This tropical plant is a photophilous species, meaning it thrives in bright, indirect light. However, bear in mind that direct sunlight can scorch its stunning leaves.
Indoor Placement
(Note these placements are for the Nothern Hemisphere)
- North or East-facing windows are ideal. They provide the gentle morning sunlight that Calathea Orbifolias love. If you only have South or West-facing windows, consider using a sheer curtain to diffuse the sunlight or placing your plant a little further away from the window.
- Humidity is vital – These plants are native to the tropical rainforests of Bolivia, and do best in a humid environment. A bathroom or kitchen can often provide the moisture they crave but a humidifier can also help you out.
Outdoor Placement
- Shade is key – When planting outdoors, choose a location with plenty of shade. Direct sunlight can burn the leaves, while shade mimics the plant’s natural rainforest habitat.
- Protect from wind – Wind can easily damage the broad, delicate leaves of the Calathea Orbifolia. Ensure your chosen location is well-protected from strong winds.
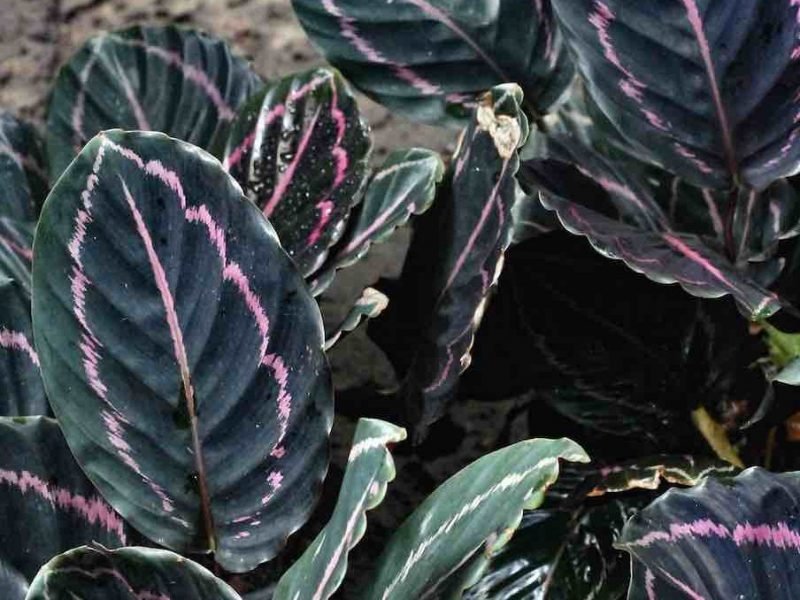
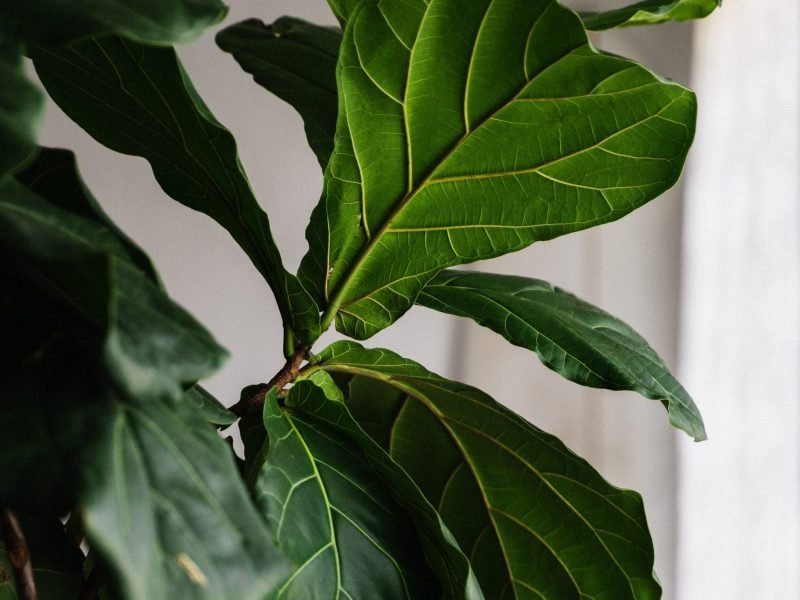
Calathea Orbifolia Leaves
Watering your Calathea Orbifolia
Tip #1: Water Quantity
Unlike some houseplants, the Calathea Orbifolia is not a fan of being waterlogged. It’s essential to provide just enough water to keep the soil moist, but not soaked. A good rule of thumb is to water the plant until you see water begin to drain from the bottom, then allow the soil to dry out before the next watering.
On average you want to be watering around once a week in spring and summer and every 10-14 days in winter. These are just an average and there are so many actors that can determine if your plant needs watering more or less frequently than this so be sure to check the moisture regularly and adjust your watering pattern accordingly.
Tip #2: Water Quality
This plant species has a particular fondness for filtered or rainwater. Tap water often contains chlorine and other chemicals that can harm the delicate foliage, turning the leaves brown at the edges. The level is usually fine but if you live in a hard water area, consider avoiding tap water.
Tip #3: Water Temperature
Avoid shocking your plant with cold water. Room temperature water is ideal, as it mirrors the tropical environment the Calathea Orbifolia is accustomed to. Really warm or hot water can also burn the root system so you want to avoid that as well.
Temperature requirements for your Calathea Orbifolia
Creating the ideal habitat for your Calathea Orbifolia starts with temperature control. This tropical plant thrives best in moderate temperatures, typically between 64 to 75°F (18- 24°C).
Winter Care:
- During the colder months, it’s essential to maintain a minimum indoor temperature of 59°F (15°C). Anything lower may cause stress to the plant, leading to leaf curling or yellowing.
- Be attentive to its placement. Avoid placing it near draughty windows or doors, as sharp cold gusts can be harmful.
- It’s not just cold air that you need to be careful of in winter as radiators, cookers and heating vents can cause your plant to dry out.
Summer Care:
- In the warmer months, try to keep the indoor temperature below 27°C. High temperatures can cause the leaves to lose their lush green colour and crisp texture.
- Be mindful of air conditioning units. These can drastically alter the room’s temperature and humidity, both of which are crucial for the plant’s well-being. The cool air might be a nice break for you but it can cause havoc with your plant’s health if it’s in the direct stream of cold air.
Humidity requirements for your Calathea Orbifolia
The ideal humidity range for a Calathea Orbifolia is between 50% and 70%. Anything less could lead to dry, crispy leaves, while a higher rate might encourage mould growth on the leaves and in the soil.
Increasing the humidity isn’t tricky and there are plenty of cheap (and free) ways to do it:
-
- Use a humidifier: This device can help maintain the required humidity level, especially during the drier months or in air-conditioned rooms.
- Group your plants: Keeping your Calathea Orbifolia in close proximity to other houseplants can naturally increase humidity – a clever trick, right?
- Misting: Misting your plant with water can also help, but be careful not to overdo it, as this could lead to leaf rot.
- Place on a pebble tray: A tray filled with pebbles and water, with the pot sitting on top (not submerged in the water), can create a mini microclimate of increased humidity.
- Move to the bathroom or kitchen: These rooms naturally have a higher humidity rate so are a great place for your Orbifolia.
Choosing the Perfect Soil for a Calathea Orbifolia
The Calathea Orbifolia thrives best in a well-draining soil that holds enough moisture without becoming waterlogged. The ideal soil should be rich in organic matter, with a slightly acidic pH.
- Coir-Based Mix: If you’re looking for an eco-friendlier alternative tp peat, opt for a coir-based mixture. Made from coconut husks, this soil is sustainable and also provides good water retention.
- Perlite or Pumice: Adding perlite or pumice to your mix can enhance drainage and prevent waterlogging. This is crucial for preventing root rot, a common issue with Calathea Orbifolia.
Checking Soil pH
If you want to ensure your soil has the right pH for your Calathea Orbifolia, you can conduct a soil test. These are readily available online or at garden centres. Your Calathea prefers a slightly acidic soil, so aim for a pH between 6.0 and 6.5.
Fertilizing your Calathea Orbifolia
This tropical plant thrives on a balanced, water-soluble fertiliser, applied approximately once a month during the growing season.
Choosing Your Fertiliser
Search for a fertiliser that is high in nitrogen. Nitrogen contributes significantly to leaf growth and can help keep your Calathea Orbifolia’s leaves vibrant and healthy.
When to Fertilize
Fertilise your Calathea Orbifolia during the growing season only, typically from early spring to late summer. During the winter months, the plant enters a dormancy phase and requires less nutrients, so you can reduce feeding completely during this time.
How to Fertilize
- Firstly, dilute the liquid fertiliser to half the recommended strength. This prevents nutrient burn on the plant’s delicate roots (it’s better to be safe than sorry).
- Next, water your plant thoroughly before applying the fertiliser. This ensures that the fertiliser is evenly distributed and prevents it from sitting in one spot, which can lead to root burn.
- Finally, apply the diluted fertiliser to the soil, avoiding the leaves and stem. After fertilising, do not water your plant for a couple of days to allow it to absorb the nutrients.
Pruning a Calathea Orbifolia: When, How and Why
Why Pruning is Essential
Regular pruning keeps your Calathea Orbifolia looking its best, keeping it in tune with its natural, spherical shape. It also helps the plant focus its energy on new growth, rather than maintaining old, potentially unhealthy foliage, thus promoting overall plant health.
Pruning dead or dying leaves is also important to prevent issues such as various diseases and pests (more on that further down).
When to Prune
Pruning should ideally be done during the plant’s active growth phase, typically in the warm months of spring and early summer. However, if you notice brown or yellowed leaves, these should be pruned at any time of year to prevent potential disease spread.
How to Prune
Pruning a Calathea Orbifolia is a really simple process but it can seem daunting at first if you aren’t sure what to do or how to do it.
All you’ll need is a clean, sharp pair of pruning shears or scissors. Then start by identifying and removing any unhealthy leaves at the base, being careful not to damage the healthy ones. Be sure to disinfect your tools after each cut to prevent any disease or pest transmission during the process.
Flowers on a Calathea Orbifolia
Although its main attraction lies in its large, round silver-green leaves, its flowers are a lovely but very unpredictable bonus!
Calathea Orbifolia flowers are not a common occurrence, particularly when grown indoors. They are small, delicate and often overlooked amongst the striking foliage. However, their rarity makes them all the more special when they do make an appearance.
Typically, these flowers appear in the warmer months when the plant is in its growth phase. Their understated, white and purple blooms create a stunning contrast to the vibrant green of the leaves.
Here are a few tips to encourage your Calathea Orbifolia to flower:
- Provide ample indirect sunlight. Whilst these plants prefer low to medium light conditions, a touch of indirect sunlight can stimulate flowering.
- Ensure the right temperature. Calathea Orbifolia prefer warmer conditions, ideally between 18°C and 27°C. Avoid temperatures below 15°C.
- Consistent humidity is key. Try to maintain a humidity level of around 50-70% for optimal growth and potential flowering.
Remember, flowering is unpredictable and uncommon. It can happen in both very healthy thriving plants but also in struggling plants as an effort to reproduce before they die. So don’t be worried if your plant isn’t blooming.
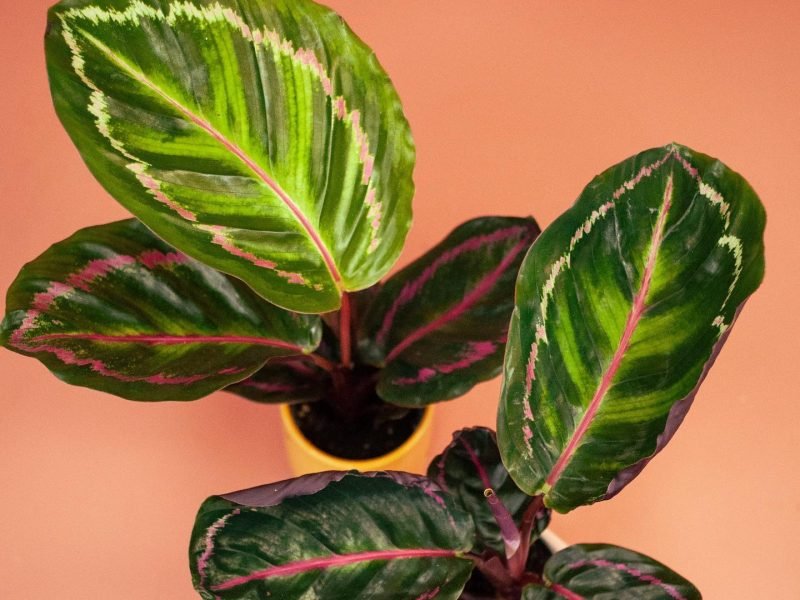
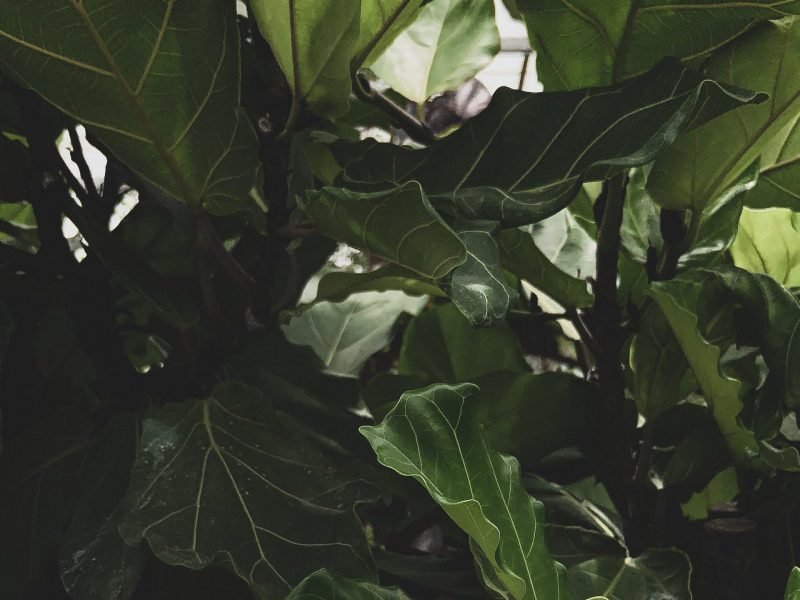
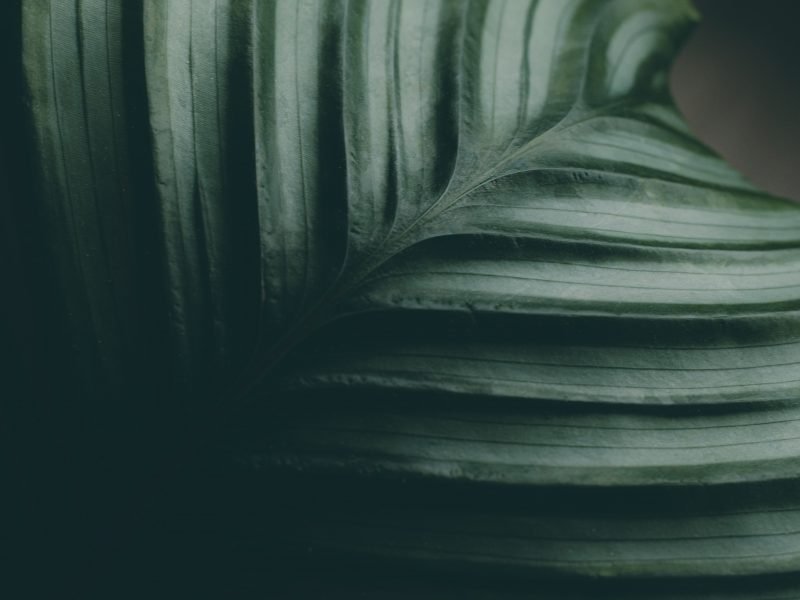
Calathea Orbifolia Close Up
Cleaning your Calathea Orbifolia
Keeping your Calathea Orbifolia clean is crucial to its long-term health and well-being. Dirt and dust can accumulate on the leaves, obstructing sunlight and photosynthesis. Yes, even a very thin layer of dust will block some sunlight and cause slightly slower or smaller new growth over time.
Cleaning procedure:
- Use a soft, damp cloth and avoid using any harsh chemicals or cleaning agents as they may harm the plant. If needed, use a drop or two of dish soap but that is all.
- Gently wipe each leaf, paying particular attention to the undersides where dust and pests often hide.
- Be very gentle so you don’t damage the leaves, as the Calathea Orbifolia does have breakable foliage.
- After wiping the leaves, clean the pot and surrounding area to ensure the plant’s environment is as healthy as the plant itself.
Calathea Orbifolia Toxicity
The Calathea Orbifolia is non-toxic. It’s not only safe for human touch but also harmless to your beloved pets. This indeed makes it a perfect choice for households with curious cats, dogs, or toddlers who might want to take a nibble!
However, it’s important to note that while the plant itself is non-toxic, it’s crucial to consider the types of fertilisers or plant food you use. Some can contain harmful chemicals so always opt for pet-friendly options when available.
Note: while Calathea Orbifolia plants are non-toxic, excessive consumption of any plant can still cause some mild stomach upset in pets.
Pests: Identifying and Treating Common Pests
Common Pests
- Spider Mites: These tiny arachnids are often invisible to the naked eye. If you notice fine webbing and yellow spots on your Orbifolia, suspect spider mites.
- Mealybugs: Characterised by their white, cottony appearance, mealybugs can cause yellowing and curling of the leaves as they suck and dehydrate the foliage.
- Scale: These pests appear as small, round, brownish patches on the plant. They can cause the leaves to yellow and drop prematurely.
- Thrips: These minute, slender insects cause silver-white streaks or spots on the leaves. They can also stunt growth.
Treating Pests
Once you’ve identified the culprits, it’s time to evict them from your precious Calathea Orbifolia.
- Isolate the Plant: Always isolate an infected plant from others to prevent the spread of pests (they can jump across leaves hanging close to eachother).
- Use Soapy Water: A mixture of mild soap and water can be used to wash off most pests. Use a soft cloth or sponge to gently clean the leaves.
- Apply Insecticide: If the infestation is severe, consider using a suitable houseplant insecticide. Always follow the product instructions to ensure the safety of your plant.
- Prune Infected Leaves: If only a few leaves are affected, prune them to prevent further infestation and cut down the size of the infestation to make it easier to treat.
Calathea Orbifolia FAQs
How much water does a Calathea Orbifolia need?
Knowing how much to water your Calathea Orbifolia can be a little tricky because they need a good balance of moist but not soggy soil. They don’t like their potting mix to be dry for extended periods of time but are also sensitive to root rot if the potting mix is soggy.
Can a Calathea Orbifolia survive in low light levels?
Whilst Calathea Orbifolia plants can adapt to lower light levels, growth will be slow and will often result in smaller leaves. On the other hand, if your Calathea Orbifolia is exposed to intense direct light, it can scorch and burn the leaves leaving irreversible yellow and brown patches.
Is the Calathea Orbifolia a fast-growing plant?
Calathea Orbifolia plants fit somewhere in the middle of being fast and slow growing. Whilst you will see plenty of new growth during the warmer months of spring and summer, you don’t need to worry about it outgrowing the space too quickly.
How big does the Calathea Orbifolia get?
Calathea Orbifolia plants don’t get too large as a houseplant and will reach a maximum of 60-80cm in height.
Are Calathea Orbifolia easy to care for?
Calathea Orbifolia plants aren’t totally low maintenance but also won’t kick up a fuss if the slightest thing is wrong as they can adapt to a range of environments. The one thing you need to be careful of is moisture in the soil but also boosting the humidity to prevent the leaves from drying out. We don’t recommend these for beginner plant parents but you don’t need to be an expert to keep your Calathea Orbifolia thriving.
Common Problems with your Calathea Orbifolia
Here are some common issues that you might run into. It’s important to diagnose any issues early to give your plant the best chance of bouncing back.
Why does my Calathea Orbifolia have brown leaf tips?
Brown tips on a Calathea Orbifolia can be a little difficult to diagnose because there are several causes. It may be due to underwatering, dry air or sensitivity to chemicals in the tap water. Check the moisture in the soil using a moisture meter and leave the water to sit for a day so the fluoride can evaporate.
Why are there yellow edges on my Calathea Orbifolia’s leaves?
A yellowish tinge on the edges of the leaves suggest a reaction to the fluoride and chlorine in your tap water. We recommend using rainwater or alternatively leaving your tap water to sit for a day to the chemicals can evaporate.
Why does my Calathea Orbifolia have limp stems?
Limp stems on a Calathea Orbifolia are a sign of overwatering. Check the moisture levels in the soil using a moisture meter and replace if waterlogged. Adjust your watering schedule going forward and the stems should start to recover.
Why are the leaves on my Calathea Orbifolia drooping?
As with drooping stems, drooping leaves are a sign of overwatering. Check the moisture levels in the soil using a moisture meter and replace it with fresh high-quality potting mix if waterlogged. Adjust your watering schedule going forward and the leaves should start to pick back up again.