Complete Jade Plant Propagation Guide

Last Updated: August 26, 2022

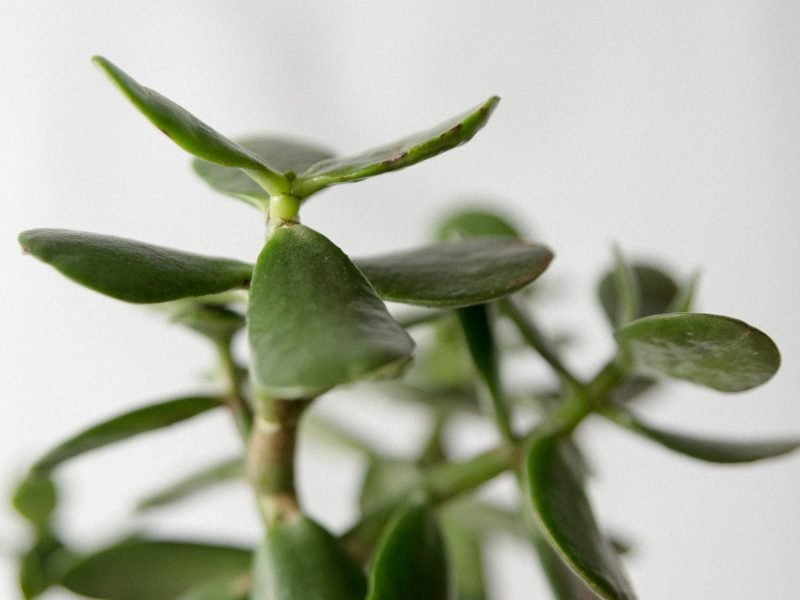
Jade Plants, also known as Money Plants or Lucky Plants, are popular succulents that are believed to bring luck to their owner. So we can totally understand the desire to create more of them through propagation. They aren’t that difficult to propagate if you know all the right steps so soon you’ll have plenty of new Jade Plants before you know it.

In this article we will guide you through the complete Jade Plant propagation process; from the best way to propagate, step by step method as well as our top tips for success.

Why propagate a Jade Plant?

Jade Plants don’t always grow how we want them to! They can sometimes end up quite leggy, grow sideways or even just become too big for the desired space. If this happens, pruning is the best way to keep your Jade Plant looking fresh and fitting into the space. But instead of just throwing away those incredible cuttings, why not propagate them and create new plants.

You may also have no other option but to propagate your Jade Plant out of necessity if it’s starting to die. Propagating part of the healthy plant can help keep some of your beloved Jade Plant alive.

And lastly, our favourite reason to propagate your Jade Plant; get new plants without having to spend any more money! Buying houseplants can be expensive so propagating the ones you already have lets you expand your collection or gift cuttings to friends and family.

Jade Plant Propagation Methods

The best way to propagate your Jade Plant is through stem cuttings. Whilst you can grow Jade Plants from seed cultivation, we like to leave this to the professionals. The process is lengthy and is often unsuccessful. You can also propagate only single leaves of your Jade Plant as you would other succulent plants. Although this isn’t as successful as stem cutting propagation, it can still work well given the right environment.

How to propagate a Jade Plant through stem cuttings

  1. Check your plant to make sure it is healthy.

    You should only ever propagate a healthy plant. This is because any issues with your mother plant will transfer onto your cuttings and harm your success at propagation. Avoid using any part of the plant that is looking a little wilted, yellow or dry.

  2. Make the cut(s)

    Now that you’ve chosen the section(s) of the stem that you want to propagate, you need to cut it off! Use clean scissors/ shears or a knife to make the cut across the main stem. Don’t ever rip the stem off your Jade Plant as this can harm both the parent plant and the cutting.

  3. Remove any lower leaves

    As you’ll be placing your stem cutting in water you want to carefully remove any leaves on the lower part of the cutting that may end up sitting in the water. This is because they will start to rot and release bacteria into the water which can harm your cutting.

  4. Place your cuttings in water

    Make sure the water is room temperature as you don’t want to shock/burn your cuttings. Place the cutting into the water so that one-third of it is submerged. If you place any more of the cutting into the water you risk it rotting.

  5. Change out the water every few days

    It’s important that you keep the water fresh to keep it free from bacteria.

  6. Be patient

    Now that your Jade Plant cutting is happily in the water, there’s nothing left to do but continue to switch out the water and be patient. You might need to wait several weeks for anything to happen but as long as the environment is right, all you’ll need is patience.

  7. Plant your Jade Plant cuttings into potting mix

    Use a high-quality potting mix to make sure your plant is getting the right balance of nutrients. For Jade Plants, we also recommend getting a well-draining mix including perlite to help avoid issues caused by accidental overwatering as they can be quite sensitive to this.

  8. Resume usual Jade Plant care

    Keep a close eye on your plant for a few weeks as this is when any issues might crop up.

How to propagate a Jade Plant through leaf cuttings

Propagating with leaf cuttings can be done by removing individual leaves from your Jade Plant.

Some leaves will come straight off with a gentle tug, while others may require a sharp knife to remove them. Just never rip the leaves off as this can damage the tissue.

Remove a few of the leaves to give you the best chance that one of them will be successful. Once you have removed the leaf from the plant, leave it in a warm dry place to callous over.


After the leaf has calloused over, prepare a new pot with fresh high-quality potting mix. Moisten the soil slightly and place the leaf on top of the potting mix. Press it down slightly so that it is sitting firmly in the soil, but not covered.

Use a spray bottle to mist your leaves when the soil is dry but don’t let the soil ever get soggy. You also want to make sure that the leaves aren’t soggy enough to rot. Keep the leaves in a bright spot, but stay away from any direct light as this can burn the cuttings.

After a few weeks of care, the leaves should start to grow little roots. After that, you should see small leaves starting to grow out of the cuttings. Keep the leaves in the pot for a few weeks and only repot them when the original leaf starts to wilt. This is a sign that your plant is ready to let go of the nutrients from the leaf.

And there you have it, your Jade Plant propagated through a leaf cutting.

Jade Plant Propagation FAQs

We hope you’ve found this complete guide to Jade Plant propagation useful. It can be a little scary cutting the beautiful stems off your mother plant to propagate but the end result is definitely worth it for sure!

Check out our full Jade Plant Care Guide for more information on caring for your new plants after propagation.

Fiddle and Thorn is a participant in the Amazon Services LLC Associates Program, an affiliate advertising program designed to provide a means for sites to earn advertising fees by advertising and linking to Amazon.com

Take our houseplant survey!

Quickly respond to our 30 second houseplant survey and get 75% off our Complete Houseplant Care eBook!

Take the Survey

No thanks…

Common Tree Philodendron Problems and How To Fix Them

Last Updated: April 17, 2022

One of the most visually dramatic houseplants out there, the Tree Philodendron has really picked up in popularity and availability over the past few years and we couldn’t be happier about it! But we know as much as any other plant parent just how worrying it can be if you notice issues developing with your Tree Philodendron and you don’t know what is causing them!

In this post, we will go through some of the most common problems that you’ll find with Tree Philodendrons as well as how to treat them and prevent them from occurring again in future. We have also written a guide on how to diagnose and treat brown leaves on your Tree Philodendron.

Causes of yellow leaves on a Tree Philodendron:

  1. Overwatering.

    If you notice that your Tree Philodendron is developing yellow patches on its leaves, the problem is commonly too much water (or a lack of drainage). This can really damage the root system of your plant which is why you’ll notice yellow leaves. To check if your Tree Philodendron is struggling due to overwatering, it’s important to check the soil right away and replace it if waterlogged. You also want to trim away any roots that have started to rot so that your Tree Philodendron can begin the recovery process.

    To prevent more yellow leaves from being caused by overwatering in future, make sure that the potting mix has time to dry out between waterings. We also recommend checking back 30 minutes after watering and pouring away any excess water that is in the saucer or at the bottom of the planter.

  2. Direct sunlight.

    One thing that Tree Philodendron plants can’t handle so well, is long periods of direct sunshine during summer. You won’t really find that direct sunlight causes much of an issue during winter as the sun is a lot weaker, but during the main summer months it can burn the leaves, causing them to turn yellow in patches.

    If direct sunshine is causing the yellow leaves on your Tree Philodendron, try to move your plant a little bit further away from the window so that it doesn’t receive any direct sun. Unfortunately, once the leaves have burnt and turned yellow, this is not reversible so we recommend trimming off the worst affected leaves to encourage new healthy growth.

  3. Pests can cause yellow spots on leaves.

    If your Tree Philodendron has developed little yellow spots across the leaves, rather than the entire leaf turning solid yellow, then this might be due to pests. They will suck on the leaves, exhausting them and causing them to turn yellow and as the problem progresses, these leaves will eventually fall off!

    Take a proper in-depth look at the undersides of the leaves on your Tree Philodendron as this is where they like to live. If you spot pests lurking on your Tree Philodendron isolate your plant to prevent the infestation from spreading throughout any other plants. Then you want to trim off the worst affected leaves, give your Tree Philodendron a wash down in the sink and treat with neem oil. 

  4. Natural ageing.

    As your Tree Philodendron matures, it can be normal for it to lose a few of its oldest smallest leaves in favour of new bigger growth. These leaves will often turn yellow before falling off your plant. This natural ageing process is normal and you don’t need to worry as long as the rate of yellowing is slow and there aren’t any other issues.

Tree Philodendrons lose leaves for a variety of reasons

  1. Lack of sunlight.

    Tree Philodendrons like bright, indirect light and if they spend too long in a shady spot, they may start to drop some of their leaves as they aren’t receiving enough light to keep them alive. You might also need to think about moving your Tree Philodendron around depending on the seasons.

    In the winter months, when the sun isn’t as strong (and out for less of the day) it might be best to move your plant closer to the window to maximise as much of the natural sunlight as possible. However, if there isn’t a sunnier spot you can move your Tree Philodendron to, then you might need to invest in an LED grow light to supplement the lack of sunlight. These are also great for propagating young cuttings so overall a good investment for any plant parent.

  2. Cold temperatures.

    Another reason why your Tree Philodendron may be losing its leaves is due to consistent exposure to cold air. Cold drafts can also damage your Tree Philodendron’s health causing it to lose leaves, particularly in winter.

    Make sure your Tree Philodendron isn’t placed next to a particularly drafty window or door or near an air conditioning vent in summer. You can always pick up a digital thermometer to check the temperature around your Tree Philodendron to see if this is the reason it is losing leaves.

  3. Stress.

    It’s not just cold temperatures that can shock your Tree Philodendron but any dramatic or sudden change in its environment can cause stress and shock which can lead to leaf loss. Your Tree Philodendron will also only ever lose a few leaves due to environmental shock so keep an eye on the number and rate of leaves falling off. If the problem persists for a few weeks then you might need to look at other factors.

  4. Natural ageing.

    If it’s only the oldest leaves on your Tree Philodendron that are falling off, then this may be natural ageing. This is completely natural so you don’t need to worry. The one thing you do need to keep an eye on though is the rate of ageing. On average your Tree Philodendron should lose 1-2 leaves every 6 months or so, but not more. If your Tree Philodendron is losing more than this then it’s a sign that something isn’t quite right and I would consult the reasons we have listed above to find the cause.

Why is my Tree Philodendron drooping?

  1. Underwatering.

    The most common reason Tree Philodendron’s leaves droop down is underwatering and subsequent dry potting mix. A droopy and limp plant is often the first sign of your Tree Philodendron being thirsty so hopefully, it means you have caught the problem early. Check to see if the soil is powdery and dry before watering your plant a little once a day for a week. To solve the issue in the long term, make sure that you don’t leave the soil dry for too long so set reminders or calendar events to ensure a regular watering routine.

  2. Overwatering.

    Similarly to underwatering, too much water can actually also make your Tree Philodendron’s leaves droop down. Waterlogged soil can damage the root system, which starves your plant of needed nutrients, moisture and oxygen, causing it to droop. Overwatering can cause some really harmful problems so it’s important you act quickly to stop any permanent damage.

    If you suspect overwatering is the cause of your Tree Philodendron’s drooping leaves, then inspect the root system and trim away any rotten or damaged roots. If the potting mix is soggy, replace it with fresh high-quality mix so that your plant can start to recover. Don’t wait for the potting mix to naturally dry out as this will only cause more damage to the roots/plant.

    Going forward, make sure to only water your Tree Philodendron when the potting mix has fully dried out. This will help stop your Tree Philodendron from drooping again in future.

Causes of curling leaves on a Tree Philodendron

  1. Temperature extremes.

    One of the most common causes of curling leaves on a Tree Philodendron is heat stress. This can be caused by close proximity to cookers, radiators or heating vents so you want to check the placement of your plant as well as use a digital thermometer to check if your plant needs moving. This can also happen if your Tree Philodendron is too close to the window as during summer hotspots can occur, drying out your plant and causing the leaves to curl up.

  2. Low humidity.

    Alongside temperature, humidity is another factor that can cause your Tree Philodendron to curl its leaves. They thrive in humid environments and if your home has really dry air, this will also dry out the leaves and cause them to curl up. This is their mechanism to prevent moisture loss from the leaves. Luckily, the curling is reversible if you boost the humidity so we recommend getting into the habit of misting or bathing your plant as well as buying a humidifier if you don’t already have one.

To learn more about how to care for your plant and prevent any further issues from developing, check out our Tree Philodendron care guide.

Fiddle and Thorn is a participant in the Amazon Services LLC Associates Program, an affiliate advertising program designed to provide a means for sites to earn advertising fees by advertising and linking to Amazon.com

Take our houseplant survey!

Quickly respond to our 30 second houseplant survey and get 75% off our Complete Houseplant Care eBook!

Take the Survey

No thanks…

Common Staghorn Fern Problems and How To Fix Them

Last Updated: April 16, 2022

Getting their name from their striking leaves, Staghorn Ferns are a little bit different to most houseplants as they are often mounted on planks of wood and hung up. You can grow them in pots, however, which does make their care a little easier.

If you have noticed issues developing on your Staghorn Fern but aren’t sure what’s causing them or how to fix them, then you have come to the right place. In this post, we will go through some of the most common issues that occur on Staghorn Ferns as well as methods to treat and prevent the issue.

Causes of Staghorn Fern yellow leaves:

  1. Overwatering.

    If you notice that your Staghorn Fern is developing yellow patches on its leaves, the problem may be too much water. The reason why overwatering is so dangerous for a Staghorn Fern is that it can very quickly lead to root rot without you even noticing before the issue has progressed far enough to cause yellow foliage.

    Although the yellow leaves are irreversible (you can trim those off), this doesn’t have to mean a death sentence for your Staghorn Fern as you just need to replace any soggy potting mix and adjust your watering schedule moving forward. Allow either more time between waterings or give your Fern less water each time.

  2. Direct sunlight.

    Alongside watering, the right amount of sunlight is also crucial for your Staghorn Fern’s health and there is such thing as too much light. If your plant is receiving a lot of bright direct sunlight each day you may start to notice yellow patches forming on the leaves. This is where the leaves are becoming sunburnt, something which is unfortunately irreversible.

    Make sure to move your plant further away from the window during summer to avoid it getting any direct sunlight. You can get away with having it closer in winter as the sun is a lot weaker and won’t really cause any sunburn.

  3. Natural ageing.

    If it’s only the oldest and smallest leaves on your Staghorn Fern that are turning yellow then this may be simply natural ageing. Over the years, it’s normal for your Staghorn Fern to focus its energy on new growth, meaning it will drop a few of its oldest leaves to conserve energy. These leaves will often turn yellow before dropping off your plant.

    The rate of natural yellowing should be about 2 or 3 of the oldest leaves every year.

Staghorn Ferns lose leaves for a variety of reasons…

  1. Overwatering.

    Alongside brown leaves, too much water can also lead to your Staghorn Fern losing leaves. This often happens when the problem has progressed quite far but doesn’t mean you still won’t be able to revive your plant, it might just take a little longer.

    It’s important that you adjust your watering schedule moving forward to avoid more leaves falling from your plant. Either water less often or give your Fern less water each time. You also need to account for environmental changes such as seasonality that might impact how much water your Staghorn Fern needs.

  2. Cold temperatures.

    Another reason why your Staghorn Fern may be losing its leaves is due to inconsistent temperatures, particularly cold air. The ideal temperature for Staghorn Fern is somewhere between 18°C – 24°C, so it shouldn’t be too difficult to keep in a good range.

    Drafty external windows and doors can cause real havoc for your Staghorn Fern as the cold airstreams can freeze the leaves and also increase the risk of root rot. Air conditioning vents are also a problem during summer so watch out that your Staghorn Fern isn’t too close or this might be why it is losing leaves.

  3. Natural ageing.

    As we mentioned above with the yellow leaves, another less worrying cause of leaf drop is simply the natural shedding process. This is where your Staghorn Fern loses a few of its oldest leaves in favour of growing new bigger ones. If your Staghorn Fern isn’t dropping many leaves (1 or 2 every few months) then it probably is nothing to worry about and is simply part of the natural shedding process.

    But do keep an eye on how often they are falling off. If the rate speeds up then check your plant over again to spot any signs of overwatering or temperature extremes.

Why is my Staghorn Fern drooping?

  1. Underwatering.

    If you notice that the drooping leaves are more towards the bottom of the plant, it may be due to underwatering as your plant prioritises new healthy growth over its older leaves. A drooping plant tends to be one of the earlier signs of underwatering so this hopefully means you have caught the problem before it has started to cause any permanent damage.

  2. Overwatering.

    Strangely both underwatering and overwatering can have the same consequences including a drooping plant. This is because both extremes cause damage to the root system, weakening the plant and causing it to droop. You may find that the drooping leaves are fairly soft which is another sign of overwatering.

Causes of curling leaves on a Staghorn Fern

  1. Underwatering.

    Curling up their leaves is the best way for plants to retain as much moisture as possible and this is often one of the earlier signs of dry potting mix. Inspect the soil and give your Staghorn Fern plenty of water over the next few days and you should see the leaves uncurl. Usually, this is a reversible issue so act quickly once you’ve diagnosed the problem to ensure that it doesn’t start to cause brown leaves on your Staghorn Fern.

  2. High temperatures.

    If watering isn’t a problem then your Staghorn Fern might be curling its leaves if it is being exposed to hot air. Hotspots that form near windows, as well as radiators and cookers can dry out your Fern and cause the leaves to curl up in response. Use a digital thermometer to check that your room sits within the ideal temperature range for your Staghorn Fern and move it to a new spot if needed and you should start to see the leaves uncurl.

Those are the most common issues that you might face as a Staghorn Fern plant parent. As well as being armed with the right methods, the best chance you have at fixing the issue is making sure you catch it early. We recommend that in future you give your plant a good check over each time you water it. This will help you spot any early warning signs and treat the issue quickly.

To learn more about how to care for your plant and prevent more issues from arising, check out our Staghorn Fern care guide.

Fiddle and Thorn is a participant in the Amazon Services LLC Associates Program, an affiliate advertising program designed to provide a means for sites to earn advertising fees by advertising and linking to Amazon.com

Take our houseplant survey!

Quickly respond to our 30 second houseplant survey and get 75% off our Complete Houseplant Care eBook!

Take the Survey

No thanks…

Common Snow Queen Pothos Problems And How To Fix Them

Last Updated: March 25, 2022

Loved for their white and green heart-shaped leaves, the Snow Queen Pothos is one of our favourite plants so it can be pretty distressing when you find something is wrong. There are a range of issues that can affect your Snow Queen Pothos, from brown and yellow leaves to a drooping plant, curling leaves and even your plant losing leaves altogether.

Whatever the problem, there are always several things you can do to revive your dying Snow Queen Pothos, you just have to know what the right steps are. This is why in this post we will be going through all the various problems your Snow Queen Pothos can face, as well as how to fix the issues and prevent them from harming your plant in future.

Causes of brown leaves on a Snow Queen Pothos

  1. Underwatering.

    If the brown patches on your Snow Queen Pothos have become quite light brown, dry and crispy (starting from the tips) it may be because you have underwatered your plant. Make sure to regularly water your Snow Queen Pothos, a little and often to make sure that the soil is always slightly damp. Snow Queen Pothos plants don’t like to be swimming in water, but they don’t like to have dry soil for too long either. If you spot a few dry brown tips, adjusting your watering schedule should solve the problem pretty quickly. Trim away the brown parts and any new growth should hopefully be healthy and luscious green and white.

  2. Overwatering.

    If your Snow Queen Pothos has developed dark brown spots, a common cause of this is too much water which can quickly lead to root rot. You will notice that the leaves closest to the root system are the first to turn brown. If you think you might have overwatered your Snow Queen Pothos it’s important to check the soil right away and change it out completely if necessary. Never wait for the soil to dry out naturally as this risks more brown leaves forming. If you want to make it super easy consider investing in a moisture monitor, these little things give you all of the data you need to keep your Snow Queen Pothos happy and healthy.

  3. Temperature extremes.

    Snow Queen Pothos don’t like rapid changes in temperature, so you should make sure you keep them out of areas that are often drafty, for example, drafty doors, windows or air conditioning vents. You should also keep them away from heating vents and radiators as the hot dry air that is produced can quickly turn your Snow Queen Pothos’s leaves brown. We recommend buying a digital thermometer if you don’t already have one as these can really help spot any fluctuations.

  4. Sunburn.

    Snow Queen Pothos plants thrive in bright areas but can show symptoms of sunburn if they receive too much intense light. This often occurs during the summer when the sun is a lot stronger. Unfortunately, sunburn scars are permanent but moving your Snow Queen Pothos to a slightly shadier spot will prevent any more leaves from turning brown.

  5. Lack of humidity.

    Snow Queen Pothos can often develop brown leaf tips if the humidity level is too low. Luckily, solving the issue is actually quite easy as there are a few different ways you can boost the humidity. The best is through misting your plant every few days but you might also choose to build a pebble tray, move your Snow Queen Pothos to the bathroom where the humidity is higher or invest in a humidifier to keep a stable humidity level.

  6. Chemical sensitivity.

    If humidity isn’t an issue but your Snow Queen Pothos is still developing brown leaf tips, then your plant might be struggling with the chemicals in the water. If you live in a hard water area, the high levels of chlorine and fluoride in the water can be causing the brown leaf tips. The best thing to do here is to use purified water or rainwater.

Causes of yellow leaves on a Snow Queen Pothos

  1. Overwatering.

    Too much water is one of the main reasons why Snow Queen Pothos plants develop yellow leaves. If you accidentally overwater, or the drainage holes are blocked by something then the roots may start to rot. This prevents your Snow Queen Pothos from getting any of the needed nutrients which causes yellowing in the leaves. Take your Snow Queen Pothos out of its pot to double-check this is the cause and replace if waterlogged. In future, to prevent more yellow leaves, make sure the potting mix has time to dry out between waterings.

  2. Pests.

    Whilst rarer than some of the other problems, your Snow Queen Pothos’ leaves may be turning yellow due to a pest infestation. If you notice yellow spots forming on the leaves then could definitely be a sign of pests. Give your plant a once over with a magnifying glass so you can spot the pests and isolate your plant if you spot any as you don’t want them jumping onto your other plants. To treat the issue, spray your plant with neem oil daily for a week. We also recommend removing the worst affected leaves to try to control the problem.

  3. Natural ageing.

    If it’s only the oldest top leaves on your Snow Queen Pothos that are turning yellow then this may be simply natural ageing. Over time, your Snow Queen Pothos will drop some of its oldest leaves in favour of growing bigger healthier new ones at the end of the vine. These will often turn yellow before falling off the plant. This is completely natural and isn’t something you did wrong. As long as your plant is growing more leaves than the ones that are turning yellow, then this shouldn’t be anything to worry about.

Your Snow Queen Pothos could lose leaves because…

  1. Overwatering.

    Too much water can also lead to your Snow Queen Pothos losing leaves. If you notice the stems and leaves becoming a little softer than usual this may be because the roots are beginning to rot. To figure out if overwatering is the cause of the loss of leaves, check the moisture levels in the soil immediately. Due to the damage to the root system, your Snow Queen Pothos may take a little while to fully recover and grow new healthy leaves. But be patient and you should start to see improvements after a few weeks.

  2. Cold temperatures.

    Another reason why your Snow Queen Pothos is losing leaves is shock caused by cold temperatures. Although they can adapt to a range of environments, being exposed to a constant stream of cold air can cause quite serious issues. We recommend using a digital thermometer to keep tabs on the temperature fluctuations that might be causing your Snow Queen Pothos to lose leaves.

  3. Natural ageing.

    If you have noticed that your Snow Queen Pothos is losing a few leaves, but it’s not a constant issue and only happens every now and again, then it might just be natural ageing. It’s totally normal for your Snow Queen Pothos to lose one or two leaves a year as your plant prioritises energy for new healthy leaves at the bottom of the vine. Monitor the rate of leaf drop to make sure it’s not increasing as this would suggest there is something else going on.

Your Snow Queen Pothos could be drooping due to…

  1. Underwatering.

    The most common issue that will cause your Snow Queen Pothos to droop is a lack of water. When it comes to watering we normally recommend a little and often view that should keep your Pothos happy. Make sure to give your Snow Queen Pothos plenty of water and you’ll see it spring back to life in as little as a few hours. Consider amending your watering schedule if drooping is a common occurrence as you might not be watering frequently enough.

  2. Shock and stress.

    A Snow Queen Pothos can also begin to droop due to stress and shock. This can be caused by a variety of issues so have a think about if anything has suddenly changed for your plant. This could be moving to a new spot or home, a sudden drop in temperature or light levels. As long as the care and environment is right for your Snow Queen Pothos, it should stop drooping in a few days.

Why does my Snow Queen Pothos have curling leaves?

  1. Underwatering.

    A common reason Snow Queen Pothos curl their leaves is in response to a lack of moisture. By curling their leaves, your plant is reducing the moisture lost through their leaves and allowing it to hold onto as much moisture as possible. Check the soil to see if it feels dry and increase watering frequency. This should help them uncurl and prevent them from curling more in future.

  2. High temperatures.

    Another cause of curling leaves is in response to heat stress. If your Snow Queen Pothos is too close to radiators, heating vents or cookers then this might be the cause of the leaves curling. Use a digital thermometer to monitor any extreme temperatures.

  3. Direct sunlight.

    As well as extreme temperatures, too much direct light can also cause your leaves to curl up in response. Make sure that your Snow Queen Pothos isn’t receiving any direct light during summer as this can not only cause curling leaves, but also brown patches if they become burnt.

Those are the most common problems that impact Snow Queen Pothos plants. The key to reviving your plant is catching the issue early which is why it’s important to keep a very close eye on your plant to spot early warning signs. We tend to do this whenever we water our plants to ensure it’s a regular check-up.

To learn more about how to best care for your plant and prevent any problems from occurring, check out our Snow Queen Pothos care guide.

Fiddle and Thorn is a participant in the Amazon Services LLC Associates Program, an affiliate advertising program designed to provide a means for sites to earn advertising fees by advertising and linking to Amazon.com

Take our houseplant survey!

Quickly respond to our 30 second houseplant survey and get 75% off our Complete Houseplant Care eBook!

Take the Survey

No thanks…

Common Rattlesnake Plant Problems | Causes and Solutions

Last Updated: August 24, 2022

Diagnosing issues with Rattlesnake Plants can be tricky as most of the time, several completely different factors can have the same impact on your plant. This can leave you wondering what’s really wrong with your plant and are the changes you’re making really the right ones. On top of this, Rattlesnake Plants can be a little fussy so it’s not abnormal for issues to be popping up from time to time when just the slightest thing is off.

Luckily, if your Rattlesnake Plant is displaying issues, you’ve come to the right place as below we will be going through each of the different factors for some of the most common problems that you’ll find with these plants. We will also cover the different ways to diagnose the issue as well as how to treat it properly and effectively so that your beloved Rattlesnake Plant can begin to thrive again!

Causes of yellow Rattlesnake Plant leaves

  1. Overwatering.

    If the leaves on your Rattlesnake Plant have turned yellow you are most probably overwatering. This is one of the main problems all plant parents face with their houseplants because the issue is often hidden in the soil until it has progressed enough to show up on the leaves and stems. If your Rattlesnake Plant is suffering from root rot then won’t be able to take up water or nutrients from the soil and the plant will start to become unstable and die.

    To diagnose the problem, check if the soil is waterlogged and if the roots have started to turn black and mushy. To solve the issue, cut back on your watering to give the potting mix time to dry out. We also recommend replacing the potting soil straight away (rather than waiting for it to naturally dry out). This will mean the root system can start to recover straight away.

  2. Sunburn.

    Intense, direct sunlight can also be a common reason why Rattlesnake Plant plants start to develop yellow leaves. Though a lack of light can also cause several issues for them, they don’t do well in harsh direct sunlight as they have quite thin delicate leaves. Direct sunlight will very quickly scorch and burn the leaves of your Rattlesnake Plant which is, unfortunately, irreversible.

    If you think that direct sunlight is the cause of the yellow leaves on your Rattlesnake Plant, remove the worst affected leaves and move your plant to a slightly shadier spot in your home. If you are unsure how much light your plant is getting throughout the day/year, it can be useful to use a light meter to keep track.

  3. Pests.

    Whilst rarer than some of the other factors, your Rattlesnake Plant’s leaves may be turning yellow due to a pest infestation. Insects like spider mites damage your plants and leave behind yellow patches or holes in the leaves. Get up close to your plants using a magnifying glass and inspect the tops and undersides of the leaves to see if you can spot any insects.

    There are a few ways to get rid of spider mites and other pests, including showering, neem oil and insecticide sprays. It’s also important to isolate your plant so that the pests don’t spread onto your other houseplants.

  4. Natural ageing.

    This is one factor that causes yellow leaves that you don’t actually have to be worried about. As your plant matures, it will start to lose the occasional leaf to prioritise new bigger growth. The leaves will often be the oldest and smallest and will turn yellow before dropping off your plant.

    There are a few things to monitor when it comes to checking for natural ageing. Firstly, that the rate of yellowing does not increase and secondly that the rate of yellowing isn’t faster than your plant is growing new healthy leaves.

Rattlesnake Plants lose leaves for a variety of reasons

  1. Shock/stress.

    If your Rattlesnake Plant is losing leaves from the bottom up, and you are sure that watering and lighting issues are not the cause, then it may be due to temporary shock. This can be caused by a sudden change in environment (moving house etc).

    Luckily, as long as the care/environmental factors are right, your Rattlesnake Plant should recover from this quickly and shouldn’t lose more than a few leaves over a few days.

  2. Cold temperatures.

    Another common reason why Rattlesnake Plants lose their leaves is due to inconsistent temperatures, particularly cold temperatures and drafts. If your plant is exposed to low temperatures (the ideal temperature for Rattlesnake Plant is between 18°C – 24°C), it can often cause them to go into shock and some leaves will drop from the plant. Cold drafts can be caused by a range of things but doors or windows with small cracks are your plant’s worst enemy.

    But it’s not just in winter that you have to be careful about cold drafts; Rattlesnake Plants will struggle if too close to any AC vents so move them at least 1m away to prevent your Rattlesnake Plant from losing leaves. We really recommend buying a digital thermometer to check the temperature around your Rattlesnake Plant. They are great investments for all plant parents and can go a long way to spotting fluctuations in temperature before they impact your plant.

  3. Natural shedding.

    As we mentioned above with yellow leaves, your Rattlesnake Plant matures, it may occasionally lose a lower leaf as a natural sign of ageing. This is absolutely nothing to worry about but make sure that you keep track of how many leaves have dropped and how often this is occurring.

    If you feel it is losing too many leaves, more than a few each month, double-check the environment around your Rattlesnake Plant as it could be a sign of one of the issues detailed above. There is no harm in giving the soil and roots a once-over to check for signs of root rot and keep an eye on any changes in light or temperature that may be affecting its health.

Why is my Rattlesnake Plant drooping?

  1. Overwatering.

    If the drooping leaves are paired with dark brown spots but the leaves aren’t crispy to touch, then overwatering is the most probable cause. Whilst a one-time overwatering won’t kill your plant instantly, over time it will mean their leaves will start to droop as their roots begin to rot and turn mushy.

    Rattlesnake Plants need to be watered no more than once a week in the hottest months of the year, and less frequently in autumn and winter. If you think that you may have overwatered your Rattlesnake Plant it is best to replace the soil straight away rather than just sit and wait for it to dry up over time. But be careful when removing the soil from the roots as you don’t want to cause any further damage to a sensitive root system. Moving forward, make sure to check the moisture in the soil before you water your Rattlesnake Plant to avoid this happening again.

  2. Underwatering.

    Funnily enough too little water can also harm your Rattlesnake Plant plant in more ways than one. It can cause dry leaves, lack of growth and nutrient deficiency. But one of the earlier signs of underwatering is drooping stems and leaves. Your plant will start to look quite sad and limp as a result.

    Your first instinct might be to give your plant loads of water straight away to compensate for the lack of it. However, it can actually be harmful to your Rattlesnake Plant if the soil goes from one extreme to the other. Instead, you want to reintroduce frequent watering for a week or two and this should solve the problem.

    Over time keep an eye on how much you are watering your Rattlesnake Plant by checking the moisture in the soil frequently.

Why does my Rattlesnake Plant have curling leaves?

  1. Natural praying.

    Before we go any further you just need to confirm that the curling you are seeing on your Rattlesnake Plant’s leaves is not natural praying. Part of the Prayer Plant family, Rattlesnake Plants occasionally fold their leaves up at night and uncurl them during the day.

    This is a natural part of the plant’s cycle and nothing to worry about. However, if the leaves aren’t uncurling, then read on…

  2. Underwatering.

    The first port of call when you discover your Rattlesnake Plant’s leaves are permanently curled is underwatering. This is because it is a natural response from all plants to curl their leaves to retain moisture. Check the moisture levels in the soil and look for crispy roots to confirm the issue. To fix the problem, reintroduce water slowly so that you don’t shock the plant.

  3. Low humidity.

    This ties a little bit with underwatering because it might be a lack of humidity that is causing your Rattlesnake Plant to curl its leaves to retain moisture. The best thing to do here is to use a humidity monitor because it’s a difficult thing for us to measure without it. This will let you know if the humidity is in the right range for your Rattlesnake Plant.

  4. Heat stress.

    If your Rattlesnake Plant is placed near a window during summer or is close to a radiator, heating vent or cooker, then it might be heat stress that is causing the leaves to start curling. The ideal temperature range for your Rattlesnake Plant is 18-24 degrees Celcius so anything above that can start to cause your plant to dry out.

    This causes the leaves to curl up to reduce moisture loss. This is quite an easy one to fix as you just need to find a slightly cooler spot for your plant and as long as no permanent damage has been done (most commonly brown leaves) then the issue should resolve itself fairly quickly.

The key to treating and overcoming all of the issues we mentioned above is timing. The longer the issue goes unnoticed and undiagnosed, the harder it will be to get your Rattlesnake Plant back to full health. This is why we cannot stress enough how important it is to check in on your plants regularly so that you notice any early warning signs straight away.

To find out more about how to take the best care of your plant, check out our Rattlesnake Plant care guide.

Fiddle and Thorn is a participant in the Amazon Services LLC Associates Program, an affiliate advertising program designed to provide a means for sites to earn advertising fees by advertising and linking to Amazon.com

Take our houseplant survey!

Quickly respond to our 30 second houseplant survey and get 75% off our Complete Houseplant Care eBook!

Take the Survey

No thanks…

6 Common Raindrop Peperomia Problems And How To Fix Them

Last Updated: February 24, 2022

Loved for their incredible raindrop shaped leaves, this Peperomia variety is great for small spaces as they can be quite slow growers. Whilst their care needs don’t tend to be as complex as many other plant types, they are still quite specific with what they need to thrive and can’t adapt well to extremes. Because of this, it’s not rare to be faced with a range of common problems on your Raindrop Peperomia, from brown leaves to a drooping plant, if something isn’t right, your plant will tell you.

In this post, we will go through each of the main problems you might face with your Raindrop Peperomia as well as go through each of the possible causes to help you figure out what’s wrong with your plant.

Causes of brown leaves on a Raindrop Peperomia

  1. Overwatering. This is probably the most damaging of issues as it can cause many issues beyond only brown leaves. Raindrop Peperomias don’t like super soggy soil as causes root rot and brown leaves to form as a result. To figure out if overwatering is the reason your Raindrop Peperomia is turning brown, check the moisture levels in the soil and replace if waterlogged. Moving forward cut back on how much you water your plant and ensure it has time to dry between waterings.

  2. Underwatering. This often causes the leaves on your Raindrop Peperomia to turn light brown in colour, dry and crispy from the tips inwards. To confirm this is what’s causing the brown leaves, carefully take your Raindrop Peperomia out of the pot to inspect the soil. If it is very dry and powdery then water a little bit once a day for a week to avoid shocking your plant.

  3. Lack of humidity. This also causes your Raindrop Peperomia to develop brown leaves from the tips inwards. There are a few really simple techniques to keep the humidity higher than normal for your Raindrop Peperomia and prevent more brown leaves; mist the leaves with a spray bottle, build a pebble tray or use a humidifier.

Causes of yellow leaves on a Raindrop Peperomia

  1. Overwatering. This will most commonly cause the bottom leaves to turn yellow first. To check if this is the cause, take your Raindrop Peperomia out of its pot to double-check how much moisture is in the soil and replace if still waterlogged. This will allow your Raindrop Peperomia to begin the recovery process and hopefully prevent any more yellow leaves from developing.

  2. Underwatering. In contrast, this will often cause leaves across the entire plant to turn yellow. Again, you want to check the soil to make sure before increasing how much you water your Raindrop Peperomia. If the soil is very powdery and dry then this is most probably the cause of the yellow leaves on your Raindrop Peperomia. Reintroduce water over the next week and increase how often you water your plant in future.

  3. Fertiliser issues. This can be either too much or too little fertiliser which makes diagnosing the problem quite tricky. If you are fertilising more than once a month, then cut back on this completely as this could be causing the yellow leaves. If you aren’t fertilising at all, and haven’t refreshed the potting mix in a while, then a lack of nutrients could be the cause.

  4. Too much sunlight. If your Raindrop Peperomia is getting too much bright light you’ll start to notice yellowy patches throughout the leaves. This is due to the sunlight burning the leaves which is unfortunately irreversible. Try moving your Raindrop Peperomia into a slightly shadier place, and if there’s no improvement move it a little further again until you find it’s the perfect spot.

  5. Pests. A rarer cause of yellow leaves on a Raindrop Peperomia is a pest infestation. Inspect your entire plant, focusing particularly on the undersides of the leaves and the stem joints as this is where they like to live. To fight the pests, trim off the worst affected leaves to curb the infestation and then treat your Raindrop Peperomia with neem oil.

  6. Natural ageing. If only the lower leaves on your Raindrop Peperomia are turning yellow then it might be nothing to worry about. Over time, your Raindrop Peperomia will drop some of its oldest leaves in favour of growing bigger healthier ones. The rate of natural ageing should be 1 or 2 of the oldest leaves every few months. Monitor the rate of yellowing to see if it’s above this to ensure there is no underlying problem.

A Raindrop Peperomia can lose leaves for a variety of reasons

  1. Underwatering. Raindrop Peperomias will forgive you if you occasionally forget to water them but they will struggle with dry soil for weeks and weeks. Check the soil to see if it’s dry to touch, Crispy roots are another sign this is why your Raindrop Peperomia is losing leaves. A little bit of water once a day for a week should get your Raindrop Peperomia back on track and increasing how frequently you water in future should prevent it from losing any more leaves.

  2. Overwatering. Once the root system becomes damaged, it can’t provide oxygen and nutrients to your plant so the leaves will droop and eventually fall off. Check the moisture levels in the soil immediately using a moisture meter to confirm if this is why your Raindrop Peperomia is losing leaves. If the soil is quite waterlogged and clumpy then replace it with fresh dry mix. You might be tempted to wait for the potting mix to naturally dry out but this just risks even more damage to your plant. We also recommend trimming off the soft, rotten roots as this focuses your plant’s energy on growing new healthy ones.

  3. Natural ageing. Your Raindrop Peperomia might also lose leaves as part of its natural ageing process. As your plant matures, it’s normal for it to drop a few of its oldest and smallest leaves so it can focus energy on producing new growth. As long as your plant doesn’t lose more than a leaf or two every few months, there shouldn’t be much to worry about.

Why is my Raindrop Peperomia drooping?

  1. Underwatering. The most common reason why your Raindrop Peperomia is drooping is a lack of water. Check that the potting mix is dry and then make sure to give your Raindrop Peperomia plenty of water and you’ll see it spring back to life in as little as a few hours. Consider amending your watering schedule if drooping is a common occurrence with your Raindrop Peperomia.

  2. Shock or stress. If you have recently moved house or moved your Raindrop Peperomia to a new spot, then this change may be causing the leaves to droop. Plants can get quite stressed if their environment changes and will show this in a variety of ways. One of which is drooping their leaves. It should be a temporary thing and if the new spot is just as good as the old one then there should be no reason why your Raindrop Peperomia won’t return to normal after a few days/weeks.

Causes of curling leaves on a Raindrop Peperomia

  1. Underwatering. One cause of curling leaves on a Raindrop Peperomia is a lack of water. Usually, this is one of the earlier signs so hopefully should mean you have a good chance at bringing your plant back to full health. Check the moisture levels in the soil and adjust your watering schedule accordingly.

  2. Lack of humidity. Curling Raindrop Peperomia leaves can also indicate a lack of humidity. We recommend using a humidity monitor to test the area where your plant lives to see if it needs a boost. Luckily, increasing the humidity is super easy as you have quite a few options; misting the plant, using a pebble tray, showering your plant or investing in a humidifier.

  3. Too much sunlight. Another factor to consider if your plant has curling leaves is lighting. If your Raindrop Peperomia is receiving a lot of intense direct light, your plant might curl its leaves as a result. The best thing to do is move your plant to a slightly shadier spot.

  4. Natural curling. Before making any changes to how you care for your plant or any environmental factors, consider that it might be natural. Sometimes new Raindrop Peperomia leaves curl quite a bit and almost look like a dome. This is normal and is something that resolves itself as the leaf matures.

Causes of stagnant growth on a Raindrop Peperomia

  1. Weather / season. If your Raindrop Peperomia isn’t growing any new leaves, but it’s currently autumn, winter or even the very beginning of spring, then this isn’t anything to be alarmed about. Most plants go into a dormant phase during the colder, darker months so you won’t really see much growth during this period. As long as your plant is in the right environment and is receiving the right care, you should start to see plenty of new growth soon.

  2. Lack of sunlight. If your Raindrop Peperomia’s lack of growth is happening during summer then it might be a lack of sunlight that is to blame. Although they don’t like bright intense light, low light levels aren’t great for your Raindrop Peperomia so make sure to move it a little closer to the window.

  3. Generally slow growers. It’s also important to note that Raindrop Peperomia plants are slow growers so you might be mistaking this for a complete lack of growth. They don’t pop out new leaves all the time, even in the height of summer so be patient and monitor how many leaves are growing each month.

For all of the issues above, the main thing is catching the problem early as this gives you the best chance at getting your Raindrop Peperomia back to full health. We recommend keeping a close eye on all of your plants, inspecting them each time you water as this helps to spot issues before they’ve really taken hold of your plant. The second most important thing is to act quickly once you have diagnosed the issue (time is of the essence). Don’t hope that the issue resolves itself, inspect the potting mix, measure different elements in your plant’s environment and take a look at the leaves closely to help you diagnose and solve the issue quickly.

To learn more about how to best care for your plant, and avoid any more problems popping up in future, check out our Raindrop Peperomia care guide.

Fiddle and Thorn is a participant in the Amazon Services LLC Associates Program, an affiliate advertising program designed to provide a means for sites to earn advertising fees by advertising and linking to Amazon.com

Take our houseplant survey!

Quickly respond to our 30 second houseplant survey and get 75% off our Complete Houseplant Care eBook!

Take the Survey

No thanks…

Common Pinstripe Calathea Problems | Causes and Solutions

Last Updated: April 9, 2022

Pinstripe Calathea

Pinstripe Calathea

One of the most popular varieties of Calathea, the Pinstripe Calathea is an incredible houseplant but can also be pretty fussy. Even small adjustments to their care or environment can cause some serious issues with these plants so it’s important to know what to look out for and why certain problems arise.

In this post, we will outline several of the most common problems that Pinstripe Calathea plant parents face, as well as methods to fix the issue and stop it from harming your plant in future.

Causes of yellow leaves on a Pinstripe Calathea

  1. Overwatering.

    This is probably the most common reason why Pinstripe Calathea plants develop yellow leaves and this is always where we would start in the diagnostic process.

    To check if overwatering and subsequent waterlogged soil and root rot is the cause of the yellowing leaves on your Pinstripe Calathea, take your plant out its pot and see how much moisture is in the soil. Overwatering will also cause the root system to go dark brown/black in colour. Replace the soil if waterlogged and adjust your watering schedule in future to make sure you leave enough time for the soil to dry out properly.

  2. Direct sunlight.

    If too much intense direct light is hitting the leaves of your Pinstripe Calathea, this can cause yellow burnt patches. This happens mostly during summer as the sun is stronger and out for more of the day. Move your Pinstripe Calathea to a slightly shadier spot to prevent any more from developing across your plant and cut off the worst affected leaves.

  3. Pests.

    This is a more worrying cause of yellow leaves on your Pinstripe Calathea as it is trickier to treat. If you suspect pests, then inspect the leaves closely (using a magnifying glass can help you spot them on your plant). Use neem oil daily for a week to treat the pests and cut away the worst affected yellow leaves.

  4. The natural ageing process.

    There is one more cause of yellow leaves that is actually nothing to worry about; natural ageing. As your Pinstripe Calathea (and other houseplants) matures, it will prioritise growing bigger new growth over its oldest leaves.

    These will then often turn yellow before dropping off your plant. As long as the rate of yellowing continues to be slow (one or two every year) then you shouldn’t worry about this at all.

Why is my Pinstripe Calathea losing leaves?

  1. Cold air.

    Getting the right temperature is critical to your Pinstripe Calathea’s health and if your plant is exposed to extremely cold air then it can cause them to drop a few leaves. The best way to monitor changes in the temperature and prevent more leaves from falling off is to use a digital thermometer. This will help ensure your Pinstripe Calathea is not being exposed to any particularly low temperatures.

  2. Environmental shock and stress.

    Things such as moving your plant to a new spot in your home, repotting, propagation or being knocked around a lot in a move for example, can cause some level of stress for your plant. This stress can often cause your Pinstripe Calathea to lose a few leaves as a result. But as long as the environment and care are right, this leaf drop should be temporary and after about a week or two, you shouldn’t see any more leaves falling off your plant.

  3. Natural ageing.

    If your Pinstripe Calathea is only losing a few leaves each year but nothing in the environment is changing that would indicate an issue, then this leaf drop might be natural. As we mentioned above, Pinstripe Calathea plants can sometimes lose a few of their oldest and smallest leaves in favour of using the energy for new growth. These will usually turn yellow before falling from the plant.

Causes of a drooping Pinstripe Calathea

  1. Too much water.

    If your Pinstripe Calathea has waterlogged soil then this can cause root rot which cuts off nutrients, moisture and oxygen from your plant, causing it to droop down and look visually limp. If this is the cause of your droopy Pinstripe Calathea then it can often mean you have caught the issue quite early which is good. This means by replacing the waterlogged soil with fresh mix, trimming away some of the rotting roots and adjusting your watering schedule should be enough to bring your plant back to full health in no time.

  2. Too little water.

    It might seem strange that the two extremes can have the same impact, but underwatering can indeed also cause your Pinstripe Calathea to droop down. This is because it also damages the root system, depriving your plant of what it needs to thrive and be strable.

    Slowly reintroduce watering by giving your Pinstripe Calathea a bit of water each day for one full week. Adjust your watering habits to prevent your Pinstripe Calathea from drooping again in future.

Causes of curling leaves on a Pinstripe Calathea

  1. Natural curling.

    Pinstripe Calatheas naturally curl and uncurl their leaves (as most Calathea varieties do) so you want to make sure you aren’t mistaking this for an issue. Monitor your plant to see if the leaves are uncurling or not and go from there.

  2. Underwatering.

    If the leaves on your Pinstripe Calathea are permanently curled and you don’t see any movement throughout the day, then it suggests there is another issue, such as underwatering. Curling up their leaves is the best way for plants to retain as much moisture as possible. To confirm if this is the cause, inspect the soil and give your Pinstripe Calathea plenty of water over the next few days.

  3. Temperature extremes.

    Curling leaves can also indicate that your plant is stressed from being exposed to hot or cold airstreams. Things such as air conditioning vents, fans, radiators, cookers and drafty windows can cause havoc to your plant’s health. Luckily, curling leaves is one of the early signs of trouble so if there are no other visible problems, then you have probably caught the issue early. Use a digital thermometer to check that your room sits within the ideal temperature range for your Pinstripe Calathea.

  4. Low humidity levels.

    Humidity is often forgotten as people fixate on giving their plants the right amount of water and sunlight. However, if the air in your home is really dry then it can mean your Pinstripe Calathea starts to curl its leaves. The best thing to do is buy a humidifier as this will take care of keeping a stable humidity level next to your Pinstripe Calathea.

It can be confusing that a lot of the same issues can be caused by violently different factors and this does make diagnosing the issue tricky sometimes. This is why it’s really important to keep a close eye on your Pinstripe Calathea for the weeks following any changes to their environment or care routine. This will help you establish whether or not the changes you made are having a positive impact or if something else is to blame.

To learn more about the care requirements needed to keep your plant thriving, check out our Pinstripe Calathea care guide.

Fiddle and Thorn is a participant in the Amazon Services LLC Associates Program, an affiliate advertising program designed to provide a means for sites to earn advertising fees by advertising and linking to Amazon.com

Take our houseplant survey!

Quickly respond to our 30 second houseplant survey and get 75% off our Complete Houseplant Care eBook!

Take the Survey

No thanks…

Common Philodendron Squamiferum Issues | Causes and Solutions

Last Updated: September 10, 2023

There is little more frustrating than finding your Philodendron Squamiferum struggling to survive but having absolutely no idea what is causing it.

This can be made even worse by the fact that pretty much every issue can be caused by a whole range of different factors, making the diagnosis part a minefield. But don’t worry, you’ve come to the right place when it comes to treating common Philodendron Squamiferum problems.

Below you’ll not only find out how to diagnose each of the issues but also details on treating and preventing the issue so you can get your Philodendron Squamiferum back in tip-top shape.

Causes of brown Philodendron Squamiferum leaves

  1. Underwatering is a common cause of brown leaves on a Philodendron Squamiferum.

    Don’t worry if you forget the occasional watering, but consistent underwatering can cause some real issues. To confirm the issue, take your plant out of its pot to check the potting mix and root system.

    If it’s bone dry and the roots look crispy, then underwatering is the most likely culprit of the brown leaves on your Philodendron Squamiferum. The best way to fix your underwatered Philodendron Squamiferum is to water your plant a little bit once a day for about a week.

    This will help to gradually reintroduce water without causing shock by changing the environment too rapidly. We recommend buying a moisture meter to help you keep an eye on when your Philodendron Squamiferum needs more or less water which will help to avoid brown leaves in future.

  2. Overwatering can also cause brown leaves.

    Whilst they won’t die suddenly if you overwater them once in a while, consistent overwatering will mean it will start to develop root rot. This will cause your Philodendron Squamiferum to develop brown leaves that are soft to touch. If the potting mix is waterlogged, then it is best to replace the soil straight away rather than just sit and wait for it to dry up over time.

    This allows your plant to begin the recovery process. Moving forward, to prevent more brown leaves, cut back on either how much water you give your plant or how frequently you water it. Make sure to check the moisture levels in the soil using a moisture meter before you water so that you can monitor how long it takes for the soil to dry out.

  3. Low humidity can cause brown leaf tips.

    If your Philodendron Squamiferum has brown and dry leaf tips or leaf edges, then humidity may be the problem. Philodendron Squamiferums like a good humidity level and will struggle in homes that have quite dry air.

    This problem is a lot more common in winter as heating and less ventilation can mean the air in your home dries out a lot quicker. Misting your plant using a spray bottle or buying a humidifier are the best ways to consistently increase the humidity for your plant and stop any more brown leaf tips from occurring.

Causes of yellow Philodendron Squamiferum leaves

  1. Overwatering is a common cause of yellow leaves.

    Philodendron Squamiferum plants don’t like sitting in puddles of water for long periods of time. This will cause damage to the root system and mean your plant will develop yellow leaves, as well as become soft and eventually also fall off your plant.

    To check if you have been overwatering, check the moisture levels in the soil immediately. If the soil is quite waterlogged and clumpy then replace it with fresh dry mix and trim off any rotten roots.

    To prevent yellow leaves from reoccurring, adjust your watering schedule so you aren’t watering your Philodendron Squamiferum as much as you were before and make sure to cut back during winter when your plant is more dormant.

  2. Sunburn.

    Another cause of yellow leaves on Philodendron Squamiferum plants is too much direct sunlight. This is most commonly an issue in summer as the sun is a lot stronger and out for more hours in the day.

    Unfortunately, once the leaves on your Philodendron Squamiferum are yellow and burnt from the sun there is no reversing that. Trim off the worst-affected yellow leaves and move your Philodendron Squamiferum to a shadier spot, away from any direct sunshine.

    You might need to get into the habit of moving your Philodendron Squamiferum around depending on the seasons to ensure it is getting the right level of sunlight.

  3. Natural yellowing is nothing to worry about.

    As your Philodendron Squamiferum matures, it may occasionally lose a leaf as part of the natural ageing process. Before dropping the leaf, it can happen that it turns yellow first as it starts to die.

    There are a few ways to spot natural yellowing; firstly, if your plant is losing the lowest, oldest and smallest leaves and secondly if the rate of new healthy growth is faster than the rate of yellowing. There is no harm in giving the soil and your plant’s environment a once-over to check for any other potential issues.

Philodendron Squamiferums start losing leaves for a variety of reasons

  1. Shock and stress.

    Much like humans, houseplants can get pretty shocked or stressed if their environment changes suddenly. Things like repotting, propagating or moving to a new spot can cause your Philodendron Squamiferum to get a little shocked and drop a few leaves.

    As long as the current or new environment is right for your plant, this isn’t anything to be concerned about and simply means that your Philodendron Squamiferum is adjusting.

    After a week or so, you shouldn’t see your Philodendron Squamiferum losing any more leaves. Using a light meter and digital thermometers are great ways to check the environment.

  2. Cold temperatures can also result in your Philodendron Squamiferum losing leaves.

    Cold drafts coming in through windows, external doors or air conditioning vents can be pretty harmful to your Philodendron Squamiferum over time.

    Whilst they won’t die on you from one day to another, if the issue persists they will start by losing a few leaves. The ideal temperature for Philodendron Squamiferum is between 18°C – 24°C, so it shouldn’t be too difficult to keep in a good range.

    You can always pick up a digital thermometer to check the spot your Philodendron Squamiferum is growing in to make sure it’s right.

  3. Natural shedding.

    If you have gone through all of the above but none of it really fits what is going on with your Philodendron Squamiferum then it may simply be natural ageing that is causing your plant to be losing leaves.

    As we mentioned above, over time it’s totally normal for your Philodendron Squamiferum to drop some of its oldest leaves as it focuses on new bigger growth. These old leaves will often turn yellow before falling off the plant.

    Do keep an eye on how often your Philodendron Squamiferum is losing leaves as if the rate speeds up then you need to check your plant over again to spot any of the signs we listed above.

Why does my Philodendron Squamiferum have curling leaves?

  1. Underwatering can result in curling leaves.

    When plants need to reduce the water loss through their leaves they begin curling them which is why underwatering is the first port of call to diagnose this issue. Check the potting mix over and adjust your watering schedule accordingly.

  2. Low humidity can also result in curling leaves.

    It might not be your watering schedule that is leading your Philodendron Squamiferum to start curling its leaves to reduce moisture loss but actually dry air in the room.

    The best way to diagnose this is to use a humidity meter as it’s not something we can accurately measure without.

    If humidity is the issue, then start by misting your plant and investing in a humidifier. Luckily, curling leaves are an early warning sign and are also reversible so you shouldn’t see any permanent damage if you’ve caught the issue early enough.

Why is my Philodendron Squamiferum drooping?

  1. Underwatering can cause your Philodendron Squamiferum to start drooping.

    This occurs commonly on plants with long stems as they need to carry the weight of the leaves which is why it can be quite common with Philodendron Squamiferum.

    If you find that the stems and leaves look a little lifeless, it is most probably because the soil has been too dry for too long. Stick a finger in the top few centimetres of the soil to check the moisture levels.

    To stop your Philodendron Squamiferum from drooping, reintroduce frequent but light watering each day for a week or two and this will help prevent environmental shock.

  2. Overwatering can also be the cause.

    Once the roots on your plant have begun to rot, it can cause the stems and leaves on your Philodendron Squamiferum to start drooping. This is because they aren’t getting enough moisture, nutrients and oxygen from the damaged root system.

    It also means that the roots can’t physically support the plant anymore and it’ll start to hang and droop down. The combination of these two issues is why overwatering causes your plant to droop.

    If you think your Philodendron Squamiferum might be suffering from overwatering and root rot take your plant out of its pot immediately and inspect the root system, checking for waterlogged soil and black mushy roots. Over the next few weeks, only water your Philodendron Squamiferum when the potting mix feels dry and hopefully your plant can begin to recover.

    To avoid your Philodendron Squamiferum from drooping again in future, get into the habit of checking the moisture in the potting mix before watering your Philodendron Squamiferum. We recommend buying a moisture meter to make sure you are only watering your plant when it needs it.

You might find our Philodendron Squamiferum care guide useful to ensure your plant is getting what it needs to thrive!

Fiddle and Thorn is a participant in the Amazon Services LLC Associates Program, an affiliate advertising program designed to provide a means for sites to earn advertising fees by advertising and linking to Amazon.com

Take our houseplant survey!

Quickly respond to our 30 second houseplant survey and get 75% off our Complete Houseplant Care eBook!

Take the Survey

No thanks…

Common Pencil Cactus Problems And How To Fix Them

Last Updated: March 26, 2022

Pencil Cacti are relatively adaptable succulents that can thrive in a wider range of environments compared to a lot of houseplants. However, this doesn’t make them immune to the same common problems that you can face with the rest of your plant collection and if things aren’t right, your plant will definitely kick up a fuss.

In this post, we will go through each of the main problems you might face with a Pencil Cactus, such as brown/ yellow leaves, leaf drop or a drooping/ wilting plant. We will also give you tips on how to solve the issues and prevent them from harming your Pencil Cactus again in future.

Causes of brown leaves on a Pencil Cactus

  1. Underwatering.

    Pencil Cacti can be forgiving for the odd time where you forget to water as they don’t really need much moisture to thrive but consistent underwatering can lead to a variety of issues if not sorted; the most common of which is brown leaves that will quite quickly fall off the plant. Before changing how much you water your plant, you want to be sure that a lack of moisture is the issue as your Pencil Cactus will be very sensitive to overwatering. If the soil is dry and feels quite sandy to touch, and the roots look a little crispy and shrivelled, then underwatering is likely the cause. Using a moisture meter is a great way to avoid any more brown leaves on your Pencil Cactus caused by a lack of water in future.

  2. Direct sunlight.

    Your Pencil Cactus could be in an area where it’s getting a little too much direct sunlight. Although they do like a good amount of sunshine, there is such thing as too much. This will usually happen during summer when the sun is at its strongest. The perfect spot for your Pencil Cactus is just a touch further inside a bright room. Although it’s impossible to reverse the brown leaves once they have burnt, moving your Pencil Cactus to a new spot should stop any more from developing.

  3. Too much heat.

    As well as too much bright sunlight, brown leaves can develop on a Pencil Cactus if the plant is getting too hot. If you’re not already, make sure to open your windows every now and then to make sure that the air in your room is circulating properly. This reduces the risk of hotspots forming in the room where your plant is living. We also recommend investing in a digital thermometer to track any fluctuations in the temperature, so you can prevent the brown leaves from happening again in future.

Causes of yellow leaves on a Pencil Cactus

  1. Overwatering.

    Too much water is one of the main reasons why Pencil Cacti develop yellow leaves. As they are a succulent plant, they’re super sensitive to any moisture in their potting mix. Once the roots have started to rot, your plant is unable to take anything up which causes yellowing in the leaves. Take your Pencil Cactus out of its pot to double-check. If the soil is even the slightest bit waterlogged and clumpy then you want to replace it straight away. It’s important that you monitor the moisture levels in your Pencil Cactus going forward so you can adjust your watering schedule accordingly and prevent more yellow leaves.

  2. Natural ageing.

    If there don’t seem to be any watering issues explaining why your Pencil Cactus has yellow leaves then it may just be due to natural ageing. Like most other houseplants, Pencil Cacti will drop their oldest leaves in favour of producing new growth. These leaves will turn yellow before falling off the plant. It is totally normal for this to be happening and isn’t because of anything you are doing wrong.

Pencil Cacti lose leaves for a variety of reasons

  1. Cold temperatures.

    This is one of the most common reasons why a Pencil Cactus starts to lose leaves. Cold air coming in through air conditioning vents or drafty windows can shock your plant and result in your plant shedding some of its leaves. It can sometimes be difficult to notice drafts so it’s best to pick up a digital thermometer so you can keep an eye on the temperature. They’ll also help you detect hotspots that can cause yellow leaves, so a great investment all around!

  2. Overwatering.

    If you find that your Pencil Cactus is starting to lose leaves from the root system downwards, then it may be a problem with the root rot that is causing the issue. Giving them too much water too often is one of the main killers of Pencil Cacti so you need to act quickly if you suspect this is the problem. Pencil Cacti hate sitting in soggy potting mix as this can easily lead to root rot meaning the plant becomes unstable and also cannot get needed nutrients from its root system.

  3. Natural ageing.

    If you have gone through all of the above but none of it really fits with why your Pencil Cactus is losing leaves, then it may simply be natural ageing. Over time it’s totally normal for your Pencil Cactus to drop some of its oldest leaves as it focuses on new bigger growth. These old leaves will often turn yellow before falling off the plant. The most important thing here is to monitor the rate of leaf drop compared to the rate of new healthy growth. Your Pencil Cactus should only be losing a small number of leaves compared to new growth.

Why is my Pencil Cactus drooping?

  1. Underwatering.

    The first and most common issue that will cause your Pencil Cactus to droop is a lack of water. Check the moisture levels in the potting mix before adjusting your watering schedule. Pencil Cacti need their potting mix to dry out so we recommend increasing how much water you give your plant, rather than how frequently you water.

  2. Overwatering.

    Another potential cause of drooping Pencil Cactus leaves is consistent overwatering – yep exactly the opposite problem can cause the same issue. It’s super easy to do accidentally if you aren’t keeping an eye on the moisture levels in the soil and it can cause quite severe problems for your Pencil Cactus fairly quickly. If drooping leaves are the only thing that seems to be wrong with your Pencil Cactus, then this again is good news – it means that the problem is in the early stages and is often easier to fix. Other signs of overwatering include soft leaves, brown or yellow leaves and potting mix that smells damp.

  3. Cold temperatures.

    A droopy Pencil Cactus can also be caused by shock from cold temperatures. Pencil Cacti thrive in warm climates and will struggle in homes with cold drafts and will go quite droopy and limp. You may not notice the cold air coming through cracks in doors and windows but if your Pencil Cactus is right next to them then the constant stream of cold air from outside can really shock and damage the plant. Alongside the drooping leaves, you may notice a general lack of growth. Try to draft-proof the windows and doors that your houseplants are near or move your Pencil Cactus into a slightly warmer room in your home.

Those are the most common issues you might run into if you have a Pencil Cactus. The key to reviving a dying Pencil Cactus is making sure you catch the problem as early as possible before it has taken hold of the entire plant. Give your plant a good once over each time you water and invest in gadgets to help you monitor temperature, moisture, humidity and light levels as this will make sure the environment and care are right for your plant.

To learn more about how to best care for your plant, and avoid these problems in future, check out our Pencil Cactus care guide.

Fiddle and Thorn is a participant in the Amazon Services LLC Associates Program, an affiliate advertising program designed to provide a means for sites to earn advertising fees by advertising and linking to Amazon.com

Take our houseplant survey!

Quickly respond to our 30 second houseplant survey and get 75% off our Complete Houseplant Care eBook!

Take the Survey

No thanks…

Common Peacock Plant Problems and How To Fix Them

Last Updated: March 26, 2022

If your Peacock Plant has started to display signs of unhappiness, then it’s vital that you get to the bottom of the problem quickly. More often than not, if your Peacock Plant has issues such as yellow or brown leaves, is losing leaves or even simply drooping down, this is a sign that something in its environment or the care it receives needs to change. Diagnosing the issue properly is crucial as you want to make sure you are taking the correct steps to get your Peacock Plant back to full health.

In this post, we will cover the main issues you might face with a Peacock Plant, how to diagnose the issue, fix it and prevent it from harming your plant in future.

Causes of brown leaves on a Peacock Plant

  1. Overwatering.

    If the leaves on your Peacock Plant have turned dark brown and are a little softer than usual to touch, then you are most probably overwatering. Peacock Plants don’t like to be sitting in a lot of water for long periods of time as this can lead to root rot, which deprives your Peacock Plant of water and nutrients, turning the leaves brown. If you think that the brown leaves are a consequence of overwatering, check the moisture of the soil immediately and adjust your watering schedule accordingly. The most reliable way to do this is by using a moisture meter which will tell you how damp or dry the soil is.

  2. Overwatering.

    If the leaves on your Peacock Plant have turned dark brown and are a little softer than usual to touch, then you are most probably overwatering. Peacock Plants don’t like to be sitting in a lot of water for long periods of time as this can lead to root rot, which deprives your Peacock Plant of water and nutrients, turning the leaves brown. If you think that the brown leaves are a consequence of overwatering, check the moisture of the soil immediately and adjust your watering schedule accordingly. The most reliable way to do this is by using a moisture meter which will tell you how damp or dry the soil is.

  3. Direct sunlight.

    If your Peacock Plant is getting too much bright light you’ll start to notice the tips and edges of the leaves turning brown. Peacock Plants have quite delicate leaves so are quite prone to burning in intense light. If you aren’t sure how much light your Peacock Plant is getting in its current spot (or any alternative spots in your home) then we highly recommend using a light meter. They’ll tell you what level of light is in your home throughout the day and you’ll be able to monitor how it varies across the year.

  4. Lack of humidity.

    Peacock Plants love a humid environment, so if your home has dry air, you’ll want to increase the humidity a little. There are a few really simple methods to increase the humidity for your Peacock Plant; you can mist the leaves with a spray bottle every few days, sit your plant in a pebble tray or use a humidifier. Our Peacock Plant really love this humidifier which is available on Amazon and is super affordable too!

  5. Chemical sensitivity.

    If you notice that the tips of your Peacock Plant are starting to turn brown and dry it may also be due to sensitivity to chemicals in the tap water you’re using. The salts, chlorine and fluoride found in tap water can build up in the soil and suffocate the roots. This is a slow process but over time can cause brown tips on your Peacock Plant. If you live in a hard water area, we recommend using rainwater or filtered water for your plants.

Causes of yellow leaves on a Peacock Plant

  1. Overwatering.

    Too much water is a very common reason behind yellow leaves on Peacock Plants so it’s a good idea to inspect the potting soil closely. They don’t like sitting in soggy soil for long periods of time as this will rot the root system, causing yellow leaves. If the soil is quite waterlogged and clumpy then replace it with fresh dry mix. Don’t wait for the potting mix to dry out naturally as this risks more yellow leaves. Trim away the rotten roots and adjust your watering schedule so you aren’t watering your Peacock Plant as much or as often as you were before.

  2. Pests.

    Although this doesn’t happen so much on plants that don’t spend any time outside, it is possible that the yellow leaves on your Peacock Plant are caused by a pest infestation. Use a magnifying glass to give your plant a once over, looking particularly at the undersides of the leaves and at the stem joints as this is where they usually hang out. Trim off the worst affected plants to curb the infestation from growing quickly and then treating your Peacock Plant with neem oil. Pests don’t always have to mean a death sentence for your plant but you’ll have most success getting rid of them if you have caught the issue very early.

  3. Natural ageing.

    As your Peacock Plant matures, it may occasionally lose a lower leaf as a natural sign of ageing. Before dropping the leaf, it can happen that it turns yellow first as it starts to die. This is nothing for you to worry about as long as the rate of yellowing is slow (slower than the rate of new healthy growth).

Peacock Plants lose leaves for a variety of reasons

  1. Overwatering.

    Once the root system becomes damaged, it can’t provide oxygen and nutrients to your plant and cannot keep your plant stable anymore so the leaves will droop and eventually fall off. To figure out if overwatering is the reason your Peacock Plant is losing leaves, check the moisture levels in the soil immediately using a moisture meter. If the soil is quite waterlogged and clumpy then replace it with fresh dry mix to stop your Peacock Plant from losing any more leaves.

  2. Cold temperatures.

    Another cause of leaf drop in Peacock Plants can be cold temperatures and drafts. Even though the temperature of your home may seem fine, if even small drafts of cold air can harm your plant’s health. Move your plant away from drafty windows or AC vents and this should prevent your Peacock Plant from losing more leaves. We recommend using a digital thermometer to monitor any temperature fluctuations in future.

  3. Natural ageing.

    If only a couple of the oldest and lowest leaves are falling off your Peacock Plant, then this may be natural ageing. As your plant matures, it’s normal for your Peacock Plant will drop some of its leaves to focus its energy on growing new healthy and often bigger growth. On average your Peacock Plant should only lose 1-2 leaves every few months. If it’s losing more than this then it could be a sign that something isn’t quite right and I would consult the reasons we have listed above to find the cause.

Why is my Peacock Plant drooping?

  1. Underwatering.

    Too little water can harm your Peacock Plant in several ways as we have outlined above. However, one of the earliest signs that your Peacock Plant is being underwatered is a drooping plant. Your first instinct might be to give it loads of water straight away to compensate for the lack of it. However, it can actually be harmful to your Peacock Plant if the soil goes from one extreme to the other. Instead, you want to reintroduce frequent watering for a week or two and this should solve the problem. Over time keep an eye on how much you are watering your Peacock Plant by checking the moisture in the soil frequently.

  2. Overwatering.

    Another factor you need to watch out for is overwatering as this can also cause a droopy Peacock Plant. The reason that both extremes can have a similar impact is that both cause damage to the root system, which starves your plant of water and nutrients, causing it to droop. Check the soil to see if it is soggy or holding onto too much excess water and replace the wet soil with fresh mix to allow your plant to recover.

  3. Shock or stress.

    Just like humans, plants can get a little stressed out when they move home or there is a sudden change in their environments. Signs such as drooping leaves after repotting your Peacock Plant or moving them to a different spot are totally normal. It may take a few days for the signs to appear but in the right environment, with the right care, it should only take a few weeks for your Peacock Plant to get used to the changes and stop drooping.

  4. Cold temperatures.

    Peacock Plant plants are native to the tropics so thrive in warm temperatures meaning they’ll struggle in homes with cold drafts and may start to drop their leaves as a result. You may not notice the cold air coming through cracks in doors and windows but if your Peacock Plant is right next to them then the constant stream of cold air from outside can really shock and damage the plant and cause droopy leaves and stems.

Causes of curling leaves on a Peacock Plant

  1. Natural curling.

    Part of the Calathea family, Peacock Plants naturally curl their leaves at night and unfold their leaves in the morning. This is a natural process and it almost looks as though the leaves are praying. It can be easy to mistake this curling for an issue, but monitor how the leaves move and see if you can spot some other issues alongside the curling leaves to see if there’s something wrong with your Peacock Plant.

  2. Underwatering.

    If the leaves are not uncurling, then it might be that your Peacock Plant is being underwatered. Your plant will curl up its leaves as this is the best way to retain as much moisture as possible. Inspect the potting mix and give your Peacock Plant plenty of water and you should see the leaves starting to uncurl in only a matter of hours.

  3. High temperatures.

    If you’ve checked the potting mix and there aren’t any issues with the moisture levels, then hot air might be why your Peacock Plant has curling leaves. Although they thrive in warm environments, hotspots can cause issues for Peacock Plants as it dries out the leaves very quickly. Use a digital thermometer to check that your plant isn’t being exposed to hot air. This can be both hot air from the sun hitting the window, or if your Peacock Plant is too close to the radiator. Adjust your plant’s positioning and you should start to see the leaves uncurl.

Those are the most common problems that you will encounter when caring for a Peacock Plant. We strongly recommend giving your plant a good check-up every few weeks to see if you can spot any early warning signs. Catching issues early will give you the best shot at reviving a dying plant so inspect those leaves and monitor that environment!

To learn more about caring for your plant and avoiding these problems in future, check out our Peacock Plant care guide.

Fiddle and Thorn is a participant in the Amazon Services LLC Associates Program, an affiliate advertising program designed to provide a means for sites to earn advertising fees by advertising and linking to Amazon.com

Take our houseplant survey!

Quickly respond to our 30 second houseplant survey and get 75% off our Complete Houseplant Care eBook!

Take the Survey

No thanks…