Fiddle Leaf Fig Tree Yellow Leaves | Causes and Solutions

Last Updated: June 5, 2022

If Fiddle Leaf Fig Trees were the only houseplants in this world, we’d still be over the moon. Their incredible dark veined leaves and strong barky stems deserve a beautiful spot in your home to be marvelled at. However, if your incredible Fiddle Leaf Fig Tree is starting to develop yellow leaves, then it might mean that there is something wrong with either the environment or the care that your plant is receiving.

But don’t worry, as long as all the leaves haven’t turned yellow and fallen off your plant, then there is still a good chance that you can rescue your plant and bring it back to full health. In this post below we will take you through each of the different causes of yellow leaves on Fiddle Leaf Fig Trees so you can figure out what is going on with your plant.

Too much water can quickly cause yellow leaves

If the leaves on your Fiddle Leaf Fig Tree have turned yellow from the bottom up, there is a good chance that you are giving your plant too much water. This is one of the main problems all plant parents face (yes, even the most experienced) with all houseplants because it can often be difficult to know exactly how much water they need.

Although Fiddle Leaf Fig Trees have quite sturdy roots in comparison to a lot of other houseplants, they still don’t like sitting in really soggy soil for too long. Over time, this can lead to the roots starting to rot which is why your plant develops yellow leaves. It can also lead to your plant becoming unstable so watch out for this too.

If there is a chance that your Fiddle Leaf Fig Tree has been overwatered, check the moisture in the soil immediately using a moisture meter or through the chopstick method. If the potting mix is soggy and waterlogged, then replace it immediately to stop it from damaging the plant any further. At the same time as switching out the potting mix, it’s best to trim away the rotten roots so that your Fiddle Leaf Fig Tree can focus on producing new healthy growth.

Not enough sunlight

If watering isn’t an issue with your Fiddle Leaf Fig Tree and the soil doesn’t seem waterlogged and the roots haven’t started to rot, then sunlight may be the cause of the yellow leaves. If your plant isn’t getting sufficient levels of sunlight, then it will not only develop yellow leaves but you might also notice smaller or stunted growth.

If you suspect that a lack of natural sunlight is the cause of the yellow leaves, start by placing your Fiddle Leaf Fig Tree nearer to a window. If this happens during winter, you can get away with placing it right by the window as the direct sun rays won’t be as intense as in summer. However, during summer, you’ll want to be a little more cautious as to how much extra sunlight you give your Fiddle Leaf Fig Tree as too much light can dry out the plant and cause some other issues too.

A nutrient deficiency

Some yellowing can also occur on your Fiddle Leaf Fig Tree due to a lack of nutrients. Over time, your potting mix will become nutrient deficient or too much water can also flush out a lot of the nutrients. It’s best to swap out some of the potting mix for fresh, nutrient-rich soil.

From there it’s good to consider the water you’re giving to your plants, if you’re from an area with particularly hard water your plants could be getting too much calcium. It’s rare that this causes any real issues for your Fiddle Leaf Fig Tree, but if you’re concerned make sure to replace your soil a little bit more often as calcium toxicity can reduce the root system’s ability to take up other nutrients.

Pests can also cause yellow leaves

Whilst rarer than some of the other factors we mentioned above, your Fiddle Leaf Fig Tree’s leaves may be turning yellow due to a pest infestation. Pests such as spider mites, mealybugs, aphids or whiteflies can damage your Fiddle Leaf Fig Tree and leave behind yellow patches or holes in the leaves. Get up close to your plants using a magnifying glass and inspect your plant to see if you can spot any insects.

Top tip: check the undersides of each of the leaves as this is where the unwanted visitors like to hang out.

There are a few ways to get rid of spider mites and other pests, including showering, neem oil and insecticide sprays.

Natural ageing

If it’s only the lower leaves on your Fiddle Leaf Fig Tree that are turning yellow, but there aren’t any issues with the watering or moisture levels in the soil, then it might just be caused by natural ageing. Over time, your Fiddle Leaf Fig Tree will drop some of its oldest and smallest leaves in favour of growing bigger healthier new ones. This is completely natural and isn’t something you did wrong or anything to worry about.

It’s important that you monitor the rate of yellowing to see if it is speeding up or is above the rate of new growth as this is a sign that something might be wrong with your plant and it’s best to look over the issue above again.

Those are the most common causes of yellow Fiddle Leaf Fig Tree leaves. Yellow leaves are often an early sign that something is wrong with your plant (other than with natural ageing) so it’s important that if something needs to be adjusted that you do it straight away. This will allow your plant to recover and you don’t risk any other further damage to your Fiddle Leaf Fig Tree.

To learn more about how to best care for your beloved Fiddle, check out our Fiddle Leaf Fig Tree care guide!

Fiddle and Thorn is a participant in the Amazon Services LLC Associates Program, an affiliate advertising program designed to provide a means for sites to earn advertising fees by advertising and linking to Amazon.com

Take our houseplant survey!

Quickly respond to our 30 second houseplant survey and get 75% off our Complete Houseplant Care eBook!

Take the Survey

No thanks…

Yellow English Ivy Plant – Causes and How to Fix it

Last Updated: January 18, 2022

Loved for their fast-growing habits and ability to grow either outdoors or indoors, the English Ivy is a great staple houseplant to have around. It’s relatively low maintenance and can produce some incredible variegated leaves. However, just because they are less sensitive than a lot of other houseplant types, your English Ivy is still prone to suffering from the same common problems, notably yellow leaves.

If you have noticed that your English Ivy has developed yellow leaves, or you have found yellow patches or spots on the leaves, then this is a sign that something is wrong with your plant. Luckily, diagnosing the cause of yellow leaves on English Ivy plants is relatively simple as there are three main causes. We will go through each of the causes below, outlining how to treat the issue and prevent it from causing any more yellow leaves on your English Ivy in future.

Overwatering is the most common cause of yellow leaves

The most common reason why English Ivy plants develop yellow leaves is overwatering and subsequent root rot. To establish whether this is behind the yellow leaves on your English Ivy, it’s best to take your plant out of its pot so you can feel the moisture in the potting mix, as well as get a good look at the health of the root system.

If the potting mix is waterlogged then replace it immediately. Don’t wait for it to naturally dry out as this risks causing more harm to your English Ivy and causing more yellow leaves. You also want to trim away any soft or rotted roots as these won’t be able to deliver needed nutrients to your plant anymore.

Over the next few weeks, adjust your watering schedule so that you are watering your English Ivy less frequently or with less water than you were doing before so that it can start to recover. Using a moisture meter is a great way to know how often your English Ivy needs water and will really help to avoid overwatering again and causing more yellow leaves.

Top tip: You will also want to adjust your watering schedule depending on the seasons, to ensure that you are cutting down on watering over the colder, darker months of autumn and winter.

Chemical sensitivity might be causing the yellow leaves

English Ivy plants can actually be a little sensitive to fluoride that you find in tap water. This is usually fine and more often than not you won’t really notice a visible difference on your English Ivy. However, if you live in a particularly hard water area, over time these minerals can build up in the soil and around the root system and cause some damage to your plant.

There are a few ways to make sure that the water you give them has a lower level of fluoride or other chemicals. Firstly you can leave a jug of tap water for around 24 hours to allow for a lot of the chemicals to evaporate.

You can also use collected rainwater which is a lot better for your plants than the treated water that comes out of your tap. Some plant parents also have a filter system for their houseplant water but we find that the methods above work just as well!

Pests

If the yellowing is not so consistent on the leaves of your English Ivy and shows up as small spots or little patches across your plant then pests could be behind it. Take a quick look over the plant for any unwanted insects (using a magnifying glass can really help here). If you do spot pests, isolate your plant away from any of your other houseplants to stop the pests from spreading then shower your English Ivy and treat with an insecticide.

Those are the 3 main causes of yellow leaves in English Ivy plants. Overwatering and pests are the most worrying issues as these can cause plant death a lot sooner than a lack of nutrients. Once you have figured out what is causing the yellow leaves on your English Ivy, it’s important that you take the right steps immediately to start treating the problem.

Moving forward, it’s good to get into a habit of regularly checking your plants to spot any early warning signs (not just yellow leaves) that something might be wrong. The earlier you spot any issues, the better chance you will have at fixing the issue and getting your plant back to its healthy self without any yellow leaves or other issues.

To learn more about how to best take care of your plant (and avoid any more problems), take a look through our detailed English Ivy care guide.

Fiddle and Thorn is a participant in the Amazon Services LLC Associates Program, an affiliate advertising program designed to provide a means for sites to earn advertising fees by advertising and linking to Amazon.com

Take our houseplant survey!

Quickly respond to our 30 second houseplant survey and get 75% off our Complete Houseplant Care eBook!

Take the Survey

No thanks…

Yellow Aluminium Plant Leaves | Causes and Solutions

Last Updated: April 1, 2022

It’s always pretty heartbreaking to see the incredible foliage on a beautiful Aluminium Plant turn yellow, especially when you aren’t really sure what is causing it! But don’t worry, in this post, we will go through each of the 3 main reasons why Aluminium Plants get yellow leaves and help you not only fix the issue but prevent it from happening again in future.

Too much direct sunlight

Intense direct sunlight can be quite a common reason why Aluminium Plants start to develop yellow leaves and yellow patches on their leaves. Although too little sunlight is also bad for them, there is also such a thing as too much light (sometimes this fact doesn’t get enough attention in the plant world).

If your Aluminium Plant is receiving several hours of direct sunlight during the summer months, it can very quickly scorch the leaves and turn them yellow. The patches will look quite dry and be on the part of the plant that faces the window. If the yellow leaves on your Aluminium Plant are caused by harsh light and sunburn, it’s a good idea to remove the worst affected leaves. You won’t be able to get them back to their nice luscious green/ silver colours and you don’t want your plant wasting vital energy trying to keep these alive.

To solve and prevent the problem, move your Aluminium Plant to a spot that gets only indirect light. You want to make sure that it is still getting plenty of light during the day, but just avoid direct light to prevent yellow leaves and other issues. If you are unsure how much light your Aluminium Plant is getting throughout the day/year, it can be useful to use a light meter to keep track.

Consistent overwatering

If the leaves on your Aluminium Plant have turned yellow but there is no issue with lighting, then it might be overwatering that is the culprit This is one of the main problems plant parents face with all of their houseplants because each and every plant is different. Age, size and many environmental factors all determine how much water your plant needs, so it’s different for each and every one.

The roots on Aluminium Plants don’t like to be sitting in soggy soil for too long and consistent overwatering can lead to root rot. This starves the plant of needed nutrients, oxygen and water and the leaves will not only turn yellow, but the whole plant can become unstable and droopy.

If you think that your Aluminium Plant may be overwatered, check the moisture in the soil immediately and adjust how much and how often you are watering your plant.

As well as reducing the amount that you are watering, if the potting mix is waterlogged, it’s vital that you replace it immediately. This will mean the root system can start to recover straight away and minimises the risk of any future yellow leaves. At the same time as switching out the potting mix, trim away the rotten roots so that your Aluminium Plant can focus on producing new healthy growth.

Too much fertiliser

Although Aluminium Plants do well with a bit of fertiliser during the growth months of spring and summer, too much fertiliser can very quickly cause scorched leaves and yellow patches. These will show up across the plant but do often start from the tips and edges of the leaves first.

To stop the issue from progressing any further, remove any fertiliser spikes or replace the entire potting mix if the pellets are mixed in. If you’ve been using a water-soluble fertiliser, either replace the potting mix as well or rinse it through properly in the shower and hold off fertilising for the remainder of the year.

Make sure you aren’t fertilising your Aluminium Plant during autumn or winter as your plant will be dormant and it’ll be quite damaging, causing yellow leaves and other issues with your plant. If/when you do choose to fertilise your Aluminium Plant again, make sure you are using less than the recommended amount on the bottle. Every houseplant is different, not just the type of plant, but also the size and maturity which means there is no one-fits-all recommended amount so using less is safest.

Those are the 3 most common reasons why Aluminium Plants develop yellow leaves. The first place to look tends to be the soil as if the yellow leaves are caused by overwatering, this will be the quickest killer out of the list. Then check the environmental factors to see if there is anything wrong with the sunlight of fertiliser levels. After making a change to the care or environment of your Aluminium Plant, make sure to monitor it for several weeks to make sure there are no more yellow leaves or other issues cropping up.

To learn more about caring for your plant, as well as how to spot and solve other common problems, check out our Aluminium Plant care guide.

Fiddle and Thorn is a participant in the Amazon Services LLC Associates Program, an affiliate advertising program designed to provide a means for sites to earn advertising fees by advertising and linking to Amazon.com

Take our houseplant survey!

Quickly respond to our 30 second houseplant survey and get 75% off our Complete Houseplant Care eBook!

Take the Survey

No thanks…

Yellow Aloe Vera Leaves – Causes and Solutions

Last Updated: April 1, 2022

Aloe Vera plants tend to have a reputation that they are easy to care for, but this isn’t actually always the case. They can be pretty sensitive and if things aren’t quite right, their leaves can often turn yellow. To find out why the leaves on your Aloe Vera are turning yellow, it’s important to go through each of the factors we will go through below to see what is happening to your Aloe Vera.

Overwatering

9 times out of 10 your Aloe Vera plant will be turning yellow due to overwatering. This problem is also often accompanied by your plant losing leaves. Aloe Veras hate sitting in soggy soil more than anything and it can quite quickly cause a number of issues for your Aloe Vera. The most serious issue is root rot which can happen very quickly as the roots on Aloe Vera plants are delicate and short. This means even the slightest issue in the soil can cause your Aloe Vera to show signs of unhappiness such as yellow leaves.

Rotting and mushy roots mean that your Aloe Vera is unable to take up nutrients and the leaves will turn quite soggy as well as yellow. Waterlogged soil also gives off quite a damp and musty smell so get up close to all your houseplants every so often to check for any smells.

There are a few really simple ways to find out if your Aloe Vera’s soil is waterlogged:

Take your Aloe Vera out of its pot

If there are a significant amount of yellow leaves on your Aloe Vera then you probably want to take the plant out of its pot so you can inspect the soil up close. If you feel that it is waterlogged and clumpy then this is definitely the issue causing the yellow leaves.

Finger/Chopstick Method

Firstly, the finger trick method where you stick a finger into the soil to see if there is any moisture in the soil. If yes, you’ll notice soil sticking to your finger when you take it out. If the soil is bone dry then it will just be like dust which will fall off your finger. If you don’t want to get your hands dirty then you can also use a chopstick where the same rule applies. If the chopstick comes out clean then you probably haven’t been overwatering it.

Do I risk damaging the root system if I stick my finger in the soil?

As long as you are careful and don’t prod around too much, then you shouldn’t cause too many issues. If you notice a large root in your way, try and pick a different spot rather than forcing the chopstick in as this will break the root.

Picking up your Aloe Vera

Another way you can check the moisture levels and prevent more yellow leaves in the soil is by regularly picking up your plant. This is a great method to get to know your plants and soon you’ll have a really clear gauge as to when they need watering. The lighter the plant is, the less water there is in the soil – pretty simple! Luckily, Aloe Vera are very light houseplants as they don’t have thick stems or roots which means picking them up shouldn’t be too difficult but don’t try this with bigger plants as you don’t want to cause injury.

Use a moisture meter

If you want to take the guesswork out of knowing when to water your Aloe Vera (and prevent more yellow leaves) you can use a moisture meter. You simply pop the meter in the potting mix and it will give you a reading of the moisture in the soil – yes it’s that easy! They are super affordable little gadgets and are great investments for every plant parent! We recommend this one which is available at Amazon.

How do I fix a waterlogged Aloe Vera?

If the yellow leaves on your Aloe Vera are caused by overwatering and root rot, then it’s super important that you act quickly. Root rot can be damaging to your plant due to the shallow and delicate leaves and it can quickly mean your plant doesn’t have much of a root system left. Instead of letting the soil dry out naturally, you want to replace it straight away once you notice it is waterlogged. This will prevent any further yellow leaves from developing on your plant and the roots can start to recover and healthy growth should resume soon. Make sure to use a high-quality well-draining potting mix like this one which you can buy on Amazon.

After replacing your Aloe Vera’s potting mix, prune away all of the yellow leaves. Once they have turned yellow, this is unfortunately irreversible. The best thing to do next is prune off the damaged leaves and stems so your Aloe Vera can focus on growing new healthy (and green) growth.

In future, to prevent any more yellow leaves on your Aloe Vera, try to regulate your watering and always check that the top of the soil is dry before giving your Aloe Vera any more water. You also need to adjust your watering routine according to the seasons. During the growth period of spring and summer your Aloe Vera will require water about every 10 days. However, in winter months about once every month or two is enough or you risk more yellow leaves.

Drainage Issues

Sometimes it may not be your watering schedule that is causing your Aloe Vera’s leaves to turn yellow, but inadequate drainage. You can very easily increase the amount of drainage in the pot of your Aloe Vera by mixing in a small amount of perlite. This helps with drainage and aeration of the soil. Make sure your pot has drainage holes so excess water can flow out the bottom. Another easy step is to add a few small stones or pebbles to the bottom of your pots, this helps in making sure that the drainage holes are never blocked by clumpy soil.

Although clay or terracotta pots tend to be a bit more expensive and are breakable, they are great for your plants and sometimes it’s worth spending a little more to prevent yellow leaves on your Aloe Vera. The clay they are made of is permeable which means that a little bit of water in the soil can evaporate through the sides of the pot. This doesn’t happen with plastic pots that houseplants often come in, which hold in every drop of water. We love these terracotta pots from Amazon.

Cold Temperatures

Another cause of yellow leaves on Aloe Vera plants are extreme temperatures It’s important to keep your Aloe Vera away from AC or heating vents/radiators as these temperature extremes can be very harmful to your plant and result in various issues, including yellowing leaves. The ideal temperature for your Aloe Vera is between 18°C – 24°C, so it shouldn’t be too difficult to keep in a good range. You can always pick up a digital thermometer to check the spot your Aloe Vera is sitting for peace of mind.

Sunburn

If the yellowing on your Aloe Vera’s leaves is quite patchy and the leaves look scorched then it may be due to too much direct sunlight which has burnt the leaves.

Aloe Vera plants like a spot with bright light, but it needs to be indirect so try to avoid placing right next to a window. You need to also watch out a little more in summer when the sun is a lot stronger for more of the day where the risk of yellow leaves is higher. It is best to move your Aloe Vera a metre or so further away from the window in warmer months to avoid any leaf burn.

Those are the most common causes of yellow leaves on your Aloe Vera plant. Yellow leaves is a sign that your plant is unhappy and is usually a few steps before plant death so it’s super important that you fix the issue at this stage. As long as some of the plant is still nice and green, you should be able to bring it back to full health with a lot of care and attention so don’t give up too soon.

To learn more about how to care for your plant, as well as propagation methods and tips on how to solve other common issues, check out our Aloe Vera care guide.

Fiddle and Thorn is a participant in the Amazon Services LLC Associates Program, an affiliate advertising program designed to provide a means for sites to earn advertising fees by advertising and linking to Amazon.com

Take our houseplant survey!

Quickly respond to our 30 second houseplant survey and get 75% off our Complete Houseplant Care eBook!

Take the Survey

No thanks…

Worm Plant Care Guide: How to keep your Crassula Marnieriana thriving

Last Updated: October 16, 2023

Worm Plant

Worm Plant

Introduction: Meet the Worm Plant

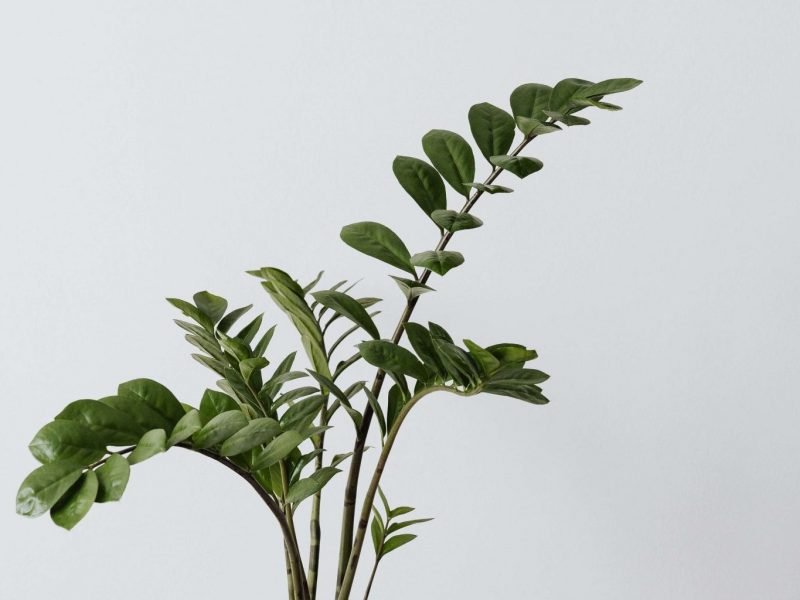
This charming succulent, with its distinctive worm-like appearance and attractive jade-green colour, is an incredibly easy-going and resilient houseplant. We recommend it as a great choice for both novice and experienced plant enthusiasts alike.

Native to South Africa, the Crassula Marnieriana has adapted to thrive in dry, rocky terrains, making it hardy and adaptable. Its plump, oval leaves are densely packed around a slender, trailing stem, resembling a string of tiny green worms – hence its common name. As a bonus, mature plants may even produce clusters of star-shaped flowers but these can be unpredictable.

In our comprehensive care guide, we will walk you through everything you need to know to keep your Worm Plant thriving. From light requirements and watering tips to potential problems and propagation methods, we’ve got you covered.

Lighting Requirements: How to Make Sure Your Worm Plant Gets the Right Amount of Sunlight

When it comes to lighting, the Crassula Marnieriana loves sunshine. This does not mean it needs constant direct sunlight but good amounts of indirect bright light (and direct sunlight in winter) will keep this one thriving.

A spot near a window where it will receive plenty of indirect light for at least 6 hours a day is ideal. If your home doesn’t get much bright light then you’ll be happy to know that the Worm Plant is quite adaptable. It can tolerate lower light conditions, although growth may slow and be a little smaller than with ample sunlight.

To supplement light levels you may also choose to use a grow light. If you’re using artificial light, opt for a fluorescent light setup as this will encourage strong and healthy growth and can be a real life saver in winter for many plants.

Make sure you are monitoring your plant and adjusting the light intensity based on the plant’s response. If the leaves start to stretch out or lose their colour, it may be a sign that the plant needs more light.

Watering: How Often and How Much Water Does the Worm Plant Need?

The Worm Plant is a robust succulent that requires a careful watering regimen to thrive. Despite its hardy nature, overwatering can quickly lead to root rot, a common ailment among succulents so it’s important to be monitoring soil moisture regularly.

Frequency of Watering

A good rule of thumb for watering your Worm Plant is to do so only when the soil has completely dried out from the previous watering. Typically, this translates to watering once every two weeks during the warmer months and less frequently, around once a month, during the cooler months.

Amount of Water

The amount of water required by your Worm Plant will vary based on factors such as the size of the plant and the ambient temperature. However, a useful guideline to follow is the “soak and dry” method. This involves watering the soil thoroughly until water runs out of the drainage holes at the bottom of the pot, then waiting until the soil has completely dried out before watering again.

Signs of Overwatering

Overwatering is a common pitfall for many succulent owners. It’s important to keep an eye out for signs such as yellowing leaves, a mushy trunk, or a rotten smell, which could indicate that your Worm Plant is getting too much water. If you notice any of these symptoms, reduce the frequency of watering immediately.

Water Quality

Lastly, while the Worm Plant isn’t particularly picky about water quality, it’s always best to provide it with clean, filtered water free from harmful chemicals. Tap water that has been left to stand overnight is a suitable option.

The Best Soil for Worm Plants

This succulent plant is hardy and adaptable but thrives best in well-draining soil, either pre-mixed or created by you!

Pre-Mixed Cactus Soil:

  • This is an excellent choice as it is formulated to mimic the natural sandy and gritty conditions that succulents love.
  • It provides exceptional drainage, which is crucial for preventing root rot, a common problem with succulents.

DIY Soil Mix:

  • Alternatively, you can create your own mix. A popular blend is one-third regular potting soil, one-third coarse sand, and one-third perlite or pumice.
  • This allows you to customise the soil to your plant’s specific needs and ensure excellent drainage.

Temperature Requirements

Indoor Climate

Indoors, the Worm Plant prefers a temperature range of 59-80°F (15-27°C). It’s a forgiving plant, tolerating minor fluctuations, but major temperature drops or spikes can lead to stress.

Outdoor Climate

When kept outdoors, the Worm Plant can withstand temperatures down to 30°F (-1°C) but it won’t be too happy about any lower than that. Prolonged exposure to frosty conditions can be detrimental, so consider moving your plant inside during the coldest months.

Temperature Transitions

When transitioning your plant between different temperatures, it’s important to do so gradually. Quick changes can cause shock, potentially damaging your Worm Plant and it may start to cause a few issues such as brown leaves and leaf drop for a week or two.

Humidity Requirements

Native to South Africa, it thrives in arid environments typical of its homeland, but it can actually also adjust well to more humid conditions. However, keep in mind like any succulent, it is predisposed to rot if the humidity becomes too high.

Optimal Conditions

Typically, a Worm Plant prefers lower humidity levels, closer to what you’d find in a desert environment, around 30-40% humidity. This is often the standard indoor humidity in many homes but it can tolerate higher humidity if it’s given proper ventilation and drainage.

High Humidity

If you’re growing your Worm Plant in a high humidity environment, take extra care to ensure it’s not sitting in water as this can make the issue worst. Make sure you’re using a well-draining soil and pot with drainage holes. It’s also a good idea to place it in an area with good airflow to help dissipate excess moisture.

Low Humidity

While it can handle dry air, it may need a bit more water than usual during the hottest, driest months. But remember, it’s always better to underwater than overwater when it comes to succulents.

Fertilizing your Worm Plant

Like other succulents, the Crassula Marnieriana does not require heavy fertilisation. However, a small boost during its growing season can help keep it thriving and help it maintain healthy new growth levels.

When to Fertilize

Typically, the growing season for the Worm Plant falls between spring and early autumn. During this period, a monthly application of a water-soluble or liquid succulent fertiliser will suffice.

Fertilizer Choices

When it comes to choosing a fertiliser, opt for one specifically designed for succulents and cacti. These fertilisers typically have a lower nitrogen content and a higher phosphorus and potassium content to support root growth and flowering.

How to Apply

  1. Dilute the fertiliser according to the instructions on the package. To be on the safe side, we often recommend diluting it a little bit more than suggested, particularly for smaller and less mature succulents.
  2. Water your plant as usual.
  3. Then, apply the diluted fertiliser to the soil, avoiding direct contact with the plant to prevent fertiliser burn.

Fertilizing in Non-Growing Season

During the non-growing season (late autumn and winter), it’s best to withhold fertiliser completely. The plant’s metabolism slows down during this period, and excess nutrients can cause harm.

Pruning a Worm Plant: Why, How and When

Regular pruning not only promotes new plant growth but also helps in controlling pests and diseases. Let’s delve into the details of why, how, and when to prune your Crassula Marnieriana.

Why Prune Your Worm Plant?

Pruning mainly serves three purposes: it encourages fuller growth, maintains plant shape, and keeps diseases at bay. By eliminating overgrown or unhealthy branches, your Worm Plant can focus its energy on producing new, healthy growth.

How to Prune Your Worm Plant?

  1. Start by sterilising your pruning shears to prevent the spread of potential diseases between plants.
  2. Identify the parts of the plant that need to be pruned: these include dead or yellowing leaves, leggy branches or any part that seems unhealthy.
  3. Cut the identified parts at a 45-degree angle, which will facilitate quicker healing and prevent water accumulation.
  4. After pruning, dispose of the cut parts responsibly to keep pests and diseases away from your plant. If you are only pruning to keep a desired shape, you may choose to propagate the healthy pruned cuttings (more on that below).

When to Prune Your Worm Plant?

The best time to prune your Crassula Marnieriana is during its active growth phase, which typically occurs in spring or early summer. This gives the plant ample time to heal before the dormant winter period. However, if there’s a pest infestation or the plant is overgrown, don’t hesitate to prune, irrespective of the season.

How to Successfully Propagate a Worm Plant

Propagation is the process of creating new plants from an existing one, and it is surprisingly simple with the Crassula Marnieriana. Below is our simple step-by-step guide to ensure you know what do to and when to do it.

Step 1: Choosing the Right Time

The best time to propagate a worm plant is during the warmer months. This is when the plant’s growth is most vigorous, making it more likely for the cuttings to take root and grow. However, bear in mind that propagation can be attempted at any time of the year if the environment is right.

Step 2: Taking a Cutting

Using a clean, sharp knife or scissors, cut a healthy-looking stem or leaf from your worm plant. Ensure that the cutting is 3-5 cm in length. Remember, the cleaner the cut, the better the chances of successful propagation and it reduces the risk of harming your mother plant.

Step 3: Let it Dry

Once you have your cutting, let it dry out for a few days. This process, known as ‘callousing’, helps to prevent infection and encourages healthier root development.

Step 4: Plant Your Cutting

After the cutting has dried, place it in a pot filled with well-draining succulent soil. Water it sparingly until it begins to establish roots. Within a few weeks, your cutting will begin to sprout new growth and you should care for it as you would the mother plant.

Repotting your Worm Plant: Step-by-Step Method

What You’ll Need:

  • Pot: Choose a pot that is a few inches larger than the current one as Crassula Marnieriana enjoys a bit of extra room to grow. Make sure that it’s not too much larger as this can cause instability and increases the risk of root rot.
  • Drainage Material: A layer of pebbles or broken pottery at the bottom of the pot is perfect for preventing water stagnation.
  • Well-draining Soil: This plant prefers soil that drains well to avoid waterlogging.
  • Gloves: Always wear gloves to protect your hands from any potential toxic sap.

Step-by-Step Guide:

  1. Prepare the new pot: Place a layer of drainage material at the bottom of the new pot and fill it halfway with soil.
  2. Remove the mother plant: Gently remove the Worm Plant from its current pot, taking care not to damage the roots.
  3. Place the plant: Position the plant in the new pot and slowly add soil, making sure it encases the roots fully.
  4. Water thoroughly: After repotting, water the plant thoroughly and let it drain.

Flowers on a Worm Plant

Occasionally a Worm Plant can bloom small charming flowers. This occurrence is relatively rare and typically occurs in the cooler months which is the opposite to most other houseplant types.

Identifying the Flowers

Flowers of a Worm Plant are small, star-shaped and exhibit a brilliant white or pale pink hue. Often, they cluster together, creating a fascinating contrast against the plant’s thick green leaves.

Encouraging Flower Growth

As a Worm Plant owner, you might naturally aspire for your plant to produce these beautiful blooms. However, achieving this isn’t always straightforward. It requires specific care and conditions of bright, indirect light, avoiding overwatering and slightly cooler temperatures over winter. However, even if all these things align, there’s no guarantee that your Worm Plant will flower.

Note that young plants won’t produce blooms so it’s only possible in plants older than a few years.

Cleaning your Worm Plant

Keeping your Worm Plant free from dust and dust is an essential part of its care routine. Not only does it enhance the plant’s aesthetic appeal, but it also contributes to its overall health.

The Cleaning Process

If your plant has been neglected for a while, you might notice a layer of dust on the leaves. This dust can hinder the plant’s photosynthesis process, so it’s crucial to keep the leaves clean. Start by gently dusting the leaves with a soft brush to remove any dust and loose dirt.

For a thorough cleaning, use a damp cloth to wipe each leaf. Make sure the cloth is not too wet to avoid causing the leaves to rot (this can happen if they are damp in cold environments). This process can be time-consuming, especially for larger plants, but it’s worth the effort to keep your Crassula Marnieriana looking its best.

Avoiding Common Cleaning Mistakes

While cleaning, it’s important to avoid common mistakes that could potentially harm your plant. Never use harsh cleaning products or detergents, as these can damage the plant’s leaves. Instead, stick to water or a mild, organic leaf cleaner.

Lastly, ensure you’re gentle when cleaning. Being too rough can cause the leaves to break or bruise, which is not good for the plant’s health or appearance. Take your time and handle the plant with care.

Worm Plant Toxicity to Pets and Humans

One crucial aspect to consider when choosing houseplants is their toxicity to pets and humans.

Good news! The Worm Plant is generally considered non-toxic to humans and pets. However, it’s always wise to discourage children and pets from eating any houseplants as ingestion may cause minor discomfort, such as a mild upset stomach.

While the Crassula Marnieriana is not listed as toxic to cats and dogs by the American Society for the Prevention of Cruelty to Animals (ASPCA), individual animals may react differently. If your pet has a tendency to nibble on your greenery, it’s best to keep this plant out of their reach.

In case of accidental ingestion by pets, observe them closely for any signs of discomfort, like vomiting or diarrhoea. If they exhibit any of these symptoms, take them to a veterinarian immediately.

Pests and Diseases: Common Issues and How to Fix Them

Despite its overall hardiness, the Worm Plant isn’t immune to pests and diseases. There are some common issues that this resilient plant may encounter over time.

1. Mealybugs

Mealybugs are tiny white bugs that feed on the sap of the Worm Plant. They often hide in hard-to-reach areas, making them somewhat difficult to spot. If left untreated, the infestation can grow rapidly and it can cause the leaves of your plant to yellow and drop.

Fix: Wipe the plant with an alcohol-soaked cotton swab. For severe infestations, consider using an insecticidal soap or neem oil spray. Regular inspections can help catch these pests early.

2. Root Rot

Root rot is a common disease that can affect Worm Plants, particularly if they’re overwatered. The roots start to decay, turning black and mushy. The leaves may also become discoloured or drop off.

Fix: If you spot this, immediately stop watering and remove the plant from its current soil. Trim off any affected roots and repot in fresh, well-draining soil. Going forward, water only when the top inch of soil is dry to prevent recurrence.

3. Aphids

Aphids are tiny green or black insects that suck the sap from the Worm Plant. They leave a sticky residue known as honeydew, which can attract other pests and cause a sooty mould to grow.

Fix: Spray the plant with a mild soapy water solution. For severe infestations, consider using an insecticidal soap spray. Regularly check the underside of leaves where they often hide.

4. Scale Insects

Scale insects are small bugs that attach to the plant and feed on its sap. They can cause the leaves to yellow and drop, and stunt the growth of the Worm Plant.

Fix: Scrape off the bugs using a soft brush or cloth. If the infestation persists, consider using a horticultural oil or insecticidal soap.

Armed with this information, you’re now well-prepared to keep your Worm Plant healthy and thriving, preventing any pest or disease that dares to threaten its wellbeing.

Fiddle and Thorn is a participant in the Amazon Services LLC Associates Program, an affiliate advertising program designed to provide a means for sites to earn advertising fees by advertising and linking to Amazon.com

Take our houseplant survey!

Quickly respond to our 30 second houseplant survey and get 75% off our Complete Houseplant Care eBook!

Take the Survey

No thanks…

Here’s Why You Shouldn’t Use Leaf Shine for your Houseplants

Last Updated: November 1, 2023

Healthy Houseplants

Healthy Houseplants

To keep their houseplant’s leaves looking glossy and beautiful, many individuals reach for commercially prepared leaf shine products. But did you know these products might be harming your plants?

In this article, we dive into why traditional leaf shine products might not be the best choice for your houseplants. We’ll offer safe, DIY alternatives, allowing you to maintain healthy houseplants and avoid damaging the leaves.

Understanding Leaf Shine: What is it and How Does it Work?

Leaf shine products, also known as leaf polish, are typically made from a mixture of petroleum-based waxes or oils. They’re applied to the foliage of houseplants to give them a glossy and attractive veneer.

When Leaf Shine Seems to Be the Perfect Solution

Leaf shine or leaf polish is intended to improve the aesthetic appeal of your houseplants. It enhances the green color of leaves and, at first glance, appears to give them a healthier look.

Here’s How Leaf Shine Works

When you spray these products on your houseplant’s leaves, the liquid coats the surface, drying to form a shiny layer. This layer reflects light, giving the leaf a polished look.

The layer also offers a superficial level of protection against dust and contaminants.

The Negative Effects of Leaf Shine on Houseplants

1. Accumulation of Chemical Residue

It’s common knowledge that leaf shine products often contain silicone or mineral oils, but did you know that these substances can build up on your houseplant’s leaves over time? And this isn’t a good thing.

The accumulation of these non-organic compounds prevents the plant from breathing correctly, ultimately affecting its overall health and vibrancy.

Over time, residue from leaf shine can create a nasty, sticky build-up. Additionally, it can hinder the absorption of beneficial substances like water and vital nutrients, which plants naturally absorb through their leaves.

Avoiding Chemical Build-up in your Plants

Opt for alternatives that not only accentuate your plant’s beauty but also contribute to its overall growth and a healthy life.

As long as you care for them well and dust them regularly, your houseplants will boast a natural shine that can rival any artificial product out there.

2. Blocking the Natural Breathing Process

Firstly, think of the leaf shine as a plastic cover, wrapping around the leaf surface, forming sort of a ‘shield’. This ‘shield’, although providing a gleaming appearance, ironically chokes your houseplant.

Simply put, the leaf shine clogs the stomata (minute pores) located on the leaf surface.

These pores or ‘stomata’ are critical for a plant’s respiration—they allow for an exchange of gases like carbon dioxide and oxygen to take place.

When these pores get plugged, the natural breathing process of the plant is halted, ultimately causing the plant to suffocate and leading to a slower growth rate.

3. Disrupting the Photosynthesis Process

Commonly, the clean, glossy look achieved through leaf shine products can lead some to believe that their plants are healthier and more vibrant. But, the shine can disturb the photosynthesis in your plants.

Photosynthesis is the process through which plants use sunlight to synthesize nutrients from carbon dioxide and water, producing oxygen as a byproduct.

If this process so crucial to plant health is disrupted, it affects overall plant growth.

This obstruction prevents the plant from adequately taking in carbon dioxide and releasing oxygen, essentially suffocating the plant gradually.

Extreme use could lead to a weaker plant, susceptible to diseases and pests.

4. Attracting Dust and Dirt

When you apply traditional leaf shine to your houseplants, it not only covers the pores of the leaves but also provides a sticky surface.

What’s the downside to this? Well, the shiny substance tends to catch and attract dust and dirt particles from the surroundings.

Over time, these particles build up and form a hard to remove, dark crust on the surface of the leaves.

The Impact of Dust and Dirt on Houseplants

Dust and dirt coating the leaf surfaces prevent sunlight from reaching the cells responsible for photosynthesis.

This reduction in sunlight can limit your plant’s ability to produce food, potentially leading to weaker growth and overall health.

Moreover, the dust and dirt accumulation makes your houseplants increasingly less attractive, defeating the very purpose of applying leaf shine.

5. Increasing the Risk of Pest Infestations

Using leaf shine products doesn’t just harm the plant directly—it also creates an inviting environment for pests.

The residue left behind by these products is akin to a welcome mat for tiny critters. The smell and texture of leaf shine can attract a number of pests, including spider mites, aphids, and mealybugs.

The Environmental Impact of Traditional Leaf Shine

These products don’t just harm your houseplants; they also have a significant impact on the environment.

The production and disposal of leaf shine products comes with a considerable environmental footprint.

Since they often contain myriad chemicals and non-renewable substances, these products can contribute to pollution if not properly discarded. The waste generated from their plastic bottles only compounds the problem.

On top of this, the manufacturing process itself can be energy-intensive and harmful to the ecosystem.

Safe Alternatives to Leaf Shine: DIY Solutions

1. Homemade Leaf Shine Spray with Neem Oil

Neem oil is often a gardener’s secret weapon! A natural pesticide, neem oil can keep pests at bay while offering your plants’ leaves a healthy shine.

What’s more, it doesn’t leave harmful residue or prevent plants from ‘breathing’ like commercial leaf shines do.

Creating your homemade leaf shine is relatively simple. Here’s a quick recipe you can try:

  1. Gather your ingredients: A spray bottle, 1-2 teaspoons of neem oil, and 1-liter water.
  2. Mix the neem oil into the water, ensuring they blend well. It can take a bit of vigorous shaking, but patience pays off.
  3. Lightly spray it on your plants, taking care not to drench them.

Remember, as oils can block sunlight, which plants need for photosynthesis, use this solution sparingly and ensure it’s lightly sprayed.

2. Natural Leaf Shine Recipes with Olive Oil

You may find it surprising, but olive oil can indeed make an effective, eco-friendly leaf shining solution.

To create your own olive oil leaf shine, you need very few ingredients, some olive oil and a soft cloth or sponge.

  1. Firstly, add a tiny drop of olive oil to your cloth.
  2. Next, gently wipe the leaves of your houseplant, making sure to cover the entire surface, but without leaving any excess oil. You don’t want the leaves to become overly greasy.
  3. After that, let the plant sit and do not water it for a few hours. This allows the oil to be absorbed, nourishing the leaves and giving them a natural sheen.

Note: While olive oil is safe for most houseplants, we recommend testing this method on a single leaf first, especially if you have a delicate or sensitive plant.

3. Using Banana Peels as Natural Leaf Shine

Banana peels are packed with nutrients like potassium, calcium, and even a small amount of protein, and they leave a lovely, appealing shine on your plant’s leaves.

To utilize this method, you’ll simply need to smooth the inside of a banana peel, the part that’s usually in contact with the fruit, over your plant’s leaves.

As you do this, be gentle as not to damage the delicate surface. Just give it a gentle brush over each leaf, allow the residues to dry.

4. Applying Milk as a Leaf Shine Alternative

Using milk to keep your houseplants gleaming is an old-time trick. It’s an easy, organic, and inexpensive way to give your houseplants the extra shine they deserve!

How to Apply Milk for Leaf Shine

Milk acts as a gentle cleanser, removing dust and grime, and leaving a subtle shine on your plant’s leaves. Here’s how you can make your own milk-based leaf shine:

  1. Mix equal parts of milk and water. This dilutes the milk to prevent a heavy residue.
  2. Pour the solution into a spray bottle for easy application.
  3. Give each leaf a gentle spray, making sure to cover both the top and bottom surfaces.
  4. Take a clean, soft cloth and wipe each leaf gently. This will help spread the mixture and remove any excess.

Precautions with Milk as aLeaf Shine

This method may be natural, but you still need to remember a few precautions:

  1. Avoid over-spraying. This can lead to a build-up of milk protein which, over time, can attract pests and fungus.
  2. Avoid using full strength milk. Undiluted milk may leave a thicker residue which can block leaf pores.
  3. Avoid spraying milk on plants exposed to high heat or direct sunlight. This could cause the milk to spoil.

Preventive Measures for Healthy and Shiny Houseplants

1. Regular Dusting and Cleaning

Being proactive in caring for your houseplants by keeping them clean not only helps them to shine but also fends off common pests and diseases.

Regular dusting supports the process of photosynthesis, which is vital for your plants’ health. To maintain a healthy luster, all you need is a soft, damp cloth or sponge.

Just remember to be gentle while dusting as leaves can be quite delicate and handle them with care to avoid damage.

The Houseplant Dusting Technique

Begin from the base of the plant, wiping each leaf individually. Make sure you clean the undersides as well, where pests and dust commonly collect.

Be patient, and take your time as rushing through this process will only lead to missed spots and potential damage to the leaves.

Frequency and Benefits of Dusting

For most plants, a monthly dusting should suffice. However, plants like succulents might require less frequent cleaning, and those in more dust-prone areas may need a little more attention.

Regular dusting not only keeps your plants looking bright and healthy but allows you to spot any emerging issues at an early stage.

2. Proper Plant Placement and Lighting

Improper positioning and insufficient light levels can lead to dull and unhealthy-looking foliage. However, getting these basics right can make your houseplants thrive and shine naturally.

While different plants have varying sunlight needs, most houseplants benefit from a spot that gets indirect sunlight.

Too much direct sunlight can cause leaf burn, while too little may result in a lackluster appearance.

Moreover, turning your plants occasionally to face the light will ensure even growth and color.

Benefits of Proper Lighting

When subjected to the right amount of light, the chlorophyll production in the plants gets a boost, leading to healthier and vibrant-looking leaves.

Essentially, the right light encourages photosynthesis, which can optimally nourish your plants and unlock their inherent shine.

Frequently Asked Questions

Is leaf shine really harmful to all types of houseplants?

It’s always safer to avoid using them because they can potentially clog the pores, disrupt photosynthesis, and leave a residue that appeals to pests.

It’s crucial to remember that the glossy shine you admire might not be beneficial for your plant’s health.

Is it necessary to apply ahomemade leaf shine on my plants for that aesthetic appeal?

If your plants are clean and healthy, they will naturally shine without any artificial assistance whatsoever. You can dust them off regularly and place them in a suitable location to ensure good health and a natural shine.

Can Iuse any type of oil for the homemade leaf shine recipes?

Not all types of oil are suitable for your plants. Some might end up attracting more dust, blocking pores, or turning rancid, harming your plant in the process.

It’s best to stick with the recommended oils or conduct thorough research before experimenting with another type.

How often should Iapply the homemade leaf shine?

Any leaf shine, homemade or otherwise, should be used sparingly to avoid overdoing it and creating a build-up on the leaves. More isn’t always better.

In terms of frequency, it’s recommended to apply these solutions once every couple of months.

Can these natural alternatives also attract pests to my plants?

Interestingly, these natural alternatives do not tend to attract pests as readily as their commercial counterparts. They lack the heavy chemical components that pests find appealing in commercial leaf shines. However, misapplication or overuse may still pose a risk.

Fiddle and Thorn is a participant in the Amazon Services LLC Associates Program, an affiliate advertising program designed to provide a means for sites to earn advertising fees by advertising and linking to Amazon.com

Take our houseplant survey!

Quickly respond to our 30 second houseplant survey and get 75% off our Complete Houseplant Care eBook!

Take the Survey

No thanks…

Why isn’t my Peace Lily flowering?

Last Updated: May 2, 2022

We have condensed all the main reasons why your Peace Lily might not be flowering into this simple post. Whilst they are unpredictable plants, there are a few things you can make sure of to give your Peace Lily the best chance at producing flowers.

Not enough sunlight

Peace Lilies are fairly low light tolerant plants and don’t mind shady corners. However, if there is too little sunlight you won’t see any flowers growing. Whilst the leaves may be thriving, this doesn’t always mean the conditions are right for flowers.

Try moving your Peace Lily to a spot with more sunlight and you may start to see some blooms coming through after a few months.

Underfertilisation

One of the main reasons plant parents fertilise their houseplants is to produce healthy flowers. If you aren’t fertilising your Peace Lily then doing so could really help your chances when it comes to flowering.

We recommend using a water soluble fertiliser at less than the recommended strength a few times over spring and summer. Remember to never fertilise your Peace Lily (or other houseplants) during winter as they practically hibernate and you definitely won’t see any new flowers growing.

Tap water

If you live in a hard water area then your Peace Lily may be a little sensitive to the tap water. The water contains chemicals such as fluoride that over time will impact your plant’s health and could prevent your Peace Lily from blooming.

There are two ways to avoid this problem that don’t involve you getting a whole purification system installed in your home. Firstly, you can leave a watering can full of tap water standing for over 24 hours. Over that time most of the chemicals with evaporate or sink to the bottom of the watering can. Then the only thing left to do is remember not to pour away the last few inches of water. The other method is to collect rainwater as it is a lot better to use that the treated water out of your tap. Hopefully, over time, this will help your Peace Lily to produce flowers.

Time of year

Peace Lilies tend to only bloom during spring and summer. The warm light months provide the perfect environment for flowering. During autumn and winter your Peace Lily will go dormant and not produce much growth or flowers.

So don’t be alarmed if your Peace Lily isn’t flowering during autumn or winter. Just be patient and you should start to see some come through when the days get longer and warmer.

Watering issues

Another cause of a lack of flowers on your Peace Lily could be watering issues. Peace Lilies like their soil to be moist but not soggy. Over or underwatering will stop it from producing healthy flowers.

If you notice your Peace Lily drooping down then this is often an indication of a lack of water. If the leaves are beginning to turn yellow or brown then this can mean overwatering. Check the moisture levels in the soil to determine if there is an issue with watering and adjust your watering schedule accordingly.

If your Peace Lily has been overwatered then it can take a few months for it to fully recover and produce flowers. This is because the root system has been damaged and needed time to recover and grow back.

Plant age

Another totally natural factor that stops Peace Lilies from flowering is plant age. Young or old plants won’t always flower which is totally normal and doesn’t mean there is anything wrong with the plant, its environment or the care you are giving it.

Those are the most common reasons why your Peace Lily may not be producing flowers/blooms. Remember that Peace Lilies are very unpredictable when it comes to producing flowers so sometimes it doesn’t mean there is anything wrong at all. Check over your plant, the soil and its location in your home to see if there might be something wrong. Otherwise, you may just have to be patient and hope for the best.

If you want to find out more about how to best care for your Peace Lily then visit our Plant Guide or download our How to Care for your Houseplants ebook.

Complete Houseplant Care eBook

Our comprehensive (and rather good looking) eBook that will teach you everything you need to know to successfully care for, and maintain your houseplants!

Buy on

Fiddle and Thorn is a participant in the Amazon Services LLC Associates Program, an affiliate advertising program designed to provide a means for sites to earn advertising fees by advertising and linking to Amazon.com

Take our houseplant survey!

Quickly respond to our 30 second houseplant survey and get 75% off our Complete Houseplant Care eBook!

Take the Survey

No thanks…

Why is my ZZ plant turning brown?

Last Updated: March 17, 2023

ZZ Plants are becoming more and more popular due to their fairly easy care requirements. However, if you find that your ZZ’s leaves are starting to turn brown, it tends to be your plant telling you that something isn’t quite right. But if you have caught the problem early and fix whatever it is that is causing the brown leaves, then your ZZ Plant should return to full health pretty quickly. The most common causes of brown leaves in ZZ Plants are: overwatering, underwatering, chemical sensitivity and a lack of humidity.

Overwatering can quickly lead to brown leaves

If the leaves on your ZZ Plant have turned brown and a little mushy you are most probably overwatering. Another sign of this is if some of the brown leaves are starting to fall off.

Overwatering is one of the main killers of ZZ Plants as you might not always be able to tell before it is too late. ZZ Plants don’t like to be sitting in a lot of water for long periods of time as this can lead to root rot meaning the plant becomes unstable and also cannot get needed nutrients from its root system. Waterlogged soil also gives off quite a damp and musty smell so get up close to your plants every so often to check on this.

If you think that the brown leaves on your ZZ Plant are a consequence of overwatering, check the moisture of the soil immediately and adjust watering accordingly. The most reliable way to do this is by using a moisture meter which will tell you how damp or dry the soil is.

We also recommend replacing the potting soil straight away (rather than waiting for it to naturally dry out) so that the roots can begin to recover. Cut away the rotten roots and brown leaves so that the plant focuses on regenerating healthy growth. You’ll want to use a high-quality potting mix such as this one from Miracle Gro to make sure your ZZ Plant gets the right balance of nutrients.

Underwatering can also cause brown leaves

If your ZZ Plant’s leaves have become quite brown, dry and crispy (starting from the tips) it may be because you have underwatered your plant for a while. Although your ZZ Plant won’t die on you suddenly if you forget to water it every once in a while, or make it go a little longer without water whilst you are on holiday, consistent underwatering will start to have an impact on your plant’s health and brown leaves might only just be the beginning. It is important to keep an eye on the moisture levels of the soil so you know when your plant is ready for watering.

Make sure to check the moisture in the soil before you water your ZZ Plant. There are a few really easy ways to make sure that it definitely needs water. First check the moisture at the top of the soil, if it is still damp then wait a few days before watering again. You can also lift up your ZZ Plant to check the weight of the plant before and after watering. You will then start to be able to gauge how heavy the soil is when it is in need of water. Using a moisture meter is another way to be sure about how dry the soil is.

If you find that your ZZ Plant feels very dry, water it a little every other day for a week. Your first instinct might be to give it loads of water straight away but this can actually be harmful to your plant if the soil goes from one extreme to the other. Yes, plant’s can get shocked too by a sudden change in environment. So instead you want to reintroduce frequent watering for a week or two and this should solve the problem.

Luckily underwatering won’t instantly kill your ZZ Plant so you have time to rectify the problem before it is too late. Trim away the brown leaves and any new growth should hopefully be healthy and luscious green!

Brown spots may be caused by chemical sensitivity

ZZ Plants can actually be a little sensitive to fluoride that you find in tap water. Over time, this may be causing harm to the roots which often shows itself in brown/yellow leaves on your ZZ Plant. If you live in a hard water area, it may be that your ZZ Plant is reacting to high levels of chemicals in the water.

There are a few ways to make sure that the water you give them is free of both these chemicals. Firstly you can leave a jug of tap water for around 24 hours to allow for a lot of the chemicals to evaporate. Another method is leaving a tray outside to collect rainwater to give to your houseplants to make sure chemical levels are lower than the treated water that comes out of your tap. Some plant parents also have a filter system for their houseplant water but we find that the methods above work just as well!

Lack of humidity can also cause brown ZZ Plant leaves

Alongside watering, it is important that you try and increase the humidity for your ZZ Plant get it back to tip-top condition. Often our homes can have quite dry air, especially in the winter months where we often have the heating on for several hours in the day. A lack of humidity in the air can cause your ZZ Plant’s leaves to be a little limp, droop down, and turn dry, brown and crispy from the tips up.

But luckily for plant parents, it can be pretty simple to increase the humidity for your ZZ Plant, here are our top tips:

Misting the leaves

One of the simplest ways to increase the humidity for your ZZ Plant is to mist them with a spray bottle a couple of times a week. We love these amber glass spray bottles from Amazon.

Pebble tray

Place your ZZ Plant over a tray of pebbles with fresh water over the top. Over the day water from the tray will evaporate giving your plant exactly what they’re looking for.

Give your ZZ Plant a shower

To quickly raise the humidity and wash down your plant of any long-standing dust, you can always give them a quick shower. Simply pop them in the shower and wash them down with lukewarm water, this will clean off the leaves and give the soil a good soaking. You will want to keep the water pressure fairly low so you don’t cause any further damage to the leaves or stems.

Move your ZZ Plant to the bathroom

If you’re lucky enough to have great lighting in your bathroom you can move your ZZ Plant in there to increase the humidity. The running water from your showers means your bathroom is probably one of the most humid in your home and a great place for your houseplants to thrive in.

Buy a humidifier

They’re relatively affordable little devices and they make keeping a consistent humidity level so much easier. Most will allow you to place them on a timer so they run on a fixed schedule, and some will even have a built-in monitor so they automatically turn on and off to keep the humidity exactly where you want it. We recommend this humidifier from Amazon – our plants love it!

Want to know more about how to raise the humidity for your ZZ Plant and other houseplants? We have written a whole guide on this.

Why does my ZZ Plant have burned leaves?

If you notice that the leaves on your ZZ Plant look burned, then this is likely due to intense light. Although ZZ Plants are adaptable, they can burn when exposed to direct sun rays during summer.

If it’s only the edges or the tips of the leaves that are burned, then your ZZ Plant may be suffering from over-fertilization. The best thing to do is hold off fertilizing for a few months and reduce the frequency when you resume. If the issue continues to get worse, then replace the potting mix and wash down the root system of your ZZ Plant as this may be suffocating due to excess fertilizer in the soil which can cause burned leaves.


The odd brown leaf on your ZZ Plant isn’t the end of the world but if you find that quite a few leaves are turning brown, or maybe entire areas of the plant are then its definitely a cause for concern. It is important that you are able to diagnose why your ZZ is developing brown leaves early and put a few steps in place to encourage healthier growth. By shifting your watering schedule and keeping a close eye on your ZZ to spot any further signs of unhappiness, it should return to full health quickly. Don’t expect the brown leaves to all of a sudden turn luscious green with a bit of TLC, what’s done is done. Another tip from us is to make sure you don’t pull away the brown leaves as this can harm your plant. Instead, wait for them to drop naturally or carefully prune away the brown leaves with sharp scissors or shears once your ZZ Plant has resumed healthy growth.

Check out our detailed ZZ Plant Care Guide for more information on general care tips and diagnosing other common problems.

Fiddle and Thorn is a participant in the Amazon Services LLC Associates Program, an affiliate advertising program designed to provide a means for sites to earn advertising fees by advertising and linking to Amazon.com

Take our houseplant survey!

Quickly respond to our 30 second houseplant survey and get 75% off our Complete Houseplant Care eBook!

Take the Survey

No thanks…

Why is my ZZ Plant losing leaves? Causes and Solutions

Last Updated: June 15, 2022

ZZ Plants are often given the crown for one of the easiest to care for houseplants. However, this doesn’t mean they can adapt to every environment or are exempt from developing issues (we speak from experience!). It can happen that your ZZ Plant starts losing some leaves which is a sign that something isn’t wrong. Whilst some leaf drop can sometimes be natural, this is quite uncommon for ZZ Plants so it’s important to figure out what is causing the leaf loss.

In this post, we will uncover all of the different reasons why your ZZ Plant might be losing leaves. We will also be going over how to treat the issue and stop it from causing your plant to lose any more leaves!

Overwatering is a common cause of ZZ Plants losing leaves

If your ZZ Plant has started to lose leaves, then the first thing you should consider is overwatering. It is a common cause of a lot of houseplant issues as the issue can be pretty damaging. If the leaves that are falling off your ZZ Plant are dark in colour, or slightly softer than they should be, then your ZZ Plant might be suffering from too much water in the potting mix.

ZZ Plants really don’t like moisture in their potting mix and can very quickly start to rot in waterlogged soil. This starves your plant of nutrients and your ZZ Plant will have to shed leaves as it just can’t keep them alive.

To figure out if overwatering is the cause of the loss of leaves on your ZZ Plant, check the moisture levels in the soil immediately. If the soil is quite waterlogged and clumpy then replace it with fresh dry mix which will allow the plant to start to recover. Trim away the rotten roots and hold off on watering as much as you did before. Avoid waiting for the potting mix to dry out naturally as you are simply risking more damage being done over the next few days. Instead, by replacing the potting mix you’re allowing your ZZ Plant to begin the recovery process and it should stop them from losing any more leaves.

Top tip: remember to always use fresh potting mix as using soil from other plants increases the risk of carrying pests or diseases across your plant.

Moving forward, make sure to decrease either the frequency that you water your ZZ Plant or the amount of water you give it each time. By letting your plant’s soil dry out between waterings, it will reduce the risk of more leaves falling off your ZZ Plant.

It’s important to check the moisture levels in the soil before watering your ZZ Plant again. It’s not as easy as creating a schedule to water once every two weeks as environmental factors such as light levels and humidity mean that the soil will dry out at different rates across the year.

There are a few methods you can use to check the moisture levels in the potting mix to ensure you aren’t overwatering your ZZ Plant again in future, causing it to start losing leaves again.

Firstly, if your ZZ Plant is still fairly small and you can lift it no problem, then we recommend getting into the habit of lifting before and after watering. Over the next weeks, you’ll get a good understanding of how light your plant becomes when the potting mix is dry.

Another method to test the soil moisture is the finger or chopstick method. If the chopstick comes out clean, then the potting mix is dry. If there is still soil attached to the chopstick then wait a few days before watering your ZZ Plant.

The final method to test the moisture levels in the soil is to invest in a moisture meter. These literally tell you how damp or dry the soil is so you can accurately water your ZZ Plant and prevent any further issues such as your plant starting to lose leaves again.

If your ZZ Plant is losing leaves, it might also be due to underwatering

Funnily enough both over- and underwatering can lead to your ZZ Plant losing leaves, though underwatering won’t have that effect as quickly. It will take several months of improper watering before your ZZ Plant is forced to lose leaves due to a lack of moisture as they do prefer dry soil.

Here’s how to spot if your ZZ Plant is underwatered:

  1. Leaves are dry and crispy

    If the leaves that are falling off your ZZ Plant are dry and crispy to touch and look very dehydrated, then the problem is probably a consistent lack of water.

  2. The potting mix is dry

    An easy way to see if your ZZ Plant is losing leaves due to a lack of water is by taking the plant out of its pot and inspecting the potting mix. If the soil feels very dry to touch, almost like dust, then your plant needs more water.

  3. The leaves that are falling off your ZZ Plant are light brown

    When your ZZ Plant is underwatered, the foliage will sometimes turn light brown in colour. This tends to start off from the edges and moves inwards as the issue progresses.

  4. Use a moisture meter

    Just like with overwatering above, using a moisture meter will help figure out how dry the potting mix is and if you need to water more to stop your ZZ Plant from losing any more leaves.

How do I fix an underwatered ZZ Plant that is losing leaves?

Now that you’ve established that your ZZ Plant is losing leaves because of a lack of moisture in the soil, it’s important to solve the issue properly. The best way is to lightly water your plant once a day for a week. This will gradually increase the moisture levels in the pot. ZZ Plants won’t like it if their soil goes from bone dry to super soggy all at once. It can cause some environmental shock and this can actually mean your ZZ Plant starts losing even more leaves as a result. This is why watering very lightly once a day for a week will get your plant back on track.

Over-fertilisation can cause leaves to fall off your ZZ Plant

Most generic plant foods and fertilisers will recommend a dosage for your plants, but there is no way that this can be accurate for every individual plant. There are so many factors that play into how much fertiliser plants need and can handle; from size, age, light level, temperature and the list could go on.

Because of this, we always recommend starting with a fraction of the recommended amount and slowly increasing a little bit if your plant responds well.

ZZ Plants don’t need much fertiliser to thrive so the recommended amount on the bottles is often far too much for your ZZ Plant and can result in your plant losing leaves. Alongside leaf drop, too much fertiliser can also causes yellow or brown leaf tips/ edges so inspect the leaves that are falling off your ZZ Plant to see if you can spot these.

To solve the issue and prevent your plant from losing any more leaves, flush out the soil or replace the potting mix entirely. We recommend the latter if possible as it avoids any potential risk of root rot if the soil is being flushed through.

Then moving forward, to prevent the issue from happening again, stay away from fertiliser for about a year and gradually reintroduce it in very small quantities.

Remember that you don’t have to fertilise your ZZ Plant at all. You’ll see plenty of luscious growth without it (as long as your plant gets the right care) and you avoid the risk of your ZZ Plant losing leaves.

Those are the 3 main reasons why ZZ Plants lose their leaves. It’s important to look out for any other signs of unhappiness as these will also help you properly diagnose the issue. More often than not, leaf drop is accompanied by something else so keep a close eye on your plant. The sooner you are able to spot any issues, the easier it will be to solve them and get your plant back to full health. By giving your plant a good check each time you water, you’re able to spot any issues as they crop up rather than waiting until the problem has properly taken a grip of your plant before noticing.

Take a look through our ZZ Plant care guide for more information on how to keep your plant thriving.

Fiddle and Thorn is a participant in the Amazon Services LLC Associates Program, an affiliate advertising program designed to provide a means for sites to earn advertising fees by advertising and linking to Amazon.com

Take our houseplant survey!

Quickly respond to our 30 second houseplant survey and get 75% off our Complete Houseplant Care eBook!

Take the Survey

No thanks…

Why is my Zebra Plant drooping?

Last Updated: September 20, 2022

Loved for their luscious dark green and white veined leaves, these plants can be a little fussy if things aren’t exactly how they like it. This can result in your plant beginning to droop down as a sign of unhappiness. There are a few different factors that can cause a drooping Zebra Plant, so it’s important to go through each possible issue one by one to see what fits your plant best.

Below we will go over all of the main causes of a drooping Zebra Plant as well as how to effectively treat the issue and prevent it from causing any more damage to your plant in future.

Underwatering is the most common cause of a droopy Zebra Plant

Consistent underwatering can lead to a variety of serious issues if not solved in time, but even just the occasional underwatering can result in drooping leaves. Alongside a drooping plant, it can lead to crispy leaves, brown spots or patches and leaf drop if the issue progresses for a long time.

Before you start watering your Zebra Plant more deeply or frequently, we recommend taking your plant out of the pot and seeing how dry the potting mix feels. You want to be sure that the issue is being caused by a consistent lack of moisture before you change anything about your care routine.

The best way to bring your underwatered Zebra Plant back to full health is to water your Zebra Plant plant a little bit once a day for a week. Drowning it in water may cause it to become shocked and stressed which can cause further issues beyond the initial droopy leaves.

After a week you want to go back to a more normal care routine, making sure to not forget to water and adjust your schedule if necessary. A moisture meter will be super useful to have if you don’t already as it will tell you how moist the soil is and allow you to establish a good watering routine.

A droopy Zebra Plant can also indicate overwatering

Similarly to underwatering, too much water can actually also make your Zebra Plant’s leaves droop down and it can be a much more worrying issue. This is because waterlogged soil can very quickly rot the roots which is one of the biggest plant killers. You want to make sure that the potting mix has fully dried out before watering again to avoid root rot.

How do I know if overwatering is the cause of the drooping leaves?

Luckily, a lot of the signs for overwatering are quite different to underwatering so you just need to know what to look out for to properly diagnose the issue.

  1. Leaves are soft and mushy

    If you notice that the leaves on your Zebra Plant are soft and mushy, as well as droopy, then overwatering is the most probable cause.

  2. There are dark patches on the leaves

    Underwatering will cause the leaves to turn quite light brown and crispy in colour, whereas overwatering causes dark brown soft patches across the leaves.

  3. The potting mix is waterlogged

    If you notice the potting mix is soggy and clumpy, overwatering is probably the cause of your Zebra Plant’s drooping leaves.

  4. The potting mix will smell

    If you suspect overwatering, we recommend getting up close to your plant and smelling the soil. Waterlogged soil gives off an unpleasant musty and damp smell.

How do I fix an overwatered Zebra Plant?

If overwatering is definitely the cause of your Zebra Plant’s drooping leaves, then you must act quickly to prevent any more damage. Take your Zebra Plant out of its pot and replace any waterlogged soil. You also want to use this opportunity to trim away any rotten roots.

Going forward, make sure to only water your Zebra Plant when the potting mix has fully dried out. This will help avoid the problem recurring and help keep your plant happy, healthy and not drooping!

You may also want to use a self-watering pot to make sure that your plant only gets the water it needs. They help to avoid both under and overwatering and are definitely worth it to stop your drooping Zebra Plant leaves turn into something more serious.

Low temperatures are another cause of a drooping Zebra Plant

If you have inspected the potting mix of your Zebra Plant, and analysed your watering schedule and just can’t be sure that watering issues is the cause of the drooping leaves, then it may be cold temperatures that are to blame.

Zebra Plants thrive in warm temperatures and they’ll struggle in homes with cold drafts. You may not notice the cold air coming through cracks in doors and windows but if your Zebra Plant is right next to them then the constant stream of cold air from outside can really shock and damage the plant. You also want to watch out for air conditioning vents in summer as these can also be pretty damaging to your plant.

If your Zebra Plant is living in a cool room, it’s also more at risk from overwatering and root rot. Your plant won’t need as much water as the soil will take a lot longer to dry out. This is the perfect mix for problems such as root rot to occur which is why you should be extra cautious when it comes to caring for your plants in winter or in cooler areas of your home.

Those are the most common reasons why Zebra Plants can start drooping. The key to successfully treating the issue quickly is by catching it early. This is why we recommend checking over your plants at regular intervals so you can spot any early warning signs that something might be wrong. Once you’ve diagnosed the issue and started treating it, keep a close eye on your Zebra Plant to ensure things are moving in the right direction and it is slowly stopping drooping.

Check out our Zebra Plant care guide for more tips and tricks to keep your plant happy and thriving!

Fiddle and Thorn is a participant in the Amazon Services LLC Associates Program, an affiliate advertising program designed to provide a means for sites to earn advertising fees by advertising and linking to Amazon.com

Take our houseplant survey!

Quickly respond to our 30 second houseplant survey and get 75% off our Complete Houseplant Care eBook!

Take the Survey

No thanks…