How to Grow and Care for a Monkey Mask Plant

Last Updated: May 15, 2023

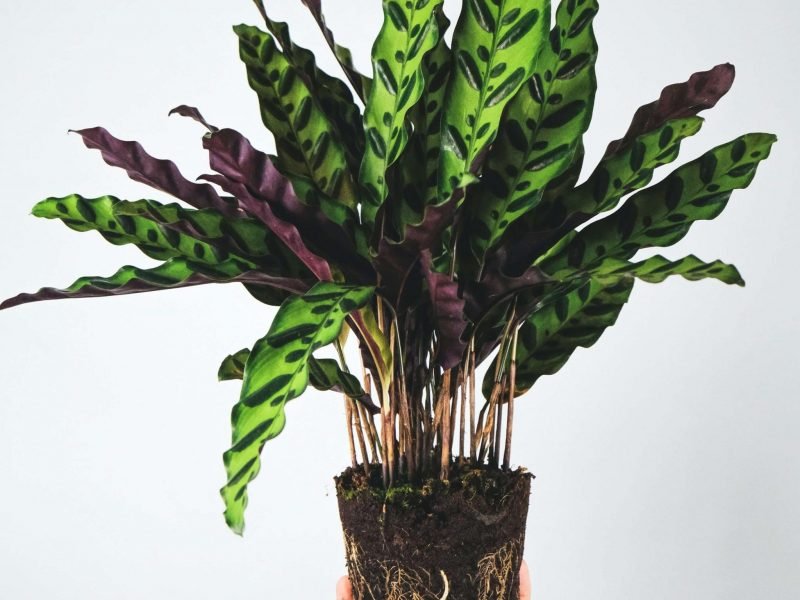
Commonly known as either the Monkey Mask Monstera, Swiss Cheese Vine or Five Holes plant, the Monstera Adansonii are becoming more and more popular in the houseplant world and we totally understand why! Their unique leaves and ability to either be a trailing plant or a tall one means it’s versatile while also being one of the prettiest houseplants around.

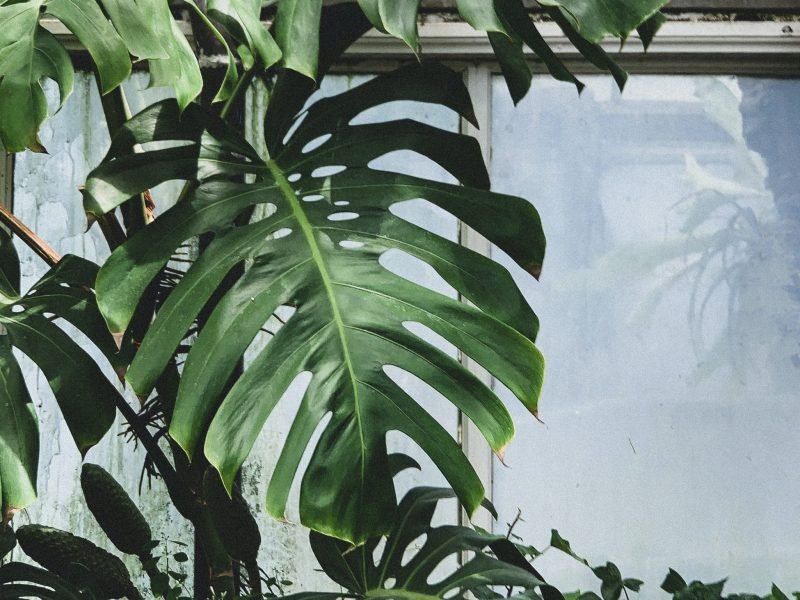
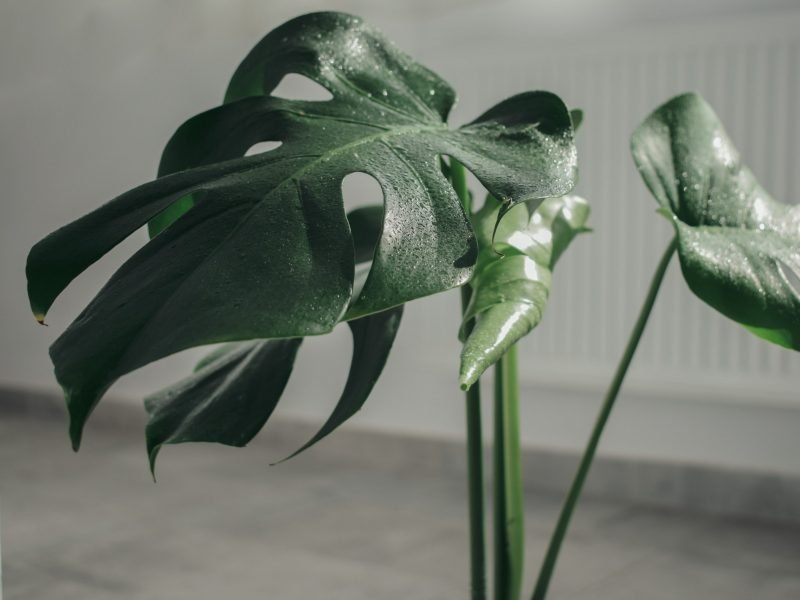
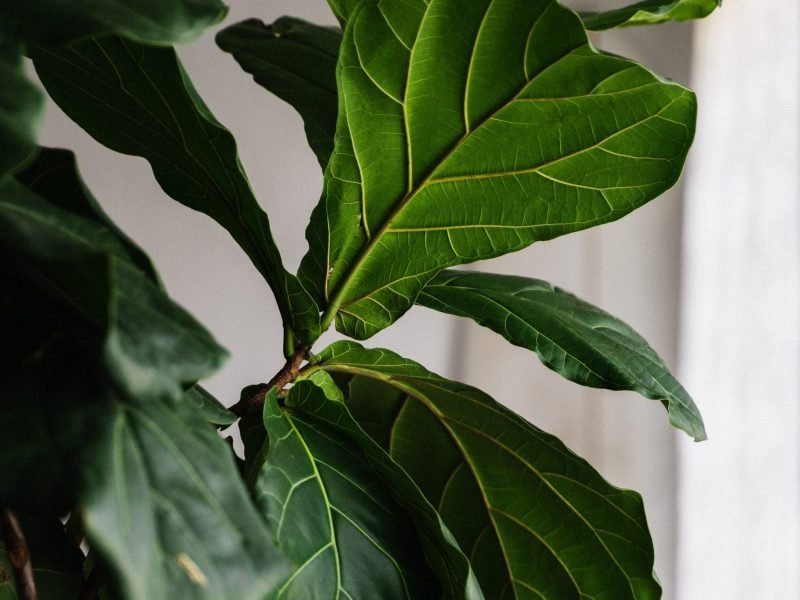
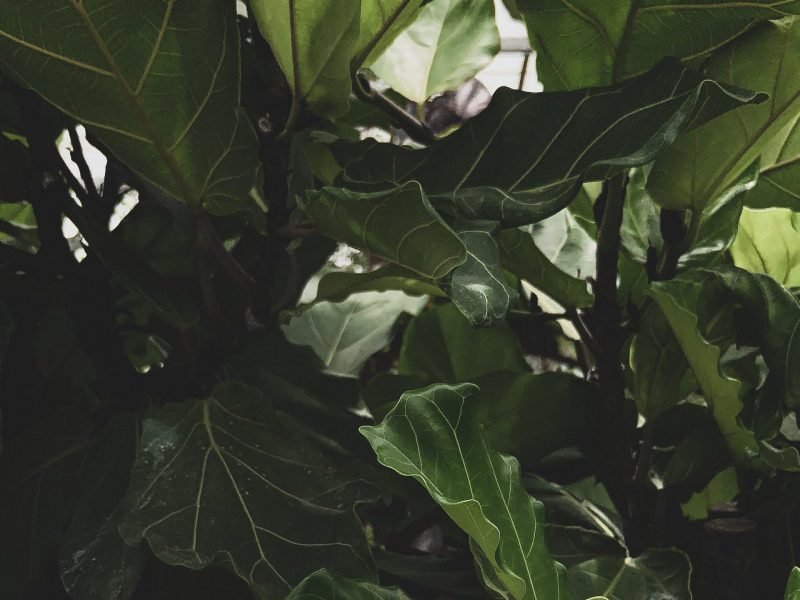
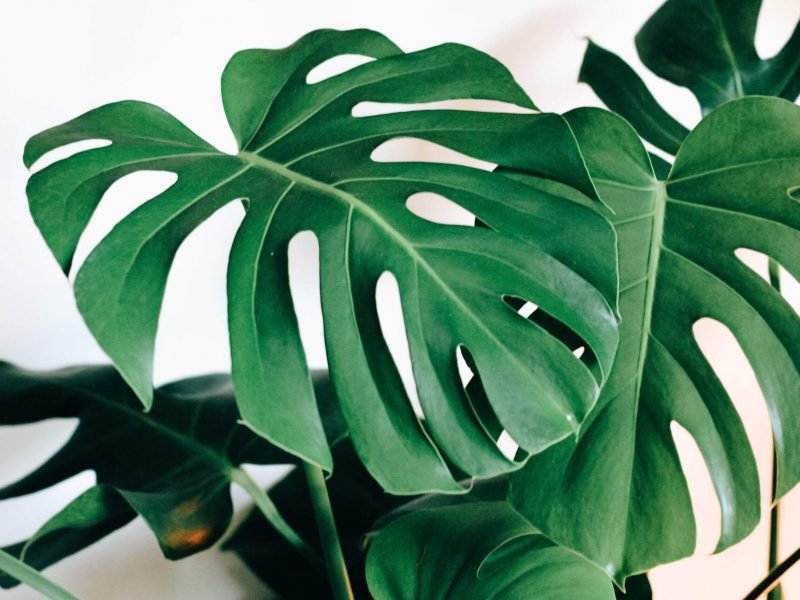
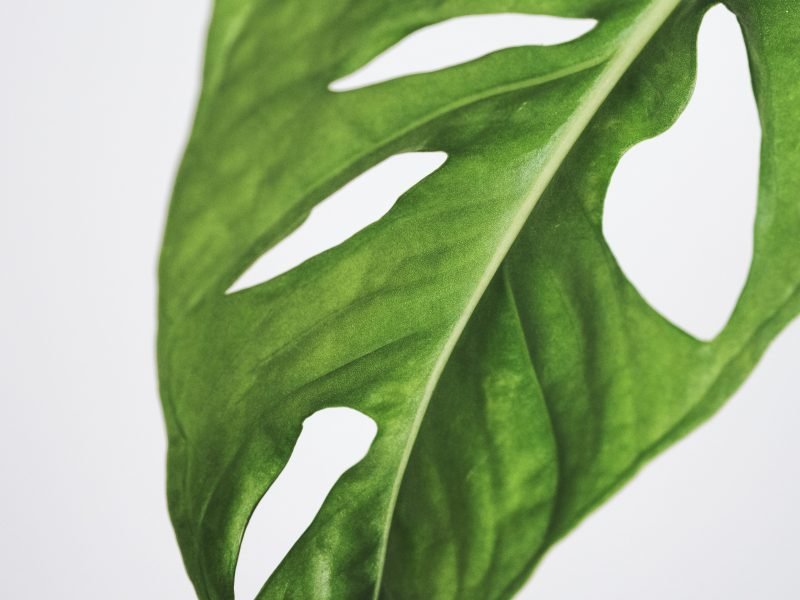
Native to the tropics of South and Central America, the Monkey Mask Monstera is mostly known for its foliage. What makes this plant quite unique is that its leaves have holes in the centre and the edge of the leaf is solid. This is different to the famous Monstera Deliciosa, which often has splits right to the edge of the leaf.

These plants have some specific requirements when it comes to keeping them happy but once you nail down a few particularities, they can adapt to and thrive in the majority of homes.

Below you will find all the information you need to care for your Monkey Mask Plant and make sure that it rewards you with luscious new foliage.

How to care for a Monkey Mask Monstera

There are a few essential things to know to keep your plant happy and the most important factor for this variety is humidity. These plants have very delicate thin leaves which means high humidity is essential to prevent dry leaf tips and edges. Get into the habit of misting your Monkey Mask Plant at least a few times a week and use a humidity monitor to keep track of any major fluctuations before they cause any issues with your plant.

The next important factor is allowing the soil of your Monkey Mask Monstera to fully dry out between waterings. If you aren’t doing this then the risk of root rot will dramatically increase. This can cause issues such as yellow leaves, soft droopy vines and a lack of new growth.

The third pillar of care is lighting and with these types of plants, it’s actually really simple because they can tolerate and adapt to pretty much all light levels apart from intense direct sunlight. You will see slower growth in lower light levels and your plant may lose some of the holes but it can survive.

Monkey Mask Monstera Overview

Origin: Central and South America

Plant Family: Araceae

Difficulty Level: Medium

Appearance: Thin delicate leaves with holes forming from the main vein.

Height and Size: Can trail up to 3m

Growth Rate: Medium

Flowering: Can produce white flowers, however, this is rare and are often insignificant.

Pruning: Do not need regular pruning so only remove leaves when there is an issue.

Cleaning: Dust the leaves every few weeks to avoid build-up.

Light Requirements: Bright but indirect light

Water Requirements: Always ensure potting mix has dried out

Best Soil: Well-draining potting mix

Ideal temperature: Average room temperature

Fertilizing Routine: Weak fertilizer during the growth period only

Ideal Humidity Level: High humidity is essential.

Propagation: Through stem cuttings.

Repotting Frequency: Infrequent as they like to be somewhat rootbound.

Toxicity: Mildly toxic to pets and humans

Risk of Pests: Spider mites and scale insects are the most common.

Common Problems: Discolouration of the leaves caused by sunlight or watering issues.

Origin of a Monkey Mask Monstera

They are native to the tropical forests and humid jungles of Central and South America.

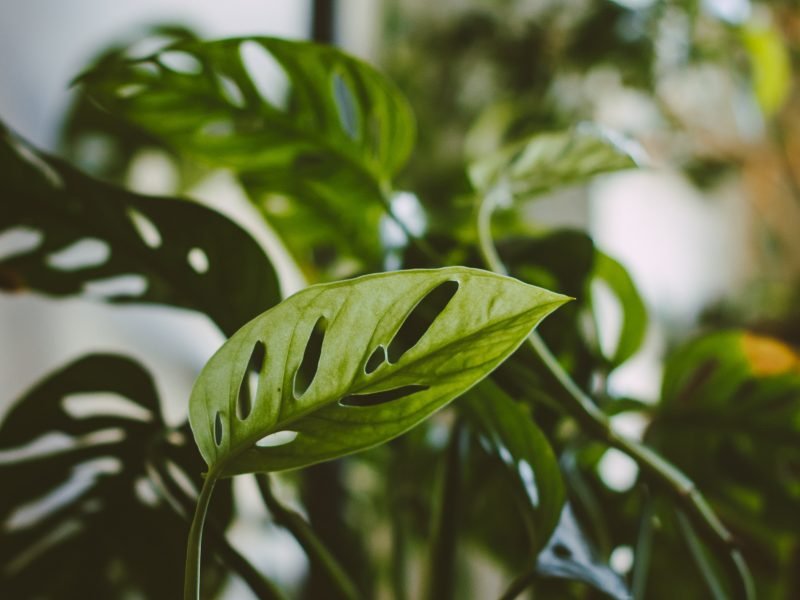
Monkey Mask Monstera Appearance

You can spot one of these plants mainly by the holes in their leaves, which are in the middle rather than the edge of the leaf. Monkey Mask Plants are smaller than their famous relative the Monstera Deliciosa and grow nicely as trailing plants.

Monkey Mask Monstera Height and Size

These plants can grow up to 3 metres in length but this will take several years and your plant must be in the ideal environment. Although they will naturally grow as trailing plants, the Monkey Mask can be propped up using a moss pole and trained to grow vertically if you prefer.

Growth Rate of a Monkey Mask Monstera

These plants aren’t fast-growing but also aren’t slow growing, they fit somewhere in the middle. During the growth months of spring and summer, you’ll be rewarded with plenty of new growth if the environment and care are right. However, expect your plant to be dormant all autumn and winter. This is nothing to be concerned about, it’s just natural for houseplants to stop growing in the darker, colder months.

Cleaning your Monkey Mask Monstera

They are prone to a build up of dust on their leaves, which not only stops the light from getting to the plant but also makes the leaves look a little dull. We recommend carefully wiping the leaves down with a damp cloth every month or two to keep the leaves looking and feeling fresh.

When wiping the leaves, you want to be very careful that you don’t damage or rip them as they are particularly thin in places. Using a feather duster can be beneficial here.

Monkey Mask Monstera

Monkey Mask Monstera

Light Requirements for a Monkey Mask Monstera

One thing that makes caring for these plants quite easy is that they can survive in a range of light conditions. You want to make sure to stay away from intense direct light as this can quickly scorch the leaves and dry them out as they are so thin.

When growing in lower light conditions, plant growth will be slower and you may notice that new leaves are more solid and have fewer holes. This is your plant’s way of maximising the amount of light it is exposed to.

Water Requirements for a Monkey Mask Monstera

Make sure that you allow enough time for the soil to dry out between waterings as this will over time cause root rot. Using a moisture meter to determine when to water your plants is the best way to track moisture levels as we recommend against strict watering schedules. There are so many factors such as plant maturity, pot size and temperature that impact how much you need to water your plant so using a moisture meter can help track these differences.

We recommend watering your Monkey Mask Monstera once a week in the growth months and fortnightly over winter but use this as a guide and adjust where necessary.

Best Soil for a Monkey Mask Monstera

Use a well-draining potting mix for your plant to ensure that excess water can flow through the soil. If the soil doesn’t already contain some perlite, then we recommend adding this in to help with drainage but also aeration of the soil.

The ideal temperature for your Monkey Mask Monstera

Luckily for us Monkey Mask Plant owners, they are not too fussed about temperatures. As long as your home doesn’t reach below 10ºC for extended periods of time, you should be fine.

But it’s not just cold temperatures that you need to be concerned about when it comes to keeping your plant thriving as hot air can really quickly dry out their leaves. You want to make sure that you keep your plant at least 1 meter away from cookers, radiators or heating vents. Hotspots can also form quickly around windows that receive a lot of sunlight in summer so monitor the environment for these as well.

We highly recommend buying a digital thermometer if you don’t already have one as they will help you spot fluctuations as they happen.

Monkey Mask Monstera Fertilizer Requirements

As with most other houseplants, you should only feed your Monkey Mask Plant in spring and summer as they will go through a more dormant growing period in the colder months.

We recommend using a fertiliser at half strength to avoid damaging the root system. Sometimes the amount listed on the bottle can be too much for your Monkey Mask Plant as they have a very delicate root system and thin leaves. This liquid feed is our favourite and is suitable for most houseplants.

Ideal Humidity Level for your Monkey Mask Monstera

It is important that you regularly mist the leaves of your Monkey Mask Plant to increase the humidity levels as they thrive in high humidity. As they are native to the humid jungles of Central and South America, if you can mimic this environment a little bit, you will dramatically increase the happiness of your plant.

Mist your plant using a spray bottle, or invest in a humidifier for a more regular boost to the humidity level.

These plants also grow really well in bathrooms and kitchens due to the increased levels of steam from showering and cooking so if there is a spot that receives a good amount of natural sunlight in either of these rooms, this can be a great option for your plant.

Monkey Mask plant propagating in water

Monkey Mask Monstera propagating in water

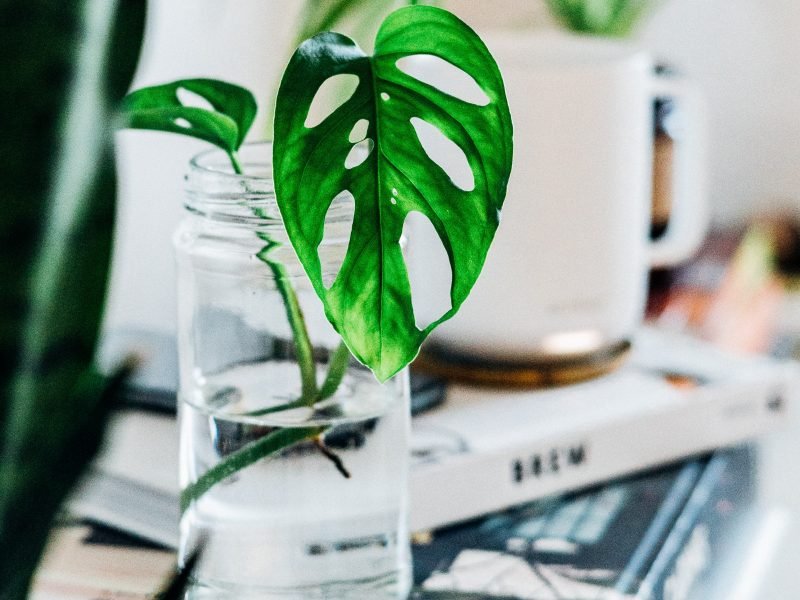
Propagating your Monkey Mask Monstera

The easiest and most successful method of propagating these plants is through stem cuttings. We have a whole guide on propagating your Monkey Mask so check that out for more information.

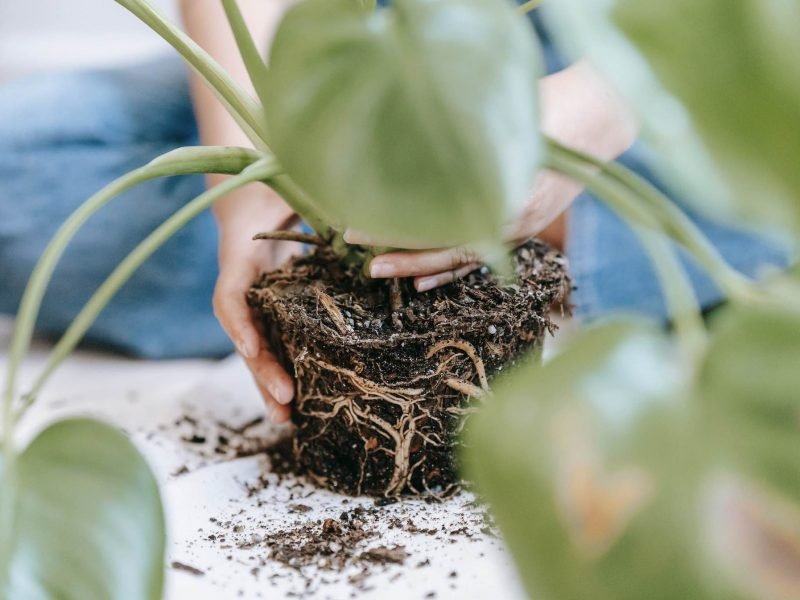
Repotting your Monkey Mask Monstera

You don’t need to worry about repotting for a few years as Monkey Mask Plants actually like being a little bit root bound. If they are in a pot that is too big for them, it can cause your plant to become unstable. It also increases the risk of root rot as the soil will take longer to dry out when there is more of it.

Aim to repot your plant every 2 years, or sooner if you spot signs that it is severely root bound. These include roots coming out of the drainage holes or the top of the pot and stagnant growth in summer.

Flowers on a Monkey Mask Monstera

As they are part of the Araceae plant family, the Monkey Mask Monstera can occasionally produce white flowers. However, this is extremely rare when grown as a potted plant outside of its natural environment.

Pruning your Monkey Mask Monstera

You don’t need to be regularly cutting the vines back so there are only really two reasons why we would prune a Monkey Mask Plant. Firstly, if there are issue areas on your plant – so we are talking brown or yellow leaves here. Once the majority of the leaf has discoloured, it’s no longer serving your plant and it’s best to remove it.

The second reason you might want to get the pruning scissors out is if the vines have become particularly leggy. This can happen over winter or in low-light areas and pruning these parts off can help your plant look a little fresher.

Monkey Mask Plant Leaf

Monkey mask plant leaf

Monkey Mask Monstera Toxicity to Humans and Pets

Unfortunately, Monkey Mask plants are mildly toxic if ingested or if they come into contact with your eyes so it is really important that you keep the plant away from pets and small humans that might try and eat parts of the leaves.

If your pet does nibble at the leaves, they will often be fine if it’s only a small part that they ingested. However, because of the toxicity of Monkey Mask Plants, we do still recommend that you seek advice or treatment from a veterinarian to be sure.

As these plants are toxic, they can cause mouth, eye, throat and stomach irritation if ingested and can also cause vomiting.

Treating and Preventing Pests

Spider Mites and Scale Insects are the most common pests that you will find on a Monkey Mask Monstera.

If you do spot pests then it’s important to isolate your plant from all other houseplants, remove the worst affected areas to curb the infestation, shower your plant and treat it with an insecticide.

You also want to make sure that you look over any plants that were close by as pests can spread across houseplants quite easily.

Monkey Mask Plant in sunlight

Treating Common Problems

One common issue that you may come across with these plants is brown leaf tips and edges. As they have very delicate foliage, it’s not uncommon for parts to dry out a little bit. It can be unavoidable as creating a humidity level as high as that of the jungle is impossible and uncomfortable. However, regular misting will help to avoid this problem as much as possible.

Yellow leaves on your Monkey Mask Plant indicate that the plant has either received too much light (most probably direct sunlight) or the soil is waterlogged due to overwatering. Use a light meter or a moisture meter to determine if the environment is right.

If you find that the potting mix is waterlogged then this is most probably the cause of the yellow leaves on your Monkey Mask Plant. We recommend replacing the soil immediately and trimming away any rotten roots so your plant can begin to recover. Moving forward, cut back on how frequently you water your plant as you want the potting mix to dry out to prevent any more yellow leaves from developing.

If it’s direct sunlight that is scorching the leaves of your Monkey Mask and causing them to turn yellow, move your plant to a shadier spot in your home.

Fiddle and Thorn is a participant in the Amazon Services LLC Associates Program, an affiliate advertising program designed to provide a means for sites to earn advertising fees by advertising and linking to Amazon.com

Take our houseplant survey!

Quickly respond to our 30 second houseplant survey and get 75% off our Complete Houseplant Care eBook!

Take the Survey

No thanks…

How to give your houseplants a shower

Last Updated: February 27, 2023

Like anything around the house, your plants will need to get a good cleaning every now and then. Over time dust can collect on the leaves of your houseplants making it difficult for them to breathe properly, in extreme cases it dusty leaves can actually hinder the plants ability to properly photosynthesise — which we just shouldn’t let happen to our little leafy friends.

How to shower your houseplants

We recommend you give your plants a thorough cleaning around twice a year— the easiest and quickest way to do that is in the shower. To shower your houseplants simply place them into the shower and spray them down with lukewarm water, you don’t them to get chilly but you also aren’t looking to cook them. Make sure that you don’t have your shower on full pressure as this can damage the leaves and stems. After you’ve washed down all of the leaves (and the bottoms of the leaves too!) it’s best to give them a good amount of time to dry off — otherwise, you’ll be dealing with dirty drops of water all around the house too…

If you’ve not got a shower or you’ve just got far too many plants to fit in, you can always take them outside and wash them down with a hose — just make sure that you can control the flow as you don’t want to be blasting any gentle leaves too hard. If all else fails, or you just want to go for a more natural approach, you can just pop your houseplants outside in the rain. This likely won’t clean them off quite as well but it’ll definitely help out, just remember to bring them back inside if it starts to get too cold. Another thing to remember if you are placing your plants outside is the wind, try to place them in a slightly sheltered spot as their leaves and stems can be damaged if blown about a lot or if they fall over.

As you don’t need to wash your plants down so thoroughly that often — we’d recommend that you wipe down your large-leaved plants every couple of months. It prevents a build-up of dust and makes them look shinier. This means you might not have to give them a shower at all, and it gives you an opportunity to properly look at the new growth on your plants and how they’re developing over time. It also means you might spot any warning signs early if your plants are unhappy in their environment or spot any pests that might be starting to develop on the leaves.

Complete Houseplant Care eBook

Our comprehensive (and rather good looking) eBook that will teach you everything you need to know to successfully care for, and maintain your houseplants!

Buy on

Why should you give your houseplants a shower?

Other than the obvious cleaning advantages of washing away all of the collected dust, showering your houseplants can also reduce the risk or help remove any pests. It’s well known the pests such as Spider Mites hate the humidity brought around by showering your plants and will either be washed away by the water or die afterwards.

It’s can also be important if you have more tropical species and live in an area that often becomes cool and dry — it’s a great way for tropical plants to recover some moisture and also helps in keeping up the required humidity levels.

Fiddle and Thorn is a participant in the Amazon Services LLC Associates Program, an affiliate advertising program designed to provide a means for sites to earn advertising fees by advertising and linking to Amazon.com

Take our houseplant survey!

Quickly respond to our 30 second houseplant survey and get 75% off our Complete Houseplant Care eBook!

Take the Survey

No thanks…

How to get rid of Spider Mites

Last Updated: December 31, 2021

There’s nothing worse than finding out your houseplant is infested with tiny Spider Mites. The best ways we have found to remove them are to keep the humidity high, spray down the leaves with water or a neem oil product, shower the plants or use a simple insecticide spray.

How to identify spider mites on your houseplants

You’ll have to start off by finding out if Spider Mites have infested your houseplant. The best way to identify Spider Mites as the culprits of your houseplants illness is by looking under the leaves for white webbing. Spider Mites, as the name might suggest, are a web spinning arachnid so there’s one telltale sign that they are present on your houseplant.

One other symptom you might notice is yellow or brown spots on the leaves of your houseplant. The mites will eat the chlorophyll from the leaves removing the normal, healthy green colour and leaving behind yellow or brown areas.

Complete Houseplant Care eBook

Our comprehensive (and rather good looking) eBook that will teach you everything you need to know to successfully care for, and maintain your houseplants!

Buy on

How to prevent spider mites

The best way to deal with Spider Mites is to never get them at all, luckily there are some really simple ways to prevent them from infesting your houseplants. The keys points are easy; Water your plants regularly, maintain good humidity (don’t let things get dry) and keep the leaves clean by dusting or showering your plants.

As always good watering habits will help a tonne. Getting into a routine of watering your plants on a regular basis will keep the soil moist, humidity a little higher and will stop leaves from drying out quickly. Spider mites love dry places so keeping all of your plants watered correctly is a great start to prevention.

Raising the humidity will also be a great helper. There’s a couple of really simple ways to do this like placing your plants over a tray of pebbles and adding some water, the water will slowly evaporate and cause an increase in humidity. If you’re looking for a quick and easy solution you can always mist down the leaves with a spray bottle, just remember to do this every few days to maintain the humidity.

Dusting the leaves of your plants often is a great way to make sure that you wipe away any sneaky mites that have made their way in. It also helps in letting your plants leaves breathe properly, which in turn reduces the risk of them drying out quickly. You can always give your houseplants a shower if you haven’t dusted them in a while – check out our post all about how to shower your plants to learn more.

It’s also important to quarantine any new plants that you bring into your home by isolating them for a little while. By giving them a couple of weeks away from any of your other plants you’ll get the chance to see if they have any pests or infections before they get the chance to spread around.

Best ways to remove spider mites

As soon as you’ve identified Spider Mites on your houseplant you should isolate it from any other plants nearby, and start checking for other infested plants. The mites can make their way onto any surrounding plants quickly and multiply extremely quickly to take over a healthy plant.

Once you’ve isolated the infected plants it’s time to raise the humidity and do what you can to get the mites gone fast. If left too long you’ll have to say goodbye to your beloved leafy friends, so it’s key that you get moving quickly. Start off by removing as many of the infected leaves as possible and binning them straight away. After that I’d recommend getting the plants into the shower and washing down all of the leaves with slightly cool water, the lower temperature will stop any of the leaves drying out and will help in washing away any of the mites that are left behind. You can find out a little more about how to give your houseplant a shower in our dedicated post.

You’ll want to be watering the plants as often as possible (without overwatering), watering little and often keeps the surface of the soil moist so as to help with raising the humidity. Misting down the leaves every day is another great way to keep up the humidity.

It might be worth picking up an insecticidal spray and giving your plant a good spray down, this should kill any of the spider mites that are left on the plant. In future, you can create a homemade prevention spray using a teaspoon of neem oil, a teaspoon of normal liquid soap and a litre of water. Spraying your plants down with this after washing the leaves should help in preventing any resurgences in the mite population.

So there are a variety of ways to deal with Spider Mites, but it’s most important to prevent any infestations in the first place and act very quickly if you identify them among your plants. These simple tips should give you the best chance of preventing and removing spider mites from your beloved houseplants.

Fiddle and Thorn is a participant in the Amazon Services LLC Associates Program, an affiliate advertising program designed to provide a means for sites to earn advertising fees by advertising and linking to Amazon.com

Take our houseplant survey!

Quickly respond to our 30 second houseplant survey and get 75% off our Complete Houseplant Care eBook!

Take the Survey

No thanks…

How to fix an overwatered Monstera

Last Updated: March 4, 2023

Overwatering is very easy to do because it is hard to know exactly how much water your Monstera needs as there are so many factors at play. From sunlight levels, to the time of year and even how long your heating is on. If you fear you may have overwatered your Monstera then try not to worry. If you catch the problem fairly early, your plant won’t die on you suddenly. Even if there is only one healthy leaf left, there is still hope.

Signs of an overwatered monstera:

You want to be really sure that your Monstera is overwatered before you take steps to fix it. Here are the most common signs to look out for:

  • Yellow/ brown leaves
  • Mushy leaves that are soft to touch
  • Musty smell coming from the soil
  • Water droplets on the leaves (paired with one or more of the above)

How to fix your overwatered Monstera plant

Step 1: Remove from pot

The first step to fixing your Monstera is to 100% make sure that is has been dramatically overwatered. You want to carefully take it out of its pot so you can inspect the root system and see how damaged the plant is. Because overwatering causes root rot, the problems will start below the soil and will only start to show on the leaves a few days/ weeks later.


Step 2: Remove the potting soil

If the soil is waterlogged then you will need to remove it and replace with fresh dry mix. Carefully remove as much as you can from the root system to it can begin to recover. The best way to do this is to carefully loosen the roots and run your fingers through them shaking them gently.

Step 3: Trim off rotten parts of the plant

Now that you have removed most of the old waterlogged soil you should be able to see the root system better. We recommend trimming away all of the rotten roots and dead leaves on your Monstera. This will encourage your plant to produce new healthy growth. You don’t want your Monstera to waste energy trying to keep the dying roots and leaves alive. As long as there is around 40% of the original root system in tact, your plant should recover fine.


Step 4: Replace with new potting soil

Now that only the healthy parts of the root system remain, it’s time to put your Monstera back in its pot. There are two things to look out for when replacing the potting mix. Firstly, you want to make sure the pot has good drainage holes. This will hopefully decrease the risk of overwatering in the future. You can also place a few stones at the bottom of the pot which will aid drainage and stop the holes being blocked by clumpy soil. And secondly, you want to use a well draining potting mix. Choose one with perlite in as this aids with drainage and aeration of the soil.

Put a few handfuls of potting mix at the bottom of the pot before placing your Monstera back in the pot. This gives it space to grow into.

Step 5: Make sure it’s in the right spot

Before returning to normal care, it’s important to take a look and see whether the spot your Monstera is in is actually a good one. Overwatering can be really easily done when your plant isn’t getting enough light, or the temperature is too cold. These factors mean your plant won’t take up as much water and the soil will stay quite soggy.

Monsteras need bright, indirect sunlight as well as a warm room and humid air. You can find out more about the ideal spot for your plant in our Monstera care guide.


Step 6: Reintroduce watering slowly

You want to be really careful when reintroducing watering. The root system is still quite sensitive and will be recovering from the shock. But don’t be afraid to give it water as underwatering can cause a whole load of issues too!


Step 7: Check moisture levels

The best way to prevent overwatering your Monstera again in future is to regularly check the moisture in the soil before watering. We recommend a few different methods which all work really well. Firstly the finger test where you check how damp the top of the soil feels. Secondly, the lift test where you see how heavy your plant feels (not great for mature Monsteras so be careful!).

Lastly, the moisture meter method which is the most trustworthy way to know how moist the soil is. They are affordable little devices that you put into the soil and it gives a reading. We recommend this one from Amazon.

Step 8: Hope for the best

If you have followed all the steps so far then there is a good chance that your Monstera will survive the overwatering. But there is an element of just crossing your fingers and hoping for the best. Keep an eye on any changes that happen over the next few weeks in case there are any more signs of unhappiness but more often than not your Monstera will recover well and produce growth pretty soon!


Those are the key steps to fix an overwatered Monstera. Once it has fully recovered continue to keep an eye on how much water you are giving it to avoid the problem happening again. We have a full 34 page chapter to watering in our downloadable ebook if you want to learn more.

Fiddle and Thorn is a participant in the Amazon Services LLC Associates Program, an affiliate advertising program designed to provide a means for sites to earn advertising fees by advertising and linking to Amazon.com

Take our houseplant survey!

Quickly respond to our 30 second houseplant survey and get 75% off our Complete Houseplant Care eBook!

Take the Survey

No thanks…

How to diagnose natural leaf drop in houseplants

Last Updated: August 2, 2022

If you’ve noticed that your houseplant has started to lose some leaves then you might be starting to panic a little and worrying that it’s slowly dying. Whilst leaf drop is a symptom of a range of issues, some loss of leaves is natural on houseplants and is absolutely nothing to worry about.

However, knowing the difference between natural leaf drop and there being an issue is crucial because you don’t want to leave an undiagnosed issue to get worse. You also don’t want to start changing things about how you care for your plant, or the environment it is in when there really wasn’t an issue in the first place.

In this article, we will take you through the different things you need to look out for to help you diagnose natural leaf drop in houseplants.

Your plant is losing its smallest leaves

When natural leaf drop occurs, the reason for it is simply that your plant is maturing. As it gets bigger, it will sacrifice its oldest, smallest leaves in favour of growing new and bigger leaves. This is a very natural process and happens with nearly all plant types.

If your houseplant is dropping its oldest, smallest (and on many plants, its lowest) leaves, then this indicates natural leaf drop. These leaves will often turn yellow before falling off the plant.

The frequency of leaf drop is low

If your plant is only losing a leaf every couple of months here and there then this also indicates that it’s nothing to worry about. Natural leaf drop doesn’t occur all in one week and is very slow and steady.

This is why it’s important to monitor the rate at which your plants are losing leaves. If the rate is more than one every few months, or the rate of leaf drop is increasing, then we recommend taking a very close look at your plant and its environment to diagnose the issue that’s causing it before it’s too late.

Natural leaf drop can happen a little bit faster in winter as your plant begins to conserve more energy as the sun isn’t giving as much light and warmth. But even if your plant is losing the odd leaf in summer, this can just mean it’s maturing and getting ready to grow new bigger leaves which is exciting!

There are no other signs of unhappiness

Whenever you spot any of your plants losing leaves, it’s really important that you fully check over the leaves, stems and potting mix.

When looking at your plant, check for any yellow or brown patches throughout the leaves. Remember that if the issue is solely on the bottom smallest leaves, this can be part of that natural ageing process. You also want to check for any signs of pests. This includes small spots across the leaves, holes in the leaves, white webbing or powder and of course visible insects.

You should also remove your plant from its pot to inspect the soil and root system to check for any watering issues that might be going on. Overwatering and underwatering can really impact the root system and cause your plant to drop leaves as a result. This is why you need to eliminate watering issues straight away.

Another top tip is to really inspect the leaves that have fallen off your plant to see if you can spot any telltale signs as to what’s happening. Signs of pests or sickly patches across the leaves can let you know that it’s not the natural ageing process but in fact, a problem that needs addressing.

Nothing in the environment has changed

Alongside taking a look over your plant and soil, checking environmental factors is also vital when trying to figure out why your plant is losing leaves. If there are even small changes in temperature or light levels, your plant may begin to drop leaves.

Most houseplant types are quite sensitive to cold drafts so you want to make sure that all windows and external doors that are close to your plant are draft-proof. Using a digital thermometer can really help with spotting any fluctuations. You might not notice a small draft from outside but if your plant is sitting right next to it, over time this can cause real issues.

If you have recently moved your plant to a new spot then this might also mean it’s not getting as much light as it previously did. Low light can mean a lot of plant types become quite leggy and drop leaves.

Moving your plant to a new spot may have also caused some shock which can result in your plant temporarily losing a handful of leaves. As long as the environment is right for your plant and it’s getting enough water, light and warmth then this should only result in your plant losing the odd leaf across a week or two before returning to normal.

Those are the main ways to check if your plant is losing leaves due to the natural ageing process or if there is something else going on that is making your plant unhappy. Leaf drop can be a really serious problem if it’s not natural as it means the problem has progressed for long enough that it’s causing your plant to actually drop leaves. This can make fixing the issue slightly trickier but often not impossible.

Moving forward, it’s important to monitor the rate of leaf drop even if you have come to the conclusion that it’s natural and nothing to be worried about. If the rate increases steadily then you know that something else might be going on. Whilst the rate of natural leaf drop will fluctuate from time to time, it won’t steadily increase unless there is a problem.

Check out our Plant Index for all of our care guides so you can figure out exactly what environment and watering routine each of your houseplants needs. This will help you diagnose natural leaf drop a little easier if you are able to determine if the care and environmental factors are right for your individual plant.

Fiddle and Thorn is a participant in the Amazon Services LLC Associates Program, an affiliate advertising program designed to provide a means for sites to earn advertising fees by advertising and linking to Amazon.com

Take our houseplant survey!

Quickly respond to our 30 second houseplant survey and get 75% off our Complete Houseplant Care eBook!

Take the Survey

No thanks…

How to Clean your Monstera’s Leaves

Last Updated: April 5, 2023

Cleaning the leaves of your Monstera (and other houseplants) doesn’t just have aesthetic benefits but it aids photosynthesis and promotes a healthier plant. As they have such large flat leaves, they can get dusty pretty quickly so it’s something you need to stay on top of with Monstera plants.

However, cleaning them in the wrong way or using the wrong products can actually be damaging to the leaves so you must be cleaning them in the right way. But don’t fret, we are here to guide you through the entire process, leaving you with a clean and healthy Monstera.


Why is it important to clean your Monstera’s leaves?


There are 3 main reasons why you should be regularly cleaning your Monsteras leaves.

Firstly, if a layer of dust has formed on top of the leaf, then it will be blocking some potential sunlight from reaching the plant. You might not think that it’s a lot, but by reducing the light, your Monstera won’t be able to photosynthesise as effectively. This can result in stunted and slower growth as the problem progresses.

The second reason that a thin layer of dust can be harmful to your Monstera is that it can block the pores of the leaves. You won’t be able to see them with the naked eye, but the leaves on your Monstera have stoma which are small holes in the leaf, essentially like pores. These stoma have the important job of water and vapour exchange. If the stoma become blocked by dust, this can also slow down growth and lead to dry leaves.

The third reason why it’s important to clean the leaves on your Monstera is more for aesthetic reasons than health reasons. When Monstera leaves become dusty they can look quite dull and you don’t get any of that natural shine. Wiping the leaves helps them appear more vibrant!


Signs that it’s time to clean the leaves on your houseplant

So now we know why it’s so important to clean the leaves on your Monstera, now we want to tackle when to know that it’s time to do so. Whilst of course it can be a good idea to schedule it in your calendar once a month, there are also some things to look out for specifically that mean it’s time to get the cloth out.

  • Visible dust on the leaves

    If the leaves on your Monstera are looking quite dull or you can see visible dust on the leaves, then it’s time to clean them! One good test is to run your finger along one of the leaves. If the leaf is dusty, you’ll see a difference in the green colour where your finger was and if the issue is pretty bad then you’l likely see a small clump of dust.

  • Sticky residue

    If your Monstera has any type of sticky residue on the leaves, then this needs to be removed immediately. Sometimes this can be a sign of pests so inspect your plant thoroughly to check if you can either spot pests on your Monstera or any signs of them (this includes brown or yellow spots, holes in the leaves or white webbing/poweder on the leaves and stem joints).

    But it’s not only pests that can result in sticky residue on your plant. If your Monstera is near any plants that may be dropping sap or if it’s just getting dirty from something else entirely such as children or pets that might be playing near your Monstera.

  • Pests

    Whilst we hope that you never have to experience a pest infestation on your Monstera, if you do, then cleaning the leaves is vital to reduce the size of the infestation. Whilst there are other things you need to be doing such as treating your Monstera with neem oil or an insecticide, wiping the leaves and showering your plant will help fight the pests too.

How to clean your Monstera’s leaves

There are actually quite a few different ways that you can clean the leaves of your Monstera and each has positives and negatives. We’ll go over each below.

  1. Wipe the leaves over with a soft dry cloth

    If the leaves are just dusty but otherwise quite clean, then it should be enough to simply wipe them down with a dry cloth every few weeks. This should remove a lot of the dust and keep the leaves looking fresh.

    It’s very important that you use a soft cloth though as anything rough can damage the leaves, either ripping or scratching them.

  2. Wipe the leaves using a damp cloth

    If your Monstera’s leaves are extremely dusty or dirty and a dry cloth isn’t doing the job then you want to use a moist one instead. This is also the method we recommend when removing pests and sticky residue.

    When using a damp cloth you want to make sure that the water is temperate as any hot or cold water can damage the leaves. If the leaves are still dirty then we recommend adding a drop of two of dish soap and that should do the job.

  3. Use a very soft-bristled brush or feather duster

    This method should only be used to remove dust as you won’t have much luck with anything sticky and if you use a feather duster with pests, all you’ll do is fling them around the room where they could potentially land on other plants.

    We only tend to use a soft bristled brush with plants that have very small delicate leaves, such as the String of Hearts. It would be a nightmare to wipe down every single one of the leaves and would probably result in a long of damage. This way you can gently wipe down the plant.

    The reason we don’t often recommend using a feather duster or brush on a Monstera plant is that the leaves are large enough to use a cloth. This would instead collect all of the dust whereas a brush just pushes it off the plant but keeps it in the air.

  4. Shower your Monstera

    Showering is another great way to clean your Monstera but that does require a little bit more effort and isn’t something you want to be doing too regularly. As Monsteras can get pretty big and heavy, don’t risk hurting your back trying to lug it into the bath but if you are able to lift it, a shower every few months is always a great thing.

    Not only will it get rid of dust and residue on the leaves, but it can help get rid of pests and lift the humidity for your plant – a real combo of benefits!

    When showering your Monstera, make sure to use room temperature water at relatively low pressure so that you don’t damage your plant.

  5. Bathe your Monstera

    If you have quite a small Monstera, another option is to bathe the leaves. This reduces the risk of damage from high water pressure in the shower and is a great way to get shiny clean leaves.

Leaf shine and Monstera Plants

One product that gets sold a lot to houseplant parents looking for shiny clean leaves is leaf shine. However, we strongly recommend against using it on your Monstera or any other plant for that matter.

The thing with leaf shine is that it actually often contains a lot of chemicals. Yes, this depends a little bit on the brand as there are better ones out there but many can actually cause more harm to your plant. This is because the leaf shine chemicals will clog the pores on your Monstera’s leaves, stunting growth and preventing your plant from photosynthesising correctly.

Yes, they will make the leaves look extra shiny in the short term, but there are real long-term damages that can be done with these products. Instead using natural cleaning techniques will help your Monstera shine but remain in tip top health!

How to maintain clean Monstera leaves

To make cleaning the leaves easier you need to be doing it more frequently. This will help to avoid a large build-up of dust or residue on the leaves, making cleaning quicker and easier when you do it. There are also other things you should be doing to prevent your Monstera from getting dusty and dirty in the first place and we’ve covered these below.

  1. Get into a dusting routine

    We tend to dust our Monstera every few weeks, sometimes more, sometimes less depending on our schedules but also how dusty the leaves are. Ideally, you want to be dusting them before they start to look dull.

  2. Ventilate your home well

    You should be opening the windows at least once a day to ventilate any rooms with houseplants (and any rooms without too really!). This increased ventilation will actually help to keep the leaves a little bit more dust free. Plus fresh air has great benefits on humidity and your health too.

  3. Buy an air purifier

    If you find that your houseplant’s leaves are always getting really dusty within just a few days or a week after dusting, then it might be worth investing in an air purifier. Alongside benefits for you, they can be great at cleansing the air for your Monstera and other plants too.

  4. Find a better spot for your houseplants

    Some rooms are naturally going to be more dusty and dirty than others and you may want to find another space for your Monstera if you’re constantly cleaning it. You want to keep them out of the way of high traffic areas of your home as not only is there an increased risk of the leaves and stems becoming damaged, but it’s more likely to get dirty.

  5. Mist your plant’s leaves

    As well as boosting the humidity, misting the leaves can help remove some of the dust that has settled on your Monstera’s leaves. During summer you want to be misting up to a few times a week and slightly less in winter.

    You want to decrease how much your misting in winter as cold wet leaves is the ideal place for leaf rot to occur so you want to avoid that!

    Another tip for misting your Monstera is to use temperate water as you don’t want to shock or burn your plant by using hot or cold water. If you find that you’re seeing residue on the leaves of your Monstera after misting, then it may be that the water you are using is too hard (contains too much fluoride or other chemicals). Instead, you want to use distilled water or rainwater.

  6. Move plants when you have building works

    Building works can be stressful for humans but is the ultimate nightmare for your houseplants if they aren’t moved out of the way. Even after just a small bit of work, there seems to be dust everywhere, forever!

    It’s super important that you move your Monstera away from any major works that might be dusty, dirty or messy to prevent your plant from being covered in sand, paint or dirt.

We hope that our ultimate guide to cleaning your Monstera’s leaves has been useful. You’re now equipped with everything you need to know to keep your plant looking shiny and fresh. Cleaning the leaves is often quite an underrated and forgotten part of plant care but can be vital to your plant’s health.

A lot of plant parents also only really give them a once over in spring as part of a wider clean but having dust-free leaves all year round is important. Light levels in winter can drop quite significantly so you need to be maximising how much of that sunlight your Monstera is able to get. Having a thin layer of dust over the leaves can really lower this amount so make sure you’re cleaning the leaves all year round!

To learn more about how to best care for your plant and keep it happy and healthy, check out our Monstera care guide.

Fiddle and Thorn is a participant in the Amazon Services LLC Associates Program, an affiliate advertising program designed to provide a means for sites to earn advertising fees by advertising and linking to Amazon.com

Take our houseplant survey!

Quickly respond to our 30 second houseplant survey and get 75% off our Complete Houseplant Care eBook!

Take the Survey

No thanks…

How to Care for Your String of Pearls Plant: The Essential Guide

Last Updated: October 16, 2023

String of pearls care

String of pearls care

Native to the arid plains of Southwest Africa, the String of Pearls has become a favourite globally. Despite its exotic origins, it’s surprisingly low-maintenance, making it perfect for both seasoned horticulturists and green-thumbed novices alike.

To help you keep your String of Pearls happy and healthy, our care guide will go through everything from light requirements to propagation, ensuring your plant thrives for years to come.

Origins and Characteristics of the String of Pearls Plant

The String of Pearls is native to Southwest Africa but its botanical name, Senecio rowleyanus, pays homage to British botanist Gordon Douglas Rowley who brought it to the limelight.

The String of Pearls is a trailing houseplant with vines of vibrant green, bead-like leaves that drape down, giving it a distinctive appearance.

But wait, there’s more! They don’t only look great but are also a pro at purifying air. It’s no wonder these enchanting succulents are fast becoming a must-have in homes and offices alike.

Key Characteristics:

  • Tolerance: Thrives in dry, well-drained conditions. Not a fan of too much water.
  • Light: Loves bright, indirect sunlight. Direct sun can cause sunburn.
  • Temperature: Prefers moderate temperatures, around 70-75°F (21-24°C).
  • Soil: Grows best in well-draining soil, like a cactus mix.
  • Growth: With the right care, expect your String of Pearls to cascade several feet down.
  • Bloom: Occasionally, you might be surprised with tiny, white flowers.

Why String of Pearls is a Must-Have for Your Home

Low Maintenance

One of the best things about the String of Pearls plant is its low-maintenance nature. Perfect for those of us with busy schedules or without the greenest of thumbs, this plant doesn’t demand much attention, yet it continues to flourish.

Air purifying

Did you know that the String of Pearls plant is a natural air purifier? That’s right, it removes toxins from the air, promoting a healthier living environment.

Aesthetic Appeal

With its unique cascading stems and pearl-like leaves, the String of Pearls plant is an instant attention-grabber and will stand out in every room!

Boosts Mood and Reduces Stress

Studies have shown that being around plants can help reduce stress and anxiety so while this isn’t a benefit specifically for the String of Pearls, it is an added bonus for every plant!

The Best Lighting for a String of Pearls

Your String of Pearls adores bright but indirect sunlight. This means it shouldn’t be getting too many direct sun rays hitting the pearls. East or North facing windows are the most ideal for your String of Pearls. Be it a windowsill, a shelf, or a hanging basket, make it a spot drenched in gentle light.

Lighting in Different Seasons

As the seasons change, so should your lighting strategy. In the summer, your plant enjoys morning sunlight but prefers to chill in the shade during the scorching afternoon. When winter arrives, keep it in a well-lit area as daylight hours diminish. You can get away with your plant receiving a bit more direct sunlight during autumn and winter as the weaker sun won’t burn your plant as quickly.

Can they survive in low light?

In the absence of adequate sunlight, don’t fret, as a fluorescent grow light can serve as a decent understudy, ensuring your String of Pearls continues to glow even during darker days. Consistent low light will start to have an impact though and you may find your plant is growing slower, smaller and is losing leaves.

Watering your String of Pearls

When it comes to watering your String of Pearls, the golden rule is ‘Less is More’. This plant is a succulent, which means it stores water in its stems and leaves. It’s important to give it a good drink but then it can go for quite a while without needing another.

On average, watering once every two weeks during the warmer months and once a month during winter should be enough. But remember, this isn’t a set-in-stone rule and we don’t believe in keeping rigid watering routines as there are so many ever-changing factors that impact how much water your plant needs. Look out for signs that your plant is thirsty – if those pearls start to look a bit shrivelled, it’s time for water.

Watering Technique

Give your String of Pearls a good soak, letting water drain through the pot’s holes, then let it dry out completely before watering again. This helps prevent water from stagnating at the bottom of the pot, which can lead to root rot pretty quickly.

Consider the Climate

The climate you live in will also affect how often you need to water. If you live somewhere hot and dry, your String of Pearls may need watering more often. If you’re in a cooler, more humid environment, it might need less. Adjust your watering habits accordingly.

Choosing the Ideal Soil for your String of Pearls

Loam-based soil is best for your String of Pearls. This well-drained, nutrient-rich soil allows the plant to drain excess water while storing the necessary moisture and nutrients it needs to thrive.

A mix of sand or perlite with the loam-based soil provides that extra drainage and prevents your plant from getting its roots too wet.

A sprinkle of organic compost on top acts as a slow-release fertiliser, providing a steady stream of nutrients over time. While this is an optional addition, it can go a long way to keeping your plant healthy.

Choosing the Perfect Pot for Your String of Pearls

Choosing the perfect pot for your String of Pearls needs to balance aesthetics, practicality, and the unique needs of this succulent.

The Material Matters

It might surprise you, but the pot’s material can significantly impact your String of Pearls’ health as it means water absorption and evaporation can vary significantly. Generally, terracotta pots are the go-to choice. Being porous, they allow excess moisture to escape, keeping your plant’s roots delightfully dry.

Size Does Matter

When it comes to pot size, your String of Pearls prefers to be very slightly rootbound, so opt for a pot that’s just slightly larger than the root ball. This prevents water from lingering in the soil, a surefire recipe for root rot.

Don’t Forget Drainage

A pot with one or more drainage holes is vital to prevent waterlogged soil. They will allow any excess water to flow out into the saucer or planter.

Temperature Requirements for Your String of Pearls

String of Pearls plants prefer a warm environment and really don’t like cold drafts. Typically, they thrive in temperatures between 70-75°F (21-24°C). While they can handle a little chill, temperatures below 60°F (15°C) are a no-no. They are also sensitive to sudden temperature changes. So, avoid placing them near drafts, air conditioning vents or heaters.

Fertilizing Your String of Pearls Plant

When to Fertilise:

  1. Spring: This is the ideal time to start feeding your String of Pearls and they’ll appreciate the extra nutrients to help them burst back into life. Make sure the winter weather is behind you before starting.
  2. Summer: Continue the feed through summer, as this is when your plant is doing most of its growing.

What to Use:

Look for a water-soluble, well balanced fertiliser. The magic numbers you’re after are 10-10-10 or 20-20-20 (nitrogen-phosphorus-potassium). Remember, you don’t want to overdo it – a half-strength solution every month should suffice to avoid over-fertilization (this can cause yellow leaves and leaf drop so dilute the fertilizer more than recommended to avoid this).

How to Apply:

  • First, water your plant well. Hydrating the soil before fertilising helps to prevent root burn.
  • Next, add the fertiliser to your watering can and mix until dissolved.
  • Now, simply water your plant as usual, ensuring the fertiliser solution reaches the roots.Remember, your String of Pearls doesn’t need a heavy feed. Stick to this routine and you’ll have a happy, healthy plant.

Pruning your String of Pearls Plant

The mention of the word pruning is often met with a lot of nervousness. But with String of Pearls, it’s actually a really easy and important step in their care routine. Pruning can not only help to remove old and leggy growth, but it can also help to stimulate growth hormones found in the vines to create a fuller plant.

  1. First, identify the strands that have become too long or started to look ‘leggy’. You also want to spot any that are turning yellow, brown or are crisping up.
  2. Next, with a clean, sharp tool, snip off these strands just above a leaf node.
  3. If you are pruning growth that is simply too long, but otherwise healthy, you can propagate these vines!

Propagating Your String of Pearls

Propagating your plant can be a great way to create a fuller plant or new plants altogether. And if you’ve already got enough houseplants, then gifting cuttings to friends and family can be a really nice idea.

Before you get started there are a few things to note. Ensure you are propagating in spring or summer for the best results. You also only want to propagate healthy parts of your plant.

Here’s a brief step-by-step of how to propagate your String of Pearls:

  1. Take the cuttings you’ve pruned (see above), and set them aside for a few days to callus over.
  2. Next, place the callused cuttings in well-draining soil, ensuring the leaf nodes are in contact with the soil.
  3. Water sparingly until you start to notice new growth. And voila, you’ve just created a new String of Pearls plant! You can either pop it right back into your mother plant or you can leave it to be a whole new plant.

Common Pests and Diseases that Affect String of Pearls Plant

Although rare, it can happen from time to time that your String of Pearls starts to suffer from pests or disease. The key thing here is treating the issue early so make sure to check on your plants regularly. Below is a list of the most common pests and diseases:

Mealybugs

These little white bugs, fondly referred to as fluffy cotton balls, are the usual suspects. Not only do they suck the life juice out of your plant, but they also leave behind a nasty, sticky residue called honeydew. A mealybug infestation will grow quickly so act fast to get these under control.

Aphids

Aphids, also known as plant lice, are tiny insects that come in various colours. They love to feast on new growth, causing the leaves to curl and become discoloured.

Spider Mites

Spider mites create a fine, silky web on the plant and cause the leaves to turn yellow and drop.

Root Rot

Root rot is caused by overwatering, leading to a soggy soil environment which is the perfect breeding ground for fungi. Pay attention to your watering routine to keep root rot at bay.

Light Burn

Too much of a good thing can be harmful, and this is true for sunlight too. Excessive direct sunlight can lead to light burn, causing the leaves to turn yellow or white. Your String of Pearls loves a good sunbath, but remember, it prefers indirect rays.

FAQs

Common Problems with your String of Pearls

Here are some common issues that you might run into. It’s important to diagnose any issues early to give your plant the best chance of bouncing back. This is why we strongly recommend giving your plant a monthly check-up so you can spot any issues at their early stages.

Conclusion

And there we have it, your complete guide to String of Pearls care. This little gem may seem delicate, but with the right conditions and care, they can become fairly easy to care for. The main things to remember are to water sparingly, provide ample sunlight, and avoid temperature extremes. These simple steps are the secret sauce to keeping your String of Pearls happy and healthy.

Fiddle and Thorn is a participant in the Amazon Services LLC Associates Program, an affiliate advertising program designed to provide a means for sites to earn advertising fees by advertising and linking to Amazon.com

Take our houseplant survey!

Quickly respond to our 30 second houseplant survey and get 75% off our Complete Houseplant Care eBook!

Take the Survey

No thanks…

How To

Detailed instructions to help you care for your indoor plants.

How To

Detailed instructions to help you care for your indoor plants.

How To

Detailed instructions to help you care for your indoor plants.