With their unique and striking leaf patterns, African Mask Plants are not the easiest houseplant to care for. But don’t let that put you off; they are worth the extra hassle.
Native to the tropics of the South Pacific, African Mask Plants have thick veined leaves which almost look like masks which is where that name comes from. With the Latin name Alocasia Amazonica, the African Mask Plant is also commonly known as an Alocasia Polly or a Kris Plant.
How to Care for an African Mask Plant
These plants definitely aren’t the easiest to care for as they do have some more specific requirements which means they don’t qualify as a low-maintenance houseplant in our eyes unfortunately. However, most of the trouble comes with finding a good spot for your plant so once that’s done, a lot of the other things will become a lot easier.
The number one thing that plant parents need to know when growing and caring for an African Mask Plant is that they require a high humidity level. If grown in dry air, the leaf tips and edges will quickly dry out, turning brown.
Another thing to note is the need for bright but indirect light. Your plant will struggle in extremes of bright, direct light and low light areas and it will start to cause irreversible issues quite quickly. We’ll explain more of this below alongside a full and comprehensive overview of how to care for your African Mask Plant.
African Mask Plant Overview
Origin: Tropics of the South Pacific region
Latin Name: Alocasia Amazonica
Common Names: African Mask Plant, Alocasia Polly, Kris Plant
Plant Family: Araceae
Difficulty Level: Medium
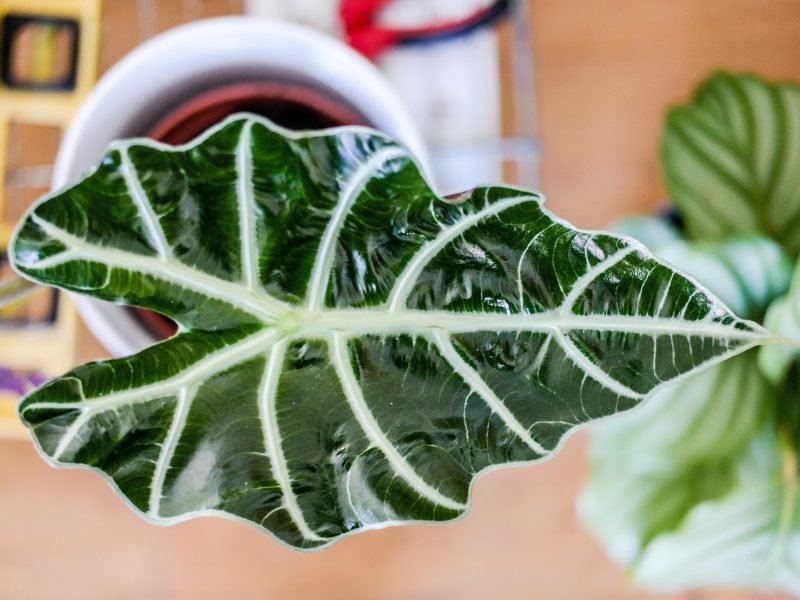
Appearance: Dark green waxy leaves with thick yellow/white veins. The leaf shape is an elongated heart or arrow.
Height and Size: Maximum height of around 2-4 feet as they are bred smaller than other alocasia varieties.
Growth Rate: Medium
Light Requirements: Bright but indirect light. Avoid direct sunlight or low light environments.
Water Requirements: Moderate watering in summer to avoid soil drying out for extended periods.
Best Soil: Well-draining, nutrient-rich potting mix.
Flowering: Can rarely produce small white flowers during summer.
Pruning: Only to remove discoloured leaves
Cleaning: Dust frequently to remove dust
Ideal temperature: 65-85°F (18-29°C)
Fertilizing Routine: Apply a well-balanced fertilizer at half-strength every 1-2 months during spring and summer.
Ideal Humidity Level: 50-70% humidity is ideal
Propagation: Division of the mother plant
Repotting Frequency: Every 2-3 years
Toxicity: Toxic to dogs and humans as they contain insoluble calcium oxalate crystals.
Risk of Pests: Spider mites, whiteflies, scale insects and aphids
Common Problems: Dry leaf edges and tips and brown or yellow foliage.
Origin of an African Mask Plant
They are native to the tropics of the South Pacific region. Their native environment tells you a lot about their environmental requirements in your home as they love high humidity and warmer temperatures.
African Mask Plant Family
Alocasia Polly plants are part of the Araceae family. This is a plant family made up of over 3,000 species, all of which are flowering plants which create a type of inflorescence which is known as a spadix. (More on that in the flower section below).
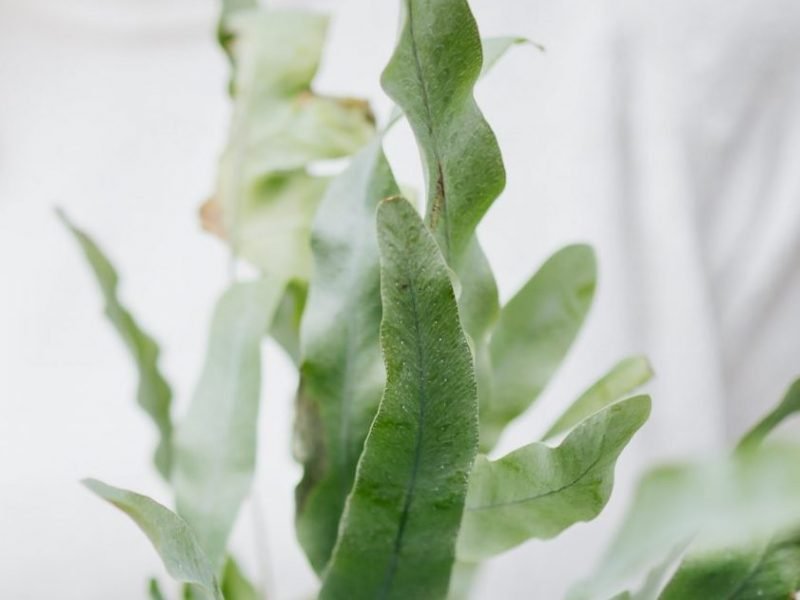
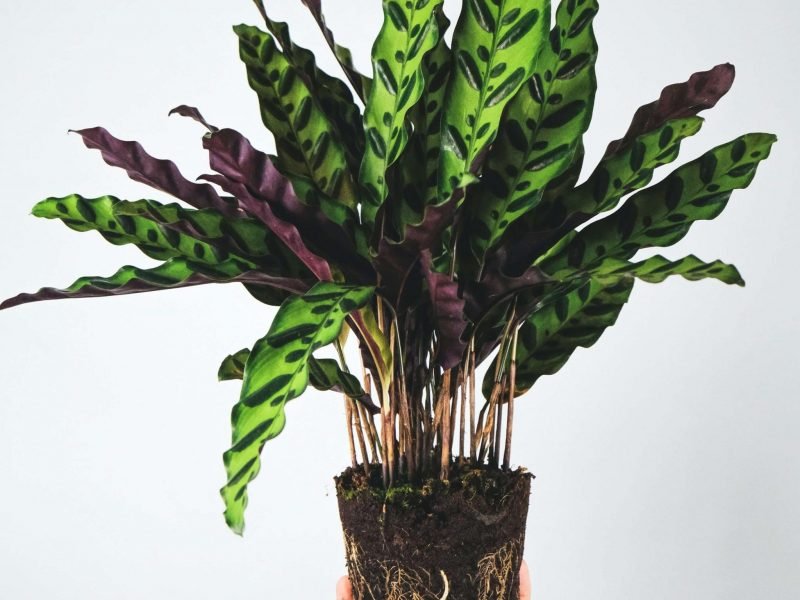
African Mask Plant Leaves
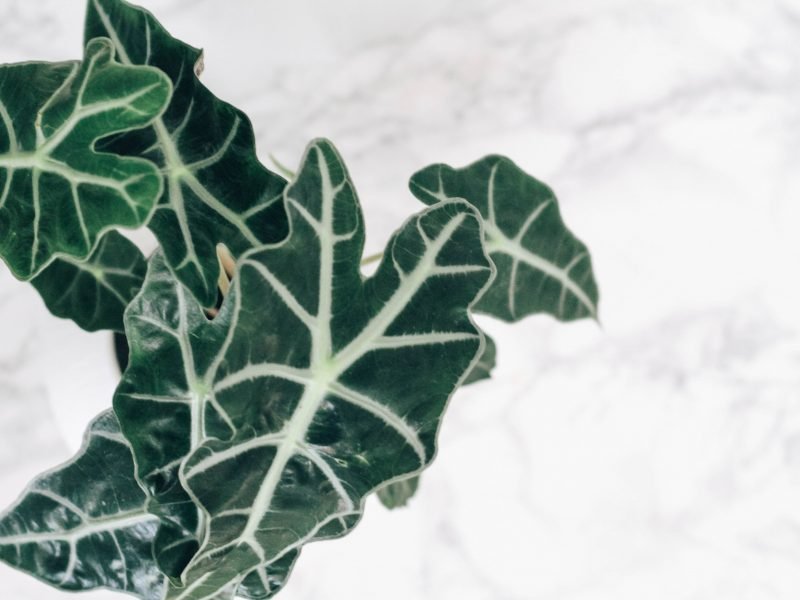
African Mask Plant Appearance
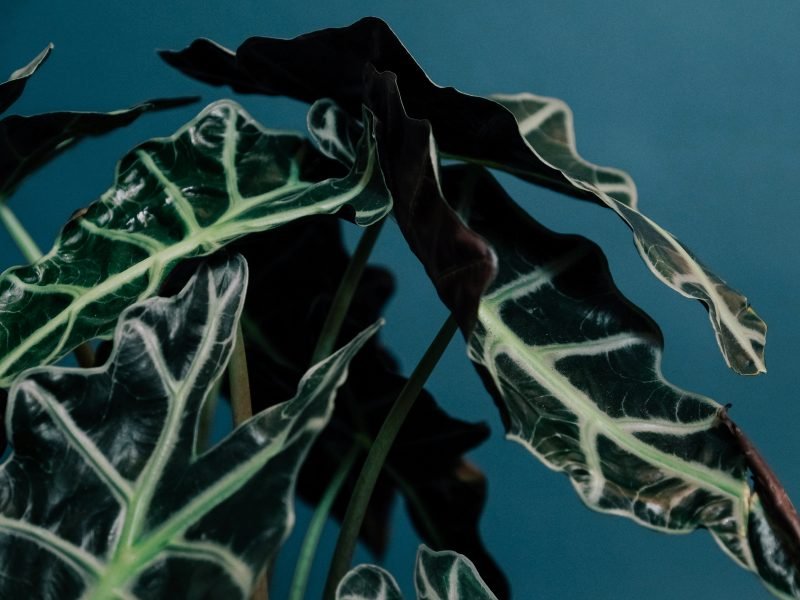
Known and loved for their thick dark-green waxy leaves, African Mask Plants have prominent yellowy/white veins throughout. Their leaves are quite shield/mask-like which is where it gets its common name.
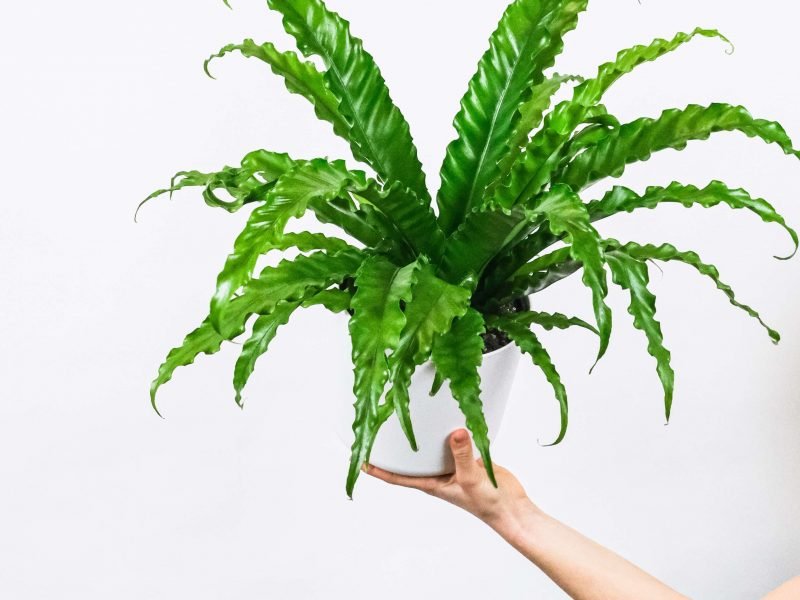
African Mask Plant Height and Size
The varieties that are grown indoors can reach heights of 2-4 feet at a maximum, although, in their native environment, African Mask Plants can grow a lot larger and taller.
Growth Rate of an African Mask Plant
During summer, African Mask Plants have a moderate growth rate so you will see new leaves popping out every few weeks. However, like most other houseplant types, they will go dormant throughout autumn and winter and you won’t tend to see much if any new growth during that time.
If there is a new leaf growing in the colder, darker months, it will often be a lot smaller in size compared with the rest of the plant.
Flowers on an African Mask Plant
Mature African Mask Plants can produce small white flowers. However, this is rare when grown indoors. The spadix flowers are white, small and very insignificant. We often remove them before they bloom to allow the plant to redirect energy to new healthy leaves.
Pruning your African Mask Plant
One great thing about growing and caring for these plants is that they don’t require regular pruning. We only recommend pruning a leaf from your African Mask Plant if it has discoloured (ie. turned brown or yellow).
Cleaning your African Mask Plant
As with any houseplant with large flat leaves, African Mask Plants are prone to a build-up of dust. Make sure to wipe the leaves down with a damp cloth every few weeks.
If this is not enough to remove the dirt from the leaves, use a few drops of dish soap. Avoid using any harsh chemicals on your plant as this can damage the leaves.
Some plant parents turn to leaf shine to make their plants look extra shiny. However, we strongly advise against it as it can actually strip your plant’s leaves of a natural protective layer.
Once the majority of the leaf has discoloured, it won’t be valuable to your plant for the photosynthesis process so it’s best to remove it.
Remember, when pruning your African Mask Plant, use clean, sharp shears and wear gloves as they are toxic.
Alocasia Polly Plant
African Mask Plant Sunlight Requirements
African Mask Plants struggle in low light and bright, indirect sunlight. The ideal place for your plant is a spot with nice natural bright but indirect light.
If your plant receives too much intense direct sunlight during summer, it can dry out, scorch and burn the leaves. While you can get away with direct light during winter, make sure to move your plant when the warmer weather comes around.
If you’re unsure of whether or not your plant is getting enough light, we recommend picking up a light monitor. They can help you spot changes throughout the day and figure out if your plant is getting too much or too little light.
Water Requirements for an African Mask Plant
African Mask Plant require moderate to frequent watering but not with a large volume of water at once. They don’t want their soil to dry out, but they also don’t want their roots to become waterlogged. This is why a little but often approach works best to ensure your plant continues to thrive.
It’s best to continually monitor the moisture level of the soil and adjust your watering habits accordingly, rather than sticking to a regimented watering routine. There are so many factors that impact how quickly the soil dries out, for example, plant size, temperature, and light level so there is no one-fits-all timeline that will work all year around.
We often use a moisture meter to help us know exactly when our plant needs water and it has saved our plants many many times!
Best Soil for an African Mask Plant
Choose a well-draining, high-quality, nutrient-rich potting mix with good aeration qualities. Make sure the potting mix includes perlite as this helps both drainage and aeration.
It’s also good to have peat (or a peat alternative) in the potting mix to help some retention of the water to ensure it doesn’t dry out too quickly. Getting the right balance is key.
African Mask Plant Temperature Requirements
Alocasia Pollys require a temperature of between 65-85°F (18-29°C) to thrive. When grown in colder climates, growth will be slower and the risk of root rot is higher.
Make sure to keep them away from drafty windows or air conditioning vents where they might experience cooler temperatures. At the same time, you want to avoid placing them too close to radiators or heating vents as hot temperatures will dry out your plant more quickly.
A digital thermometer is a great way to know for sure if your plant is in the right spot and monitor any extremes so you can fix the issue before it’s causing problems for your African Mask Plant.
African Mask Plant Fertilizer Requirements
Fertilize your Alocasia Polly once every 1-2 months during spring and summer. Use a well-balanced, liquid fertiliser at half-strength to avoid over-fertilization. This can damage and burn the leaves so make sure to dilute it properly.
It is very important that you only feed African Mask Plants during spring and summer as this is the main growth period.
African Mask Plant Humidity Requirements
Alocasia Pollys require a humid environment of between 50-70% humidity. They require a humid environment as they are native to the tropics and will struggle to grow in dry air (this can cause dry brown leaf tips, edges and eventually entire brown leaves).
There are several ways you can increase humidity levels which we explain further in our humidity guide. The easiest way to increase humidity levels is by using a humidifier or by getting into the habit of misting your plant at least several times per week.
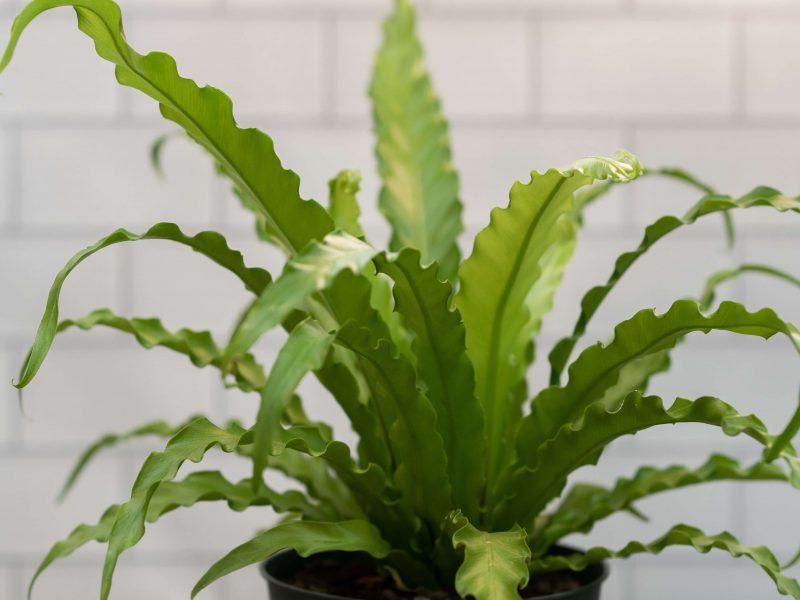
Healthy African Mask Plant
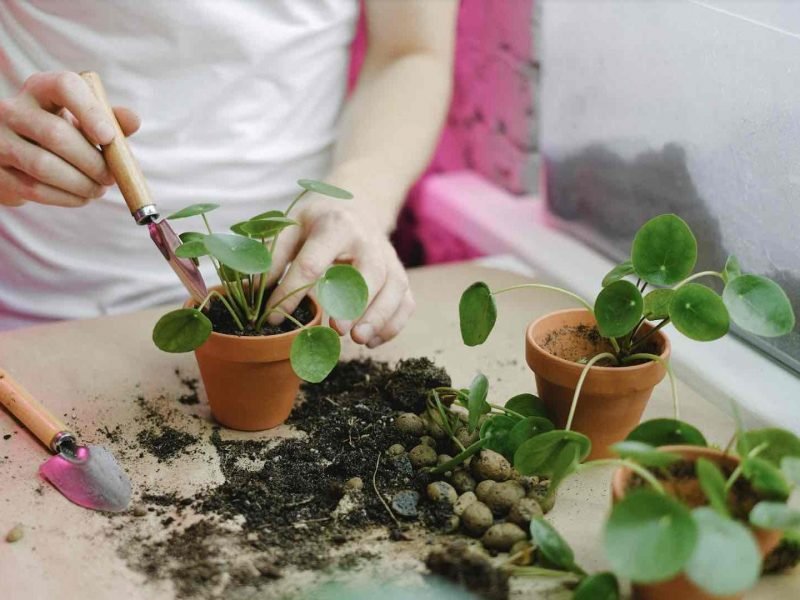
Propagating your African Mask Plant
As your African Mask Plant matures, you might want to think about propagating if the plant becomes too big for the space. Carefully take the roots out of the pot and separate the root systems with your fingers.
Unfortunately, as they grow from one central rhizome, you can’t propagate through stem cuttings and division of the mother plant is the only option.
We have written a detailed guide on propagating your African Mask Plant so check that out for a detailed step-by-step guide, FAQs and top tips to remember along the way.
Repotting your African Mask Plant
Alocasia Pollys like being slightly rootbound, so you will only need to repot your plant every 2-3 years. We still recommend occasionally checking for signs that your plant is too rootbound. These include roots growing out of the drainage holes, roots growing out of the soil at the top of the pot, the roots being very tightly coiled when removed from their pot and a lack of new growth in summer.
The best time to repot would be in spring as the growth period approaches so that the plant can get used to its new environment and shock will be easily overcome.
African Mask Plant Toxicity to Humans and Pets
Unfortunately, African Mask Plants are toxic to pets and humans as they contain insoluble oxalate crystals. Because they are insoluble, they do not dissolve when they come into contact with moisture in the mouth. Instead, these crystals can cut the inner mouth and throat tissue.
If part of the plant is ingested, this can cause burning and irritation of the mouth, throat and stomach. It can also cause vomiting and wheezing in cats and dogs.
We highly recommend seeking medical advice and treatment if any part of the plant has been ingested.
Treating and Preventing Pests
While a pest infestation is rare, African Mask Plants can suffer from spider mites, whiteflies, scale insects and aphids.
The first thing to do if you spot pests (or signs of them) is to isolate your plant from all other houseplants to avoid the infestation spreading. Then remove the worst affected areas of the plant as this will simply reduce the number of pests which makes the infestation easier to tackle.
Start treatment with neem oil and an insecticide to remove the pests. You also want to continuously check over any other houseplants as pests can easily spread between plants close to each other.
African Mask Plant Common Problems
Why has my African Mask Plant got yellow leaves?
Yellowing leaves on an African Mask Plant are often caused by watering issues. This can be either over or underwatering so it is important to regularly check the moisture in the soil and adjust your watering schedule accordingly.
You can pick up a moisture meter from Amazon here which will help you keep track of the moisture in the soil.
Why is my African Mask Plant dying?
If you notice your African Mask Plant looks as though it is dying, you need to act quickly to reverse this. It may be a mixture of issues that are causing this but we always recommend checking soil moisture first, as well as increasing humidity and checking it has enough sunlight.
Why is my African Mask Plant drooping?
Drooping leaves is an indication that your African Mask Plant is suffering from water stress. This can be either over or underwatering so check the moisture levels in the soil using a moisture meter and adjust your watering schedule accordingly. If your soil is waterlogged we recommend replacing it entirely with fresh high-quality potting mix.
Why has my African Mask Plant got brown leaf tips?
Brown leaf tips are sometimes a difficult problem to treat because it has several causes. It may be due to dry air, over-fertilization or overwatering.
Why are the leaves on my African Mask Plant curling?
African Mask Plants tend to curl their leaves if they are either being underwatered, or the humidity level is too low for them. We recommend checking the potting mix to see if the roots have shrivelled and crisped up (a sign of underwatering) and increasing the frequency of watering.
If humidity is the reason your plant has curling leaves, then mist it down a few times a week to boost the humidity. They’ll also love it if you shower them every few weeks as this can go a long way to preventing curling leaves.