How to propagate a Schefflera / Umbrella Plant

Last Updated: May 27, 2022

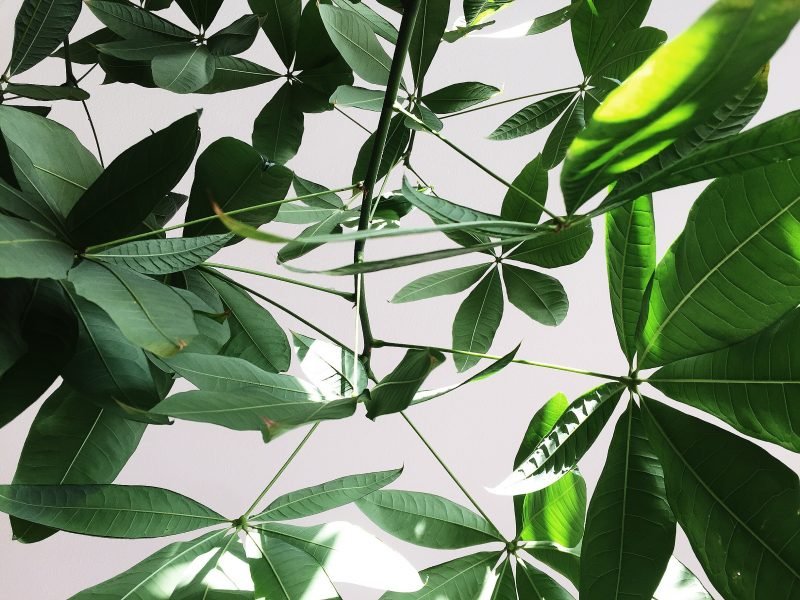
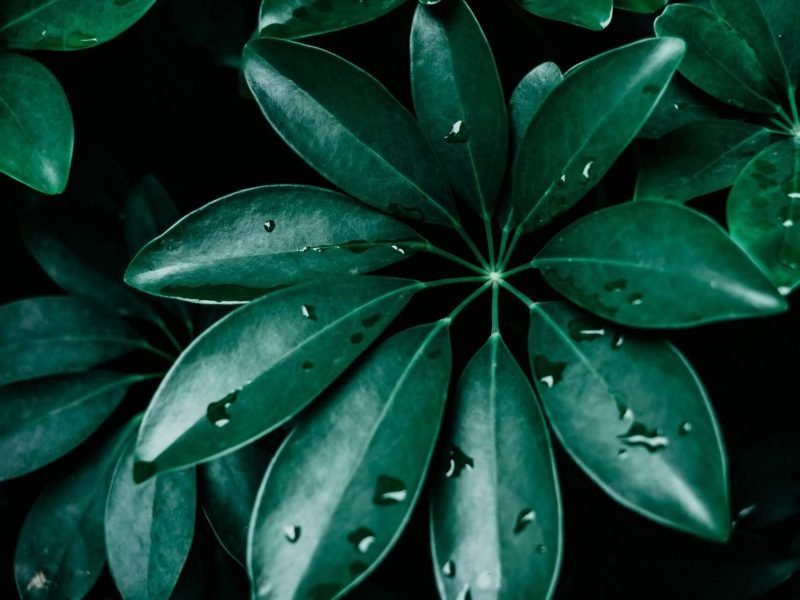
Schefflera plants, also commonly known as Umbrella Plants due to the shape of their leaves, are a definite favourite of ours. They are fairly painless to look after but propagating them can be a little bit of a challenge so it’s important to know exactly what the process is as well as what things to look out for.

In this post we’ll guide you through the complete process; the various methods you can use as well as the dos and don’ts, what tools/equipment you’ll need and lastly things to look out for to ensure a successful propagation.

Why might you want or need to propagate your Schefflera plant?

There are several reasons why you might choose to propagate your plant. Firstly, they don’t always grow how we want them to! They sometimes grow sideways, too leggy or even too tall and end up hitting the ceiling. Pruning is the best way to keep your plant in the desired shape but instead of just throwing away those incredible cuttings, why not use them to create new plants.

You may also need to propagate your Schefflera out of necessity if you find that it’s starting to die. If you spot issues such as yellow leaves, brown leaves, a drooping plant or if it’s starting to lose leaves, these suggest that your plant is starting to suffer. We recommend trying to diagnose the issue and fixing it first but if things keep getting worse you might need to take cuttings to save part of the plant. If this is the case, you need to make sure that you are using a part of the plant that is healthy.

And lastly, our favourite reason; get free plants! This is the best way to multiply the number of plants in your home without actually having to spend any more and you can even give cuttings as presents. So the list is endless…

Tools/ equipment you will need to propagate a Schefflera plant

It’s important you have all the right things before you get started.


  • Healthy and mature Schefflera plant

  • Sharp scissors/shears

  • Spare pot

  • Fresh soil and water

  • Newspaper or plastic sheet

What methods can be used to propagate a Schefflera?

Whilst there are a few different ways you can propagate your plant, including growing from a seed and air layering, the most successful method is stem cuttings. In this guide, we will only take you through the stem cutting method as the others not only take an unrealistic amount of time to grow, but the success rates are very low when grown at home.

Below you’ll find a step by step process to make sure you’re taking the stem cuttings in the right way.

How to propagate a Schefflera through the stem cutting method


  1. Locate the healthy stems on your Schefflera

    When taking a stem cutting you want to make sure that the part of the plant you are cutting is healthy to give you any chance of success. Most mature Schefflera plants will have several stems but less mature plants may only have one. You can choose whether to take one or more stem cuttings from your plant, it doesn’t impact the process.

  2. Make the cut

    This is the scary part! Now that you’ve located the section of the stem that you want to propagate, you need to cut it off! Use clean scissors/ shears or a knife to make the cut diagonally across the stem. This increases the surface area and encourages more root growth. You also want to make sure your tools are clean to avoid passing on any bacteria into the stem wound.

  3. Remove any lower leaves

    As you’ll be placing your stem cutting in water for several weeks you want to carefully remove any leaves on the lower part of the cutting that may end up sitting in the water as they will start to rot very quickly. If your Schefflera cutting only has a few leaves then skip this step and just make sure the water level isn’t super high.

  4. Fill up a clear container with water

    Next, you want to fill up a glass with fresh temperate water to place your Schefflera cutting into.

    Avoid hot or cold water as this will shock/burn your stem cutting and can often mean your cutting will quickly wilt and die. We like to use a transparent container not only so that we can see the roots growing, but it allows you to spot any issues early.

  5. Place your Schefflera cutting in water

    Make sure that the lower part of your cutting is sat in water. Avoid placing too much of it in as it can increase your chances of stem rot. Place your glass in bright but indirect sunlight. Intense light will damage your cutting and might mean your propagation isn’t successful.

  6. Change out the water regularly

    It’s super important that you keep the water fresh so we recommend switching it out every couple of days. This keeps it free from bacteria and stops it from stagnating and smelling.

  7. Be patient

    Now that your stem cutting is safely in water and you’re switching it out regularly, there’s nothing left to do but continue and be patient.

    Don’t worry if this process takes several weeks or months as that is totally normal!

  8. Plant your cuttings into potting mix

    Once the roots on your Schefflera cutting have matured well and reached about 5-10 centimetres in length, they are ready to be pot into soil. Use a high-quality well-draining mix to give your plant the right nutrients and helps to avoid problems caused by waterlogged soil.

  9. Resume usual care

    Now you can continue to care for your new Schefflera plant as you would the mother plant. Soon enough, it’ll be mature enough for you to propagate it all over again.

Schefflera Propagation FAQs

Although it seems like Schefflera propagation isn’t that complex, it’s still really important to understand the basics as these can really impact how successful it is.

Common problems when propagating a Schefflera

It won’t be successful 100% of the time and it may happen that you come across some issues in the process. It’s important to keep an eye on your cuttings regularly so you can spot the issue early and have the best chance of fixing it.

We hope you’ve found this complete guide useful. It can be a little scary cutting the beautiful stems off your mother plant to propagate but the end result is definitely worth it.

Check out our full Schefflera Care Guide for more information on how to look after your stem cuttings once they have matured.

Fiddle and Thorn is a participant in the Amazon Services LLC Associates Program, an affiliate advertising program designed to provide a means for sites to earn advertising fees by advertising and linking to Amazon.com

Take our houseplant survey!

Quickly respond to our 30 second houseplant survey and get 75% off our Complete Houseplant Care eBook!

Take the Survey

No thanks…

How to propagate a Satin Pothos plant

Last Updated: September 5, 2023

We are in love with Satin Pothos plants because of their incredible silver speckles leaves. Although they can sometimes be a little fussy to care for, propagating Satin Pothos plants is a total breeze! It really couldn’t be easier and soon you’ll have so many Satin Pothos plants you won’t know what to do with them all.

In this post, we will guide you through the whole process of propagating your Satin Pothos plant, from tools needed to step by step methods as well as issues you might face along the way.

Why propagate a Satin Pothos plant?

There are several reasons why you might choose to propagate your Satin Pothos. The main reason is probably just wanting to multiply the number of Satin Pothos’ you have without having to shell out any more money on houseplants! Plants and plant cuttings make great gifts for friends which is why we always make sure to take a few cuttings from each of our new plants.

The other reason why many plant parents choose to propagate their Satin Pothos is that their plant is either too long or becoming very leggy. Cutting your Satin Pothos back encourages bushier growth and is a great way to cut back that winter growth which may have become straggly or leggy. But instead of simply throwing away those special Satin Pothos cuttings, why not propagate them and start a whole new mother plant.

What tools will you need to propagate a Satin Pothos plant?

Let’s start off with the easy part. It’s important to make sure you have all the things you need before taking that first cutting.

Propagate a Satin Pothos using stem cuttings

This is the main method of propagating Satin Pothos plants as it’s suitable for all maturities and lengths of Pothos plants. It’s also really easy too as you can create several new Satin Pothos plants just by taking a short stem cutting.

  1. Locate a healthy stem

    When taking a stem cutting you want to make sure that the part of the plant you are cutting is healthy to give you any chance of success. Avoid any sign of disease or pests as they will be transferred onto your new cuttings.

    Ideally, you want to locate a stem that has several healthy nodes and leaves. A node is the joint in the stem where the root would grow out from (you will feel a slight bump running a finger down the stem). If you can, try to choose a section of the plant that already has aerial roots as this means it will be a more mature plant and propagation will be quicker.

  2. Make the cut

    You want to use clean scissors/ shears or a knife to make the cut to avoid passing on dirt or any infection to the cuttings. Use your tools to make a clean cut across the stem leaving at least one node per section. If possible try to include 2-3 nodes and leaves on each cutting but it will also work with just 1 so it depends on how much you want to cut off your plant.

  3. Fill up your container with water

    Next, you want to fill up a glass with fresh temperate water to place your Satin Pothos cuttings into. Make sure the water isn’t super cold or hot as this will shock or burn the cutting and weaken your chances at a successful propagation.

    It’s best to use purified water so the levels of chlorine and fluoride aren’t as high as in the water straight out of the tap. A great way to do this naturally is to leave the water out for 24 hours to allow the chemicals to evaporate. You can also use filtered water or collected rainwater to avoid this sensitivity.

  4. Place your cuttings in water

    Make sure that the nodes on your Satin Pothos stem cutting are sat in the water so that the roots will start to grow out from them. Place your glass in bright but indirect sunlight. Intense light will damage the cutting and prevent a successful propagation. You can use a light monitor to figure out if you’re Satin Pothos cuttings are getting the right amount of sunlight. You can also supplement sunlight levels by using an LED grow light which are great at encouraging growth in cuttings. We love this one which is available on Amazon here.

    It’s at this stage that you might choose to use rooting hormone. This will help to speed up root growth on the new cuttings. We have always found this rooting gel to be successful – you can buy it on Amazon here.

  5. Change out the water regularly

    One of the most important steps in the Satin Pothos propagation process is to switch out the water in your glass regularly (every 2-3 days). This keeps the water free from bacteria and stops it from stagnating which is harmful to your cutting. Stagnant water will also start to smell so it’s something you really want to avoid.

  6. Be patient

    Luckily Satin Pothos plants are fairly quick at growing roots and after a week or two, you should start to see them popping through. It can be a little unpredictable though so just make sure your cuttings are getting enough light, warmth and fresh water and you should start to see roots soon.

  7. Plant your cuttings into fresh potting mix

    Once the roots on your Satin Pothos cutting are a few inches long, it’s time to pot them into soil! We recommend using a high-quality potting mix to aid with drainage and aeration. Our top choice for soil would be this potting mix from Miracle Gro. Carefully place your cuttings a few centimetres into the soil, making sure not to damage the newly formed roots as they can be quite delicate.

  8. Resume usual Satin Pothos care

    For the first few weeks of your cuttings living in potting mix, we recommend keeping the soil a little more moist than usual as the cuttings are used to living in water. But after a few weeks, you can go back to usual Satin Pothos care and soon those cuttings will be long enough to propagate again!

Propagate a Satin Pothos through division of the mother plant

This method of propagation only really works if your Satin Pothos is quite bushy and you don’t mind taking a chunk from it to form a new plant. But it’s a great way to propagate your Pothos plant if you don’t want to wait weeks and months for new growth. This way you get two (or more) plants instantly!

  1. Take your plant out of the pot

    In order to propagate your Satin Pothos through division, you need to be able to locate the various vines and separate out the roots. Take your plant out of its pot carefully, trying not to damage the leaves or root system.

  2. Locate the various natural divisions

    When looking for a part of the plant to divide it will become very obvious that there are various different offshoots and stems on your Satin Pothos. The best way to locate them is by following each individual vine and loosening the roots around it.

    Shake off the potting mix around the roots so you can see the entire root system clearly. A good way to loosen the soil is to run your fingers through the roots to start to separate them. Don’t worry if a few break or fall out, this is normal and won’t cause much damage to your plant.

  3. Separate your plant

    You may have to trim off the odd root here and there if they aren’t detangling easily but you should be able to carefully pull the sections and vines apart from each other. It’s ok if you have to slice around the plant a little to separate them but just make sure that each section ends up with a good amount of roots to ensure your propagation is successful.

  4. Place each section in fresh potting mix

    Pop your mother plant back into its original pot (or downsize slightly if you have taken away a substantial amount of the original plant). Then pot your new Satin Pothos plant(s) into fresh potting mix.

    If the roots aren’t very mature you may want to grow them in water for a few weeks but we tend to always go straight into potting mix when propagating Satin Pothos through division. Never reuse old potting mix from another plant as this can contain pests or bacteria that will transfer onto your new Satin Pothos plant.

  5. Continue normal care

    That’s all, your Satin Pothos propagation is complete! Now your plants are safely in their new homes you want to resume normal Pothos care.

Satin Pothos Propagation FAQs

Here’s some answers to the most common questions we get on this subject, hopefully something here can help!

Common problems when propagating a Satin Pothos plant

Propagating plants doesn’t always have a 100% success rate and you may encounter some problems along the way. But don’t worry, below we have all the main problems you may face when propagating your Satin Pothos so you can figure out what is causing these problems to arise and hopefully solve them before it kills your plant cuttings.

We hope you have found this complete guide to Satin Pothos propagation useful. You might not get a 100% success rate all the time as some cuttings take longer to root in and sometimes it just doesn’t work. But as long as you are equipped with the right method, care, environment and tools you should have a pretty good shot at growing new Satin Pothos plants. We have had to wait several months before seeing any root growth on plant cuttings so it really can just be a waiting game. But the end result is worth it so be patient!

Check out our full Satin Pothos care guide to find all the information on how to continue to care for your cuttings once they have matured.

Fiddle and Thorn is a participant in the Amazon Services LLC Associates Program, an affiliate advertising program designed to provide a means for sites to earn advertising fees by advertising and linking to Amazon.com

Take our houseplant survey!

Quickly respond to our 30 second houseplant survey and get 75% off our Complete Houseplant Care eBook!

Take the Survey

No thanks…

How to Propagate a Rubber Plant | Step by Step Methods

Last Updated: March 15, 2023

Rubber Plants (Ficus elastica) is one of the houseplant classics! With their elegant leaves and easy care routine, it’s no surprise why these plants are so loved. If you’ve been thinking about expanding your urban jungle, then propagating your plant is a great way to go. They aren’t always the easiest plant to use though but we hope this guide will guide you through everything. From step by step methods, to what tools you’ll need and common problems you might face in the process.

Why propagate a Rubber Plant?

Before we get into the details, you might be wondering why it’s beneficial to propagate your plant in the first place? Well here are some of the main reasons:


  • Create more plants for free!

    This is often the most common reason as it’s a great way to expand your plant collection without needing to spend any more money! They also make great gifts for friends and family if you already have enough houseplants.

  • Save a dying plant

    If you’ve accidentally overwatered (which is easy to do), over-fertilised or simply forgotten about your plant for too long and it has started to die, sometimes the best way to save it is by taking the healthy stems and using them to create new healthy plants before it’s too late.

  • If it has outgrown the spot in your home

    Giving them a trim is a great way to cut back some of the growth. This is a great way to make use of those cuttings.

What tools/equipment will I need to propagate my Rubber Plant?

Let’s start off with the easy part, here’s everything you’ll need:

  • Healthy and mature Rubber Plant

  • Clean, sharp scissors/shears

  • Spare pot(s)

  • Fresh potting mix and water

  • Newspaper or plastic sheet (if propagating indoors)

  • Rooting hormone (optional)

  • Gardening gloves (optional)

  • Toothpick, peat moss, plant tie and plastic wrap (if using the air layering method)

What methods of propagation can be used?

There are two main methods; stem cuttings and air layering. The first method is definitely the easiest and can be done using top cuttings or stem cuttings (more on that later). Stem cutting method is great for not only all maturities, but it’s also a lot easier so you don’t have to be a pro to get this one right.

The air layering method can be a bit of a challenge, and the success rate is lower. However, if you are pretty experienced at the other propagation methods and want a bit of a challenge, this method can be a lot of fun!

How to propagate a Rubber Plant through stem cuttings

  1. Locate healthy stem(s)

    It’s really important when choosing which bit to propagate, that the section of the plant is healthy. Avoid using any stems or leaves that show signs of disease or pests, most commonly brown or yellow patches on the leaves. You also need to make sure that the part of the stem has at least one node.

    Nodes are stem joints where the leaves come out from. You will pick the top of one of the stems for the first cutting, but you can then also take stem cuttings lower down to have a few shots at success. The process is exactly the same whether you choose the top cutting, or stem cuttings further down as well.

  2. Make the cut(s)

    This can be the scary bit – especially with Rubber Plants that don’t have many stems so one cut feels like quite a big deal! Now that you have located the section of stem that you want to propagate, you need to cut it off! We recommend wearing gloves in this stage as the sap can be quite toxic if ingested.

  3. Take off any lower leaves

    As you’ll be placing your cutting in water for several weeks you want to carefully remove any leaves on the lower part of the cutting that may end up sitting in the water. They will rot if they are sat in water for a long period of time so best to cut them off now. If your cutting only has a few leaves then skip this step and make sure the water level isn’t super high (this will mean you will have to top up the water more often as there is an increased risk that the cutting will dry out).

  4. Fill up a tall container with water

    Next, you want to fill up a glass with fresh water to place your cutting into.

    Use temperate water as extremes will harm your cutting and decrease your chances of a successful propagation. We like to use a transparent container, not only to see the roots grow which can be pretty cool but to keep an eye out for any signs of unhappiness. Spotting issues on your cuttings early is the secret to solving them quickly!

  5. Place your Rubber Plant cutting in water

    Make sure that the node(s) of your stem cutting is sat in the water so that the roots will start to grow out from there. Place your glass in bright but indirect sunlight (direct sunlight can be too intense for new cuttings) and away from any temperature extremes.

  6. Change out the water regularly

    Make sure you are switching out the water in the glass every couple of days. This will stop it from stagnating and keep it free from bad bacteria that can really damage your cutting. Stagnant water will also smell quite bad so it’s something you really want to avoid.

  7. Now just wait

    Once you’ve gotten into the routine of regularly switching out the water, the rest can be a little boring

    You might not see anything for several weeks and sometimes even months but this is normal and not a sign that it won’t work. Rubber Plants grow slowly and the same is for the cuttings.

    As long as your cutting is getting the right care and environment, you should see roots pop out soon, followed by new leaves!

  8. Plant your cuttings into fresh potting mix

    Once the roots on your cutting have matured, you can now pot into fresh potting mix. Always use a fresh, high-quality mix to ensure your new plant is getting the right balance of nutrients as well as reducing the risk of pests that comes from reusing potting mix.

    Carefully place your cutting into the mix making sure not to damage the delicate newly formed roots and continue regular Rubber Plant care.

How to propagate a Rubber Plant through air layering

This method can be a little trickier and fiddlier so we only recommend it if you are slightly more experienced (or you want a little bit of a challenge).


  1. Locate a healthy stem

    When choosing the air layering method you want to make sure you are using a healthy and strong plant. With stem cuttings, you could get away with using the healthy part of the plant but as you won’t be removing anything from the plant for a while, it’s important that your entire plant looks healthy.

  2. Make a vertical incision into the stem

    Using a clean knife make a vertical cut into your Rubber Plant’s stem that is a couple of inches long. You want it to go about halfway through the stem. When making the cut it’s important you don’t slice all the way through to the other side of the stem.

  3. Open up the incision in the stem

    Insert a toothpick into the centre of the incision to hold it slightly open. This can be a little fiddly as you don’t want to poke all the way through the stem so take your time when doing this.

  4. Attach damp peat moss to the side of the incision

    You want to tie the peat moss around the stem with the cutting in making sure it stays damp but not soggy at all times. Use brown string, plant ties or garden wire to secure the peat moss to your plant’s stem.

  5. Wrap up the incision using peat moss

    Wrap a piece of plastic wrap around the peat moss and stem. Wrap it firmly around the stem but still leaving some air pockets around the peat moss.

  6. Once you see a new root you can cut off the stem

    After several weeks you should start to see new roots growing out of the peat moss. Once you see this you can slice the cutting off your plant, remove the film and pot the cutting into fresh potting mix. Handle your new cutting with care as the fresh roots will be delicate and easily damaged.

Rubber Plant Propagation FAQs

Common problems when propagating a Rubber Plant

It won’t always be successful and you’re more than likely to come across some issues along the way. Spotting the problems early and knowing how to solve them will give you the best chance at getting your cutting back to full health.

Where is the node on a Rubber Plant?

Locating the node on your Rubber Plant is crucial to successful propagation as you’ll know where to make the cut. Without a node, it’s impossible to propagate your Rubber Plant with just a single leaf. Rubber Plants have nodes at each stem joint where a leaf is growing out from.

Nodes can be a little hard to feel on the stem of a Rubber Plant as there isn’t often a bulge like you’ll find on other plants.

How to care for your Rubber Plant cuttings after propagation

After your propagation is complete, now all of your attention will be focused on caring for your new plants and ensuring they mature properly. Although they have a reputation for being easy to care for, there are a few things you need to do and monitor that will help your plant thrive.

When it comes to sunlight, make sure that your Rubber Plant is getting enough sunlight but stay away from direct light. Mature Rubber Plants don’t do well with intense light and you need to be especially careful with less mature plants as they are more sensitive to the extremes.

You also need to make sure that your new plants receive enough warmth after the propagation process is over. make sure they are away from any cold drafts as this will stunt growth and increases the risk of root rot. Misting and using a humidifier will also go a long way to keeping those edges and leaf tips from drying out.

Check out our full Rubber Plant care guide to find all the information on how to continue to care for your cuttings once they have matured.

We hope you have found this guide useful. It is always an unpredictable process so things won’t happen like clockwork. You just have to sit back and wait with one eye on your cutting! But with the right care and the ideal environment, you shouldn’t have too many problems.

Check out our full Rubber Plant Care Guide for all the information on how to continue care for your cutting once it has matured.

Fiddle and Thorn is a participant in the Amazon Services LLC Associates Program, an affiliate advertising program designed to provide a means for sites to earn advertising fees by advertising and linking to Amazon.com

Take our houseplant survey!

Quickly respond to our 30 second houseplant survey and get 75% off our Complete Houseplant Care eBook!

Take the Survey

No thanks…

How to propagate a Rattlesnake Plant

Last Updated: March 27, 2022

Unlike their name suggests, the Rattlesnake Plant is a super easy to care for, non-toxic plant that adds a little something vibrant to your home.

You’ll be very pleased to hear that propagating a Rattlesnake Plant is actually quite an easy process, and it’s super quick too so you can create several new plants in minutes! In this post, we will go through the whole process of how to propagate a Rattlesnake Plant to make sure it’s a success.

What methods can I use to propagate my Rattlesnake Plant?

Although propagating Rattlesnake Plants is easy, this is because you can only propagate it through division. Whilst it’s possible to propagate through the cultivation of seeds, this is a very difficult and slow process and we don’t recommend trying it at home. The other downside to propagating Rattlesnake Plant is that as you are using division, you’ll need quite a mature plant and won’t work on baby plants.

How to propagate a Rattlesnake Plant through division

  1. Remove your plant from its pot

    Hold the plant firmly at the bottom of the stems and gently pull it out of the pot. You want to be careful not to damage the leaves at this stage as they are quite delicate.

  2. Shake off the potting mix from the roots

    Our top tip is to loosely run your fingers through the root system to shake off the soil. Do this gently so you don’t snap any of the large roots.

  3. Untangle the various natural sections

    To do this, you might need to slice through a few roots using pruning scissors. If your Rattlesnake Plant only has one central section, then you will need to slice your plant in half or slice off a section to create two individual plants.

  4. Grow in water or straight into fresh potting mix

    You need to decide if you want to grow your new plant in water first or plant it straight into potting mix. Either option can work but if your new plant has quite short and delicate roots, you might want to grow it in water for a few weeks.

  5. Continue a normal Rattlesnake Plant care routine

    If your new plant is now in fresh potting mix then you can care for it as you would your other Rattlesnake Plant. If you’ve decided to grow it in water for a while, make sure to refresh the water every few days to prevent it from stagnating. Once the roots have matured a little, pot into fresh soil.

Can I propagate my Rattlesnake Plant from a single leaf?

Unfortunately, it’s not possible to propagate a Rattlesnake Plant from a leaf cutting or a stem cutting. This is because it needs part of the central section for roots to grow out of.

What time of year should I propagate my Rattlesnake Plant?

As you can only propagate your Rattlesnake Plant through division, you can usually propagate it throughout the year. We recommend not doing it in the height of winter as this can lead to more problems but for the rest of the year, this should be absolutely fine.

Those are all the important things you need to know about how to propagate a Rattlesnake Plant. Each and every individual plant is different so the process won’t always follow the exact same timeline. Environmental factors also play a role in the speed and success of your propagation efforts so make sure your new plant is getting everything it needs.

To learn more about how to care for your new plants after propagation, check out our Rattlesnake Plant care guide.

Fiddle and Thorn is a participant in the Amazon Services LLC Associates Program, an affiliate advertising program designed to provide a means for sites to earn advertising fees by advertising and linking to Amazon.com

Take our houseplant survey!

Quickly respond to our 30 second houseplant survey and get 75% off our Complete Houseplant Care eBook!

Take the Survey

No thanks…

How to Propagate a Raindrop Peperomia

Last Updated: May 17, 2022

Below you’ll find our complete Raindrop Peperomia propagation guide, with a step by step guide to the different methods, a list of tools and equipment that you’ll need as well as our top tips to help you along the way. Oh and we’ve also included a list of common problems to help you identify any problems and solve them fast!

Why propagate a Raindrop Peperomia?

Firstly, simply getting new houseplants for free; this is a great way to make gifts for friends and family without having to spend more money on plants (although we love doing that too of course!)

Another reason why you might choose to propagate your Raindrop Peperomia is to shape your plant and curb any leggy growth. Pruning your plant can help to encourage bushier growth and instead of simply throwing away those beautiful cutting, this gives you the perfect opportunity to grow new plants.

You may also need to take some plant cuttings if you notice any bad signs such as brown or yellow leaves, loss of leaves or signs of pests. If you think your plant is starting to die, it might be a good idea to take some cuttings from the healthy part of your plant and propagate it whilst also trying to revive your mother plant.

The tools/equipment you will need


  • A healthy and mature Raindrop Peperomia

  • Sharp scissors/shears

  • Spare pot(s)

  • Fresh soil and water

  • Sealable plastic bag (if propagating through the leaf-cutting method)

What are the different methods that can be used to propagate a Raindrop Peperomia?

One of the greatest things about these plants is that there are several ways to propagate them. Each method comes, of course, with its own set of advantages, challenges and barriers.

You can also just use one whole leaf of your Raindrop Peperomia and roots will form from the leaf stem but you can also cut the leaf and place the sections in potting mix to grow new roots. Another method you can use is dividing cutlets and growing those in water or directly in potting soil depending on the maturity of the root system.

Propagating a Raindrop Peperomia

Raindrop Peperomia Plant

How to propagate a Raindrop Peperomia using leaf cuttings

Unlike a lot of other houseplants, you can use just a single leaf, rather than needing a node or stem cutting!


  1. Locate a healthy leaf

    When taking a leaf cutting you want to make sure that the part of the plant you are cutting is healthy to give you any chance of success. Avoid using any leaves that are showing signs of disease or pests as any problems will be transferred onto your new cuttings.

    You can try to use leaves that have naturally fallen off (as you’ve got nothing to lose) but you will have more success with healthy leaves.

  2. Make the cut

    Use your clean scissors to cut off one or several leaves. Make sure your tools are clean to avoid passing on any bad bacteria to your cutting. Cut fairly close to the stem to as this helps if you choose to grow it in water.

  3. Choose how to grow your leaf cutting

    It’s at this stage you need to decide between the two main methods of growing leaf cuttings. The first method is where you place the stalk attached to the leaf in fresh water. After several weeks, roots will begin to grow.

    For the second method you need to cut the leaf in half horizontally. Place both parts of the leaf into the potting mix with the cut side facing down. Push the leaf section with the stem further into the soil than the other as this is where the roots will form. With this method, you should see multiple Peperomia plants grow out across the edge of the leaf that was cut.

  4. Place in a sealable clear plastic bag

    If you’ve pot your cuttings in fresh mix, you want to create a little greenhouse with a plastic bag to make the environment warm and humid. Keep the bag a little open to have some air circulation. The humidity that will build up in the bag means you won’t have to water as much. Just a little each week or slightly more if you notice the potting mix is very dry.

  5. Be patient

    Now all there is left to do is wait and occasionally water and check in on your Raindrop Peperomia cuttings. It will take several weeks or even months for roots to start to grow. The most important thing is that you don’t try and check root growth every few days by pulling the cutting out to inspect it. This can damage the cutting and stop any future growth.

  6. Check on your cuttings

    After about 4-5 weeks, it’s time to check how growth is progressing. If roots are still very small and delicate then maybe grow in the ‘greenhouse’ for a few more weeks. If roots are quite established then you can start to grow the cutting outside of the plastic bag. If you’re growing the cuttings in water, then transfer to potting mix once the roots are more than a few centimetres in length.

  7. Enjoy your new plants

    After a few months, you may start to see new leaves growing out from your leaf cutting. This is a great sign and shows that your propagation efforts have been a success. Continue caring for your new plants as you would any other Raindrop Peperomia and in no time you should start to see even more new healthy growth appearing.

How to propagate a Raindrop Peperomia plant through the stem cutting method

  1. Locate your stem cutting

    Like with the method above, you need to make sure that the plant is healthy. You also need to make sure this section has at least one node (stem joints). You will pick the top of one of the stems for the first cutting, but you can then also take stem cuttings lower down to have a few shots at success.

  2. Make the cut

    This is the scary part! Now that you have located the section of the stem, you need to cut it off! Use clean scissors/ shears or a knife to make the cut to avoid passing on dirt or any infection to the plant. Use your tools to make a clean cut across your plant in a diagonal way. This increases the surface area of the cutting which allows for faster root growth.

  3. Take off any lower leaves

    As you will be placing your cutting in water for several weeks you want to carefully remove any leaves on the lower part of the cutting that may end up sitting in the water. They will rot if they are sat in water for a long period of time so best to cut them off now. If your Raindrop Peperomia cutting only has a few leaves then skip this step and make sure the water level isn’t super high.

  4. Place your cuttings in water

    Make sure that the node(s) on the stem cutting is sat in the water so that the roots will start to grow out from there. Place your glass in bright but indirect sunlight away from any temperature extremes.

  5. Change out the water regularly

    Refresh the water every few days to keep it free from bacteria and stop it from stagnating. Stagnant water will not only harm your plant but it will smell pretty bad too!

  6. Be patient

    This is the point at which things can get a little boring. There is nothing left to do other than change out the water and wait for roots to grow. Don’t worry if this process takes several weeks or months as that is totally normal! Raindrop Peperomia propagation is very unpredictable and depends on a lot of things so just make sure your cutting is healthy and you should start to see new roots soon.

  7. Plant your cuttings into potting mix

    Once the roots have matured well growing in water you can pot your cutting into soil. We recommend using a high-quality potting mix to aid with drainage and aeration. Carefully place your cutting into the mix making sure not to damage the delicate newly formed roots and continue regular plant care.

Propagating a Raindrop Peperomia is easy!

Raindrop Peperomia plant

Raindrop Peperomia Propagation FAQs

Propagating these plants can be a little trickier than other plants (especially when using single leaves) so it’s really important to understand the various steps, the best time of year, equipment needed and fertiliser needs.

Common problems you might run into

Growing new houseplants from cuttings will never always be successful (even for plant experts) and you will probably run into some issues from time to time. But luckily for you, we have learnt the hard way to bring you all the different problems that might arise.

How to care for your Raindrop Peperomia after propagation

Peperomia Raindrop plants need quite a bit of sunlight to thrive but you want to make sure that your new plants aren’t getting too much direct light. Intense light can be particularly damaging to young plants so monitor the light level closely.

You also want to make sure that you are getting the right level of moisture in the soil. Not too much but not too little to keep an even moisture level. The roots on your new Raindrop Peperomia will be very delicate and particularly sensitive.

But it’s not just water and lighting that you need to monitor when it comes to caring for your new Raindrop Peperomia plants. They need warm temperatures and higher humidity levels to thrive. You want to make sure that you keep your new plants away from any cold drafts. This includes being near external windows or doors that are drafty but it also means away from air conditioning vents. Although the cool air might be refreshing for you, it can be really damaging to your plants. We recommend picking up a digital thermometer to keep track of any changes in temperature. It’s a small investment to make to ensure your new Raindrop Peperomia plants are in the right spot to aid root growth.

And when it comes to humidity, that’s pretty easy to take care of too. Whilst we can’t create a tropical paradise in our homes, misting every few days, using a pebble tray and buying a humidifier will go a long way to keeping your Raindrop Peperomia plants happy. It will prevent the leaves from drying out so it’s not something you want to forget about and hope for the best!

We hope you have found this complete guide to Raindrop Peperomia propagation useful. It’s never an exact science and some cuttings will take longer to grow than others.

Check out our Raindrop Peperomia care guide for more information on how to care for your new plants once they start to mature!

Fiddle and Thorn is a participant in the Amazon Services LLC Associates Program, an affiliate advertising program designed to provide a means for sites to earn advertising fees by advertising and linking to Amazon.com

Take our houseplant survey!

Quickly respond to our 30 second houseplant survey and get 75% off our Complete Houseplant Care eBook!

Take the Survey

No thanks…

How to Propagate a Prickly Pear Cactus

Last Updated: November 5, 2023

Prickly Pear Cacti

Prickly Pear Cacti

The Prickly Pear Cactus, known scientifically as the genus Opuntia, is particularly popular due to its unique flat pads, colourful blooms, and edible fruit. Known for being a resilient plant, it is an excellent choice for both experienced gardeners and beginners.

Propagating a Prickly Pear Cactus is relatively straightforward, but there are a few things you should know before you get started, including the methods, how to take the cuttings and how to care for your new plant babies. We will cover all of this and more below.

Methods of Prickly Pear Cactus Propagation

When it comes to propagating the Prickly Pear Cactus, you have three options. Each method has its own benefits, challenges and suitable conditions that affect the success rate of propagation.

Propagation through seeds

One of the traditional methods of propagation is using the seeds. In nature, propagation through seeds often happens after the fruit is eaten by wildlife and the seeds are dispersed in their droppings.

In a home setting, you carefully remove the seeds from the fruit, clean them thoroughly, and finally, sow them in a suitable growing medium.

We don’t tend to recommend this method to beginner plant parents because it can be quite tricky and has a lower success rate compared to the other two methods. But these aren’t the only downsides as seed propagation is super slow!

Propagation through cuttings

A common and generally successful method is propagation through cuttings. The process involves cutting the pads of the cactus, also known as cladodes, letting the cutting callus over, and then planting it in a suitable planting medium.

This approach tends to yield higher success rates, as it provides a more mature starting point for growth.

Propagation through offsets

Finally, there is propagation through offsets. The Prickly Pear Cactus often produces smaller side shoots, known as offsets or ‘pups.’

You can separate these from the mother plant and repot them.

As these offsets are already partially mature and contain established tissues, they often take root and grow successfully, providing a relatively easy method of propagation.

The one downside to this method is that you are of course only able to do it if your Prickly Pear Cactus has offshoots, which means this won’t be suitable for everyone.

Creating a Suitable Propagation Environment

Once you’ve decided on your propagation method, creating a suitable environment for your Prickly Pear Cactus is the next crucial step. These plants are native to arid regions, so they prefer conditions that mimic their natural habitats: think well-draining soil, plenty of sun, and minimal water.

Choosing the Right Soil

Apart from sunlight, the type of soil you use is one of the most significant factors in successful prickly pear propagation.

A well-draining potting mix – often sold as “cactus mix” or “succulent mix” – is essential. These mixes typically contain coarse sand, perlite, or pumice to increase drainage.

If those aren’t available, you can make your own by mixing two parts regular potting soil with one part coarse sand and one part perlite.

Sunlight and Temperature

Prickly pear cacti love the sun! Ensure your plant gets plenty of direct sunlight each day. But remember – while they’re heat-tolerant, temperatures above 100°F (38°C) can cause damage as it may dry out your Cactus over time.

During winter, your prickly pear will appreciate cooler temperatures and may even need some protection from frost if temperatures drop below freezing. As a general rule, aim for temperatures between 70-85°F (21-29°C).

Watering Needs

Overwatering is the most common cause of failure when propagating cacti (and caring for them too). Extra moisture can cause root rot, one of the few things capable of killing these hardy plants.

The key is to let the soil fully dry out between waterings, then water thoroughly.

Propagation Containers

Another aspect to consider is the propagation container. Ideally, this should have drainage holes (to prevent water-logging), be relatively shallow (since cactus roots don’t run too deep), and be made of a material that doesn’t retain too much moisture, such as terracotta or unglazed ceramics.

Using Seeds to Propagate a Prickly Pear Cactus

Before you get started it is important to know that this method is significantly more time-consuming and requires a lot of patience.

Gathering Seeds

To get the seeds, you need to wait for the cactus to bloom and produce fruit, which typically happens in late summer. The fruit of the Prickly Pear, commonly known as ‘Tunas’, carry the seeds.

Wait for the fruit to ripen; it’ll turn a deep red or purple color. Carefully harvest a few ripe ones but remember to protect your hands with gloves when handling these prickly fruits.

Cleaning and Drying the Seeds

Next, cut the harvested fruit open and scoop out the seeds. It’s wise to wash the seeds to get rid of the pulp. Set them aside to dry for a few days until they’re hard and dry.

Planting the Seeds

Make sure you choose a container with drainage holes to avoid water-logging. Add a well-drained soil mixture; preferably a cactus/succulent mix.

Before planting, soak your seeds in warm water for around 30 minutes: this helps to soften the hard seed coats. Once soaked, press the seeds gently into the soil.

Aim at having about an inch space between each seed so they have room to grow.

Providing the Required Conditions

Cacti seeds need warmth for germination so a sunny windowsill location will do the trick. Cover the pot with plastic to maintain humidity, but make sure there’s still some air circulation.

Keep the soil slightly moist but beware of overwatering.

The germination time can take anywhere from two weeks to a few months so patience is key when it comes to propagating Prickly Pear Cacti from seeds.

Taking Cuttings to Propagate a Prickly Pear Cactus

When it comes to propagating a Prickly Pear Cactus, cuttings are arguably the most efficient and straightforward method.

Before we get into the steps, we just want to point out one thing you need: a mature, healthy Prickly Pear Cactus. If your mother plant has issues, your propagation is likely going to be unsuccessful.

Choosing aHealthy Pad to Cut

You begin by identifying a healthy pad on the cactus—this typically appears firm and plump, exhibiting a vibrant green hue.

Removing the Cuttings Safely

After selecting the right pad, it’s time to make a clean cut. You’ll need a pair of gardening gloves for this as you don’t want to hurt yourself in the process!

Using a sterile, sharp knife, you make a cut at the joint, where the pad you want to remove meets another pad. A clean, swift cut inhibits the growth of bacteria, reducing any risk of infection.

Caring for Prickly Pear Cactus Cuttings

Once you have managed to successfully take the cuttings from a healthy prickly pear cactus, it’s time for the next crucial phase – caring for these cuttings.

Give the Cuttings Time to Callus

The very first step in caring for your prickly pear cactus cuttings is to allow them time to form a callus.

A callus forms a sort of protective layer which ensures that the cutting isn’t susceptible to rot or fungal infections when it eventually gets into the soil.

Typically, it could take anywhere between a week to two weeks for your cuttings to fully callus.

Planting the Cuttings

Once you notice the appearance of a sturdy callus, it’s the green light for you to proceed to planting. Make sure to use a good draining soil, and set the cuttings into this soil.

It is important, at this juncture, to not water the soil immediately. Give it about a week before the initial watering. This ensures that the cuttings adapt to their new home without the risk of becoming too waterlogged.

Provide Adequate Light and Temperature

When it comes to lighting, Prickly Pear Cactus cuttings favor bright succulent-friendly lights. A nice spot by the window with a lot of indirect sunlight is ideal. On top of this, maintaining a warm temperature will help with the root development process.

Watering the Cuttings

Once the cuttings are in the soil and have had their initial period without water, you can proceed to water them.

Moving forward, a good way to gauge if your cuttings need watering is to check the dryness of the soil. If it’s dry to the touch, chances are your cactus could use a drink.

Propagating Prickly Pear Cactus Through Offsets

Have you ever noticed the tiny, spiny clusters or ‘babies’ that grow out from the base or the sides of your Prickly Pear? These are known as offsets. Propagating these offsets is one of the most effective and easiest methods of Prickly Pear propagation. Here’s everything you need to know:

Detaching The Offsets

Detaching offsets involves carefully separating the offset from the mother plant. To do this, you should gently twist the offset until it comes away from the parent Prickly Pear.

Use gloves or layers of newspaper to protect your hands from the spines. If the offset is quite small, you may need to use a clean, sharp knife to cut it free.

Preparing The Offsets

Once you have your offset, the next step is to prepare it for planting. Much like propagating through cuttings, you will need to let the offset dry out for a few days till a callus forms over the cut surface.

This protects the offset from infections and rot.

Planting The Offsets

After the offset has dried and callused, you can plant it. Choose the right soil mix, which should be well-draining. Plant the offset with its callused end in the soil.

Control watering to ensure the soil remains moderately moist, but never waterlogged as too much water can lead to root rot.

Caring for The Offsets

Keep the pot in an area with bright indirect light and a warm temperature. Ensure you water the newly planted offset carefully to avoid over-saturation. As it establishes a good root system, you can gradually increase its exposure to direct sunlight and reduce watering frequency.

Common Issues in Prickly Pear Cactus Propagation

Rotting Cuttings or Offsets

If your cuttings or offsets start to rot, it’s usually a sign of overwatering or improper drainage. What can you do? Begin by setting the afflicted cutting or offset aside.

Allow it to dry out completely before you consider replanting it once more. If the rot isn’t too severe, it’s possible to save the cutting by cutting away the rotten part.

Seedlings Not Germinating

What if your seeds don’t sprout? First, check the age of the seeds. If they’re old or even of poor-quality, germination might not occur.

Secondly, ensure your temperature and moisture levels are correct. Prickly pear seeds need a warm environment to germinate; consider placing the seeds in a mini greenhouse or covering the pot with clear plastic to retain warmth and moisture.

Poor Growth

Poor growth or stunted plants can often be a sign that they are not receiving enough light, the temperature isn’t ideal, or the soil doesn’t meet their requirements.

Yellowing or Fading Cacti

A prickly pear cactus turning yellow or fading can be a symptom of too much direct sunlight, which causes the plant to bleach and lose its vibrant color.

If you notice this, try adjusting the plant’s position or providing a screen to protect the cactus from harsh sunlight. Also, ensure that the cactus isn’t overwatered, as this can also lead to yellowing.

Frequently Asked Questions

How long does it take for aprickly pear cutting to root?

The rooting process can take anywhere from 2 weeks to a couple of months, depending on the environmental conditions such as temperature, light, and humidity. Patience, you’ll find, is a must-have for any cactus propagator!

Should Iwater prickly pear cuttings right after planting?

As counterintuitive as it might sound, you should actually hold off on watering right after planting. Waiting a week or so gives the cutting time to form a callus over the wound, reducing the risk of rotting.

Once this dry callus forms, regular but careful watering can commence.

Can you grow prickly pears from seeds without stratification?

Stratification – the process of treating stored or collected seeds to simulate natural winter conditions – isn’t typically necessary for prickly pears. These resilient plants can usually succeed without it.

However, some propagators recommend a simple cold stratification step if you’re having trouble with germination.

What kind of soil is best for propagating prickly pears?

Just like other cacti, prickly pears prefer a well-draining soil mix. They don’t bode well in wet environments. A mixture of coarse sand, perlite, and regular potting soil is ideal.

If you prefer purchasing pre-made soil, look for a mix labeled ‘cactus mix’ or ‘succulent mix.’

Why are my prickly pear cuttings turning yellow or soft?

Yellowing, softening, or shriveling of your prickly pear cuttings is typically an SOS sign from your cactus, indicating either overwatering or poor lighting conditions. If the soil is still waterlogged, replace it immediately rather than waiting for it to dry out naturally.

Sticking to a careful watering schedule and providing ample sunlight can help mitigate this issue.

Why are my prickly pear seeds not germinating?

Several factors can contribute to this. For instance, the temperature might be too low, the seeds might not be fresh, or they could be lacking the necessary light exposure. Review the conditions you’re providing for your seeds, and adjust accordingly.

Fiddle and Thorn is a participant in the Amazon Services LLC Associates Program, an affiliate advertising program designed to provide a means for sites to earn advertising fees by advertising and linking to Amazon.com

Take our houseplant survey!

Quickly respond to our 30 second houseplant survey and get 75% off our Complete Houseplant Care eBook!

Take the Survey

No thanks…

How to propagate a Prayer Plant

Last Updated: September 5, 2023

Maranta plants get their nickname ‘Prayer Plants’ from the unique way their leaves fold in the evenings which looks as if they are praying. If you were to timelapse your plant, you’d be shocked at how much it moved. These incredible plants add that splash of colour that every urban jungle needs so we aren’t surprised you want to propagate your plant and create more of that!

In this post, we will go over everything you need to know when it comes to how to propagate a Prayer Plant, from the methods used, step by step guides and some of the most important questions you might have along the way.

Is propagating a Prayer Plant easy?

There are two main methods you can use to propagate your Prayer Plant (more on that below) and they differ in difficulty. If you want to propagate through stem cuttings then not only does this take a lot longer, but it can be more difficult and less successful. Propagating through division though is a lot simpler and there are very few things that can go wrong.

What methods can I use to propagate my Prayer Plant?

As we mentioned above, there are two methods that allow you to propagate your Prayer Plant. Firstly, stem cuttings which are suitable for all maturities of Prayer Plant which is the main benefit. You can also propagate through division if you have a more mature plant. Below you’ll find a step by step of each of the methods.

How to propagate a Prayer Plant using stem cuttings

This is the main method of propagating Prayer Plants as it’s suitable for all maturities and doesn’t require you to take your plant out of its pot.

  1. Locate a few healthy Prayer Plant stems

    When taking a stem cutting you want to make sure that the part of the plant you are cutting is healthy. Avoid any sign of disease or pests as they will be transferred onto your new plants which can damage your chances at a successful propagation.

    When taking cuttings to propagate your Prayer Plant, you need to check for one important thing; a node. Without it, you will have a very slim chance of successful propagation. A node is where a leaf has grown from the stem.

  2. Make the cut

    Use your clean scissors to cut off one or more stems. You want to make sure that you have at least 2-3 leaves on your cutting as this ensures you have a few good nodes from which roots can grow out. It’s completely up to you as to how many stem cuttings you take from your plant.

  3. Fill up a transparent container with water

    Now that you have taken your cuttings, you need to grow them in water to allow the roots to grow. We like to use a transparent container so that you can see what’s going on with your cuttings, spot any issues quickly and track root growth.

  4. Place your cuttings in bright but indirect light

    It’s super important your cuttings aren’t exposed to any intense direct light as it will very quickly burn the cutting and prevent a successful propagation.

  5. Change out the water regularly

    Changing out the water every few days keeps it free from bacteria and stops it from stagnating which is harmful to your cutting.

  6. Be patient

    Luckily Prayer Plant cuttings grow roots pretty quickly compared to a lot of other plants so you should start to see two delicate roots pop out from the node after a couple of weeks.

    Don’t be alarmed if your cutting hasn’t grown any new roots in a few weeks as the process is unpredictable and some cuttings will grow roots a lot faster than others.

  7. Plant your Prayer Plant cuttings into fresh potting mix

    Once the roots on your Prayer Plant cuttings are a few centimetres long you can start to think about potting them in potting mix. The roots will be very delicate at this time so be careful when potting them to ensure they don’t snap.

    Carefully place your cuttings a few centimetres into the soil. You can also pop the cuttings back into the mother plant so it becomes a little fuller – it’s up to you!

  8. Resume your usual Prayer Plant care routine

    Now that your cuttings are in their home, you can go back to your usual Prayer Plant care routine. Keep a close eye on your new cuttings for a few weeks after potting them in soil to ensure things are going well. Before you know it, your cuttings will be long and mature enough to propagate!

How to propagate a Prayer Plant through the division method

  1. Remove your Prayer Plant from its pot

    Be careful if any of the roots have started to grow out of the drainage holes as you might need to untangle these to prevent them from snapping. You also want to avoid pulling at the leaves to remove the plant as they are quite thin and will likely rip and break off.

  2. Remove the potting mix from the roots

    Loosely run your fingers through the root system to shake off the soil. This will allow you to see the natural section of the plant more clearly. It’s at this point that you can decide how many plants you want to create.

  3. Untangle the various natural sections

    To do this, you might need to slice through a few roots using pruning scissors. As long as you are only cutting through a few of the smaller roots, this should have no impact on the overall health of your plant. Avoid cutting any thick large roots as these are integral to your plant’s health.

    If your Prayer Plant only has one central section, then you will need to slice your plant in half or slice off a section to create two individual plants. Don’t be afraid to do this as the sections will be completely OK as long as they still have some of the mature roots attached.

  4. Pot into fresh potting mix

    Pop your mother Prayer Plant plant back in its pot (or pot into a smaller one if you have removed a large section of the root system and leaves). Then pot your new plant into fresh soil, ensuring the pot isn’t too big, but there is still some space for it to grow into.

  5. Continue your normal Prayer Plant care habits

    That’s the process complete, we told you it was simple! Now all that’s left is to keep a close eye on your plant for a few weeks to make sure that no unexpected issues crop up.

Can I propagate my Prayer Plant from a single leaf?

Unfortunately, you can’t propagate your Prayer Plant using just a leaf. This is because it needs a stem node as this is where roots develop. If you did try to grow a single leaf, it would stay alive for several weeks in water, but no roots would grow and it would slowly wilt and die.

What season should I propagate my Prayer Plant in?

If you are using the division method when propagating your Prayer Plant, then you can do this all year around. Whilst warmer months are more ideal, as your new plant will already have established roots attached, it’s not as crucial.

However, when using the stem cutting method, you must start this in mid-spring. Make sure all of the wintery weather is behind you before taking your cuttings. Roots will take a long time to fully establish themselves which means your Prayer Plant cutting will need plenty of warmth and sunshine.

Where is the node on a Prayer Plant?

You can find the nodes on a Prayer Plant by looking at where the leaves and stems join. At each of these joints is a node. Prayer Plants also have nodes where two stems join so you are able to use any of these points to propagate.

Propagating a Prayer Plant without a node

Unfortunately, it’s not possible to propagate a Prayer Plant without a node. Growth tissue is found in the node, so without it, it’s not possible for new leaves to develop. If you do try propagating a Prayer Plant without a node, the leaf will likely survive for a week or two but then will slightly wilt.

So that’s how you propagate a Prayer Plant! If you follow all of the right steps, then you shouldn’t run into too many issues but the key to success is really keeping a close eye on your plant and cuttings. This will help you spot any very early warning signs and you can solve the problem before it’s really harmed your plant. Make sure to give your Prayer Plant good lighting and warmth, you should have plenty of success.

To learn more about how to care for your new plants after propagation, check out our Prayer Plant care guide.

Fiddle and Thorn is a participant in the Amazon Services LLC Associates Program, an affiliate advertising program designed to provide a means for sites to earn advertising fees by advertising and linking to Amazon.com

Take our houseplant survey!

Quickly respond to our 30 second houseplant survey and get 75% off our Complete Houseplant Care eBook!

Take the Survey

No thanks…

How to Propagate a Pothos Plant

Last Updated: May 2, 2022

Propagating Pothos plants is definitely one of the simpler plants and you can create plenty of new plants from just a short vine cutting.

Below we will go through the different methods you can use to propagate your plant, including a step by step process as well as top tips and any issues you may come across.

Why propagate your Pothos plant?

Whether it’s a Devil’s Ivy, Snow Queen Pothos or one of the other incredible varieties, there are several reasons why you might choose to propagate your plant. The main reason is often simply wanting more plants!

Another reason is that their plant is either too long or becoming very leggy. Cutting your plant back encourages bushier growth and is a great way to cut back that winter growth which may have become straggly or leggy. But instead of simply throwing away those special Pothos cuttings, why not propagate them and start a whole new mother plant.

What tools/equipment will you need to propagate your Pothos plant?

It’s important to make sure you have all the right things before you start the whole process.


  • A healthy and mature Pothos plant

  • Clean, sharp scissors/shears

  • Spare pot(s)

  • Fresh potting mix and water

  • Newspaper or plastic sheet if propagating indoors

How to propagate a Pothos plant using vine cuttings

This is the main method as it’s suitable for all maturities and lengths of Pothos plants. It’s also really easy and means you can easily come away with several new plants by taking a short vine cutting.


  1. Locate a Healthy Vine

    When taking a vine cutting you want to make sure that the part of the plant you are cutting is healthy to give you the highest chance of success. Avoid using parts of the plant that show any sign of disease or pests (eg. brown or yellow leaves) as these problems will be transferred onto your new cuttings and intensified in such young plants.

    Ideally, you want to cut a vine that has several healthy nodes and leaves. A node is the joint in the vine where the root would grow out from (you will feel a slight bump running a finger down the vine). If you can, try to choose a section of the plant that already has short roots coming out of the nodes as this means it will be a more mature section of the plant and propagation will be quicker.

  2. Make the Cut(s)

    Using clean scissors, shears or a knife, make the cut across the vine. It’s important your tools are clean so they don’t pass on dirt or pests to the cutting or mother plant.

    Make sure that each section of the vine has at least one node and leaf. If possible try to include 2-3 nodes and leaves on each cutting but it will also work with just 1 so it depends on how much you want to cut off your plant. The number of cuttings you take is entirely up to you and depends on your Pothos plant!

  3. Fill up a Container with Water

    Next, you want to fill up a glass with fresh temperate water to place your Pothos cutting(s) into.

    It’s super important that you don’t use hot or cold water as this can very quickly shock or burn your delicate cuttings.

  4. Place your Cutting(s) in Water

    Make sure that the nodes on your vine cutting(s) are sat in the water so that the roots will start to grow out from them. Place your glass in bright but indirect sunlight, avoiding any direct light as this can burn the leaves.

  5. Make sure you change out the water regularly

    To prevent stagnant water and bacteria from forming, you need to be refreshing the water every few days.

  6. Be patient

    Now comes the boring part – waiting! However, the good news is that Pothos propagation is actually relatively quick and you should see roots growing after only a week or two. It can be a little unpredictable though so just make sure your cuttings are getting enough light, warmth and fresh water and you should start to see roots soon.

  7. Plant your cuttings into fresh potting mix

    Once the roots on your cutting are about 5 or more centimetres long, it’s time to pot them into fresh potting mix! We recommend using a high-quality potting mix to make sure your cuttings are getting enough nutrients. Carefully place your cuttings a few centimetres into the soil, making sure not to damage the newly formed roots as they can be quite delicate.

  8. Resume usual Pothos care

    For the first few weeks of your cuttings living in potting mix, we recommend keeping the soil a little more moist than usual as the cuttings are used to living in water and you don’t want their roots to dry out and shrivel up. But after a few weeks, you can go back to usual Pothos care and soon those vines will be long enough to propagate again!

How to propagate a Pothos plant through division

This method works best if your plant is quite bushy and has several separate vines. it’s a great way to propagate your Pothos plant if you don’t want to wait weeks and months for new growth but do be prepared to take a chunk out of the mother plant and it will appear thinner.


  1. Take your plant out of its pot

    You need to be able to locate the various vines and detangle the roots. Take your plant out of its pot carefully, trying not to damage the leaves or root system.

  2. Locate the various natural divisions in your Pothos plant

    When looking for a part of the plant to divide it will become very obvious that there are various different offshoots and vines that make up your Pothos plant. The best way to locate them is by following each individual vine from the tip to the pot.

    Shake off the potting mix around the roots so you can see the entire root system clearly. A good way to loosen the soil is to run your fingers through the roots to start to separate them. Don’t worry if a few break or fall out, this is normal and won’t cause much damage to your plant. Each vine should have its own root system that you can pull apart from each other.

  3. Separate the vines

    You may have to trim off the odd root here and there if the sections aren’t coming apart from each other very easily but with a bit of work, you should be able to separate out the different vines.

  4. Place each section in fresh potting mix

    Pop your mother plant back into its original pot (or downsize to a smaller pot if you’ve taken away quite a bit from the mother plant). Then pot your new plant(s) into fresh potting mix. As you are dividing an already mature plant, you can usually skip the water step!

  5. Continue normal Pothos plant care

    That’s all there is to it! The Ppropagation is complete! Now your new plants are safely in their new pots you want to simply care for them as you would the mother plant.

Pothos Propagation FAQs

What time of year should I propagate my Pothos plant?

Spring gives quite a few months of sunshine and a warm environment which encourages new roots and leaves to grow. The warm weather will also allow the mother plant to recover quicker from any shock caused by the propagation.

Starting in autumn or winter will mean that your cuttings will be trying to grow in the dormant period and you won’t see much happening as the rate of growth will be very slow. This increases the risk of root or leaf rot which can kill your cutting.

When propagating through division of the mother plant, you can get away with doing it in less than ideal conditions as the roots are already mature and you’re simply dividing up the plant.

Is it a good idea to use a rooting gel?

It’s definitely optional to use rooting hormone on Pothos plants but you might choose to use it to speed up the process. These products stimulate root growth on new cuttings which can also produce stronger roots but you can have great success without it.

There are 3 types of rooting hormone you can choose from: powder, liquid or gel. Gel and liquid forms are the best ones to use when propagating in water first and powder will simply dissolve off the cutting in the water and won’t have a very strong effect.

What is a node?

It’s important that you are able to identify the different parts of the plant so you know where to make the cut on your plant. A node is where the vine and leaf joints meet. On Pothos plants you will often see very small aerial roots or stubs growing out from the more mature nodes. If there isn’t a root there yet, you may feel a little bump in the vine which indicates a node.

Can I propagate a Pothos from a single leaf?

Unfortunately, you can’t just use a single Pothos leaf. There needs to be at least one node on each cutting as this is where the root system will start growing from. If you do try to propagate a single leaf, it will probably stay alive for a week or two before wilting and dying out very quickly.

Should I fertilise my cuttings?

We strongly recommend against using fertiliser until the plant is at least 1 year old (so that’s one less thing for your to-do list). Fertilising too early can slow down root growth and cause a weak root system as you are giving the plant nutrients directly. Fertiliser can also shock the young cuttings which can cause a whole range of issues, the worst of which is actually killing the cutting completely.

Common problems when propagating Pothos plants

Whilst propagating Pothos plants is definitely easier than some other houseplant types, that doesn’t mean it won’t come with some issues every now and again. You might be lucky and find the whole process goes off without a hitch, but it’s important to look through the common issues below so you know what to look out for and can act quickly if something is wrong.

Help! My cutting isn’t growing new roots…

You should start to see roots growing on your Pothos plant anywhere between 1-6 weeks. The process can be super quick but can also take over a month for anything to appear.

As long as your cuttings are in the right environment and are getting the right care, you should see some roots popping out soon.

If you’re trying to do this when the temperatures in your home are quite cool then this may be why you aren’t seeing any roots growing. To help speed up the process, use a heat pad underneath your cuttings to warm up the area.

What’s causing my Pothos cutting to turn mushy?

If the vine or leaves of your cuttings are turning brown and mushy then unfortunately this isn’t a good sign. This is usually due to the cutting rotting in stagnant water or due to an infection/disease. You want to make sure you are regularly refreshing the water (every 2-3 days or more) so that it doesn’t encourage the growth of bacteria. If the node is still healthy, you may be able to salvage the cutting by trimming away the mushy parts.

Why are the new leaves on my cutting small?

Great news! Your cutting is growing new leaves. Don’t worry if they are smaller than the leaf on the cutting. This was taken from the mature mother plant and it will take a while for the cutting to mature enough to be able to support such large growth. Give it time and slowly the new leaves will start to get bigger. You can then trim away the smaller leaves if you prefer.

Why is my cutting turning yellow?

If the leaves on your cutting are turning yellow then it may be due to too much direct sunlight which has scorched the leaves. Root rot could be another cause so inspect the new roots closely to see if they are mushy.

We hope this guide to Pothos propagation has been useful! It can be a little unpredictable and things won’t always go the way you want them to! But with the right method, care and environment, you are ensuring that there’s nothing else you can do to help those cuttings thrive. These plants are fast growers and your small cuttings will soon enough be long cascading vines, so it’s definitely worth a little bit of hassle.

Check out our full Pothos care guide to find all the information on how to continue to care for your cuttings once they have matured.

Fiddle and Thorn is a participant in the Amazon Services LLC Associates Program, an affiliate advertising program designed to provide a means for sites to earn advertising fees by advertising and linking to Amazon.com

Take our houseplant survey!

Quickly respond to our 30 second houseplant survey and get 75% off our Complete Houseplant Care eBook!

Take the Survey

No thanks…

How to Propagate a Polka Dot Plant

Last Updated: September 8, 2023

Healthy Polka Dot Plants

Healthy Polka Dot Plants

Polka Dot Plants (Hypoestes phyllostachya) are some of the most colourful and unique houseplants out there. You can find them in a variety of colours, from pink, white and even red and are named simply because of their incredible dotty leaves!

Polka Dot Plants can be easy to care for but are even easier to propagate. This post will guide you through everything you need to propagate your Polka Dot Plant, including a step by step process, tools required, how to spot and solve problems that creep up and answers to all of your propagation FAQs.

Introduction: Understanding Polka Dot Plant Propagation

This vivacious perennial is revered for its lively, speckled foliage that brings a splash of joy to any indoor garden. But what if you could multiply that joy? You’re in luck! Propagating a Polka Dot Plant is a simple and rewarding process.

With patience and a little know-how, you can turn one plant into many and fill your home with these delightful dots!

Propagation is the process of creating new plants from the parts of existing ones. This can be done in a variety of ways, but for Polka Dot Plants, the easiest and most common methods are via stem cuttings and division of the mother plant.

Stem cuttings involve taking a small piece of the stem, encouraging it to grow roots, and then planting it. Alternatively, the division of the mother plant means separating the plant into several smaller plants, each with its own root system.

Don’t worry, we’ll guide you through each of these methods step by step!

By the end of this article, you’ll be a Polka Dot Plant propagating pro, ready to spread the love and share these enchanting plants with your fellow plant enthusiasts.

Why propagate a Polka Dot Plant?

Before we get into the nitty-gritty of Polka Dot Plant propagation, you might be wondering why it’s beneficial to propagate a Polka Dot Plant in the first place? Well here are some of the main reasons:

  • Create more Polka Dot Plants for free!

    Propagating your Polka Dot Plant will multiply your plant collection without needing to spend any more money! They also make great gifts for friends and family if you already have enough houseplants.

  • Save a dying Polka Dot Plant.

    If you accidentally overwatered (which is easy to do), over-fertilised or mistreated your Polka Dot Plants and it has started to die, sometimes the best way to save it is by taking the healthy stems and propagating them to create new healthy plants before it’s too late.

  • To make your Polka Dot Plants fit their environment.

    Polka Dot Plants can grow pretty quickly if in the right environment and they can slowly outgrow their pot or spot in your home. Giving them a trim is a great way to cut back some of the growth and propagating those Polka Dot plant stems is a great way to stop them from going to waste.

White Polka Dot Plant

White Polka Dot Plant

What tools will I need to propagate my Polka Dot Plant?

Let’s start off with the easy part, what you need to propagate a Polka Dot Plant. It’s important to make sure you have everything ready before taking any cuttings.

How to propagate a Polka Dot Plant using stem cuttings

This is the main method of propagating Polka Dot Plants as it’s suitable for all maturities. It’s also really easy to get right as you can create several new Polka Dot Plants just by taking a few small cuttings.

Locate some healthy Polka Dot stems

When taking a vine cutting you want to make sure that the part of the plant you are cutting is healthy to give you any chance of success. Avoid any sign of disease or pests as they will be transferred onto your new cuttings and may make it harder for the cuttings to grow into proper plants.

When taking cuttings to propagate your Polka Dot Plant, you need to check for one important thing; a node. Without it, you will have a very slim chance of a successful propagation. A node is where a leaf has grown from the stem.

Make the cut

Use your clean scissors to cut off one or more stems. You want to make sure that you have at least 2-3 leaves on your cutting as this ensures you have a few good nodes from which roots can grow out from.

Keeping your tools clean avoids passing on bacteria or pests to your plant and also is important when dealing with toxic plants. (Although Polka Dot Plants are largely non-toxic, it’s a good habit to get yourself into)

Fill up a transparent container with water

Now that you have taken your cuttings, you need to grow them in something. You can pot them directly into soil as Polka Dot Plants grow roots very quickly but we always recommend water as a middle step. It just has a better success rate.

Fill up your container with temperate water (so as not to shock your delicate cuttings) and place your cuttings in so that the lowest third is covered by the water. Covering any more of the cutting increases the chance it will rot. If any leaves will be in contact with the water then remove them at this step as they will start to rot after being submerged for a few days.

We always prefer to use a clear container when propagating as you can see everything a little clearer.

Place your cuttings in bright but indirect light

Place your glass in bright but indirect sunlight. Intense light will damage the cutting and prevent a successful propagation. You can use a light monitor to figure out if you’re Polka Dot Plant cuttings are getting the right amount of sunlight. You can also supplement sunlight levels by using an LED grow light which are great at encouraging growth in cuttings. We love this one which is available on Amazon here.

It’s at this stage that you might choose to use rooting hormone. This will help to speed up root growth on the new cuttings. We have always found this rooting gel to be successful – you can buy it on Amazon here.

Change out the water regularly

One of the most important steps in the Polka Dot Plant propagation process is to refresh the water regularly (every 2-3 days is optimal). This keeps the water free from bacteria and stops it from stagnating which is harmful to your cutting. Stagnant water will also start to smell so it’s best to avoid this!

Be patient

Luckily Polka Dot Plant cuttings grow roots pretty quickly so you should start to see two delicate roots pop out from the node after only a few days. It can be a little unpredictable though and some cuttings will be a lot faster than others. But the process is definitely a lot quicker than with some other common houseplants, where you can be waiting months for anything to happen.

The benefit of Polka Dot Plants growing roots so quickly is that there is less time for something to go wrong and the risk of root rot is significantly reduced.

Plant your Polka Dot cuttings into fresh potting mix

Once the roots on your Polka Dot cuttings are a few centimetres long it’s time to pot them into soil. Don’t worry if the roots are still very delicate, this is normal for Polka Dot plants so just be a little careful when potting them to make sure they don’t break.

We recommend using a high-quality potting mix to make sure your cuttings are getting the right mix of nutrients. Our top choice for soil would be this potting mix from Miracle Gro. Carefully place your cuttings a few centimetres into the soil. You can also pop the cuttings back into the mother plant so it becomes a little fuller – it’s up to you!

Resume usual Polka Dot Plant care

Now that your cuttings are pot nicely into soil, you can go back to your usual Polka Dot Plant care routine and soon those plants will be big enough to propagate again and you’ll end up with way more Polka Dot Plants than you could ever need…

How to propagate a Polka Dot Plant through division

This method of propagation only really works if your Polka Dot Plant is quite bushy, otherwise, they can be left looking a little straggly. If you do have a big enough Polka Dot Plant that you don’t mind dividing then this method is great for those who don’t want to wait for new roots and leaves to grow – instead, you get new plants instantly!

Take your Polka Dot Plant out of its pot

To be able to propagate your Polka Dot Plant through the division method, you need to separate the different offshoots/stems. This is particularly easy to do with Polka Dot Plants compared to some other plants as they separate easily.

The first step is to carefully lift your plant out of its pot. Don’t tug too hard at the leaves as they are quite delicate but slowly shimmy the plant out of the pot.

Separate out the plant

You may have to trim off the odd root to detangle the plant but you should be able to pull the various parts of the plant apart. Each section should have some roots attached so inspect these carefully to make sure there aren’t any obvious problems (mushy rotted roots is the main one you are looking out for here).

How many new plants you want to create is completely up to you and totally depends on your mother plant. When separating parts of the plant, make sure to always use shears rather than pulling the plant apart as this can damage it quite easily!

Place each new plant in fresh potting mix

Pop your mother Polka Dot Plant back into its original pot (or downsize slightly if you have taken away a substantial amount of the original plant). Then pot your new plant(s) into fresh potting mix. This is our favourite potting mix from Miracle Gro.

Make sure not to reuse old potting mix from other plants as there may be bad bacteria or pests lingering in it that will start to impact the health of your new plants.

Continue normal Polka Dot Plant care

That’s all there is to the division propagation method of Polka Dot Plants. Now that your plants are safely in their new homes, continue with your normal Polka Dot Plant care routine!

Pink Polka Dot Plant Leaves

Pink Polka Dot Plant Leaves

Rooting the Polka Dot Plant Cuttings

Now that you’ve successfully taken your Polka Dot Plant cuttings, it’s time to root them! This is where the true magic begins: turning a stem into a whole new plant. Isn’t that exciting?

Step 1: First, you’ll need to prepare a pot with moist, well-draining soil. Ideally, the soil should be a blend of peat moss, perlite, and compost. This will provide the perfect environment for your cuttings to establish their roots.

Step 2: Next, make a small hole in the center of the soil using a pencil or your finger. It should be deep enough to cover the node of your cutting.

Step 3: Carefully place your cutting into the hole, ensuring that the node is well-covered by soil. This is crucial as the node is where the roots will sprout from.

Step 4: After planting, gently firm the soil around the base of the cutting. It’s important to provide stability for your young plant.

Step 5: Finally, water the cutting lightly and place the pot in a bright, warm location. Avoid direct sunlight, which can scorch the delicate cuttings. Instead, choose a location with dappled sunlight or indirect light.

Once you’ve completed these steps, the waiting game begins! You’ll need to be patient, as it can take several weeks for the cuttings to establish roots. While waiting, keep the soil moist, but not soggy, and make sure the cuttings receive enough light.

After about two to four weeks, you can gently tug on the stem. If you feel resistance, congratulations! This means the cutting has successfully rooted.

From here, you can continue to care for your Polka Dot Plant as you would a fully grown one: watering when the top inch of soil is dry, providing bright, indirect light, and feeding with a balanced liquid fertilizer every two weeks during the growing season.

Potting the Newly Propagated Polka Dot Plant

Now that’s what I call fantastic news! You’ve successfully rooted your Polka Dot Plant cuttings. It’s time to introduce them to their new homes – a pot! However, there are a few crucial steps you need to follow, to ensure your young plants thrive.

Selecting the Right Pot

Firstly, the pot you choose must have good drainage. The Polka Dot Plant isn’t a fan of waterlogged soil, so go for a pot with one or more holes in the bottom. It’s also essential to consider pot size. Your baby plant doesn’t need a mansion yet; a small pot, 3 to 4 inches in diameter, should suffice. As the plant grows, you can move it to a larger pot.

Preparing the Pot

Before potting, clean your selected pot with soap and warm water. This ensures any lurking harmful bacteria or fungi are eradicated. Then, place a piece of mesh or a coffee filter at the bottom of the pot to prevent soil from escaping through the drainage hole.

Potting Mix

A Polka Dot Plant requires well-draining soil. A mixture of two parts peat moss to one part perlite or sand should do the trick. Avoid using garden soil, as it tends to compact in pots, reducing aeration and draining abilities.

Planting the Cutting

Fill your pot halfway with the prepared potting mix. Create a hole in the center, place your rooted cutting into it, and gently cover the roots with soil. Be careful not to damage the tender roots!

Aftercare

Once potted, water your newly planted Polka Dot Plant until water seeps out of the drainage hole. Place the pot in a bright, indirect light

Polka Dot Plant Propagation FAQs

Here’s a few of the most common questions we find people have when looking to propagate their Polka Dot Plants.

Common problems when propagating Polka Dot Plants

Propagating plants doesn’t always have 100% success and you may encounter some problems along the way. But don’t worry, below you can figure out what is causing these problems to arise and hopefully solve them before it kills your plant cuttings.

We hope you have found this guide to Polka Dot Plant propagation useful. It can sometimes be a little unpredictable whether or not it will be a success but this is definitely easier than propagating some other houseplant types so we are sure you will have Polka Dot Plants growing left, right and centre in no time at all!!

Check out our full Polka Dot Plant Care Guide that has all the information on how to continue care for your cuttings once it has matured.

Fiddle and Thorn is a participant in the Amazon Services LLC Associates Program, an affiliate advertising program designed to provide a means for sites to earn advertising fees by advertising and linking to Amazon.com

Take our houseplant survey!

Quickly respond to our 30 second houseplant survey and get 75% off our Complete Houseplant Care eBook!

Take the Survey

No thanks…

How to propagate a Polka Dot Begonia

Last Updated: April 1, 2022

Loved for their unique dotted leaves, the Polka Dot Begonia is a great addition to your urban jungle and although they might have super delicate leaves, they aren’t actually fussy plants.

Propagating them also doesn’t have to be difficult and can be done in a few ways so in this post we will cover not only a step by step of each method, but we will be sharing all of our top tips to help you along the way.

What methods can I use to propagate my Polka Dot Begonia?

Polka Dot Begonia plants can be propagated through both stem cuttings and the division method. The division method, whilst quick and easy, can only be used for more mature plants as you’ll have to remove a section of your mother plant to do this. Stem cuttings, however, can be used on less mature plants but do take longer to grow and mature into proper Polka Dot Begonia.

How to propagate a Polka Dot Begonia using stem cuttings

This is the main method of propagating Polka Dot Begonia plants as it’s suitable for all maturities and doesn’t require you to remove a section of the mother plant. Whilst there are more chances for something to wrong compared to with division, by using a few stem cuttings, you have a really good chance at one or two of them properly taking root.

  1. Locate some healthy Polka Dot Begonia stems

    There are a few things to look for when choosing the right stem to propagate. Firstly, you want the part of your Polka Dot Begonia to be healthy and not showing any signs of unhappiness (brown or yellow patches are a no-no). You also want to make sure that the cutting has at least one or two nodes on it as this is where the roots will grow out from. Without a node, your stem cutting can’t be propagated.

  2. Make the cut

    Use scissors to cut off one or more stems. Ensure the scissors are clean as you don’t want to accidentally transfer bacteria onto your fresh cutting.

  3. Fill up a transparent container with water

    Now that you have taken your cuttings, you need to grow them in water to help roots grow. Fill up a clear container with temperate water (so as not to shock your delicate cuttings) and place your cuttings in so that the lowest third is covered by the water. Make sure that the leaf (leaves) are not touching the water at all or they will rot.

    By choosing a clear container, not only will you be able to see the roots growing which is pretty cool, but this will also help you spot any early warning signs that something might be wrong with your cutting.

  4. Place your cuttings in bright but indirect sunlight

    Keep your new cuttings away from any direct light. Polka Dot Begonia plants are very sensitive to intense light as they have super delicate leaves.

  5. Refresh the water every few days

    This keeps the water free from bacteria and stops it from stagnating which is not only damaging to your new cutting, but it can also start to smell pretty bad too.

  6. Wait, wait, wait

    There is no guarantee that you’ll start to see roots at a certain time but as long as you are refreshing the water and giving your plants the right amount of warmth and sunlight, you’ll see roots popping out soon.

  7. Plant your Polka Dot Begonia cuttings into fresh potting mix

    Once the roots on your cuttings are a few centimetres long you can pot them into potting mix. The roots will still be very delicate so just be a little careful when potting them to make sure they don’t break.

  8. Continue usual Polka Dot Begonia care

    Now that your cuttings are pot nicely into soil, you can go back to your usual Polka Dot Begonia care routine. Keep a close eye on your new plants for a few months to ensure everything is going well but with the right care routine, they should be thriving!

How to propagate a Polka Dot Begonia using the division method

  1. Remove your Polka Dot Begonia from its pot

    Squeeze the pot (if it’s plastic) to help your plant come away from the pot. You want to avoid pulling at the leaves or stems as they are very delicate and can break easily.

  2. Remove the potting mix from the roots

    Shake off the soil from the root system so that you can start to see the various natural divisions in your plant. This will allow you to see where you can divide your Polka Dot Begonia.


  3. Untangle the various natural sections

    It’s OK if you need to slice through a few roots using pruning scissors just make sure you keep the thickest roots intact as these are crucial to the health of your plant.

  4. Grow in water or fresh potting mix

    Either option will work well but we recommend using water as a middle step if your new plant doesn’t have a very mature root system.

  5. You’re all done

    If your new plant is now in fresh potting mix then you can care for it as you would your other Polka Dot Begonia. If you’re using the middle step of water, make sure to change it out every few days to prevent it from stagnating. Once the roots have matured a little, pot into fresh soil.

Can I propagate a Polka Dot Begonia from a single leaf cutting?

Unfortunately, you can’t propagate using just a leaf cutting from your Polka Dot Begonia. This is because there is nowhere for the roots to grow out from, meaning you need to use stem cuttings or the division method to have any success.

What time of year should I propagate my Polka Dot Begonia?

If you are propagating your Polka Dot Begonia through stem cuttings, then always do this in spring. This is because your cutting will need plenty of warmth and sunshine to grow new roots and this process can take a while.

If you are propagating your Polka Dot Begonia through division, you can do this at most points in the year. Maybe avoid doing it in the coldest months as this can lead to an increased risk of root rot, but otherwise, it should work well.

Check out our Polka Dot Begonia care guide for more information on how best to care for your new plants after the propagation is complete.

Fiddle and Thorn is a participant in the Amazon Services LLC Associates Program, an affiliate advertising program designed to provide a means for sites to earn advertising fees by advertising and linking to Amazon.com

Take our houseplant survey!

Quickly respond to our 30 second houseplant survey and get 75% off our Complete Houseplant Care eBook!

Take the Survey

No thanks…