How to propagate an Alocasia Dragon Scale plant

Last Updated: April 1, 2022

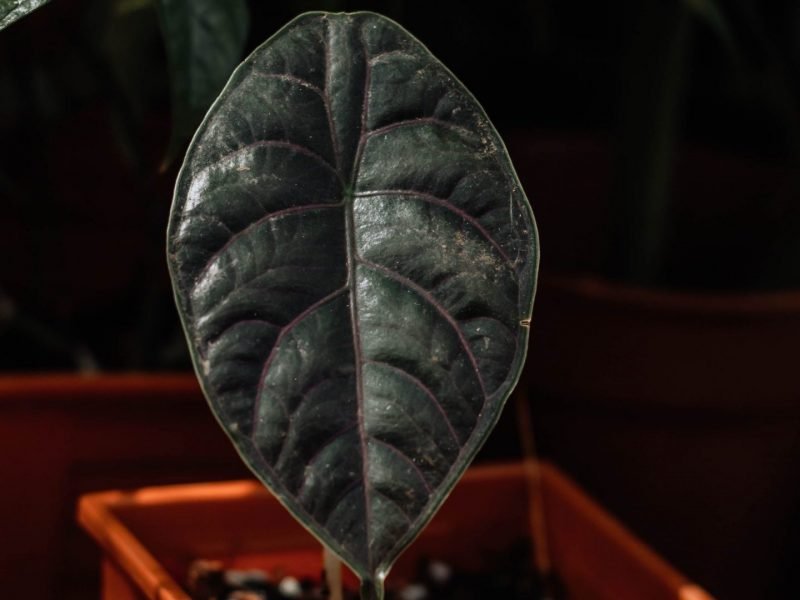
The once rare Alocasia Dragon Scale plant is becoming more and more common in plant shops across the world and has quickly become one of our favourite houseplants! As the demand for this plant has increased, getting a hold of them can still be a challenge so the best way to make more is to propagate the Alocasias you already have.

Propagating your Alocasia Dragon Scale isn’t tricky as they can be divided through their rhizomes. Don’t worry if you have never done this kind of propagation before, this post will guide you through each and every step. We even have the answers to the most commonly asked questions as well as some fixes to common issues you may discover along the way to help your Alocasia Dragon Scale propagation be a success.

Why propagate your Alocasia Dragon Scale?

There are several reasons why you might choose to propagate your Alocasia Dragon Scale. The main one is simply wanting to multiply the number of plants you have without actually having to buy any more. Who can say no to free plants?! Plant cuttings also make great gifts for friends, especially when it might be hard for them to get their hands on their own Alocasia Dragon Scale. You can also make a little bit of spare cash selling these back to plant shops and nurseries if they are looking to grow their Alocasia offering.

Another reason why many plant parents choose to propagate because they’ve noticed part of the plant is showing signs of illness or unhappiness. We are always strong believers in trying to revive your plants rather than giving up at the first brown leaf. But if your revival efforts have been in vain and your Alocasia Dragon Scale is continuing to die, propagating the healthy parts of the plant is the best way to go. Just make sure that you are propagating healthy sections as any illnesses will transfer onto the new plant.

What tools will I need to propagate my Alocasia Dragon Scale?

We always like to start off our propagation guides with the easy part; the tools and things you’ll need. It’s important to make sure you have everything on hand before making the first cut!


  • Healthy and mature Alocasia Dragon Scale

  • Sharp scissors/shears

  • Spare pot(s)

  • Fresh soil and water

  • Newspaper or plastic sheet

What are the different methods I can use to propagate my Alocasia Dragon Scale?

One of the reasons propagating Alocasia Dragon Scale plants is so easy is because there is only one real method of propagation. Often plant parents won’t know what the best method is and can sometimes choose the wrong one for their plant. However, the only proper way you can propagate your Alocasia Dragon Scale is through the division of the mother plant and its rhizomes. Below you’ll find a step by step guide to this method to ensure success.

How to propagate Alocasia Dragon Scale plants through division


  1. Locate the various offshoots

    When looking for a part of the plant to divide you’ll need to take your Alocasia Dragon Scale out of its pot to see the rhizomes. These are natural divisions within the plant’s root systems where the stems grow from. Be careful when lifting your plant out of its pot as you don’t want to cause any damage to the stems or leaves.

  2. Separate the sections

    Now that you have determined the natural sections of your Alocasia Dragon Scale, you can choose how many new plants you want/can create from the mother plant. Run your fingers through the soil to remove some of it from the root system. You may have to trim roots or slice the plants apart if they aren’t detangling easily.

  3. Place in water or fresh potting mix

    Pot the main mother plant back into its original pot (or downsize if you have taken a substantial amount of the overall plant away) and decide whether you want to place the offshoot in water first or straight into potting mix. This depends on the size of the cutting and the maturity of the root system.

    If the offshoot has quite mature roots then it will be totally fine growing in potting mix already. However, if you feel the roots need to grow a little more then we recommend placing your new Alocasia Dragon Scale into water as a middle step.

  4. Continue normal care

    If your cutting is now in fresh potting mix then you can care for it as you would your other Alocasia Dragon Scale. If it is in water first you want to refresh that water every couple of days and repot into potting mix once the roots have matured a little.

Alocasia Dragon Scale Propagation FAQs

Here’s a few of the most common questions we find people have when looking to propagate their Alocasia Dragon Scale.

Common problems when propagating Alocasia Dragon Scale plants

Propagating plants, including Alocasia Dragon Scales, won’t always go smoothly and sometimes you will encounter a few issues along the way. We recommend keeping an eye on your new plant every day for a while to give you the best chance at spotting any issues early on. Below we have covered all of the most common issues you may face when propagating Alocasia Dragon Scales.

We hope you have found this complete guide to Alocasia Dragon Scale propagation useful. Propagating by division is often the easiest and most successful method so you should have new mature Alocasia Dragon Scales in no time!

Check out our full Alocasia Dragon Scale care guide to find all the information on how to continue to care for your new plants.

Fiddle and Thorn is a participant in the Amazon Services LLC Associates Program, an affiliate advertising program designed to provide a means for sites to earn advertising fees by advertising and linking to Amazon.com

Take our houseplant survey!

Quickly respond to our 30 second houseplant survey and get 75% off our Complete Houseplant Care eBook!

Take the Survey

No thanks…

How to propagate an Air Plant | Step by Step Methods

Last Updated: October 26, 2022

Most plant parents tend to have a slightly weird obsession with Air Plants as they are completely unique and require such different care compared to the majority of our urban jungles. When it comes to propagating them, it’s actually pretty simple as they grow pups that can be used to form new plants.

In this post, you’ll find the complete Air Plant propagation guide, including a step by step process, what tools you’ll need and all of our top tips to help you along the way.

Why propagate Air Plants?

Whether or not you choose to separate the pups on your plant is completely up to you as they can grow forever attached to the mother plant. However, there are several reasons why you might choose to remove and use them to create new plants. Firstly, it’s a great way to get more plants without spending any more money. Who can say no to free plants! But if you already have too many plants in your home then these pups can make great gifts for friends and family. They are low maintenance and look great in every room – the perfect present!

Another reason that you may be forced into propagating your plant is that you have noticed your mother plant is starting to look unhappy and unhealthy. If this is the case, it might not be long until the pups on your Air Plant also become wilted and die.

Propagating Air Plants is easy!

Air Plants

What tools will I need to propagate my Air Plant?

This is the easy part – especially because you really don’t need much to grow new plants.


  • Healthy and mature Air Plant

  • Sharp scissors/shears

  • Container with fresh water

What methods can I use to propagate my Air Plant?

There is only really one way and that’s through removal of pups. These are small Air Plants which will grow off the base of your mother plant once it is mature enough. It’s probably the easiest method of propagation and there are very few things that can go wrong if you follow the right steps.

Air Plants in a glass

How to propagate Air Plants through pups


  1. Locate healthy pups to propagate

    The only issue you might have is that your plant isn’t mature enough to grow pups. This happens at the end of the bloom cycle which happens on at different times. Some varieties will bloom after one year, others will take 3 years before growing any pups.

    If your Air Plant is at the point of maturity where it is growing pups, you’ll notice them growing out of the bottom of your plant. Usually a few will grow at once out of the mother plant. You want to make sure that the pup is about one third the size of the mother plant. This will mean it can happily survive on its own. Any smaller and you risk the propagation being unsuccessful.

  2. Remove the pup from the mother plant

    Start by gently tugging at the pup to see if it can be easily removed from the mother plant. Ideally, you want the pup to come away without needing to cut it off. This tells you that the pup is ready to be separated from the mother plant and can grow on its own.

    If it doesn’t come away from the mother plant by just tugging at it, and the pup is large enough to grow on its own, then you can slice it off using a clean sharp knife. If you aren’t sure where to cut, we recommend cutting more from the mother than the pup.

  3. Give your pup a bath

    After removing the pup from the main plant, give it a very quick bath in fresh temperate water. It should be fully submerged for about 10 seconds. Make sure the water is not hot or extremely cold as this will shock and harm the delicate Air Plant pup and could damage it long term.

  4. Find the right spot to grow your new pup

    Air Plants need bright but indirect light to thrive so make sure you place it in the right environment. Then just continue your usual care routine and over time it may even start to grow new pups of its own. That’s the natural cycle of Air Plants.

An Air Plant pup ready to be propagated!

Baby Air Plant

Air Plant Propagation FAQs

It’s definitely easier than some other plants but that doesn’t mean it doesn’t come with its own set of problems, questions and difficulties. It’s really important to understand the basics, such as time of year, equipment and fertiliser needs.

Common problems when propagating Air Plants

Propagating houseplants will never have a 100% success rate and you may encounter some problems along the way. But don’t worry, we have learnt the hard way to bring you all the different problems that might arise as well as what this means and how to solve them!

There aren’t many steps involved but it’s important that you follow all the advice to give you the best chance of success. With the right methods, care and environment you shouldn’t have any issues!

Check out our Air Plant care guide for more information on how to care for your new pups.

Fiddle and Thorn is a participant in the Amazon Services LLC Associates Program, an affiliate advertising program designed to provide a means for sites to earn advertising fees by advertising and linking to Amazon.com

Take our houseplant survey!

Quickly respond to our 30 second houseplant survey and get 75% off our Complete Houseplant Care eBook!

Take the Survey

No thanks…

How to propagate an African Milk Tree | Step by Step Method

Last Updated: February 12, 2023

Although African Milk Trees look like cacti, they are actually technically classed as succulents which is important to remember during the process. Propagating them is pretty simple and can be done with small or large plants. You just need to be a little careful when handling the plants as they can be a little sharp and their sap is toxic to touch.

In this post we will guide you through the complete process; the various methods you can use, the dos and don’ts, what tools you’ll need and things to look out for to ensure everything goes smoothly.

Why propagate an African Milk Tree?

There are several reasons why plant parents choose to propagate their luscious plants. Sometimes they can simply get too big for the space and not grow in the way we want them to. Regularly pruning cutting off stems or the tops of stems helps to control growth. But instead of just throwing away those beautiful stem cuttings, use them to create new plants!!

Another reason is if part of your plant is starting to look quite unhealthy. This might be yellow leaves, brown leaves or if your African Milk tree is suddenly losing some of its leaves. We always recommend trying to diagnose the problem and try to fix it, but if there is no sign of change you might choose to remove a healthy part of the plant before it’s too late. It’s crucial that you only propagate the healthy stems as you won’t have much luck using parts of the plant that are already dying.

You might also want to remove parts of your African Milk Tree simply because you want to create new plants without having to pay for any more. And if you’re home is already filled with plenty of greenery, then plant cuttings can make great gifts for friends and family too.

What tools will I need?

Let’s start off with the easy part. It’s important to make sure you have all the right things to hand before you make that initial cut!

  • Healthy and mature African Milk Tree

  • Protective gloves

  • Sharp scissors/shears

  • Spare pot

  • Fresh succulent soil and water

  • Newspaper or plastic sheet if propagating indoors

What methods can I use to propagate my African Milk Tree?

There’s only really one main method which works for all shapes, sizes and maturity of plant; the stem cutting method. This is where you cut off a part of, or all of one stem and grow it like a new plant. It’s great for any propagation beginners as there aren’t many steps involved.

How to propagate an African Milk Tree through the stem cutting method

  1. Locate your stem cutting

    When taking an a stem cutting you want to make sure that the part of the plant you are cutting is healthy to give you any chance of success. You can either take a tip cutting or a full stem cutting. A tip cutting is when you slice part of one of the stems off, whereas a full stem cutting would be cutting where the chosen stem meets the main stem on your African Milk Tree. Either can be just as successful and follow exactly the same process. Try to choose a cutting that is at least 10-15cm long to have the best chance of success.

  2. Make the cut

    This is the scary part! Now that you have located the section of the stem that you want to propagate, you need to cut it off! Use clean scissors/ shears or a knife to make the cut to avoid passing on dirt or any infection to the plant. Use your tools to make a clean cut across your plant in a diagonal way. This increases the surface area of the cutting and will encourage more growth.

    It is very important that you wear thick gardening gloves at this stage because sap will very quickly leak out from your stem cutting. The sap from African Milk Trees is toxic and causes skin irritation if you come into contact with it.

  3. Stop the sap flowing

    To stop the flow of sap out of your fresh cutting, you want to run it under cool water for a minute or two. Make sure only the bottom section of the cutting is getting wet as African Milk Trees are sensitive to leaf rot.

  4. Let the cutting callous over

    One thing we can do to stop infections or leaf rot is to let the cutting callous over. Leave the cutting in a warm, dry place for a full week before continuing to the next step.

  5. Plant your cutting into potting mix

    With most houseplants, you tend to grow your stem cuttings in water for several weeks to encourage root growth but with African Milk Trees you pot them straight into soil. This is because they are succulents and will simply rot if placed directly in water for long periods of time.

    Fill your new pot with fresh succulent potting mix and place your cutting 5 centimetres into the soil. Make sure you use fresh mix as you don’t want to accidentally transfer pests or bacteria between your plants. You also want to make sure you are using a high-quality potting mix with the right nutrient balance as regular potting mix won’t have enough drainage.

  6. Give it a little bit of water

    You want to water your new cutting a little to give the potting mix some moisture but be careful not to overwater as this will very quickly kill your cutting.

  7. Be patient!

    Care for your African Milk Tree as you would the mother plant and hopefully, after several weeks or months, it’ll grow its own root system and start to grow taller too! Don’t lift your cutting out of its pot too often to check on the roots as this will hinder the process. As long as your cutting is getting the right amount of water and light, everything should be going well!

African Milk Tree Propagation FAQs

Taking cuttings can sometimes be quite daunting and you might not be 100% sure on the right things to do. But don’t worry, we have all of the answers to your questions to make sure that everything goes well.

Common problems when propagating African Milk Trees

This process won’t always be straightforward and it can happen that you run into some problems along the way. But don’t worry, we have you covered. Below you’ll find all of the most common problems as well as how to fix them!

We have found a lot of success through the stem cutting method so with a little bit of patience you should have plenty of new plants for your home!

Check out our full African Milk Tree care guide for more information on how to care for your cutting once it has matured.

Fiddle and Thorn is a participant in the Amazon Services LLC Associates Program, an affiliate advertising program designed to provide a means for sites to earn advertising fees by advertising and linking to Amazon.com

Take our houseplant survey!

Quickly respond to our 30 second houseplant survey and get 75% off our Complete Houseplant Care eBook!

Take the Survey

No thanks…

How to propagate African Mask Plants (Alocasia Polly)

Last Updated: April 1, 2022

Over the past year, African Mask Plants have become one of the most popular houseplants! They are the centrepiece of many plant shops around the world and you won’t have to meet many plant lovers to come across one of these beauties. Also known by their Latin name Alocasia Polly, African Mask plants are actually really easy to propagate. In this post, you’ll find the complete African Mask Plant propagation guide, including a step by step process, what tools you’ll need when propagating and all of our top tips to help you along the way.

Why propagate an African Mask Plant?

There are several reasons why you might choose to propagate your African Mask Plant. The main one is simply wanting to multiply the number of plants you have without actually having to buy any more. African Mask Plant cuttings also make great gifts for friends, especially when it might be hard for them to get their hands on their own.

The other main reason why many plant parents choose to propagate is that their African Mask Plant is becoming too big for the space. Cutting your African Mask Plant can also stop it from becoming straggly or leggy. But instead of simply throwing away those beautiful African Mask Plant offshoots, why not propagate them and start a whole new mother plant.

You may also want to propagate your African Mask Plant if you notice that part of it is starting to die. If you are unable to revive your plant, then propagating the healthy parts of it is a great way to save your African Mask Plant.

What tools will I need to propagate my African Mask Plant?

Let’s start off with the easy part. It’s important to make sure you have all the right things before you start propagating!


What methods can I use to propagate my African Mask Plant?

Unlike many other houseplants, African Mask Plants grow from one central rhizome which means you can’t propagate through stem cuttings. It means that there is only really one way to successfully propagate an African Mask Plant which is through division of the mother plant. This means you will need quite a mature African Mask Plant with various natural offshoots to be able to make two or more plants out of it which can be an issue if your plant is quite young.

How to propagate an African Mask Plant through division

Follow this quick guide and hopefully you’ll have a successfully propagated African Mask Plant in no time!


  1. Take your African Mask Plant out of its pot

    To propagate your African Mask Plant through division, you will need to find what natural offshoots there are in your plant. The first step is to carefully take your plant out of its pot. Hold on to the strongest stems whilst you slowly pull out the plant.

  2. Loosen the soil

    Once the plant is safely out of its pot, you’ll need to loosen the potting mix around the root system. A good way to loosen the soil is to run your fingers through the roots to start to separate them.

  3. Locate the various offshoots

    When looking for a part of the plant to divide it will become very obvious if there are various offshoots on your African Mask Plant. They will be completely separate and growth will stem from the middle of each section. These are called rhizomes.

  4. Separate the sections

    You may have to trim off the odd root if they aren’t detangling easily but you should be able to carefully pull the sections of your African Mask Plant apart. It’s okay if you have to slice around the plant a little with your scissors/ shears to separate them but just make sure that each section has strong roots to help your African Mask Plant propagation be successful

  5. Place the section(s) in water or fresh potting mix

    Pot the main mother African Mask Plant back into its original pot (or downsize if you have taken a substantial amount off the plant). You will then need to decide whether you want to pot the sections in water or potting mix. This depends on the size of the new plant and the maturity of the root system.

    You can use a light monitor to figure out if you’re African Mask Plant cuttings are getting the right amount of sunlight. You can also supplement sunlight levels by using an LED grow light which are great at encouraging growth in cuttings. We love this one which is available on Amazon here.

    It’s at this stage that you might choose to use rooting hormone. This will help to speed up root growth on the new cuttings. We have always found this rooting gel to be successful – you can buy it on Amazon here.

    If the offshoot has quite mature roots then it will be totally fine growing in potting mix already. You’ll want to use fresh high-quality potting mix to ensure your new plants get all the nutrients they need. Our top choice for soil would be this potting mix from Miracle Gro. However, if you feel the roots need to grow a little more then we recommend placing them into water as a middle step.

  6. Refresh the water regularly

    If you are growing your new African Mask Plant sections in water then you need to make sure you are changing this out regularly (every 2-3 days). This will stop the water from stagnating and breeding bacteria which can harm your plant’s health.

  7. Continue normal African Mask Plant care

    Once your new plant is in fresh potting mix you can resume your usual African Mask Plant care. Make sure the new plants don’t get any intense direct sunlight as this can damage the leaves.

    If your new sections grew in water then you will need to keep the potting mix slightly more moist for a few weeks. This is just to ease your plant into growing in potting mix and avoiding too much shock.

African Mask Plant Propagation FAQs

Propagating African Mask Plants is definitely easier than some other plants but that doesn’t mean it doesn’t come with its own set of problems, questions and difficulties. It’s really important to understand the basics, such as time of year, equipment and fertiliser needs. Below you will find all the answers to your African Mask Plant propagation questions!

Common problems when propagating an African Mask Plant

Propagating houseplants will never have a 100% success rate and you may encounter some problems along the way. But don’t worry, we have learnt the hard way to bring you all the different problems that might arise as well as what this means and how to solve them!

We hope you have found this complete guide to African Mask Plant propagation useful. It’s never an exact science and some divisions of the plant will take longer to grow than others. But with the right methods, care and environment you shouldn’t have any issues!

Check out our African Mask Plant care guide for more information on how to care for your new plants after you’ve propagated them.

Fiddle and Thorn is a participant in the Amazon Services LLC Associates Program, an affiliate advertising program designed to provide a means for sites to earn advertising fees by advertising and linking to Amazon.com

Take our houseplant survey!

Quickly respond to our 30 second houseplant survey and get 75% off our Complete Houseplant Care eBook!

Take the Survey

No thanks…

How to Propagate a ZZ Plant | Step by Step Methods

Last Updated: May 29, 2022

ZZ Plants are one of the easiest houseplants to care for, and are actually really easy to propagate too! They might not look it, but there are several simple different ways you can do it which we will cover each one in this post. We will also cover what tools you’ll need, step by step methods, issues you may face and all of our top tips.

Why propagate a ZZ Plant?

Lots of people want to simply multiply the number of plants you have without actually having to buy any more. Who can say no to free plants?! Plant cuttings also make great gifts for friends.

Another reason why many plant parents choose to take cutting from their plants is because it outgrows the space. But instead of simply throwing away those cuttings, why not propagate them and start a whole new mother plant.

You may also want to propagate your plant if it’s starting to die and you are unable to revive it. Just be careful that the bit of the plant that you are using is healthy and pest-free. Otherwise, the illness or pests will transfer onto your new plant.

What tools will I need to propagate my ZZ Plant?

Let’s start off with the easy part. It’s important to make sure you have all the right things before taking the first cutting!


  • Healthy and mature ZZ Plant

  • Sharp scissors/shears

  • Spare pot(s)

  • Fresh soil and water

  • Newspaper or plastic sheet

What methods can I use?

There are three main methods of propagation you can use; stem cuttings, leaf cuttings and divisions. Stem cuttings and leaf cuttings are quite a slow one for ZZ Plants and division can only be done every so often as these plants are generally slow growers. If you are completely new to this then we recommend starting off with division. Below you will find a step by step guide to each method.

ZZ Plant

How to propagate a ZZ Plant through the stem cutting method

This is a pretty easy method of propagation that doesn’t require too much effort, but it can be a slow process.


  1. Locate a healthy ZZ Plant stem

    When taking a stem cutting you want to make sure that the part of the plant you are using is healthy.

  2. Make the cut

    You want to use clean scissors/ shears or a knife to make the cut to avoid passing on dirt or any infection to the plant. Use your tools to make a clean cut at the base of the plant. If you can, cut across your plant in a diagonal way. This increase the surface area of the cutting for the rhizome and roots to grow.

  3. Take off any lower leaves

    As you will be placing your cutting in water for several weeks you want to carefully remove any leaves on the lower part of the cutting that may end up sitting in the water. They will rot if they are sat in water for a long period of time so best to cut them off now. Usually, ZZ Plant stems have a long bit before the leaves appear and if you have cut close to the base of the plant there shouldn’t be too many leaves in the water.

  4. Fill up your container with water

    Next, you want to fill up a glass with fresh temperate water to place your cutting into. Make sure the water isn’t super cold or hot as this will shock or burn the cutting and may cause it to die. It’s best to use purified water so the levels of chlorine and fluoride aren’t as high as in the water straight out of the tap but if that’s not possible don’t worry as ZZ Plants aren’t as sensitive to tap water chemicals as other houseplants.

  5. Place your cutting(s) in water

    Make sure that the bottom quarter of the stem cutting is sat in the water so that the roots and rhizome will start to grow out from them. Place your glass in bright but indirect sunlight. Intense light will damage the cutting.

  6. Change the water out regularly

    It’s super important that you keep the water fresh so we recommend switching it out twice a week. This stops the water from stagnating as this is the perfect breeding ground for harmful bacteria to grow. Stagnant water will also start to smell pretty bad so definitely something you want to avoid.

  7. Be patient

    Now that your stem cutting is in water and you are in the habit of changing it out frequently, all there is left to do is wait. Your stem cutting will start to grow a large round rhizome out of the bottom. This is where ZZ Plants store water which means they don’t need to be watered often. Roots will also start to grow out of the cutting but be prepared to wait a month or two before you see proper growth forming.

  8. Plant your cuttings into fresh potting mix

    After a few months, your stem cutting should have roots and a small rhizome and it will be ready to be pot into fresh potting mix. We recommend using a high-quality potting mix to aid with drainage and aeration and ensure your new plant gets all the nutrients it needs. Carefully place your cutting into the mix making sure not to damage the delicate newly formed roots and continue regular care.

ZZ Plant

How to propagate a ZZ Plant using leaf cuttings

The reason that so many plant parents love propagating ZZ Plants is that you can do it from just a single leaf, unlike most other houseplants.


  1. Locate a few healthy leaves

    When taking leaf cuttings you want to make sure that the part of the plant you are cutting is healthy to give you any chance of success. Avoid any sign of disease or pests as they will be transferred onto your new cuttings.

    You can try to propagate leaves that have naturally fallen off but you will have more success with healthy leaves that you cut off.

  2. Make the cuts

    Use clean scissors to cut off one or several leaves (several leaves gives you more of a chance that at least one will be successful). Make sure your tools are clean to avoid passing on any bad bacteria or pests to your cutting or mother plant.

  3. Choose how to grow your leaf cuttings

    It’s at this stage you need to decide between two methods of growing leaf cuttings. You can either grow your cuttings in fresh water or straight into potting mix.

    If you choose to grow them in water then we recommend using shot glasses to keep the leaves upright. Place the leaf facing down so that the part which was attached to the stem is sat in water. You want the water to cover about one third of the leaf but no more. If too much of the leaf is covered in water then it may cause the leaf to rot.

    If you choose to grow in potting mix, use a high-quality well-draining mix to help with drainage. Place the leaves into the soil as you would the water and press the soil around them to that they stand up straight.

  4. Be patient

    Now all there is left to do is wait and occasionally add water and check in on your cuttings. It will take several weeks or even months for roots to start to grow. The most important thing is that you don’t try and check root growth every few days by pulling the cutting out to inspect it. This can damage the cutting and stop any future growth.

  5. Enjoy your new plants

    After a few months, you may start to see roots growing out from your leaf cutting and this will eventually turn into a full mother plant. This is a great sign and shows that your efforts have been a success. Continue caring for your new plants and in no time you should start to see even more new growth appearing.

How to propagate a ZZ Plant through division of the mother plant

This method is probably the quickest and most likely to be successful, so if you have an existing healthy plant this is your best choice!


  1. Take your plant out of its pot

    In order to locate the various sections and separate them into two or more individual plants, you will need to take your plant out of the pot so you can divide the root system. ZZ Plants are pretty hardy and have strong stems which means you can pull your plant out of the pot by gripping onto the stems. Shake off the potting mix around the roots to uncover the various rhizomes. A good way to loosen the soil is to run your fingers through the roots to start to separate them.

  2. Locate the various rhizomes on your plant

    When looking for a part of the plant to divide it will become very obvious that each leaf on your ZZ Plant has a large round rhizome attached to the root system. These should separate themselves really easily and you can bunch groups together to form new plants.

  3. Separate the rhizomes

    You may have to trim off the odd root if they aren’t detangling easily but you should be able to carefully pull the rhizomes apart from each other. It’s ok if you have to slice around the plant a little to separate them but just make sure that each part of the plant has a substantial amount of the root system.

  4. Place in water or fresh potting mix

    Pot the main mother plant back into its original pot (or downsize to a smaller pot if you have taken away a large amount of the plant). Now you need to and decide whether you need to place any of the rhizomes in water first or straight into potting mix. This will depend on the size and maturity of the root system. If the offshoot has quite mature roots then it will be totally fine growing in potting mix already. However, if you have separated the rhizome from a lot of the roots then we recommend placing that section into water as a middle step.

  5. Continue normal care

    If your cutting is now in fresh potting mix then you can care for it as you would your mother plant. If it is in water first you want to refresh that water every couple of days and repot into potting mix once the roots have matured a little.

ZZ Plant Propagation FAQs

Using stem or leaf cuttings can be a little trickier as it will take a while but you shouldn’t have too many issues if you know the basics.

Common problems when propagating a ZZ Plant

As these plants are really slow growers, roots and new leaves won’t appear for a month or two. This can be quite a long time for problems to develop so it’s important you keep an eye on your cuttings and know what signs to look out for which may suggest a problem.

Fiddle and Thorn is a participant in the Amazon Services LLC Associates Program, an affiliate advertising program designed to provide a means for sites to earn advertising fees by advertising and linking to Amazon.com

Take our houseplant survey!

Quickly respond to our 30 second houseplant survey and get 75% off our Complete Houseplant Care eBook!

Take the Survey

No thanks…

How to propagate a Watermelon Peperomia

Last Updated: May 17, 2022

Watermelon Peperomia plants are great! They aren’t super difficult to care for and are completely safe for pets and children. And on top of that, they are really easy to propagate. We have written this guide to help you figure out all the different ways you can propagate your Peperomia plant, with step by step guides, a list of tools you will need and all of our top tips to help you along the way.

Why propagate a Watermelon Peperomia?

There are several reasons why you might choose to grow more Watermelon Peperomia plants. Firstly, simply getting new plants for free; it’s a great way to make gifts for friends and family without having to buy new plants!

Another reason why many choose to propagate their plant is to curb leggy growth. During winter, they cam to go a little leggy and straggly as they deal with having less sunlight. To encourage bushier growth we recommend pruning your plant. But instead of simply throwing away those beautiful leaves and stems, why not use them and start a whole new mother plant.

You may also want to propagate your Watermelon Peperomia if you notice that part of it is starting to look a little unhealthy or starting to die. Be careful that you only use the healthy parts of your plant though, as trying to grow leaves that are rotting or have pests won’t be much of a success.

What tools will I need to propagate my Watermelon Peperomia?

Let’s start off with the easy part as it’s important to make sure you have all the right things before you start propagating!


Make sure you’re prepared before you start the propagation process!

Tools needed for propagation
  • Healthy and mature Watermelon Peperomia

  • Sharp scissors/shears

  • Spare pot(s)

  • Fresh soil and water

  • Sealable plastic bag

  • Newspaper or plastic sheet if you’re propagating indoors

What are the different methods I can use to propagate my Watermelon Peperomia?

One great thing about these plants is that they root fairly quickly from either the leaf or the stem which means there are several ways to propagate them.

You can use one whole leaf and the roots will form from the red leaf stem or you can also cut the leaf and roots will grow directly out of the leaf forming a whole new plant. You can also propagate your Watermelon Peperomia plant by dividing cutlets and growing those in water or directly in potting soil depending on the maturity of the root system.

We will go over each different method in detail below so you can figure out which is the best for you and your plant!

How to propagate a Watermelon Peperomia using leaf cuttings

Unlike most other houseplants, you can actually use just a single leaf cutting.


Watermelon Peperomia Propagation through leaf cuttings

Watermelon Peperomia leaves
  1. Locate a healthy leaf

    When taking a leaf cutting you want to make sure that the part of the plant you are cutting is healthy to give you any chance of success. Avoid any sign of disease or pests as they will be transferred onto your new cuttings.

    You can try to use leaves that have naturally fallen off but you will have more success with healthy leaves.

  2. Make the cut

    Use your clean scissors to cut off one or several leaves. Make sure your tools are clean to avoid passing on any bad bacteria to your cutting.

  3. Choose how to grow your leaf cutting

    It’s at this stage you need to decide between two methods of growing leaf cuttings. The first trims off the stem so there is about 2-3cm still attached to the leaf. Then place the entire leaf into potting mix so that the stem is dug into the soil. Using this method will result in one new Watermelon Peperomia plant growing out from the stem.

    For the second method you cut the leaf in half horizontally across the stripes. Place both parts of the leaf into the potting mix with the cut side faced down. Push the leaf section with the stem further into the soil than the other as this is where the roots will form. WIth this method, you should see multiple Peperomia plants grow out from the darker stipes in the leaf.

  4. Place in a sealable clear plastic bag

    Once you have pot your cuttings in fresh mix, you want to create a little greenhouse with a plastic bag to make the environment warm and humid. Keep the bag a little open to have some air circulation. The humidity that will build up in the bag means you won’t have to water as much. Just a little each week or slightly more if you notice the potting mix is very dry. But be cautious when watering as overwatering is the number one reason why this method fails.

  5. Be patient

    Now all there is left to do is wait and occasionally add water and check in on your Watermelon Peperomia cuttings. It will take several weeks or even months for roots to start to grow. The most important thing is that you don’t try and check root growth every few days by pulling the cutting out to inspect it. This can damage the cutting and stop any future growth.

  6. Check on your cuttings

    After about 4-5 weeks, it’s time to check how growth is going on your cuttings. If roots are still very small and delicate then maybe grow in the ‘greenhouse’ for a few more weeks. If roots are quite established then you can start to grow the cutting outside of the plastic bag.

  7. Enjoy your new plants

    After a few months, you may start to see new leaves growing out from your leaf cutting. This is a great sign and shows that your propagation efforts have been a success. Continue caring for your new plants as you would any other Watermelon Peperomia and in no time you should start to see even more new growth appearing.

How to propagate a Watermelon Peperomia using stem cuttings in water

This method is sometimes a little easier, it’s also a more standard method used for other kinds of houseplants!


  1. Take your Watermelon Peperomia out of its pot

    In order to locate the various sections of your plant, you will need to take your plant out of the pot so you can divide the root system. Carefully lift the plant out and shake off the potting mix around the roots.

  2. Locate the various offshoots

    When looking for a part of the plant to divide it will become very obvious if there are various offshoots on your Watermelon Peperomia. They will be completely separate and growth will stem from the middle of each section.

  3. Separate the sections

    If there is a natural section within your plant then it should come apart fairly easily. However, if your plant comes out of just one central rhizome then you will have to slice it in two to propagate a cutlet.

  4. Place in water

    Pot the main mother Watermelon Peperomia plant back into its original pot and decide whether you want to place the offshoot in water first or straight into potting mix. If the offshoot has quite mature roots then it will be totally fine growing in potting mix already. However, if you feel the roots need to grow a little more then we recommend placing them into water as a middle step.

  5. Refresh the water often

    When growing your Watermelon Peperomia cutting in water you want to make sure you replace the water every few days to stop it stagnating. Stagnant water is a great breeding place for bacteria that can harm your cutting.

  6. Pot your Watermelon Peperomia cutlet

    Once more mature roots have grown out from your cutting it is ready to be pot into soil. We always recommend using a high quality well-draining potting mix so your plant gets all the right nutrients. Ingredients such as perlite can help avoid root rot caused by overwatering.

  7. Resume normal care

    If your Watermelon Peperomia cutting is now in fresh potting mix then you can care for it as you would your other plants.

Create new Watermelon Peperomia plants through propagation!

A healthy Watermelon Peperomia

Watermelon Peperomia Propagation FAQs

It can be a little trickier than other plants so it’s really important to understand the various steps, the best time of year, equipment needed and fertiliser needs.

Common problems when propagating a Watermelon Peperomia plant

Propagating plants will never always be successful and you will probably run into some issues from time to time. But luckily for you, we have learnt the hard way to bring you all the different problems that might arise as well as how you can try to solve them.

We hope you have found this complete guide on how to propagate a Watermelon Peperomia useful. It’s never an exact science and some divisions of the plant will take longer to grow than others. But with the right methods, care and environment you should have plenty of new plants in no time!

Check out our Watermelon Peperomia care guide for all the information on how to care for your new plants after propagation.

Fiddle and Thorn is a participant in the Amazon Services LLC Associates Program, an affiliate advertising program designed to provide a means for sites to earn advertising fees by advertising and linking to Amazon.com

Take our houseplant survey!

Quickly respond to our 30 second houseplant survey and get 75% off our Complete Houseplant Care eBook!

Take the Survey

No thanks…

How to Propagate a Wandering Jew plant (Tradescantia)

Last Updated: May 27, 2022

We are in love with Wandering Jew plants not only because they are fast growers, but because of their incredible colourful leaves that make them stand out in a room full of green. Luckily for plant parents, they are also one of the easiest houseplants we have ever propagated so you shouldn’t have too many issues.

In this post, we will guide you through the whole process, from the tools and equipment needed, to a detailed step by step method and how to solve common problems.

Tools and equipment you will need to propagate

Let’s start off with the easy part. It’s important to make sure you have all the things you need before taking that first cutting.

  • Healthy and mature Wandering Jew plant

  • Clean, sharp scissors/shears

  • Spare pot(s) with and without drainage holes

  • Fresh soil and water

  • Newspaper or plastic sheet (if you’re propagating indoors)

Propagating your Wandering Jew Plant

Wandering Jew Plant

What methods can I use to propagate my Wandering Jew plant?

The main method is through stem cuttings. Although you can also do it through division of the mother plant, there really is not much point as stem cuttings is such a simple and successful method.

Below you’ll find a step by step method of how to propagate your plant through stem cuttings.

How to propagate a Wandering Jew using stem cuttings

  1. Locate a healthy vine

    Ideally, you want to locate a stem that has several healthy nodes and leaves. A node is the joint in the stem where the leaves grow out from. This is also where the roots will grow from once in water.

  2. Make the cut(s)

    Make sure to include several nodes in each section of cutting as it’ll mean root growth will be much quicker. How many cuttings you take, and exactly how long each one is, is entirely up to you!

  3. Fill up a container with fresh temperature water

    Next, you want to fill up a glass with fresh water to place your Wandering Jew cuttings into. Avoid hot or cold water as you don’t want to shock or burn the cuttings as they are quite sensitive having just been removed from the mother plant. We like to use a transparent container so we can see the roots growing and it allows us to spot any issues early.

  4. Place your cuttings in water

    Make sure that the nodes on your vine cutting are sat in the water so that the roots will start to grow out from them. Remove any lower leaves that might be sat in the water as they will very quickly rot. Place your glass in bright but indirect sunlight making sure it doesn’t receive any direct sunlight which can burn the young cutting.

  5. Change out the water regularly

    One of the most important steps in the Wandering Jew propagation process is to switch out the water in your glass every couple of days. This keeps the water free from bacteria and stops it from stagnating which is harmful to your cutting.

  6. Be patient

    Luckily, you don’t have to be too patient with Wandering Jew cuttings as they grow roots sometimes within a day or two of being in the water. Soon enough you’ll see a real web of small delicate white roots shoot out from your cutting.

  7. Plant your cuttings into potting mix

    Once the roots on your cutting are a few inches long, it’s time to pot them into soil! We recommend using a high-quality potting mix to make sure your cuttings are getting enough nutrients.

  8. Resume usual Wandering Jew care

    For the first few weeks of your cuttings living in potting mix, we recommend keeping the soil a little more moist than you usually would as the cuttings are used to living in water.

How to propagate a Wandering Jew plant

A Wandering Jew Houseplant

Wandering Jew Propagation Frequently Asked Questions

Propagating a Wandering Jew Plant can be easy!

Propagating a Wandering Jew Plant

Common problems when propagating a Wandering Jew plant

Below we have all the main problems you may face when propagating your Wandering Jew so you can figure out what is causing these problems to arise and hopefully solve them before it kills your plant cuttings.

Whilst you can also propagate through division, stem cuttings is the best method and the only one we recommend as it couldn’t be simpler. Now that you are equipped with the right method, care instructions and top tips, your propagation should go off without a hitch!

Check out our full Wandering Jew care guide to find all the information on how to continue to care for your cuttings once they have matured.

Fiddle and Thorn is a participant in the Amazon Services LLC Associates Program, an affiliate advertising program designed to provide a means for sites to earn advertising fees by advertising and linking to Amazon.com

Take our houseplant survey!

Quickly respond to our 30 second houseplant survey and get 75% off our Complete Houseplant Care eBook!

Take the Survey

No thanks…

How to Propagate a String of Pearls plant

Last Updated: May 18, 2022

The String of Pearls plant is one of the most delicate and unique houseplants out there. Their thin stems lined with round bright green leaves that transcend out of the pot make them a must-have for every houseplant lover. Though they can be a little fussy about their care routine and environment, one thing that is super simple is propagating them! It really couldn’t be easier and with the right process, you’ll have plenty of new plants in no time.

In this post, we’re going to guide you through the entire process, including a step by step guide for each method you can use, what tools you will need and any problems you may encounter.

But first, why might you even want to propagate your plant?

Before we get started you might be wondering why it’s beneficial to propagate a String of Pearls Plant? Here are some of the main reasons:


  1. Create more plants without having to spend an extra penny!

    This is a great way to expand your urban jungle for free. Cuttings also make great gifts for friends and family if you already have enough houseplants. They can be a little tricky to get a hold of so they’ll definitely be grateful.

  2. To save a dying String of Pearls plant.

    If you’ve accidentally overwatered (which is easy to do as they are very sensitive to soggy soil) or neglected your Plant and it has started to die, develop brown leaves, yellow leaves, or has become mushy and shrivelled, take some healthy stem cuttings and propagating them to create new healthy plants. We always recommend trying to figure out what the issue is first so you can change your care routine or its environment in future.

  3. To make your plant fit its environment

    As they mature, these plants can grow very long and if they start to hit the floor or become inconvenient in your space, then giving them a trim will help keep them in shape. But instead of simply throwing away the beautiful cuttings, why not use them to create new plants.

What tools/equipment you’ll need

It’s important to make sure you have everything ready before taking any cuttings.


  • Healthy and mature String of Pearls plant

  • Clean, sharp scissors/shears

  • Spare pot(s)

  • Fresh potting soil and water

  • Plastic sheet if you’re propagating indoors

  • Rooting hormone (optional)

What methods can I use to propagate my String of Pearls?

There are three main methods; stem cuttings, layering and division. Division is the safest method as each section will already have an established root system. However, it’s not so great to use if you don’t have a mature and bushy plant. We will go through each of the methods below so you can figure out what’s best for you and your plant.

How to propagate a String of Pearls plant through stem cuttings

This is the most common method as it’s suitable for most maturities and lengths. Below you’ll find out step-by-step guide.

  1. Locate one or more healthy vines

    When taking a stem cutting you want to make sure that the part of the plant you are cutting is healthy to give you any chance of success. Avoid any sign of disease or pests as they will be transferred onto your new cuttings and will harm your chances at success.

    Make sure the stem cutting has several nodes on the vine that you choose. This is where leaves come out from the stem. With these plants, it’s pretty difficult to get a stem cutting without a node as the leaves are so close together so this should be fine.

  2. Make the vine cutting

    The next step in the propagation method is to use clean scissors to cut off one or more stem cuttings. Make sure your tools are clean to avoid passing on any bad bacteria to your cutting. You want each stem cutting to be at least 5cm in length. How many you choose to cut off is entirely down to you.

  3. Remove the upper leaves

    You want to remove the top few leaves so that the upper section of the stem is bare. This is because you will be placing the cutting in potting mix and don’t want the leaves to rot and go mushy in the soil.

  4. Plant your cuttings into fresh potting mix

    Carefully place the bare end of the String of Pearls cutting you’ve propagated into fresh potting mix. You want to use a succulent specific potting mix to ensure that it has all the right nutrients and ingredients for your plant. Perlite is crucial to aid drainage and aeration of the soil.

  5. Sparingly water your cuttings

    We like to water our cuttings with a spray bottle to avoid overwatering. They don’t require that much water and can very quickly start to rot if sat in soggy soil for a while.

  6. Be patient

    You might not see much happening above the soil for a while which means this stage of the propagation process can get a little boring. However, refrain from putting your stem cutting(s) out of the soil as this will damage any delicate roots that are growing. As long as your cutting looks healthy, you should be fine.

  7. Resume usual care

    Now that your vines are pot nicely into soil and the roots have started to grow, you might soon see some new leaves growing from the cutting. Soon enough those vines will be long enough to propagate again!

How to propagate a String of Pearls plant through layering

The first thing to note with this method is that it’s completely different to the air layering method of propagation. That requires cutting into the stem and using a wrap of peat moss. It’s a lot more complex than the layering method.


  1. Locate a healthy stem

    You want to make sure that you choose a nice healthy stem for this method of propagation as any issues will harm your chances of success.

  2. Fill a spare pot with fresh soil

    Make sure to use a high-quality potting mix so that your cutting gets the right balance of nutrients. It’s also important to use a potting mix that is well-draining (you’re looking for high levels of perlite) as this will help to prevent waterlogged soil.

  3. Place the stem on top of the potting mix

    Carefully place your cutting on top of the pot. We like to wrap it around in circles so that each of the nodes is touching the soil. Press in each node very very slightly into the potting mix but don’t cover the stem or leaves.

  4. Water your node

    You want to keep some moisture in the top of the potting mix at all times. Not enough to rot the stem but a little bit of moisture to encourage roots to grow. The best way to do this is by using a spray bottle.

  5. Be patient

    Now that your String of Pearls vine is happy in its pot and you are watering it occasionally, the only thing left to do is wait. It will be several weeks before anything happens above the soil. Avoid constantly checking root growth as disturbing and stem and pulling it away from the potting mix will slow down and disturb root growth.

  6. Continue normal care

    Soon enough, new String of Pearls leaves will pop up from some of the nodes, forming their own vines. Enjoy your new plant and continue to care for it as you would your mother plant!

How to propagate a String of Pearls plant through division

This method of propagation is best used when your plant is quite bushy and has lots of vines that you don’t mind dividing up into several smaller plants. This method is also great for those who don’t want to wait for weeks/months for roots and new leaves to grow.


  1. Take your plant out of the pot

    To propagate your String of Pearls through the division method, you’ll need to separate the different vines. The first step is to carefully lift your plant out of the pot, trying not to damage the leaves or root system as they are very delicate.

  2. Separate out the vines

    You may have to trim off the odd root to detangle the plant but you should be able to pull the vines apart fairly easily. Each vine should have its own roots so make sure these are healthy before dividing. You then want to group the vines together to form new plants. How many new plants, and how bushy each of them are is completely up to you!

  3. Place each new section in fresh potting mix

    Pop your mother plant back into its original pot (or downsize slightly if you have taken away a substantial amount of the original plant as this will help with stability and avoiding waterlogged soil). Then pot your new plant(s) into well-draining potting mix. Make sure you are always using fresh soil as bacteria and pests can linger in the soil without you knowing. f

  4. Continue your normal String of Pearls plant care routine

    Make sure that your new plant is getting enough light and warmth and before you know it, they’ll be big enough to take cuttings from again.

String of Pearls Propagation FAQs

How to care for your String of Pearls cuttings after propagation

Once you’ve successfully propagated your String of Pearls and they’ve started to grow roots and even new pearls, it’s time to nurture them into mature plants. But you might be wondering what kind of care they need to properly thrive after the propagation process.

In a nutshell, you want to care for your new cuttings as you would the mother plant, but be a little bit extra cautious and not expose them to any extreme environments. This goes for sunlight, watering habits and temperature levels.

Find a bright spot in your home for your new String of Pearls but do keep it away from too much direct sunlight as it can cause them to burn and dry out. When it comes to watering your newly propagated String of Pearls, be very careful not to overwater. They are succulent plants after all and thrive in dry soil. Make sure you allow the potting mix to fully dry out for a bit before watering again. Their delicate roots can very quickly rot if the soil is soggy for a long time so be careful.

One thing you don’t need to worry about at all though is fertiliser. As we mentioned above, wait about a year after propagating before you even think about feeding your new plant. It can actually cause quite a lot of damage to such young plants.

That’s everything you need to know to successfully propagate your String of Pearls plant. There is a lot of patience involved as you wait for the roots to grow so keep an eye on your plant to spot any early warning signs. But with the right care and environment, you shouldn’t encounter too many issues.

Check out our full String of Pearls Care Guide for all the information you need on how to continue caring for your cuttings once they have matured.

Fiddle and Thorn is a participant in the Amazon Services LLC Associates Program, an affiliate advertising program designed to provide a means for sites to earn advertising fees by advertising and linking to Amazon.com

Take our houseplant survey!

Quickly respond to our 30 second houseplant survey and get 75% off our Complete Houseplant Care eBook!

Take the Survey

No thanks…

How to propagate a Snow Queen Pothos plant

Last Updated: August 26, 2022

Loved for their variegated leaves and relatively easy care requirements, there’s no wonder that the Snow Queen Pothos is taking the houseplant world by storm right now.

Propagating them is also super simple so whether you want to make your plant bushier, expand your urban jungle, or gift cuttings to friends and family, this Snow Queen Pothos propagation guide is the right thing for you!

How to propagate a Snow Queen Pothos using stem cuttings

This is the main method of propagating Snow Queen Pothos plants as not only can you do it on less mature plants, but it means you don’t have to take a large chunk out of your Pothos as you do with division. Below you’ll find our detailed step by step to make sure your propagation is a success.

  1. Locate a healthy vine or two

    Choosing a healthy part of your plant to propagate is the most crucial thing when it comes to stem cuttings as if you start off with a part of the plant that is unhealthy, this will only get worse and your propagation will likely be unsuccessful. Avoid any sign of disease or pests as they will be transferred onto your new cuttings.

  2. Make the cut

    You want to use clean scissors/ shears or a knife to make the cut to avoid passing on dirt or any infection to the cuttings. Make sure that the section you are cutting off your Snow Queen Pothos has at least one node as this is where the roots will grow out from. You’ll see small stubby roots growing out of each node, or feel a bump in the stem on less mature sections of the vine.

  3. Fill up a container with temperate water

    Next, you want to fill up a glass with fresh water to place your Snow Queen Pothos cuttings into. We like to use a transparent container as this lets you not only see the roots growing which is pretty cool but it helps you spot any issues early.

  4. Place your cutting(s) into the water

    Make sure that the nodes on your Snow Queen Pothos stem cutting are sat in the water so that the roots will start to grow out from them. You might need to trim off the lowest leaves if these are in the water as they’ll begin to rot.

  5. Change out the water regularly

    Once you’ve found a good spot to grow your Snow Queen Pothos cuttings in (bright but indirect light) then the only thing you need to do now is refresh the water every few days. This keeps the water free from bacteria and stops it from stagnating which is harmful to your cutting.

  6. Be patient

    Luckily Snow Queen Pothos plants are fairly quick at growing roots compared to a lot of other houseplants types, so you should start to see some small roots coming through after a few weeks.

  7. Plant your cuttings into fresh potting mix

    Once the roots on your Snow Queen Pothos cutting are a few inches long, it’s time to pot them into fresh potting mix. Carefully place your cuttings a few centimetres into the soil, making sure not to damage the newly formed roots as they can be quite delicate.

  8. Resume usual Snow Queen Pothos care

    That’s everything – your Snow Queen Pothos propagation is complete! You can now begin to care for your new plant as you would your mother plant and it’ll be long enough to propagate again in no time!

How to propagate a Snow Queen Pothos through division of the mother plant

If stem cuttings isn’t for you, then you might also choose to propagate your Snow Queen Pothos through division. Although this is easier, quicker and less risky, it does require a fairly mature and bushy plant. This is because you will be removing entire vines to form new plants.

  1. Take your Snow Queen Pothos out of its pot

    To propagate your Snow Queen Pothos through division, you need to be able to locate the various vines and separate out the roots. Take your plant out of its pot carefully, trying not to damage the leaves or root system. You want to make sure to detangle any roots that have started to grow out of the drainage holes at the bottom as otherwise, these will tear if you tug your plant out.

  2. Locate the various natural divisions

    The best way to locate the various offshoots is by following each individual vine and loosening the roots around it. Each vine will have its own root system and will be able to be separated. Then you need to choose how much of the plant to separate, and how many plants you actually want to end up with. This has no implication on the propagation process so just depends on your and your plant.

  3. Place each new plant in fresh potting mix

    If the roots on your Snow Queen Pothos sections aren’t very mature you may choose to grow them in water for a few weeks. However, we tend to always go straight into potting mix when propagating Snow Queen Pothos through division.

  4. Continue normal Snow Queen Pothos care

    Your propagation through division is complete! Keep an eye on your new plants for a little while to make sure that everything has gone as planned but you should now begin to care for them as you did your mother Snow Queen Pothos plant.

Snow Queen Pothos propagation FAQs

Check out our Snow Queen Pothos care guide to find all the information on how to continue to care for your cuttings once they have matured.

Fiddle and Thorn is a participant in the Amazon Services LLC Associates Program, an affiliate advertising program designed to provide a means for sites to earn advertising fees by advertising and linking to Amazon.com

Take our houseplant survey!

Quickly respond to our 30 second houseplant survey and get 75% off our Complete Houseplant Care eBook!

Take the Survey

No thanks…

How to Propagate a Snake Plant | Step by Step Methods

Last Updated: May 17, 2022

Snake plants are one of our favourite plants here at Fiddle and Thorn, they are pretty striking in their appearance and are also pretty easy to care for and propagate. There are several methods you can use and we will be going through each of them as well as pros and cons for each. You’ll also find plenty of FAQs to make sure you have everything you need along the way.

Why propagate a Snake Plant?

Before we get started you might be wondering why it’s beneficial to take cuttings from your plant? Well here are a few good reasons:


  1. Create more plants for free!

    This will multiply your plant collection without needing to spend any more money! They also make great gifts for friends and family if you have enough greenery in your home already.

  2. Save a dying plant

    If you accidentally overwatered, over-fertilised or mistreated your Snake Plant and it has started to die, sometimes the best way to save it is by taking the healthy leaves and using them to form new plants entirely.

  3. Using a damaged leaf.

    If one of the leaves on your plant has become sunburnt or scarred from taking a knocking then a great way to put this leaf to use is to propagate it. It’s a shame to throw away any leaves and this way it gets a second life.

  4. To make your Snake Plant fit its environment.

    If your plant has become too big for your space or you simply want to prune the shape a little then growing the leaves you cut off is a great way to stop them from going to waste.

Snake Plant Propagation Methods

There are 4 main methods you can use. Each come with their own set of difficulties, advantages and requirements so it’s important to figure out which is the best for you and your plant.


  1. Propagation with cuttings in water

  2. Propagation with cuttings in soil

  3. Propagation by division

  4. Propagation by rhizome

Propagating a Snake Plant

Propagating a Snake Plant

How to propagate a Snake Plant with cuttings in water

This is probably the easiest way as you won’t need any fancy tools, just some clean sharp shears/scissors and some spare time.


  1. Choose a healthy leaf to propagate

    A few scars or sunburn patches won’t affect the health of the leaf but avoid leaves that are fully turning yellow or show signs of pests as this will impact the health of the cutting and new plant.

  2. Cut the leaf near the base of the plant

    Using a clean, sharp knife or shears, cut the leaf off as close to the soil. Sharper, cleaner cuts have a better chance at growing healthy roots and also avoids too much damage to the mother plant. We recommend cutting a V shape into your leaf to increase the surface area for root growth.

    If you want to you can also cut up the leaf into several horizontal sections and root each part to form multiple new plants. However, when doing this it is super important you don’t accidentally turn the cutting upside down as they will only root out of the bottom.

  3. Let your cutting callous

    We recommend leaving your newly cut Snake Plant leaf out of water for a few days so the end can callous over a little. This stops the leaf from rotting once it is placed into water.

    It’s at this point that you may choose to use rooting gel to encourage faster root growth. It’s totally optional and down to personal preference.

  4. Place the leaf in water

    Next, you want to place your cutting(s) into water to encourage root growth. You want to cover the lower quarter of the cutting but no more as this may cause the leaf to root and become mushy. Use temperate water to avoid shocking or burning the plant.

  5. Find a nice spot for your cutting

    It’s important to find a place with enough but not too much sunlight. Bright but indirect is best as intense light will scorch the cutting but a lack of light will stunt any new root or leaf growth.

  6. Replace the water regularly

    This is a really important step – make sure you switch out the water every few days to stop it from stagnating as this can very quickly kill your leaf cutting!

  7. Be patient!

    It can take a little while for anything to start happening on your new cutting so you’ll need a lot of patience. After a few weeks (or sometimes 1-2 months) you should start to see some little roots forming at the bottom of the leaf. This is an indication that your propagation was successful and your cutting will soon be ready to be pot.

  8. Pot into well-draining potting mix

    Once the roots are several inches in length, you might decide your cutting is ready to be pot into fresh mix. Make sure you use a well-draining mix including perlite to aid aeration and drainage of the soil. This helps to prevent root rot which Snake Plants are quite sensitive to.

Positives of propagating your Snake Plant in water

  • It’s really easy! This is probably the simplest method.
  • If you use a clear vessel, you get to see the roots growing on your cutting which is always super cool.

Negatives of propagating your Snake Plant in water

  • It can take a while for roots to start growing on your cutting. Sometimes you may be waiting several months to see any change.
  • This method doesn’t work for variegated plants. Any dark margins or yellow edges will be lost on the new cuttings and they will most likely be solid green.

How to propagate a Snake Plant directly into potting mix

If you’re looking for an even more straightforward option, or just don’t like having to swap water out every couple of days, you can grow your cuttings directly into soil using this method.


  1. Choose a healthy leaf

    Like when using water, you want to make sure you use a relatively healthy leaf. Pests or diseases will persist on any new growth that comes from your cutting.

  2. Cut the leaf near the base of the plant

    Again you want to make sure you are using a clean, sharp knife to cut the leaf off as close to the soil. For this method, you will need to slice the leaf into smaller horizontal segments to create multiple new plants. Using one long leaf won’t work so well as there are no roots to keep it stable. It’s also important to remember what we mentioned before about not turning the cutting upside down as roots will only grow out of the natural bottom of the cutting.

  3. Let your cutting callous

    Leave your cutting out of water or soil for a few days to let it callous. It protects the leaf from rotting or taking up any bacteria found in the soil.

    At this point in the process, you may choose to use rooting gel to encourage more root growth. It’s completely optional though as some horticulturists warn against potential damage to the leaf when used.

  4. Pot the cutting into fresh soil

    When choosing the right potting mix for your new cuttings, it’s important you choose a well-draining mix. Sometimes this comes labelled as succulent mix, other times you can just read the components of the mix to check it has perlite to aid drainage and aeration of the soil.

  5. Find a nice spot for your Snake Plant cuttings to grow

    Now that your various cuttings are potted nicely into fresh soil you want to find the right place for them to thrive. Bright but indirect sunlight is what your new cutting needs as intense light will scorch the cutting but a lack of light will stunt any new root or leaf growth.

  6. Be patient!

    It will take a long time for your new cuttings to show any signs of new leaves growing from the soil. It can take months before roots start to grow.

Positives of propagating straight into soil

  • You can get quite a few new plants from just one leaf cutting!
  • You can skip out the water part which avoids a few potential issues

Negatives of growing your Snake Plant cutting straight in soil

  • As you can’t see the roots growing you won’t be able to spot any potential warning signs around root rot, growth or general unhappiness.
  • It will take quite a long time to start seeing results.
  • This method also doesn’t work for variegated plants. Any dark margins or yellow edges will be lost on the new cuttings and they will most likely be solid green.

How to propagate a Snake Plant through division of the mother plant

If your plant is getting pretty big and dense, using the division method is a great option as you will still be left with a healthy and full mother plant (as well as luscious new smaller plants).


Propagating your Snake Plant through division

Root system of a Snake Plant
  1. Locate the various natural divisions

    When looking for a part of the plant to divide it will become very obvious if there are various offshoots on your plant. They will hopefully be completely separate and growth will stem from the middle of each section. If this isn’t the case you will need your knife to slice down the middle of the plant.

  2. Take the plant out of the pot

    Once you have located the various sections of the plant you will need to take your plant out of the pot so you can divide up the root system and leaves. Carefully lift the plant out of the pot, holding firmly on the leaves (Snake Plants are sturdy and can handle a bit of tugging).

    Then shake off the potting mix around the roots so you can see the entire root system clearly. A good way to loosen the soil is to run your fingers through the roots to start to separate them. Don’t worry if a few break or fall out, this is normal and won’t cause any damage to your plant.

  3. Separate your plant

    You may have to trim off the odd root if they aren’t detangling easily but you should be able to carefully pull the sections apart from each other. It’s ok if you have to slice around the plant a little to separate them but just make sure that each part of the plant has a substantial amount of the root system.

  4. Place in fresh potting mix

    Pop your mother plant back into its original pot (or downsize if you have taken away a substantial amount of the original plant). Then pot your new plant(s) into fresh well-draining mix. If the roots aren’t very mature you may want to grow them in water for a few weeks but we tend to always go straight into potting mix when propagating Snake Plants through division.

  5. Continue normal care

    Now your plants are safely in their new homes you want to resume normal care.

Positives of the division method

  • The results are pretty instant as you don’t have to wait for months for roots and leaves to grow.
  • High chances of success as the plants already have a strong root system
  • Keeps any variegation on the leaves, unlike the previous two methods.

Negatives of the division method

  • You’ll need quite a big and mature plant to be able to get several larger plants from it.
  • You don’t get the fun part of watching the roots and leaves grow.

How to propagate a Snake Plant through rhizomes

Rhizomes are little offshoots that grow from the mother plant underneath the soil. As they mature, they pop out and grow new plants. Rhizomes are a great way to propagate Snake Plants as they won’t harm or take away from the growth of your main plant.


  1. Take your mother plant out of its pot

    You might not know that your plant is growing rhizomes as they start off growing underneath the potting mix. If your plant is mature then you should be lucky! Remove your plant from its pot carefully and lay it on its side. Carefully look for light green/white rhizomes growing out from the mother plant.

  2. Slice off the rhizome

    Using your clean, sharp knife to remove the rhizome from the mother plant. Try to cut as close to the mother plant as possible to increase the chances of healthy root growth.

  3. Let it callous over

    Before popping your newly cut rhizome in fresh potting mix, we recommend leaving it in fresh air to callous over. This will stop the cutting from rotting or picking up any bacteria that may be in the potting soil.

    At this stage, you may also choose to use a rooting hormone.

  4. Pot in fresh well-draining soil

    Now that your cutting has had the chance to callous over, you want to place it into a pot filled with fresh well-draining soil. Ingredients such as perlite will help aeration and draining in the soil which is key for your Snake Plant’s health.

  5. Continue normal care

    You’ve done it, your propagation is complete! Now your new Snake Plant rhizome is safely in its new home you want to resume normal care.

Positives of propagating your plant through division

  • This is a quicker method compared to leaf cuttings and you will see new growth appear sooner.
  • Keeps any variegation on the leaves as this is a direct offshoot from the mother plant.
  • You don’t need to take any divisions or leaves away from your mother plant

Negatives of propagating your plant through division

  • Less mature plants might not have rhizomes yet so you may not find any to remove.

Snake Plant Propagation FAQs

Here’s some answers to the most common questions we get on this subject, hopefully something here can help!

Common Problems when Propagating Snake Plants

Although on paper, it’s a simple process, sometimes it just doesn’t work out as expected. Here’s some advice on the most common issues we come across from time to time.

Propagating doesn’t have to be super difficult once you have chosen your preferred method. But one thing you have to be prepared for is for nothing to happen for weeks and weeks. But with the right care and the right environment, your Snake Plant should start to grow roots and new leaves soon and it will be well worth the wait.

Check out our Snake Plant care guide for more info on how to take care of your plants as they mature.

Fiddle and Thorn is a participant in the Amazon Services LLC Associates Program, an affiliate advertising program designed to provide a means for sites to earn advertising fees by advertising and linking to Amazon.com

Take our houseplant survey!

Quickly respond to our 30 second houseplant survey and get 75% off our Complete Houseplant Care eBook!

Take the Survey

No thanks…