How to revive a dying String of Hearts

Last Updated: April 1, 2022

There are quite a few reasons why your String of Hearts might be starting to die. Either it’s getting the wrong care, is sat in the wrong environment or has simply been forgotten about. We are strong believers in reviving your plant and not giving up until we really have to. There was even a point where we managed to save an entire plant by just having one healthy leaf yet. Below you’ll find several different things you can try to revive your dying String of Hearts plant.

Watering could cause your String of Hearts to start dying

If you’ve been neglecting your String of Hearts and forgotten to water, then this will need to be first on your list when trying to revive your dying plant. But before you do anything, double-check that it actually needs watering because overwatering is also a major issue for String of Hearts plants as they really don’t need a lot. Check the moisture in the soil just by feeling it and only remove the plant if necessary. String of Hearts have very delicate roots so if you can tell how much moisture is in the soil through the finger or chopstick method, then that’s preferred. A moisture meter is also a great tool to use for this as it takes away the guesswork.

If the potting mix is completely dry it will feel very dusty and crumbly. This indicates that your String of Hearts needs more frequent watering. But before you give your dying String of Hearts a big bucket of water, hold off for a moment as a rapid change of environment can actually shock your plant and this won’t help anything. There is a two-step process to reviving an underwatered String of Hearts. Firstly, fill up a bucket with room temperature water and soak your String of Hearts for around half an hour. Then let it drip dry in the shower or sink before popping it back in its pot. This helps to avoid the delicate roots from sitting in too much water as your plant will only take in what it needs. Then over the next few weeks, continuously check the moisture levels in the potting mix and water a little more frequently than you have been. If you feel as though the root system is still pretty dry, you can soak your String of Hearts again in the first week.

It might also be that your String of Hearts is dying because of overwatering. If you find that the potting mix of your String of Hearts is waterlogged then you’ll need to replace it immediately. Don’t wait for it to naturally dry out as this risks more damage to the delicate root system and will make reviving your String of Hearts even more difficult. Trim off any rotten roots as these won’t be helping your plant anymore and you’ll want to encourage more healthy roots to grow.

Now that the initial problem is sorted, it’s really important that you prevent any watering issues in future to stop your String of Hearts from dying. Luckily there are a few methods you can use to help prevent waterlogged or dry soil. Firstly, investing in a self-watering pot means that you can be sure that your String of Hearts is only getting the water it needs at the right time. We recommend this self-watering pot from Amazon which our plants love! A moisture meter is also a great way to know when the soil is ready to be watered and they are super affordable making them a must-have for every plant parent.

We also recommend using terracotta pots instead of plastic ones as these let some of the water evaporate out of the sides. The plastic pots that you get from plant shops or nurseries are good for transportation and are cost-efficient, but aren’t always the best thing for your plants. It can make overwatering your String of Hearts a lot easier to do.

Caring for the leaves of your String of Hearts

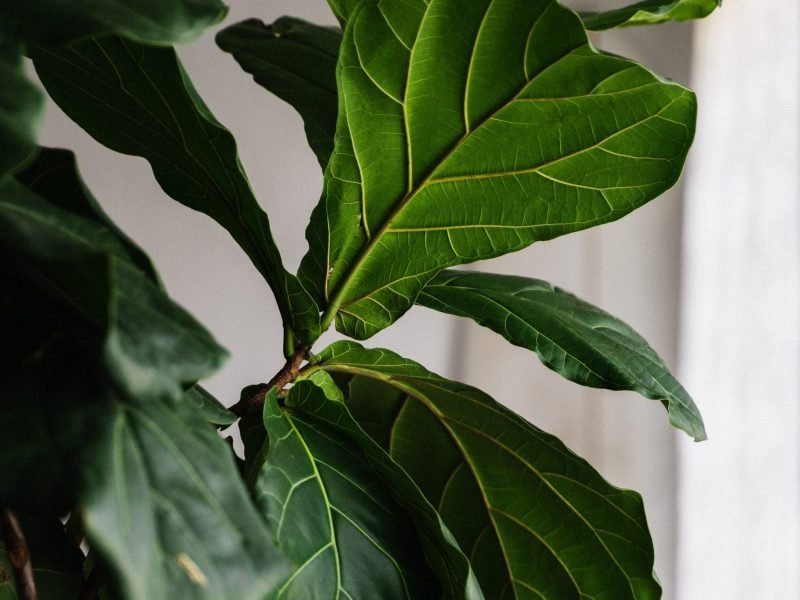
When reviving your String of Hearts it’s important to pay attention to the vines and leaves rather than just the roots. As the String of Hearts has very delicate leaves and vines, we recommend removing any that are dry, crispy, yellow or mushy. Your String of Hearts will be wasting valuable energy trying to keep those alive, so you want to remove those dying parts of the plant so that your String of Hearts can focus on growing new, healthy vines and leaves.

Increasing the humidity can help revive a dying String of Hearts

Alongside watering, increasing the humidity is also a great way to revive a dying String of Hearts plant and get it back to tip-top condition. Our homes can sometimes have quite dry air, especially in the winter months where we often have the central heating on. Dry air can cause the leaves to be a little limp and droop down as well as turn brown and crispy. Luckily there are several easy methods to increase the humidity and help to revive your dying String of Hearts:

Misting your String of Hearts’ leaves

One of the simplest ways to increase the humidity for your String of Hearts (and the rest of your humidity-loving houseplants) is to mist them with a spray bottle a few times a week. Make sure you do this in the morning so there is enough time for the water droplets to evaporate before nightfall. Once the temperature drops, the risk of leaf rot on damp leaves increases. 

Make a Pebble tray

If you’re up for a little DIY then this one is for you. Place your String of Hearts over a tray of small stones and add fresh water about halfway up the container. Over the day, the water from the tray will evaporate around your plant giving your String of Hearts above a little humidity boost. The number one thing is to not let the water level reach your plant pot as you don’t want the roots sitting in a puddle of water as they are very susceptible to root rot.

Get the right placement

If you happen to have great lighting in your bathroom or kitchen, we recommend moving your String of Hearts in there. The running water from your showers and steam that comes from your cooking means these rooms have often have a naturally higher humidity level than the rest of your home. We find using a humidity/ temperature meter can really help you decide where to put your String of Hearts.

Invest in a humidifier

If you want to take the worry and guesswork out of getting the humidity level just right, then we have the perfect thing for you. Humidifiers are super affordable little devices that keep a consistent humidity level. You can find our current favourite humidifier on Amazon here. Our plants really love it and it not only helps to revive dying plants, but it keeps them healthy throughout the year too!

Want to know more about raising the humidity level for your String of Hearts and other houseplants? Check out our humidity guide to find out everything you need to know!

Check the Lighting Conditions

It can happen that too much direct sunshine can burn your plant so if your String of Hearts has been left near a window for long periods of time, this might be why your plant has started to die. If you notice scorched, crispy leaves then it may be due to too much direct sunlight hitting the leaves. Move your plant further away from the window, and remove the scorched leaves.

If your String of Hearts has been growing in darker areas of your home, then you probably need to adjust the light levels to revive your dying plant. Leggy vines or a complete lack of growth is a classic sign of not enough sunlight but be careful not to move your String of Hearts into direct sunlight as this will cause a whole range of other issues as we mentioned above.

It’s important that you monitor the light levels and how they change throughout the day and year. Your String of Hearts might be getting the right amount of light in the morning or during winter but too much or too little light for the rest of the day or year. You’d be surprised how much the light level can change. To monitor the light level, and to be sure your String of Hearts is getting the right amount, use a light meter.

If you’ve established that your String of Hearts needs more light, but there isn’t a suitable spot in your home then we have a solution. We recommend purchasing a LED light to encourage new healthy growth. They are also great for your other houseplants if they don’t get as much light during winter so are a great investment. Oh, and you can also use them during the propagation process to provide the ideal environment. Our plants love this grow light from Amazon.

Temperature issues might be causing your String of Hearts to die

To help bring your String of Hearts back to full health, you need to make sure that there are no temperature extremes that might be slowly killing your String of Hearts plant. Radiators, heating vents, cookers and air conditioning systems can be harmful to your String of Hearts as they create hotspots and cool drafts. Ideally, you want them to be in a spot with temperatures between 60-80 degrees Fahrenheit. Use a digital thermometer to keep an eye on temperature fluctuations to prevent any further damage to your String of Hearts. Whilst you might not notice a cold draft coming through the window, over time this can be quite damaging, especially during the night when temperatures drop.

Pests might be why your String of Hearts is dying

One thing to look out for when trying to revive your dying String of Hearts is pests. It can happen that pests such as mealybugs, spider mites, scale insects and more can take hold of your String of Hearts and cause it to develop yellow leaves, a lack of growth and often drop a lot of leaves. Give your plant a once over to spot any signs of a pest infestation. If you’re lucky you may even be able to spot pests. Signs include white powder, webbing on the leaves or holes in the leaves. Use a magnifying glass to inspect the plant, looking at the undersides of the leaves and vine joints as this is where they like to hang out. If you spot pests or signs of pests, then it’s not the end for your String of Hearts as luckily there are a few different ways to get rid of them.

Your first port of call to reviving your String of Hearts and getting rid of the pests is to remove the worst affected leaves. This will help to curb the infestation initially. Then you want to wash your plant down in the sink. If the infestation continues, you might need to replace the potting mix as this is where some pests lay their eggs. Alongside these methods, you should also treat your String of Hearts with neem oil or another insecticide to fight the infestation.

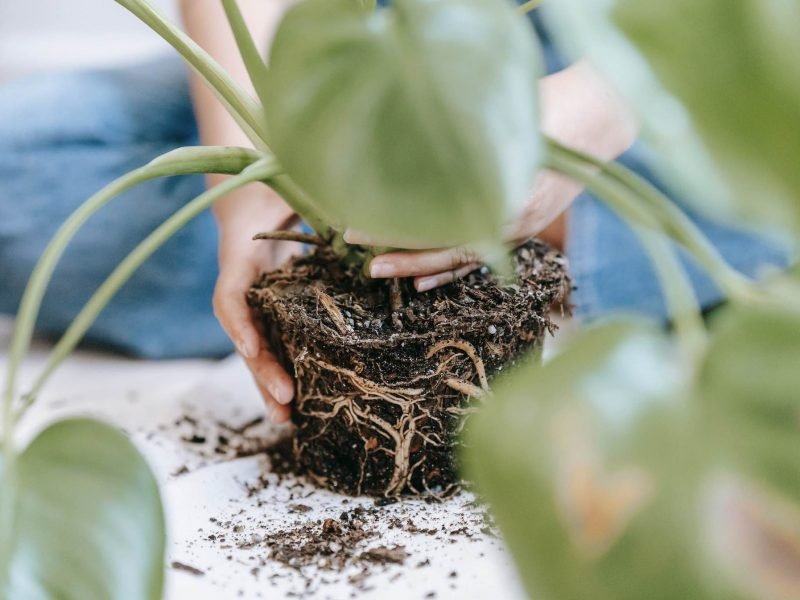
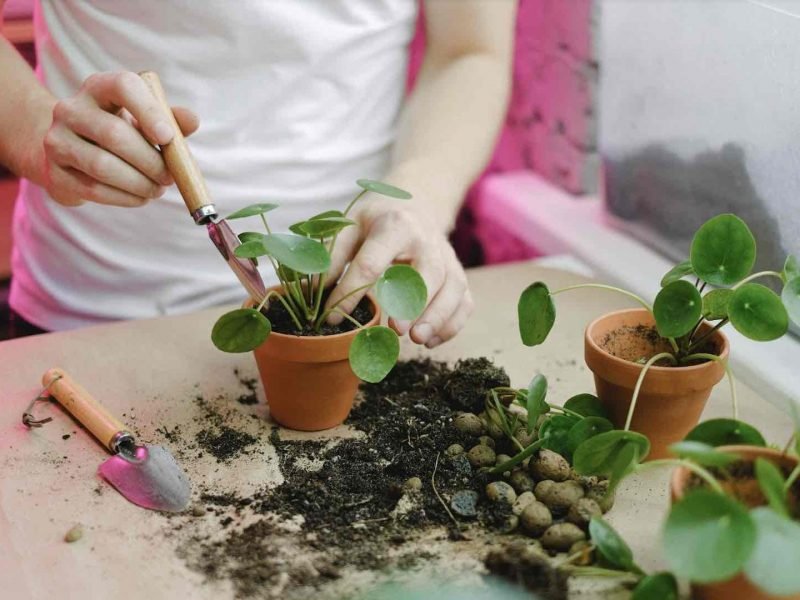
Repot into Fresh Soil

Alongside a lot of the methods above, you might also choose to replace the potting mix to help revive your String of Hearts. When replacing the soil, make sure to use a high-quality potting mix that is specially designed for houseplants as this will give your String of Hearts the right balance of nutrients. We recommend Miracle Gro’s houseplant mix.

Gently rub all the old soil from the root system by running your fingers through it. It’s important you are very careful when handling the roots of your String of Hearts, as they are very delicate. With a lot of other plants, we often say that it’s okay to break a few roots when repotting but try to avoid this with String of Hearts plants as they have a very small root system to begin with.

Avoid fertiliser to help revive your dying plant

There is mixed advice on whether or not your should fertilise your String of Hearts when trying to revive your dying plant. We always recommend steering clear of it, to begin with. Fertiliser is great at encouraging new healthy growth but it can also shock your plant if used incorrectly or when your plant is struggling. We recommend waiting about two months after making any changes to the environment or care routine before even thinking about using fertiliser. Only use if you don’t see any signs of unhappiness or distress.

Once your String of Hearts is ready to be fertiliser, you need to choose between liquid fertiliser or spikes that you pop into the soil. Our String of Hearts really loves this liquid feed from Miracle Gro which is available on Amazon. When fertilising your String of Hearts always use less than the recommended strength. There is no such thing as one size fits all when it comes to plant feed as size, maturity and environment will impact how much it needs. So using less than it says on the bottle is safer and avoids any risk of over-fertilising (which is higher as the roots on your String of Hearts are so delicate).

Reviving any of your dying houseplants can be a difficult, emotional process, especially if they have been neglected for months on end. If you find yourself always forgetting to take care of your houseplants, try adding watering to your calendar every week or asking a family member or housemate to help you out. Alternatively, it’s also worth looking into low-care houseplants as some really don’t need much care or attention to thrive. In fact, several plants prefer it if you forget about them!

Don’t give up on your String of Hearts too quickly, they can look pretty dead but will actually start to grow new vines and leaves with the right care. So be patient, treat them well and they will hopefully reward you with plenty of new healthy growth soon!

Find out more about caring for your String of Hearts in our care guide.

Fiddle and Thorn is a participant in the Amazon Services LLC Associates Program, an affiliate advertising program designed to provide a means for sites to earn advertising fees by advertising and linking to Amazon.com

Take our houseplant survey!

Quickly respond to our 30 second houseplant survey and get 75% off our Complete Houseplant Care eBook!

Take the Survey

No thanks…

How to Revive a Dying Pilea Peperomioides?

Last Updated: April 1, 2022

Life can make us really busy sometimes and we don’t blame you if ‘water Pilea’ just gets forgotten from the to-do list every now and again. And things like holidays and unexpected emergencies can sometimes leave our Pilea a little worse for wear. But don’t worry, there are several ways you can give your Pilea a little bit of TLC and revive your plant.

Your Pilea might be dying due to watering issues

If you’ve been neglecting your Pilea and forgotten to water, then this will need to be first on your list when trying to revive it. But before you do anything, double-check that it actually needs watering because overwatering can be a sudden cause of Pilea death too, surprisingly too much love isn’t great for your plants either!! If your Pilea has developed dry, crispy, light brown leaves and the soil is light and dry, chances are your plant definitely needs more water. If you aren’t sure if your Pilea has too much or too little moisture in its soil, use a moisture meter first to check.

And before you give your dying Pilea a big bucket of water, hold off for a moment as a rapid change of environment can actually shock your plant and this won’t help anything. There is a two-step process to reviving an underwatered Pilea. Firstly, fill up a bucket with room temperature water and soak your Pilea for around half an hour. Then let it drip dry in the shower or sink before popping it back in its pot. Then continue to water your Pilea little and often over the course of a week or two before taking up a normal care routine once again. If you feel as though the root system is still pretty dry, you can soak your Pilea again a few times in the first week.

Soaking is super important when reviving a dying and neglected Pilea. It works better than just pouring a lot of water on it as it can either run straight out of the drainage holes or waterlog the soil and cause more stress to your Pilea.

It might also be that your Pilea is dying because of overwatering. If you find that the potting mix of your Pilea is waterlogged then you’ll need to replace it immediately. Don’t wait for it to naturally dry out as this risks more damage to the root system. Trim off any rotten roots as these won’t be helping your plant anymore and you’ll want to encourage more healthy roots to grow.

Now that the initial problem is sorted, it’s really important that you prevent any watering issues in future. Luckily there are a few methods you can use to help prevent waterlogged or dry soil. Firstly, investing in a self-watering pot means that you can be sure that your Pilea is only getting the water it needs. We recommend this self-watering pot from Amazon. A moisture meter is also a great way to know when the soil is ready to be watered and they are super affordable making them a must-have for every plant parent.

We also recommend only using terracotta pots instead of plastic ones as these let some of the water evaporate out of the sides, whereas plastic pots hold in every drop of moisture which can make overwatering affect your Pilea a lot more.

Leaf Care

It’s also super important to not only focus on the roots when trying to revive your Pilea but also giving the incredible round leaves some needed love. To get rid of any dust and grime on the leaves, gently wipe them down with soapy warm water. This is really important to maximise the sunlight your Pilea can get which will allow it to photosynthesise properly again. This also allows you to give the leaves a thorough once over to check for any pests or signs of further problems. Make sure to check the undersides of the leaves as this is where the pests love to hangout most.

Sometimes brands will try to sell you leaf shine to get your Pilea leaves looking nice and shiny. However, this isn’t always the best idea as can be full of chemicals that clog the pores on the leaves and stops them from oxygenating. Instead, cleaning them with a cloth as we mentioned above should get them looking fresh and sparkly without the need for any harsh chemicals.

Increasing the humidity can help revive your dying Pilea

Alongside watering, increasing the humidity is also a great way to revive a dying Pilea plant and get it back to tip-top condition. Our homes can sometimes have quite dry air, especially in the winter months where we often have the central heating on. Dry air can cause the leaves to be a little limp and droop down as well as turn brown and crispy. Luckily there are several easy and often free ways to increase the humidity for your Pilea:

Misting your Pilea’s leaves

One of the simplest ways to increase the humidity for your Pilea (and the rest of your tropical or humidity-loving houseplants) is to mist them with a spray bottle a few times a week.

Make a Pebble tray

Place your houseplants over a tray of small stones with fresh water reaching about halfway up the tray. Over the day water from the tray will evaporate giving your Pilea above a little humidity boost. The number one thing is to not let the water level reach your plant pot as you don’t want the roots sitting in a puddle of water.

Give your Pilea a shower

A quick way to raise the humidity is to give them a quick shower. Simply pop them in the shower (or sink) and wash it down with lukewarm water, this will clean off the leaves of dust, give the soil a good soaking and raise the humidity which is great!

Get the right placement

If you happen to have great lighting in your bathroom or kitchen, we recommend moving your Pilea in there. The running water from your showers and steam from your cooking means these rooms have a naturally higher humidity level. We find using a humidity/ temperature meter can really help you decide where to put your Pilea. 

Buy a humidifier

If you don’t want to worry about the humidity level dropping, then getting a humidifier is the best idea for you. They’re super affordable little devices that keep a consistent humidity level. You can find our current favourite humidifier on Amazon here.

Want to know more about raising the humidity level for your Pilea and other houseplants?

A dying Pilea can indicate lighting issues

It can happen that too much direct sunshine can burn your plant so if your Pilea has been left near a window for long periods of time, this might be why your plant has started to die. If you notice scorched, burnt-like patches on the leaf then it may need to be moved further inside the room, away from the windows.

If your Pilea has been growing in darker areas of your home, then you probably need to adjust the light levels to revive it. Leggy or stunted growth is a classic sign of a lack of sunlight but be careful not to move it to direct sunlight as this will cause a whole range of other issues like we’ve mentioned above.

It’s important that you monitor the light levels and how they change throughout the day. Your Pilea might be getting the right amount of light in the morning, but much too much in the evening for example. To monitor the light level, and to be sure your Pilea is getting the right amount, use a light meter.

If you’ve established that increasing the light level is a great way to revive your dying Pilea, but there isn’t a better spot in your home, then it’s not all lost. We recommend purchasing a LED light to encourage new healthy growth. They are also great for your other houseplants if they don’t get as much light during winter so are a great investment. Our plants love this grow light from Amazon.

Check the Temperature

To help bring your Pilea back to full health, you need to make sure that there are no temperature extremes that might be killing your plant. Radiators, heating vents or air conditioning systems can be harmful to your Pilea as they create hotspots and drafts. Ideally, you want them to be in a spot with temperatures between 60-80 degrees Fahrenheit. Use a digital thermometer to keep an eye on temperature fluctuations to prevent any further damage to your Pilea.

Pests might be causing your Pilea to die

One thing to look out for when trying to revive your dying Pilea is pests. It can happen that pests such as mealybugs, spider mites, scale insects and more can take hold of your Pilea and cause it to droop, have yellow leaves and lose leaves altogether. Give your plant a once over to spot any pests. If you do notice them or any signs of them (white powder, webbing on the leaves or holes in the leaves) then it’s not the end for your plant as luckily there are a few different ways to get rid of them.

Your first port of call to reviving your Pilea and getting rid of the pests is to remove the worst affected leaves. This will help to curb the infestation initially. Then you want to wipe down the leaves with warm water as well as washing them down in the sink. If the infestation continues, you might need to replace the potting mix as this is where some pests lay their eggs. Alongside these methods, you should also treat your Pilea with neem oil or another insecticide to fight the infestation.

Use a Support Stake for your Pilea

When Pilea plants start to struggle, they tend to get a little droopy and leggy. To help revive your plant, we recommend giving your Pilea a support to hold it up. You can get a variety of support stakes that you just dig in the soil and attach to your plant. Over time, it will start to become strong enough to hold itself up and you’ll be able to remove it if you choose. These supports are great and will help your Pilea look more alive!

Repot into fresh soil

Another method you can use to revive your dying Pilea and return it to full health is to repot it into fresh potting mix. When replacing the soil, make sure to use a high-quality potting mix that is specially designed for houseplants as this will give your Pilea the right balance of nutrients. We recommend Miracle Gro’s houseplant mix. 

Gently rub all the old soil from the root system by running your fingers through it. It’s okay if a few roots break off, this is normal when handling your plant and they’ll grow back pretty quickly. Repotting the soil also gives you a good opportunity to inspect the root system and trim off any rotten or crispy roots.

A dying Pilea can also indicate overfertilisation

There is mixed advice on whether or not your should fertilise your Pilea when trying to revive your dying plant. We always recommend steering clear of it, to begin with. Fertiliser is great at encouraging new healthy growth but it can also shock your plant if used incorrectly. We recommend waiting about a month before even thinking about using fertiliser.

Once your Pilea is ready to be fertiliser, you need to choose between liquid fertiliser or spikes that you pop into the soil. Our Pilea really loves this liquid feed from Miracle Gro which is available on Amazon. When fertilising your Pilea always use less than the recommended strength. There is no such thing as one size fits all when it comes to plant feed as size, maturity and environment will impact how much it needs. So using less than it says on the bottle is safer and avoids any risk of over-fertilising.

Reviving any of your houseplants can be a difficult, emotional process, especially if they have been neglected for months on end. If you find yourself always forgetting to take care of your houseplants, try adding watering to your calendar every week or asking a family member or housemate to help you out. Alternatively, it’s also worth looking into low-care houseplants as some really don’t need much care or attention to thrive. In fact, several plants prefer it if you forget about them!

Don’t give up on your Pilea too quickly, they can look pretty dead but will actually start to grow new leaves and stems with the right care. So be patient, treat them well and they may reward you with new healthy growth!

Fiddle and Thorn is a participant in the Amazon Services LLC Associates Program, an affiliate advertising program designed to provide a means for sites to earn advertising fees by advertising and linking to Amazon.com

Take our houseplant survey!

Quickly respond to our 30 second houseplant survey and get 75% off our Complete Houseplant Care eBook!

Take the Survey

No thanks…

How to Repot your Houseplants Properly

Last Updated: August 6, 2022

Repotting houseplants is key to them maturing well and increasing in size as there is when roots become potbound, it can stagnate growth and sometimes even cause further issues like a loss of leaves. Repotting might sound easy but there are actually several things to consider to make sure the process is a success and isn’t harming your plant in any way.

Below we will take you through all of our top tips when it comes to repotting your houseplants so you can keep them happy and healthy for many more years to come.

How to know when to repot your plant

We’ve written a whole guide on how to know when your plant needs a bigger pot but the main things to look out for are stagnant growth during spring and summer, roots growing out of the drainage holes and roots appearing on top of the soil. These are telltale signs that your plant has become root bound and there is nowhere left for it to grow.

Finding the right pot size is crucial

You might be thinking that the bigger the pot the better when it comes to repotting your houseplants but that isn’t true at all. If the pot is too big for your plant it can cause two problems.

Firstly, your plant can become quite unstable if the root system is not properly sunk into the pot which is especially a problem for taller plants such as Peace Lilies or Spider Plants as they require a strong stable root system.

The second issue is to do with overwatering and root rot. If the soil to root ratio is off, then this means the soil will take a lot longer to dry out which increases the risk of root rot and might mean you begin overwatering if you don’t adjust your watering schedule accordingly.

Untangle any roots from drainage holes

Our next tip will help you maintain the health of the root system as when a plant hasn’t been repotted in a while, the roots can begin to grow out of the drainage holes. These may then break when you remove the plant from its pot. To avoid this, gently detangle the roots so that they can glide out of the drainage holes without breaking.

Don’t pull at delicate leaves

When removing the plant from its pot the one thing you must not do is tug at any leaves that are quite thin and delicate. Instead, you want to loosen the soil around the edges of a pot using a stick or knife and then gently pull at the main stems of the plant to remove it from its pot.

If you are using plastic pots, squishing the sides can also help loosen the plant and make it easier for you to remove it.

Replace half of the potting mix with fresh mix

When repotting your plant it’s a great excuse to also refresh some of the potting mix. This helps your plant in terms of natural minerals and nutrients in the soil.

You want to be doing this around once a year if you aren’t supplementing with fertiliser as over time the soil will become nutrient deficient. We recommend replacing about one-third to half of the overall soil rather than replacing it all.

Let the soil breathe

Now that you have placed your plant in its new pot and refreshed some of the potting mix, one thing to keep in mind is to not compact the soil too much. It’s better to leave the soil slightly loose and pat it down a little at the top.

The reason for this is if you press the soil in too much and it compacts a lot, the soil isn’t able to aerate which can deprive the roots of enough oxygen.

At the end of the process, water your plant well

Now that your repotting process is complete, there is only one thing left to do and that is to water your plant well. Of course, the amount depends very much on your plant type as well as the time of year, environment and maturity of your plant.

The reason that we recommend watering after repotting can be quite a stressful experience for your houseplant so watering it nicely ensures it’s on the road to recovery.

Those are our repotting tips to help you make sure your plant has enough space to expand its root system and grow new leaves and stems. Repotting can be scary and a lot of plant parents put it off for as long as possible but the benefits are incredible.

Not only will your plant be a lot happier and thrive from a bit of fresh soil, but it also increases the growth potential so next time you are worried about repotting, think about all those incredible new leaves you could get out of it.

Fiddle and Thorn is a participant in the Amazon Services LLC Associates Program, an affiliate advertising program designed to provide a means for sites to earn advertising fees by advertising and linking to Amazon.com

Take our houseplant survey!

Quickly respond to our 30 second houseplant survey and get 75% off our Complete Houseplant Care eBook!

Take the Survey

No thanks…

When and How to Repot your Pilea Peperomioides

Last Updated: July 12, 2023

Whether you’re a seasoned plant parent or have newly received your Pilea (also known as a Chinese Money Plant), our repotting guide will help you through the entire process. Not only will we go through the 5 simple steps to successfully repot your plant, but we will ensure that you know what to look for to suggest your plant is rootbound, as well as how to care for your plant after repotting.

Repotting any houseplant can feel daunting and a lot of plant parents put it off. However, this can be damaging to its health and prevent any new leaves or Pilea pups from developing.

Why repotting your Pilea is important

Repotting isn’t just a cool thing to do; it’s an essential step to keep your plant happy and healthy.

Repotting gives your Pilea the chance to stretch its roots and grow new ones too. This allows your plant to grow new stems and leaves and have the root system to support it. Also, fresh soil is a treat for your Pilea as all houseplants exhaust the nutrients in their soil over time, meaning repotting provides new nutrient-rich soil.

Lastly, repotting is a really good chance to inspect the health of your plant. You can check for pests, root rot or any other ‘unwanted guests’ making a home in your plant’s pot. Problems tend to start in the root system so by the time they are showing up on your plant, it can make solving them a lot trickier.

When to repot a Pilea Peperomioides

Rootbound: If your Pilea’s roots are poking out of the drainage holes, it’s time to size up. Likewise, if the plant has grown taller but not wider, it may be in need of a larger pot to balance its top-heavy nature. Your Pilea will likely grow out of its current pot every 2-3 years depending on how quickly it’s growing.

Time of year: Generally, the best time of the year to repot is in the spring or early summer. This is the period when plants are in their growth phase and can recover quickly from the stress of repotting. However, if you notice your plant showing signs of needing a bigger pot outside this period, don’t panic. Pileas are a hardy plant and can handle repotting at other times, too. Just ensure it has plenty of indirect light and a bit of extra TLC post-move (more on that later).

Choosing the right size pot for your Pilea

Pot Size: When it comes to repotting your Pilea, you don’t want a pot that’s a lot larger than the one it’s currently in. A too-big pot can lead to over-watering and root rot! This is because there will be a lot more soil compared to root system and it will take longer to dry out. This combined with the ability to now absorb more water can be a big problem. Instead, opt for a pot that’s just 1-2 inches (2.5-5 cm) larger than its current pot.

Drainage is Key: Make sure to choose a pot with adequate drainage holes. These are essential to prevent water from pooling at the bottom of the soil, which can cause the roots of your Pilea to become waterlogged and eventually rot.

Material Considerations: Whether you choose a ceramic, plastic, or terracotta pot, make sure it fits your Pilea’s needs and not just your aesthetic. Each material has its pros and cons, so weigh these up before making your choice.

Material Pros Cons
Ceramic Stylish Can be heavy, may not have drainage holes
Plastic Lightweight, affordable Can look cheap, is not permeable
Terracotta Classic look, good moisture control Can be heavy, fragile and more expensive

Choosing the right type of soil for your Pilea

What’s the perfect Pilea soil mix? Well, your Pilea prefers a well-draining, and well-balanced (in terms of nutrients) potting mix.

  • Peat Moss: It’s light, retains moisture perfectly, and allows for good aeration. However, peat moss isn’t the most environmentally friendly option so you may prefer to go for a peat-free potting mix.
  • Perlite: Perlite is the small white spots that you often see in soil mixes. It helps enhance drainage and keeps the soil light. This is a must-have for your Pilea soil mix!
  • Coarse Sand: A bit of coarse sand can improve the soil’s texture and drainage but don’t go too heavy on this.

You should also consider adding a slow-release fertiliser to the mix. It will provide a steady supply of nutrients to your plant, keeping it healthy and happy and will aid new healthy growth.

Tools needed for repotting your Pilea

  • Pot: The new home for your Pilea, it should be no more than 2 inches larger in diameter than the current pot to avoid issues such as waterlogged soil and root rot.
  • Potting mix: Your Pilea craves well-draining soil so ensure that the mix contains perlite.
  • Gardening gloves: To protect your hands from soil. Although the Pilea doesn’t have toxic sap, some other houseplants do so it’s just a good habit to get into.
  • Watering can: You’ll need to moisten the new soil once your Pilea has been repotted.
  • Pruning shears: These come in handy to trim any unhealthy roots. Keep them sharp and clean to avoid plant damage or disease.

Steps for repotting your Pilea

The actual process of repotting your Pilea plant is pretty simple, but it’s important to do everything carefully and in the right order.

  1. Remove the Pilea: Gently remove your Pilea from its current home, being careful not to damage its roots. If the roots are growing out of the drainage holes, make sure to untangle these as they will snap if you simply pull your plant out.
  2. Inspect the roots: Look for any signs of rot or damage and remove any dead or dying roots.
  3. Shake out the root system: Remove some of the soil from the root system so that you can replace it with your fresh mix.
  4. Prepare the new pot: Place some potting mix at the bottom of the pot, then position your Pilea in the centre.
  5. Fill the pot: Add more potting mix, ensuring the Pilea’s root ball is entirely covered. Pat the soil lightly to keep the plant in place.
  6. Water the Pilea: Thoroughly water your Pilea, but be sure not to overwater. Your Pilea likes to be moist, not drenched.

How to care for your newly repotted Pilea

1. Light and location: Your Pilea Peperomioides loves a bright, indirect light spot. Make sure to avoid any direct sunlight as that can burn the leaves.

2. Watering: Wait until the top inch of the soil is dry before watering again. Remember, your plant prefers to stay slightly dry rather than too wet. Pro tip: Use your finger to test the soil’s dryness. If it comes out clean, your Pilea is ready to be watered.

3. Temperature and Humidity: Room temperatures of 59- 75°F (15-24°C) are ideal for your Pilea. It’s not a fan of drafts or heating vents. Luckily they don’t need a large boost to the humidity so just keep it away from dry air sources, and it’ll do just fine.

4. Fertilising: During the growing season (spring and summer), feed your Pilea a balanced houseplant fertiliser every two weeks. In the colder months, the plant is dormant and doesn’t need feeding.

5. Pruning: Prune your Pilea to keep it in shape. Remove old leaves from the bottom as they yellow and die off. This encourages the growth of new leaves on top.

Common mistakes to avoid when repotting Pilea Peperomioides

1. Neglecting the right size of pot

If the pot is too big your Pilea’s roots may drown in excess water; too small, and your plant could become root-bound. Aim for a pot that’s about 2-3cm larger in diameter than the current one.

2. Ignoring the drainage

Drainage holes are essential to prevent waterlogging. Ensure your new pot has them so that any excess water can flow out of them rather than pooling at the bottom, causing root rot.

3. Using the wrong soil

Pilea Peperomioides love well-draining soil, so don’t just use any soil. You want to make sure that there is some perlite in there to aid drainage.

4. Forgetting to water after repotting

Your pilea will be thirsty after repotting. Don’t forget to give it a drink once it’s settled into its new pot. Just don’t overdo it – remember, we’re aiming for moist, not drenched.

5. Repotting at the wrong time

Timing is everything! The best time to repot is during the growing season, typically spring or early summer. Your plant will have plenty of time to adjust before winter slumber. If your Pilea is severely rootbound during other times of the year then you can get away with repotting at this time but just make sure the environment is as ideal as possible to help your plant bounce back quickly.

FAQS

Conclusion

So, there you have it, our complete guide to repotting your Pilea. Although it can be nerve-wracking, there isn’t anything to be afraid of once you know when to do it and how. Just be careful with your plant and don’t choose a pot that’s much too big! Each of your houseplants will need repotting at a different time so make sure to regularly check in with your plants’ root systems to see when they need more space!

Fiddle and Thorn is a participant in the Amazon Services LLC Associates Program, an affiliate advertising program designed to provide a means for sites to earn advertising fees by advertising and linking to Amazon.com

Take our houseplant survey!

Quickly respond to our 30 second houseplant survey and get 75% off our Complete Houseplant Care eBook!

Take the Survey

No thanks…

How to Prune your Pothos Plant – The Ultimate Guide

Last Updated: March 5, 2023

Pothos Plants are loved around the world and are definitely one of our all-time favourite houseplants. Not only are they pretty hardy and easy to care for, but their long cascading vines brighten every room.

When it comes to Pothos varieties, there are so many to fall in love with but you’ll be happy to know that the principles of pruning them are the same. So regardless of what type of Pothos you have, everything still applies!

When it comes to caring for your Pothos Plant, there are obviously the basics of water and sunlight needs but pruning is also an important part of plant care. Not only does it help maintain a healthy and happy Pothos Plant but it also is a good way to keep your plant the size and length that works for your space.

The Benefits of Pruning Pothos Plants

It’s pretty obvious the role that water, sunlight and warmth play in creating a healthy Pothos Plant but where does pruning come into it? Well, there are actually plenty of benefits of regularly pruning your Pothos.

Pruning promotes more growth

It may feel counterproductive to chop off parts of your Pothos Plant to help it grow more, but pruning in the right way can actually stimulate growth. This is because there are growth hormones throughout the vines of your Pothos Plant and when the stem is cut, the hormones kick in to repair and regrow the plant tissue. The outcome is faster, stronger and healthier growth as a result.

Pruning controls the shape of your plant

Pothos Plants can grow pretty long and you’ll find the vines often reaching the ground before you know it. Pruning the vines at the right time is not only a great way to keep your plant healthy, but it will also give it the shape and length that you need. Pruning and propagating the cuttings also helps create new vines if you are after a fuller look.

Helps cut back leggy growth

During the darker winter months, it’s not unusual for your Pothos Plant to become quite leggy. This is when you get long sections of stem without any leaves. Aesthetically this never looks quite as nice as a full plant so pruning these sections off can be a great way to spruce up the plant a little.

When to Prune your Pothos Plant

Time of year

The best time to prune your Pothos Plant is in spring and summer. This is because your plant is in the growth period and will reward you with plenty of new healthy leaves. If you prune during autumn and winter, your plant will be dormant which means you won’t see any new growth for a while. Pruning in spring and summer also gives you the best chance at successfully propagating the cuttings you remove (if you want to propagate them) as root growth is quickest in a warm and bright environment.

Remove sections that are developing issues

If you spot any leaves that are starting to turn yellow or brown, then this can be a good time to prune your plant. It’s important that you try to diagnose what’s causing the issue as quickly as possible to prevent it from spreading.

However, sometimes Pothos Plants can naturally develop brown or yellow leaves as a sign of ageing. When this happens, it’s up to you whether you want to remove them. They will eventually fall off but for aesthetic reasons, you might want to remove them.

What you need to successfully prune your Pothos Plant

Scissors or shears. Make sure these are sharp as you can damage the vine if you don’t make a clean cut. You also want your tools to be clean to avoid passing on any bacteria or dirt into the vine.

Gloves. Although Pothos Plants aren’t toxic enough to kill you, they do contain calcium oxalate crystals. These are dangerous when consumed and can cause swelling of the mouth and throat if consumed. Although it’s unlikely that you would consume any, wearing gloves is an important safety precaution when pruning your Pothos Plant as their sap can also cause eye irritation.

Containers if you are propagating. If you choose to propagate the parts of your plant that you remove, then it’s good to have some transparent containers to hand which you can pop the new cuttings into.

How to Prune Pothos Plants: A Step by Step

  1. Determine how much you want to cut

    Before you even start to get your shears out, it’s important to take a look at how much you want to prune your plant. There’s little point cutting it just above the ground as it will grow too long again in no time.

  2. Locate the nodes on the vines

    You want to prune your Pothos Plant by cutting just below the node. This is where the stem joint is and where often you’ll see small little roots starting to grow out. The node is where the new growth will start so it’s good to cut just after a node.

  3. Make the cut(s)

    Use your clean, sharp shears to make one or several cuts across your Pothos Plant’s vines. It’s important that the cuts aren’t rough as if you pull the vine or chop away at it several times, this can damage the plant.

  4. Put any cuttings in water to propagate them

    If you do want to propagate any offcuts, then transfer these into a clear container filled with water. You can only propagate cuttings that have one or more nodes as roots cannot grow out from anywhere else on the vine.

How to care for your Pothos Plant after pruning

Now that you’ve cut back your Pothos Plant, there are a few things to do to ensure it grows back healthy and strong. Your plant may be a little stressed after the shock of pruning, so it’s just good to make sure the environment is right for your plant to help it recover.

Firstly, you want to give your plant a good soak. You can either do this by top watering your plant and removing any excess water from the saucer, or you can give it a soak/shower. This will ensure that the roots and soil take up as much water as needed, without the risk of overwatering.

The next thing you need to check is the light levels around your plant. Although Pothos Plants are fairly adaptable when it comes to the amount of light they are exposed to, it’s good to make sure they get ample bright but indirect light after they have been pruned. This helps to stimulate new growth.

Hold off fertilizing for a few weeks just whilst your plant recovers. Then you can go back to your usual feeding routine throughout spring or summer to help assist strong growth. Just a reminder though that fertilizing is optional and you can still see plenty of new growth without it if the environment is right.

Frequently Asked Questions

So that’s everything you need to know when it comes to pruning your Pothos Plant. It’s a really important part of the care routine that is often forgotten by plant parents. Not only does it stimulate growth, but pruning is key to getting your plant the shape and length that you want it. Throughout the growth season, Pothos Plants are pretty quick growers so can quickly dominate the space which is why pruning can really help hold them back a bit.

We hope that you’re able to successfully prune back your Pothos Plant and if you want to learn more about how to care for your plant, check out our Pothos Care Guide for tips on watering, feeding and more!

Fiddle and Thorn is a participant in the Amazon Services LLC Associates Program, an affiliate advertising program designed to provide a means for sites to earn advertising fees by advertising and linking to Amazon.com

Take our houseplant survey!

Quickly respond to our 30 second houseplant survey and get 75% off our Complete Houseplant Care eBook!

Take the Survey

No thanks…

How to prune your Fiddle Leaf Fig Tree

Last Updated: March 22, 2023

Fiddle Leaf Fig Trees are some of the most popular houseplants, and we can totally understand why. With their luscious dark green leaves, they really do become the centrepiece of any room! One part of houseplant care that is often forgotten is pruning and with Fiddle Leaf Fig Trees it’s a pretty important part of keeping them healthy and in the right shape.

In this article, we will be exploring the benefits of pruning your Fiddle and what steps you need to take to make sure it’s a success. We will also be answering all of your questions at the end of the article!

Why should I prune my Fiddle Leaf Fig Tree?

There are a few reasons why you might want to prune your Fiddle back a little, some optional and some extremely recommended. Pruning can often be to shape your tree for personal taste, but also often to keep your plant looking and feeling healthy.

Removing damaged leaves

However well you look after your Fiddle Leaf Fig, sometimes they may have a few leaves that turn a little brown, or stems that aren’t super healthy. Make sure to figure out the cause of the problem and adjust the environment or your care straight away. Once you have solved the problem, you may want to trim away the dead parts of your Fiddle carefully so that no energy is wasted on trying to revive these dying leaves.

Control the shape and size of your Fiddle

Whether due to personal taste, or the size of the environment, you may want to prune your plant a little every so often to keep it in a certain shape or size. Although Fiddle Leaf Fig Trees aren’t the fastest-growing houseplants out there, they can begin to dominate a room in a few years so if you don’t have much space for your plant, then pruning is a good way to keep it tamed.

Keep your Fiddle balanced

Although you might want your plant to grow straight up, they often have a mind of their own. They will always start to follow the sunlight and will start to grow towards the nearest window. This can often mean that your Fiddle starts to become lopsided so you might want to reshape your plant to keep it upright. Fiddle Leaf Fig Trees can become pretty heavy as they mature so this minimizes the risk of it falling over.

Reduce leaf crowding

Leaf crowing can sometimes harm your Fiddle’s health as the leaves like space and airflow. The leaves can sometimes rub up against each other a lot if there is too much crowding, so removing a few leaves can be a really good idea for bushy areas.

Promotes more growth

If your Fiddle Leaf Fig Tree has become quite leggy, then pruning can be an excellent way to promote bushy growth. Whenever you make a stem cutting at a node, two branches will grow out from where you made the cut. This gives you a lot of power over creating a bushier and fuller Fiddle Leaf.

When is the best time to prune a Fiddle Leaf Fig Tree?

Best time of year to prune

It is ideal if you can wait until early spring or summer to prune your Fiddle Leaf Fig Tree. You want there to be enough light for the weeks/months after the pruning so it can develop healthy and steady growth. It will also allow you to propagate any cuttings a lot more successfully than if you were trying to do that in winter.

Removing sections with issues

If you are simply removing a brown leaf or a dying part of your Fiddle Leaf Fig Tree, then it’s perfectly fine to do this all year round.

What will I need to prune my Fiddle Leaf Fig Tree?

  • A sharp pair of pruning shears.

    It’s really really important that the shears are sharp as Fiddles have very thick stems. Blunt and dull tools will harm the stem and leaves when you are cutting. Oh and make sure they are clean too as you don’t want to infect your plant when cutting into it.

  • Newspaper/plastic sheet to protect your floors.

    This isn’t only to collect any soil or debris but also to avoid getting any of the sap from the stems on your floor as it can cause damage.

  • Gardening gloves.

    These are important as the sap that will leak from the stem when you take the cutting is mildly toxic to humans and can cause skin and eye irritation if you come into contact with it.

How to prune a Fiddle Leaf Fig Tree: Step-by-Step Guide

  1. Decide how much to prune

    Before you make any cuts, make sure you know exactly where on your Fiddle Leaf Fig Tree you want to cut. Making a mark using a pen can help figure out what’s best as once you’ve made the cut there is no going back.

    Because Fiddle Leaf Fig Tree are quite slow growers (in comparison to a lot of other plant types), we don’t recommend cutting much more than desired. With some other houseplants that grow a lot quicker, we tend to recommend cutting off a bit more to leave room for it to grow. Otherwise, you’ll be right back at it in a few months.

  2. Make the cut(s)

    Use your shears to make one or several cuts across your Fiddle Leaf Fig Tree. It’s important that the cuts aren’t rough as this can damage the stem and impact the success of any new branches growing out from the cut.

  3. Put any cuttings in water to propagate them

    If you do want to propagate any of the stem cuttings you’ve taken, pop these into a clear container with fresh water. If you have only removed single leaves, then you won’t be able to propagate them as each cutting needs a node. Sometimes single leaves will grow some roots but that will not turn into a new plant. Check out our Fiddle Leaf Fig Propagation Guide for more information.

Caring for your Fiddle Leaf Fig after pruning

Once the seemingly hard bit is out of the way, you need to make sure that you keep an eye on how your Fiddle is recovering and check up on any new growth. If your Fiddle is healthy, it should split its new branch where it has been cut to create two offshoots.

However, if there is only one, don’t worry too much as this is usually only a sign that it is not getting enough sunlight to produce more growth. Make sure that your plant is getting good levels of indirect sunshine to encourage new healthy growth. We also recommend fertilizing your Fiddle Leaf Fig Tree a few weeks after pruning (not before) to encourage new healthy growth.

Our tips and tricks for a successful pruning

  • Never remove more than 10% of the plant

    This is quite important especially if your Fiddle Leaf Fig Tree isn’t that mature yet. You don’t want to go overboard and cut too much off as it may struggle to revive itself without enough leaves to take in sunlight.

  • Remove the least healthy areas first

    You want to try and make sure that you start by pruning the least healthy leaves first. You don’t want to snip away too many luscious leaves only to be left with slightly yellowing and underdeveloped leaves which will struggle to keep your plant alive.

  • Propagate the stem cuttings

    Instead of throwing the stem cuttings away, propagate them to create more Fiddle Leaf Figs. Put the stem cuttings in water and after a month or two they should form new roots and be ready for planting! If you have only removed leaves, you won’t, unfortunately, be able to propagate them as they need to have a node for new growth to develop from.

Frequently Asked Questions

That’s everything you need to know to successfully prune a Fiddle Leaf Fig Tree! Whilst it’s not something you need to pay constant attention to as you would with watering for example, pruning in the right way, at the right time is a key part of plant care. Although you might find it daunting to make any cuts to your Fiddle Leaf Fig Tree, it can actually be super beneficial to promoting an abundance of healthy growth on your plant.

To learn more about keeping your plant happy and healthy, check out our Fiddle Leaf Fig Tree care guide.

Fiddle and Thorn is a participant in the Amazon Services LLC Associates Program, an affiliate advertising program designed to provide a means for sites to earn advertising fees by advertising and linking to Amazon.com

Take our houseplant survey!

Quickly respond to our 30 second houseplant survey and get 75% off our Complete Houseplant Care eBook!

Take the Survey

No thanks…

How to Prune a Rubber Plant (The Ultimate Guide)

Last Updated: March 20, 2023

Loved around the world for being a great low maintenance houseplant, Rubber Plants are a great way to bring a bit of the tropics right into your home. However, caring for your plant isn’t always as simple as watering and light requirements as pruning is an important element too.

Pruning can often be daunting to plant parents as they are afraid to cut any part of their beloved plant off. However, when done right, it can have great health benefits as well as aesthetic ones.

We’re here to make pruning your Rubber Plant a little less scary. Below you’ll find everything you need to know about when, why and how to prune your Rubber Plant.

The benefits of pruning Rubber Plants

If you’ve never pruned your houseplants before, then you are missing out on some great benefits. There might be several reasons why you are forced to prune your Rubber Plant but there are also other times when it’s completely optional but still a great decision.

Pruning promotes better growth

It may feel counterproductive to remove whole sections of your Rubber Plant to help it grow more, but pruning in the right way and at the right time can actually help to stimulate faster, stronger and larger growth.

Your Rubber Plant contains hormones within the stems and when the stem is cut, the hormones kick in to repair and regrow the plant tissue. This leads to your plant regenerating quickly as well as coming back stronger.

So if your plant has been pretty dormant for a while (and it’s not root bound), then this can be a great way to promote new growth.

Pruning helps to control the shape of your plant

Rubber Plants can become quite wide and tall which can often not be great for the space that you want it to grow in. Maybe you’re always knocking past it or it’s just dominating the room too much.

Pruning back your plant is the best way to create the shape and size that you want or need for your home. Pruning and propagating the cuttings also helps create new stems that you can add to the mother plant for a fuller look.

Top tip: if you find that your Rubber Plant is spreading out a bit much, but you don’t actually want to prune it, then use support stakes to hold the stems upright. This can reduce the space needed for your plant whilst still keeping all of it!

You can cut back small or leggy growth

During the darker winter months, it’s not unusual for your Rubber Plant to become quite leggy. What we mean by this is either smaller leaves or a lot of space between the leaves on the stem. This can often not look as great as a fuller plant which is where pruning can help you.

Whilst leggy growth isn’t actually detrimental to the health of your plant, removing them can simply help spruce up your plant and help it look fresher.

Removing unhealthy parts of your Rubber Plant

If your plant has developed brown or yellow leaves, then it can be a good idea to prune these leaves or sections of your plant. Once the leaves have turned brown or yellow, there is no getting them back and they are dying or dead.

Chopping them off helps your plant to focus energy on growing new healthy leaves, rather than wasting nutrients and energy trying to keep the dying bits of the plant alive.

Curbing a pest infestation

If you have discovered pests on your Rubber Plant (or any other plant), one of our first pieces of advice is to remove the leaves that are worst affected and have a lot of pests living on them.

The reason we recommend this is that it just curbs the size of the infestation, making it a little bit easier to treat.

When to prune a Rubber Plant

Time of year considerations

The best time to prune your Rubber Plant is in spring and summer, once you are sure that the cold weather is behind you. This is because your plant is in (or entering) the growth period and will reward you with plenty of new healthy leaves.

If you prune during autumn and winter, your plant will be in its dormant phase which means you won’t see any new growth for a while and it won’t be able to recover from the stress of being pruned as quickly.

Pruning in spring and summer also gives you the best chance at successfully propagating the cuttings you remove (if you want to propagate them). This is because cuttings need plenty of sunshine and warmth to grow strong roots.

Remove sections that are developing issues

If you spot any leaves that are starting to turn yellow or brown, then this can be a good time to prune your plant. It’s important that you try to diagnose what’s causing the issue as quickly as possible to prevent it from spreading.

It’s worth noting that sometimes Rubber Plants can naturally develop brown or yellow leaves as a sign of ageing. This is completely normal and is nothing to worry about. Most commonly natural ageing will mean the lowest leaves turn yellow or brown. They will eventually fall off but for aesthetic reasons, you might want to chop them off.

Tools needed to successfully prune a Rubber Plant

  1. Scissors or shears.

    Because Rubber Plants do have fairly thick stems, these will need to be sharp to prevent damaging the plant. It’s also vital that your tools are clean to avoid passing on any bacteria or dirt onto the mother plant (or the cuttings if you want to propagate them).

  2. Gloves.

    Rubber Plants are toxic and when you cut through the stem, milky sap will be released. This can cause skin irritation if you come into contact with it and will cause stomach irritation if ingested. This is why it’s pretty important that you wear gloves±

  3. Containers (only if you are propagating).

    If you choose to propagate the parts of your plant that you remove, then it’s good to have some tall containers which you can transfer the new cuttings into. If you don’t want to keep the cuttings then maybe ask friends if they’d like to grow them (not many people will say no to free plants!).

How to prune a Rubber Plant: Step-by-Step Guide

  1. Decide how much to prune

    Before you pick up your shears, make sure you know what you want to do. If you’re pruning to create a shape, figure out how much you want to cut before just going into it. Making a mark using a pen can help figure out what’s best as once you’ve made the cut there is no going back.

    Because Rubber Plants are quite slow growers, we don’t recommend cutting too much more off than desired. With some other houseplants that grow a lot quicker, we tend to recommend cutting off a bit more to leave room for it to grow. Otherwise, you’ll be right back at it in a few months.

  2. Make the cut(s)

    Use your clean, sharp shears to make one or several cuts across your Rubber Plant. It’s important that the cuts aren’t rough as this can damage the plant. You also mustn’t make half a cut and rip the rest off as this can impact how strong the new growth is.

  3. Put any cuttings in water to propagate them

    If you do want to propagate any offcuts, then transfer these into a clear container filled with temperate water. You can only propagate the cutting if it has part of the stem as single leaves won’t grow any roots. You can check out our full Rubber Plant propagation guide to learn more.

How to care for your Rubber Plant after pruning

You might think that the work is done the moment you put down the shears, but there are actually a few things you need to pay attention to after pruning to ensure the health of your plant.

Plants can be a little like humans sometimes and get stressed by big changes. Pruning can be one of those events that leave your plant a little stressed. This is why it’s vital that the environment and care are exactly what your plant needs.

Firstly, you want to give your plant a good soak. You can either do this by top watering your plant and removing any excess water from the saucer, or you can give it a soak/shower. This will ensure that the roots and soil take up as much water as needed, without the risk of overwatering.

The second thing to pay attention to is if your Rubber Plant is getting the right amount of light. Luckily they are pretty adaptable and can deal with a whole range of light conditions but it’s ideal if they are getting several hours of bright but indirect light. This helps to stimulate new growth and prevent any issues from occurring. This is also the reason why we recommend pruning in late spring and summer where possible.

When it comes to your fertilizing routine, hold off for a good few weeks just to let your plant recover from the shock. Just a reminder though that fertilizing is optional and you can still see plenty of new growth without it as long as the environmental factors are right.

Frequently Asked Questions

We hope now that the idea of pruning your Rubber Plant isn’t quite as scary as you would have thought. Although it may seem strange to remove sections of the plant to actually grow more, pruning can be a great way to stimulate new healthy growth. Another really important thing to remember specifically for Rubber Plant pruning is to wear gloves as you really don’t want to come into contact with the sap.

If you want to learn more about caring for your plant, check out our Rubber Plant care guide.

Fiddle and Thorn is a participant in the Amazon Services LLC Associates Program, an affiliate advertising program designed to provide a means for sites to earn advertising fees by advertising and linking to Amazon.com

Take our houseplant survey!

Quickly respond to our 30 second houseplant survey and get 75% off our Complete Houseplant Care eBook!

Take the Survey

No thanks…

How to Prune a Monstera (The Ultimate Guide)

Last Updated: April 22, 2023

A variegated monstera cutting being propagated in an amber glass bottle and water.

Monstera plants are known and loved for their lush, tropical foliage and striking appearance, but like all plants, they require regular maintenance to keep them looking their best. Pruning is an essential part of Monstera care that helps to promote healthy growth and prevent your plant from becoming too large, leggy or unruly.

However, many plant parents often feel intimidated by the idea of pruning their Monstera, unsure of where to start or how to go about it. We completely understand that it can feel counterintuitive to remove parts of your beloved Monstera!

In this guide, we’ll cover everything you need to know about pruning your Monstera, including why it’s beneficial to prune, when you should do it, how to make clean cuts, and what to do with the cuttings. Whether you’re a seasoned plant pro or a newbie to Monstera care, this guide will provide you with all the information you need to keep your plant looking healthy and beautiful.

Photo of a monstera with large holes in the leaves

The benefits of pruning a Monstera

If you’ve never pruned your Monstera or any of your other houseplants before, then you may not realise the benefits. Although cutting back to reduce size is one of them, this isn’t the only reason why you should be regularly pruning your Monstera.


Pruning promotes stronger growth

Pruning in the right way and at the right time can actually help to stimulate faster, stronger and larger growth.

This is because Monstera plants contain hormones within their stems and when the stem is cut, the hormones kick in to repair and regenerate the plant tissue. This leads to your plant producing new growth from that cut and if your plant is getting the right care and the environmental factors are right, that new growth will be stronger and larger.

If your Monstera has been a little slow at producing new growth during the months of spring and summer, then check that it’s not rootbound first. If this isn’t the case, then pruning your plant can help to stimulate new growth.


Pruning helps shape your plant

Monsteras can become quite wide and tall over time and often without you realising, it’s suddenly dominating the room.

Pruning back your plant is the best way to create the shape and size that you want or need for your home. If you’re looking for a fuller plant, then propagating the cuttings and adding them back into the mother plant can help achieve this.

Top tip: if your Monstera is spreading out a bit too much, but you don’t actually want to prune it, then use support stakes to hold the stems upright. This can reduce the space needed for your plant without actually removing any leaves.


Removing unhealthy parts of your Monstera

If your plant has developed issues such as yellow or brown leaves, then we recommend pruning off the worst affected areas. If the leaves have the odd brown leaf tip or a small brown patch then these should not be removed as they are still extremely valuable to your plant.

However, any leaves that are all or majority brown or yellow can be removed. There is no returning them to their luscious green and you don’t want your Monstera to waste any energy keeping them alive. Instead, by removing them you allow your plant to focus on new growth.


Removing small or leggy growth

Although you don’t tend to see much new growth on your Monstera during autumn and winter, if you do it tends to be small and a bit limp.

Whilst smaller leaves and leggy growth won’t actually negatively impact the health of your Monstera, removing them can help your plant look fresher.


Pruning can help to curb a pest infestation

If you have discovered pests on your Monstera (or signs of pests including brown or yellow spots, white webbing or powder across the leaves and stems) then we would always start by pruning the worst affected areas.

Although you’ll need to follow a rigorous treatment plan, pruning away the leaves with the most pests reduces the size of the infestation and makes it easier to tackle.

When to prune your Monstera


Spring or summer is best

The best time of year to prune your Monstera is throughout spring and summer. There are a few benefits of doing it during this time. Firstly, the sunny warm weather will provide a good environment for your Monstera to recover from the shock of pruning.

Secondly, because your Monstera will be entering the growth period, if you are pruning to stimulate growth then you’ll be quickly rewarded with new luscious leaves.

Pruning in spring and summer also gives you the best chance at successfully propagating the cuttings you remove (if you want to propagate them). This is because cuttings need plenty of sunshine and warm temperatures to grow roots and eventually new leaves.


Remove dying sections as they appear

Obviously, you can’t time any issues so that they appear only in spring and summer so you’ll need to react and prune them as they appear. Don’t throw away the leaves too quickly though as they can provide a lot of clues as to what the issue is. For example, the colouration, any patches on the leaves, holes and even the texture can help you identify the problem.

It’s worth noting though that sometimes Monsteras will naturally develop brown or yellow leaves as a very natural part of the ageing cycle. This is very normal and shouldn’t be anything you need to worry about so long as it’s only the odd leaf from time to time. Another way to diagnose brown/yellow leaves as natural ageing is if it’s only happening to the lowest, smallest leaves on your Monstera.

Tools needed to successfully prune a Monstera

  • Sharp scissors or shears

    It’s vital that your tools are clean to avoid passing on any bacteria or dirt onto the mother plant (or the cuttings if you want to propagate them).

  • Gloves

    Monsteras are mildly toxic to humans and when you cut through the stem, sap can be released. If you do come into contact with this sap, it can cause skin irritation This is why we recommend that you wear gloves when pruning a Monstera.

  • Transparent containers (only if you are propagating)

    If you choose to propagate the parts of your plant that you remove, then it’s good to have some tall containers which you can transfer the new cuttings into. If you don’t want to keep the cuttings then maybe ask friends if they’d like to grow them (not many people will say no to free plants!). We always tend to use transparent containers when propagating as not only is it fun to track the root growth, but it will allow you to spot any issues quickly.

How to prune a Monstera: Our Step-by-Step Guide

  1. Decide how much you want to or need to prune

    It’s important to know what and where you are going to cut before you pick up your shears. You don’t want to be making random cuts so make sure to mark the stems where you want to prune. You always want to make sure that you are cutting just above a node. This is where future growth will develop so cutting just above it is ideal.

    Because Monsteras are quite slow growers, we don’t recommend cutting too much more than desired. With some other houseplants that grow a lot quicker, we tend to recommend cutting off a bit more to leave room for it to grow. Otherwise, you’ll be right back at the pruning process in just a couple of months.

  2. Make the cut(s)

    Use your clean, sharp shears to make one or several cuts across your Monstera. It’s important that the cuts aren’t rough as this can damage the plant. Instead, you want clean quick cuts across the stem. This not only helps the mother plant but also means the cuttings can develop new roots easily.

  3. Put any cuttings in water to propagate them

    If you do want to propagate any offcuts that you prune from your Monstera,? transfer these into a clear container filled with temperate water. You can only propagate the cutting if it has part of the stem as single leaves won’t grow any roots. Often you will see photos of single monstera leaves growing roots but without a node, these won’t ever develop into a plant. You can check out our full Monstera propagation guide to learn more.

How to care for your Monstera Plant after pruning

You might think that the work is done the moment you put down the shears, but there are actually a few things you need to pay attention to after pruning to ensure the health of your Monstera. Plants can become a little stressed during the pruning process, so can take a few days to recover. If you notice your plant drooping a little or curling up then this isn’t usually a cause for concern. Things should return to normal after a few days.

However, to help your plant produce new healthy growth, there are a few extra things you should be doing to promote this.

Firstly, you want to give your Monstera a good soak. You can either do this by top watering your plant and removing any excess water from the saucer, or you can give it a soak/shower. This will ensure that the roots and soil take up as much water as needed, without the risk of overwatering.

The second thing to pay attention to is if your Monstera is getting the right amount of light. Luckily they are pretty adaptable and can deal with a whole range of light conditions but it’s ideal if they are getting several hours of bright but indirect light. This helps to stimulate new growth and prevent any issues from occurring. The more sunlight your Monstera, the more splits it will also develop in its new leaves so this is an important one for aesthetic reasons too!

The one thing that you can forget about for a few weeks is fertilizing. In the few weeks following the pruning, your Monstera needs to recover a little. You may think that fertilizing will help stimulate new growth but it can be damaging to a weakened plant. Wait at least one month before continuing your normal fertilizing routine. If you aren’t fertilizing your Monstera, then that’s absolutely fine – you can still see plenty of new growth without it if the care routine and the environmental factors are right.

Frequently Asked Questions

We hope now that the idea of pruning your Monstera isn’t quite as scary as you would have thought. Pruning your Monstera plant is actually an essential part of its care routine and can have some great benefits. By regularly trimming back excess growth and damaged leaves, you can help keep your Monstera healthy and thriving, and encourage it to produce new foliage.

And don’t be afraid to experiment with different pruning techniques and styles to find what shape works best for your plant and your own aesthetic preferences. With a little practice and patience, you can master the art of pruning your Monstera and enjoy a beautiful and thriving plant for years to come.

If you want to learn more about caring for your plant, check out our Monstera care guide.

Fiddle and Thorn is a participant in the Amazon Services LLC Associates Program, an affiliate advertising program designed to provide a means for sites to earn advertising fees by advertising and linking to Amazon.com

Take our houseplant survey!

Quickly respond to our 30 second houseplant survey and get 75% off our Complete Houseplant Care eBook!

Take the Survey

No thanks…

How to propagate a String of Hearts plant

Last Updated: May 18, 2022

String of Hearts Plants (Ceropegia woodii) are some of the most unique and delicate houseplants. Luckily for all of us plant lovers, they are super easy to propagate and success rates are much higher than other plants if you have a strong and healthy mother plant. We are going to guide you through the process, letting you know and the various methods, a step by step guide for each, what tools you will need and any problems you may encounter along the way.

Why propagate a String of Hearts?

Before we get started you might be wondering why it’s beneficial to propagate your plant? Well here are some of the main reasons:


  • Create more plants for free!

    Propagating your plant will multiply your plant collection without needing to spend any more money! They also make great gifts for friends and family if you already have enough houseplants.

  • Save a dying plant

    If you accidentally overwatered (which is easy to do), over-fertilised or mistreated your plant and it has started to die, sometimes the best way to save it is by taking the healthy stems and propagating them to create new healthy plants.

  • To make your String of Hearts Plant fit its environment.

    These plants can grow pretty long and if they start to hit the floor or become inconvenient in your space, then giving them a trim and propagating those stems is a great way to stop them from going to waste.

What tools will I need to propagate my String of Hearts?

Let’s start off with the easy part, what you need to propagate your plant. It’s important to make sure you have everything ready before taking any cuttings.


  • Healthy and mature String of Hearts plant

  • Clean, sharp scissors/shears

  • Spare pot(s) with and without drainage holes

  • Fresh soil and water

  • Newspaper or plastic sheet if you are propagating indoors

  • Rooting hormone (optional)

  • Gardening gloves (recommended)

How to propagate a String of Hearts using stem cuttings

This is the main method as it’s suitable for all maturities and lengths. It’s also really easy to get right as you can create several new plants just by taking a short vine cutting.


  1. Locate some healthy vines

    When taking cuttings to propagate your String of Hearts, you need to check for one important thing; a node. Without it, you will have a very slim chance of success. A node is where two leaves have broken out from the vine and where roots will start to grow from.

  2. Make the cut

    Use your clean scissors to cut off several vines, making sure each includes one or more nodes.

  3. Fill up your container with water

    Next, you want to fill up a glass with fresh temperate water to place your cuttings into. If possible, use filtered water or collected rainwater to avoid any sensitivity to fluoride but don’t worry too much about this if inconvenient.

  4. Place your cuttings in water

    Before placing your cuttings in water, cut off the leaves on the lowest node. These will be sat in water for several weeks and will rot so better to get rid of them now. Then pop your cuttings into the water, making sure that the lowest node is submerged.

    Place your glass in bright but indirect sunlight. Intense light will damage the cutting. You can use a light meter to determine where to place your cuttings. We recommend this one from Amazon.

  5. Change out the water regularly

    One of the most important steps in the propagation process is to refresh the water regularly (every 2-3 days is optimal). This keeps the water free from bacteria and stops it from stagnating which is harmful to your cutting. Stagnant water will also start to smell so it’s you’ll notice pretty quickly!

  6. Wait for the roots to grow

    Luckily these vine cuttings grow roots pretty quickly so you should start to see two delicate roots pop out from the node after a few weeks. It can be a little unpredictable though and some cuttings will be a lot faster than others. You can use rooting gel to help the roots grow quicker but it’s an optional step.

  7. Plant your cuttings into fresh potting mix

    Once the roots on your cutting are a few centimetres long it’s time to pot them into soil. Don’t worry if the roots are still very delicate, this is normal for String of Hearts plants which is why they are so sensitive to overwatering.

    We recommend using a high-quality potting mix like this one from Miracle Gro to make sure your cuttings are getting the right mix of nutrients. Carefully place your cuttings a few centimetres into the soil, making sure not to damage the newly formed roots as they will be very delicate. We also like to simply pop the cuttings back into the mother plant so it becomes a little fuller.

  8. Resume usual care

    Now that your vines are pot nicely into soil, you can go back to your usual care routine.

How to propagate a String of Hearts directly into potting mix

We wanted to keep this method separate from the water cuttings method as there are a few different ways you can do this.


  1. Choose a vine to propagate

    You want to make sure you use a relatively healthy vine. Pests or diseases will persist on any new growth that comes from your cutting.

  2. Decide how you want to grow your cutting

    This is where this method gets a little bit different. There are 3 ways you can grow your cutting in soil. Firstly you can loop the vine back into the pot without actually cutting it off. Secondly, you can pop the cutting straight into potting mix once cut off. And thirdly you can lay your cutting flat onto potting mix so that the cutting roots out of more than one node.

  3. Pot the cutting into fresh soil

    Whichever way of growing you choose for your cutting, one thing stays the same. It’s important to use fresh, high-quality potting mix. Never reuse old mix from other houseplants as this can transfer pests and diseases that may be lingering in the mix undetected.

    You also want to choose a potting mix that is well-draining. Sometimes this comes labelled as succulent mix like this one available on Amazon, other times you can just read the components of the mix to check it has perlite to aid drainage and aeration of the soil. String of Hearts plants are very sensitive to overwatering so this bit is vital.

  4. Find a nice spot for your cuttings to grow

    Now that your various cuttings are potted nicely into fresh soil you want to find the right place for them to thrive. Bright but indirect sunlight is what your new cutting needs as intense light will scorch the cutting but a lack of light will stunt any new root or leaf growth.

  5. Be patient!

    It may take a long time for your new cuttings to show any signs of new leaves growing from the soil, or it may only take weeks – there is really no way of knowing sometimes. But as long as your vines are given the right care, your propagation should be a success!

How to propagate a String of Hearts using tubers


  1. Locate any tubers

    If you look at your String of Hearts plant closely, you should spot a few tubers if your plant is mature enough. These look like small cream balls along the vines of your plant.

  2. Cut off your tubers

    Use clean scissors to cut the tubers off the mother plant. Don’t tug or pull at them as this can damage your plant. You can also loop the vine back into the pot so the tuber is touching the potting mix, however, for the sake of creating an entirely new plant we want to go through the method where it is propagated on its own.

  3. Place the tuber into fresh potting mix

    Place the tuber on top of fresh moist potting mix, pushing it gently into the soil a little. Never reuse old mix from other houseplants as this can transfer pests and diseases that may be lingering in the mix undetected.

  4. Mist your tubers

    You want to keep some moisture in the soil to help your tubers grow roots and prevent them from drying out. The best way to do this is regularly misting the tubers using spray bottles. This way you can control the amount of water it is getting and stop overwatering.

  5. Now all you have to do is wait

    Propagating through tubers is much more of a waiting game than other methods. It may take a long time before you start to see any signs of new leaves growing from the soil.

How to propagate a String of Hearts through division of the mother plant

This method only really works if your plant is quite bushy and has lots of vines so that it can form a whole new plant. If you do have a big enough plant that you don’t mind dividing then this method is great for those who don’t want to wait for weeks/months for roots and new leaves to grow. With the division propagation method, you get new plants instantly!!


  1. Take your plant out of the pot

    To be able to propagate your plant through division, you need to separate the different vines. This is particularly easy to do with String of Hearts compared to some other plants as they separate easily. The first step is to carefully lift your plant out of its pot, trying not to damage the leaves or root system. These plants are quite delicate so be careful when you’re doing this.

  2. Separate out the vines

    You may have to trim off the odd root to detangle the plant but with a little gentle tugging, you should be able to pull the vines apart. Each vine should have its own roots so make sure these are healthy and not mushy. You then want to group the vines together to form new plants. How many new plants, and how bushy each of them are is completely up to you.

  3. Place each section in fresh potting mix

    Pop your mother plant back into its original pot (or downsize slightly if you have taken away a substantial amount of the original plant). Then pot your new plant(s) into fresh potting mix. Make sure not to reuse old potting mix from other plants as this can really easily transfer pets or bacteria without you realising!

String of Hearts propagation FAQs

Here’s some answers to the most common questions we get on this subject, hopefully something here can help!

Common problems when propagating String of Hearts Plants

Check out our full String of Hearts Care Guide that has all the information on how to continue care for your cuttings once it has matured.

Fiddle and Thorn is a participant in the Amazon Services LLC Associates Program, an affiliate advertising program designed to provide a means for sites to earn advertising fees by advertising and linking to Amazon.com

Take our houseplant survey!

Quickly respond to our 30 second houseplant survey and get 75% off our Complete Houseplant Care eBook!

Take the Survey

No thanks…

How to Propagate String of Turtles

Last Updated: November 6, 2023

String of Turtles Plant

String of Turtles Plant

Loved for its petite leaves, the String of Turtles, scientifically known as Peperomia prostrata, is a very popular trailing houseplants.

Native to the rainforests of Brazil, this compact creeper is part of the Peperomia family, known for their incredible adaptability to indoor environments. This plant’s succulent-like qualities help it store water efficiently for periods of drought.

Though its delicate aesthetic may suggest otherwise, the String of Turtles is renowned for being easy to propagate.

Why Propagate a String of Turtles?

Propagation offers a range of benefits you might not have thought about!

First of all, propagation allows you to multiply your plants and have String of Turtles throughout your home or even your office. It’s a cost-effective way to grow your indoor garden without needing to purchase new plants.

Besides, propagation can serve as a back-up plan in case your original String of Turtles plant faces a health issue.

Another one of our favourite benefits of propagation is being able to gift cuttings or small plants to friends and family!

Gathering the Necessary Tools and Materials

Before you can delve into the exciting process of propagating your String of Turtles plant, it’s important to ensure you have the right tools and materials on hand.

  • Pruning shears or sharp scissors: Sterilized, sharp cutting tools are essential for making clean incisions on the plant, which can reduce the risk of infection on the cut surfaces. Pick tools that provide a neat cut without causing unnecessary harm to your String of Turtles plant.
  • Propagation medium: Although String of Turtles can be propagated in water, you’ll need some potting mix to move them into once they’ve grown new roots.
  • Rooting hormones: Though optional, these can help assist the cutting in developing roots faster. You can find these in a powder or liquid form at most garden supply stores.
  • Containers: Small pots or growing trays work well for starting cuttings. Make sure they have drainage holes to prevent waterlogging.
  • Plastic bag or cover: This helps to retain humidity around the plant cuttings, aiding in their growth. A transparent plastic bag or an upside-down clear plastic container would work well.

Preparing the Parent String of Turtles Plant for Propagation

First off, you want to ensure your String of Turtles mother plant is strong and healthy. Struggling plants often don’t have the energy to produce new growth.

In the weeks prior to propagating, make sure you are caring for your String of Turtles plant correctly. This includes:

  • Watering: Don’t let the plant dry out entirely, but also don’t waterlog it. The soil should be somewhat moist.
  • Light: These plants prefer plenty of bright, indirect sunlight.
  • Feeding: A balanced, water-soluble houseplant fertilizer once a month should suffice.

When deciding which part of your String of Turtles plant to propagate, look for stem sections that appear robust and full of leaves. These will have the best chance of propagating successfully. Avoid stems that look discolored, wilted, or otherwise unhealthy.

Taking Cuttings from the Parent Plant

Stem cuttings are the best route for propagating your String of Turtles plant. To take a stem cutting, select a healthy, full vine from the parent plant.

With sterilized scissors or a sharp, clean knife, make your cut just below a node (the point where a leaf joins the stem). Aim to cut sections that are two to four inches long, as larger cuttings can be more challenging to root.

Allowing Cuttings to Callus

After you’ve taken your cuttings, the next step is the callusing process. Callusing is when the cut ends of the plant stem or leaves form a hardened, dry layer, almost creating a protective ‘scab’.

This process is important in String of Turtles propagation as it helps prevent the onset of rot or disease when the cuttings are eventually placed in a propagation medium.

So, how do let your cuttings callous?

The first thing you’ll need to do is lay out your cuttings on a clean, dry surface, cut-side up. Generally speaking, it takes about 3–7 days for the cuttings to callus properly.

The duration can vary based on the environmental conditions, like temperature and humidity. You’ll know that your cuttings have callused adequately when the cut end feels dry and looks slightly off-white in color.

Planting your String of Turtles Cuttings in Water

Once your String of Turtles cuttings have completed the callousing process, the next step is to place them into some water (but you can also choose potting soil).

Choose a transparent container that is large enough to submerge some of your cutting, but not the entirety.

You want to choose temperate water as hot or cold water can shock or burn your String of Turtles cutting, which will lead to an unsuccessful propagation.

The next stage is simply waiting for several weeks while your new cuttings grows some roots. This stage requires a lot of patience because there is no way of knowing exactly how long it will be. This is why we like to have a transparent container, as you can see clearly what’s going on.

During this time, make sure that you are switching out the water every few days to prevent it from stagnating, and bacteria growing.

Then once the roots are an inch or so long, your cutting is ready to be transferred into a well draining potting mix, and cared for like an adult String of Turtles.

Providing Optimal Environmental Conditions

Firstly, let’s talk about light. Your newly propagated String of Turtles likes bright, indirect sunlight. Avoid direct sunlight as this can cause your String of Turtles cutting to wither, so make sure to place them in a well-lit vicinity but out of the direct rays of the sun.

Next on the list is temperature. These plants are tropical by nature but thrive at room temperatures between 65°F to 85°F (18°C to 29°C).

In terms of humidity, they love a good level of moisture. The goal here is to strike a balance: not too dry, but also not overly damp.

You can maintain this by misting your plants regularly or using a humidity tray.

Troubleshooting Common Issues

Brown or Yellow Leaves

Brown or yellow leaves can be a sign of overwatering if you have already transferred your cutting into potting mix. Remember, String of Turtles plants prefer slightly dry soil.

Water the cuttings sparingly and ensure the propagation medium offers excellent drainage. Make adjustments to your watering schedule if necessary – but remember, less is more when it comes to watering these plants.

If your String of Turtles cutting is still growing in water, but has developed brown or yellow leaves, then it may be due to light issues, temperature fluctuations or stagnant water.

Slow Growth

Are your cuttings growing slower than you expected? This issue may be due to inadequate light, cold temperatures or a tiny container.

Addressing these factors and patiently providing your String of Turtles plant the care it needs will usually lead to improved growth.

Transferring Propagated Cuttings to Soil

Now that you’ve patiently watched your little String of Turtles sprout roots, it’s time to give them more space to grow.

Firstly, you don’t want to rush things: wait until the roots of your new String of Turtles cuttings have sufficiently developed in water before transferring to soil.

Choose a pot that will comfortably fit your cuttings and their roots, while giving them a bit of space to grow, but not too much. The pot should have good drainage to prevent the risk of waterlogging or root rot.

Add a layer of potting mix at the bottom of the new pot, then place your String of Turtles plant in, positioning it at the center. The plant should not be too deep inside the pot.

Once secure, gently fill in around your plant with more potting mix, but don’t pack it too tightly; remember, roots need to breathe.

In the ensuing weeks, closely monitor your repotted String of Turtles, watching for signs of stress or shock. Temporary drooping or leaf drop is normal at this stage, but it should bounce back after a while.

Frequently Asked Questions

1. How often should I water my String of Turtles cuttings?

The key thing to remember here is: less is more. Overwatering can lead to root rot. Always ensure that the top layer of the soil dries out before the next watering. Typically, you should water every 7-10 days.

2. How long does it take for String of Turtles cuttings to root?

Patience is vital when it comes to any plant propagation. While the timeframe can vary depending on environmental conditions and the overall health of your String of Turtles cutting, you can generally expect to see roots forming after 2-3 weeks.

3. Can Ipropagate String of Turtles in water?

Yes, you can propagate the plant in water. Submerge the cut end in a jar of water and change the water every few days to prevent it from becoming stagnant. Once the cuttings develop roots, you can then move them to a potting mix.

4. Why are my String of Turtles cuttings not growing?

A multitude of factors may be at play here. It could be down to an issue with lighting, temperature, or even the health of the parent plant itself.

5. When is the best time to propagate my String of Turtles?

The optimal time to propagate most plants, including the String of Turtles, is during the growing season. This is usually in the spring or early summer. The plant should have an easier time establishing itself when it’s naturally inclined to grow.

Fiddle and Thorn is a participant in the Amazon Services LLC Associates Program, an affiliate advertising program designed to provide a means for sites to earn advertising fees by advertising and linking to Amazon.com

Take our houseplant survey!

Quickly respond to our 30 second houseplant survey and get 75% off our Complete Houseplant Care eBook!

Take the Survey

No thanks…