Indoor Herb Gardening: A Guide for Houseplant Enthusiasts

Last Updated: June 29, 2023

If you’re an ardent houseplant enthusiast looking to add a touch more green to your indoor space or a culinary enthusiast yearning to have fresh herbs at your fingertips, then you are in for a treat. This guide is all about digging into the delightful realm of growing herbs, right in the comfort of your home.

Indoor herb gardening is swiftly becoming a beloved hobby among houseplant enthusiasts. But why, you ask? The reasons are as varied as the plant species you can cultivate.

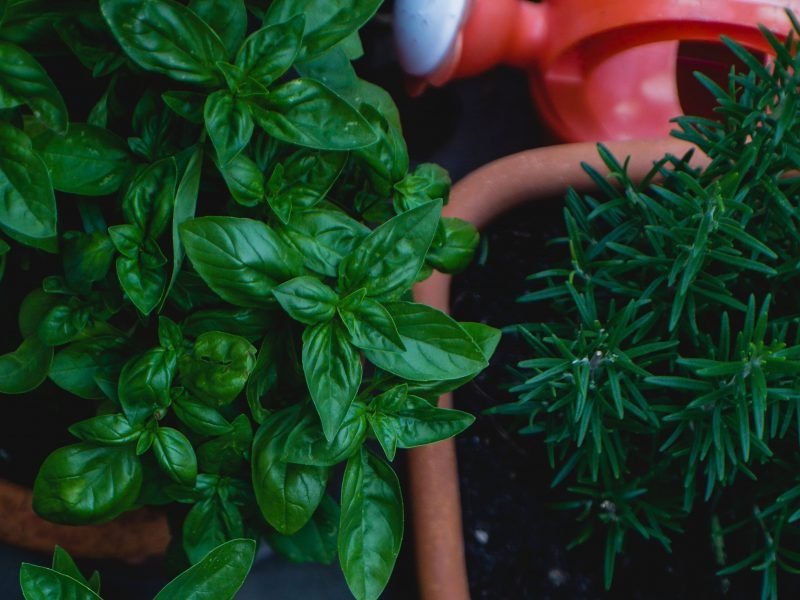
Practicality is one key factor. With a little sunshine and water, you can grow a bevvy of herbs, right in the comfort of your own home. Think of the convenience of plucking fresh rosemary or basil for your next culinary masterpiece!

Health benefits galore, too! Many herbs possess medicinal qualities – peppermint for digestion, chamomile for relaxation, and so on.

The satisfaction of nurturing something from seed to full bloom, of course, is unmatched. When keeping normal houseplants you rarely get the opportunity to see the full growth journey.

And let’s not forget about the positive environmental impact. By growing your own herbs, you reduce the need for store-bought ones, cutting down on plastic packaging waste.

With such an array of benefits, it’s no wonder indoor herb gardening is blossoming in popularity among houseplant enthusiasts.

The Best Herb Varieties to Grow Indoors: A Comprehensive Guide

Growing your own herbs is not just a serene and gratifying hobby; it’s also your ticket to a constant, fresh supply of aromatics. However, you might be wondering: which herbs should you choose to kickstart your indoor garden adventure?

Basil, the quintessential herb in every kitchen, is an excellent option to kickstart your indoor garden. It thrives in warm temperatures and loves a lot of sunlight, making it perfect for your sunny window sill. It’s also the perfect herb for beginners as it’s very easy to sprout from seed and grows quickly!

Next on our list is Parsley. This biennial plant does well in pots, tolerating low light levels and cooler temperatures. Its pretty, green tufts are not only a visual treat but it also adds a subtle, fresh flavour to your dishes.

For a pop of colour, add some Chives to your indoor herb collection. This onion relative is a wonderful indoor resident that’s easy to grow. Its dainty, purple flowers can brighten up any room.

Mint is another superb choice. This hardy herb is almost impossible to kill, making it perfect for beginners. Just remember, mint can be a bit of an overachiever and has a tendency to take over, so it’s best kept in its own pot.

If you’re after something a little more exotic, Coriander is a must-have. It’s a bit of a diva that doesn’t like too much heat or too little light, but once you find its happy place, it rewards you with a unique flavour that elevates any dish.

Now that you’re familiar with some indoor-friendly herb species, it’s time to get your fingers a little dirty. In the next section, we’ll dive into how to start your indoor gardening journey.

But first, let’s take a look at the level of difficulty for growing each species. This will give you a better idea of where you might want to start, especially if you’re new to the world of indoor gardening.

Herb Species Difficulty Level
Basil Easy
Parsley Intermediate
Chives Easy
Mint Easy
Rosemary Advanced
Oregano Intermediate
Thyme Intermediate
Sage Advanced
Coriander Intermediate
Dill Easy

Remember, these are just guidelines. Every gardener’s experience can differ depending on factors like available light, temperature, and personal attention. So, don’t be disheartened if your first herb plant doesn’t flourish. Just try again!

Small indoor herbs

How to Choose the Perfect Indoor Herb Garden Location in Your Home

Discovering the best spot for your indoor herb garden is a bit like finding the perfect pair of shoes. It requires a keen eye for detail and a touch of trial and error. But don’t worry, a few golden rules will have you unveiling your green thumb in no time.

The Light Factor

First and foremost, let’s talk about light. All herbs need a good dose of it, especially Mediterranean ones like rosemary and thyme. In general, a south or southwest-facing window is your best bet.

Temperature and Humidity

Next comes temperature and humidity. Herbs prefer cooler nights and warmer days, mimicking their natural outdoor environment. A spot that offers a temperature around 18-24°C during the day and a slightly lower one at night is ideal.

Room to Grow

Lastly, remember that your herbs need love and attention. Water them regularly, but not too much! Overwatering can quickly lead to rotten roots.

What Equipment You Need to Start Your Indoor Herb Garden

Just as a painter needs a palette, an indoor herb gardener needs the right equipment to bring their green dreams to life. Here, we’ll guide you through the essentials you’ll need to kickstart your indoor gardening journey.

1. Containers

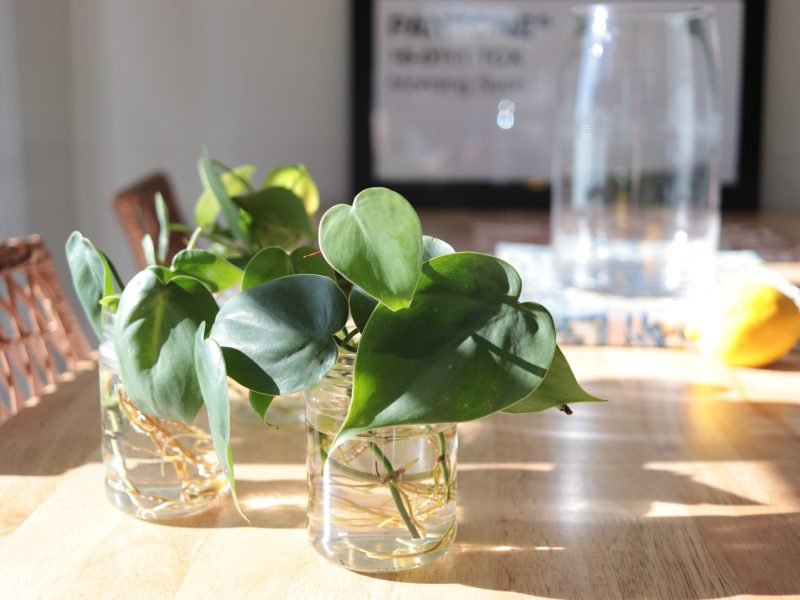
When it comes to containers, your herbs aren’t picky – they just need something with drainage holes. You can opt for classic terra cotta pots or get creative with mason jars, old tea tins, or even a wooden crate.

2. Potting mix

Herbs prefer a potting mix that’s light and drains well. Look for a mix that’s specifically made for indoor plants, as these are generally lighter and contain the right nutrients for your herbs.

3. Grow lights

Unless your home is blessed with ample natural light, you’ll likely need grow lights. These special bulbs can replicate sunlight, helping your herbs thrive even in the darkest corners.

4. Watering can

A good old-fashioned watering can is a must. Choose one with a long spout to make watering easier, especially if your plants are in high or hard-to-reach spots.

5. Fertiliser

While not always necessary, a quality fertiliser can give your herbs an extra boost. Choose a slow-release type, preferably organic, to feed your herbs over time.

6. Pruning shears

Lastly, don’t forget your pruning shears. Regular pruning encourages your herbs to grow bushier and healthier – plus, it gives you a fresh harvest of delicious herbs to use in your kitchen!

Remember, the joy of indoor herb gardening lies not only in the end result, but also in the process. So gather your equipment, roll up your sleeves, and let’s get planting!

Starting Your Indoor Herb Garden: Tips and Tricks for Beginners

Starting an indoor herb garden can be an exciting endeavour, especially if you’re a newbie. It all starts with just a few simple steps. So, let’s get those green fingers working!

Choosing the Right Herbs

As a beginner, it’s best to start with herbs that are easy to grow indoors. Mint, Basil, Parsley, and Chives are all excellent choices. They’re not only culinary favourites but also quite forgiving to minor gardening mishaps.

Acquiring the Necessary Equipment

Taking care of indoor herbs doesn’t require a massive amount of equipment. In fact, you probably have most of it already! A few pots with drainage holes, some good-quality potting soil, and a spot with plenty of sunlight are all you really need.
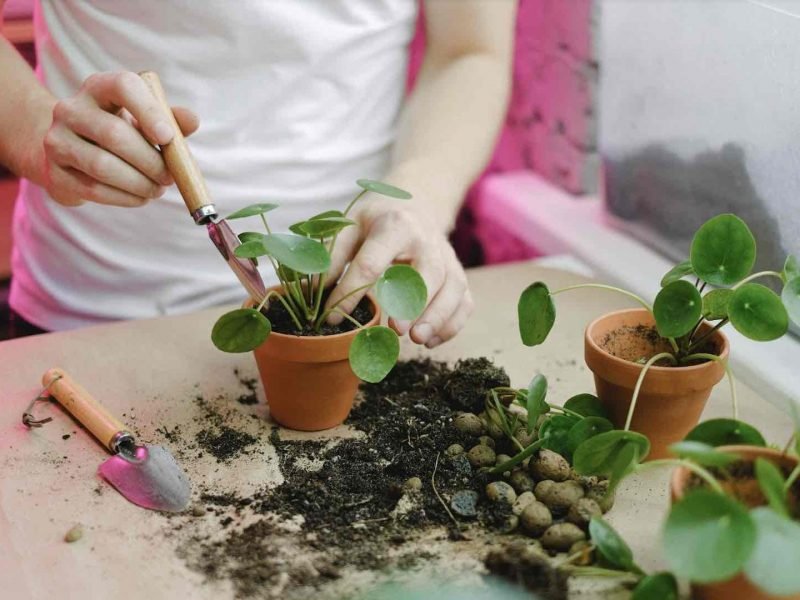
Planting Your Herbs

When it comes to planting, start by filling your pots with soil. Then, make a small hole and place your herb cutting or seedling into it. Cover the roots with soil, press down slightly to secure it, and give it a good watering.

Watering and Feeding Your Herbs

Indoor herbs generally prefer a slightly damp soil. So, it’s best to water them regularly but sparingly. To help your herbs grow strong and healthy, you could also consider giving them a weak feed of liquid plant food every couple of weeks.

Harvesting Your Herbs

When your herbs are flourishing, it’s time to reap the fruits of your labour. Simply trim off what you need as and when you need it. Just remember, never harvest more than a third of the plant at a time to ensure it continues to thrive.

There you have it! With these tips and tricks, you’re well on your way to starting your own indoor herb garden. Happy planting!

Simple indoor herb garden

Harvesting Your Indoor Herbs: When and How to Do It

If you’ve been nurturing your green thumb with indoor herb gardening, there comes a thrilling moment when your little plant babies are ready for the big world – the kitchen! Yes, we’re talking about harvesting. Knowing when and how to harvest your indoor herbs is a critical part of ensuring that your plants stay healthy and productive.

Timing Is Everything

Deciding when to collect your indoor herbs can be somewhat of a guessing game, but don’t worry, there are some tell-tale signs to look out for. A general rule of thumb is to harvest just before the plant blooms, as this is when the leaves are most flavourful. Monitor your herbs closely and look for buds as they’re about to open, that’s your cue!

How to Harvest

Harvesting indoor herbs requires a delicate touch, a bit like a plant surgeon if you will. The key is to snip off pieces here and there, without harming the overall plant. Here’s a quick step-by-step guide:

Firstly, use a pair of sharp, clean scissors to make precise cuts. Target the new growth areas – the tips of the stems where you can see new leaves forming. By cutting here, you’re encouraging the plant to grow bushier.

Next, make sure you only ever cut around a third of the plant’s overall foliage. This ensures the plant still has enough leaves for photosynthesis, which is essential for its growth. Lastly, remember, regular harvesting is beneficial for your herb plants, promoting new growth and keeping them healthy. Happy snipping!

How to Use Your Freshly Grown Herbs in the Kitchen: Recipes and Ideas

Herbs from your own garden can transform an ordinary dish into a culinary masterpiece! Not only do they carry an unbeatably fresh aroma and flavour, but their nutritional benefits are at their peak when freshly picked. Here are some inspiring uses of your homegrown herbs in the kitchen.

1. Basil Pesto

With a bushel of basil, you’re mere steps away from a delightful basil pesto. All you require is Parmesan cheese, pine nuts, garlic, olive oil, and of course, your fresh basil. Blend these together and presto, you have pesto! It’s perfect for pasta or as a marinade for chicken.

2. Rosemary Infused Olive Oil

Why buy flavoured oil when you can make your own? Simply heat some olive oil and add a couple of sprigs of rosemary. Let it cool, strain, and bottle. This aromatic oil is a delightful addition to salads, roasted vegetables, and meat dishes.

3. Minty Fresh Lemonade

Nothing says summer like a glass of homemade lemonade, spruced up with a fresh sprig of mint. The refreshing taste of mint beautifully complements the tangy lemon, making this the ultimate thirst quencher.

4. Herb Butter

Cooking becomes a joy when you have ingredients like herb butter. Simply combine your favourite herbs (like parsley, thyme, or dill) with some butter, and voila! The perfect companion for your morning toast, grilled steak, or baked potato.

And it doesn’t stop there! Herbs can make their way into a myriad of dishes, from soups to desserts. So let your culinary creativity run wild and make the most of your indoor herb garden.

Troubleshooting Common Indoor Herb Garden Problems: Pests and Diseases

For all the joy that indoor herb gardening brings, it’s not without its fair share of challenges. One of the main culprits of this green-thumbed headache? Unwanted pests and diseases. But fear not, dear reader, because we’re here to help you troubleshoot these common problems.

Pests

Indoor herbs may sometimes play host to tiny, uninvited guests. Pests such as spider mites, aphids, and whiteflies can wreak havoc on your lush herb garden if left unchecked. But before you panic, let’s arm you with some knowledge and practical solutions.

  • Spider Mites: These little critters love dry conditions. Keep your plant’s environment humid, and regularly mist the leaves. For a severe infestation, try a natural insecticidal soap.
  • Aphids: These pests can be washed off with a gentle spray of water. For persistent issues, consider introducing beneficial insects, like ladybugs, into your indoor garden.
  • Whiteflies: Yellow sticky traps work wonders here. If the problem persists, a solution of water and dish soap sprayed on your plants can help.

Diseases

Plants, like humans, can fall ill too. Fungal diseases, root rot, and powdery mildew are common culprits that can affect your indoor herb garden. Fear not, we’ve got a remedy for each of these ailments.

  • Fungal Diseases: These typically thrive in damp conditions. Ensure good air circulation, avoid overwatering, and consider using a natural antifungal treatment if necessary.
  • Root Rot: Overwatering is the main cause here. If the roots look brown and feel mushy, cut back on watering, and consider repotting the plant in fresh, well-draining soil.
  • Powdery Mildew: This often appears as a white powdery substance on leaves. Increase air circulation, reduce humidity, and treat with a homemade spray of water and baking soda.

In the grand scheme of growing your indoor herb garden, these problems are just minor bumps on the road. With a dash of knowledge, a sprinkle of patience, and a hearty helping of love, your indoor herbs can thrive, despite the challenges they might face.

Taking Your Indoor Herb Garden to the Next Level: Creative Display and Design Ideas

Let’s face it, budding indoor gardeners, not only do you want your herbs to thrive, but you also want them to add a dash of beauty to your home decor. The right display and design can transform your green friends from simply being houseplants to becoming vibrant pieces of indoor art. Here are some innovative ideas that will enhance both the aesthetics and the functionality of your indoor herb garden.

1. Vertical Gardens

When floor space is at a premium, think upward! Vertical gardens provide a unique, space-saving way to cultivate your herbs. They also make a stunning visual impact, transforming a bare wall into a lush green canvas.

2. Mason Jar Herb Garden

Mason jars don’t just look great, they’re practical too. With a bit of gravel for drainage, some potting soil and seeds, you’ve got yourself an adorable mini herb garden. Arrange them on a windowsill for maximum sun exposure and watch your herbs flourish.

3. Hanging Herb Garden

Hanging herb gardens offer another fantastic solution for those short on space. Plus, they add a bit of bohemian flair to your home. You can use anything from tiered wire baskets to macramé hanging planters for a chic, free-spirited vibe.

4. Herb Garden as a Room Divider

Why not make your herb garden work a little harder and use it as a room divider? A tall, narrow shelf filled with herbs can create a beautiful, aromatic barrier that’s far more charming than your standard partition.

5. Pallet Herb Garden

For an earthy, rustic look, consider transforming a wooden pallet into a lovely herb garden. Just be sure to seal it first to protect the wood and keep it looking great.


Remember, the key to a fantastic indoor herb garden is not just about growing healthy plants, but also about displaying them in a way that complements your home and personal style. So why not get creative with your green thumbs and start designing?

Indoor herb gardening is both enjoyable and advantageous, allowing the cultivation of fresh herbs throughout the year. With suitable herbs, equipment, and care, anyone can partake in this hobby.

Starting with herbs like basil, mint, and parsley can be encouraging for beginners. Essential equipment includes a good potting mix, suitable pots, and a grow light. Consistency and patience are key to a successful indoor garden.

Fiddle and Thorn is a participant in the Amazon Services LLC Associates Program, an affiliate advertising program designed to provide a means for sites to earn advertising fees by advertising and linking to Amazon.com

Take our houseplant survey!

Quickly respond to our 30 second houseplant survey and get 75% off our Complete Houseplant Care eBook!

Take the Survey

No thanks…

How to Care for an Inch Plant (Spiderwort)

Last Updated: October 16, 2023

Inch Plant (Spiderwort)

Inch Plant (Spiderwort)

Inch Plants are one of our favourite houseplants to take care of as they seem to grow bigger and wilder every day and are pretty low-maintenance too.

Native to Mexico, Central America, and Colombia, the Tradescantia zebrina is a fast-growing houseplant loved for its purple and silver striped foliage. It’s very unique in its appearance and stands out in any urban jungle.

The Inch Plant has several well-used names including Wandering Jew Plant, Flowering Inch Plant and Spiderwort. It’s also often referred to by its Latin name Tradescantia zebrina

In our detailed Inch Plant care guide, we will cover everything you need to know to keep your plant thriving including environmental requirements and diagnosing/treating common problems.

How to care for an Inch Plant

There are three main elements to ensure a healthy Inch Plant. Firstly, ensuring that your plant gets enough bright, indirect sunlight. You want to avoid too much direct sun as this can scorch and fade the leaves and a long time in low light will create small leaves and leggy vines.

The second main element of Inch Plant care is, of course, watering. Wandering Jew Plants love even moisture in the soil and will struggle if the potting mix either dries out for extended periods of time, or is extremely waterlogged. Monitor the soil moisture and adjust your watering routine accordingly.

The third pillar of Wandering Jew Plant care is pruning and this is often forgotten. Pruning the vines back helps to promote strong healthy new growth but it’s especially important for these plants. As they mature, the vines will naturally lose a lot of their oldest leaves at the top of the vine. This can make the plant appear quite leggy and doesn’t look great. Cutting the vines back and propagating them will help ensure a bushy plant.

Inch Plant Overview

Origin: Mexico, Central America, and Colombia

Latin Name: Tradescantia zebrina

Common Name(s): Inch Plant, Inch plant, Flowering Inch Plant, Wandering Jew Plant and Spiderwort

Plant Family: Commelinaceae

Difficulty Level: Moderate

Appearance: Purple foliage with silver, white or grey stripes across the leaf.

Height and Size: 6 feet (2 meters) long

Growth Rate: Fast

Flowering: Can occasionally grow small pink or purple flowers

Pruning: Regular pruning is required to maintain healthy growth.

Cleaning: Dust regularly to prevent a build-up on the leaves

Light Requirements: Bright, indirect sunlight

Water Requirements: Water weekly in spring and summer and fortnightly in autumn and winter to ensure even moisture in the soil

Best Soil: Standard houseplant mix with well-draining qualities

Ideal temperature: 65-80°F (18-26°C)

Fertilizing Routine: Apply a well-balanced fertilizer every 2 months during spring and summer only.

Ideal Humidity Level: 45-60% humidity

Propagation: Through vine cuttings

Repotting Frequency: Repot every 1-2 years

Toxicity: The sap is mildly toxic to pets and humans when ingested

Risk of Pests: Rare but risk of aphids, mealybugs, scale insects, thrips, whiteflies and spider mites.

Common Problems: Leggy growth, brown and yellow leaves and faded leaves

Inch Plant Appearance and Size

Inch Plants are trailing houseplants with long vines adorned with purple and silver striped leaves. Given the right care, each of the vines can grow to around 6 feet (2 meters) in length.

Growth Rate of a Tradescantia zebrina

The Wandering Jew Plant is one of the fastest-growing houseplants. They grow new leaves in no time at all and are great to propagate because roots grow on cuttings in just a few days.

It can happen that they become a little leggy at the top of the vines as they become longer so propagating the ends and potting them into the mother plant to give a fuller look.

Care Difficulty Level

The Inch Plant is quite a low-maintenance plant because it can adapt to quite a range of environments. We often recommend them to beginner houseplants as they’ll reward you with plenty of new growth very soon. They are also super easy to propagate too which makes them a great plant to gift to friends and family without needing them to have a green thumb.

Flowers on an Inch Plant

Although uncommon, it can happen that small pink and purple flowers grow on the Inch Plant. These don’t often last longer than a few days but are very cute!

Pruning your Inch Plant

Pruning your Tradescantia zebrina is an important part of the care routine to maintain your plant’s health, and shape, prevent legginess and promote bushier growth.

Vines on an Inch Plant naturally become quite leggy at the top, near the pot as they often lose their oldest leaves. This can make the plant quite bottom-heavy which doesn’t always look great. Pruning these leggy leaves and propagating the section of the vine will help to create a bushier look. Aim to do this every 1-2 years.

When pruning the vines, it’s important to use clean and sharp pruning tools such as pruning shears or scissors. If you roughly cut the vines or break them off, it can damage the vine and make it more difficult for new healthy growth to develop.

Carefully trim the vines just above a leaf node or joint. This is a small bump on the stem from which leaves grow out from. Cutting just above a node encourages new growth to sprout from that point, making the plant fuller and more compact.

But it’s not just leggy growth that you should be pruning but it’s best to remove any dead or dying leaves that may have turned yellow or brown. Once the leaf has discoloured, there is no reversing this so removing it is best.

Dead leaves will naturally fall from your plant but it’s good to remove them yourself as it avoids any energy being wasted trying to revive them.

Cleaning your Tradescantia Zebrina

Make sure you are cleaning your plant’s leaves regularly to prevent a build-up of dust. Not only is the dust damaging to your plant’s health but it makes the leaves appear dull. Giving them a good wipe-over with a damp cloth will make them sparkle again!

If you are struggling to remove dirt or stickiness from the leaves of your Inch Plant, only ever use dish soap on the cloth. Any harsh chemicals can damage the leaves.

Spiderwort as a hanging plant

Spiderwort or Inch Plant in a pink ceramic pot

Light Requirements for a Spiderwort Plant

Bright, indirect light is ideal for an Inch Plant and they will struggle to thrive in darker areas of your home (they can become quite leggy, droopy and turn brown). However, if your plant receives direct sunlight it can fade the leaves which is irreversible. So you want to find a nice light balance.

Water Requirements for an Inch Plant

Inch Plants don’t like their soil to be too dry or waterlogged so you want to find a balance between the two. We recommend watering your plant little and often so that the soil retains some moisture but not enough to cause issues such as root rot.

You should also be adjusting your watering throughout the year, making sure you are watering your Inch Plant less in the colder, winter months. This is because your plant will be in its dormant phase, meaning growth will slow and the demand for water will be less. Watering in winter can often lead to root rot so check the moisture in the soil before watering.

Best Soil for a Tradescantia zebrina

A standard, high-quality houseplant potting mix will suffice for your Inch Plant. It’s worth checking though if the potting mix you are using contains perlite. This is a great ingredient for helping the soil drain better (and avoiding root rot) but it’s also great at promoting aeration of the potting mix too!

Top tip: If your current potting mix doesn’t contain perlite or you can’t find one that does, you can also buy it individually and add it to any mix.

Inch Plant Temperature Needs

A great thing about caring for an Inch Plant is that they aren’t too fussy about the temperature and will grow well in your home regardless. They do tend to prefer slightly cooler temperatures but are happy with warm environments too.

It’s definitely still worth using a digital thermometer to check for hot or cold extremes every so often though as hotspots and freezing drafts will start to cause issues over time.

Inch Plant Fertilizer Requirements

Inch Plants are not heavy feeders and you should only be fertilizing every 2 months during spring and summer. It’s also important to note that you will still see plenty of new healthy growth without fertilizing at all.

However, if you do choose to feed your plant, follow these rules:

Firstly, apply a well-balanced 10-10-10 fertilizer as this gives your plant everything it needs. Secondly, using a water-soluble liquid fertilizer helps you control the strength and frequency of feeding a lot more than fertilizer sticks or pellets. And the third rule is to always fertilize less than it says on the bottle. This helps to avoid issues caused by over-fertilization such as yellow leaves, faded leaves and small new foliage.

Ideal Humidity Level for your Inch Plant

Although Inch Plants do survive well in the natural humidity levels in your home, they will repay you with plenty of healthy growth if you up the humidity a little. The ideal range is between 45-60% humidity.

We recommend placing it in the kitchen or bathroom where humidity is a little higher or using a humidifier to boost it and keep a steady level. It can also be a good habit to get into to start misting your plant a few times a week. Check out our humidity guide for more information.

Red and White Striped Inch Plant Leaves

Red and white striped Inch Plant leaves

Propagating your Inch Plant

It really couldn’t be simpler to propagate an Inch Plant. All you need to do is take a stem cutting and pop it in some water. Change out the water every few days to keep it fresh and after a few days, you should see roots start to appear. At this point your cutting is ready to be pot into soil.

It’s worth noting that Inch Plants are actually one of the fastest plants to propagate. Usually, it can take several weeks for other houseplants to develop roots on their cuttings but it will only be a few days until you start to see them appear on the Inch Plant cuttings.

Repotting your Inch Plant

It is not super necessary to constantly be repotting your Inch Plant, as they won’t suffer too much if they are a little root bound. On average you want to be doing this every 2 years but do look out for signs that your plant is rootbound. These include roots growing out of the drainage holes or out of the top of the pot.

But when you do decide to repot, make sure the new pot isn’t more than a few centimetres larger in diameter than the last one otherwise this may your plant to become stressed.

Inch Plant Toxicity to Humans and Pets

The Wandering Jew Plant is mildly toxic to pets and humans when ingested. They can also cause some skin irritation if handled but this is relatively rare. It’s still best to wear gloves when handling, repotting or propagating just to be safe.

Treating and Preventing Pests

Although it’s rare, your Inch Plant can sometimes suffer from a pest infestation. This can very quickly begin to cause a range of issues from brown and yellow leaves, to holes in the leaves and stunted growth. If not treated in time, it can also kill your plant.

Here is a list of some of the pests that you may encounter:

Spider Mites: These are tiny insects that are difficult to spot with the naked eye (use a magnifying glass to confirm the issue). The reason that they are so damaging to Inch Plants (and other houseplants) is that they feed on the sap of the plant, dehydrating it and killing it slowly. To treat, use neem oil and an insecticide.

Aphids: Aphids are small, soft-bodied insects that love to hang out on new growth and on the undersides of the leaves (so look closely here to diagnose the issue). They also suck on the plant sap but they leave behind a sticky dew which makes them easier to spot. Remove aphids by gently spraying the plant with an insecticide.

Mealybugs: Mealybugs are white insects that almost look like tiny fluffs of cotton. These sap-feeding bugs dehydrate the leaves and lead to stunted growth. The best way to remove mealybugs is by using a cotton swab that has been dabbed in alcohol.

Scale insects: These have a brown protective shell which makes them quite solid and dangerous to your plant. The only upside is that they are easier to remove yourself as they are larger and hard.

Regardless of what pest has decided to call your Inch Plant home, the same rule applies to catching the issue early. Having success when fighting pests is an uphill battle but treating it as early as possible gives you the best chance. Monitor your plant regularly and give it thorough checkups about once a month to spot any early warning signs of pests or other problems.

Inch Plant Common Problems

Fiddle and Thorn is a participant in the Amazon Services LLC Associates Program, an affiliate advertising program designed to provide a means for sites to earn advertising fees by advertising and linking to Amazon.com

Take our houseplant survey!

Quickly respond to our 30 second houseplant survey and get 75% off our Complete Houseplant Care eBook!

Take the Survey

No thanks…

Humidity Guide

Last Updated: January 8, 2022

Introduction

Although not one of the two most important things for plants (sunlight and water), humidity levels in your home are also really important to monitor. Plants native to the tropics will thrive in humid homes, whilst others such as cacti and succulents prefer dryer air.

Humidity levels

The way in which humidity is measured is by the amount of water vapour in the air. You can find the different levels below which correspond to the plants that like that level.

  • 80% – 90%

    This is the level of humidity that you will find in the topics which can also be replicated in greenhouses. Some plants love this level of humidity to grow but can also survive well at lower levels.

  • 60% – 80%

    Tropical plants also thrive at this level of humidity, though it is difficult and uncomfortable to reach and sustain this level in your home.

  • 40% – 60%

    This is the average humidity levels for homes and is suited to the majority of houseplants. For plants native to the topics, you may want to help increase the humidity for that plant specifically (see our tips below).

  • 10% – 40%

    This is the level adored by succulents and cacti plant types as it is quite dry air. During winter, if you have the heating on a lot you may start to reach these levels which can be quite uncomfortable for many of your houseplants.

Signs humidity is too low

Although it will vary slightly between each houseplant type, there are a few things to look out for that might indicate that your plant requires a slightly higher humidity. Be sure to check other aspects of the care and environment as well as water and light levels can also produce similar symptoms.

  • Brown leaf tips and edges

  • Dry and yellow leaf edges

  • Leaves dry and shrivel up

Signs humidity is too high

Although this is rare, it may also occur that the humidity in your home is too high for some of your plants to really thrive.

  • Leaves and stems starting to rot

  • Plants starting to show signs of sweating

  • The plant is starting to develop mouldy patches

Ways to increase humidity

If you find that your home has quite dry air, you may want to up the humidity a little for your houseplants to really be happy. This may become more urgent over winter as central heating can really dry out the air in your home. Testing a couple of these simple tips and tricks should make it super easy for you to increase the humidity for your houseplants, keeping them happy and healthy.


Misting your houseplants

Although a short term solution, one of the simplest ways to increase the humidity for your houseplants is to mist them with a spray bottle. Depending on your plant type, you might want to mist up to a few times a week. However, make sure that you only mist humidity-loving plants otherwise, it can cause delicate leaves to rot.

You can get spray bottles of all different kinds too that will definitely suit the style you’re looking for — we love these amber bottles.

It’s best to mist your houseplants in the morning so that all of the water that lands on the leaves and stems has time to evaporate before nightfall. If the leaves or stems are too damp when the temperature drops, it may cause the leaves to wilt and rot.


Pebble Tray

This method is great for keeping a more consistent humidity level for your houseplants and it’s pretty simple too! Just place your houseplants over a tray of pebbles with fresh water over the top. Over the day water from the tray will evaporate giving the plants above exactly what they’re looking for. The pebbles stop the bottom of the plant pots reaching the water in the tray, ultimately stopping your plants from getting waterlogged and developing nasty problems like root rot.

It’s best to fill the tray with a small amount of water every couple of days instead of filling the tray completely and letting it sit for weeks. This reduces the risk of any stagnant water gathering a bad smell in your home.


Humidifiers

Looking for the easy solution? Getting a humidifier is definitely the way for you. They are relatively affordable little devices and they make keeping a consistent humidity level so much easier. Most will allow you to place them on a timer so they run on a fixed schedule, and some will even have a built-in monitor so they automatically turn on and off to keep the humidity exactly where you want it.

This is likely the best way to go if you find that you just can’t keep the balance right with any other option, or if you travel often and can’t keep to a consistent schedule for misting or refilling a pebble tray.


Giving your houseplants a shower

To quickly raise the humidity of your houseplants you can always give them a quick shower. Simply pop them in the shower and wash them down with lukewarm water, this will clean off the leaves and give the soil a good soaking. Once washed leave them in the shower a little to let any excess water run off before returning them to their normal spots. Over the next couple of days, your plants should have a good boost in humidity levels.

Giving your houseplants a shower not only raises the humidity levels for them, but it is a great way of cleaning the leaves, getting rid of dust and washing our any bugs or pests that might be hiding on the plant! You can read more about how to shower your houseplants here.


Place your houseplants in the bathroom

If you’re lucky enough to have great lighting in your bathroom you can move a couple of your houseplants that need the help of increased humidity in there. The running water and steam from your showers will vastly increase the humidity of the room.

A top of being great for the plants, it’s also really nice to include some greenery in your bathroom as they bring a good amount of life to any room. Some recommendations for bathroom plants would be anything tropical as these will all thrive in the increased humidity environment and look great too!

Ways to decrease humidity

Although rarer, it may happen that the air in your home is too humid for your houseplants. There are a few simple ways to reduce the humidity in your home:


Buy a dehumidifier

The easiest and most effective way to reduce the amount of humidity in your home for your plants is to use a dehumidifier. They are affordable portable devices that you can just plug in for a while and let it do the job!


Use the bathroom fan

If you find that a lot of the humidity is coming from your warm and lengthy showers (and you aren’t ready to give those up yet), then you need to get your bathroom fan working a little harder. Don’t let the moist air escape from the bathroom as this may be causing the increased humidity that your houseplants are suffering with.

Summary

Although you might not have immediately realised it, humidity is an important thing to look out for when caring for your houseplants. Misting bottles or humidifiers are definitely the way to go if your plants need that extra boost! But we also recommend making use of the natural humidity levels found in your bathroom and kitchen and tailoring your plant choices for each room depending on their humidity requirements. You can find out more about each individual plant in our set of care guides.

Fiddle and Thorn is a participant in the Amazon Services LLC Associates Program, an affiliate advertising program designed to provide a means for sites to earn advertising fees by advertising and linking to Amazon.com

Take our houseplant survey!

Quickly respond to our 30 second houseplant survey and get 75% off our Complete Houseplant Care eBook!

Take the Survey

No thanks…

Hoya Carnosa Care

Last Updated: August 17, 2022

Basic Hoya Carnosa Care

There are two important things to remember when caring for a Hoya Carnosa. Firstly, avoid direct sunlight as this can be pretty damaging for their leaves and impacts the ability to flower as well. The second thing to note is that they are succulents which means they store water well. This is why deep but frequent watering is the best habit to get into.

Below you’ll find our complete care guide with everything you need to know to keep your Hoya Carnosa happy!

Detailed Hoya Carnosa Care

They can deal with a range of light conditions

Hoya Carnosa plants are great as they thrive in most light conditions. The only thing to avoid is really intense direct light during summer as this can scorch the leaves. They can also adapt to lower light levels but most probably won’t bloom. Bright but indirect light is ideal.

Water infrequently but deeply

Hoya Carnosa plants are succulents meaning they store water well. You don’t want to water your plant often, but when you do make sure it gets a real drink. Be wary of watering before most of the soil has dried out or this can cause root rot.

Avoid temperature extremes

The Hoya Carnosa plant is a happy plant when in average room temperature of 18-24C. Keep this plant away from cold drafts, AC vents or radiators as these temperature extremes will affect your plant’s health.

Give the humidity a boost occasionally

Hoya Carnosa plants will do absolutely fine in the average humidity of your home. Give them a mist or use a pebble tray every once in a while to give the humidity a boost but they will be absolutely fine unless the air in your home is super dry.

Only fertilise in spring and summer

Feeding your Hoya Carnosa is totally optional as they can do just fine without it. However, if you do choose to feed your Hoya Carnosa then use a water soluble fertiliser at half strength once a month during spring and summer. Don’t ever feed your plant during winter as growth is dormant.

They can produce fragrant flowers

If given the right care, mature Hoya Carnosa plants will produce some fragrant flowers! They do sometimes excrete sticky nectar which can stain furniture so be a little careful about that.

Propagate your Hoya Carnosa through stem cuttings

The most successful method of propagating a Hoya Carnosa is through stem cuttings. Make sure the cutting has at least one node (where the leaf and stem meet) as this is where the new roots will grow from. Place in water and after a few weeks you should start to see roots develop. Make sure to regularly switch out to water otherwise it will stagnate and your chances at a successful propagation will drop.

Keep Hoya Carnosa plants away from pets and children

Unfortunately, the sap found in Hoya Carnosa plants can cause skin and stomach irritation so we recommend keeping small children and pets away from them.

Hoya Carnosa Care FAQs

Hoya Carnosa Common Problems

Even the best plant parents run into issues from time to time so it’s important to know what the warning signs are so that you can solve the issue as quickly as possible.

Fiddle and Thorn is a participant in the Amazon Services LLC Associates Program, an affiliate advertising program designed to provide a means for sites to earn advertising fees by advertising and linking to Amazon.com

Take our houseplant survey!

Quickly respond to our 30 second houseplant survey and get 75% off our Complete Houseplant Care eBook!

Take the Survey

No thanks…

How To

Detailed instructions to help you care for your indoor plants.

How to Use Leca for Houseplants

Last Updated: November 6, 2023

Soil Mix

Soil Mix

If you’re on the hunt for an innovative and low-maintenance method to care for your indoor plants, you’ve probably come across the term ‘Leca’. But what is it really? How does it work with houseplants and most importantly, how do you use it?

Below we’ll explore what Leca is, its benefits and potential downsides, how to choose and prepare it, and finally, how to replant your houseplants in it.

We’ll also guide you through monitoring and adjusting moisture levels, making propagation so much easier.

What is Leca?

Leca is an acronym for Light Expanded Clay Aggregate. It’s essentially small balls of clay that have been heated to such a high temperature that they expand.

This process forms a hard shell on the outside, while the inside remains porous.

The result? A growing medium that’s lightweight, airy, and fantastic at holding onto both moisture and air. And the best part is that Leca is reusable, making it a sustainable choice!

Note: Leca is also referred to as clay pebbles, clay balls, hydroton, or hydrocorn.

Properties of Leca

  • Lightweight: As the name suggests, Leca is light due to the air pockets created during its manufacturing process. This can make managing larger indoor plants far more manageable.
  • Porous: The porous nature of Leca means it’s excellent at absorbing water. This is beneficial for delivering moisture and nutrients to your plant roots gradually.
  • Reusable: Unlike soil or other potting mediums, Leca can be cleaned and reused countless times, making it a cost-effective and environmentally friendly alternative.
  • pH neutral: Leca is pH neutral, which means it doesn’t affect the acidity or alkalinity of the water or nutrient solution your plants are growing in.

Why is Leca beneficial for Houseplants?

The benefits of using Leca for your houseplants are plentiful.

First off, Leca is reusable. Unlike some other substrates, it doesn’t break down over time, which means you can sterilize and reuse it for many planting cycles to come.

Due to its excellent water-retaining capability, this lightweight expanded clay aggregate can soak up and gradually release moisture. This slow moisture release greatly reduces the risk of overwatering, and if you forget a watering day or two, it can provide a buffer.

Leca can also actually help prevent bug infestations. Because it holds no organic matter for them to feed upon, it’s a not-so-friendly environment for pests like gnats and mites.

And if that wasn’t enough, Leca is also great for root aeration. The spaces between the Leca balls allow air to circulate around the roots of your plants, which can stimulate healthier and more robust growth.

The Downsides of Leca for Houseplants

One potential caveat we need to address when using LECA for houseplants is the initial investment cost.

While LECA itself is not expensive, the cost of the materials needed to correctly use LECA can add up.

This includes things like clay pebbles, water pH tester, and the time and effort to continuously monitor and adjust water levels.

Other areas to consider include the necessity for frequent water changes. Unlike soil that can be left unchanged for a while, water in LECA requires regular observation and adjusting in order to maintain the necessary moisture levels and keep your houseplants happy.

Another consideration to bear in mind, is that not all plants do well in LECA. Some houseplants might struggle with the transition or may not thrive in a soil-less environment. It’s always best to do research on what your specific plant prefers before making the switch.

Lastly, due to LECA’s nature of soaking up and releasing water, it creates a damp environment that may lead to the growth of mold or algae. However, this can be easily controlled by cleaning the LECA pebbles and the plant pot frequently and ensuring your plant gets enough light.

Choosing the Right Type of Leca for your Houseplants

  • Smaller sized Leca: These are typically between 8mm to 16mm in diameter and work great with smaller houseplants that have delicate root systems. Indoor herbs, succulents and flowering plants like African violets thrive with this size.
  • Medium sized Leca: These pebbles range anywhere from 16mm to 18mm. They’re ideal for larger houseplants that need more space for root expansion and are also suitable for the succulents and herbs mentioned earlier.
  • Larger sized Leca: With diameters over 18mm, these are perfect for big houseplants or outdoor plants that have vigorous root systems. Plants that require a lot of water, like tropical houseplants and ferns, will benefit from these.

Similarly, it’s important to keep in mind that different brands may have different quality standards for their Leca. You may find upon examination that some brands polish their pebbles for a smooth finish while others leave them with a rough, porous texture.

So, should you go for the polished or unpolished? Our advice is to opt for the unpolished ones. The rough texture provides a better condition for root growth and anchors the plants evenly.

Preparing Leca for Use with Houseplants

Step 1: Soaking the Leca

This process helps to remove any dust or impurities that may be present. All you need to do is to place your Leca pebbles in a bowl of water for up to six hours or overnight.

Soaking not only cleans the pebbles but also allows them to absorb water, which is crucial for the optimum growth of your plant as Leca will serve as your plant’s primary water source.

Step 2: Rinsing the Leca

After soaking, it’s important to rinse your Leca. Simply drain the water from the bowl and run each Leca pebble under a stream of clean, warm water.

While rinsing might seem repetitive, this step ensures that any remaining dust is completely removed from the Leca.

Step 3: Buffering the Leca

The next step in the setup process is buffering the Leca. Buffering refers to the process of soaking Leca in water mixed with a nutrient solution, usually a balanced liquid houseplant fertilizer.

By doing so, the Leca acquires essential minerals needed by your plant.

Step 4: Final Rinse and Drain

Once buffering is done, don’t forget to give your Leca one last rinse. You can then allow the Leca to drain in a colander or a mesh bag until it stops dripping.

How to Repot your Houseplants using Leca

Repotting your beloved houseplants using Leca might initially seem daunting but here’s a simple step-by-step guidance to ensure a successful transition.

Step 1: Select your Plant

Choosing the right plant for this process is crucial. Beginners might want to start with hardy plants that adapt well to different conditions, like Pothos or ZZ plants.

If you’re more experienced, feel free to experiment with your favorites. However, avoid succulents and water-sensitive plants when starting out.

Step 2: Remove Soil from the Plant’s Root

Carefully remove the plant from its current pot and gently shake off the existing soil. Rinse the roots under lukewarm water to remove any remaining particles.

This step might require a level of patience – especially with plants having a dense root system. Remember, we want our roots as clean as possible to reduce the risk of disease transmission into our Leca environment.

Step 3: Size your Leca Base

Start by placing a layer of your prepared Leca at the bottom of the new pot. This should be approximately 1/4th of the pot, but it can vary depending on the plant and pot size.

Step 4: Set your Plant

Place your plant on this layer and ensure it’s stable enough before proceeding. Remember, the plant’s crown should stay above the Leca, as submergence might lead to rotting.

Step 5: Complete the Leca Top-Up

Fill the rest of the pot with Leca, up to the base of the plant. You can gently shake the pot to help the Leca settle and fill any gaps.

Be sure not to pile it too high – the top of the Leca should sit about an inch below your pot’s edge.

Step 6: Water Your Plant

Once your houseplant is nestled comfortably in its new Leca home, it’s time to water it using your prepared nutrient solution.

The level of water should be kept around the base where the Leca ends.

Note: Avoid getting the plant’s leaves or stems wet, to well combat any possibilities of rotting.

Monitoring and Adjusting Moisture levels in Leca

Getting the moisture levels right is a crucial component of successfully growing houseplants in Leca. Too little water and your plant might dry out, too much and it becomes vulnerable to root rot.

Firstly, it’s important to remember that Leca isn’t like traditional potting soil – it doesn’t absorb water in the same way. Instead, Leca acts as a medium for water to surround your plant’s roots, providing them with moisture as needed.

Water is poured into a reservoir at the bottom of the pot, typically to a depth which covers around one fifth of the Leca pellets. The tiny spaces between and within the pellets carry the water upwards in a process known as capillary action.

Now, you might be wondering, “how often should I refill the reservoir?”. Well, this varies greatly depending on the type of plant, the environment, and the size of your Leca.

However, a good rule of thumb is to wait until the top layer of Leca appears dry, and then refill the reservoir. It’s also wise to ensure your plant isn’t sitting in stagnant water by pouring out any excess after a few hours.

Troubleshooting Common Moisture problems

Here’s a quick rundown of common moisture-related problems and solutions:

  1. Brown leaf tips: This is often a sign of dryness. Your plant may need more frequent watering, or a deeper reservoir.
  2. Yellowing leaves: This can indicate overwatering. Try waiting a little longer between refills, or reducing the size of the reservoir.
  3. Root rot: If you notice a foul smell, or your plant’s roots appear mushy and brown, this could be a result of overwatering. Unfortunately, this can be fatal to your plant if not addressed quickly. Immediately remove the rotting parts, let the roots air out and apply a fungicide if possible.

Using Leca as a Propagation Medium for Houseplants

Choosing and Preparing Your Cuttings

First things first, you need to select cuttings from your houseplant. Be sure to choose healthy, disease-free stems or leaves.

Then, prepare them by removing any extra leaves and leaving just a few at the top. Experience proves this step can help conserve the plant’s moisture.

Note: You can optionally dip the cutting end in rooting hormone, but it’s not necessary as LECA does a wonderful job promoting root growth by itself.

Preparing LECA for Planting

After preparing your cuttings, it’s time to prep our LECA. Reuse some of the previously buffered LECA balls or prepare fresh ones as described in earlier sections.

Keep in mind, a smaller pot or container is beneficial during this phase as it helps maintain moisture levels appropriately.

Planting Your Cuttings in LECA

With your LECA and cuttings ready, it’s planting time! Make a little hole in the LECA, put the cutting in, and surround it with LECA balls.

The top of the LECA should sit at the same level as the bottom of the cutting. Ensure your cutting has solid contact with the LECA to facilitate effective moisture absorption.

Maintenance

Just as with a full-grown houseplant, you’ll want to maintain a water level around 1/3 of your container or pot. Try not to let it go dry, but also avoid over-watering. Adjust as necessary.

After detecting root growth, you can continue to leave the cutting in the LECA for more development or transplant it into another medium.

Frequently Asked Questions

Do all types of houseplants work well with Leca?

Generally, many houseplants can thrive in Leca, but there are a few exceptions. Drought-tolerant plants like succulents and cacti or plants preferring a dry environment might not be the best fit due to the moist condition that Leca creates.

As always, do your research and observe how your specific plant responds.

How frequently should I water my Leca repotted plant?

The watering schedule varies depending on the type of your plant and its specific needs. Typically, you’ll water your plant once the Leca becomes dry to the touch or the water reservoir is empty. This could be every few days or once a week.

Can I reuse Leca?

Yes Leca is reusable! After moving a plant out of Leca, simply rinse it until the water runs clear, soak it in a water and vinegar solution for an hour, rinse again, and it’s ready for a new plant!

What do I do if my plant in Leca starts looking unhealthy?

Plants can often go through an adjustment period when first moved to Leca. If the plant continues to appear unhealthy, look at possible causes such as incorrect watering, lack of nutrients, or pH imbalance.

Do I still need to fertilize my plant when using Leca?

Yes, you do! While Leca offers many benefits, it doesn’t naturally contain the nutrients found in traditional soil.

Therefore, regular fertilizing with hydroponic fertilizer or adding nutrient-rich water to your Leca pebbles is essential to keep your plants thriving.

Is Leca cheaper than regular soil?

While the initial investment in Leca is higher than the cost of soil, keep in mind that Leca is reusable. This feature makes it a cost-effective option in the long run, especially if you have a large number of houseplants.

Fiddle and Thorn is a participant in the Amazon Services LLC Associates Program, an affiliate advertising program designed to provide a means for sites to earn advertising fees by advertising and linking to Amazon.com

Take our houseplant survey!

Quickly respond to our 30 second houseplant survey and get 75% off our Complete Houseplant Care eBook!

Take the Survey

No thanks…

How to Use a Chopstick to Check Soil Moisture

Last Updated: August 3, 2022

Knowing when to water your houseplants can be difficult and the balance between over and under watering is one of the biggest struggles that plant parents face. Whilst the amount you need to water each plant will differ for each variety, there are a few great tricks you can use to ensure that you find the right balance for each plant. 

Enter the chopstick method. This is one of our favourite ways to check the soil moisture and know whether you need to water your plant more or less. But you’re probably wondering what the chopstick method even is and how you can use it to prevent watering disasters. Well luckily, we have written this short guide with all the information you need to know. 

Inserting the chopstick

It’s important that you don’t damage the root system too much when putting the chopstick into the soil. This is because if you break or damage any of the larger roots, it can cause your plant to go into shock and can even (in more severe cases) cause your plant to lose leaves. This is because the root system can’t uphold that level of growth anymore. 

It’s OK to hit a few of the smaller roots though as breaking those won’t really cause any damage to your plant. You want to avoid doing this frequently though as it can start to cause problems. The best way around this is to gently wiggle the chopstick around and not force it through when it feels as though it has hit something. It might be that you need to insert it into a different spot where it goes into the potting mix easier. 

When inserting the chopstick you want to ensure that it’s at least 5cm into the soil. This will give you a more accurate reading of how much moisture is in the potting mix. Essentially the more soil you can test, the better. 

Removing the chopstick

You don’t really need to keep the chopstick in the soil for too long, a few seconds will be enough to determine how much moisture is in the soil. Gently remove the chopstick from the soil. The next thing you’ll need to do is understand what you’re looking for when it comes to figuring out how moist the soil is. 

It’s pretty easy to figure out as soggy soil will stick to the chopstick whereas dry potting mix won’t. Therefore, if your chopstick comes out clean, then the soil is pretty dry. However, if all of or part of the chopstick comes out covered in soil, then there is still some moisture in the soil.

Adjusting your watering pattern

Now that you’ve figured out how much moisture is in the potting mix, you need to know how to adjust your watering routine (if at all). This all depends on the plant type that you are looking at as some plants love moist soil whereas others thrive if the potting mix is bone dry. 

This means that you can’t simply water your plant when the soil is dry as it can still cause root rot among plants with delicate roots. Check out our Plant Index to figure out how much water your plant needs and use that to adjust your watering routine. The chopstick method should simply be used to figure out how much moisture is in the soil, rather than dictate your watering routine. 

Fiddle and Thorn is a participant in the Amazon Services LLC Associates Program, an affiliate advertising program designed to provide a means for sites to earn advertising fees by advertising and linking to Amazon.com

Take our houseplant survey!

Quickly respond to our 30 second houseplant survey and get 75% off our Complete Houseplant Care eBook!

Take the Survey

No thanks…

How to revive your dying office plants

Last Updated: February 15, 2022

Whether you have returned to the office after a long holiday to find the plants in need of some more love, or if you have simply forgotten about them in a mix of conference calls and spreadsheets, we have all the needed tips and tricks to bring your office plants back to full health.

The main things to attend to are: watering, leaf care, checking its environment, increasing humidity and replacing some of the soil.

Correct watering can help revive your dying office plants

Firstly, double-check that it actually needs watering and that your colleague hasn’t secretly been overwatering it like crazy. If your plant has developed dry and brown leaves and the soil is light and dry, chances are your plant definitely needs a watering. But before you quickly give your dying plant a bucket load of water, hold off for a second as there are some special techniques that will help get your plant looking and feeling healthier.

Try and locate a bucket of some sort (this may be difficult in your office situation but an empty bin or something would do the trick) and fill it with water. Soak your plant for around 20-30 minutes before letting it drip dry back in its pot and saucer. Then continue to water it little and often over the course of the next week or two before taking up a normal care routine once again.

Soaking is super important when reviving a dying and neglected houseplant. It works a lot better than just giving it a lot of water as the water will run out into the saucer straight away and leave the root system just as dry. So you want to make sure that the whole soil is moist throughout.

Proper leaf care can help save a dying houseplant

It is also really important to not only focus on the roots when trying to revive the plant, but also giving the leaves some needed TLC. Start by gently wiping the leaves down with soapy warm water to remove dust build up. This is really important to allow the plant to photosynthesise fully again and also leaves them looking shiny and brighter.

It is also a good idea to give the leaves a once over to check for any pests or signs of further problems which we touch on a little more below.

Increase the humidity to save your dying plant

Alongside watering, it is important that you try and increase the humidity for your plants as offices can have quite dry recirculated air. This can be especially damaging in winter months when we often have the heating on all day, every day. A lack of humidity in the air can cause the leaves to be a little limp and droop down. These are the best and easiest way to increase the humidity for your office plants:

Misting the leaves

One of the simplest ways to increase the humidity for your office plants is to mist them with a spray bottle a couple of times a week.

Pebble tray

Place your houseplants over a tray of pebbles with fresh water over the top. Over the day water from the tray will evaporate giving the plants above exactly what they’re looking for.

Buy a humidifier

They are relatively affordable little devices and they make keeping a consistent humidity level so much easier. Most will allow you to place them on a timer so they run on a fixed schedule, and some will even have a built-in monitor so they automatically turn on and off to keep the humidity exactly where you want it.

Want to know more about how to raise the humidity for your plants? We have written a whole guide on this.

Check the environment

Whilst this can’t undo any of the damage caused to the plant already, making sure that the plants are in their ideal environment is important to help it regain strength and healthy growth.

Check the lighting conditions

If your plant has been left near a window for long periods of time, it may be receiving too much direct sunshine (especially over the warmer months). If you spot bleached, burnt-like patches on the leaf then it may need to be moved further inside the office, away from the windows.

If your plants were left in dark corners of the office, and are producing small spindly growth, chances are it needs more light to thrive. In this case, move it to a sunnier spot but be careful of direct sunshine if that plant type doesn’t like it too much.

You can check over the specific care guides for your plant over in our Plant Index.

Check for heating/AC vents

Radiators, heating vents or AC systems can be quite harmful to your plant as they create extreme temperatures and drafts. Check with your building manager to see if the heating and AC vents are turned off at all on evenings and weekends. If they are always on (which for most offices they probably will be) then you might need to re-think where you place your plants. You want them to be close to natural sources of sunlight, but never directly below a vent or next to a radiator.

Check for pests

One thing to look out for when giving the leaves a once over is pests. It can happen that pests such as mealybugs, spider mites, scale insects and more can take hold of your plants.

If you find pests on your plants we recommend wiping down the leaves with soapy warm water and washing the soil once through. If it is easier you can also replace all of the soil to get rid of the pests. You should treat your plant with an organic insecticide to fight the infestation alongside these other methods.

Make sure to check over your other plants in the office to see if any other plants have pests. Keep your infected plants a good distance away from any of your other office plants as you don’t want the pests to spread.

Repotting can help to save a dying houseplant

Another way to give your office plants some love is to repot them into fresh soil. This wouldn’t be a good idea for the first week or two of trying to revive the plant as this may cause some shock so it is better to leave the plant for about two weeks of good care in an ideal light environment before repotting.

When you do replace the soil, make sure to gently rub all the old soil from the root system by running your fingers through it. Don’t be alarmed if some of the roots come with the soil, this is natural and they will regrow pretty quickly. If you notice that some of the roots are rotted and dying, snip these away with some clean scissors.

Stay away from fertiliser if your plant is dying

There is some mixed opinion on whether fertilisation is a good idea or not when trying to revive the plant, but we steer clear of it. You don’t want to shock the plant into trying to produce rapid new growth so it is best to wait at least a month before adding in some water-based fertiliser. You want to make sure that the roots and soil is moist and the plant is in the right environment before fertilising.

Reviving your plants can be difficult, especially if they have been neglected for long periods of time. If you find yourself out of the office quite a bit and unable to give regular care to your plants, it is worth looking into low-care houseplants as some really do thrive from being neglected. Don’t give up on your plants too quickly, they may look pretty dead but will actually start to grow again with the right care. So be patient, treat them well and they may reward you with new healthy leaves!

Fiddle and Thorn is a participant in the Amazon Services LLC Associates Program, an affiliate advertising program designed to provide a means for sites to earn advertising fees by advertising and linking to Amazon.com

Take our houseplant survey!

Quickly respond to our 30 second houseplant survey and get 75% off our Complete Houseplant Care eBook!

Take the Survey

No thanks…

How to revive your dying Monstera

Last Updated: September 3, 2023

A healthy monstera

Life can make us really busy sometimes and there will be times where ‘water monstera’ just gets forgotten from the to-do list. However, don’t fret. There are a few ways which you can try to revive your Monstera plant and return it to normal health.

Signs that your Monstera is dying

Seeing your beloved plants wilt away can be heart-wrenching. It’s crucial to understand the signs that your monstera isn’t doing so well, allowing you to take quick actions to save it. Here are some red flags to look out for:

  • Wilting: Wilting or sagging leaves can be a sign of underwatering. If your monstera’s leaves are wilting and the soil is dry, it might be time to give it a drink.
  • Yellow Leaves: Monstera leaves that are turning yellow can indicate overwatering or poor drainage. A few yellow leaves are normal, but if the problem persists, it may signify that your monstera is in trouble.
  • Brown Spots: If you notice the leaves developing brown spots, there is a strong chance that your plant is suffering from a fungal or bacterial infection. This is often a result of overwatering or high humidity levels.
  • Root Rot: If the roots of your monstera plant are turning black and becoming mushy, it is a clear sign of root rot, often caused by overwatering or poor drainage.

Identifying these signs early can make a huge difference in the revival of your dying monstera plant. It’s essential to remember that each sign may have several causes, and an accurate diagnosis is the first key step in the process.

Understanding why your Monstera is dying

Although the Monstera is known for being robust and resilient, it’s not entirely immune to neglect and environmental stress. The most common causes of a monstera dying are improper watering, inadequate light, and incorrect temperature.

Common Cause Description
Improper Watering Overwatering can lead to root rot, which is often a death sentence for plants. Conversely, underwatering can result in the plant drying out and wilting.
Inadequate Light Monsteras thrive in bright, indirect sunlight. If your Monstera is tucked away in a dark corner or is subjected to harsh, direct sunlight, it may start to decline.
Incorrect Temperature and Humidity It’s a tropical plant, so it thrives in warmer temperatures and higher humidity levels. If your indoor environment is too dry or too cold, your Monstera might start to suffer.

Watering could save your dying Monstera

If you have been neglecting your monstera, then watering will need to be your first port of call when trying to revive it. But double-check that it actually needs watering because overwatering can be a sudden cause of plant death too, surprisingly too much love isn’t great either!!

If your Monstera has developed dry and brown leaves and the soil is light and dry, chances are your plant definitely needs a watering. If you aren’t sure if your Monstera has too much or too little moisture in its soil, use a moisture meter to check.

And before you quickly give your dying plant a bucket load of water, hold off for a second as there are some special techniques that will help get your Monstera looking and feeling healthier.

How to soak your Monstera

Fill up a bucket with room temperature water and soak your monstera for around 20-30 minutes before letting it drip dry back in its pot and saucer. Then continue to water it little and often over the course of the next week or two before taking up a normal care routine once again. If you feel as though the root system is still pretty dry, you can soak for half an hour a few times in the first week to make sure that the moisture in the soil is increasing.

Soaking is super important when reviving a dying and neglected Monstera. It works a lot better than just giving it a lot of water as the water will run out into the saucer straight away and leave the root system just as dry. So you want to make sure that the whole soil is moist throughout.

Get your watering schedule working

To avoid over or underwatering your Monstera in future, there are a few methods you can take which will help prevent waterlogged or dry soil. Firstly, investing in a self-watering pot means that you can be sure that your Monstera is only getting the water it needs. We recommend this self-watering pot from Amazon.

We also recommend using terracotta pots rather than plastic ones as these let some of the water evaporate out of the sides, whereas plastic pots hold in all the moisture which can make overwatering affect your Monstera a lot more.

How often should you water a Monstera plant?

Generally speaking, a Monstera plant should be watered once a week. However, this can change based on various environmental factors. For instance, if your Monstera is in a dry environment, it might need more frequent watering. Conversely, if it resides in a humid space, it might require less.

The best way to know if you need to water is to check the soil. If the top two inches of soil are dry, it’s time to water your plant. Remember, Monstera plants are native to the rainforests of Central America, where they receive frequent, but not heavy, rainfall.

Healthy variegated monstera leaves

Healthy variegated monstera leaves

Help your Monstera’s leaves

It is also really important to not only focus on the roots when trying to revive your Monstera, but also giving the leaves some needed TLC. Because of the size of Monstera leaves, they are prone to build up dust pretty quickly.

To remove this build-up gently wipe down the leaves with soapy warm water. This is really important to allow the plant to photosynthesise fully again and also leaves them looking shiny and brighter.

It is also a good idea to give the leaves a once over to check for any pests or signs of further problems which we touch on a little more below.

Increase the humidity for your Monstera

Alongside watering, it is important that you try and increase the humidity for your Monstera to get it back to tip-top condition, they are a tropical plant after all!

Often our homes can have quite dry air, especially in the winter months where we often have the heating on for most of the day.

A lack of humidity in the air can cause the leaves to be a little limp and droop down. These are the best and easiest way to increase the humidity for your monstera:

  • Misting your Monstera’s leaves

    One of the simplest ways to increase the humidity for your houseplants is to mist them with a spray bottle a couple of times a week.

  • Use a Pebble tray

    Place your houseplants over a tray of pebbles with fresh water over the top. Over the day water from the tray will evaporate giving the plants above exactly what they’re looking for.

  • Give your monstera a shower

    To quickly raise the humidity and wash down your monstera of any long-standing dust, you can always give them a quick shower. Simply pop them in the shower and wash them down with lukewarm water, this will clean off the leaves and give the soil a good soaking.

  • Move your monstera to the bathroom

    If you’re lucky enough to have great lighting in your bathroom you can move your monstera in there to increase the humidity. The running water from your showers means your bathroom is probably one of the most humid in your home.

    We find using a humidity/ temperature meter can really help you decide where to best put your Monstera.

  • Invest in a humidifier

    They’re relatively affordable little devices and they make keeping a consistent humidity level so much easier. Most will allow you to place them on a timer so they run on a fixed schedule, and some will even have a built-in monitor so they automatically turn on and off to keep the humidity exactly where you want it.

    You can find our current favourite humidifier on Amazon here.

Check your Monstera’s environment

Whilst this can’t undo any of the damage caused to your Monstera already, making sure that your plants are in their ideal environment is important to help it regain strength and healthy growth.

  • Check the lighting conditions

    If your Monstera has been left near a window for long periods of time, it may be receiving too much direct sunshine (especially over the warmer months). If you spot bleached, burnt-like patches on the leaf then it may need to be moved further inside the room, away from the windows.

    If your plants were left in dark corners of the home/office, chances are it needs more light to thrive. You can tell this your monstera is not producing split leaves, and it stunted in growth. In this case, move it to a sunnier spot but be careful of direct sunshine – it’s all about the right balance.

    It’s important that you monitor the light levels across the day as your Monstera may be in a spot that only gets light in the morning, or receives very intense direct light in the afternoon. To monitor the light level, and to be sure your Monstera is getting the right amount, use a light meter.

  • Consider additional grow lights

    If your Monstera needs more light but you can’t move it to a better spot in your home, then we recommend buying a LED light to encourage new healthy growth. They can really help all of your plants during winter when light levels are much lower so are a great investment for every plant parent. We love this grow light from Amazon.

  • Check for heating/AC vents

    Radiators, heating vents or AC systems can be quite harmful to your Monstera as they create extreme temperatures and drafts. You want them to be close to natural sources of sunlight, but never directly below a vent or next to a radiator so it might be time to find a new spot for your Monstera.

    Ideally you want them to be in a spot with temperatures between 60-80 degrees Fahrenheit. Use a digital thermometer to keep an eye on temperature fluctuations.

Check for pests on your Monstera

One thing to look out for when giving the leaves a once over is a pest infestation. It can happen that pests such as mealybugs, spider mites, scale insects and more can take hold of your Monstera. If you do spot pests, this is not game over for your Monstera as there are some really simple ways to get rid of them!

First off we recommend wiping down the leaves with soapy warm water. We also always recommend giving the whole plant a shower. They have quite hardy leaves so can withstand the shower better than some other more delicate plants.

Make sure the shower isn’t on full pressure and you should be fine. Then it is time to replace the soil. Just be careful not to damage too much of the root system whilst you do this. Alongside these methods you can also treat your Monstera with neem oil to fight the infestation.

Make sure to check over your other plants in the room to see if any other plants have pests. Keep your infected plants a good distance away from any of your other plants as you don’t want the pests to spread.

Here’s a handy table to help you identify some common pests that may be causing issues for your plants, along with simple solutions to get them under control:

Pest Signs Solution
Spider Mites Yellow spots, tiny webs on the plants. Wipe leaves with soapy water or use a miticide.
Aphids Stunted growth, curling leaves, and sticky residue. Use insecticidal soap or introduce beneficial insects like ladybugs.
Mealybugs White cotton-like patches on the leaves or stems. Wipe with alcohol-soaked cotton swabs or use insecticidal soap.
Scale Insects Brown or black bumps on the leaves and stems. Scrape off gently with a soft brush and apply neem oil.

Monstera plant supported by a moss pole.

Monstera plant supported by a moss pole.

Give your Monstera a support

When Monstera plants become a little unhappy, they tend to droop down quite a lot and become quite straggly and unruly. To help strengthen your Monstera, you need to give it something to grow onto or a support stick that will hold it up.

The best option is using a moss pole. At first you will have to attach your Monstera to your moss pole using string or plant fasteners but over time, the new roots will support themselves on the moss pole and it will encourage growth upwards. Our Monstera loves this moss pole which is available on Amazon.

You may also choose to use support stakes to prop up your Monstera until it recovers and can support itself. These supports are great and will help your Monstera look more alive too!

Repot your Monstera into fresh soil

Another way to help revive your Monstera and return it to full health is to repot it into fresh soil. This wouldn’t be a good idea for the first week or two of trying to revive the plant as this may cause some shock so it is better to leave your Monstera for about two weeks of good care in an ideal light environment before repotting.

When you do replace the soil, make sure to use a high-quality potting mix that is especially designed for houseplants as this will give your Monstera the right balance of nutrients. We recommend Miracle Gro’s houseplant mix.

Make sure to gently rub all the old soil from the root system by running your fingers through it. Don’t be alarmed if some of the smaller roots come with the soil, this is natural and they will regrow pretty quickly. If you notice that some of the roots are rotted and dying, snip these away with some clean scissors.

If you are repotting your Monstera into a larger pot, make sure it is no more than 5cm larger in diameter. If you repot your Monstera into a pot that is a lot bigger, the roots will struggle to fill out the pot and stabilise the plant.

Do not fertilise your Monstera if it’s dying

There is some mixed opinion on whether fertilisation is a good idea or not when trying to revive your Monstera, but we steer clear of it for the first few weeks.

You don’t want to shock the plant into trying to produce rapid new growth so it is best to wait at least a month before adding in some water-based fertiliser. You want to make sure that the roots and soil are moist and your Monstera is in the right environment before fertilising.

Once your Monstera is starting to look a little healthier then you can start to think about fertilising. You can choose between liquid fertiliser or spikes that you pop into the soil. Our Monstera really love this liquid feed from Miracle Gro which is available on Amazon.


Reviving any of your houseplants can be difficult, especially if they have been neglected for long periods of time. But don’t give up on your Monstera as with some love and attention you should be able to revive it.

If you find yourself always forgetting to take care of your houseplants, try adding watering to your calendar every week or asking a family member or housemate to help you out.

Alternatively, it’s also worth looking into low-care houseplants as some really do thrive from being neglected. Don’t give up on your plants too quickly, they may look pretty dead but will actually start to grow again with the right care. So be patient, treat them well and they may reward you with new healthy leaves!

Fiddle and Thorn is a participant in the Amazon Services LLC Associates Program, an affiliate advertising program designed to provide a means for sites to earn advertising fees by advertising and linking to Amazon.com

Take our houseplant survey!

Quickly respond to our 30 second houseplant survey and get 75% off our Complete Houseplant Care eBook!

Take the Survey

No thanks…

How to revive a dying Fiddle Leaf Fig Tree

Last Updated: March 4, 2023

It can happen sometimes that we are too busy to give our Fiddle Leaf enough care, but don’t worry as there are some really simple things you can try to help nurse your Fiddle back to full health. Even if you think it is too late, it probably isn’t as Fiddles can come back to life even if all of their leaves are snipped off. It’s pretty incredible.

How proper watering can save your dying Fiddle Leaf Fig

If you have been neglecting your Fiddle Leaf, then watering will need to be your first port of call to prevent it from dying. But double-check that it actually needs watering because overwatering can be a sudden cause of plant death too, surprisingly too much love isn’t great either!! If your plant has developed dry and brown leaves and the soil is light and dry (you can check this using a moisture meter) chances are your plant definitely needs watering. But before you quickly give your dying Fiddle Leaf Fig a bucket load of water, hold off for a second as there are some special techniques that will help get your Fiddle looking and feeling healthier.

Fill up a bucket with room temperature water and soak your plant for around 30 minutes before letting it drip dry back in its pot and saucer. Then continue to water it little and often over the course of the next week or two before taking up a normal care routine once again. If you feel as though the root system is still pretty dry, you can soak for half an hour a few times in the first week to make sure that the moisture in the soil is increasing. Be careful when lifting your Fiddle as they can get pretty heavy, especially after being soaked for a good half an hour!

Soaking is super important when reviving a dying and neglected Fiddle Leaf. It works a lot better than just giving it a lot of water as the water will run out into the saucer straight away and leave the root system just as dry as it was before. So you want to make sure that the whole soil is moist throughout.

If you just can’t get on the right watering schedule it could be worth investing in a good quality self watering plant pot, these take all of the trouble out of the process and will make sure that your Fiddle isn’t resting in stagnant water – eliminating the risk of root rot or other watering based issues.

How plant maintenance can help revive your dying Fiddle Leaf

It is also really important to not only focus on the roots when trying to revive your dying Fiddle, but also giving the leaves some needed TLC. Because of the size of Fiddle Leaf Fig leaves, they are prone to build up dust pretty quickly. To remove this build-up gently wipe down the leaves with soapy warm water. This is really important to allow the plant to photosynthesise fully again and also leaves them looking shiny and brighter. Try to do this once a month as the leaves will quickly start looking quite dull in colour and a lot of dust does block out much-needed sunlight.

It is also a good idea to prune the dead leaves so that the plant can focus its nutrients on producing new healthy growth. Carefully cut away the dead leaves with clean sharp shears. Never pull or tug at the dead leaves as this can cause damage to the main plant which you don’t want to be doing when it is vulnerable (or even if it is healthy!).

It is also a good idea to give the leaves a once over to check for any pests or signs of further problems to prevent it from dying but we touch on this little more throughout the post.

Increasing humidity could save your Fiddle Leaf

Alongside watering, it is important that you try and increase the humidity for your Fiddle Leaf to get it back to tip-top condition and stop it from dying. Often our homes can have quite dry air, especially in the winter months where we often have the heating on for most of the day. A lack of humidity in the air can cause the leaves to be a little limp and droop down. Luckily increasing the humidity of your home is pretty easy, below are some of our suggestions.

Misting the Leaves

One of the simplest ways to increase the humidity for your houseplants is to mist them with a spray bottle a couple of times a week. You can pick up great amber glass spray bottles here, they’re great quality and a quick solution for humidity problems and can go a long way to reviving your dying plant.

Make a Pebble Tray

Place your houseplants over a tray of pebbles with fresh water over the top. Over the day water from the tray will evaporate giving the plants above exactly what they’re looking for.

Give your Fiddle Leaf a Shower

To quickly raise the humidity and wash down your Fiddle of any long-standing dust, you can always give them a quick shower. Simply pop them in the shower and wash them down with lukewarm water, this will clean off the leaves and give the soil a good soaking. Just make sure the water pressure isn’t on full and you should be good to go.

Move your Fiddle Leaf to the Bathroom

If you’re lucky enough to have great lighting in your bathroom you can move your dying Fiddle Leaf Fig in there to increase the humidity. The running hot water from your showers means your bathroom is probably one of the most humid in your home. This is a great passive option to help prevent your Fiddle from dying.

Invest in a humidifier

They’re relatively affordable little devices and they make keeping a consistent humidity level so much easier, this one is our personal favourite. Most will allow you to place them on a timer so they run on a fixed schedule, and some will even have a built-in monitor so they automatically turn on and off to keep the humidity exactly where you want it.

Want to know more about how to raise the humidity for your Fiddle Leaf and other houseplants? We have written a whole guide on this.

Make sure the environment is right can save your dying Fiddle Leaf Fig

Whilst this can’t undo any of the damage caused to the plant already, making sure that the plants are in their ideal environment is important to help it regain strength and healthy growth.

Check the Lighting Conditions

If your plant has been left near a window for long periods of time, it may be receiving too much direct sunshine (especially over the warmer months). If you spot bleached, burnt-like patches on the leaf then it may need to be moved further inside the room, away from the windows to prevent it from dying from this intense light.

If your dying Fiddle Leaf was left in dark corners of the home/office, chances are it needs more light to thrive. In this case, move it to a sunnier spot but be careful of direct sunshine – it’s all about the right balance. You can use a light meter to accurately determine how much light your plant will get in various spots in your home.

If you’re struggling to find a spot with better lighting or if you live in an area that doesn’t get a whole lot of natural light through the colder darker months, it could be worth looking into and investing in a quality grow light. These are a great year round solution and can come in handy for any propagation projects too.

Check for heating/AC vents

Radiators, heating vents or AC systems can be quite harmful to your Fiddle Leaf Fig tree as they create extreme temperatures and drafts. You want them to be close to natural sources of sunlight, but never directly below a vent or next to a radiator so it might be time to find a new spot for your tree to stop it from dying.

Check for pests

One thing to look out for when giving the leaves a once over is a pest infestation. It can happen that pests such as mealybugs, spider mites, scale insects and more can take hold of your Fiddle Leaf. If you do spot pests, this is not game over for your plant as there are some really simple ways to get rid of them and stop your Fiddle from dying from this infestation!

First off we recommend wiping down the leaves with soapy warm water. We also always try and give the whole plant a shower, but again be careful when lifting as they can be pretty heavy. They have quite hardy leaves so can withstand the shower better than some other more delicate plants. Make sure the shower isn’t on full pressure and you should be fine. Then it is time to replace the soil. Just be careful not to damage too much of the root system whilst you do this. Alongside these methods, you can also treat your dying Fiddle Leaf Fig tree with neem oil to fight the infestation.

Make sure to check over your other plants in the room to see if any other plants have pests. Keep your infected Fiddle a good distance away from any of your other plants as you don’t want the pests to spread.

Repotting can help save a dying Fiddle

Another way to give your Fiddle some love and prevent it from dying is to repot it into fresh soil. This wouldn’t be a good idea for the first week or two of trying to revive the plant as this may cause some shock so it is better to leave your tree for about two weeks of good care in an ideal light environment before repotting. Using a high-quality mix (like this one from Miracle Gro) will help give your Fiddle the right nutrients

When you do replace the soil, make sure to gently rub all the old soil from the root system by running your fingers through it. Don’t be alarmed if some of the smaller roots come with the soil, this is natural and they will regrow pretty quickly. If you notice that some of the roots are rotted and dying, snip these away with some clean scissors.

If you are repotting your plant into a larger pot, make sure it is no more than 5cm larger in diameter. If you repot your plant into a pot that is a lot bigger than the previous one, the roots will struggle to fill out the pot and stabilise the plant. When repotting, we also recommend switching from plastic pots to terracotta ones if you haven’t already. They allow some of the excess water to evaporate out of the sides which helps avoid root rot in future. Our plants love these terracotta pots.

Don’t use fertiliser on a dying Fiddle Leaf Fig

There is some mixed information on whether fertilisation is a good idea or not when trying to revive your dying Fiddle Leaf, but we always recommend you steer clear of it for the first few weeks. You don’t want to shock the plant into trying to produce rapid new growth so it is best to wait a bit before adding in some water-based fertiliser. You want to make sure that the roots and soil are moist and your plant is in the right environment before fertilising. When you think the time is right for your Fiddle to receive some fertiliser, stay well below the recommended amount for the time being.

Reviving any of your dying houseplants can often be difficult, especially if they have been neglected for long periods of time. If you find yourself always forgetting to take care of it, try adding watering to your calendar every week or asking a family member or housemate to lend you a hand. Alternatively, it’s also worth looking into low-care houseplants as some really do thrive from being neglected. But don’t give up on your plants too quickly, they may look like they are dying or already dead and past revival but will actually start to grow again with the right care. So be patient, treat them well and they may reward you with new healthy leaves!

Fiddle and Thorn is a participant in the Amazon Services LLC Associates Program, an affiliate advertising program designed to provide a means for sites to earn advertising fees by advertising and linking to Amazon.com

Take our houseplant survey!

Quickly respond to our 30 second houseplant survey and get 75% off our Complete Houseplant Care eBook!

Take the Survey

No thanks…