One of the most important parts about taking care of your houseplants is making sure you are watering correctly. Too much, too little or even watering in the wrong way can harm your plant, so it is worth getting it right. We hope our watering guide will help you understand your houseplants better and know what to look out for when it comes to watering them.
Understanding light levels
Direct light/ full sun
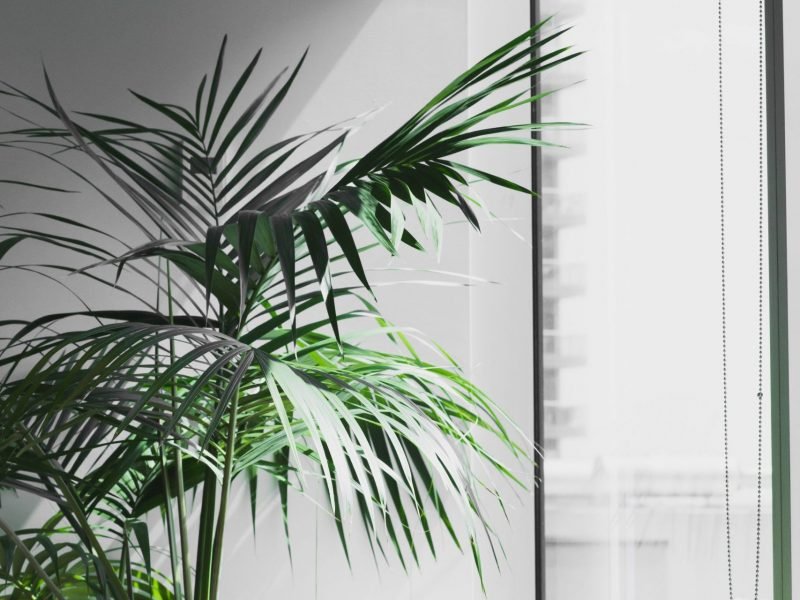
Most houseplants won’t do well with long periods of direct light each day. Direct sunlight will be found next to most windows but is especially prominent in south-facing windows. East and west-facing windows will receive some direct sunlight but only for a couple of hours each day. Be careful placing plants too close to the windows as many will suffer from leaf burn from the sun. Unfortunately once a leaf has been scorched there is no going back, so make sure that the plants nearest the windows can survive with some exposure to direct light.
It is also important to note that the levels of direct sunlight will change throughout the seasons. During summer, it may be better to move some of the plants away from the window as the intense light and heat may damage them. However, in winter you won’t need to worry as much as the sun is weaker and out for less of the day.
Indirect light
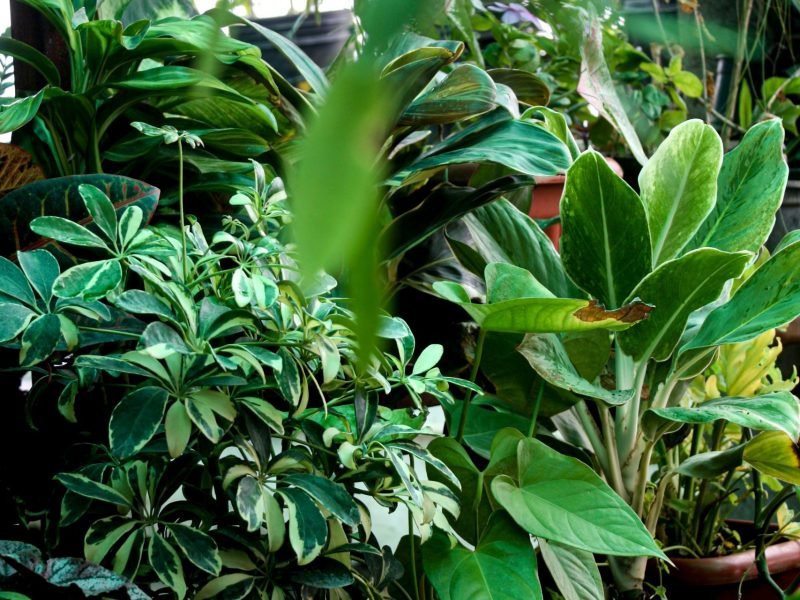
Areas with bright, but indirect light are ideal spots for the majority of houseplants. Whilst they still receive plenty of sunlight, there is no risk of overheating or leaf burn. Areas with indirect light won’t receive the direct sun rays but are still bright and sunny areas of your home. They are usually a little further away or to the side of a window.
Medium light levels
Plenty of houseplants still do well with medium light levels. Medium light will be found in homes with smaller windows or corners of an otherwise bright room. Make sure when buying a houseplant for those areas, that you do the research into their light requirements. Many plants will still grow in medium light levels even if it’s not their ideal position. This will, however, sometimes mean slower growth and a lower chance of blossoms forming.
Low light/ full shade
If your home tends to be quite shady, don’t think that artificial plants are your only option. There are plenty of plants that thrive in low light. The bonus is that these are often also quite low maintenance! It is important to do your research into low light plants as not all houseplants will survive in less than ideal environments.
One of the best things to invest in is a light monitor. It allows you to measure the light levels throughout the day in your home. It makes it super easy to choose the right plant for each location and you don’t need to worry about it getting too much or too little light. They are also super affordable and will up your houseplant game instantly!
Artificial Light
If you don’t get much natural light in your home, then an artificial light bulb might be the thing for you. It is especially helpful in winter to give your plants that little top up they will be asking for. It encourages flowering in certain plants and ensures your houseplants stay green all year round! Artificial grow lights are also great for propagation and will increase your chances of success.
Note that household light bulbs are not sufficient in stimulating houseplant growth and you need a fluorescent bulb. These can either be bought as lamps, or just as bulbs that you can put into your current lamps.
Signs of too much light
This may be slightly different in each individual plant type, but there are some general signs to look out for that indicate your plant is getting too much sunlight:
Leaves shrivelling up and drying out
Leaves losing their luscious green colour
Scorched, burnt areas on a leaf
Signs of not enough light
Growing houseplants that require bright light in low light areas can heavily impact their health so it is important to keep an eye out for some of these warning signs.
Weak and spindly growth
Slow or no growth
Yellowing or dropping leaves
New growth stays very small
Growing towards windows
You may notice that some of your plants start to grow sideways, reaching towards the window or light source. This is totally natural and isn’t always an indication that it needs more light. The best thing to do is rotate your plant weekly so that he growth stays even and balanced.
Summary
It is important to take into account sunlight levels throughout your home when looking for a new plant. Some houseplants can survive well in a range of light levels, whilst others can be quite sensitive. Once you have found the perfect spot for your houseplant, keep an eye on any changes that occur over the seasons as the light levels change as you may need to move it closer to or away from the window depending on how intense the light is.
If you are moving house, or simply want to change the spot that your plant is in, try and find a spot with similar conditions or your plant may need a little time to adjust. A few dropped leaves, or slower growth is normal if you change where your houseplant lives as it is just adjusting to its new environment and this initial change may have caused some stress.
Fiddle and Thorn is a participant in the Amazon Services LLC Associates Program, an affiliate advertising program designed to provide a means for sites to earn advertising fees by advertising and linking to Amazon.com
Kentia Palm Care: How to Keep Your Indoor Palm Thriving
August 22, 2023
Last Updated: October 16, 2023
Kentia Palm
Introduction to Kentia Palm Care
The Kentia Palm, known scientifically as Howea forsteriana, indoor palm hailed for its elegant appearance and relatively low-maintenance care requirements. Possessing an ability to adapt to varying light conditions, this Palm is a favorite amongst plant enthusiasts and interior designers alike. However, while it may be more forgiving than some other species, successful Kentia Palm care still requires knowledge of its specific needs and preferences which we will go through in this guide.
Origin and History of the Kentia Palm
The Kentia Palm hails from the Lord Howe Island, a small, serene island off the eastern coast of Australia. The tranquil environment and unique climate of this location make it an ideal natural habitat for the Kentia Palm.
It was during the Victorian era that the Kentia Palm made its journey from Australia to Europe. Seed exporters started exporting seeds of the Kentia Palm from Lord Howe Island to European nurseries. Once there, these seeds were carefully cultivated until they grew into the striking palms that adorned many Victorian homes.
Interestingly, the Kentia Palm remains a crucial part of the economy of Lord Howe Island, the place of its origin. The island is the world’s primary supplier of Kentia Palm seeds, which are gathered sustainably from natural stands and exported worldwide.
Kentia Palm Characteristics
This Palm is known for its elegant, arching fronds that can grow up to 3 meters long. The Kentia Palm has smooth, slender trunks that are often clustered together, giving the plant a sophisticated and lush appearance.
Additionally, this palm variety is slow-growing, which allows it to maintain its size for a long period. This characteristic makes it an excellent choice for indoor gardening, as it won’t outgrow its space quickly.
Here are some key characteristics of the Kentia Palm:
Height and Spread: Kentia Palms can reach up to 10 meters in height in their natural environment. However, when grown indoors, they usually reach a height between 1 to 3 meters. The spread of the plant is typically about 2 to 3 meters.
Foliage: The fronds of the Kentia Palm are feather-like and arching, with each frond having up to 100 leaflets. The color of the foliage is a deep green that doesn’t fade or yellow.
Growth Rate: This palm species is slow-growing. Indoor specimens may take several years to reach their full height, which is beneficial for homeowners who want a manageable indoor plant.
Flower and Fruit: In its natural habitat, the Kentia Palm produces small, white flowers that develop into red-orange fruits. However, when grown indoors, it rarely flowers or produces fruit.
Watering Your Kentia Palm the Right Way
The Howea forsteriana is a tropical plant that prefers its soil to remain consistently moist but never overly saturated. Overwatering can lead to root rot, a condition that can be detrimental to the plant’s health. However, on the other hand, underwatering can lead to dry, brown leaf tips, although this is a slower issue to progress compared to the impact of overwatering.
Frequency
The frequency of watering a Kentia Palm depends largely on the time of year and the environment.
As a general guide, during the warmer months, your Kentia Palm may need watering as frequently as once a week. However, in the cooler months, you can reduce watering to about every two weeks, maybe even every three. It’s essential to remember that these are only guidelines; the specific needs of your plant may vary so adjust your watering frequency depending on your plant.
Checking Moisture Levels
Before watering your plant, it’s a good idea to check the moisture levels in the soil. One easy way to do this is by inserting your finger about an inch deep into the soil. If the soil feels dry at this depth, it’s time to water your Kentia Palm. If it still feels moist, wait a day or two and check again. You can also use a chopstick instead of your finger, or a moisture meter for a more accurate and precise reading.
Water Quality
The quality of the water you use can also affect your Kentia Palm’s health. Tap water often contains chemicals, such as chlorine, which can harm your plant’s root system over time, particularly if you live in a hard water area. If possible, use filtered or distilled water to water your Kentia Palm. Alternatively, you can leave tap water out for 24 hours before using it to water your plant. This allows the chlorine to evaporate, making the water safer for your Kentia Palm’s roots.
Watering Method
When watering your Kentia Palm, aim to water it thoroughly. This means watering until you see water start to come out of the drainage holes at the bottom of the pot. Afterwards, allow the pot to drain fully before placing it back in its usual spot. This helps to ensure that the roots are getting enough water without becoming waterlogged.
Lighting Requirements for Kentia Palm
Most Kentia Palms thrive in medium to bright, indirect light. They are tolerant of lower light conditions, but their growth could be slower, smaller and a little more leggy.
Direct, intense sunlight can cause the leaves to scorch and brown, which is indicative of damage so this should be avoided in summer (you can get away with more direct light in winter as the sun is weaker).
Humidity and Temperature Needs for Your Kentia Palm
Native to the Lord Howe Island of Australia, the Kentia Palm is accustomed to a tropical climate. It flourishes in temperatures between 65 and 85 degrees Fahrenheit. However, it can tolerate a wider range, from as low as 55 degrees to as high as 95 degrees Fahrenheit.
Avoid low temperatures though as exposing your plant to temperatures below 55 degrees can lead to the browning and wilting of fronds.
On the topic of humidity, Kentia Palms prefer moderately humid conditions. However, one of the reasons for their popularity as houseplants is their adaptability to various humidity levels. They can survive in lower humidity environments often found in most indoor settings, but for optimal health and growth, a relative humidity level of 40-50% is ideal. Any lower than 40% and you may start to see brown leaf tips develop over time.
Here are some tips for maintaining the ideal climate for your Kentia Palm:
Keep your plant away from drafts, air conditioners, and heating vents. These can cause sudden changes in temperature.
Place your Kentia Palm in a room with a consistent temperature. Rapid fluctuations can lead to leaf damage.
To increase humidity, consider using a humidifier. Alternatively, place your pot on a tray of pebbles filled with water, ensuring the pot is above the water level. The evaporation will help to increase the humidity around your plant.
Misting your Kentia Palm is another way to increase humidity in summer. However, do this sparingly in winter to avoid the risk of fungal disease.
Fertilizing Your Kentia Palm for Optimal Growth
Generally, Kentia Palms should be fertilized during the growing seasons of spring and summer. The plant’s nutrient needs decrease during the non-growing seasons of fall and winter so you shouldn’t be fertilizing during this time.
A slow-release, balanced houseplant fertilizer with a ratio of 3:1:2 or 1:1:1 of nitrogen, phosphorus, and potassium respectively, is often recommended for Kentia Palms.
Nitrogen (N) – This nutrient promotes the growth of leaves and stems, giving the Kentia Palm its lush, green appearance.
Phosphorus (P) – Phosphorus aids in the development of roots and blooms, strengthening the plant’s overall structure and health.
Potassium (K) – Potassium boosts the plant’s overall health, improving disease resistance and water intake efficiency.
Pruning your Kentia Palm
When to Prune
Timing is key when it comes to pruning your Kentia Palm. Ideally, pruning should be done during the warmer months of the year, typically from spring to early summer. This is when the plant is in its active growing phase, allowing it to recover quickly from the pruning process.
What to Prune
When pruning your Kentia Palm, focus on removing the yellow, brown, or wilted leaves. This not only improves the plant’s overall appearance but also prevents the spread of possible diseases.
Avoid removing the green fronds unless they are overly large and blocking light to the lower parts of the plant. These leaves are important for photosynthesis, thus crucial for the plant’s health and growth.
How to Prune
Sanitize your pruning shears: Always start by sanitizing your tools to prevent the spread of diseases. You can do this by wiping the blades with rubbing alcohol or a solution of one part bleach to nine parts water.
Cut at the base: When removing a frond, make the cut as close to the base as possible. This helps prevent the development of stubs that can potentially harbor pests or diseases.
Be gentle: Kentia Palms are delicate plants. Avoid tearing or ripping the fronds, as this can cause unnecessary stress to the plant.
Pest and Disease Management for Kentia Palm
The Kentia Palm is known for being relatively resistant to pests and diseases. However, like any houseplant, it can still be susceptible to certain issues and we’ve actually had to say goodbye to a Kentia Palm due to pests so it’s something to make sure you are aware of.
Pest Management
The most common pests that might make your Kentia Palm their new home include spider mites, scale insects, and mealybugs. These tiny creatures can cause discoloration, spots, and curling on the leaves.
Spider mites: These pests are often found on the undersides of leaves. They suck plant sap, causing the leaves to develop yellow or brown spots. These can be a pain to get rid of so remove the worst affected leaves and treat with an insecticide frequently.
Scale insects: Scale insects attach themselves to the plant and feed on its sap, leading to yellowing leaves. These can be removed by wiping the leaves with a cloth dipped in soapy water or an insecticidal soap.
Mealybugs: These pests appear as white cottony masses on the leaves and stems. They can be controlled by dabbing the infested areas with a q-tip soaked in rubbing alcohol or using a neem oil spray.
Disease Management
Kentia Palms are less prone to diseases compared to other houseplants but they are not immune. The most common disease affecting Kentia Palms is root rot, often a result of overwatering.
Root rot is a fungal disease that leads to the decay of the roots, causing the plant to wilt and leaves to turn yellow or brown. To avoid root rot, ensure your Kentia Palm is planted in a well-draining soil and remove excess water from the saucer about 15 minutes after watering.
Another disease to look out for is leaf spot, which presents as brown or black spots on the leaves. This is often caused by bacteria or fungus and can be managed by reducing humidity around the plant and ensuring good air circulation.
Repotting Your Kentia Palm
Repotting a Kentia Palm is an essential practice for the plant’s health and growth but is quite commonly ignored by a lot of plant parents. Repotting allows the Kentia Palm to have access to fresh soil and more room for its roots to spread. However, it’s vital to remember that these palms prefer to be pot-bound and don’t require frequent repotting. Generally, it is only necessary to repot a Kentia Palm every two to three years.
Knowing When to Repot
It’s important to know the right time for repotting your Kentia Palm. One clear sign is when the roots start to become visible on the surface of the soil or poke out of the drainage holes at the bottom of the pot. Additionally, if your plant is growing slower than usual or shows signs of distress, such as yellowing leaves, it could need a larger pot. Inspect the root system to see if it is rootbound.
Step-by-step Guide to Repotting Your Kentia Palm
Choosing the Right Pot: Select a new container that is 2-3 inches larger in diameter than the current one.
Preparing the New Pot: Fill the new pot with a good quality potting mix, ideally one specifically designed for palms. Create a hole in the center, large enough to accommodate your palm’s root ball.
Removing the Palm: Gently loosen the soil around the edges of the current pot and carefully remove the palm, ensuring not to damage the roots.
Transferring the Palm: Place your Kentia Palm in the hole you’ve prepared in the new pot. Make sure the top of the root ball is level with the soil surface.
Finishing Up: Fill the remaining space in the pot with soil, patting it down gently around the base of the palm. Water the plant thoroughly.
Kentia Palm Toxicity
The Kentia Palm is considered safe and non-toxic to pets and humans.
However, it is important to note that, like any other plant, it can cause mild digestive upset if ingested in large quantities. This is not due to toxic compounds but rather to the fact that our bodies, as well as those of our pets, are not designed to digest large amounts of plant material.
Cleaning your Palm
The routine cleaning of your Kentia palm is an essential task that should not be overlooked. This task not only improves the aesthetic appeal of your houseplant but also helps in maintaining its health. Dust can hinder the plant’s ability to absorb sunlight, a crucial element for photosynthesis, and can also attract pests.
Start the cleaning process by simply using a soft cloth or sponge. It’s important to be gentle to avoid causing damage to the fronds. Always remember to work from the base of the leaf to the tip to prevent tearing and place your other hand at the back of the leaf for support.
When cleaning your Kentia palm, avoid using any form of leaf shine products. These products can block the plant’s stomata (tiny pores), impeding its ability to breathe and carry out photosynthesis.
It is also beneficial to occasionally give your Kentia palm a gentle shower. This can be accomplished by taking the plant to a location where it can be safely drenched, such as an outdoor space, a sink, or a bathtub. Use tepid water and allow the plant to drain thoroughly before returning it to its original location.
Kentia Palm FAQs
How big do Kentia Palms get?
When grown indoors, Kentia Palms can reach 2-4 meters (6-13 feet) in height.
How quickly do Kentia Palms grow?
Kentia Palms are quite slow growing and it can take many years for them to fully mature. However, the perk of this is that they won’t outgrow the space very quickly and you don’t need to worry about repotting each year.
How often should I water my Kentia Palm?
You want to water your Kentia Palm moderately, about once a week during summer and less during winter. They don’t like to have super dry soil but also won’t cope well with soggy soil as that can quickly cause root rot.
How much sunlight do Kentia Palms need?
Kentia Palms thrive in bright but indirect sunlight. Although they can adapt to lower light areas, growth will be slower.
Are Kentia Palms toxic?
Kentia Palms are completely safe and non-toxic making them perfect for every home.
Common Problems with your Kentia Palm
Why are leaf tips on my Kentia Palm turning brown?
If you notice that your Kentia Palm’s leaf tips are turning crispy brown, this is most likely due to underwatering which is drying out the leaves. Check the moisture in the soil and water your palm more regularly. Remember Kentia Palms don’t like to dry out completely in between waterings.
Why are some of the leaves on my Kentia Palm turning yellow?
Yellowing leaves on Kentia Palms is most often caused by root rot meaning you are overwatering your palm. Replace the soil if it is waterlogged and water less frequently. Find out more in our post about yellow Kentia Palm leaves.
My Kentia Palm is unstable
Overwatering can affect the root system which will mean your Kentia Palm is unable to stand upright. The best option is to stop watering as much for a while. If the problem persists, try taking your palm out of the pot and replacing the soil.
Fiddle and Thorn is a participant in the Amazon Services LLC Associates Program, an affiliate advertising program designed to provide a means for sites to earn advertising fees by advertising and linking to Amazon.com
Tips for keeping your houseplants alive this winter
May 2, 2022
Last Updated: May 2, 2022
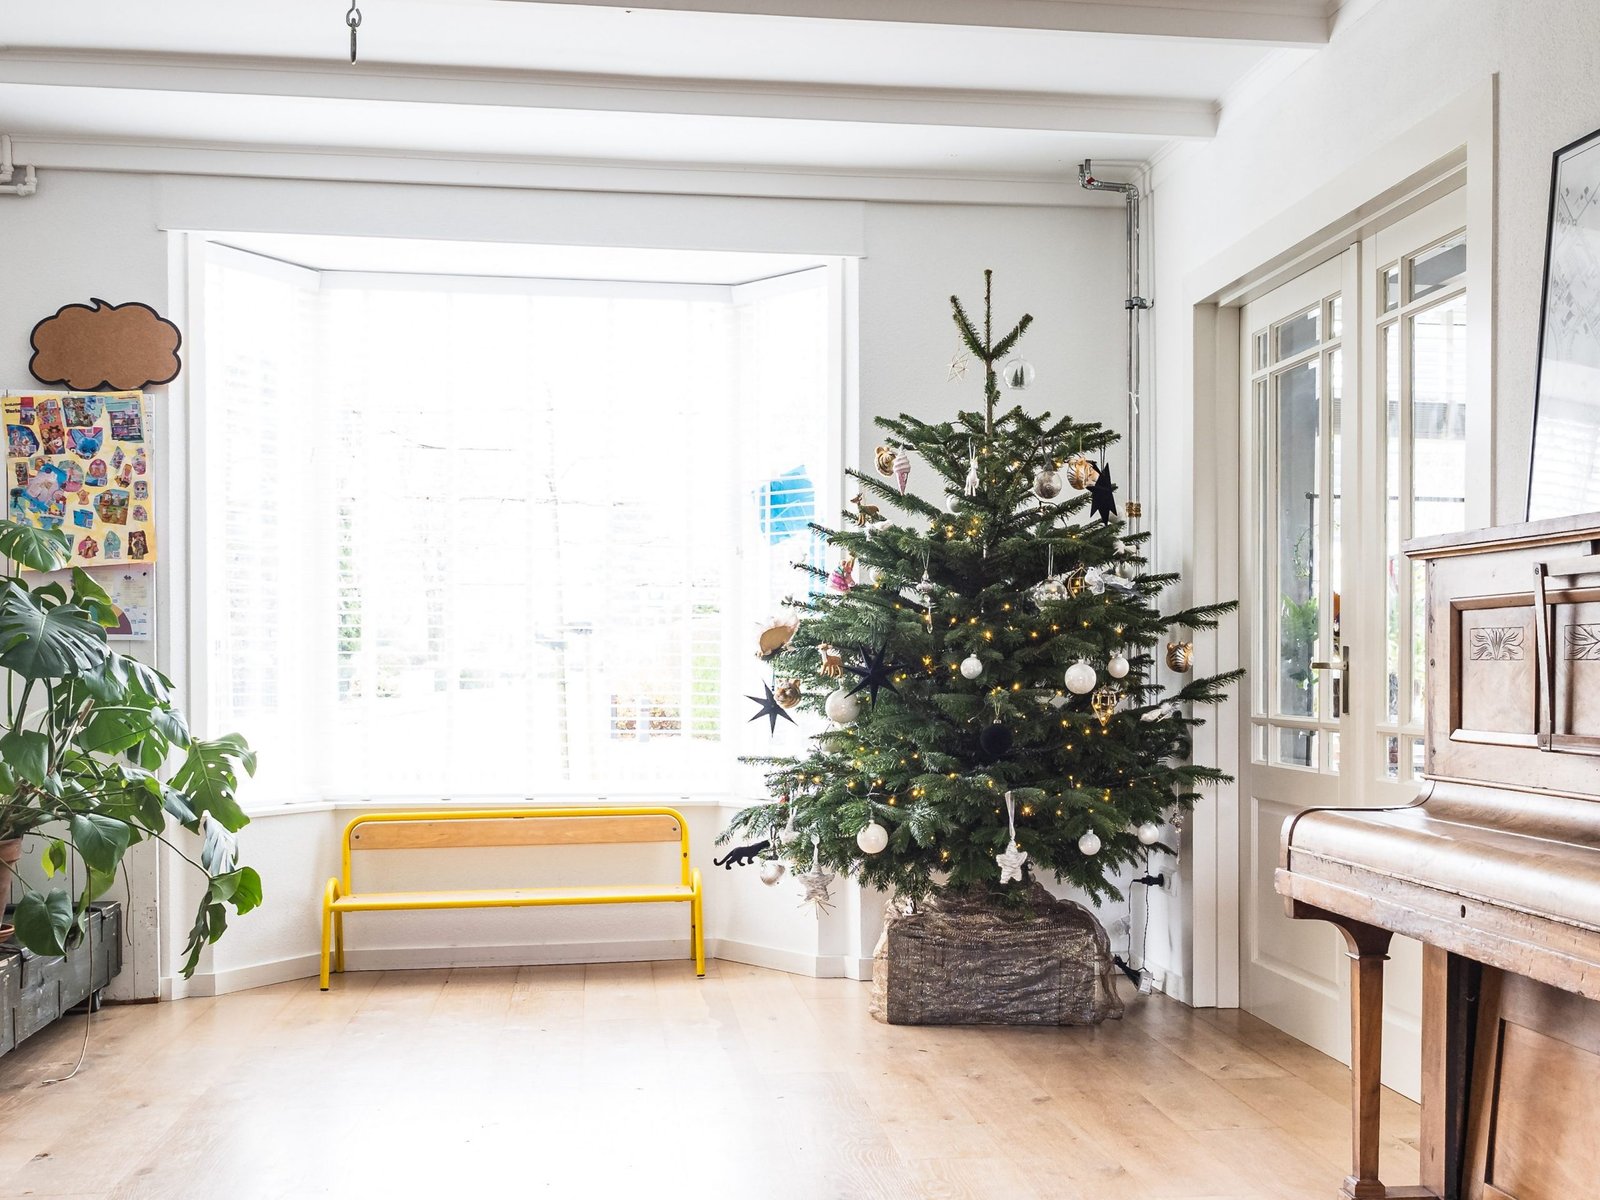
The colder darker months of winter can sometimes be difficult for your houseplants and some may not survive if in the wrong environment or given the wrong care. Below are some of our top tips to help you keep your houseplants happy and healthy over the winter months.
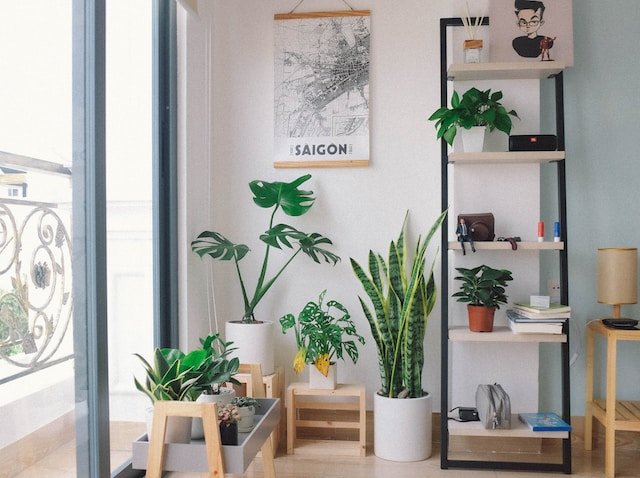
Move your plants closer to the window
Over the winter months, as the days get shorter, you want to maximise the amount of light that your houseplants are receiving. For plants that thrive in bright light, we recommend trying to move them to a spot a little closer to the window. Don’t worry as much about leaf burn as the sun is a lot weaker over winter.
Make sure that you check the light levels needed for each plant before moving them around too much as it can cause stress to your plant (yes humans aren’t the only ones who find moving house stressful).
Check windows and doors for drafts
Before moving your plants closer to the window, it’s important to check that there are no drafts of cold air coming through the cracks. Although fresh air is good for your plants, they will really struggle being exposed to the cold air from outside for long periods of time, especially at night where the temperature will really drop.
Move away from radiators or heating vents
Similarly to drafty windows and doors, you want to make sure to move your plants away from your radiators and heating vents. Over winter they will be on a lot more and the dry warm air can really harm your plants if they are right next to the radiator. A metre or so away is a good distance and should ensure that it doesn’t burn the leaves.
Raise the humidity levels
Over winter, when you have the heating on most days, the air in your home will become really dry. In order to keep your houseplants alive over winter, you’ll need to raise the humidity to combat the dry air. Luckily it can be pretty simple to increase the humidity for your houseplants over winter, here are our top tips:
Misting the leaves
One of the simplest ways to increase the humidity for your houseplants is to mist them with a spray bottle a couple of times a week. We recommend doing this in the mornings to give enough time for the water to evaporate before nightfall where excess water can cause the leaves to rot.
Pebble tray
Place your houseplants over a tray of pebbles with fresh water over the top. Over the day water from the tray will evaporate giving your plant exactly what they’re looking for.
Give your plants a shower
To quickly raise the humidity and wash down your plant of any long-standing dust, you can always give them a quick shower. Simply pop them in the shower and wash them down with lukewarm water, this will clean off the leaves and give the soil a good soaking. You will want to keep the water pressure fairly low so you don’t cause any further damage to the leaves or stems.
Move your plants to the bathroom
If you’re lucky enough to have great lighting in your bathroom you can move your humidity-loving houseplants in there to increase the humidity. The running water from your showers means your bathroom is probably one of the most humid in your home and a great place for your houseplants to thrive in.
Buy a humidifier
They’re relatively affordable little devices and they make keeping a consistent humidity level so much easier. Most will allow you to place them on a timer so they run on a fixed schedule, and some will even have a built-in monitor so they automatically turn on and off to keep the humidity exactly where you want it.
Want to know more about how to raise the humidity for your houseplants? We have written a whole guide on this.
Water your houseplants less
One of the main things to take into consideration when caring for your houseplants over winter is to keep an eye out on the amount you are watering. On average your houseplants will need less water than in summer but this will fluctuate depending on how dry the air is from the heating.
Make sure to check the moisture in the soil before you water your plants. There are two really easy ways to make sure that they definitely need water. First check the moisture at the top of the soil, if it is still damp then wait a few days before watering again. You can also lift up your plants to check the weight of the plant before and after watering (probably best to only do this for smaller plants to avoid injuries). You will then start to be able to gauge how heavy the soil is when they are in need of water.
Our comprehensive (and rather good looking) eBook that will teach you everything you need to know to successfully care for, and maintain your houseplants!
Although this won’t apply for all houseplants, as a rule we tend to steer clear of all fertiliser over autumn and winter. The best time to fertilise is in spring just before the growth period. So this gives you one less thing to think about.
Make use of available light
Moving plants closer to the windows in winter is one of the ways to maximise on the reduced amount of light over winter, but it’s not the only way. Cleaning your windows regularly allows for more sunlight to pass through and reach your plants so make sure to keep your window panes clean. Another method we use to maximise on the light over winter is dusting our houseplant’s leaves. Although this is best practice to do all year around, make sure you don’t forget to do it over winter as a build up of dust stops the sunlight getting to the leaves meaning they cant photosynthesise. Use a cloth with warm water (and a bit of soap if needed) and this should do the job.
Use artificial light
If your home doesn’t get much sunlight over winter and your plants seem to be struggling to adjust, then it might be worth investing in a grow light to give them an extra boost. They encourage flowering in certain plants and ensures your houseplants stay green all year round!
Artificial grow lights are also great for propagation and will increase your chances of success in winter. Note that normal light bulbs are not sufficient in stimulating houseplant growth and you need a fluorescent bulb. These can either be bought as lamps or just as bulbs that you can put into your current lamps.
Leave the repotting until spring
Another thing to avoid doing over winter is repot your plant. Growth slows when the temperature and light levels drop so you don’t need to worry about your plant outgrowing its pot until spring. You don’t want your houseplant going through any further stress by rehoming it as the slow growth means it won’t take to its new pot quickly and could lead to the plant becoming unstable.
Summary
By following these tips you should be able to keep your plants happy and healthy over winter. Don’t worry if growth slows or becomes a bit leggy, this is totally normal. The main thing is to maximise on the light that you do get in your home and keep an eye on watering and root rot.
Fiddle and Thorn is a participant in the Amazon Services LLC Associates Program, an affiliate advertising program designed to provide a means for sites to earn advertising fees by advertising and linking to Amazon.com
There are two things to remember when caring for a Jade Plant. Firstly, they love sunshine and can’t get enough of it (be wary of hotspots though). This makes them a great plant for that sunny spot many of your other houseplants might not have been able to handle. The second thing to remember is that they have very delicate roots so are very sensitive to root rot. Water sparingly and make sure that the pot and soil have good drainage.
To learn more about what your Jade Plant needs outside of water and light, you’ll find everything you need to know below…
Detailed Jade Plant Care
Jade Plants need full sun
It is important that your Jade Plant gets at least a few hours of direct sunlight each day. If you are lucky enough to have a south-facing window in your home, we definitely recommend placing them near that to maximise the exposure each day.
Good drainage is vital
Jade Plants like it if the soil is moist but not damp and they hate sitting in water. This means you need to ensure your pot has good drainage holes and you have added perlite into the soil mix. During winter, you need to reduce the amount of water as this can easily lead to root rot in colder temperatures.
Keep the leaves of your Jade Plant dry as you water
It is important that you do not splash the leaves whilst watering your Jade Plant as this can lead them to rot so make sure to water directly into the soil from a narrow spout.
Jade Plants prefer warmer temperatures
Although they will survive in slightly cooler homes, Jade Plants thrive best in environments at or above room temperature. Don’t worry if your room sometimes drops below 10°C in winter as your Jade Plant will still be able to survive, but growth will be minimal.
Low humidity levels are best for Jade Plants
Jade Plants thrive best at humidity levels of around 30%-50%. Never mist your Jade Plant as they need their leaves to be dry to avoid rot. You can find out more about humidity levels and percentages in our humidity guide.
Use a water soluble fertiliser
Throughout the warmer months of spring and summer you may want to fertilise your Jade Plant to encourage growth. We recommend using a weak water-soluble fertiliser once a month during the growth period, and none at all during autumn and winter.
Jade Plants are sensitive to tap water salts
We recommend you filter the water for your Jade Plant if you live in a hard water area. This is because they can be quite sensitive to salts that are in your tap water.
They don’t mind being a little pot bound
Frequently repotting your Jade Plant is not a necessity, they won’t suffer too much by being root bound so you might only need to repot every few years or so. When you do though, make sure you repot in spring so it can settle into its new home during the warmer months.
Jade Plants can flower if neglected
If you do want your Jade Plant to produce flowers, do not repot too often so that the plant becomes quite root bound and keep the soil quite dry. This will encourage the plant to produce little white flowers.
Propagating your Jade Plant couldn’t be easier
You can propagate a Jade Plant straight from a leaf cutting. Place them straight into a cacti or succulent potting mix and after a few weeks they should start to produce little roots and grow into a mature new mother plant.
Keep your Jade Plant away from your pets
Jade Plants are toxic to both humans and pets so it is important you keep them away from small children as well as your dogs and cats.
Jade Plant Care FAQs
Are Jade Plants easy to care for?
Jade Plants are perfect beginner houseplants as they couldn’t be easier to care for. Adaptable to most homes, Jade Plants don’t need much tending to and thrive from actually being neglected.
How often should I water my Jade Plant?
Jade Plants hate having soggy soil so you want to make sure that the potting mix has time to full dry out between waterings. Overwatering can quickly cause root rot as they have such a delicate root system.
Can Jade Plants tolerate full sun?
Yes, in fact Jade Plants need plenty of sunlight to thrive and are one of the few plants that love direct sunlight.
Are Jade Plants toxic?
Jade Plants are toxic so you want to keep your pets and children away from them if they are likely to try to nibble at the leaves.
Common Issues for Jade Plants
Although the requirements for taking care of a Jade Plant are quite clear, this doesn’t necessarily mean it always works out in practice. There are quite a few common issues that occur so its important to know the warning signs and act quickly.
Why are the leaves on my Jade Plant dropping?
If you notice that your Jade Plant is losing quite a few leaves, this is often an indication that your plant is thirsty. Increase the watering a little (making sure there is sufficient drainage) but be careful not to overcompensate as too much water can cause root rot.
Why are the leaves on my Jade Plant shrivelling?
Shrivelled, dry leaves on a Jade Plant are a sign that it is not receiving enough water. Increase the watering a little (making sure there is sufficient drainage) but be careful not to overcompensate as too much water can cause root rot.
Why are my Jade Plant’s leaves turning brown?
If there are light brown spots or patches on the leaves of your Jade Plant, it may be due to underwatering. If there are dark brown, squidgy leaves, it may be overwatering. Check the moisture in the soil and adjust your watering schedule accordingly.
Why are the leaves on my Jade Plant squishy?
Squishy Jade Plant leaves are an indication that you have been overwatering, or there is not enough drainage in your pot. Make sure you have added perlite to the potting mix and hold off on the watering for a while.
Fiddle and Thorn is a participant in the Amazon Services LLC Associates Program, an affiliate advertising program designed to provide a means for sites to earn advertising fees by advertising and linking to Amazon.com
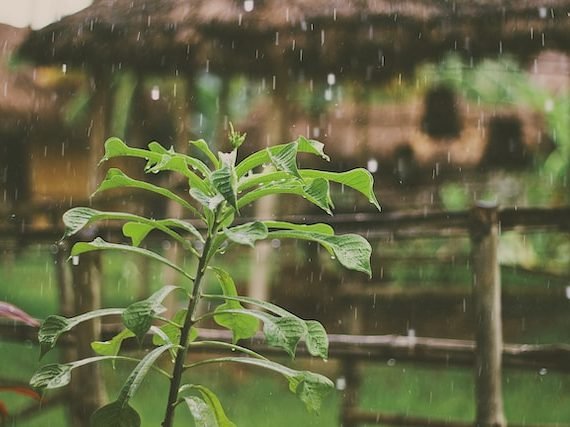
Why should you consider using rainwater for your houseplants? What are the pros and cons, and how do you ensure its safety? How do you even collect and store rainwater at home? We’re going to go through all of this and more below…
As it turns out, rainwater can be much more nourishing for your houseplants than your ordinary tap water.
Natural Nutrient Boost
Rainwater is naturally soft and free of chlorine, fluoride, and other chemicals typically found in tap water. But besides being pure, it is also enriched with trace elements and nutrients from the atmosphere.
Perfect pH Balance
Rainwater typically lands in the sweet spot of a pH of around 6.0, which is mildly acidic, making it perfect for the majority of houseplants.
This helps to maintain your plants’ health by promoting nutrient uptake from the soil, leading to stronger, healthier plants.
Keeps Pests at Bay
When plants are stressed due to inadequate or poor-quality water, they become an easy target for pests.
By watering with rainwater, you’re providing them the high-quality hydration they need, therefore reducing their susceptibility to pests.
Water Conservation
By choosing to use rainwater, you’re also playing your part in conserving our planet’s precious water resources. You are also reducing your water bill and although you probably won’t notice a big difference month to month, over time, these little savings here and there could add up.
The Drawbacks of Rainwater for Houseplants
While rainwater often serves as an excellent hydration source for your houseplants, it’s not always the best thing to use.
Possibility of Contaminants
Rainwater can contain all sorts of contaminants, especially in urban areas with high pollution. As rain falls from the sky, it can pick up pollutants like soot, dust, and chemicals.
Could these contaminants harm your precious houseplants? Potentially, but it’s largely dependent on the specifics of your location and weather conditions.
Mosquito Breeding Ground
Rainwater, especially when stored improperly, can attract unwanted pests like mosquitoes which can be a bit of a nuisance.
Filtering Rainwater: Ensuring Quality for Your Houseplants
With well-filtered rainwater, accumulator contaminants become less of a problem and can deliver healthier water to our plants.
The Basics of Filtering Rainwater
Filtering rainwater is not a complicated process but it’s important to note that it can be as simple or advanced as you want. At its most basic, filtering rainwater involves running the collected water through one or more barriers to remove debris and additional particulates.
Types of Filters
Screen Filters: These are the simplest filters which just catch larger debris like leaves and insects.
Sediment Filters: These take it a step further and eliminate not only larger particles but also finer sediment like dust and pollen.
Activated Carbon Filters: On to more advanced territory, these target chemical contaminants, bad odors, and improve the taste of water.
Ceramic Filters: These provide excellent filtration down to a microbial level. They’re typically combined with activated carbon for a comprehensive filtering solution.
Choosing the Right Filter
A lot of factors come into play when choosing a filter. Considering the specific needs of your houseplants and the quality of collected rainwater will lead towards making the right choice.
Maybe a screen filter will suffice, or perhaps you need the added assurance of an activated carbon filter.
Either way, investing in a good filter system is a critical step to ensuring the health of your houseplants using rainwater.
Changing and Maintaining Filters Regularly
How long it last is largely dependent on regular maintenance as a clogged filter won’t be great for your houseplants so make sure that it’s clean and free from debris.
Also, replace cartridges as recommended by the manufacturer.
Harvesting Rainwater: Tips for Collecting and Storing
A Simple DIY Approach to Rainwater Harvesting
While there are advanced systems available for purchase, a basic rain barrel or even a simple bucket can be a great starting point.
Catch the rainwater using a clean container that has been properly placed beneath your home’s downspouts. Just ensure the container is removed once filled to avoid creating a breeding ground for mosquitoes.
Note: it’s important to keep the collected water covered and use it within a few days.
Advanced Rainwater Collection Systems
If you’re looking to step up your rainwater harvesting game, there are a multitude of advanced systems available on the market.
These systems often come equipped with filtration units, pumps, and covered storage tanks – ensuring you always have a stock of high-quality rainwater ready for your houseplants.
Storing Rainwater Safely and Effectively
Always store your collected rainwater in a cool, dark place to deter the growth of algae. Where possible, aim to use stored rainwater within a week of collection.
Using older water for plants, especially those sensitive to bacterial growth, could be detrimental.
Remember: While storing, keep the water containers tightly sealed to avoid mosquito breeding and obliterate any chances of contamination.
Sustainable Materials for Rainwater Collection
Opt for containers made of recycled materials, or better yet, repurpose something you already have at home. This not only saves you money but also helps reduce waste.
Rainwater vs. Tap Water: Which is Better for Houseplants?
Benefits of Tap Water for Houseplants
Tap water is, without a doubt, the more convenient option. With ready access straight from your taps, you’re never left wanting for supply.
Additionally, many municipal water supplies contain fluoride and chlorine, both of which (at the right levels) can protect your houseplants from disease.
Drawbacks of Tap Water
On the flip side, though, tap water often contains a high mineral content. These can lead to build-up in your pot soil, adversely affecting your plant’s health over time.
Additionally, the pH levels of tap water can vary significantly, which might not be ideal for all houseplants.
So, Rainwater or Tap Water?
This is something only you can decide. It will help if you consider your local climate, the type of houseplants you are growing, and their specific needs. There’s no one-size-fits-all solution, but we find that a balanced approach often yields the best results.
Perhaps alternating between tap water and rainwater could give your plants a good mix of convenience, natural nutrients, and disease protection.
Watering Techniques: Best Practices for Using Rainwater
Timing is Crucial
Timing is everything when it comes to watering your plants. You don’t want to drown them or let them dry out. The best time to water most houseplants is in the first half of the day your plant has time to adjust before it gets cooler at night.
Experiment with your plants and see what works best for them, but remember, overwatering is often more harmful than underwatering.
Temperature Matters
Just as important as timing is the temperature of the water. Plants, like us, tend not to respond well to extreme temperature changes.
So allow the rainwater to reach room temperature before using it. You don’t want to shock your plant’s root system with cold water straight from the rain barrel.
Adjust the Amount
Always research the specific water needs of your houseplants to ensure you’re not over or under watering them. Some plants thrive on light, regular watering, while others prefer their soil to dry out completely between waterings.
Beware of Direct Application
Avoid watering the leaves of your houseplants directly. Moist leaves can harbor bacteria and fungus, potentially causing your plant to become sick.
Aim for the soil, or if your plant has a watering hole at the bottom of its pot, water there instead.
Using a narrow spouted watering can is a great way to avoid splashing the leaves and you can pour the water directly onto the soil.
Watering Methods
Several methods can be used to water your houseplants with rainwater, including bottom watering, top watering, and misting.
Bottom watering, the process of filling the catch tray of your pot to let the plant drink from below, is a great method for ensuring the water really gets to the roots of your plants.
Top watering, the more traditional method of pouring water onto the surface of the soil, is often faster and more convenient and misting is commonly used for ferns and other humidity-loving houseplants,
Common Mistakes: Pitfalls to Avoid When Using Rainwater
Not Testing Rainwater Quality
One common mistake is not testing the quality of the collected rainwater. But why does this matter? Well, this helps to avoid giving your houseplants water that contains pollutants, bacteria, or harmful substances that could affect their health.
Therefore, it’s crucial to routinely check for contaminants, pH level and temperature of your collected rainwater. If there are any issues, consider filtering or purifying the water before use.
Improper Storage of Collected Rainwater
Failing to store collected rainwater correctly is another common pitfall. It’s easy to think that once you’ve collected the rainwater, you’re done. However, inadequate storage conditions can encourage the growth of algae and mold, and may even serve as a breeding ground for mosquitoes.
Always ensure that your rainwater storage containers are cleaned regularly, covered properly and kept in a cool, dark place. This not only keeps your water fresh but also ensures it is safe for your houseplants.
Misunderstanding Your Plant’s Watering Needs
You may think all plants require the same amount of water, but this is a common misconception. Different plants have different watering needs, depending on their species, size, growing conditions, and the season. Too much or too little water can be detrimental to their growth.
Frequently Asked Questions
Is rainwater safe for all houseplants?
Generally speaking, rainwater is an excellent addition to most houseplants’ care routine, due to its ideal pH level and the presence of natural nutrients. However, every plant has its unique needs, so it’s vital to understand your plant’s specific requirements.
What is the best method for collecting rainwater?
The best method depends heavily on your local climate, what resources you have at hand, and how much effort you’re willing to invest in the process.
It can be as simple as placing a clean bucket outside, or as advanced as installing a dedicated rainwater harvesting system.
How often should I water my plants with rainwater?
Many factors influence how often you should water your houseplants, such as the type of the plant, the size of the pot, the type of soil, the time of year, and even the indoor temperature and humidity.
Be sure to avoid over-watering, as this can lead to several issues like root rot.
Can I use rainwater straight from the collection point for my plants?
While rainwater is usually cleaner than tap water, it could still carry contaminants, depending on your geographical location and the air quality.
Therefore, it is always a good idea to filter the collected rainwater before using it for your houseplants.
What can I do if I want to use rainwater, but live in a dry climate?
Even if you live in a dry but humid climate, consider getting a dehumidifier. Not only will it make your indoor environment more comfortable, but you can also use the water collected in the dehumidifier for your plants.
Fiddle and Thorn is a participant in the Amazon Services LLC Associates Program, an affiliate advertising program designed to provide a means for sites to earn advertising fees by advertising and linking to Amazon.com