Brown leaves on a Kentia Palm plant

Plant Care Guides

Find out how to care for all of your plants!

Brown leaves on a Kentia Palm plant

Plant Care Guides

Find out how to care for all of your plants!

Brown leaves on a Kentia Palm plant

Plant Care Guides

Find out how to care for all of your plants!

The Complete Guide to Pinstripe Calathea Care

Last Updated: October 16, 2023

Pinstripe Calathea

Pinstripe Calathea

Introduction to the Pinstripe Calathea

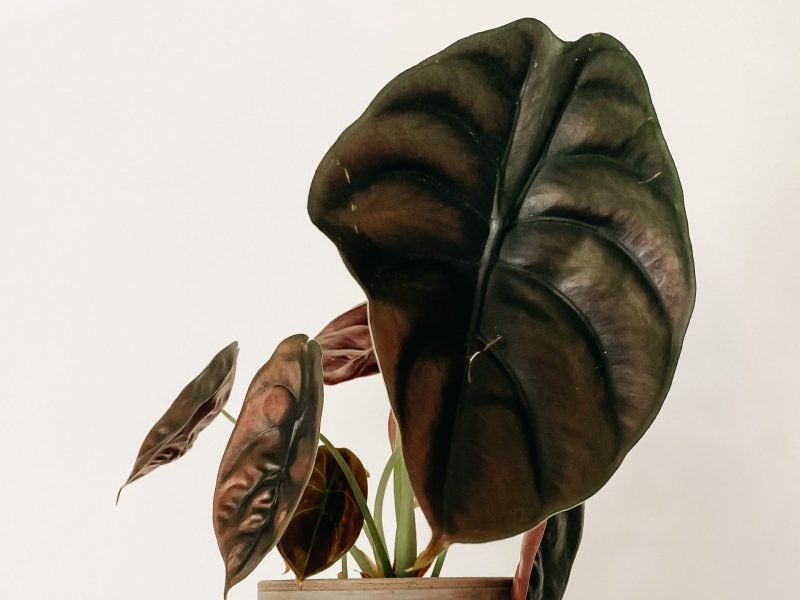
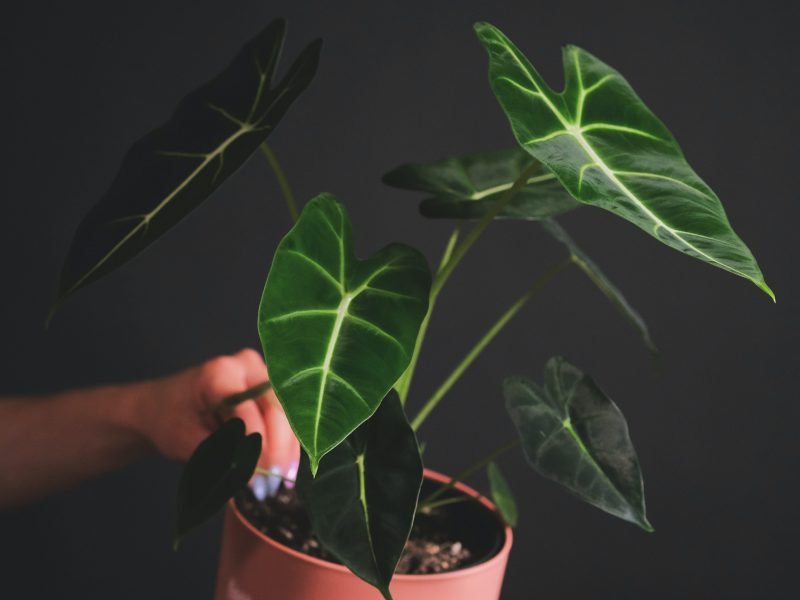
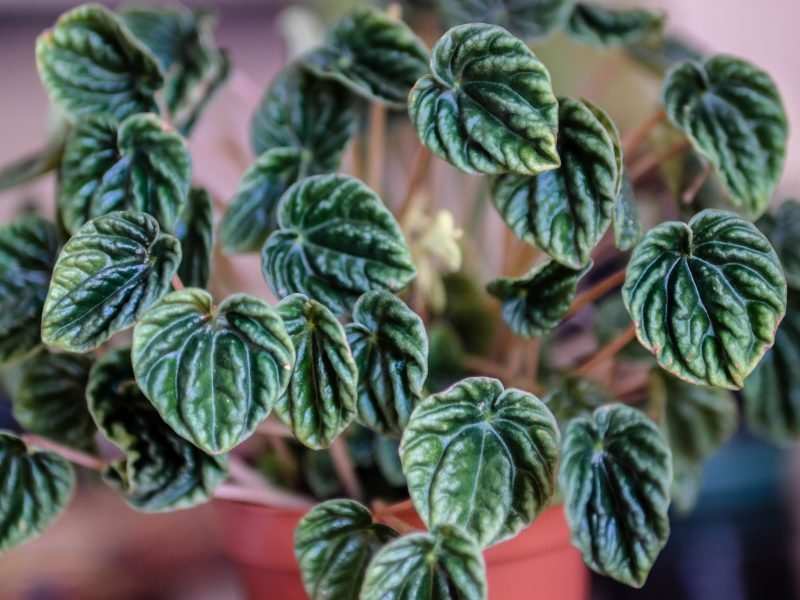
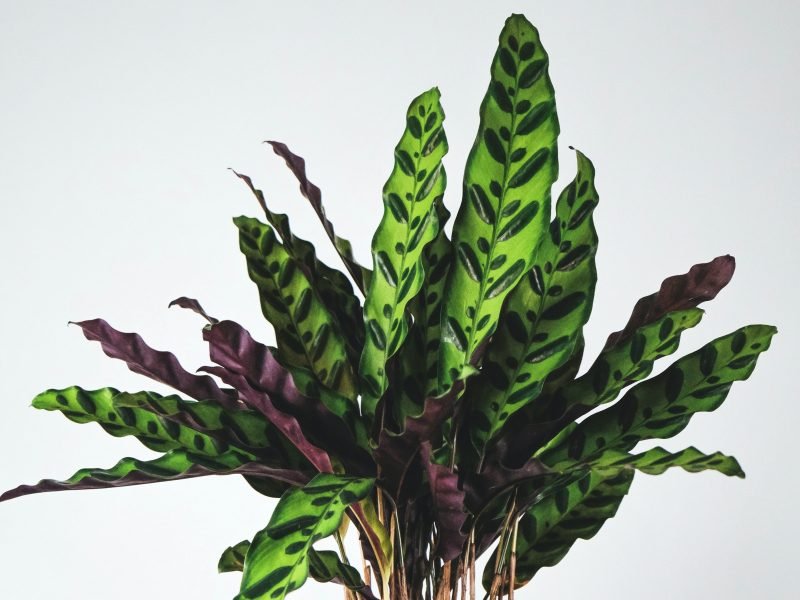
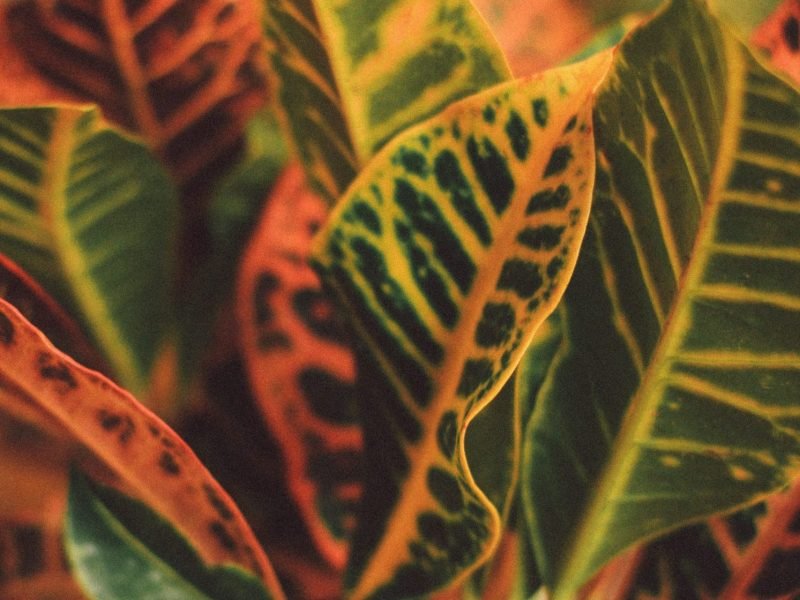
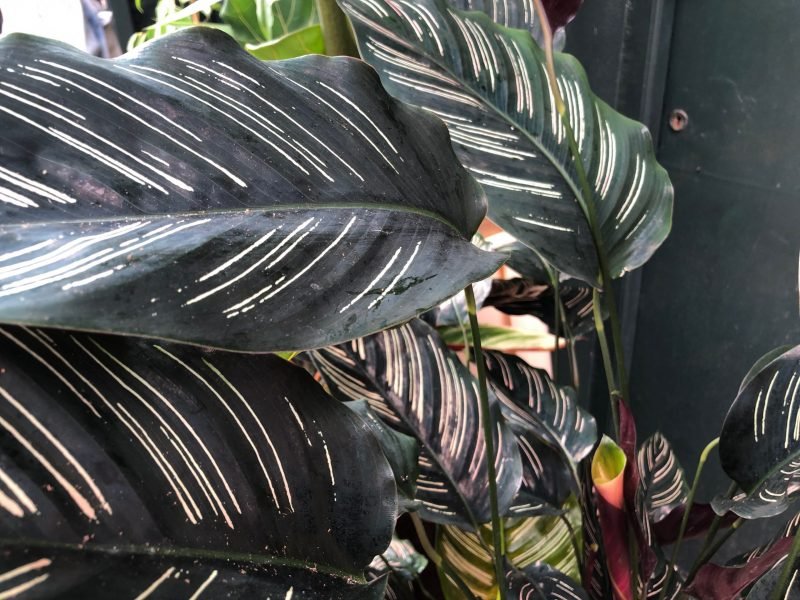
The Pinstripe Calathea, scientifically known as Calathea ornata, is an eye-catching tropical plant native to South America, particularly Colombia and Venezuela. Known for its distinctive foliage, the plant boasts dark glossy leaves adorned by delicate pink lines, resembling the intricacies of a pinstripe pattern, hence the common name.

The Pinstripe Calathea is commonly referred to as a “prayer plant” due to its unique circadian rhythm. As the sun sets, the plant’s leaves will fold upwards, which looks like hands coming together in prayer.

Pinstripe Calathea Characteristics

Size and Growth

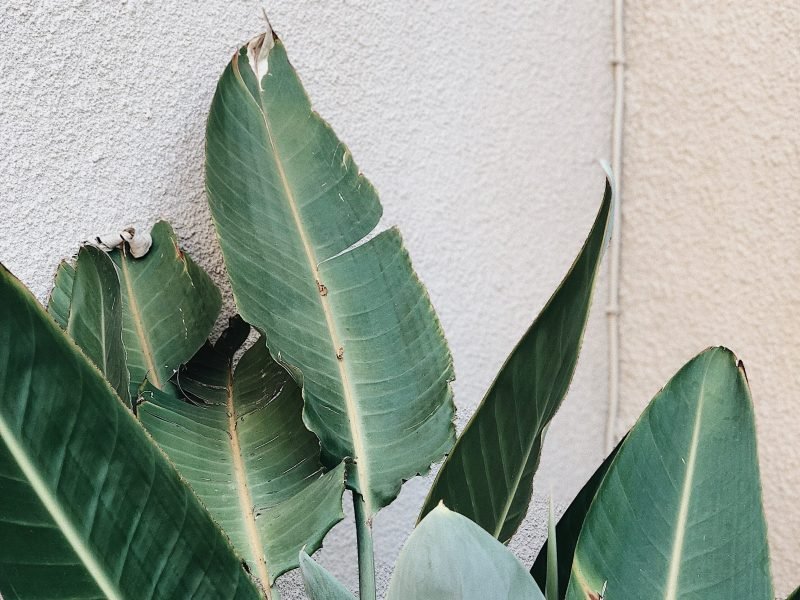
Typically, a Pinstripe Calathea grows up to roughly 2 feet in height when grown as a houseplant. The plant is slow-growing, but with proper care and favorable conditions, it can reach its full height in a few years’ time. The leaves extend from long, slender stalks and can grow up to 18 inches in length but factors such as light can impact their size.

Foliage

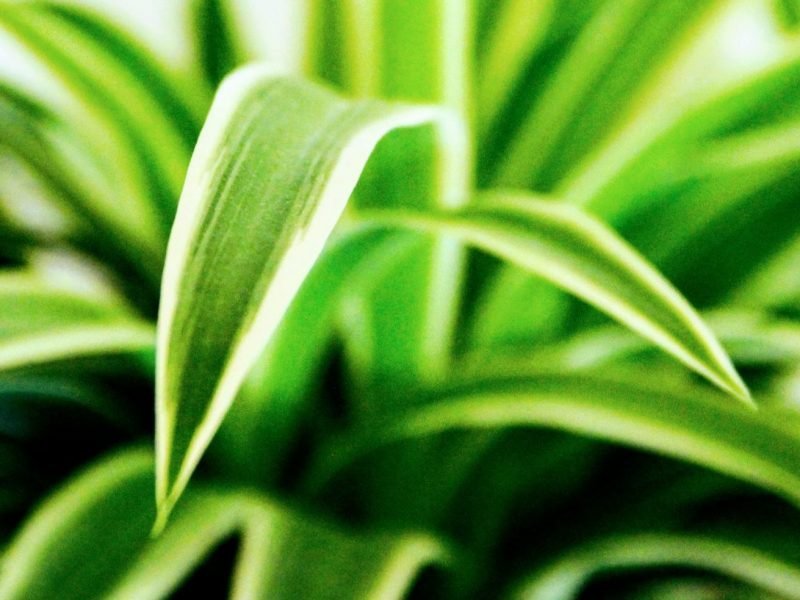
The beauty of the Pinstripe Calathea lies in its distinctive and unique foliage. The plant’s long, lance-shaped leaves are a deep, mid to dark glossy green and adorned with thin lines of light pink to white. These stripes run along the veins of the leaves, giving the plant its common name. The undersides of the leaves are a rich, purple-red which you can see a lot more of when the plant folds up its leaves.

Flowers

While not commonly seen when grown as a houseplant, the Pinstripe Calathea does produce flowers under optimal conditions. The flowers are small and inconspicuous, typically appearing in the summer months but sometimes at other points of the year too. They’re pink and white in color and neatly tucked within the plant’s foliage.

Root System

The root system of the Pinstripe Calathea is shallow, meaning it does not require a deep pot for growth. However, the roots are sensitive and need proper care to prevent damage.

The Growth Cycle and Rate of Pinstripe Calathea

The Pinstripe Calathea typically follows a seasonal growth pattern, with its main growth periods occurring during the warmer, humid months of spring and summer. Its growth rate slows down during the cooler months of fall and winter, often entering a dormancy-like phase where its energy is conserved for the next growth period.

During the growing season, new leaves emerge from the center of the plant, unfurling into the plant’s distinctive pinstriped pattern.

Key Stages of the Pinstripe Calathea Growth Cycle

  1. Spring: As temperatures rise and daylight hours increase, the Pinstripe Calathea begins its growing season. New leaves start to appear, and the plant will benefit from increased watering and misting to mimic its natural humid environment.
  2. Summer: This is a period of rapid growth, where diligent watering, feeding, and pruning are crucial. The plant will continue to produce new leaves and may even produce flowers.
  3. Fall: As the days grow shorter, growth starts to slow down. Watering should be reduced, and feeding should stop to allow the plant to prepare for its rest period.
  4. Winter: This is the plant’s rest period. It’s important to keep the plant warm and to reduce watering even further. The plant will not grow much during this time, but this is perfectly normal and part of its natural growth cycle.

Light and Temperature Requirements for Pinstripe Calathea

Light Requirements

The Pinstripe Calathea is not a fan of direct sunlight. In fact, placing your Calathea in an area with direct sunlight can cause the beautiful pinstripes on the leaves to fade, and in severe cases, it can lead to scorched leaves. Ideally, this plant prefers to be placed in a well-lit spot, with plenty of bright but indirect light.

Temperature Requirements

Originating from the tropical forests of Brazil, the Pinstripe Calathea is accustomed to a warm and humid environment. It generally prefers temperatures between 65°F (18°C) and 85°F (29°C). Anything below this range for long periods of time can cause the plant to stop growing, while anything above may lead to the leaves becoming crispy.

Avoid placing your Pinstripe Calathea near drafts, air conditioning vents, or heaters as these can cause sudden fluctuations in temperature which the plant does not handle well. Using a digital thermometer in your home is a great way for you to make sure your Calathea is getting the right amount of warmth across the year.

Watering and Humidity Needs of Pinstripe Calathea

Watering Needs

The Calathea ornata has specific watering requirements that need careful attention. Overwatering or underwatering can lead to issues such as leaf yellowing, wilting, or even root rot.

  1. Water Frequency: Generally, watering once a week is sufficient, but this can vary based on the season and environment. The soil should be kept moist, but not waterlogged. In warmer months, you may need to water more frequently.
  2. Water Quality: Pinstripe Calatheas are sensitive to the chemicals found in tap water. It’s best to use filtered, distilled, or rainwater if possible. If using tap water, let it sit out overnight to allow the chlorine to evaporate before watering the plant.
  3. Watering Method: Directly water the soil, taking care not to splash the leaves. This prevents the risk of leaf spot disease, which is caused by sitting water on the foliage. The best way to do this is to use a watering can with a long thin spout.

Humidity Needs

As a tropical plant, the Pinstripe Calathea craves high humidity. While it can tolerate average household humidity, it truly thrives in a more humid environment to prevent the most common issue of dry brown leaf tips and leaf edges.

  • Humidity Levels: A humidity level between 50% and 60% is ideal for this plant. Use a hygrometer to measure the humidity in your home.
  • Increasing Humidity: If the air in your home is too dry, there are several ways to increase humidity. This includes misting the leaves regularly, using a humidifier, or placing the plant on a water-filled pebble tray.
  • Location: Kitchens and bathrooms often have higher humidity levels due to the use of hot water. Therefore, these may be good locations for your Pinstripe Calathea (just be careful that it’s not too close to the cooker if placing it in the kitchen as this can dry out the plant quickly).

Soil and Fertilizer Requirements

When it comes to soil, our Calathea friend prefers a well-draining mix. A standard houseplant potting mix with perlite or sand to improve drainage will serve the plant well. Calathea ornata is indigenous to the tropical rainforests of South America, where it typically grows in the rich, loamy soil of the forest floor. This is why it appreciates an organic-rich, slightly acidic soil mix in the household environment.

Moving onto fertilizer requirements, the Calathea ornata does not require heavy feeding but the occasional dose of fertilizer can give new growth a real boost. A balanced liquid houseplant fertilizer, diluted to half the recommended strength, will suffice.

Frequency: Feed your Pinstripe Calathea once a month during the growing season (spring and summer) and avoid feeding during the dormant winter months.

Pruning your Pinstripe Calathea

Pruning your Pinstripe Calathea not only ensures a tidier and more appealing look for your plant but also promotes healthier growth. By removing dead or damaged leaves, you create room for fresh, vibrant leaves to flourish, making your Calathea more attractive and bushier.

The best period to prune your Pinstripe Calathea is during the spring and summer, which is its active growing season. However, if you notice any unhealthy leaves throughout the year, remove them immediately, regardless of what time of year it is.

Here’s a helpful step-by-step guide on how to prune your Calathea:

  1. Identify: The first step is to identify the leaves that need pruning. Look for yellow, brown, or wilted leaves, as these are indicators that the leaf is no longer healthy. You may also want to prune areas of your plant that are leggy or outgrowing your space.
  2. Prepare: Once you’ve identified the leaves, prepare your pruning tools. A clean pair of sharp scissors or pruning shears will do the job. Remember to sterilize your tools before use to prevent the spread of plant diseases.
  3. Prune: Cut the unhealthy leaf at the base of the stem, taking care not to harm the main stem or nearby leaves. It’s best to make a clean cut to help the plant heal faster.
  4. Dispose: After pruning, dispose of the cut leaves properly. Leaving them around can attract pests that might harm your plant.

If you’re a first-time plant owner, pruning might seem a daunting task. But with patience and a bit of practice, it can become a simple and rewarding part of your plant care routine and it can make a massive difference to your plant’s overall health and wellbeing.

Decorating Your Home with Pinstripe Calathea

Not only does this plant purify the air around it, but it also adds a touch of elegance and sophistication to any setting, making it an ideal decorative piece for your home.

However, there are a few different things to get right before incorporating this plant into your home’s interior design. Here are a few tips to consider:

  • Location: Place your Pinstripe Calathea in an area with bright, indirect light. Harsh sunlight can cause the leaves to fade and lose their distinct pinstriped pattern. A north or east-facing window, for instance, would be an ideal location.
  • Container: Choose a decorative pot that complements your home’s decor, but also ensures proper care for the plant. The pot should have adequate drainage to prevent waterlogging, a condition that the Pinstripe Calathea dislikes.
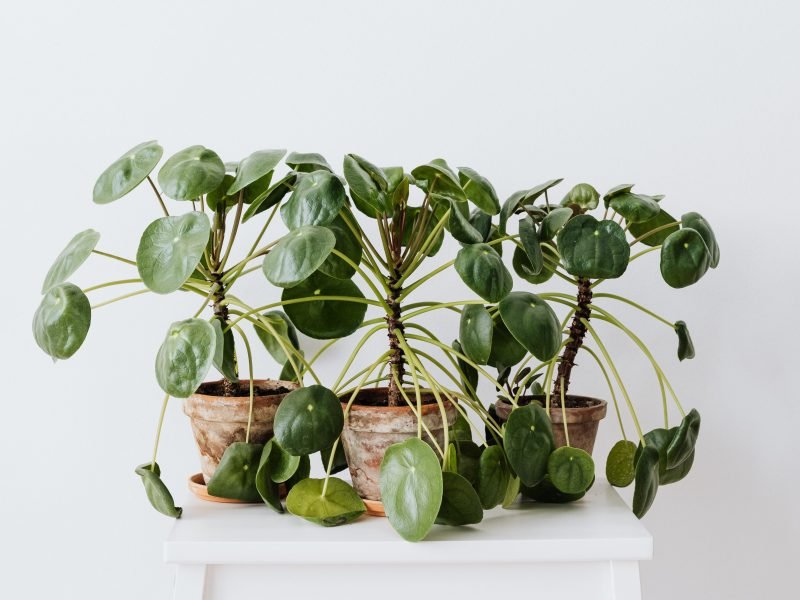
  • Grouping: Grouping Pinstripe Calatheas with other houseplants can not look great but also help with boosting the humidity. Just make sure each plant has enough space for healthy growth.

Common Pests and Diseases Affecting Pinstripe Calathea

The Pinstripe Calathea can fall prey to common household plant pests if its surroundings aren’t properly maintained or if it’s not given the appropriate care. Here are some of the most common pests and diseases that can affect your Pinstripe Calathea as well as some advice on how to deal with them.

Spider Mites

Spider mites are tiny pests that can cause severe damage to your Pinstripe Calathea (we’ve been there and it’s a real pain!). They usually appear when the air is too dry, which is particularly harmful to Calatheas that prefer humid conditions. Spider mites suck the sap from the plant, causing the leaves to turn yellow and eventually fall off.

Prevention and Treatment: Increase humidity levels and regularly mist your Pinstripe Calathea to ward off spider mites. If an infestation occurs, isolate the affected plant and use a mild insecticidal soap or neem oil to treat it. We also recommend trimming away the worst affected areas to cut down the size of the infestation to make it slightly easier to treat.

Mealybugs

Mealybugs are another common pest. They are small, white, and have a cottony appearance. Like spider mites, they suck the sap from the plant, leading to yellowing and drooping of leaves.

Prevention and Treatment: Regularly inspecting your plant and cleaning the leaves can help prevent a mealybug infestation. If you do notice mealybugs, isolate the plant and wipe off the bugs with a cotton swab dipped in rubbing alcohol.

Root Rot

Root rot is a disease often caused by overwatering, which creates an environment conducive to fungus and bacteria. It can be fatal to the plant if not treated promptly and effectively and the issue can occur quite quickly.

Prevention and Treatment: Avoid overwatering and ensure your Pinstripe Calathea has good drainage. If you notice signs of root rot, such as wilting leaves and a foul smell, you may need to repot the plant in fresh soil and trim any affected roots.

Pinstripe Calathea Toxicity

The Pinstripe Calathea is non-toxic to both humans and pets. This makes it an excellent choice for homes with curious cats, dogs, or toddlers who may accidentally ingest part of the plant.

However, it is always a good idea to prevent any pet or child from chewing on any houseplant as while non-toxic, consuming parts of the plant may not be entirely free of consequences.

  1. Humans: Ingesting parts of the plant may lead to mild discomfort in the stomach or throat due to the rough texture of the leaves.
  2. Pets: Pets, particularly cats and dogs, may experience mild oral and gastrointestinal irritation after chewing or swallowing pieces of the plant. Symptoms may include drooling, vomiting, or diarrhea.

Cleaning your Plant: Why, When and How

Maintaining the cleanliness of your Pinstripe Calathea is not just about enhancing its aesthetic appeal; it’s an essential part of plant care that contributes significantly to its overall health as dust and grime on the leaves can hinder the plant’s photosynthesis process.

When to Clean Your Pinstripe Calathea

A good rule of thumb is to include leaf cleaning in your monthly plant care routine. This way, you’re ensuring not only the beauty of the plant but also its overall well-being.

How to Clean Your Pinstripe Calathea

  1. Prepare the Cleaning Solution: Mix a few drops of mild dish soap with water in a spray bottle. This solution is gentle enough not to harm your plant while being effective in removing dust and grime. Don’t use any other chemicals on your plant as they can damage the leaves.
  2. Remove Loose Dirt: Before applying the solution, use a soft brush or cloth to gently remove any loose dust from the leaves.
  3. Apply Cleaning Solution: Spray the soap solution lightly onto the leaves, taking care not to soak them. Also, avoid spraying the solution directly into the soil.
  4. Gently Wipe the Leaves: Using a soft, damp cloth, gently wipe each leaf’s surface, removing the grime and the soap solution. Remember to clean the undersides of the leaves where pests often hide.
  5. Rinse and Dry: After wiping, rinse the leaves with lukewarm water and blot dry with a towel to prevent water spots from forming.

Note that while cleaning, it’s also a good time to inspect your Calathea for any signs of pests or diseases. Pay attention to any discoloration, spots, or unusual markings on the leaves.

Pinstripe Calathea FAQs


Common Problems with your Pinstripe Calathea

Fiddle and Thorn is a participant in the Amazon Services LLC Associates Program, an affiliate advertising program designed to provide a means for sites to earn advertising fees by advertising and linking to Amazon.com

Take our houseplant survey!

Quickly respond to our 30 second houseplant survey and get 75% off our Complete Houseplant Care eBook!

Take the Survey

No thanks…

Pink Quill Plant Care Guide: Tillandsia Cyanea Tips and Tricks

Last Updated: October 16, 2023

Tillandsia Cyanea

Tillandsia Cyanea

Introduction to the Pink Quill Plant

The Pink Quill Plant, officially known as Tillandsia Cyanea, is an evergreen perennial that hails from the rainforests of Ecuador. A member of the Bromeliad family, the Pink Quill Plant is best known for its vibrant pink to purple inflorescence, which resembles a feathered quill. A wonderful and exotic addition to any indoor plant collection, the Pink Quill Plant is not only visually striking but also exceptionally low-maintenance.

The Plant’s Unique Features

What truly sets the Pink Quill Plant apart is its remarkable, fan-shaped bloom. This bloom, or ‘quill’, is actually a large bract that turns a vivid pink at maturity and can remain vibrant for months on end. Small violet flowers then emerge from the quill, adding to the plant’s overall charm.

Why Choose a Pink Quill Plant?

The Pink Quill Plant is a great choice for beginners and seasoned plant parents alike. Its easy care requirements, coupled with its beautiful and unique appearance, make it a popular choice for home or office spaces. Plus, it’s excellent for improving air quality and adding a touch of tropical flair to any environment.

Understanding the Pink Quill Plant’s Characteristics

When it comes to the world of epiphytic bromeliads, the Pink Quill Plant is a standout with its distinctive features. In its native environment, it grows freely on trees without causing harm, a characteristic trait of epiphytes. The plant rarely exceeds a height and width of 50cm, making it an ideal choice for indoor decoration.

Key Characteristics of Pink Quill Plant

  • Height and Spread: Typically, the plant grows to a size of around 50cm in both height and width.
  • Flower Colour: The plant produces vibrant blue-violet flowers from a pink bract.
  • Bloom Time: Flowers usually bloom from late summer to autumn, but this can vary depending on the care provided.
  • Leaf Colour: The leaves are deep green in colour and can grow up to 20 inches long.
  • Hardiness: The Pink Quill Plant is known for being hardy and can withstand a range of conditions.

Lighting Requirements for a Pink Quill Plant

Understanding the lighting needs of your Pink Quill Plant is crucial to its growth and bloom cycle. This plant is native to the cloud forests of Ecuador and therefore thrives in bright, indirect light. Direct sunlight, particularly in the hotter months, can lead to leaf burn.

Indoor Lighting:

  • Position your Pink Quill Plant near a well-lit window, preferably facing east or north.
  • Avoid southern windows as these can emit harsh, direct sunlight, especially during summer months.
  • In darker areas, consider augmenting natural light with artificial grow lights.

Outdoor Lighting:

  • If your Pink Quill Plant is potted outside, it should be placed in a shaded area that receives filtered sunlight throughout the day.
  • Avoid placing the plant in direct sunlight; a few hours of morning sun will be adequate.

Watering your Pink Quill Plant: Tips and Tricks

To maintain your Pink Quill Plant’s lush, tropical allure, understanding its watering needs is crucial. A member of the bromeliad family, Tillandsia Cyanea, thrives in moist, humid environments. Here, we will delve into some watering tips and tricks for this elegant, feather-like plant.

Tip #1: Monitor your Watering Frequency

Watering frequency is a balancing act with the Pink Quill Plant. It enjoys moist conditions, but it’s also susceptible to rot if consistently overwatered. As a rule of thumb, water your plant once a week during the summer and reduce it to once every two weeks during the colder months.

Tip #2: Use the Soak and Dry Method

For best results, employ the ‘soak and dry’ method. Fully immerse your plant in water for a period of 10-20 minutes, then allow it to dry completely before the next watering. This method mimics its natural rainforest habitat where rainfall is heavy but interspersed with periods of drying sunlight.

Tip #3: Adapt to Your Environment

Be mindful that the Pink Quill Plant’s watering needs can vary depending on environmental factors. In hotter, drier climates, or when indoor heating is used, you may need to water more frequently.

Tip #4: Water Quality

Finally, consider the quality of water you’re using. Rainwater or distilled water is best for Pink Quill Plants, as they can be sensitive to the minerals found in tap water. If tap water is your only option (and you live in a hard water area), let it sit for 24 hours before using it to allow any chlorine to evaporate.

Temperature Requirements

These plants thrive in warm environments. During the daytime, a temperature range of 68-77°F (20-25°C) is ideal for the Pink Quill. At night, a slight drop to around 59-64°F (15-18°C) reflects its natural habitat, where temperature variations between day and night are common.

Extreme heat or cold can be detrimental to your plant so watch out for large fluctuations. It’s not frost-hardy and high temperatures can cause it to dehydrate quickly.

You also must remember that consistency is key. Drastic changes in temperature can cause stress to the plant, potentially leading to leaf drop or a halt in growth.

Humidity Requirements

One defining characteristic of the Pink Quill Plant is its love for high humidity. Originating from the rainforests of Ecuador, this tropical plant thrives in a humid environment.

Humidity Levels: Aim to keep the humidity level around your plant between 50% and 60%. However, this plant is rather forgiving and can tolerate levels as low as 40%.

If you need to boost the humidity a little, here are the top two methods to try:

  • Use a Humidifier: If you live in a dry climate, consider using a humidifier to maintain the humidity level around your plant.
  • Misting: Another effective method is to mist your Pink Quill plant regularly with distilled water. However, avoid over-watering as this can lead to root rot.

Remember, while Pink Quill plants are lovers of humidity, they also need good air circulation to thrive. Make sure the area around your plant isn’t overly stuffy or stagnant.

Flowers on a Pink Quill Plant: Everything you need to know

Their flowers are a lovely shade of violet-blue, a stunning contrast to their pink bract, commonly known as the ‘quill’. They bloom sequentially along the quill, ensuring a long-lasting display of beauty. Each flower stays vibrant for a few days before wilting away.

Blooming Cycle

Interestingly, a Pink Quill Plant flowers only once in its lifetime. But don’t be dismayed! Though a single blooming cycle, it can last from several weeks to a few months, providing an extended spectacle of colour and allure.

After Blooming

Once the blooming cycle concludes, the plant focuses on producing ‘pups’, or baby plants. These pups sprout around the base of the mother plant. With proper care, they mature into new, independent plants, allowing the cycle of life to continue.

Caring for the Flowers

Caring for these flowers is very straightforward. They don’t require any special attention, apart from regular watering and indirect sunlight. Just ensure you don’t overwater, as this can lead to rot.

Fertilizing Your Pink Quill Plant: How, Why and When

Why Fertilize?

Fertilising your Pink Quill Plant provides it with essential nutrients, like nitrogen, phosphorous, and potassium, that it cannot get sufficiently from potting soil alone. This nutrient boost encourages the growth of vibrant green leaves and stunning pink flowers. It also enhances the plant’s overall health, strengthening it against pests and diseases.

How to Fertilize?

Fertilising your Pink Quill Plant doesn’t have to be a daunting task. Simply choose a high-quality, water-soluble fertiliser, and mix it with water following the recommended ratio on the product package. Then, thoroughly drench the soil with the fertiliser solution, ensuring it’s fully absorbed.

When to Fertilize?

As a rule of thumb, the Pink Quill Plant should be fertilised during its active growth period, which is typically during the warmer months of spring and summer. You can fertilise it once a month during this period. However, in winter, when the plant enters a state of dormancy, fertilisation should be paused completely.

Note: Over-fertilisation can harm your Pink Quill Plant, leading to leaf burn or even plant death. Always stick to the recommended dosage (or less), and remember that less is often more when it comes to plant nutrition.

Pruning your Pink Quill Plant

When to Prune

Usually, it’s best to prune your Pink Quill Plant in early spring. This is the period just before the plant’s active growth phase. However, you can prune individual leaves at any time if you spot dying or diseased areas of the plant.

How to Prune

Begin by sterilising your pruning shears to avoid transmitting diseases or pests. Simply snip off the dead or yellowing leaves at the base. Remember to do this gently to avoid causing unnecessary stress or damage to the plant.

Post-Pruning Care

After pruning, give your plant a thorough watering. This helps to speed up the healing process and encourages new growth. However, ensure that the plant isn’t left in standing water, as this could cause root rot.

Choosing the Right Soil for Pink Quill Plant

This exotic plant thrives in loose, well-draining soil, which mimics its natural habitat. Commercially available orchid mix is a great choice, as it typically contains bark, perlite, and charcoal, which promote excellent drainage. If you prefer a homemade mix, combine equal parts perlite, peat moss, and coarse sand.

While the Pink Quill Plant is an air plant, meaning it absorbs most of its nutrients from the air, it still requires some nutrients from the soil. Therefore, rich, organic material such as compost or worm castings can be added in small amounts to provide these essential nutrients.

Pink Quill Plant Repotting Guide

With a couple of easy-to-follow steps, you can ensure your plant continues to thrive and bloom beautifully. Here’s a simple guide to help you through the process:

When to Repot

It’s crucial to understand when to repot your Pink Quill Plant. Generally, this plant should be repotted every 1.5-2 years to encourage growth. However, if your plant appears unhealthy or its roots are taking up too much space, you may need to repot it sooner.

Choosing the Right Pot

Ensure the new pot is only slightly larger than the current one (to avoid instability) and has sufficient drainage holes. This helps prevent waterlogging, a common issue for Tillandsia Cyanea.

Procedure

  1. Preparation: Start by preparing a potting mix suitable for epiphytes. A mixture of bark, perlite, and peat moss works well.
  2. Removal: Gently remove the Pink Quill Plant from its current pot, taking care not to damage the roots.
  3. Placement: Place the plant in the centre of the new pot and slowly add the potting mix around the roots until the plant is secure.
  4. Watering: Water the plant thoroughly after repotting. This helps the plant settle into its new home.

How to Propagate a Pink Quill Plant

1. Wait for the Right Time

Firstly, timing is crucial. The optimal time for propagation is when the plant starts to produce offsets, or ‘pups’, usually after blooming.

2. Carefully Separate the Pup

Identify a healthy-looking pup that is at least one-third the size of the parent plant. Gently separate the pup from the mother plant using your hands or a clean, sharp knife.

3. Preparing the Pup

Before planting, let the pup dry out for a few hours to let the cut area callous over. This reduces the risk of bacterial and fungal infections.

4. Plant the Pup

Now, it’s time for the exciting part. Place the pup into a suitable pot filled with well-draining soil designed for epiphytes. Make sure you position the pup correctly, with the base just below the soil surface.

5. Provide Proper Care

Lastly, ensure that you provide the newly planted pup with the appropriate care. Water it lightly and keep it in a bright, humid environment. Remember, patience is key when propagating Pink Quill plants.

And there you go! With these steps, you’re well on your way to successfully propagating your Pink Quill plant. Happy planting!

Cleaning your Pink Quill Plant

Dust and grime can inhibit photosynthesis (yes even a thin layer of dust can reduce the amount of sunlight your plant is exposed to) and could potentially harbour pests. This is why regular cleaning is a must for all of your houseplants.

Step-by-step cleaning process:

  1. Firstly, prepare a soft, damp cloth. Avoid using any harsh cleaning agents or detergents, as these can harm the natural coating on the leaves.
  2. Gently wipe down each leaf, paying particular attention to where the leaves join the stem. This is a common spot for dust accumulation.
  3. Give special attention to the pink quill itself. Use a soft brush or cotton swab to lightly dust this part.
  4. After cleaning, allow the plant to air dry. Do not place it in direct sunlight immediately after a wipe-down, as water droplets can magnify sunlight and cause leaf burn.

Diagnosing, Treating and Preventing Pests on your Pink Quill Plant

When it comes to Pink Quill plants, pests can be a real nuisance if not identified and treated promptly and can often kill your plant when not treated. Fortunately, there are a few common culprits to look out for and various effective treatments to keep your plant pest-free.

Common Pests

The usual suspects for pest infestations in Pink Quill plants (and most other houseplants too) include mealybugs, scale insects, and spider mites. These pests not only cause visible damage across the leaves but can also lead to stunted growth and even plant death if not addressed in time.

Recognising Pest Infestations

Regularly inspect your Pink Quill plant for signs of pest infestations. Symptoms often include yellowing leaves, tiny white cotton-like clusters (mealybugs), small brown or black bumps (scale insects), and fine webbing on the plant (spider mites).

Treating Pests

For mild infestations, a simple solution of water and mild soap can do the trick. Spray this on affected areas daily until the pests are eradicated. For more severe infestations, consider using horticultural oils or insecticidal soaps. Always remember to test any treatment on a small area first to see how the plant reacts.

Preventing Pests

Prevention is always better than cure, and this holds true for Pink Quill plant care. Ensure that your plant has the right conditions – adequate light, proper watering, and good air circulation. These conditions will make your plant less appealing to pests. Regularly clean your plant and its surrounding area to prevent pest build-up.

Pink Quill Plant Toxicity

The Pink Quill, or Tillandsia Cyanea, is non-toxic to both cats and dogs.

However, it’s crucial to remember that any plant can cause minor gastrointestinal upset if ingested in sufficient quantities. Symptoms may include vomiting, diarrhoea, or loss of appetite.

Precautionary Measures:

  • Even though the Pink Quill plant is non-toxic, it’s still recommended to place it out of reach of pets, especially if they’re known to be curious nibblers.
  • Ensure to promptly clean up any fallen leaves or flowers to prevent accidental ingestion.
  • In case your pet ingests a significant amount of the plant and exhibits symptoms, it’s best to consult with a vet immediately.

Pink Quill Plant FAQs

Quick and simple answers to the most common questions we see about the Pink Quill Plant.

Common Problems with your Pink Quill Plant

Here are some common issues that you might run into. It’s important to diagnose any issues early to give your plant the best chance of bouncing back.

Fiddle and Thorn is a participant in the Amazon Services LLC Associates Program, an affiliate advertising program designed to provide a means for sites to earn advertising fees by advertising and linking to Amazon.com

Take our houseplant survey!

Quickly respond to our 30 second houseplant survey and get 75% off our Complete Houseplant Care eBook!

Take the Survey

No thanks…

Pilea Care Guide: How to Keep your Chinese Money Plant Thriving

Last Updated: August 4, 2023

Healthy Pilea Plants

Healthy Pilea Plants

Introduction to the Pilea Plant

Known fondly as the Chinese Money Plant, but scientifically as Pilea peperomioides, this plant is loved for its round, coin-like leaves. It’s also a very adaptable houseplant that thrives in a range of environments which makes it a great recommendation for all plant parents.

A Brief History of the Chinese Money Plant

The Pilea Peperomioides has an intriguing lineage that is steeped in mystery. Its journey across the world is a tale as captivating as the plant itself. This unique herbaceous perennial is believed to have originated in the Yunnan province of Southern China.

Here, it was discovered by George Forrest, a Scottish botanist renowned for his plant exploration. However, the Pilea didn’t become popular until it was brought to Europe by Norwegian missionary Agnar Espergren in the mid-1940s. He shared small cuttings with friends, who further spread the plant throughout Scandinavia.

Why Choose a Chinese Money Plant?

Other than its quirky coin-shaped leaves, which have earned it names like Pancake Plant and UFO Plant, the Chinese Money Plant is renowned for its ease of growth, even for beginners. Our other favourite thing about the Pilea plant is that it is so easy to propagate. Pups shoot out quicker than you can count them and root really quickly when removed from the mother plant.

Identifying the Chinese Money Plant

Being able to identify this plant correctly is crucial for providing it with the best care as there are other similar-looking houseplants around. Let’s delve into the key features that make it stand out.

Leaf Shape and Colour

The most distinctive feature of the Chinese Money Plant is its circular, pancake-like leaves. These flat, shiny leaves are a bright, rich solid green that can add a splash of colour to any indoor setting.

Stem Structure

The Pilea peperomioides has a distinctive stem structure. The sturdy, thick stems stand erect and usually bear a single leaf at their tip. This gives the plant an appealing, minimalist appearance.

Size and Growth Pattern

Typically, a well-cared-for Chinese Money Plant can reach approximately 30-50cm. It exhibits an interesting growth pattern, where new leaves sprout from the base, gradually unfolding into their distinct, disc-like form.

Plantlets

A charming characteristic of the Chinese Money Plant is its production of plantlets. These miniature versions of the mature plant sprout from the root system and can be propagated to produce new plants.

Chinese Money Plant

Chinese Money Plant

Light Requirements for Your Pilea

A Pilea thrives best under bright, indirect sunlight. However, it is forgiving and can sustain in moderate light conditions too.

It’s important to know that direct sunlight is a no-no for your Pilea. This is because intense sunlight can scorch its delicate leaves, leaving discoloured patches.

But it’s not just direct sunlight that can be damaging to your plant. If your Pilea is not getting enough light, it may show signs of stretching, called etiolation. This is when the plant grows long and spindly as it reaches for more light. In more severe cases, low light can cause brown leaves, leaf drop and plant death.

Top tip: Rotate your Pilea regularly to ensure even growth. This is due to the plant’s tendency to lean and grow towards the light source.

Indoor Lighting for Chinese Money Plant

If your home lacks sufficient natural light, artificial light is a viable option for your Pilea. Fluorescent lights, including compact fluorescent bulbs or full-spectrum fluorescent tubes, serve as an excellent source of artificial light.

  • Position the plant 6-12 inches away from the light source.
  • Ensure the light source is on for 12-16 hours a day to mimic natural conditions.
  • Turn off the light source at night to give your plant some rest.

Watering Your Pilea Correctly

Watering your Pilea is requires a delicate balance between hydrating sufficiently and avoiding overwatering. Below are our top tips to help you water your Pilea properly and avoid watering-related issues such as brown or yellow leaves, leaf drop, root rot and plant death.

How Much Water Does Your Pilea Need?

Like most houseplants, Pilea plants don’t enjoy sitting in really moist soggy soil. The roots are prone to rot if the plant is watered excessively and the impact can be quick and extremely damaging. A good rule of thumb is to water it once the top 1-2 inches of soil has dried out (if you are top down watering). If you are watering from the bottom, the lifting method will help you establish when your Pilea needs more water.

Checking the Soil

One of the most reliable ways to ascertain if your plant needs watering is simply by checking the soil. Plunge your finger into the soil up to your first knuckle. If it feels dry, it’s time to quench your plant’s thirst.

Remember, your Pilea’s water needs may fluctuate with seasonal changes. During the warm summer months, your plant might require a bit more water, while in the cooler winter months, less so.

What water should you use?

When it comes to the type of water, your Pilea isn’t particularly fussy. However, it does prefer water that is free from harsh chemicals like chlorine so if you live in a hard water area, it may be best to use filtered, distilled, or rainwater if available.

Watering Technique

When watering your Pilea, aim for the base of the plant, and ensure water doesn’t sit on the leaves to avoid leaf rot. A watering can with a long narrow spout will help you get this precision and keep the water away from the leaves. A slow, steady watering technique ensures that the water is adequately absorbed by the soil and reaches the roots.

Fertilizing Your Pilea to Promote Growth

The Right Type of Fertiliser

Choosing the right fertiliser for your Pilea is crucial. They prefer a balanced houseplant fertiliser with a 10-10-10 NPK ratio. Avoid using heavy, organic fertilisers which can overwhelm your plant and cause more issues than anything else.

How Often to Fertilise

Over-fertilising can be as harmful to your Pilea as under-fertilising so it’s best to stay cautious when choosing how often and how much to fertilize. During the growing season (spring and summer), feed your Pilea every 2-4 weeks maximum. In fall and winter, cut back fertilizing completely as it doesn’t need it during the dormant growth phase.

Fertilising Technique

When it’s time to fertilise, do so after watering your Pilea. This helps avoid the fertiliser from burning the plant’s roots. And remember, it’s always better to err on the side of less fertiliser than more.

Signs your Pilea needs Fertiliser

Yellowing leaves can indicate your Pilea may need a feed. However, take care as yellow leaves can also signify over-watering and other issues (one of them also being over-fertilization). Make sure you check over the soil and environment to ensure you are making the right diagnosis.

Temperature Requirements

The Chinese Money Plant thrives in a steady indoor climate, typical of most households. Pilea prefers temperatures between 64-75°F (18°C to 24°C).

Extreme Temperatures:

  • As a tropical plant, Pilea can’t withstand cold temperatures for long periods of time. Exposure to temperatures below 55°F (13°C) can lead to wilting or even death of the plant over time.
  • On the other hand, placing your Pilea in an area with temperatures exceeding 84°F (29°C) can lead to scorching, dehydrated leaves so avoid placing your Pilea too close to cookers, radiators and heating vents.

Temperature Fluctuations:

Minor fluctuations in temperature are generally tolerable, but sudden, drastic changes may cause harm. The plant’s leaves might turn yellow or brown and you may see your Pilea lose leaves as a result of temperature stress.

Humidity Requirements for your Pilea

It’s essential to create an environment that mimics its natural habitat to the best of your ability and humidity is a part of that. However, you’ll be pleased to know that Pilea plants don’t require excessively high humidity levels and will be happy with the average humidity of many homes.

Typically, a humidity level between 40% to 50% is satisfactory for your Pilea. Nonetheless, during the dry winter months, it may require a slight boost as air can dry out a lot faster with the heating on. Here are a few great ways to boost the humidity for your Pilea:

  • Humidifier: If you have many indoor plants, investing in a humidifier could be a viable option. Not only will it cater to your Pilea’s humidity needs, but it can also benefit other humidity-loving plants. A humidifier also takes all of the work away from you and will boost the humidity without you having to lift a finger (other than to plug it in!).
  • Pebble Tray: Another affordable method is to place your plant above a tray of pebbles which is half filled with water. As the water evaporates, it’ll increase the humidity around the plant. The reason that you want the water to not reach the top of the pebbles is to ensure that your Pilea’s roots are sitting in a pool of water.
  • Misting: Regularly misting your Pilea can also aid in maintaining appropriate moisture levels. However, it’s vital to avoid soaking the leaves, as this could lead to fungal issues, especially in cold temperatures to be careful not to mist too late in the day in winter.

Pilea

Pilea

Pruning Your Pilea for Optimal Health

Pruning your Pilea is integral to its overall wellbeing and aesthetic appeal. It not only promotes healthy growth but also shapes your Chinese Money Plant into an appealing structure, shape and size. Not to mention, it’s a preventative measure against diseases as well!

When should you prune your Pilea?

Typically, pruning is best around spring or early summer, when your plant is in its active growth phase. However, you may need to undertake some minor pruning throughout the year if you notice leaves dying or showing signs of disease.

Steps to Prune Your Pilea

  1. Ensure your pruning shears or scissors are clean and sharp to prevent infection and avoid damaging your plant when making the cut.
  2. Inspect your Pilea thoroughly to identify any yellow or brown leaves, these are signs of damage or disease.
  3. Carefully trim off the unhealthy leaves at their base, ensuring not to harm the main stem.
  4. For aesthetic balance, eliminate any protruding stems that disrupt your plant’s overall symmetry.
  5. Finally, get rid of any small sprouts emerging from the soil that may steal nutrients from the main plant.

Aftercare

After pruning, take proper care to ensure your Pilea recovers swiftly. Keep an eye out for any signs of stress or disease, and provide it with plenty of indirect light and humidity to ensure it can recover nicely from the initial shock of pruning.

Choosing the Right Soil for Your Pilea

What soil is best for a Pilea?

Pilea plants are content with a well-draining, peat-moss based potting mix. One thing that can’t be stressed enough is the importance of good drainage. Pilea plants are highly susceptible to root rot and overwatering, so a potting mix that drains well can be a real game-changer.

Creating the Perfect Pilea Potting Mix

You can buy a commercial potting mix that will work fine, but many Pilea parents prefer to make their own. Here’s a simple recipe:

  1. 50% peat moss or coco coir
  2. 30% perlite for drainage
  3. 20% organic compost or worm castings for nutrients

Simply mix these together well, and voila! Your Pilea potting mix is ready.

Refreshing the Soil

Every year or two, it’s a good idea to refresh the soil in your Pilea’s pot. This replensihes the nutrients that your plant needs to keep growing strong and healthy. It also gives you a good opportunity to inspect the roots closely to see if you can spot any issues before they’ve progressed enough to start showing up on the leaves.

Repotting your Pilea: Why, When and How

Why Repot your Pilea?

The main reason for repotting a Pilea plant is to give it more room to grow. These plants expand quickly and can become root-bound if they’re kept in small pots for too long. Once your plant is rootbound, you will notice that the rate of new growth declines. So if your Pilea isn’t growing any new leaves in summer we would recommend taking a lot at the root system and seeing if it needs a bigger pot.

In addition, fresh compost in a new pot can provide essential nutrients that your plant needs to thrive.

When to Repot your Pilea?

The best time to repot your Pilea is typically in the spring. This is when the plant is coming out of its winter dormancy and is ready to start growing rapidly. This extra space will give your Pilea room to grow and expand during the upcoming growth period.

However, if you see signs of your plant becoming root-bound, such as yellowing leaves or slower growth, it may be a good idea to repot regardless of the season.

How to Repot your Pilea?

  1. Prepare a larger pot with fresh, well-draining soil.
  2. Carefully remove your Pilea from its current pot, trying to keep the root ball intact.
  3. Place the plant in the new pot, ensuring it’s at the same depth as it was in the old pot.
  4. Fill in around the plant with additional soil, gently pressing it down but not fully compacting it.
  5. Water thoroughly, but avoid overwatering as this can lead to root rot.

Remember to take care when handling your Pilea during the repotting process. Its thin stems and delicate leaves can be easily damaged.

Flowers on a Pilea Plant

While typically renowned for its appealing coin-shaped leaves, these houseplants can, on occasion, produce tiny flowers. A Pilea will bloom very unpredictable and sometimes not at all so don’t get your hopes up.

Appearance of Flowers

The flowers on a Pilea plant are small and delicate, popping up from the plant’s stalk. They usually exhibit a soft white or pale pink hue, adding a subtle charm to the overall aesthetic of the plant.

Frequency of Flowering

Flowering is not a regular occurrence in Pilea plants. It is a rare and special event that can happen on both plants with great care and plants that are struggling. Sometimes plants will bloom when they are dying as a last resort to reproduce.

The Role of Proper Care

Ensuring the optimum health and vitality of your Pilea plant is key to encouraging healthy flower growth. Factors such as sufficient bright, indirect light, consistent watering, and a warm environment are crucial to achieving any flowers.

Cleaning your Pilea’s leaves

For a vibrant, healthy Pilea, regular leaf cleaning is essential. This not only maintains its aesthetic appeal but also promotes photosynthesis and wards off pests.

Cleaning essentials

  • A soft, damp cloth
  • Warm water
  • Mild soap (optional)

Step-by-step cleaning procedure:

  1. Gently wipe each leaf with a soft cloth dampened with warm water. Start from the base of the leaf and move outwards, following the leaf’s natural growth direction.
  2. If your plant has been battling pests or if the leaves are especially dirty, add a dash of mild soap to your water. Thoroughly rinse the soap off to avoid residue build-up. Don’t forget to clean the underside of the leaves where pests like to hide.
  3. After cleaning, let your Pilea air dry in a space with indirect light. Avoid direct sunlight to prevent leaf scorch.

Pilea Leaves

Pilea Leaves

Chinese Money Plant Toxicity

Pilea peperomioides, commonly known as the Chinese Money Plant, is non-toxic. This means it doesn’t pose a threat to humans, cats, dogs, or other pets if ingested. However, as with all plants, it’s advisable not to consume them unless specifically labelled as edible.

Despite its non-toxicity, it’s always better to keep the plant out of reach of pets and children. Some animals might have a mild reaction to the plant, such as nausea or vomiting if they eat it.

If you suspect your pet has ingested a significant amount of any plant and is showing signs of illness, please contact a veterinarian immediately. The same goes for children; if ingested, contact a healthcare professional right away.


Chinese Money Plant FAQs


Common Problems with your Chinese Money Plant

Here are some common issues that you might run into. It’s important to diagnose any issues early to give your plant the best chance of bouncing back.

Fiddle and Thorn is a participant in the Amazon Services LLC Associates Program, an affiliate advertising program designed to provide a means for sites to earn advertising fees by advertising and linking to Amazon.com

Take our houseplant survey!

Quickly respond to our 30 second houseplant survey and get 75% off our Complete Houseplant Care eBook!

Take the Survey

No thanks…

How to Care for a Philodendron Squamiferum

Last Updated: October 16, 2023

Philodendron Squamiferum Plant

Philodendron Squamiferum Plant

Unique for their red hairy stems, the Philodendron Squamiferum is quite a rare but beloved find in the houseplant world! Overall they fall sort of in the middle between easy and difficult to care for. They definitely aren’t adaptable to a range of environments like some houseplants are but they also won’t be too fussy if you miss the occasional watering or forget to mist it for a while.

Native to Central America, French Guiana, and Brazil, the Philodendron Squamiferum’s natural environment is growing in the jungle or rainforest, under the canopy of large trees. Take this into account when thinking about its care requirements as high humidity and some shade is crucial.

Sometimes this variety goes by the common name of Red Bristle Philodendron (named after their stems) but this isn’t a widely used term.

In this article, we will cover everything you need to know about growing and caring for a Philodendron Squamiferum, from light and water requirements to pruning, cleaning and repotting!

How to care for a Philodendron Squamiferum

There are two main things to remember when it comes to the basic care requirements of the Philodendron Squamiferum. Firstly, make sure that you avoid your plant receiving any intense direct sunlight during summer. While you can get away with some direct light during winter, this is only because the sun is a lot weaker. In summer, you may find the leaves become scorched or start to dry up if exposed to direct sunlight.

The other thing to note is humidity. As these plants are native to rainforests and jungles, they will thrive in moderate to high humidity levels. So you’ll want to start getting into the habit of misting or invest in a humidifier to ensure the leaves don’t start to dry out… but more on that later!

Philodendron Squamiferum Overview

Origin: They are native to the rainforests and jungles of Central America, French Guiana, and Brazil,

Plant Family: It belongs to the Araceae family

Difficulty Level: Medium

Appearance: Known for its red hairy stems and leaves that resemble a Monstera Deliciosa minus the fenestrations.

Height and Size: Can grow up to 6 feet (1.8m) indoors.

Growth Rate: Slow

Flowering: Can bloom in summer, producing white flowers.

Pruning: Only if there are issues but not needed regularly.

Cleaning: Dusting the leaves once a month is crucial.

Light Requirements: Bright but indirect light is ideal, avoid any direct sunlight.

Water Requirements: Moderate watering, make sure the soil is dry between waterings.

Best Soil: Nutrient-rich, well-draining potting mix.

Ideal temperature: Between 50-80F (10-27C)

Fertilizing Routine: Optional, but if you do decide to, fertilize only every few months during spring and summer.

Ideal Humidity Level: 60-70% humidity is ideal.

Propagation: Through stem cuttings or division.

Repotting Frequency: Every 2-3 years

Toxicity: Moderately toxic to pets and humans.

Risk of Pests: Gnats and spider mites are the most common pests.

Common Problems: Dry leaf tips, brown leaves and leaf yellowing are the most common issues.

Origin of a Philodendron Squamiferum

These plants are native to Central America, French Guiana, and Brazil. Their natural environment is growing underneath the jungle or rainforest canopy.

Philodendron Squamiferum Plant Family

They are part of the Araceae plant family which consists of over 3,500 species of flowering plants. They are mostly known for their spadix and spathe flowers.

Philodendron Squamiferum Appearance and Characteristics

Known and loved for their hairy red stems, the Philodendron Squamiferum has leaves that will remind you of the famous Monstera Deliciosa but without so many fenestrations. Instead, these are a few large cuts in the leaf.

Philodendron Squamiferum Height and Size

If in the right environment and given the right care, Philodendron Squamiferum plants can grow up to 6 feet (1.8 meters) in height indoors. They aren’t the fastest-growing plants though so it will take a while for them to reach this maximum height and maturity so it shouldn’t outgrow the space for a while. (In their natural environment, they can grow up to 15 feet in height.)

Philodendron Squamiferum Growth Rate

They are a slow-growing species so it will take over 10 years for them to reach their full maturity. You should only expect to see a couple of leaves pop up throughout each growth season, so don’t be disappointed that it’s not rewarding you with lots of new growth every week.

However, the benefit of them being a slow-growing plant is that they won’t outgrow the space and pot any time soon.

Flowers on a Philodendron Squamiferum

As they are part of the Araceae family, Philodendron Squamiferum can produce white spadix flowers enclosed by a spathe. This will only happen during summer though and can also be quite rare so don’t be concerned that something isn’t right if they aren’t blooming.

The flowers on a Philodendron Squamiferum are also quite underwhelming and we often recommend that plant parents remove them from the plant as it can waste a lot of energy which can instead be redirected into growing new leaves.

Pruning your Philodendron Squamiferum

Luckily you don’t need to regularly prune your Philodendron Squamiferum. We only recommend pruning any areas that are dying or dead to help freshen up your plant.

Cleaning your Philodendron Squamiferum

As they have quite large flat leaves, cleaning your plant regularly is a must. Removing dust buildup can help to maximise the amount of light that your plant is getting and unclog any pores so that the leaves can transpire better.

Use a damp cloth to wipe over the leaves gently. If this isn’t enough to remove the dust and dirt from your plant, then do use a drop or two of dish soap. Avoid using any harsh chemicals when cleaning your Philodendron Squamiferum as this can damage the leaves very quickly.

@vriksha_nursery on Instragram

Fuzzy Philodendron Squamiferum Stem

Philodendron Squamiferum Light Requirements

The ideal light level for a Philodendron Squamiferum is bright but indirect light so keep it away from direct light. This is especially important during summer when the sun is a lot stronger.

They can deal with some medium-level sunlight but won’t grow very well in low-light areas of your home. You may need to think about moving your plant around throughout the year to avoid lighting extremes.

Watering your Philodendron Squamiferum

Getting the right balance when watering your Philodendron Squamiferum can be a little tricky as they don’t like to have waterlogged, soggy soil, but they also don’t want the potting mix drying out for extended periods of time.

If you are using the top-down method of watering, test the top inches of the soil to ensure it’s dry before watering again. If you prefer to use the bottom-up method, a moisture meter can really help you determine when it’s time to water again.

Another tip we have when it comes to how to water your Philodendron Squamiferum is to remove any excess water from the saucer or planter about 15 minutes after watering. This will ensure that your plant has had enough time to absorb the water is needs, but avoids the roots sitting in a puddle.

Best Soil for an Philodendron Squamiferum

There are two characteristics to help you determine what soil to buy for your Philodendron Squamiferum. Firstly, you want a potting mix that is high in nutrients and secondly, you want it to be well-draining.

Add perlite to the soil if you haven’t already as this helps with drainage but also aeration of the soil.

Ideal temperature for your Philodendron Squamiferum

The ideal temperature for a Philodendron Squamiferum is between 50-80°F (10-27°C). You want to avoid any extremes, both hot and cold, to prevent damage to your plant.

Things to look out for to avoid hotspots are: drafty windows and external doors, air conditioning vents, heating vents, radiators and cookers.

We highly recommend that you purchase a digital thermometer to monitor any fluctuations in temperature around your plants so that you can rectify any issues before it starts to cause any damage.

Philodendron Squamiferum Fertilizer Requirements

Apply a well-balanced fertilizer at half strength once every 1-2 months during the growth period of spring and summer. Avoid fertilizing your plant during autumn and winter as this is the dormant period.

Do note though that fertilizer is optional and you can still see plenty of healthy growth without it.

Philodendron Squamiferum Humidity Requirements

60-70% humidity is ideal for your Philodendron Squamiferum as they are native to humid jungles and rainforests.

There are plenty of ways that you can boost the humidity around your plant, including misting the leaves or investing in a humidifier to keep a nice stable humidity level.

If you want to take all of the thinking out of creating a nice humid environment for your plant, place it in either your bathroom or kitchen (as long as it still receives a good amount of light). These rooms are naturally a little bit more humid than the rest of your home due to steam released when showing and cooking.

@nicoplants on Instagram

Philodendron Squamiferum in sunlight

Propagating your Philodendron Squamiferum

The most successful method of propagating a Philodendron Squamiferum is by taking a stem cutting. Place in water and after a few weeks (or months) you should start to see new roots forming. Replace the water weekly to keep things fresh.

The process for propagating your Philodendron Squamiferum is about as easy as it gets. To start make sure that you have a healthy and mature parent plant, this gives your a slightly higher success rate and will also lower the risk of causing problems with the starter plant.

Next, with some clean sharp shears or scissors, snip off some cuttings from the stems making sure to cut just underneath some leaf nodes (remove these leaves). Take the stems and submerge them in some water, these should start rooting pretty quickly.

Once you have some leaves and a good healthy root ball go ahead and plant them into some good quality potting mix and continue care as normal.

Repotting your Philodendron Squamiferum

On average, repot every 1-2 years to avoid your plant from becoming rootbound as this can stagnate growth.

As they aren’t fast-growers, you don’t need to worry so much about repotting more frequently than this but do look out for signs that your plant is rootbound just incase. These include roots growing out of the drainage holes or popping out of the top of your plant, the roots in tight coils (removing the plant from its pot is the only way to see this).

Stagnant growth during spring and summer can also be an indication that your plant needs more space to grow its root system.

Philodendron Squamiferum Toxicity to Humans and Pets

Unfortunately, Philodendron Squamiferum plants are toxic to both humans and pets. This is because they contain insoluble calcium oxalate crystals which do not dissolve when ingested so can cause mouth, throat and stomach irritation if consumed.

Keep these away from anything or anyone who might nibble on it whilst you aren’t looking and seek medical advice if part of the plant is ingested by your pet or anyone else.

Treating and Preventing Pests

Fungus gnats and spider mites are the most common pests to infest a Philodendron Squamiferum. Treat the infestation by removing the worst affected leaves, showering your plant and treating it with neem oil and an insecticide.

You also want to isolate your plant away from all other houseplants and check them down for signs of pests (they can transfer from plant to plant quite easily).

Philodendron Squamiferum Common Problems

Fiddle and Thorn is a participant in the Amazon Services LLC Associates Program, an affiliate advertising program designed to provide a means for sites to earn advertising fees by advertising and linking to Amazon.com

Take our houseplant survey!

Quickly respond to our 30 second houseplant survey and get 75% off our Complete Houseplant Care eBook!

Take the Survey

No thanks…

How to Grow and Care for a Philodendron Birkin

Last Updated: October 16, 2023

The once-rare Philodendron Birkin is starting to pop up in plant shops across the world. They are easy to care for so are perfect for inexperienced plant parents and their incredible green and white striped leaves bring something a little different to your home.

One of the reasons that they have become so popular is because of their unique foliage. Loved

for their deep green and white pinstripe leaves, no two leaves are the same which makes this an incredible plant. In terms of flowering, it’s pretty rare to find a flower on a Philodendron Birkin and even when you do, they aren’t super aesthetic and it’s often best to remove them from the plant to save energy.

The Philodendron Birkin is also one of the plant types that are genetically unstable. This means that the leaves it produces can look wildly different from each other. You might occasionally get a leaf that is entirely white or entirely green. It’s even known to have a splash of pink in there every now and again if you’re lucky!

How to care for a Philodendron Birkin

One of the best things about the Philodendron Birkin is that they have quite an easy care routine and can adapt to a range of different environments.

Although they thrive best in bright but indirect light, they can adapt to lower-light environments. The only thing to note here is that growth will be slower and you may see that new leaves are more solid green and have lost some of that variegation.

The watering technique is pretty much the only challenge about caring for these plants as they like a moist but not soggy potting mix. Go for a little but often watering approach to avoid extremes and monitor the soil to know when it’s time for more water.

Not only are they relatively easy to care for, but they are quite compact and won’t outgrow the space that quickly. So whether you don’t have the best track record at keeping plants alive, or if you don’t have much space, the Philodendron Birkin is still a great choice!

Origin: Tropical rainforests of Central and South America

Latin Name: Philodendron Birkin

Common Name(s): Philodendron Birkin, Philodendron White Wave or ‘Birkin White Wave

Plant Family: Araceae

Difficulty Level: Medium

Appearance: Unique dark green leaves with creamy white streaks and stripes throughout.

Height and Size: Mature height of 3 feet (0.9 meters)

Growth Rate: Medium

Flowering: Rare but can occasionally grow small white flowers.

Pruning: Regular pruning not required. Only to remove dead or dying leaves.

Cleaning: Dust every 2-4 weeks.

Light Requirements: Bright, indirect sunlight.

Water Requirements: Moist but not soggy potting mix.

Best Soil: Well-draining, high-quality and nutrient-rich.

Ideal temperature: 55-85°F (13-29°C)

Fertilizing Routine: Apply a well-balanced 10-10-10 fertilizer twice a month in spring and summer.

Ideal Humidity Level: 50-60% humidity.

Propagation: Through stem cuttings

Repotting Frequency: On average, repot every 1 to 2 years.

Toxicity: Toxic to pets and humans if ingested.

Risk of Pests: Risk of spider mites, thrips, scale insects and mealybugs

Common Problems: Discolouration of the leaves (yellow or brown), leaf drop and curling leaves.

Origin and Family of a Philodendron Birkin

As you’ll know from the name, Birkins are part of the Araceae family within the Philodendron genus which was first discovered in Brazil. Native to tropical and humid climates, there are nearly 500 different varieties of Philodendron, all with their unique qualities and appearances.

However, the Philodendron Birkin differs from the rest of its family as it doesn’t actually grow in the wilderness but was created from a rare mutation when the Philodendron Rojo Congo was being cultivated.

Because the plant stemmed from this rare occurrence, at first Birkins were impossible to find and when you could, the prices were enormous for a little cutting. However, now the plant is being mass-produced and is quite commonly available and affordable.

Small Philodendron Birkin plant

Philodendron Birkin Appearance

Known for its unique creamy white and green variegated foliage, the Philodendron Birkin is actually a genetically unstable plant type. This means that you can get a lot of variation in the leaves on the same plant, and across other Birkins.

This is why you will see some leaves being more green than white, while others can be entirely white. There are even instances where a splash of pink has developed on a leaf here and there which adds an extra layer of surprise to each new leaf.

Philodendron Birkin Height, Size and Growth Rate

Birkins are a compact plant and won’t grow much larger than 3 feet (0.9 meters) in height and spread. This makes them ideal for smaller spaces where you still want an impressive and colourful plant.

As well as being compact, Birkins are slow-growing plants so don’t expect to see endless new leaves pop out every year. However, with the right care and environment, they will still reward you with enough stripy leaves to make it all worth it.

Flowers on a Philodendron Birkin

It’s quite rare to find any flowers on a Philodendron Birkin but you may occasionally see the odd white flower appear. This will only happen in mature plants and don’t be discouraged if your Birkin isn’t flowering as this doesn’t mean that anything is wrong, it’s just pretty rare. The flowers aren’t also super pretty so it’s really the leaves that are the main attraction with a Philodendron White Wave.

Although lots of plant parents will be very happy when they spot a flower, on Philodendron Birkins you might actually want to cut them off. This is because they require a lot of energy to grow and maintain a healthy flower and that can detract from your plant’s ability to develop new leaves.

Pruning your Philodendron Birkin

Regular pruning is not required as part of the Philodendron Birkin care routine. You only need to remove leaves if they are dead or dying. Removing these leaves will stop your plant from expending energy trying to revive the leaves and can instead focus on new healthy growth.

Even though they are slow-growing and compact, if they do outgrow the space, or new growth is leggy and small (this can happen over winter), it can be a good idea to prune parts of the plant to your desired shape and size.

You will also want to prune off leaves that are badly affected by pests as this can help to cut down the size of the infestation.

Cleaning your Philodendron Birkin

It’s important that you wipe down the leaves every few weeks to remove a build-up of dust and dirt. Regular cleaning of your Birkin has several benefits, the most important of which removing any particles that might limit the amount of sun that your plant receives. Even a small layer of dust can have a large impact on its photosynthesis levels.

Cleaning the leaves also helps to unclog the pores which helps your plant to ‘breathe’ better. The other aesthetic upside of dusting the leaves is that they will look brighter and fresher.

The best and safest way to clean the leaves is by using a damp cloth and wiping them gently. You can use a few drops of dish soap if they need it but refrain from using any other cleaning products or chemicals as this can really damage the leaves.

Philodendron Birkin Light Requirements

As with many houseplants, Philodendron Birkin thrive best in bright spots with indirect light. This means placing them a little away from the window so they don’t receive direct light but keeping them away from those dark corners. Too much direct sunlight can damage the leaves by burning them and creating yellow scorched patches across their beautiful leaves.

However, if your Philodendron White Wave is in a low-light area, your plant can become leggy and growth can even be stunted. The other thing to note with low light areas is that new leaves may lose some of the beloved white variegation and you will often find the new leaves are a lot more green than the others.

If you do want to place your plant next to a window, then ensure that it is an east, west-facing window as these receive plenty of sunlight but it’s not as intense as a south-facing window (if you live in the northern hemisphere).

Pick up a light monitor to check if your Birkin is getting the right level of light.

Philodendron Birkin Water Requirements

Watering is probably the most important (and challenging) part of your Philodendron Birkin care routine. They like to have moist soil but will struggle if they are consistently overwatered. This is why it’s important to get the right balance and ensure that you are on top of when you need to water your Philodendron Birkin.

We recommend checking the soil moisture before watering to make sure it has dried sufficiently. You can do this either through the chopstick or finger method. Otherwise, moisture meters are great affordable little gadgets which will help determine when your plant needs watering.

Another top tip is to remove any excess water that is still sitting in the saucer or at the bottom of the planter about 15 to 20 minutes after watering. This allows your plant to soak up as much as it needs but prevents the roots from sitting in a puddle of water.

If your Philodendron White Wave is regularly overwatered, then this can cause diseases to take hold of your plant. Bacterial leaf spot can be a bit of a concern for plant parents which appear as brown spots with yellow halos. Making sure your Birkin is receiving the best care, as well as checking the plant over regularly will help to avoid the problem and catch it early.

Soil and Drainage

Use a high-quality well-draining potting mix for your plant, ideally, a mix that includes perlite. Alternatively, you can add perlite to your mix to aid the aeration and drainage of the soil.

To avoid waterlogged soil and root rot, make sure that there is good drainage. There are a few things you can do to help with this. Firstly, only ever use a pot with drainage holes as this will allow any excess water to flow out of the soil. Then 30 minutes after watering your Philodendron Birkin, empty the drip tray or planter to avoid the roots of your plant sitting in water.

Other ways you can aid drainage is to add perlite to the soil and use terracotta pots rather than plastic ones. These will allow some of that excess water to evaporate out of the sides whereas plastic pots keep in every drop of water.

Ideal temperature for your Philodendron Birkin

As they are native to the tropics, Philodendron Birkin will struggle in colder temperatures. There are a few things to watch out for when it comes to temperature extremes. Firstly, during winter you need to be careful that your plant isn’t near any drafty windows or doors as the colder air from outside will over time harm your plant.

However, it’s not just winter that you need to worry about as air conditioning vents can also be quite harmful to your Philodendron Birkin. A digital thermometer is a great tool to help avoid temperature extremes.

Although they do like warm temperatures, hotspots are another concern as they can dry out the plant quickly which can cause brown leaves among other issues. Keep your Birkin away from radiators and cookers and be wary of hotspots that can form around windows.

Philodendron Birkin Fertilizer Requirements

Apply a well-balanced 10-10-10 fertilizer at half the recommended strength once a fortnight in spring and summer. We recommend using a water-soluble liquid fertilizer as this allows for greater control over the strength and frequency of feeding.

Getting a 10-10-10 fertilizer with equal amounts of nitrogen, phosphorus, and potassium (NPK) will ensure strong and healthy new growth.

You want to avoid over-fertilising your Philodendron Birkin as this can cause yellow sickly leaves. As there are many factors that can impact how much fertilizer your plant needs, such as light level, temperature, plant size and maturity, staying on the side of caution and diluting the fertilizer helps to avoid issues.

Ideal Humidity Level for your Philodendron Birkin

Philodendron Birkin require medium to high humidity levels to properly thrive, ideally between 50-60%. Although we can’t replicate their natural habitat of the tropics, there are a few things we can do to increase the humidity. Firstly, misting your Birkin is key to preventing the leaves from drying out. You want to get into the habit of doing this every few days to boost the humidity a little.

Alternatively, showering your plant, using a pebble tray or placing them in the bathroom can also help avoid problems caused by dry air. However, if the issue is quite bad and you want a one-solves-all solution then getting a humidifier is the best option.

Don’t worry if you have dry air in your home as we have a guide specifically on how to increase the humidity for your houseplants!

@thegoodplantco_au on Instagram

Small philodendron birkin plant on a wooden table

Propagating your Philodendron Birkin

You can easily propagate a Philodendron Birkin plant by taking a stem cutting. We recommend propagating in spring as the growth period is beginning. Place the cutting in water for a few weeks, replacing the water every other day.

Once roots begin to develop you can pot your cutting in fresh soil and continue with your normal Philodendron Birkin care routine. We have an entire Philodendron Birkin propagation guide to help you through the process and ensure it is a success!

Repotting your Philodendron Birkin

If not repotted frequently enough, your Philodendron Birkin will start to stunt its growth as there is nowhere else for the root system to expand to sustain larger growth. Depending on the environment, you will need to repot every 1-2 years.

If you see roots growing out of the bottom or top of the pot this is a sign it needs more room. A lack of new growth during spring and summer can also be an indication that your Birkin is rootbound and needs to be upgraded to a larger pot. However, there are other factors that may lead to stunted growth including time of year, temperature and light level so be sure to confirm this by checking the root system and other environmental factors.

When repotting you need to be sure that you don’t use a pot that is too big as this can not only cause the plant to become unstable but it can also increase the time needed for the soil to dry out which increases the risk of root rot.

Philodendron Birkin Toxicity to Humans and Pets

Philodendron Birkin plants are toxic to pets and children and digestion of any part of the plant can cause skin, mouth, tongue, throat and stomach irritation. This is because it includes a high level of calcium oxalate crystals which is toxic to ingest. The crystals are insoluble which means that they won’t dissolve in saliva but are instead sharp and can cut skin tissue.

If you, your child or your pet has come into contact with sap from the Birkin and are displaying symptoms, seek medical attention immediately.

Although rare, it can also happen that Birkin can cause some skin irritation when handled. This is why we tend to recommend wearing gloves when propagating, repotting or pruning your Birkin.

Treating and Preventing Pests

Although rare, it can sometimes happen that you find some unwanted visitors on your Birkin. This is more common if your plant has spent any time outdoors. Pests such as spider mites, scale insects and mealybugs can create real havoc with your plant’s health and can cause brown leaves, brown spots, holes in the leaves and plant death if not treated.

Make sure to give your Philodendron Birkin a regular check-up as treating a pest infestation early is the key to getting rid of it. Checking over the leaves will also help you spot other common problems early.

If you do spot pests on your Philodendron Birkin, isolate it from all other plants before starting treatment. Then remove the worst affected leaves, wash it down in the shower and treat it with neem oil.

Philodendron Birkin Common Problems

Fiddle and Thorn is a participant in the Amazon Services LLC Associates Program, an affiliate advertising program designed to provide a means for sites to earn advertising fees by advertising and linking to Amazon.com

Take our houseplant survey!

Quickly respond to our 30 second houseplant survey and get 75% off our Complete Houseplant Care eBook!

Take the Survey

No thanks…

The 10 Perfect Plants for Every Home

Last Updated: December 31, 2021

Houseplants that will thrive in any home

Looking after plants can seem difficult and daunting, but it really doesn’t have to be! There are quite a few plants out there that don’t really care about humidity level, or exactly how much sunlight they get each day. We have curated a list of our top 10 plants that will survive and thrive in any home.

So whether you’ve killed all your plants before, or just don’t have in your busy life to tend to a fussy houseplant, this list is the one for you!

1

Peace Lily

Spathiphyllum wallisii

There’s a reason that Peace Lilies are so popular, and it’s not just because of their incredible white flowers. They are super low maintenance plants that can adapt and thrive in pretty much every home. They can tolerate all light levels which is super rare for houseplants.

Our favourite thing about the Peace Lily is that it really helps us plant parents out by drooping its leaves when it really needs water. This can help you spot underwatering before it’s really a problem. Within minutes of watering, the leaves will perk up – it’s pretty cool! And if we haven’t sold you on the Peace Lily yet, then you should probably know that they are also one of the best plants at purifying the air and removing chemicals from your home!

Find out more in our Peace Lily care guide.

2

Snake Plant

Sansevieria Trifasciata

The bold and striking leaves of the Snake Plant make it stand out wherever you put it! Not only are they slow-growing, but they transcend upwards so are great for small spaces or that corner you never know what to do with. They have some of the sturdiest leaves or any houseplant, and their sharp leaf tips have given the plant the nickname of mother-in-laws-tongue!

When it comes to care, Snake Plant are super easy to look after, they can adapt to a range of light levels (are great low light plants), prefer dry soil and don’t need much attention in the way of misting or repotting etc. So if you want a low maintenance, sturdy houseplant, then the Snake Plant is your perfect match!

Find out more in our Snake Plant care guide.

3

Dragon Tree

Dracaena draco

The Dragon Tree was actually our first ever houseplant and ignited our initial love for caring for indoor plants many years ago. Native to Madagascar, it’s a timeless plant that brings elegance and style to every room. They are also super easy to care for and are great at purifying the air which makes them the perfect entry-level houseplant.

You’ll have a hard time trying to kill a Dragon Tree as they are pretty drought-tolerant and forgiving when it comes to light, temperature levels and humidity so it’ll adapt well to every home.

Although they can reach up to 6 metres in their natural outdoor habitat, they’ll only ever get to about 1.5/2 metres when grown indoors (and even this will take years and years) so you don’t need to worry about it getting too big to handle.

Find out more in our Dragon Tree care guide.

4

English Ivy

Hedera helix

Although they are most commonly known as outdoor plants, you can very successfully grow an English Ivy indoors as long as you give it enough light. We are obsessed with the white variegated English Ivy but if not given enough sunshine, the new leaves will lose all of that variegation.

Included in the NASA Clean Air Study, the English Ivy is great at removing toxins from the air so we recommend having this around your home. They are also believed to sometimes be able to improve allergy symptoms so as well as looking lush, they have great benefits for us too. They are also super fast-growing plants so you want to place them on a high shelf making sure they have enough space to cascade downwards.

Find out more in our English Ivy care guide.

5

Lucky Bamboo

Dracaena sanderiana

Believed to bring good luck, the Lucky Bamboo is the ideal houseplant for those wanting to bring a little bit of greenery indoors, but who just don’t have the time or skill to give it much attention. The Lucky Bamboo thrives off being neglected and as long as they have some natural sunlight, they’ll happily live for a very long time in every home! You can choose to grow them in either well-draining soil or a vase filled with water. The latter is great for forgetful waterers as there’s no risk of them drying out!

You can continue the gorgeous swirls on your Lucky Bamboo plants by simply rotating them every once in a while. The plant naturally grows towards the sunlight so you can use this to create the twists.

Find out more in our Lucky Bamboo care guide.

6

ZZ Plant

Zamioculcas zamiifolia

Also known as the Zanzibar Gem, the ZZ Plant is a great low-maintenance minimalist houseplant. Loved for their dark green glossy oval leaves, we recommend this one for those without a fantastic track record of keeping plants alive, but also for anyone looking for something smart and stylish to spruce up their home. They are very adaptable and will deal well with some bright but indirect light, as well as shady dark corners of your home.

The ZZ Plant is quite slow-growing so you won’t see new stems popping out all of the time. It’s important to note that they grow bulb-like roots called rhizomes so will need quite a large pot to really thrive and grow. This also means they are drought tolerant as they store water in their rhizomes.

Find out more in our ZZ Plant care guide.

7

Inch Plant

Tradescantia zebrina

Also known as the Inch Plant, we haven’t yet come across a faster-growing or easier to propagate houseplant. Native to the tropics of Mexico and South America, these plants offer something different with their purple and silvery leaves that transcend out of the pot.

Growing these indoors helps keep their growth more contained whilst still giving that wilderness feel which we love. Caring for these plants is also super easy as all they need is ample light and moderate water. They are quite forgiving though so won’t give up straight away if something’s a little off.

These plants are great for hanging planters or when placed on shelving so you can really make the most of those incredible vines. They can be mildly toxic though so you’ll want to keep them away from pets.

Find out more in our Inch Plant care guide.

8

Chinese Evergreen

Aglaonema

If you find that you are often killing your houseplants and you can’t seem to figure out why, then the Chinese Evergreen is the one for you. Native to South-East Asia, they are so hardy that they’ll grow and thrive in basically any home so it’s the perfect beginner plant.

Chinese Evergreens have incredible leaves, full of splashes of white, silver or pink depending on the particular variety. They are quite slow growing though (as most hardy plants are), so don’t expect a lot of new growth every year.

Find out more in our Chinese Evergreen care guide.

9

Spider Plant

Chlorophytum comosum

Spider Plants are the perfect plant for a houseplant beginner as they are super easy to care for, grow pretty quickly, and produce an abundance of spider babies which can be propagated in seconds.

The best thing about Spider Plants is that you would really have to try to kill them as they adapt to and survive in most environments and don’t mind being a little neglected. They even show you when they need more water by going quite light green. But after a little bit of water, they spring back to full health in minutes.

As your plant matures, you’ll start to see it sprouting little spiderettes which you can choose to remove from the plant to create new Spider Plants. They really are the gift that keeps on giving.

Find out more in our Spider Plant care guide.

10

Yucca

Yucca elephantipes

A staple of many homes, the Yucca is one of the most popular houseplants and you’ll often see them around offices, shops and restaurants too! They’re super easy to care for so are perfect for all plant parents. They were very popular in the ’70s so are a great way to get a little bit of vintage style in your home.

As they mature, Yucca plants can grow about 2 metres in height so make it the perfect feature plant for your space. They are very slow-growing though so if you don’t have as much space, a smaller plant won’t outgrow the room very quickly.

They are very low maintenance and can adapt to most light levels, temperature and humidity levels but unfortunately, they are toxic to keep that in mind if you have pets or small children.

Find out more in our Yucca care guide.

Fiddle and Thorn is a participant in the Amazon Services LLC Associates Program, an affiliate advertising program designed to provide a means for sites to earn advertising fees by advertising and linking to Amazon.com

Take our houseplant survey!

Quickly respond to our 30 second houseplant survey and get 75% off our Complete Houseplant Care eBook!

Take the Survey

No thanks…

How to Care for a Peperomia Pepperspot

Last Updated: October 16, 2023

Peperomia Pepperspot Plant

Peperomia Pepperspot plant in the sun

The Pepperspot variety of Peperomia can be a little difficult to get your hands on but totally worth it if you can! Native to South and Central America, the Peperomia Pepperspot is iconic for its tiny round leaves on a mess of thin little vines.

In this care guide, we will share with you all of the Peperomia Pepperspot’s environmental requirements, as well as how to repot, prune and propagate it. Scroll right to the bottom for more information on how to diagnose and treat common problems.

How to care for a Peperomia Pepperspot

It’s important that the Peperomia Pepperspot gets a lot of bright but indirect light. If grown in low-light areas they can very quickly become leggy and straggly. On the opposite end of the spectrum, if exposed to intense direct sun, it can dry out the thin leaves and stems very quickly.

When it comes to watering your Peperomia Pepperspot, make sure that the soil dries out fully between watering. They have quite a delicate root system so are sensitive to overwatering. Even the occasional accidental overwatering can lead to root rot and consequent issues.

Peperomia Pepperspot Overview

Origin: Native to South and Central America

Plant Family: Piperaceae family

Difficulty Level: Medium

Common Names: Peperomia Pepperspot, Green Coins Plant

Appearance: Small round green leaves on very thin red stems.

Height and Size: Average mature length of 16 inches (40 centimeters)

Growth Rate: Slow

Flowering: Rare but may occasionally grow small, insignificant flowers in summer

Pruning: Remove dead or dying leaves and prune to keep them in the desired shape and size

Cleaning: Use a feather duster to delicately clean the leaves

Light Requirements: Bright, indirect light. Will become leggy in low light.

Water Requirements: Water once weekly in summer, allowing the soil to dry out in between

Best Soil: Loose and well-draining potting mix

Ideal temperature: 65-85°F (18-29°C)

Fertilizing Routine: Apply a well-balanced fertilizer at half the recommended strength once a month during the growth season.

Ideal Humidity Level: 50-60% humidity

Propagation: Through vine cuttings

Repotting Frequency: Every 1-2 years

Toxicity: Non-toxic and safe for humans and pets

Risk of Pests: Mealybugs, aphids and spider mites.

Common Problems: Leggy growth and dry brown leaves

Origin of a Peperomia Pepperspot

They are native to areas across South and Central America and grow under the canopy of other larger trees. This is why they require bright but indirect light as they won’t be able to tolerate direct sunlight.

Peperomia Pepperspot Family

They are part of the Piperaceae family (also known as the Pepper family) which contains five genera: Piper, Peperomia, Zippelia, Manekia, and Verhuellia. There are over 3,500 species across these genera but most lie within the two main genera: Piper and Peperomia

Peperomia Pepperspot Appearance

The Peperomia Pepperspot is often mistaken for other Peperomia with small round leaves but there are several distinctive characteristics of this variety. They have very very small thin leaves that hang off thin red stems. The plant can look a little messy as the vines don’t always just grow straight so it can end up looking like a big bush of tiny leaves.

Care Difficulty Level

Despite having very delicate small leaves, the Peperomia Pepperspot is actually easier to care for than it looks. The hardest part tends to be getting your hands on one of these to begin with but once you’ve found a good spot for them, they are quite easy to look after as they have very standard care requirements.

Peperomia Pepperspot Height and Size

The Peperomia Pepperspot will tend to grow to a maturity of 16 inches (40 centimeters) in height and spread. They will take many years to get to this maturity so they won’t outgrow the space any time soon.

Peperomia Pepperspot Growth Rate

Like most Peperomia plants, the Green Coins Plant is quite a slow grower, making them perfect for small spaces. You will still see plenty of new growth every year but it won’t be popping out new leaves whenever you look at it.

Flowers on a Peperomia Pepperspot

Peperomia Pepperspot plants will very rarely bloom when grown indoors as houseplants. However, you may see tiny flowers appear in spring and summer but these will be very insignificant and won’t last long.

Pruning your Peperomia Pepperspot

There are two main reasons that you will need to prune your Peperomia Pepperspot; to remove dead/dying leaves and to keep your plant in the desired shape.

Once a leaf or stem has turned brown or yellow, there is no reversing this. Instead, the best thing to do is prune it from your plant. The dead leaves will eventually fall off but it’s best to prune them as soon as it happens. This allows your plant to focus all of its energy on new growth.

The second reason you may need to (or want to) prune your Peperomia Pepperspot is to shape it. These plants can become a bit messy and unruly so pruning can help to keep them the size or shape that you want.

You may also choose to prune any leggy growth that may have formed over winter. When your plant isn’t getting enough sunlight, the vines can start to become quite leggy and there will be large gaps between each leaf on the vine. Although this won’t cause any damage to your plant or impact its health, removing it can help your plant look fresher.

Cleaning your Peperomia Pepperspot

Cleaning this variety of Peperomia can be a little tricky to clean as they have very thin, delicate leaves and stems that can be easily broken. The best way to clean them is using a very soft feather duster to brush off dust and dirt from the leaves.

@hellodeka on Instagram

Peperomia Pepperspot on a white background

Light Requirements for a Peperomia Pepperspot

Peperomia Pepperspot natively grow beneath the Amazonian canopy so don’t deal well with direct light and it can scorch the leaves. You’ll want to find a spot with amble bright but indirect light.

While they can adapt to some medium light levels, they will start to become leggy and straggly in low light. It may also cause them to start dropping leaves.

Water Requirements for a Peperomia Pepperspot

Peperomia Pepperspots need a good watering every week during summer but you want to make sure that the potting mix has dried out slightly before watering again. This will help to avoid waterlogged soil and root rot. Cut back watering in winter to every other week to ensure there is enough time for the soil to still dry out.

There are a few ways to know if the soil has dried out, the most reliable of which is a moisture meter. However, if you don’t have one (or don’t want to invest) then we recommend the lifting method. Start to lift your plant up regularly after watering and you will slowly become accustomed to what it feels like weight-wise with dry potting mix.

Best Soil for a Peperomia Pepperspot

A loose and well-draining potting mix is ideal for your Peperomia Pepperspot. The most important ingredient is perlite which helps with drainage and aeration. You can find a lot of potting mixes that already include it but you can buy it separately and add it yourself too!

Ideal temperature for your Peperomia Pepperspot

The ideal temperature range for the Pepperspot is 65-85°F (18-29°C). They prefer slightly warmer temperatures and will struggle in cold air. It’s important that you keep them away from drafty windows, external doors and air conditioning vents as over time this can cause issues such as brown leaves, leggy growth, stagnant growth and your Peperomia losing leaves.

But it’s not just cold extremes that you need to watch out for as hotspots can be equally damaging to your plant. This is anything about 85°F (29°C) for extended periods of time. It’s not just intense sunlight through the window that can cause these hotspots. If your plant is too close to a cooker, radiator or heating vent, it can dry out the leaves and stems very quickly.

The best thing to do is buy a digital thermometer to monitor for any extremes and make changes before it causes issues for your plant.

Peperomia Pepperspot Fertilizer Requirements

Apply a well-balanced 10-10-10 fertilizer at half the recommended strength once a month during the growth season. The reason that you should always use less than the recommended amount is to reduce the risk of overfertilization. If given too much fertilizer, it can cause issues such as yellow leaves, stunted growth or small new leaves.

Cut back on fertiliser completely during winter as growth will be dormant and feeding during this time can be really damaging to your plant and its root system.

Peperomia Pepperspot Humidity Requirements

On average, your Green Coins Plant requires a humidity level of 50-60% to thrive. The best way to boost the humidity is to mist the plant a few times a week or use a humidifier. This will go a long way to preventing brown leaves on your Peperomia Pepperspot.

The only real way to measure the humidity around your plant is to use a humidity monitor. Luckily a lot of digital thermometers have this included so you can get a 2-in-1 combo device.

@roosanur on Instagram

Hand held Peperomia Pepperspot plant

Propagating your Peperomia Pepperspot

The process for propagating your Peperomia Pepperspot is about as easy as it gets. To start make sure that you have a healthy and mature parent plant, this gives your a slightly higher success rate and will also lower the risk of causing problems with the starter plant.

Next, with some clean sharp shears or scissors, snip off some cuttings from the stems. Take these stems and submerge the bases in some water, these should start rooting pretty quickly. Once you have some leaves and a good healthy root ball go ahead and plant them into some good quality potting mix and continue care as normal.

Repotting your Peperomia Pepperspot

As they are quite slow growers, you won’t need to repot your Peperomia Pepperspot often, on average every 1-2 years. However, you should regularly keep an eye out for signs that your plant is rootbound and may benefit from a new, bigger pot.

These signs include roots growing out of the bottom or top of the pot, the roots being tightly coiled when removed from the pot (there won’t be much soil left if rootbound) and stagnant growth.

Stagnant growth can be caused by other factors other than a rootbound Peperomia Pepperspot though so be sure to check other care and environmental factors before making the diagnosis.

Peperomia Pepperspot Toxicity to Humans and Pets

Peperomia Pepperspot plants are safe and non-toxic for humans and pets, including cats, dogs and bunnies. Whilst you still want to avoid your pet consuming large quantities of it, it’s not dangerous if they come into contact with it or nibble at it slightly.

Treating and Preventing Pests

Although it’s very uncommon, it may occur that your Peperomia Pepperspot begins to suffer from a pest infestation. This tends to be common on houseplants that spend some of the year growing outside on balconies or in the garden so make sure to thoroughly check them when moving them back inside for the winter.

A pest infestation of any kind can very quickly begin to cause a range of issues from brown and yellow leaves to holes in the leaves and stunted growth. If not treated in time, it can also kill your plant.

Here is a list of some of the pests that pose a danger to the Peperomia Pepperspot:

Spider Mites: They are very very small and difficult to spot with the naked eye so you’ll need to diagnose this by using a magnifying glass and spotting the issues they cause (yellow and brown spots). The reason that they are so damaging to Peperomia Pepperspot plants (and other houseplants) is that they feed on the sap of the plant, dehydrating it and killing it. As Pepperspots have very small thin leaves, they can kill the leaf very quickly. To treat, use neem oil and an insecticide.

Aphids: Aphids are small, soft-bodied insects that also suck on the plant sap but they leave behind a sticky dew which makes them easier to diagnose. Remove aphids by gently spraying your plant with an insecticide.

Mealybugs: Mealybugs are white insects that almost look like tiny fluffs of cotton across the leaves and vines of your Peperomia. These sap-feeding bugs dehydrate the leaves quickly and lead to stunted growth. The best way to remove mealybugs is by using a cotton swab that has been dabbed in alcohol but this can be a tedious task for this Peperomia variety.

Having success when fighting a pest infestation is difficult but spotting the issue early is key. Monitor your plant regularly and give it thorough checkups about once a month to spot any early warning signs of pests or other problems.

Peperomia Pepperspot Common Problems

Fiddle and Thorn is a participant in the Amazon Services LLC Associates Program, an affiliate advertising program designed to provide a means for sites to earn advertising fees by advertising and linking to Amazon.com

Take our houseplant survey!

Quickly respond to our 30 second houseplant survey and get 75% off our Complete Houseplant Care eBook!

Take the Survey

No thanks…