Schefflera Care Guide: How to Grow and Maintain Your Umbrella Plant

Last Updated: October 16, 2023

Introduction

The Schefflera, also known as Umbrella Tree, is a popular houseplant due to its distinctive foliage and easy-care nature. Hailing from the tropical rainforests of Taiwan and South China its glossy leaves splay out like the ribs of an umbrella (hence the name).

Schefflera Varieties

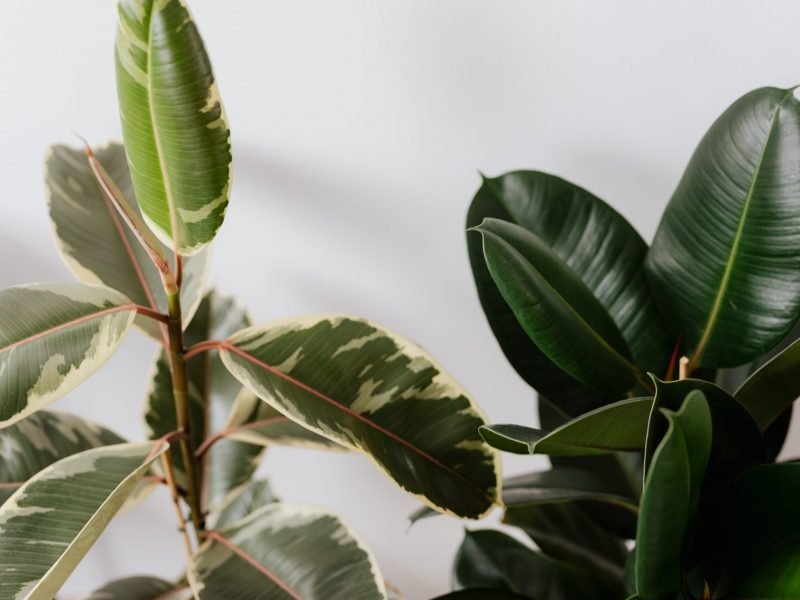
There are two main varieties of Schefflera that are typically grown as houseplants:

  • Schefflera arboricola, also known as the dwarf umbrella tree, is smaller in stature and leaf size with a bushier growth habit.
  • Schefflera actinophylla or the Australian umbrella tree, is larger and can grow up to 50 feet tall in its native environment. This variety features larger, glossier leaves and is often grown as a statement plant in homes and offices.

General Schefflera Care

Despite being relatively low-maintenance, Schefflera plants do have specific needs and preferences when it comes to lighting, watering, temperature, and feeding. Luckily for many, they fall quite down the middle in terms of their care needs and adapt well to the natural environment found in many homes.

Bright but indirect light is best, followed by moderate watering, room temperatures and monthly feeding during summer.

However, no plant is entirely immune to problems as there are so many factors that are often os out of our control. Scheffleras can sometimes fall victim to common houseplant pests and diseases, which can compromise their health and appearance if not addressed promptly. Therefore, regularly inspecting your plant and taking swift action at the first sign of trouble will help you successfully fight any issues that come along.

Plant Characteristics

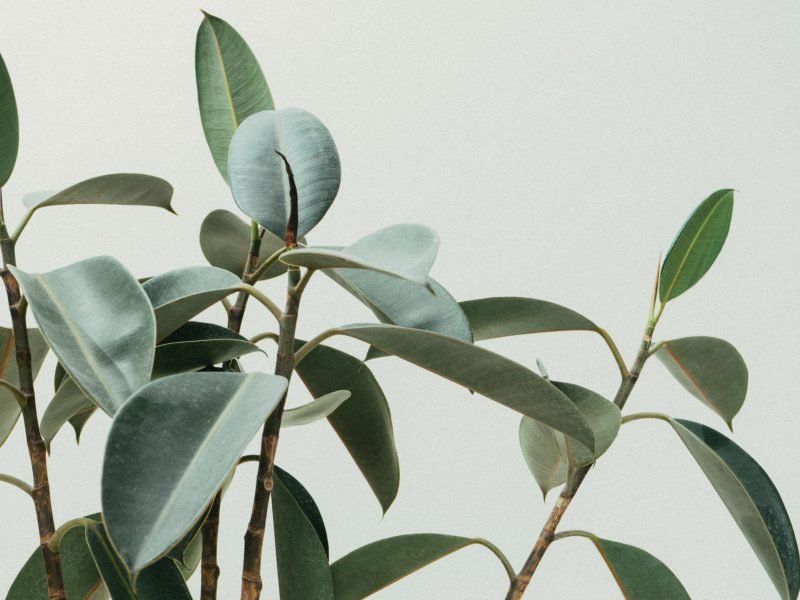
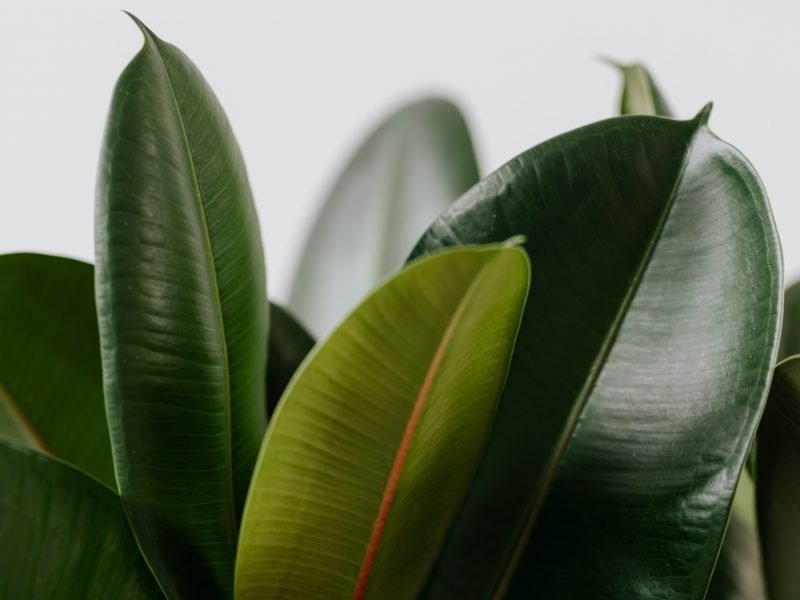
The Schefflera is characterized by its vibrant green, glossy leaves that grow in circular clusters, resembling the spokes of an umbrella. It’s from this unique growth pattern that the plant derives its common name. Native to Taiwan and South China, the Schefflera thrives in warm, humid climates, making it well-suited for indoor cultivation.

One of the key characteristics of the Schefflera is its resilience. This plant is capable of withstanding a variety of environmental conditions, making it an excellent choice for beginner plant owners or those with less than ideal growing conditions.

They are also known for their air-purifying qualities, contributing to a healthier indoor environment – just another reason to have them around!

Here’s a summary of the origin and main elements of a Schefflera Plant:

  • Native to: Taiwan and South China
  • Common name: Umbrella plant
  • Family: Araliaceae
  • Growth habit: Shrubs or small trees
  • Leaf appearance: Glossy, vibrant green, umbrella-like clusters
  • Size: Varies depending on species, from small tabletop plants to large indoor trees
  • Resilience: Can withstand a variety of environmental conditions

Schefflera Light Requirements

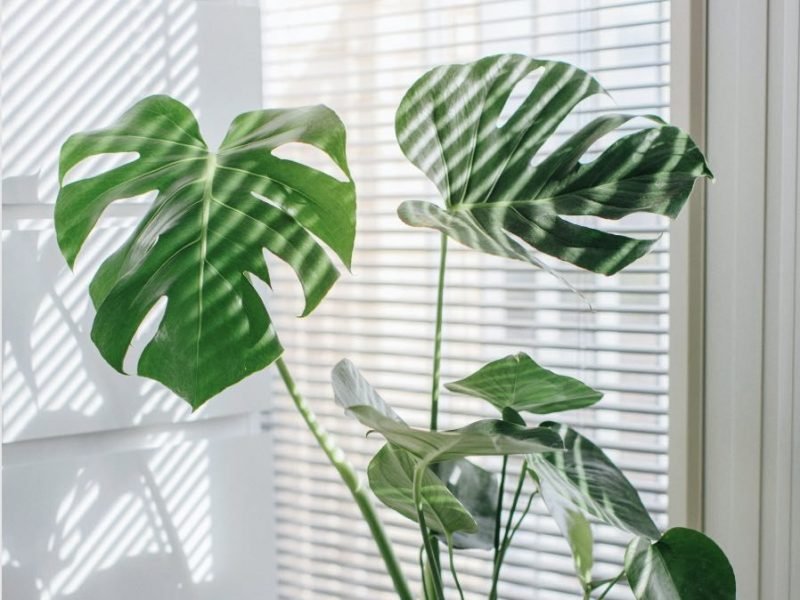
Schefflera plants thrive in bright, indirect light. In the wild, the Schefflera is accustomed to receiving dappled sunlight filtered through the lush canopy of tropical rainforests.This means it’s not a plant that enjoys direct sun exposure, particularly in summer.

Direct sunlight can scorch its leaves, leading to unsightly brown patches. Instead, a brightly lit room with ample indirect light is ideal for this houseplant. In winter, sometimes you can get away with more direct sunlight as the sun is weaker so you might want to think about moving your plant around depending on the seasons.

Tip tip: Rotate the plant every few weeks to make sure all sides are receiving equal amounts of light. This prevents the plant from growing lopsided and leaning towards the light.

Artificial lighting can also be a good choice for times when there isn’t enough natural light. Fluorescent or LED lights can be super useful and a great investment for plant parents. However, it is important to remember that artificial light should not replace natural light completely, but supplement it.

The Perfect Temperature

Generally, the Schefflera plant prefers a temperature between 60-75 degrees Fahrenheit (15-24 degrees Celsius). It can tolerate a maximum temperature of around 80 degrees Fahrenheit (27 degrees Celsius), but continual exposure to such high temperatures can lead to dry patches forming on the leaves and the stems wilting over time.

Here are some practical tips to maintain the perfect temperature for your Schefflera:

  1. Avoid placing your Schefflera near air conditioners or heating vents as these can create hot or cold drafts that can adversely affect the plant.
  2. Keep the plant away from windows that receive direct sunlight as the intense heat can cause leaf scorching.
  3. In cooler seasons, ensure your Schefflera gets enough warmth by placing it in a room that maintains a consistent temperature within the plant’s preferred range.

Watering your Umbrella Plant

Proper watering is critical for the health of your Schefflera and too much or too little water can create quite severe problems. The aim is to achieve a balance that allows the root system to take in as much water as it needs, without creating waterlogged soil.

Frequency of Watering:

Generally, a mature Schefflera should be watered once the top 1-2 inches of soil dry out. This usually means watering once a week in the summer and once every two weeks during the winter months, but it can vary based on the specific conditions in your home.

Amount of Water:

When watering your Schefflera, thoroughly soak the soil until water runs out of the drainage holes at the bottom of the pot. However, never let the plant sit in standing water. If necessary, empty the plant saucer after watering to prevent waterlogging.

Water Quality:

Schefflera plants prefer rainwater or distilled water over tap water, as they can be sensitive to chemicals like chlorine often found in municipal water supplies. This only tends to be an issue for them if you live in a hard water area though so it’s worth checking that.

Signs of Overwatering and Underwatering:

Overwatered Scheffleras may show signs of yellowing leaves and leaf drop, while underwatered plants tend to have leaves that curl inward or dry up. Adjust your watering schedule as necessary if you notice these signs.

Finding the Right Humidity Level

Schefflera prefer a humidity level ranging between 40% and 60% mimicking their natural habitat in tropical rainforests. This can be measured using a hygrometer, an inexpensive and convenient tool for any plant enthusiast (often it will have a thermometer built in as well which is great for monitoring temperature fluctuations at the same time as humidity).

If your home has quite dry air, there are several ways to increase humidity around your Schefflera plant:

  • Misting: Regularly mist your Schefflera’s leaves with a spray bottle filled with room-temperature distilled or rainwater. This not only increases the humidity but also helps to keep the leaves dust-free.
  • Humidity Tray: Place your pot on a tray filled with pebbles and water. As the water evaporates, it increases the humidity around the plant. Ensure that the pot is sitting on the pebbles and not submerged in the water to prevent root rot.
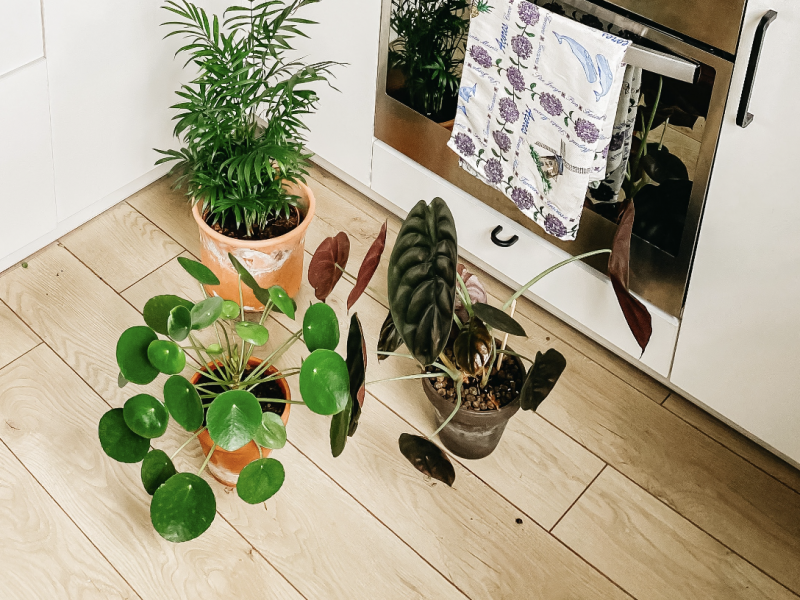
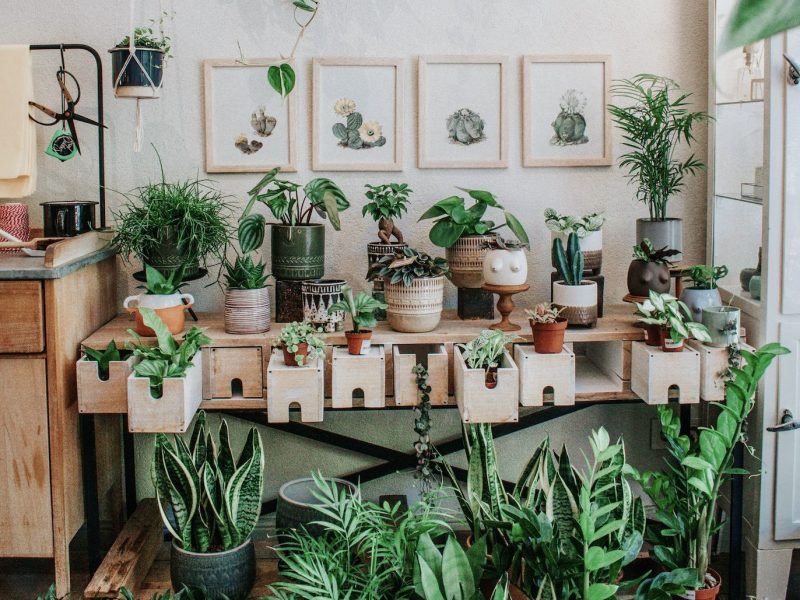
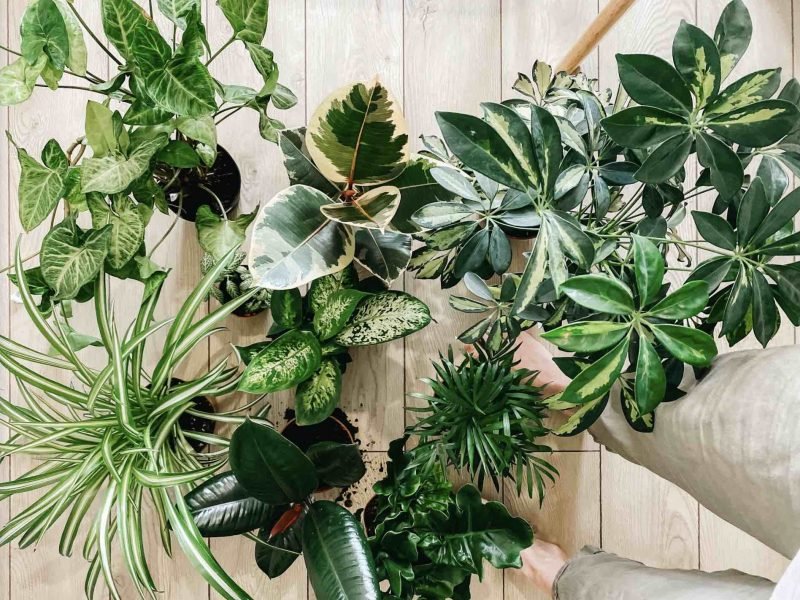
  • Grouping Plants: Group your Schefflera with other plants. As plants transpire, they release moisture into the air, thus creating a microclimate with higher humidity.
  • Humidifier: Use a humidifier in the room where you keep your Schefflera, particularly during the winter months when indoor air tends to be dry.

While Schefflera enjoys a humid environment, it’s important to prevent excess moisture which can contribute to fungal diseases.

Signs of Incorrect Humidity Levels

If the leaves start turning brown at the edges, or if the plant starts dropping leaves, this could indicate that the air is too dry. On the other side of the humidity spectrum, if the leaves become yellow and quite soft, it may be a sign of too much humidity.

Fertilizing your Schefflera

Schefflera plants do not require high amounts of fertilizer, but the use of an all-purpose, water-soluble fertilizer is generally recommended. This should be applied at half-strength every 4 weeks or so during the growing season. A 10-10-10 NPK (see below) is the ideal balance.

  • Nitrogen (N): This is crucial for your Schefflera’s leaf development as it promotes healthy, vibrant green growth.
  • Phosphorous (P): This nutrient aids in root development, helping your plant to establish a strong foundation.
  • Potassium (K): Essential for overall plant health, potassium aids in water regulation and disease resistance.

During the dormant winter months, stop fertilizing your Schefflera completely. It uses this time to rest and prepare for the next growth cycle and environmental factors such as temperature and humidity aren’t always as ideal during winter. Over-fertilizing can lead to salt build-up in the soil, which can damage the plant’s roots. This is why we always recommend that you water your Schefflera thoroughly after each fertilization to help distribute the nutrients evenly throughout the soil.

How, Why and When to Prune your Schefflera

Why Prune your Schefflera

Pruning is essential for your Schefflera for a few key reasons. Firstly, it controls the size of the plant, preventing it from becoming too large for its container or indoor location. Secondly, it encourages the development of a robust and bushy growth habit as it can activate growth hormones in the stems. Lastly, by eliminating dead or diseased branches, pruning can help prevent the spread of diseases and pests.

When to Prune your Schefflera

The ideal time to prune your Schefflera is during its active growth period, typically in the spring and early summer. This is when the plant can recover quickly and easily (pruning can be a little stressful for plants). Pruning at a time when the plant is already growing vigorously ensures that the cut areas will promptly heal and new growth will occur quickly.

How to Prune your Schefflera

Here’s a simple step-by-step guide to help you get the process nailed down:

  1. Prepare the Tools: Since Schefflera plants can be sensitive to diseases, make sure your pruning shears are disinfected before use.
  2. Identify the Branches: Look for branches that are dead, diseased or dying. These are ideal candidates for pruning.
  3. Make the Cut: Cut the unwanted branches at the point where they join with a main branch or stem. Be careful not to damage the main stem.
  4. Shape the Plant: If you want to control the size of your Schefflera, trim back the longest branches. This encourages the plant to grow in a more bushy manner.
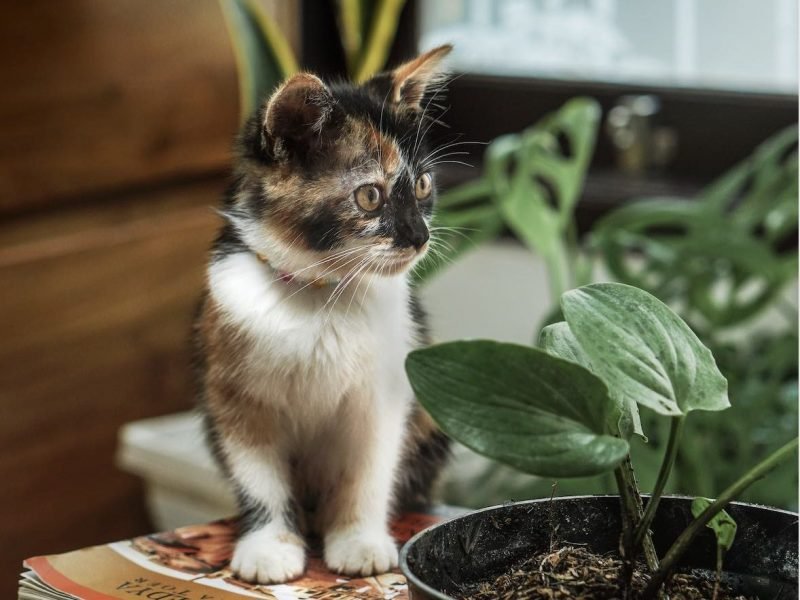
Schefflera Toxicity

The Schefflera plant is toxic to humans and pets as it contains calcium oxalate crystals, which are found in all parts of the plant. When ingested, these crystals can cause a variety of unpleasant symptoms, including:

  • Mouth irritation: The plant’s toxicity can cause mouth and throat pain, often accompanied by increased salivation and difficulty swallowing.
  • Stomach upset: Nausea, vomiting, and diarrhea are common symptoms if larger amounts of the plant have been consumed.
  • Skin irritation: Contact with the plant’s sap can cause dermatitis in extreme cases which is characterized by redness, itching, and blisters.

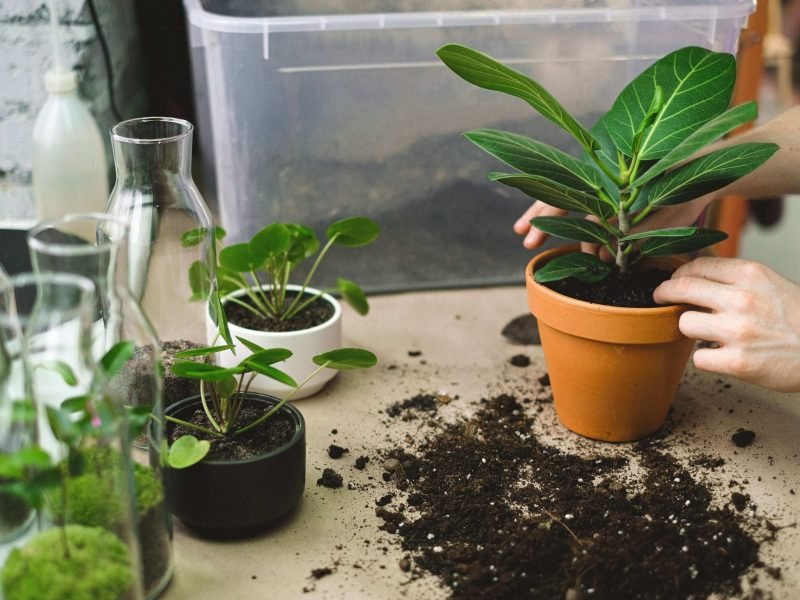
Repotting a Schefflera

When to Repot

The Schefflera plant typically requires repotting once every two to three years. Repotting is due when the plant outgrows its pot and requires a larger space to spread its roots and continue expanding.

One of the main indicators that your Schefflera needs repotting is when you notice roots coming out of the drainage holes or when the growth of the plant seems to stagnate during the growth period.

Choosing the Right Pot

When selecting a new pot for your Schefflera, choose a container that is one size larger than its current one. If the pot is too big, your plant can become unstable which is a severe issue for tall plants such as a Schefflera.

The new pot should also have ample drainage holes to prevent waterlogging and allow any excess water to flow out of the pot.

Repotting Procedure

To repot your Schefflera, follow these steps:

  1. Prepare the New Pot: Begin by placing a layer of drainage material, such as pebbles, at the bottom of the pot. This promotes water drainage and prevents root rot.
  2. Remove the Plant: Carefully remove the Schefflera from its current pot. A gentle tap to the bottom of the pot can help loosen the root ball. If you need to pull the plant out, pull the main stem, rather than the leaves as they can break easily.
  3. Inspect and Prune the Roots: Inspect the roots for any signs of disease or rot. If you find any, prune these parts away with a clean, sharp tool.
  4. Place the Plant: Position the plant in the center of the new pot, spreading its roots out over the drainage layer.
  5. Add Soil: Fill the pot with a well-draining soil mix, making sure not to pack the soil too tightly around the roots.
  6. Water: Once the plant is securely in place, water it thoroughly to help establish it in its new home.

Schefflera Care FAQs


Common Problems with your Schefflera

Fiddle and Thorn is a participant in the Amazon Services LLC Associates Program, an affiliate advertising program designed to provide a means for sites to earn advertising fees by advertising and linking to Amazon.com

Take our houseplant survey!

Quickly respond to our 30 second houseplant survey and get 75% off our Complete Houseplant Care eBook!

Take the Survey

No thanks…

How to Care for Satin Pothos: A Comprehensive Guide

Last Updated: October 16, 2023

Satin Pothos

Satin Pothos

Introduction to Satin Pothos

The Satin Pothos (Scindapsus pictus), is a vibrant houseplant, loved for its striking, silvery leaves. Native to Southeast Asia, it can adapt well to a range of environments, making it suitable for most homes. It’s worth noting though that it is a little trickier to care for than a lot of other Pothos types and you may often find curling leaves or leggy growth if something isn’t right. This is because it’s not actually a true Pothos, instead, it’s more closely related to the Philodendron species

Satin Pothos Characteristics and Benefits

Main Characteristics

  • Leaf Shape and Colour: The Satin Pothos features large, heart-shaped leaves splashed with unique silver spots. This colouring gives the plant a satin-like appearance, hence its common name.
  • Size: When fully grown, the Satin Pothos can reach a length of up to 3 metres. However, it’s size can be easily managed with regular pruning.
  • Growth Habit: The Satin Pothos is a trailing plant, making it ideal for hanging baskets or high shelves where its foliage can elegantly cascade down.

Key Benefits

  1. Air Purification: The Satin Pothos is known for its excellent air purifying abilities. It helps to remove toxins such as benzene, formaldehyde, and xylene from the air.
  2. Decorative Appeal: Thanks to its attractive foliage and trailing growth habit, the Satin Pothos adds a chic, tropical touch to any indoor space.

Light Requirements for Satin Pothos

Indirect, bright light is the ideal condition for your Satin Pothos. Position it near a window that receives lots of natural light but ensure it’s not in the direct path of direct sunlight rays. Too much direct sun can scorch the leaves, causing them to turn yellow, brown and wilt.

The Satin Pothos can also tolerate lower light conditions. However, while it might survive in dimmer corners, it won’t grow as vigorously. Note that the silver variegation on the leaves may fade if the plant does not get enough light. The new leaves may be smaller and you might find that with low light levels, the vines can become leggy.

Artificial lights can also serve as a good source of illumination for your Satin Pothos. These plants can thrive under fluorescent lights, making them perfect for offices or rooms with little natural light.

Note: changing the lighting conditions abruptly can stress the plant. It’s best to gradually adjust the light exposure, particularly if moving from a darker to a lighter spot.

Watering your Satin Pothos: How, When and How Much

This plant thrives in a consistently moist environment, yet it’s crucial not to overwater. Understanding how, when and how much to water can make all the difference in your plant’s health and vitality.

The ‘How’

To water your Satin Pothos, use a watering can or jug with a narrow spout. This enables you to aim the water directly at the soil, avoiding the leaves. If the top leaves do get wet during watering, it can mean that they start to rot if the temperatures are low. Another top tip is that the water should be room temperature, as cold water can cause leaf shock.

The ‘When’

As a general rule, water your Satin Pothos when the top 1-2 inches of soil are dry. Resist the urge to set a strict watering schedule, as this can lead to over or underwatering. Instead, monitor the soil’s moisture levels regularly and adjust your watering habits accordingly.

The ‘How Much’

The amount of water your Satin Pothos needs will depend on various factors such as pot size, environmental conditions, and the plant’s size. A good rule of thumb is to water until you see some draining out of the bottom of the pot. This indicates that the water has reached the entire root system.

Temperature Requirements for Satin Pothos

The Satin Pothos thrives in a relatively moderate temperature range. Ideally, the plant prefers temperatures between 60-85°F (15-29°C). A sudden or drastic change in temperature can cause stress to the plant, leading to leaf drop or yellowing leaves.

Winter Care

In winter months, maintain an indoor temperature above 50°F (10°C) to prevent the plant from freezing. Despite its hardy nature, the Satin Pothos does not tolerate cold well and exposure to frost may cause irreversible damage.

Summer Care

In summer, the Satin Pothos can withstand higher temperatures, provided it is not exposed to direct sunlight. Too much heat can scorch the plant’s leaves, while too much light can cause the leaf variegation to fade so be careful about this in the peak of summer.

Temperature Fluctuations

The Satin Pothos is sensitive to sudden temperature changes. Try to keep the plant in a stable environment, away from drafts, heaters and air conditioners, which can lead to fluctuating temperatures.

Humidity Requirements

Satin Pothos plants thrives in high humidity environments. This tropical plant is native to the rainy jungles of Southeast Asia and appreciates a similar atmosphere in your home. However, it’s adaptable and can also tolerate average indoor humidity levels.

While you may not be able to reach the humidity of a jungle (and even if you could, you wouldn’t want to live in it), there are a few ways you can boost the humidity for your plant.

Increasing Humidity:

  • Consider placing your Satin Pothos on a tray of water with pebbles, ensuring the pot is not submerged in water but elevated by the pebbles.
  • Group your Satin Pothos with other humidity-loving plants. As they transpire, they create a microclimate with increased humidity.
  • You could also use a humidifier, particularly during winter months when indoor heating tends to dry out the air.

Signs of Low Humidity:

  1. Brown leaf tips or edges are often a sign of dry air.
  2. Crisping or curling leaves could also indicate low humidity.
  3. Stunted growth can be another common symptom of inadequate humidity but check for other issues before diagnosing.

Choosing the Right Soil for Your Satin Pothos

Choosing the right soil for your Satin Pothos is essential for its growth and overall health. A well-draining and aerated potting mix can provide the ideal environment for this plant.

Compost: A soil rich in compost is a suitable choice. The compost provides the necessary organic matter for the Satin Pothos, which promotes healthy root development.

Perlite: You can also add perlite to the soil to enhance drainage. This porous volcanic rock helps to prevent waterlog and root rot, common issues with Satin Pothos.

Sphagnum Moss: This type of moss can help regulate moisture and facilitates good airflow to the roots. A part of this in your potting mix can be beneficial.

Remember, a good soil mix for Satin Pothos should consist of one part perlite or sand, one part compost, and one part sphagnum moss or peat moss.

You might also want to pay attention to the pH level of the soil as it should ideally be between 6.1 and 6.5 for your Satin Pothos to thrive.

Repotting a Satin Pothos

Repotting not only gives the plant more room to grow but also rejuvenates its nutrient supply. It is commonly forgotten by plant parents but is something that you definitely need to add to your plant care list.

When to Repot

Typically, a Satin Pothos requires repotting every two to three years. Signs to watch out for include roots growing out of the drainage holes and slowed growth.

Choosing the Right Pot

Choose a pot that is 1-2 inches larger than the current one. It should have adequate drainage holes to prevent waterlogging. A ceramic or terracotta pot is ideal as these materials help control soil moisture.

The Repotting Process

  1. Gently remove the plant from its current pot, taking care not to damage the roots.
  2. Prune any dead or damaged roots.
  3. Place a layer of fresh potting soil in the new pot, then position the plant inside.
  4. Fill the remaining space with more soil, pressing gently to secure the plant.
  5. Water thoroughly and place the plant in a bright, indirect light location.

Repotting is a perfect opportunity to inspect the overall health of your Satin Pothos. Take a close look at the root system to see if there are signs of watering or fertiliser issues.

Fertilizing a Satin Pothos Plant.

When to Fertilize?

Fertilizing should ideally take place during the growing season, typically from spring to early autumn. During the rest of the year, the plant’s growth slows down, and it won’t benefit as much from the nutrients in the fertilizer. In fact, fertilizing during the dormant phase can cause issues for your plant.

What Type of Fertilizer?

Use a balanced houseplant fertilizer, such as a 20-20-20, which means it has an even ratio of nitrogen, phosphorus, and potassium. These three elements are essential for the plant’s overall growth, root development, and disease resistance, respectively.

How to Fertilize?

Follow the instructions on your chosen fertilizer product. Generally, you’ll want to dissolve the recommended amount in water and apply it to the soil. Remember, it’s always better to under-fertilize than to overdo it. This is because over-fertilization can lead to a build-up of salts in the soil, which can harm your Satin Pothos. Signs of over-fertilization include brown or yellow leaf tips/edges and slower, smaller growth.

Additional Tips

  1. Before fertilizing, ensure the soil is damp. Never apply fertilizer to dry soil as it can cause root burn.
  2. Consider flushing the soil with water every few months to wash out any excess salts from the fertilizer.

Pruning your Satin Pothos

Pruning is an essential part of Satin Pothos care that is often ignored and forgotten by plant parents. Pruning keeps the plant healthy, encourages growth, and prevents it from becoming overly leggy or unmanageable.

When should you prune?

  • Spring and summer: These are the optimum times to prune, as Satin Pothos is actively growing and can easily recover.
  • When it becomes too leggy: If you notice your plant becoming long and sparse, it’s time for a trim.
  • When leaves are yellowing or browning: These are signs of stress or disease and should be removed to prevent further issues.

How to prune?

  1. Identify the areas that need to be pruned.
  2. With sharp, clean scissors, cut just below a node or leaf junction.
  3. If you’re trimming for size, cut back to your desired length.

Post-pruning care

After pruning, always monitor your Satin Pothos closely. Ensure it receives adequate water and light, and keep an eye out for any signs of stress or disease.

Cleaning your Satin Pothos: Top tips

Keeping your Satin Pothos clean is crucial not only for aesthetics but actually mainly for the plant’s overall health. Over time, dust and grime can accumulate on the leaves, obstructing photosynthesis and hindering its growth. Here are some top tips to ensure your Satin Pothos stays neat and tidy:

  • Regular Dusting: Use a soft, damp cloth to gently wipe each leaf. This helps to remove dust that can block sunlight and slow down photosynthesis.
  • Showering: Give your plant a gentle shower under lukewarm water. This is an effective way to clean its leaves fully. Ensure the water isn’t too hot or too cold to avoid shocking the plant.
  • Misting: Regularly mist your Satin Pothos as it maintains humidity and keeps the dust at bay. However, remember, overdoing it may lead to waterlogging or fungal infections.
  • Pruning: Prune any wilted, yellow or brown leaves to maintain the overall health and appearance of your plant. This also allows more energy to be directed towards new growth.

Regular cleaning not only keeps your Satin Pothos looking its best, but it also provides an opportunity to check for common pests or diseases on a regular basis.

Pest Prevention and Treatment for Satin Pothos

Common culprits can include mealybugs, spider mites, and scale insects, all of which can cause damage to your Satin Pothos if not promptly managed. Pests don’t have to be a death sentence for your plant if you know how to treat them so here is a handy guide to pest prevention and treatment.

Preventive Measures

Foremost, preventative measures are key in maintaining a healthy, pest-free Satin Pothos. This involves regular care practices designed to keep your plant strong and resilient.

  1. Regular Cleaning: Keeping your plant’s foliage clean helps prevent pests from settling. A simple wipe with a damp cloth will suffice.
  2. Proper Watering: Overwatering can create a conducive environment for pests. Ensure your Pothos isn’t sitting in water for extended periods.
  3. Isolation: Newly acquired plants should be isolated for a few weeks to avoid potential pest spread.

Pest Treatment

  1. Manual Removal: For larger pests, such as mealybugs, manual removal can be a good first step. Use a soft cloth or cotton swab dipped in alcohol.
  2. Neem Oil: A natural pesticide, neem oil can be used to treat a wide range of plant pests. Simply mix with water and spray on affected areas.
  3. Commercial Pesticides: When all else fails, commercial pesticides can come to the rescue. Always follow the manufacturer’s instructions.

It’s crucial to remember, though, that prevention is always better than cure. By investing time in regular care and maintenance, you’ll give your Satin Pothos the best possible chance of staying pest-free.

??Satin Pothos Toxicity to Pets and Humans

Unfortunately, the Satin Pothos is toxic to both pets and humans. This is due to the presence of calcium oxalate crystals in the plant’s tissues, which can cause harm if ingested or touched.

When it comes to domestic animals such as cats and dogs, ingestion of the leaves can lead to a variety of symptoms. These can range from mild irritation, such as excessive drooling and pawing at the face, to more severe issues such as difficulty swallowing, vomiting, and oral pain.

It is important to keep this plant out of reach of pets, particularly those known to have a habit of chewing on leaves. If you suspect your pet might have ingested a part of the Satin Pothos, seek immediate veterinary assistance.

For humans, the risk is notably less immediate but is still present with children. If a child ingests any part of the Satin Pothos, seek medical attention immediately. Although rare, skin contact with the leaves can sometimes lead to irritation, with symptoms including redness, itching, and in severe cases, swelling.

Satin Pothos FAQs


Common Issues with Satin Pothos and How to Fix Them

Fiddle and Thorn is a participant in the Amazon Services LLC Associates Program, an affiliate advertising program designed to provide a means for sites to earn advertising fees by advertising and linking to Amazon.com

Take our houseplant survey!

Quickly respond to our 30 second houseplant survey and get 75% off our Complete Houseplant Care eBook!

Take the Survey

No thanks…

Rubber Plant Care Guide: How to Keep Your Ficus Elastica Healthy

Last Updated: October 16, 2023

Rubber Plant

Rubber Plant

Introduction to Rubber Plant Care

Rubber plants (otherwise known by their scientific name of Ficus elastica), are known for their glossy, oval-shaped leaves and their air-purifying qualities, making them a popular choice among houseplant enthusiasts.

Not only do they add a lush touch of green to your indoor surroundings, but they also have the potential to grow into large tall plants with proper care.

Rubber Plant Characteristics

Renowned for their glossy, deep green or variegated leaves, Rubber Plants are known for their resilience and low-maintenance demands.

Native to the tropical regions of India and Malaysia, when grown indoors, they usually top out around 6-10 feet tall with a spread of 2-3 feet but grow even taller in their natural environment.

Leaf Characteristics

The most striking feature of a Rubber Plant is undoubtedly its leaves. Large and oval-shaped, they can grow up to 12 inches long and 5 inches wide. Sprouting from high up on tall, woody stems, the leaves have a thick, leathery texture and display a rich, glossy deep green color. The new leaves, initially a reddish green, gradually darken to match the older foliage.

Growth Habit

Rubber Plants exhibit a single-stem growth habit. However, with careful pruning (more on that below), they can be encouraged to grow multiple branches, creating a bushier appearance.

Their growth speed is fairly slow, putting out a few new leaves during the growing season, which typically spans from spring to early fall.

Flowering

Though it’s not common, Rubber Plants can produce flowers under optimal conditions. The flowers are small and insignificant, often hidden in the leaf axils. Keep in mind that flowering is quite rare in indoor settings, as it requires specific light and temperature conditions.

The Ideal Light Conditions for Rubber Plants

These tropical natives require a lot of bright, indirect sunlight to thrive. However, they can also tolerate lower light conditions to some extent, making them versatile and widely loved as houseplants.

When it comes to the ideal lighting conditions for your Rubber Plant, consider the following guidelines:

  1. Bright, Indirect Light: Rubber plants prefer bright, indirect sunlight for the majority of the day. Place your plant near east or north-facing windows, or in a room with plenty of ambient light.
  2. Avoid Direct Sun: While they enjoy lots of light, direct sunlight, especially during the hot afternoon hours, can be too intense. This can cause the edges of the leaves to become brown and crispy.
  3. Low Light Tolerance: They have a certain degree of tolerance for low light conditions. However, if placed in a dark room or a spot with insufficient light for a prolonged period, their growth can slow down significantly, and the leaves may lose their lustrous, dark green color and the stems will become quite leggy.

If you notice any signs of distress, such as dropping or yellowing leaves, consider adjusting the light sources. Additionally, you may need to rotate your Rubber Plant every few months to ensure all sides get equal exposure to light. This practice helps maintain balanced growth and an attractive plant shape.

Watering Your Rubber Plant

While these plants appreciate a good drink, overwatering can lead to root rot, a common issue for Rubber Plants. This is why we recommend watering deeply but not very frequently.

The Right Watering Routine

Begin by watering your Rubber Plant thoroughly, then allow the top inch of the soil to dry out completely before the next watering. This often translates to watering once a week during summer and once every two weeks during winter. However, this can vary based on your specific environment as there are so many factors that impact how much water your plant needs.

  • Step 1: Use room temperature water to avoid shocking the plant’s roots.
  • Step 2: Water the plant slowly and deeply. This method encourages the roots to grow downwards, creating a robust root system.
  • Step 3: Allow excess water to drain from the bottom. Never let your Rubber Plant sit in water.

Signs of Overwatering and Underwatering

While Rubber Plants are somewhat forgiving, they can show signs of distress when their watering needs are not met. Overwatered Rubber Plants may exhibit yellowing leaves and a generally unhealthy appearance. On the other hand, underwatered Rubber Plants may have wilted, curling leaves and the leaves may turn light brown in color.

Fertilizing Your Rubber Plant: Timing and Methods

Fertilizing provides the necessary nutrients that the plant can’t always absorb from the soil alone.

Timing Your Fertilization

Typically, Rubber Plants need to be fertilized during their growing season, which falls between early spring and late summer. During this time, fertilizing your plant once a month is generally sufficient.

When the colder months approach and growth slows, stop feeding completely as it can cause more harm than good at this stage.

Fertilizer Selection and Application Methods

Apply a well-balanced, water-soluble houseplant fertilizer, with an equal ratio of nitrogen, phosphorus, and potassium (NPK ratio). It is important to dilute this fertilizer to half its strength or more before application, to prevent root burn (it’s better to be on the safe side, especially if you have never fertilized your Rubber Plant before).

When it comes to application methods, watering the plant thoroughly a day before fertilizing is recommended. This ensures that the soil is moist and ready to absorb the nutrients.

Ideal Humidity Level for a Rubber Plant

The optimal humidity level for a Rubber Plant typically falls between 40% and 50%. At this level, the plant can absorb enough moisture from the air to facilitate its growth, while also preventing the development of mold or leaf spot.

So, how do you maintain this ideal humidity level? Here are some effective strategies:

  • Misting: Regularly mist your Rubber Plant with a spray bottle if you need to give the humidity level a boost. This not only provides the plant with moisture but also keeps the leaves dust-free.
  • Pebble trays: Place your Rubber Plant on a tray filled with pebbles and water. As the water evaporates, it increases the humidity around the plant. It’s crucial to have the tray filled with pebbles to prevent your plant from actually sitting in the water.
  • Grouping plants: Grouping your plants together can create a microclimate with higher humidity, as plants release moisture into the air.
  • Humidifier: Using a humidifier can be an effective way to control the humidity level, especially in dry indoor climates.

Temperature Requirements

Rubber plants thrive in temperatures that mimic their native tropical habitat. A consistent temperature range of 60-75°F (15-24°C) is ideal, but be aware that temperature fluctuations outside this range can result in leaf loss or a stunted growth rate.

Temperature Consistency: While the Rubber Plant can tolerate a certain degree of temperature variation, drastic or frequent fluctuations can cause stress to the plant. This is particularly true if the temperature drops below 50°F (10°C). Cold drafts, such as those from an open window in winter, can be particularly harmful over time.

Here are some tips on how to maintain the ideal temperature for your plant:

  1. Use a thermometer to monitor the temperature of the room where your Rubber Plant is kept.
  2. During the summer months, use blinds or curtains to shield the plant from harsh, direct sunlight which can cause the temperature to increase dramatically.
  3. In winter, ensure your plant isn’t too close to heaters, radiators or heating vents.
  4. Remember to keep your plant away from external doors or windows that are frequently opened and closed, to avoid sudden drafts.

Choosing the Correct Pot

When choosing a pot for your Rubber Plant, there are two critical factors to consider: size and material. A pot too small can cramp the plant’s roots and stunt its growth, while a pot too large can lead to overwatering and stability issues. As a rule of thumb, opt for a pot that is 2 to 3 inches larger in diameter than the plant’s root ball.

As for material, ceramic and terracotta pots are excellent choices due to their porous nature, which aids in soil aeration and prevents waterlogging. However, they can be heavy and may break easily.

Plastic pots, on the other hand, are lightweight and durable, but lack the breathability that ceramic and terracotta pots offer.

Always ensure that your chosen pot has sufficient drainage holes at the bottom. This allows excess water to escape, preventing waterlogging and promoting overall plant health.

Repotting a Rubber Plant

The process of repotting can seem daunting but fear not. With a few simple steps and some attention to detail, you can successfully repot your Rubber Plant and ensure its continual growth and development.

When to Repot

Typically, the best time to repot your Rubber Plant is during the early spring. This timeframe aligns with the beginning of the growth season for the plant, which allows it to adapt more readily to its new surroundings.

Choosing the Right Pot

When choosing a new pot for your Rubber Plant, select one that is approximately 2-3 inches larger in diameter than its current pot. This will provide enough room for root expansion without overwhelming the plant. Remember to ensure that the new pot has sufficient drainage holes to prevent waterlogging and root rot.

Steps to Repotting

  1. Water the Plant: Start by watering your Rubber Plant a day before the repotting process. This makes the plant easier to remove from its current pot.
  2. Prepare the Pot: Fill your new pot with a fresh potting mix, suitable for Rubber Plants, up to one third of its depth.
  3. Remove the Plant: Carefully remove the plant from its current pot. If it’s stuck, you can tap the sides of the pot to loosen the soil and roots.
  4. Position the Plant: Place your Rubber Plant in the center of the new pot. Ensure that the top of the root ball is at the same level as the rim of the pot.
  5. Add More Soil: Fill the rest of the pot with additional potting mix, pressing it down gently around the base of the plant.
  6. Water Again: Water your newly potted Rubber Plant thoroughly, allowing excess water to drain out of the bottom.

Pruning a Rubber Plant: A Complete Guide

The ideal time for pruning a Rubber Plant is in the late winter or early spring, just before the onset of the growing season. Yet, it’s important to remember that Rubber Plants can be pruned any time of the year if necessary (eg. dead or dying leaves).

Pruning Steps:

The process for pruning a Rubber Plant is straightforward and can be broken down into these easy steps:

  1. Identify: Begin by identifying which branches or leaves need to be pruned. Look for areas that are overcrowded, damaged, diseased or excessively elongated.
  2. Cut: Using your sharp, sanitized shears, make a clean cut at an angle, just above a leaf node (the point on the stem where a leaf or branch grows).
  3. Clean: After the cut, a milky white sap will ooze out. This sap can cause skin irritation, so it’s advisable to wipe it off immediately with a clean cloth.
  4. Repeat: Continue this process, working your way around the plant until you’re satisfied with its shape and size.

Important tip: Always remember to wear gloves while pruning a Rubber Plant, as the sap can cause skin irritation in some individuals.

Rubber Plant Toxicity

The Rubber Plant contains milky latex sap that is toxic to humans and pets.

Effects on Humans

For most individuals, direct contact with the Rubber Plant’s latex may cause minor skin irritation or a rash. Symptoms can include redness, itching, and swelling. More severe reactions are rare but can occur, particularly in individuals with latex allergies.

Effects on Pets

Our furry friends are also susceptible to the effects of the Rubber Plant’s latex. Cats, dogs, and other household pets may experience symptoms like vomiting, drooling, and decreased appetite if they ingest parts of the Rubber Plant

If you or your pet has been exposed to the latex from a Rubber Plant and is experiencing these symptoms, it is important to seek medical or veterinary attention immediately.

Flowers on a Rubber Plant

Indoor Rubber Plants rarely bloom, in contrast to their outdoor counterparts. However, it’s not impossible. Now, if you’re set on seeing your Rubber Plant bloom, there are a couple of things to consider:

  1. Age and Maturity: Young Rubber Plants are unlikely to produce flowers. These plants typically need to reach a certain level of maturity, often taking several years before they begin to flower.
  2. Light Conditions: Rubber plants require bright, indirect light to encourage blooming. A lack of appropriate light can hinder the plant’s ability to produce flowers.
  3. Fertilization: During the growing season, a high-phosphorus fertilizer can encourage your Rubber Plant to produce flowers.

One unusual feature of Rubber Plants is that they can produce ‘false flowers’. These are not true flowers but are growths that resemble flower buds. They usually appear when the plant is stressed.

Rubber Plant FAQs


Common Problems with your Rubber Plant

Fiddle and Thorn is a participant in the Amazon Services LLC Associates Program, an affiliate advertising program designed to provide a means for sites to earn advertising fees by advertising and linking to Amazon.com

Take our houseplant survey!

Quickly respond to our 30 second houseplant survey and get 75% off our Complete Houseplant Care eBook!

Take the Survey

No thanks…

How to Grow and Care for a Ripple Peperomia

Last Updated: October 16, 2023

Ripple Peperomia (Peperomia caperata)

Ripple Peperomia (Peperomia caperata)

With unique rippled and wrinkled leaves, the Ripple Peperomia used to be quite a rare find but is now slightly easier to find in plant shops and nurseries worldwide. You’ll be pleased to know they are fairly easy to care for, as are most of the Peperomia varieties so given the right care, you shouldn’t run into too many issues.

Native to the rainforests of Brazil, the Ripple Peperomia is a species of flowering perennial that stays relatively small and compact. They are loved for their deep ridged rippled leaves that are so iconic of these plants. They might be small, but they sure know how to stand out!

There are several different varieties of Ripple Peperomia that all have a slightly different appearance but the overall care needed is the same. We’ve included more on the individual varieties such as the Emerald Ripple Peperomia later on in this care guide.

How to Care for a Ripple Peperomia

Peperomia plants in general are fairly easy to care for and are quite adaptable to a range of environments, the Ripple Peperomia is no different. There are only a few simple rules to remember to nail the basic care requirements.

These plants can adapt well to a range of light levels, even some lower light but the one thing you must avoid is harsh direct light in summer. This can very quickly scorch and dry out the leaves so make sure that any bright light is indirect.

The other thing that is crucial to note is to adjust your watering habits according to the seasons. Increase your watering in summer so that you’re averaging about once a week and drop back to only a couple times a month in winter to avoid overwatering.

Ripple Peperomia Overview

Origin: They are native to the rainforests of Brazil.

Latin Name: Peperomia caperata

Varieties: Emerald Ripple Peperomia, Red Ripple Peperomia, Silver Ripple Peperomia (Frost Peperomia) and Ripple Peperomia ‘Rosso’

Plant Family: Piperaceae

Difficulty Level: Easy/Medium

Appearance: The plant grows with a bushy habit and has small rippled leaves.

Height and Size: Maximum height and width of 10 inches x 10 inches (25cm x 25cm)

Growth Rate: Slow

Light Requirements: Medium to bright, indirect light is ideal but they can survive in some lower light areas (growth will be slower, however).

Water Requirements: Allow the water to dry out between waterings but not for extended periods of time.

Best Soil: A nutrient-rich, well-draining potting mix.

Ideal temperature: 60-80°F (15-26°C)

Fertilizing Routine: Apply a half-strength, water-soluble fertilizer once a month during spring and summer.

Ideal Humidity Level: 40-60% Humidity is the ideal range for a Ripple Peperomia

Flowering: Can sometimes grow inflorescences which are white flowers at the end of long thin red spikes.

Pruning: Only if there is an issue area.

Cleaning: Use a damp cloth to wipe dust and dirt from the leaves.

Propagation: Division of the mother plant is the most successful method.

Repotting Frequency: Every 1-2 years

Toxicity: Safe and non-toxic to pets and humans.

Pests: Risk of mealybugs, aphids, whiteflies, spider mites and scale insects.

Common Problems: Soft, limp leaves as well as brown and yellow foliage.

Ripple Peperomia Family

They belong to the Piperaceae plant family, also known as the Pepper plant family. It is a large group of over 3,000 different plant species.

Ripple Peperomia Appearance

Famous for their iconic think and waxy ripple-effect leaves, this plant almost looks as though its foliage is crinkled up. Their leaves will remain quite small, often the size of a dime.

Ripple Peperomia Varieties

There are several different varieties, each with their own unique leaves and colour.

Emerald Ripple Peperomia

This is a bushy and compact plant, with the iconic heart-shaped rippled leaves. Emerald Ripple Peperomias have dark-green leaves with long white blooms at the end of red stems that pop out across the plant. The Emerald variety of the Ripple Peperomia is definitely one of the most popular varieties and is slightly more common than the rest.

Red Ripple Peperomia

With dark red, shimmering and shiny leaves, the Red Ripple Peperomia is anything but boring! Looking to add a splash of colour to your home? This is a great way to do it.

Silver Ripple Peperomia (Frost Peperomia)

This variety gets its name from its silver leaves. Often the newer leaves will look more green and then will turn silver as they mature.

Ripple Peperomia ‘Rosso’

This variety has a lot of contrast in its foliage with dark red undersides with solid green on the top. The leaf shape is also a little bit different from the other Ripple Peperomia varieties as they are longer and more elongated rather than round and heart-shaped.

Ripple Peperomia Height and Size

They are compact plants with a bushy growing habit but won’t grow more than 10 inches x 10 inches (25cm x 25cm).

Growth Rate of a Ripple Peperomia

Ripple Peperomia plants are slow growers so don’t expect to see too many leaves popping up all the time. This does mean though that they are great for small spaces.

Flowers on a Ripple Peperomia

Ripple Peperomia plants grow thin white flowers at the end of long red spikes. These flowers are called inflorescences and are often quite insignificant. You can decide whether to leave them on your plant or remove them to conserve energy.

They tend to bloom in summer or early fall but it depends on the environment and plant age as they do only flower once they mature a little though so don’t be surprised if your plant doesn’t flower for the first few years.

Pruning your Ripple Peperomia

These plants don’t need regular upkeep when it comes to pruning and we only recommend if if there are issues with any of the leaves. If the majority of a leaf has turned yellow or brown, then we recommend pruning it from your plant to divert the energy to create new growth, rather than trying to revive the dying part of the plant.

Freshening up your plant and removing any dead leaves and straggly parts is a great thing to do in spring, ready for the warmer weather!

Cleaning your Ripple Peperomia

These plants attract quite a lot of dust and it can often wedge itself in the ripples on the leaves. This means that cleaning with a regular cloth won’t often do the whole job. Using a soft-bristled feather duster is a great way to give your Ripple Peperomia a proper clean.

You can also wash down the leaves with water to help them look fresher and unclog the pores. Avoid using any harsh chemicals when cleaning your Peperomia as this can damage the foliage. Dish soap is the only thing we recommend if you need something to remove dirt, dust or stickiness.

@plantopian_bonnie on Instagram

Red Luna Ripple Peperomia

Light Requirements for a Ripple Peperomia

Ripple Peperomia plants can deal with quite a range of light levels, from low to bright, indirect light. The one thing you want to be careful of is too much exposure to direct light as this can scorch and burn their gorgeous leaves!

You can get away with some direct sun rays during winter as the sun is a lot weaker but avoid this at all costs during summer.

Whilst they can survive in low light, do note that you will see a drop in new growth and new leaves may be smaller.

Water Requirements for a Ripple Peperomia

During summer you want to be watering your Ripple Peperomia at least once a week to prevent the potting mix from drying out for too long. Cut back in winter to fortnightly as colder temperatures will increase the risk of root rot as your plant simply won’t need as much water.

Always check the soil moisture before watering to make sure that it’s time. If you use the top-down watering method, then all you need to do is check the top few inches of the soil with your finger to check if it has dried out. If you use the bottom-up watering method then a moisture meter or the lifting method are the best ways to monitor moisture levels.

Remove any excess water in the saucer or planter 15 minutes after watering. This will allow your plant to absorb as much moisture as it needs and prevents the roots from becoming soft and mushy.

Best Soil for a Ripple Peperomia

The main requirements for the soil of your Ripple Peperomia are that it’s loose, nutrient-rich and well-draining. Perlite is a great way at increasing drainage and aeration.

Ripple Peperomia Temperature Requirements

Average room temperature between 60-80°F (15-26°C) is best for your Ripple Peperomia and it’s important to avoid extremes.

Cold drafts coming from windows, external doors and air conditioning units can be harmful to your plant over time and can cause stunted growth, waterlogged soil and a loss of leaves.

But it’s not just cold fluctuations that are damaging as temperatures over 80°F (26°C) for extended periods of time can also dry out your plant quickly.

Using a digital thermometer is the most reliable way to check the temperature around your plant and will help alert you to any extremes.

Ripple Peperomia Fertilizer Requirements

Apply a well-balanced, fertilizer at half-strength once a month during the months of spring and summer. Weakening it to half-strength will help to avoid fertilizer burn as these plants don’t require much feeding. Do not feed during autumn and winter as your Ripple Peperomia will be in its dormant phase.

Ripple Peperomia Humidity Requirements

A humidity level of between 40% and 60% is the ideal range for your Ripple Peperomia. This is often the naturally occurring humidity as long as you are ventilating the room well so you won’t need to boost it too much. However, if the air is falling below that range then mist the leaves or use a humidifier every once in a while to give it a little boost.

@kebunsinar on Instagram

Ripple Peperomia on a white background

Propagating your Ripple Peperomia

The best ways to propagate a Ripple Peperomia is by dividing the offshoots into smaller plants or by taking a stem cutting. For both of these methods, place the cuttings and offshoots in water and after a few weeks you should start to see new roots appear. You want to make sure that you are switching out the water regularly to prevent it from stagnating.

Ideally, you want to propagate in late spring to make use of the sunshine and warmth but you can use a LED grow light and a heat pad if you are propagating in cooler temperatures.

Top tip: If you have a mature enough plant to be able to divide the mother plant into separate sections then we recommend doing this as the method is quicker and more successful.

Repotting your Ripple Peperomia

As Ripple Peperomia plants are slow-growers, they don’t require regular repotting. On average you’ll need to do this every 2-3 years, or earlier if you see signs that it is severely rootbound.

Signs to look out for include roots growing out of the drainage holes or popping out of the top of the pot. If you remove the plant from its pot, a rootbound root system will be extremely coiled up and there won’t be much soil left.

Another indicator that your plant is rootbound is that it is not producing any new growth during summer.

Ripple Peperomia Toxicity to Humans and Pets

Ripple Peperomia are non-toxic and safe for pets and children.

Treating and Preventing Pests

Although a pest infestation is rare, it can happen that you find mealybugs, aphids, whiteflies, spider mites or scale insects on your plant.

To treat the issue, isolate your plant from the rest of your houseplants, remove the worst affected areas and wash down your plant thoroughly. The next step is to start a treatment course of neem oil and an insecticide.

Make sure to check over all of your other houseplants for pests (or signs of them) as infestations can spread quickly.

Ripple Peperomia Common Problems

Fiddle and Thorn is a participant in the Amazon Services LLC Associates Program, an affiliate advertising program designed to provide a means for sites to earn advertising fees by advertising and linking to Amazon.com

Take our houseplant survey!

Quickly respond to our 30 second houseplant survey and get 75% off our Complete Houseplant Care eBook!

Take the Survey

No thanks…

10 Ways to Repurpose or Recycle Your Christmas Tree After the Holidays

Last Updated: October 21, 2023

As the holiday season wraps up, many of us are left wondering what exactly to do with our once vibrant, now wilting Christmas trees.

Luckily, there are so many different ways to recycle, reuse, and repurpose your Christmas tree to give it a new life long after the festive season has ended.

Why Recycle Your Christmas Tree?

Recycling your Christmas tree is not just about tidying up after the holiday season. It’s about finding a responsible way to get rid of your Tree rather than it ending up in landfill.

Landfills are already overflowing, and Christmas trees make up a considerable portion of the post-holiday waste. Not only do the trees take up space in landfill but as they decompose, they produce methane, a greenhouse gas that contributes to climate change.

However, when you recycle your Christmas tree, there are two main benefits. Firstly, it helps reduce the burden on landfills. Secondly, recycled trees can be chipped into mulch or compost, which can then be used to enrich soil and support new plant growth. This cycle ensures that every part of your tree continues to contribute to the ecosystem long after the holiday season is over.

Mulch Your Tree: How to Recycle Your Tree for Gardening

Mulching is a fantastic way to recycle your tree and benefit your garden. This method transforms your tree into a nutrient-rich compost that will help your garden thrive.

How does this work? The tree’s needles, which are typically acidic, can help balance the pH of your soil. The chips and shreds from the tree’s trunk can serve as a protective layer for your garden plants, reducing weed growth and maintaining soil moisture.

Now, let’s dig into the process of turning your Christmas tree into mulch:

  1. Strip the Tree: Begin by removing all ornaments, lights, and tinsel from the tree. This is an important step because these items are not compostable and can harm the environment. It would also be a shame to damage any of your nice decorations.
  2. Chop It Up: Using a small chainsaw or handsaw, cut your tree into smaller, more manageable pieces. Be sure to take necessary safety precautions during this process.
  3. Grind It Down: Rent or borrow a wood chipper to grind the tree pieces into mulch. If you don’t have access to a wood chipper, you’ll often find chipping services locally after the holidays.
  4. Spread the Mulch: Once you have your mulch, spread it around your garden, making sure to cover the roots of your plants. This will protect them from temperature extremes and retain soil moisture.

If you don’t fancy the wood-chipping process or don’t have a garden, don’t worry. There are plenty of other ways to recycle your Christmas tree. From crafting to donating, we’ll go through all of your options below.

Natural Ornaments: DIY Decorations from Your Tree

Want an eco-friendly, creative way to repurpose your Christmas tree? How about turning it into DIY ornaments for next year?

The branches, the barks, the pine cones- they’re all potential supplies to use to create your own decorations.

Pine Cone Garland

One of the simplest DIY projects you can make from your Christmas tree is a pine cone garland. They’re rustic, charming, and perfect for next year’s holiday decor.

  1. First, remove the pine cones from the tree.
  2. Next, let them dry out for a few days. To speed up the process, you can bake them at a low temperature.
  3. Then, you simply string them together using a sturdy thread or fishing line. You can add beads or other decorations for a little extra sparkle.

Wooden Ornaments

If your Christmas tree has a thick trunk, you can slice it into thin rounds to create natural wooden ornaments. These can be painted or decorated to your liking for a rustic and personalized touch to your tree next year.

  1. Start by cutting the trunk into thin slices. Be sure to sand down any rough edges.
  2. Next, drill a small hole in the top and thread a piece of twine or ribbon through for hanging.
  3. Paint your own design on the wood, or leave it natural, it’s up to you!

Needle Sachets

The needles can be transformed into lovely sachets that fill your drawers or closets with a fresh, woodland scent all year round.

  1. First, strip your tree of its needles and let them dry out.
  2. Next, sew small pouches from leftover fabric or old clothing. Fill them with the dry needles.
  3. Finally, stitch the pouches shut. Voila! You have homemade needle sachets.

How to Repurpose Your Tree as Firewood

Not only is this a practical solution, but it also adds a hint of that sweet, piney Christmas scent to your home. But before you get started, it’s crucial to follow the right steps to ensure the wood is safe and efficient to burn.

Preparation is Key

Before you can cozy up to a warm fire, you need to prepare your Christmas tree. Start by removing all the tinsel, ornaments, and lights. You don’t want any leftover plastic or metal bits in your firewood.

Once your tree is completely bare, chop it into smaller, more manageable pieces. This might be a bit of a workout but is really worth it!

Drying the Wood

Here’s where patience comes into play. Green wood, or freshly cut wood, contains a lot of moisture which can cause smoke and other issues. Therefore, it’s essential to let your tree dry out.

Ideally, this should be done outside, under a shelter to protect it from rain and snow. This process can take a few months, so you’ll need to be a little patient for this.

Using Your Firewood

Once your wood is dry and ready to go, it’s time to light that fire! But, remember to always burn it in a controlled environment like a fireplace or a wood-burning stove. Never burn your Christmas tree in a bonfire or a barrel, as this can be unsafe.

Grind Your Tree into Compost: Environmentally-Friendly Tree Disposal

When it comes to being eco-friendly and resourceful, turning your Christmas tree into compost is a fantastic option as it’s a process that gets rid of your tree in a responsible way.

Here’s how you can transform your Christmas tree into compost:

  1. Remove all decorations: Before you start, make sure your tree is completely bare. This includes ornaments, tinsel, lights, and the tree stand.
  2. Break it down: You’ll need to break your tree into smaller pieces. This can be done using a handsaw or a wood chipper if you have access to one.
  3. Compost bin: Add your tree pieces to your compost bin or heap, alternating with layers of green waste like vegetable peels, and brown waste, such as leaves or paper.
  4. Wait and turn: Over the next few months, turn your compost pile every few weeks to help it decompose faster. You’ll know it’s ready when it looks and smells like rich, dark soil.

It’s worth mentioning that some areas offer chipping and composting services. They will take your tree and handle the composting process for you. This can be a great option if you don’t have the space or resources to do it yourself. Contact your local waste management facility or city hall to see if this service is available in your area.

Giving Back to Nature: How to Donate Your Tree for Habitat Creation

By donating your tree for habitat creation, you’re helping to enrich local ecosystems. With a little effort, your tree can provide shelter for wildlife, improve soil quality, and even help with erosion control. Here’s how you can chip in.

Find a Local Program

The first step is to check with your local government or waste management company. Many communities have Christmas tree recycling or donation programs.

These programs typically collect trees curbside during the first few weeks of January. Alternatively, they may have drop-off locations. These programs will ensure your tree goes to a good cause, such as creating habitats for local wildlife.

Donate to a Conservation Group

Another option is to donate your tree directly to a conservation group. These organizations use donated trees to create habitats in local parks, nature preserves, or even underwater! Be sure to remove all decorations and tinsel before donating, as these can harm wildlife.

Preparing Your Tree for Donation

Before you send your tree off on its new adventure, make sure it’s ready. Here’s a quick checklist:

  1. Remove all decorations: Everything must go – ornaments, tinsel, lights, and the tree stand.
  2. Don’t worry about trimming: These organizations usually prefer whole trees.
  3. Keep it natural: Avoid flocked trees (those sprayed with artificial snow). The chemicals can be harmful to wildlife.

Find a Recycling Program Near You

When the holiday season draws to a close, your once vibrant and lively Christmas tree might seem like a bit of a sad sight. But don’t be too quick to just chuck it in the trash! Many communities have tree recycling points which allow you to dispose of your tree in a green and earth-friendly way.

Online Research

A quick online search is often the easiest way to find out about recycling programs near you. Try using phrases like ‘Christmas tree recycling near me”. Look for organized efforts by city councils, waste management companies, or local non-profit organizations. Often they will tell you a little more about what will happen to the treed donated there.

Check with Your Local Waste Management Company

Many waste management companies offer Christmas tree recycling programs. Reach out to your local company to inquire. They might even offer curbside pick-up of your tree, making it super convenient for you. Just remember to remove all ornaments, tinsel, and lights before you put it out!

Visit Your Local Home and Garden Stores

Many large stores offer drop-off points for Christmas tree recycling so it’s worth looking into what they say will happen to the trees donated to them.

Parks and Green Spaces

Another good option is to check with your local parks department. Some cities allow residents to drop off their Christmas trees at designated parks, where they’re chipped into mulch for use in public green spaces. Not only do you get rid of your tree, but it’s an environmentally friendly way of doing it that will benefit your local area.

Remember, recycling your Christmas tree is not just about getting rid of it. It’s about giving it a second life and helping out the environment!

Christmas Tree Removal Services: What You Need to Know

Instead of tossing it to the curb, there are several Christmas tree removal services that do more than just haul away your tree—they recycle it. Here’s what you need to know about these environmentally-friendly options.

Understanding the Process

Christmas tree recycling services work by collecting the trees from your home or a designated drop-off location and then turning them into useful mulch or compost.

The trees are typically chipped using a large wood chipper, which breaks down the branches and trunk into tiny pieces. This green waste can then be used in gardens and parks to help plants grow.

Preparing Your Tree

Before you can recycle your Christmas tree, you’ll need to prepare it. Remove all decorations, lights, tinsel, and ornaments. If your tree is artificial or sprayed with a fire retardant or snow flocking, it can’t be recycled and must be disposed of differently. Also, if your tree is over six feet tall, you might need to cut it in half—check with your local service for their specific rules.

Benefits of Tree Recycling

Recycling your Christmas tree has several benefits. First and foremost, it’s better for the environment than sending the tree to a landfill. The mulch created from the trees helps to enrich the soil and reduce the need for water. Additionally, many tree recycling programs are local initiatives that support community green spaces and conservation efforts.

So, when it’s time to take down your Christmas tree, consider recycling or repurposing it. It’s a simple way to give back to the environment and help your local community at the same time.

Fiddle and Thorn is a participant in the Amazon Services LLC Associates Program, an affiliate advertising program designed to provide a means for sites to earn advertising fees by advertising and linking to Amazon.com

Take our houseplant survey!

Quickly respond to our 30 second houseplant survey and get 75% off our Complete Houseplant Care eBook!

Take the Survey

No thanks…

Repotting your Monstera | The Ultimate Guide

Last Updated: March 14, 2023

One of the most iconic houseplants around, the Monstera Deliciosa is definitely one of our favourites. The split heart-shaped leaves make this plant so unique and the centrepiece of every room. There’s a lot of information on how to care for your Monstera through lighting and watering but one thing that’s often forgotten is repotting.

Most of the time, plant parents will keep their houseplants in the same pot that they bought them in for years and years. This not only stilts the growth potential but can also lead to your plant developing some health issues too.

In this article, we will be covering everything you need to know about successfully repotting your Monstera. This will include signs your plant needs repotting, when and how to do it and then the aftercare you need to give your plant to make sure it recovers quickly.

Before we get into it, it’s important to know that there are two types of repotting. Firstly, the one where you are upsizing the pot that your Monstera is going into but the second can also simply be refreshing the soil. We’ll cover both of these below as well as how to know when to do each.

Signs that your Monstera needs repotting

When your Monstera becomes root bound, it can start to mean the rate of new growth slows down and your plant might actually develop issues such as yellow or brown leaves.

root bound means that the root system has become too big for the pot and there is no longer space for it to grow. This requires your Monstera to be repot into a larger pot.

Your Monstera isn’t growing in summer

When your Monstera becomes root bound, it will slow down the rate of new growth and eventually stagnate altogether. One thing you need to be careful of though is that during winter, your plant usually won’t grow any (or many) new leaves. Don’t mistake this for your plant being root bound.

If you aren’t seeing any new growth in summer, however, one cause may be that it needs a bigger pot. Take a look through the other signs below and check over your plant to help confirm that diagnosis.

Roots are showing at the top of the pot

Another sign that your Monstera needs to be repotted is if roots are starting to show out of the top of the pot. This usually means that the soil has compacted as well as the root system has outgrown the pot.

You may find that when it comes to taking the plant out of its pot, it’s not actually root bound, but overly focused at the top of the pot. This isn’t always a bad thing as the roots will grow downwards but you may just want to add an extra layer of soil over the top of the roots.

Roots are coming out of the drainage holes

This is one of the easiest ways to confirm if your Monstera is root bound and needs to be repotted. However, checking this with a Monstera can be difficult because they grow so large and can be quite heavy.

If your Monstera is quite mature, you may want to get the help of a friend to do this but essentially you need to lift your plant up and check the drainage holes to see if roots are growing out of them.

If there are some small roots peeking out, then your Monstera will need repotting sometime soon. However, if they are snaking their way out of the pot in circles, then this needs to be done immediately.

The soil level has decreased

If you’ve noticed that the amount of soil has decreased and is no longer reaching near the top of the pot, then it’s likely the soil has compacted. This happens naturally over time but can increase if you’re only watering from the top down.

If your Monstera isn’t showing signs of being root bound, but the soil has compacted, this is where refreshing the soil comes into it. Instead of repotting your Monstera into something bigger, refresh with new potting mix or aerate the current soil to give the roots more breathing room.

When to repot your Monstera

Apart from the above-mentioned signs that your Monstera needs to be repot, there are also a few general good practices that we recommend you follow. We like to repot our Monstera every 2 years at a minimum. This will increase if it’s showing signs of being root bound but ideally, you want to upsize the pot slightly just before it’s reached that stage.

It’s also important to refresh the soil around the one year mark (but doing it every two years won’t tend to cause huge issues).

The other thing to think about when it comes to when to repot is the time of year. Most commonly we will repot at the start of spring. There are quite a few reasons for this but the main one is that you will be slowly heading into the growth period so it’s important that your Monstera’s root system has the space to grow. If it’s already root bound coming into the warmer months, you will likely see very stagnant growth.

The other reason why we tend to only increase the pot size in spring is that if you are doing it in winter, the root system won’t likely grow very much over the first few months. This means that there will be a lot more soil which can absorb a lot more water.

But why is that a bad thing I hear you ask? Well, the more soil there is, the more water it will take in and during winter it can take a long time to dry out because it’s so cold and your plant is dormant. This means that the soil will be pretty soggy for extended periods of time which increases the risk of root rot.

But when you repot in spring, not only will your plant need more water, but the root system will be growing and the soil-to-root ratio will decrease. This is also an important element when it comes to the stability of your plant, but more on that in a little bit.

How to repot a Monstera Deliciosa

Selecting the right pot

When it comes to choosing a new pot for your Monstera, it’s really important that you don’t go too big. It’s best to choose one that is only a few inches larger in diameter and height than your previous pot.

If you choose a pot much bigger than the last it not only increases the risk of root rot as we covered above but it can lead to stability issues. Monstera plants are upwards-growing, climbing plants and can become very tall. This height requires a very stable root system. If the new pot is too large, the roots can become quite unstable and lead to your plant drooping over and even falling over in some cases.

You also want to choose a pot that has a good amount of drainage holes. This is key to avoiding watering issues.

Removing your plant from its original pot

Once you’ve selected your new pot, carefully remove your Monstera from its original pot. If the roots are peeking out of the drainage holes, make sure to detangle these first so that they don’t rip when you remove your plant.

When removing your plant, use the stems to pull gently and not the leaves. This can very easily rip the leaves and cause a lot of damage to your plant. If your Monstera is in a plastic pot, squeezing the edges can help free your plant and make it easier to remove.

Then the next thing you need to do is carefully remove the old potting mix from the roots. Use your fingers to slowly detangle the root system and shake them slightly to remove the old potting mix.

Transferring your Monstera

Add a good few handfuls of soil to the bottom of the new pot to give your Monstera some space to grow into. Then carefully place your plant into the new pot, filling in the soil around the edges.

It’s a good idea to remove as much of the old soil as you can and replace it with fresh soil as this just gives a boost to the nutrient level of the potting mix. Over time, your plant will take the nutrients from the soil so refreshing it every year or two is always a good idea.

You want to pat down the soil gently but make sure not to press down too hard. This can compact the soil which can be damaging to the roots. It’s important there is some oxygen in the soil.

To aerate the soil even further, it can be a good idea to poke some holes into the soil.

Water your newly repotted Monstera

Return your plant to its usual spot and give it a good watering. This helps your plant recover from the shock of transplantation.

How to care for a Monstera after repotting

Now that the stressful part is done, it’s time to switch your attention to the aftercare. Transplanting a Monstera can be quite stressful for your plant so it’s important that you pay attention to the environment and care routine over the next few weeks.

Make sure your Monstera has plenty of bright but indirect sunlight over the next few days. You also want to be watering enough to prevent the roots from crisping up (but not enough to cause them to rot).

When it comes to fertilizing, hold off for a while. The fresh potting mix will contain lots of nutrients for your Monstera and feeding even more can cause over-fertilization.

It’s also really important that you keep an even closer eye on your Monstera compared to normal. You want to watch out for any signs of stress or unhappiness. It can sometimes happen that plants lose a leaf or two after repotting but this isn’t too common with Monsteras.

Our top tips for repotting a Monstera

  1. Only use fresh potting mix

    It’s crucial when you are repotting your Monstera or even just refreshing the soil that you don’t use potting mix from other plants. Soil can contain pests and bad bacteria without you even knowing it so you don’t want to give these issues to your Monstera.

    Use a high-quality new potting mix to help avoid these issues. Of course, it’s always a good idea to take a close look at the potting mix regardless to ensure there’s nothing harmful like fungal growth in there.

  2. Select a well-draining potting mix

    When choosing the new potting mix to add to your Monstera’s new pot, make sure that you select a well draining one. Ingredients such as perlite can really help the water flow through the pot which helps to avoid waterlogged soil and root rot.

    Perlite is also great at aerating the soil so that’s definitely one to look out for in the ingredients list. Alternatively, you can buy it separately and add it to the potting mix yourself.

  3. Use it as an opportunity to inspect the roots

    Whenever you repot your Monstera, make sure to give the roots a thorough inspection. You don’t often get many opportunities to take a look at the roots to use this one!

    You want to look out for any signs of the roots crisping up or rotting. This can help you figure out if there might be some watering issues developing. These will always start at the roots before becoming visible on your plant so it’s a good way to catch any issues early.

    It’s natural however for some of the roots to die occasionally so prune off any dead ones now and this can help the root system to regenerate.

  4. Use a repotting mat

    Investing in a good repotting mat will make this a lot easier. Repotting houseplants is messy business and ideally, you probably want to avoid getting soil everywhere.

    Whilst you can easily just use a plastic sheet, there are also some really great repotting mats that are made specifically for this purpose. The great thing about them is that they have raised edges so it minimises soil getting onto the floor and is easy to clean up at the end. A real lifesaver!

Frequently Asked Questions

So that’s everything you need to know to successfully repot your Monstera. It’s a really beneficial part of plant care but is so often forgotten. Without space to grow, your Monstera won’t produce any new leaves, no matter the amazing environment or precise watering routine.

Fiddle and Thorn is a participant in the Amazon Services LLC Associates Program, an affiliate advertising program designed to provide a means for sites to earn advertising fees by advertising and linking to Amazon.com

Take our houseplant survey!

Quickly respond to our 30 second houseplant survey and get 75% off our Complete Houseplant Care eBook!

Take the Survey

No thanks…

How to Grow and Care for a Red Secret Alocasia

Last Updated: October 16, 2023

Red Secret Alocasia

Red Secret Alocasia

With their metallic-like dark red leaves, the Red Secret Alocasia is quite a rare find! They tend to be a little bit more compact than other Alocasia plants so can be a nice fit for smaller homes and spaces.

Native to South East Asia, specifically Borneo, the Red Secret Alocasia likes warm humid environments so can struggle in cold homes with dry air. Take this into account when figuring out the best place to grow your plant and we have some tips below to ensure it’s getting the optimal care.

Red Secret Alocasia plants are also known as Mirror Plants or Jewel Alocasia or by their Latin name of Alocasia cuprea.

In terms of ease of care, they fall somewhere in the mid-range. We wouldn’t recommend them to complete beginners but they also are fairly adaptable and don’t require constant attention to thrive.

How to care for a Red Secret Alocasia

There are a few primary care and environmental requirements that your Alocasia cuprea will need to thrive and the first of which is bright but indirect light. Be careful to avoid all direct sunlight during the height of summer as the hot intense rays can actually scorch and dry out their beautiful metallic leaves.

The other environmental factors that you need to be aware of are temperature and humidity and the Red Secret Alocasia need a lot of both. Boost the humidity through misting and avoid areas with cold drafts and this will avoid a lot of the common problems that tend to creep up with these plants.

Below you will find our complete Red Secret Alocasia care guide with all the information you need to keep your plant healthy and happy.

Red Secret Alocasia Overview

Origin: Borneo, South East Asia

Latin Name: Alocasia cuprea

Common Name(s): Red Secret Alocasia, Mirror Plants or Jewel Alocasia

Plant Family: Araceae (Aroids)

Difficulty Level: Medium

Appearance: Red metallic shield-shaped leaves.

Height and Size: Indoors can reach a maximum of 1 meter in height.

Growth Rate: Slow

Flowering: Can produce white spathe and spadix flowers but these are rare and insignificant.

Pruning: Only to remove dead or dying leaves.

Cleaning: Use a damp cloth to remove dust every few weeks.

Light Requirements: Bright but indirect.

Water Requirements: Moderate watering to avoid fully dry soil for extended periods.

Best Soil: Well-draining, nutrient-rich houseplant potting soil.

Ideal temperature: Prefers warm temperatures between 65-85°F (18-29°C)

Fertilizing Routine: Apply a well-balanced fertilizer once a month during spring and summer.

Ideal humidity Level: Prefer a humidity level of 60% and above.

Propagation: Through division of the mother plant.

Repotting Frequency: Every 1-2 years.

Toxicity: Toxic to pets and humans.

Risk of Pests: Can suffer from aphids, spider mites, mealybugs, thrips and gnats.

Common Problems: Curling, drooping and discoloured leaves (brown or yellow)

Origin of a Red Secret Alocasia

Alocasia cuprea are native to Borneo in South East Asia which means they prefer a warm and humid environment.

Red Secret Alocasia Family

They are part of the Araceae (Aroids) family which is a group of over 3,000 species which produce spadix flowers.

Red Secret Alocasia Appearance

Loved for their red, shield-shaped leaves, the Alocasia cuprea really is a unique houseplant! As the leaves age, they become a dark red and have a glimmering metallic shine but the newer leaves will often be a brighter shade of green.

Alocasia cuprea Height and Size

They can grow to around 1 meter (3.2 feet) in height and spread to around 50 centimeters (1.5 feet). Note that this variety is more compact than some other Alocasia plants.

Growth Rate of a Red Secret Alocasia

These plants are slow growing so don’t expect there to be numerous new leaves popping out each week but with the right care, you will be rewarded with incredible red metallic leaves each year.

Flowers on a Alocasia cuprea

Although uncommon, it can happen that your Red Secret Alocasia produces white spathe and spadix flowers during spring and summer. They are often quite insignificant and will wilt after only a few days. Their incredible leaves are the real show-stopper so don’t get too excited about the potential flowers.

It’s also worth noting that only mature plants will develop any flowers, and even then it can be rare. So just because your plant isn’t developing any, it doesn’t mean that anything is wrong.

Alocasia Cuprea pruning frequency

Regular pruning is not required with Red Secret Alocasia plants and instead, only prune dead or dying leaves. Removing them before they naturally fall off your plant can help divert some energy from trying to revive them into growing new healthy leaves.

Once a leaf has started to die (ie. turned brown or yellow), there is no reversing this so pruning it from your plant is the best option.

Cleaning your Red Secret Alocasia

As they have large flat leaves, it’s important to regularly clean them to prevent dust and dirt from building up. Not only can a thin layer of dust reduce the amount of light that is getting to your plant, but it can also clog up the small pores in the leaves.

To clean your Alocasia cuprea, use a damp cloth to wipe over the leaves every few weeks. If this isn’t enough to remove the dust, use a drop or two of dish soap but avoid using any harsh chemicals as this can damage the leaf very quickly.

You’ll notice that cleaning the leaves helps them look fresher and shinier.

Red Secret Alocasia (right)

Red Secret Alocasia and other plants on wooden floor

Light Requirements for a Red Secret Alocasia

Alocasia cuprea need bright but indirect light but keep them away from direct sunlight in summer as this can scorch their beautiful leaves.

You may want to move your plant around a bit depending on the seasons as they can be closer to the window and receive direct sunlight in winter as the sun is a lot weaker. You just need to remember to relocate your plant in spring so that it only receives indirect bright light.

Water Requirements for a Red Secret Alocasia

It’s important that the potting mix is kept moist but not soggy as Red Secret Alocasia don’t like to be sitting in puddles of water. Use a little but often approach to watering to prevent dry spells and waterlogged soil.

Make sure to remove any excess water from the planter or saucer 15 minutes after watering. This allows enough time for the plant to take up what it needs and prevents the roots from sitting in a puddle of water.

We highly recommend if you haven’t already to invest in a moisture meter as this will help you to figure out when your plant needs water, and how much time to leave before watering again.

Best Soil for a Red Secret Alocasia

Like all Alocasia plants, the Alocasia cuprea thrives in a well-draining, nutrient-rich potting mix that still has some moisture retention qualities. It may seem counterintuitive to have a well-draining, moisture-retaining soil but your plant needs one that won’t hold onto every drop of moisture, but also a potting mix that doesn’t let the water simply flow right through and out of the drainage holes.

A standard high-quality houseplant mix will suffice but try to choose one that contains perlite as this helps with drainage and aeration of the soil.

Note that you can also buy perlite separately and add it to the potting mix yourself which is always a good option.

The ideal temperature for your Red Secret Alocasia

They prefer warm temperatures of 65-85°F (18-29°C) so make sure to keep them away from cold drafts. These can happen close to windows and external doors and are often unnoticeable unless you get up close. Another thing to be wary of is placing your plant too close to air conditioning vents in summer as the cold air might be refreshing for you, but it can cause havoc with your plant and the drying rate of the soil.

Invest in a digital thermometer if you haven’t already as these will help you to notice any dramatic fluctuations quickly and address them before your plant starts to suffer.

Red Secret Alocasia Fertilizer Requirements

Apply a well-balanced, water-soluble fertilizer at half-strength once a month during the growth period of spring and summer. We like to use a water-soluble fertilizer as it allows for more control over the quantity and regularity of the feed.

Diluting the fertilizer to half the recommended strength will prevent over-fertilization. There are so many factors that impact how much and when your plant needs to be fertilized (age, plant type, sunlight level, temperature) so it’s impossible for there to be a one-fits-all amount so it’s better to be on the safe side.

Another thing to remember is to cut back on all feeding throughout autumn and winter. This is a dormant phase for your Red Secret Alocasia, which means there won’t be any new leaves and fertilizing during this time will actually cause more harm than good.

Remember that fertilizing is optional and you can still see plenty of healthy new growth without it.

Ideal Humidity Level for your Red Secret Alocasia

As they are native to the tropical rainforest of Borneo in South East Asia, Alocasia cuprea plants thrive in a slightly higher humidity level of 60% and above. They can struggle in areas with dry air (below 40% humidity) and you may start to see brown leaf tips and edges develop.

This can especially be a problem over winter due to heating and less ventilation.

The best way to Increase the humidity is by misting. Use a spray bottle to mist the leaves a few times per week or invest in a humidifier which will do wonders by keeping a nice steady humidity level.

How to propagate a Red Secret Alocasia

If you’re looking to propagate your Red Secret Alocasia then the best method to choose would be by division of a larger, more mature plant. By choosing to divide/ propagate when the plant is more mature you’re significantly more likely to have success and will also run less of a risk of damaging the existing parent plant.

The process for propagating your Alocasia cuprea is really quite straightforward. Start by removing any pots and excess soil, a chopstick will often make this much easier and also allow you to be more careful with the root system.

You should be able to see separate rhizomes of the plant at this point. Gently separate these as best as possible, if you need to cut them make sure to use a sharp clean blade or pair of shears. From that point, the cuttings will simply need potting into some good quality potting mix, care for the cuttings just as you would for the more mature plants!

Repotting your Red Secret Alocasia

As they are very slow-growing plants, you only need to repot your Red Secret Alocasia every 1-2 years, on average.

There are a few signs to look out for though to suggest that your plant needs to be repot into something larger. Firstly, roots growing out of the bottom of the drainage holes or becoming visible out of the top of the pot. Secondly, the roots are tightly coiled (the only way to see this is by removing your plant from its pot).

And lastly, there being no new growth in spring and summer can indicate your plant is rootbound. Be careful diagnosing just on this basis though as there are several other reasons why your plant may not have produced new leave, such as a lack of sunlight. Be sure to check over your plant, its root system and its environment before diagnosing the problem.

Red Secret Alocasia Toxicity to Humans and Pets

Red Secret Alocasia plants are toxic to both pets and humans when ingested. If your pet or child has ingested any part of the plant, seek medical advice immediately. Signs of toxicity from Alocasia cuprea include stomach and mouth irritation and vomiting.

Treating and Preventing Pests

Although rare if your plant spends the entire year indoors, it can happen that your Red Secret Alocasia begins to suffer from a pest infestation. Aphids, spider mites, mealybugs, thrips and gnats can all infest your plant, dehydrating it and eventually killing it if not caught in time.

Look out for signs of pests that include brown and yellow spots, holes in the leaves, white webbing or powder across the leaves and stems and white mildew. If you do spot pests or signs of them, isolate your plant from all other houseplants to stop the infestation from spreading and treat it with a rigorous routine of neem oil and an insecticide.

Red Secret Alocasia Common Problems

Although they aren’t the fussiest houseplant around, they do have their own set of requirements and can start to display a range of problems if things aren’t right. It’s important to catch and treat the issue early so make sure to regularly check your plant for any warning signs.

Fiddle and Thorn is a participant in the Amazon Services LLC Associates Program, an affiliate advertising program designed to provide a means for sites to earn advertising fees by advertising and linking to Amazon.com

Take our houseplant survey!

Quickly respond to our 30 second houseplant survey and get 75% off our Complete Houseplant Care eBook!

Take the Survey

No thanks…

Recommendations

Tools, plants and products loved by us to help you nurture your indoor jungle.

Recommendations

Tools, plants and products loved by us to help you nurture your indoor jungle.

Recommendations

Tools, plants and products loved by us to help you nurture your indoor jungle.