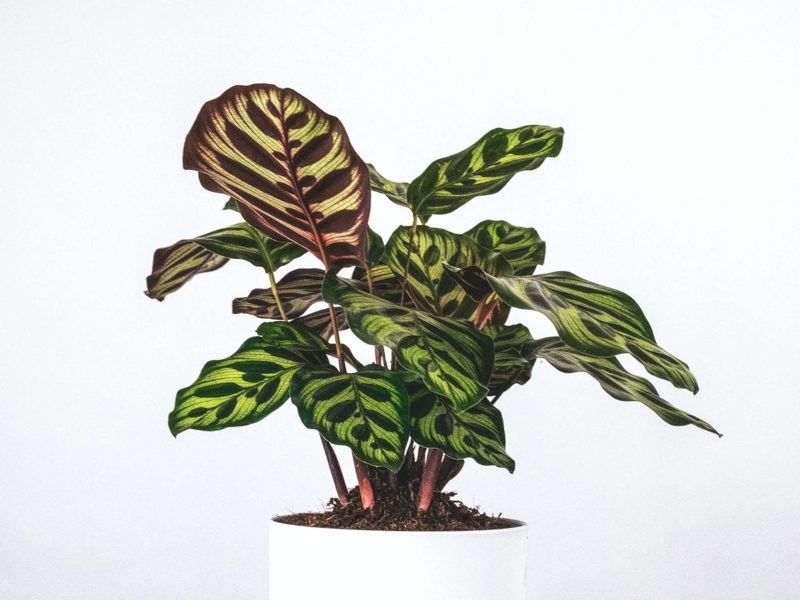
The 10 Best Dog Safe Houseplants

Last Updated: December 31, 2021

Top Dog-Friendly Houseplants

There are fewer things that we hold as close to our hearts as our pets. We do everything we can to protect them and keep them safe, and it should be no different when choosing the plants for our home. Unfortunately, there are a lot of houseplants that are toxic to dogs and when ingested can cause a whole range of issues for your furry friends. There are also some houseplants out there with sharp leaves or spikes that can lodge themselves into your pet if they aren’t careful.

To keep your dog safe, we have curated a list of the best dog-safe houseplants so you won’t need to worry about a thing. All of these plants will be fine if digested and their leaves won’t prick or hurt your dog either.

1

Spider Plant

Chlorophytum comosum

Spider Plants are the perfect plant for a houseplant beginner as they are super easy to care for, grow pretty quickly, and produce an abundance of spider babies which can be propagated in seconds.

The best thing about Spider Plants (apart from the fact they are dog safe) is that you would really have to try to kill them as they adapt to and survive in most environments and don’t mind being a little neglected. They even show you when they need more water by going quite light green. But after a little bit of water, they spring back to full health in minutes.

As your plant matures, you’ll start to see it sprouting little spiderettes which you can choose to remove from the plant to create new Spider Plants. They really are the gift that keeps on giving.

Find out more in our Spider Plant care guide.

2

Rattlesnake Plant

Calathea Lancifolia

Over the past few years, Rattlesnake Plants have gone from being quite rare to being one of the most popular Calathea plants around… and we totally understand why! Not only do they have über-cool markings on their long thin leaves, but they are quite an easy plant to take care of. Although they sound quite dangerous, the Rattlesnake Plant is totally safe for dogs so you don’t need to worry about that!

Native to the Brazilian rainforests, Rattlesnake Plants can adapt to a range of light levels, making them a great choice for those looking for a low-light plant. They also don’t need that much water as their roots absolutely hate sitting in waterlogged soil. The one thing you do need to make sure you do when caring for a Rattlesnake Plant is to boost the humidity either by misting the leaves or by using a humidifier.

Find out more in our Rattlesnake Plant care guide.

3

Air Plant

Tillandsia

There are hundreds of Air Plant varieties for you to fall in love with, all with relatively similar care requirements and all are safe for dogs. If you haven’t already guessed from the name, Air Plants are pretty different to most other houseplant types as they don’t grow in soil. Instead, all they need is regular misting and the occasional bath to survive!

Native to areas across Central and South America, Air Plants need warm temperatures and high humidity levels to really thrive which makes them great plants for terrariums. But don’t think this is the only way to grow Air Plants, because with a little bit of care and attention to their environment, you can grow them in most homes with no problems!

Find out more in our Air Plant care guide.

4

Boston Fern

Nephrolepis exaltata

If you want to bring some jungle indoors, whilst keeping your puppy safe, then the lush Boston Fern is the go-to! However, looking after them isn’t always easy as they can be a little fussy when grown indoors. There are two main things that your Boston Fern needs; bright sunshine and high humidity. This means you need to be prepared to mist your Fern daily to avoid crispy leaves.

The one downside we find to owning Boston Ferns is that they do shed a lot of leaves so you’ll find yourself tidying up after it quite a lot. This is why it’s super important that it’s dog safe, as there will be a lot of leaves lying around that your dog might try to eat. Another great thing about Boston Ferns is they are pretty cheap and you shouldn’t run into too much trouble finding them in plant shops around the world.

Find out more in our Boston Fern care guide.

5

Prayer Plant

Maranta leuconeura

Native to the tropical rainforests of Brazil, the Prayer Plant is loved for its variegated leaves with intricate vein patterns. You can easily spot a Prayer Plant by its leaf undersides as shades of deep red are revealed when the plant’s leaves curl up at night, bringing a splash of colour to your home.

There are several varieties of Prayer Plants that all look ever so slightly different but they are all completely dog safe which is great. The most common variety is the tri-colour which has red-veined leaves but you’ll sometimes see varieties with silver patches or dark green splashes. Prayer Plants are a little fussy though with light conditions, soil moisture and humidity levels though so we don’t recommend this as a starter plant, unfortunately.

Find out more in our Prayer Plant care guide.

6

Calathea Dottie

Calathea Roseopicta Dottie

With large glossy dark green (almost black) leaves, the Calathea Dottie is a plant for those who want to make a statement. Each leaf has a bright pink outline which you won’t see on any other plant! Native to South America, it’s important that Calathea Dottie plants are placed somewhere warm with a good level of humidity and bright but not direct sunlight. Without this environment, your plant will really struggle.

If you aren’t already sold on this plant just by looking at the incredible leaves, then we have a couple more reasons. Firstly, they purify the air in the room which helps us sleep a little better. Calathea Dottie plants aren’t as common globally so you might need to take a look in more specialised plant shops and nurseries to find them.

Find out more in our Calathea Dottie care guide.

7

Kentia Palm

Howea forsteriana

Kentia Palms are pretty hardy plants that can stand environments that many other houseplants wouldn’t be able to, making them quite easy to care for. They can grow up to 40 feet outdoors but will rarely get over 13 feet when kept indoors.

They can be quite fussy about watering however and prefer to get little and often as this stops their soil from drying out completely or being soggy for longer periods of time. They also aren’t great with having dusty leaves, so we recommend wiping them down with a damp cloth every now and then to keep them clean.

The good news is that they are completely safe and non-toxic, so perfect for homes with pets or kids!

Find out more in our Kentia Palm care guide.

8

Nerve Plant

Fittonia albivenis

With delicate leaves, Nerve Plants are low-growing spreader plants that aren’t always the easiest to care for. The most popular and common variety is silver and green-veined, though you’ll also often spot varieties with white, pink or red veins and leaves too! They also have quite a worrying name, but we can assure you that they are totally non-toxic so are safe to have around dogs and other pets, as well as small children.

They have quite specific care requirements though so we don’t tend to recommend them to beginner plant parents as they are quite fussy about balancing the level of light, water, humidity and temperature. If there is one tip we can give you it would be to mist your plant at every opportunity you have to prevent them from drying out.

Find out more in our Nerve Plant care guide.

9

Pinstripe Calathea

Calathea ornata

This is probably one of our favourite houseplants here at Fiddle and Thorn. Whilst they are a little fussier than a lot of other plants, their stunning pink striped leaves really make up for it. Their dark green glossy leaves can reach up to around 30cm when your plant starts to mature, so they really stand out in a room of plants.

Native to South America, these plants need high humidity or you’ll very quickly see dry leaf edges appear. You also want to keep them away from intense light or the pink stripes will start to fade which is always devastating. There aren’t that many pink plants that are non-toxic so this is a great option if that’s what you’re looking for.

Find out more in our Pinstripe Calathea care guide.

10

String of Hearts

Ceropegia woodii

Native to South Africa, the String of Hearts should be top on your list for trailing houseplants. You don’t get much more unique than their speckled heart-shaped leaves. The other thing we love about the String of Hearts is that it’s such a fast grower over the spring and summer months, you’ll blink and there will be two new leaves popping out somewhere.

The String of Hearts is a semi-succulent plant meaning they don’t need much water, otherwise, it’ll cause their delicate shallow leaves to rot pretty quickly. Oh, and because they have such shallow roots, you won’t need to repot for a very very long time.

It makes the perfect plant for hanging down shelving, and because its dog friendly, you don’t need to worry about it ever becoming too long!

Find out more in our String of Hearts care guide.

Fiddle and Thorn is a participant in the Amazon Services LLC Associates Program, an affiliate advertising program designed to provide a means for sites to earn advertising fees by advertising and linking to Amazon.com

Take our houseplant survey!

Quickly respond to our 30 second houseplant survey and get 75% off our Complete Houseplant Care eBook!

Take the Survey

No thanks…

The 10 Best Cat Safe Houseplants

Last Updated: December 31, 2021

Non-Toxic Houseplants that are Safe for Cats

There are few things in this world that we love more than our pets, so it’s really important that we choose houseplants that are safe for them to be around. A lot of houseplants have toxic leaves or sap which means when ingested, can cause severe problems for your cat. Other houseplants have sharp leaf tips or spines that can hurt your cat if they get too close.

With dogs and other pets, we can often just raise the plants up on shelves or out of reach so they can’t get to them. However, cats can literally get everywhere in your home so it’s better not to risk having any toxic plants around if your cat is sometimes tempted to nibble on the leaves.

Below you’ll find our list of the top cat friendly houseplants so you don’t need to worry about a thing!

1

Prayer Plant

Maranta leuconeura

Native to the tropical rainforests of Brazil, the Prayer Plant is loved for its variegated leaves with intricate vein patterns. You can easily spot a Prayer Plant by its leaf undersides as shades of deep red are revealed when the plant’s leaves curl up at night, bringing a splash of colour to your home.

There are several varieties of Prayer Plants that all look ever so slightly different, all of which are safe for cats. The most common is the tri-colour which has red-veined leaves but you’ll sometimes see varieties with silver patches or dark green splashes. Prayer Plants are a little fussy though with light conditions, soil moisture and humidity levels though so we don’t recommend this as a starter plant, unfortunately.

Find out more in our Prayer Plant care guide.

2

Kentia Palm

Howea forsteriana

Kentia Palms are pretty hardy plants that can stand environments that many other houseplants wouldn’t be able to, making them quite easy to care for. They can grow up to 40 feet outdoors but will rarely get over 13 feet when kept indoors.

They can be quite fussy about watering however and prefer to get little and often as this stops their soil from drying out completely or being soggy for longer periods of time. They also aren’t great with having dusty leaves, so we recommend wiping them down with a damp cloth every now and then to keep them clean.

The good news is they are safe for cats, as well as other plants and humans too!

Find out more in our Kentia Palm care guide.

3

Calathea Triostar

Stromanthe Sanguinea

Part of the Prayer Plant family, Calathea Triostar plants are loved for their incredible white, green and pink leaves. Their vibrant pink leaf undersides really make this plant stand out in a crowd.

As much as we love the Calathea Triostar, they are a little fussy so be prepared for a bit of a challenge to keep this one alive and happy. They hate direct sunlight as it can very quickly burn and scorch the leaves. It’s also important that you keep a good level of moisture in the soil, not too much and not too little. The best thing about Calathea Triostars (apart from being cat safe of course) is how quickly they do grow once you get the environment and care just right. Before you know it, there will be new leaves and stems popping up everywhere which makes it a great plant to propagate!

Find out more in our Calathea Triostar care guide.

4

Money Tree

pachira aquatica

The Money Tree is a great tropical looking houseplant, that is actually super easy to care for and can live for 10-15 years if properly maintained. They originate from Mexico but are very common throughout the world due to their ease of care, in their natural habitats they can grow all the way to 18 meters tall!

One of the great things about the Money Tree is that they can adapt to fluorescent lighting, this makes them great for offices or other commercial spaces. With them also being cat safe and simple to keep happy, we think they are a greater starter plant for budding plant parents.

Find out more in our Money Tree care guide.

5

Parlour Palm

Chamaedorea elegans

If you want to grow a palm tree indoors then the Parlour Palm is the one you need! They are easy to care for, are non-toxic to your cats and other pets and adapt well to lower light conditions. When kept indoors the Parlour Palm will stay quite small growing to a maximum of around 8 feet, this makes them manageable and easy to place anywhere in the home.

Provided with good light and some additional humidity in the dryer months your Parlour Palm will be perfectly happy – don’t be discouraged by slow growth as they can take several years to grow an extra 2 feet in height.

Find out more in our Parlour Palm care guide.

6

Burro’s Tail

Sedum morganianum

Also known as the Donkey’s Tail Plant, these striking succulents are loved for their delicate leaves that dramatically cascade out of the pot. Native to Mexico and Honduras, they are forgiving to the forgetful waterer as they store water in their leaves (this also makes them quite sensitive to overwatering so be mindful about that) and just need a nice warm sunny spot to be happy!

Their easy care routine does come at a cost, however, as the Burro’s Tail grows pretty slowly throughout the year. Their stems can often reach around 20-25 inches but it’s really important to handle the Burros Tail plant carefully as the stems break off with just the slightest touch. Luckily they enjoy being root-bound so you shouldn’t have to repot it very often and you can really easily propagate any stems or leaves that fall off. Not only are they safe for pets, but they aren’t harmful to humans either so great for homes with small children as you don’t need to worry about keeping it out of reach.

Find out more in our Burro’s Tail care guide.

7

Rattlesnake Plant

Calathea Lancifolia

Over the past few years, Rattlesnake Plants have gone from being quite rare to being one of the most popular Calathea plants around… and we totally understand why! Not only do they have über-cool markings on their long thin leaves, but they are quite an easy plant to take care of.

Native to the Brazilian rainforests, Rattlesnake Plants can adapt to a range of light levels, making them a great choice for those looking for a low-light plant. They also don’t need that much water as their roots absolutely hate sitting in waterlogged soil. The one thing you do need to make sure you do when caring for a Rattlesnake Plant is to boost the humidity either by misting the leaves or by using a humidifier. Although the name might make them sound quite dangerous, they are actually totally safe for cats!

Find out more in our Rattlesnake Plant care guide.

8

Peacock Plant

Calathea makoyana

The Calathea makoyana is known and loved for the bold and unique markings on the leaves, as well as their red undersides, a classic trademark of many Calathea plants. Peacock plants don’t grow very tall so are perfect for smaller homes and spaces.

When it comes to care, it’s important to note that the Peacock Plant can be a little temperamental sometimes, so we don’t always recommend this one to plant beginners. You must keep them away from direct light, mist them to boost the humidity and never let them fully dry out for long periods of time. They also need quite warm temperatures to really thrive, so drafts and AC vents are a no-go for Peacock Plants.

Peacock Plants can grow very small white flowers sometimes, but don’t think you aren’t caring for your plant properly if it doesn’t bloom. Flowers are quite rare and unpredictable, but a nice surprise when it does happen!

Find out more in our Peacock Plant care guide.

9

Calathea Orbifolia

Calathea Orbifolia

With their striking green and silver striped leaves, the Calathea Obifolia is the perfect plant for those looking for a little something different as they transport you straight to the tropics whilst also being totally safe for your cat! There are a few things to look out for when caring for a Calathea Obifolia, firstly, avoid direct sunshine as this will burn their beautiful leaves. They also like some moisture in the soil but hate sitting in soggy soil, so finding the right balance is key.

Although it was once slightly rare, you should now be able to get your hands on one of these pretty easily in nurseries and larger plant shops around the world.

Find out more in our Calathea Orbifolia care guide.

10

Spider Plant

Chlorophytum comosum

Spider Plants are the perfect plant for a houseplant beginner as they are super easy to care for, grow pretty quickly, and produce an abundance of spider babies which can be propagated in seconds.

The best thing about Spider Plants (other than being non-toxic) is that they adapt to and survive in most environments and don’t mind being a little neglected. They even show you when they need more water by going quite light green. But after a little bit of water, they spring back to full health in minutes.

As your plant matures, you’ll start to see it sprouting little spiderettes during the spring and summer months which you can choose to remove from the plant to create new Spider Plants.

Find out more in our Spider Plant care guide.

Fiddle and Thorn is a participant in the Amazon Services LLC Associates Program, an affiliate advertising program designed to provide a means for sites to earn advertising fees by advertising and linking to Amazon.com

Take our houseplant survey!

Quickly respond to our 30 second houseplant survey and get 75% off our Complete Houseplant Care eBook!

Take the Survey

No thanks…

The 10 Easiest Houseplants to Propagate

Last Updated: December 31, 2021

The Easiest Plants to Propagate

If you’re anything like us, you’re obsessed with growing your urban jungle and seeing how your plants mature. But it can get pretty expensive to buy new plants all the time which is why we love to propagate the ones we already have. Not only does it create more plants for free, but there’s nothing more satisfying than seeing the roots pop out from your cutting and eventually even seeing new growth.

We have put together a list of the easiest and fastest houseplants to propagate. Whether you give the cuttings to friends or simply add to your collection, these ones make propagating a breeze.

1

Spider Plant

Chlorophytum comosum

Spider Plants are the perfect plant for a houseplant beginner as they are super easy to care for, grow pretty quickly, and produce an abundance of spider babies which can be propagated in seconds.

The best thing about Spider Plants is that you would really have to try to kill them as they adapt to and survive in most environments and don’t mind being a little neglected. They even show you when they need more water by going quite light green. But after a little bit of water, they spring back to full health in minutes.

As your plant matures, you’ll start to see it sprouting little spiderettes which you can choose to remove from the plant to propagate them. It really couldn’t be easier as they will even start to grow short roots whilst still attached to the mother plant!

Find out more in our Spider Plant care guide.

2

Devil’s Ivy

Epipremnum aureum

These are pretty unique houseplants because they actually prefer lower-light conditions over anything else! That’s where the name comes from, as they are well acquainted with the darkness. So you don’t need to feel guilty about putting a Devil’s Ivy in a shady spot because it will actually love you for it. They are also pretty hardy plants in terms of their other care requirements. They don’t need complicated watering schedules or specific pruning so are perfect for any new plant parents.

When it comes to styling the Devil’s Ivy plant, shelving is where they thrive as it gives it room to cascade dramatically out of the pot. They can be trained to grow upwards by a wall or moss pole so the option is yours.

You can propagate your Devil’s ivy by taking stem cuttings and growing them in water to begin with. They’ll grow roots pretty quickly so are one of the fastest plants to propagate.

Find out more in our Devil’s Ivy care guide.

3

Snake Plant

Sansevieria Trifasciata

The bold and striking leaves of the Snake Plant make it stand out wherever you put it! Not only are they slow-growing, but they transcend upwards so are great for small spaces or that corner you never know what to do with. They have some of the sturdiest leaves or any houseplant, and their sharp leaf tips have given the plant the nickname of mother-in-laws-tongue!

When it comes to care, Snake Plant are super easy to look after, they can adapt to a range of light levels (are great low light plants), prefer dry soil and don’t need much attention in the way of misting or repotting etc.

To propagate your Snake Plant, you can either take leaf cuttings that root very quickly, or you can wait for offshoots to pop up which can be removed from the mother plant and grown as an individual plant. It’s super easy!

Find out more in our Snake Plant care guide.

4

Chinese Money Plant

Pilea Peperomioides

Otherwise known as the Chinese Money Plant (they are believed to bring good luck and fortune to its owner), Pilea plants are a must-have! They actually became popular because they are so easy to propagate as they grow Pilea pups as the plants mature which can be removed from the mother plant and grown independently.

When it comes to care, Pilea’s are somewhere in-between fussy and low maintenance. They aren’t great in low light areas, and also hate soggy or super dry soil so finding the right balance is key for Pilea care.

As your Pilea matures, the leaves can reach up to about 10cm in diameter which is incredible and makes all of the effort worth it!

Find out more in our Chinese Money Plant care guide.

5

String of Hearts

Ceropegia woodii

Native to South Africa, the String of Hearts should be top on your list for trailing houseplants. You don’t get much more unique than their speckled heart-shaped leaves. The other thing we love about the String of Hearts is that it’s such a fast grower over the spring and summer months, you’ll blink and there will be two new leaves popping out somewhere.

The String of Hearts is a semi-succulent plant meaning they don’t need much water, otherwise, it’ll cause their delicate shallow leaves to rot pretty quickly. Oh, and because they have such shallow roots, you won’t need to repot for a very very long time.

To propagate your String of Hearts, all you need to do is grow vine cuttings in water. After about 2 weeks, new roots will form from the node and are ready to be put back into the pot to create a bushier plant (or grown separately to create a new plant altogether).

Find out more in our String of Hearts care guide.

6

Inch Plant

Tradescantia zebrina

Also known as the Inch Plant, we haven’t yet come across a faster-growing or easier to propagate houseplant. The stems will grow a web of roots in days after being separated from the mother plant and grown in water.

Growing these indoors helps keep their growth more contained whilst still giving that wilderness feel which we love. Caring for these plants is also super easy as all they need is ample light and moderate water. They are quite forgiving though so won’t give up straight away if something’s a little off.

These plants are great for hanging planters or when placed on shelving so you can really make the most of those incredible vines. They can be mildly toxic though so you’ll want to keep them away from pets.

Find out more in our Inch Plant care guide.

7

English Ivy

Hedera helix

Although they are most commonly known as outdoor plants, you can very successfully grow an English Ivy indoors as long as you give it enough light. We are obsessed with the white variegated English Ivy but if not given enough sunshine, the new leaves will lose all of that variegation.

Included in the NASA Clean Air Study, the English Ivy is great at removing toxins from the air so we recommend having this around your home. They are also believed to sometimes be able to improve allergy symptoms so as well as looking lush, they have great benefits for us too. They are also super fast-growing plants that also grow new roots on stem cuttings in just a week or two!

Find out more in our English Ivy care guide.

8

Nerve Plant

Fittonia albivenis

With delicate leaves, Nerve Plants are low-growing spreader plants that aren’t always the easiest to care for. The most popular and common variety is silver and green-veined, though you’ll also often spot varieties with white, pink or red veins and leaves too!

They have quite specific care requirements though so we don’t tend to recommend them to beginner plant parents as they are quite fussy about balancing the level of light, water, humidity and temperature. If there is one tip we can give you it would be to mist your plant at every opportunity you have to prevent them from drying out. But if you can get the care routine nailed down, then they are totally worth the extra hassle!

Find out more in our Nerve Plant care guide.

9

Air Plant

Tillandsia

There are hundreds of Air Plant varieties for you to fall in love with, all with relatively similar care requirements. If you haven’t already guessed from the name, Air Plants are pretty different to most other houseplant types as they don’t grow in soil. Instead, all they need is regular misting and the occasional bath to survive!

Propagating Air Plants is a little different as they grow pups which can be removed from the mother plant or left on depending on choice. Slowly as the pups mature, they will absorb all the energy from the mother plant and the cycle starts again.

Find out more in our Air Plant care guide.

10

Aloe Vera

Aloe Barbadensis Miller

Although Aloe Vera plants are commonly loved for their gel, they are much more than just their health and beauty benefits, as they make for a super minimalist and forgiving houseplant! Like most other succulents, Aloe Vera plants don’t need much tending to as they thrive in dry coarse potting mix. But it is important that they get a good amount of bright light or will become quite straggly.

As they mature a little, you’ll see lots of little Aloe pups popping up which can be very easily removed from the mother plant and propagated! Aloe plants are super affordable and you can pick them up basically anywhere that sells plants, even supermarkets will often sell them in the summer months.

Find out more in our Aloe Vera care guide.

Fiddle and Thorn is a participant in the Amazon Services LLC Associates Program, an affiliate advertising program designed to provide a means for sites to earn advertising fees by advertising and linking to Amazon.com

Take our houseplant survey!

Quickly respond to our 30 second houseplant survey and get 75% off our Complete Houseplant Care eBook!

Take the Survey

No thanks…

String of Pearls Losing Leaves | Causes and Solutions

Last Updated: June 19, 2022

As long as the environment and care routine is right, you’ll have no problems caring for your String of Pearls and they actually become quite low-maintenance plants. However, as soon as something isn’t quite right, they can become pretty fussy and may begin losing their leaves/pearls. But don’t worry, as long as your plant hasn’t lost all of its leaves, there is still hope and a good chance you can still revive your dying plant and bring it back to full health. Below we will be going through each of the different reasons why your String of Pearls might be losing its leaves, so you can figure out which is affecting your plant and how to fix it.

Cold temperatures can result in String of Pearls plants losing their leaves

One of the most common reasons why String of Pearls start losing their leaves is due to inconsistent temperatures, particularly cold temperatures. If your plant is exposed to low temperatures (the ideal temperature for String of Pearls is between 18°C – 24°C), it can often cause them to go into shock and some leaves will drop from the plant.

Over time, if your String of Pearls is consistently exposed to really low temperatures, it can cause plant death as not only can’t they grow well in these conditions, but the risk of root rot is much higher as it’ll take a lot longer for the potting mix to dry out after watering.

Cold drafts can be caused by a range of things but doors or windows with small cracks are your plant’s worst enemy. If they are too close to drafty windows or doors then the cold air from outside during winter can be pretty damaging to your String of Pearls and will more often than not cause them to lose some leaves. But it’s not just wintertime that you have to be careful about cold drafts; String of Pearls will struggle if too close to any AC vents so move them at least 1m away to prevent leaf drop.

We really recommend buying a digital thermometer to check the temperature around your String of Pearls. It will help you spot any fluctuations and can be super beneficial to all of your houseplants to make sure they are in the ideal temperature range (hotspots can also cause some really serious issues).

Waterlogged soil might also be why your String of Pearls is losing leaves

Too much water can also lead to your String of Pearls losing leaves. If you notice the stems and leaves are a little softer than usual this may be because the pearls are filled with water and about to burst or fall from the plant. Waterlogged soil can also cause root rot which means your String of Pearls isn’t able to get all the nutrients it needs and becomes unstable and droopy.

Whilst overwatering and consequent root rot is an issue for many plants, because String of Pearls plants have very delicate roots, it can very quickly develop into quite a serious issue.

Before you start holding off watering your String of Pearls, it’s important to confirm that it is in fact overwatering and soggy soil causing your plant to lose its leaves.

To do this, check the moisture levels in the soil immediately. If the soil is quite waterlogged and clumpy then replace it with fresh dry mix which will allow your String of Pearls to begin the process of recovery and growing new healthy leaves. Don’t wait for the soil to dry out naturally as this only risks more damage to your plant and may result in your String of Pearls losing even more leaves/pearls.

When replacing the potting mix, trim away the rotten roots. These will often look dark brown or black in colour and be very soft to touch. Once the roots have started to rot, there is no reversing this. Removing them will help encourage new healthy roots to grow and won’t mean your String of Pearls plant wastes any energy trying to revive them.

In future, to prevent overwatering to cause your String of Pearls to begin losing leaves again, hold off watering as much or as frequently as you did before. Always make sure the potting mix has enough time to dry out fully (a moisture meter can really help with this) and remove any excess water from the planter or saucer about 15 minutes after watering. This should help prevent your String of Pearls from losing too many more leaves in future.

Top tip: waterlogged soil can give off a damp, musty smell so give your plants a smell every now and again to help you spot the issue even before your plant begins losing leaves.

A consistent lack of sunlight can also cause a String of Pearls to start losing leaves

String of Pearls thrive in bright, indirect light and will struggle with anything less. Insufficient light levels will start to cause your String of Pearls to start losing some of the older leaves to keep their energy reserves for the new healthy growth. It’s just a process of prioritisation as your plant will want to continue growing and developing even if the light levels aren’t high enough. This is actually one of the most common causes of leaf drop for String of Pearls.

Luckily, this is often one of the easier issues to fix. The best thing to do is find a better spot for your String of Pearls in your home so that it receives a little more natural sunlight throughout the day.

When choosing a new spot for your String of Pearls, make sure that it won’t receive any direct light (especially in summer) as you don’t want to burn the leaves on your plant. Instead, find a spot with great bright but indirect light to keep your plant thriving.

If you aren’t able to find a good spot with ample sunshine, then you might want to think about investing in a grow light to supplement light levels and prevent your String of Pearls from losing any more leaves. They can really help with keeping your plants happy throughout winter when you might not be able to find a brighter spot for your plant.

One thing that not a lot of plant parents think about doing is moving your plants depending on the season. During winter you might need to relocate some of your plants a little closer to the window to maximise on the light during the day. This can help stop leggy growth, leaf drop or brown leaves occurring during the darker months of the year.

Your String of Pearls might also be losing leaves due to pests

A slightly less common reason why your String of Pearls might be losing leaves is a pest infestation. It can happen that pests such as mealybugs, spider mites and scale bugs take hold of your plant and exhaust the pearls enough so that they drop off the plant.

This does become more common if your String of Pearls is spending any time outdoors so make sure to give your plants a full check when moving them indoors to stop the spread of pests among your houseplants.

Take a close look over your String of Pearls to spot any signs of pests. This includes insects themselves but also small brown or yellow spots, webbing or white powder across the pearls. Any of these signs indicates that pests are the reason why your String of Pearls is losing leaves.

If you find pests on your String of Pearls it’s important you give your plant a thorough wash in the shower. Keep the water pressure very low as they have very delicate vines and remove the worst affected areas to curb the growth of the infestation. You should also treat your String of Pearls with an organic insecticide and neem oil to get rid of the pests.

Sometimes natural causes can lead your String of Pearls to lose a few leaves

Occasionally it is totally normal for your String of Pearls to be losing a few leaves so if the rate of leaf drop is slow then it might be nothing to worry about at all. String of Pearls plants are very delicate so if they are knocked a little then it can cause the odd pearl to fall off. Your plant might also be losing leaves due to natural ageing. These will often be the smallest and oldest pearls from the top of the plant.

Take a look over any of the pearls that have fallen off your plant for any other signs of distress. We also recommend monitoring the speed at which your String of Pearls is losing leaves to see if it is increasing or if it is more than the new leaves it is growing. Either of these means that there is probably something more serious going on.

Those are the four most common reasons why String of Pearls plants can start losing their leaves. When your plant loses its leaves it’s often a way for it to tell you that it’s shocked or stressed so it’s important to find out what is causing it and make the right steps to not only fix the issue but prevent it from happening again. If the problem is getting quite bad then we recommend taking a small cutting of your String of Pearls to propagate it (one that is healthy with no signs of pests or other problems) so that if the worst happens, you still have a little bit of healthy plant you can grow.

To learn more about how to take care of your plant (and avoid more leaves falling off or other issues occurring), check out our String of Pearls care guide.

Fiddle and Thorn is a participant in the Amazon Services LLC Associates Program, an affiliate advertising program designed to provide a means for sites to earn advertising fees by advertising and linking to Amazon.com

Take our houseplant survey!

Quickly respond to our 30 second houseplant survey and get 75% off our Complete Houseplant Care eBook!

Take the Survey

No thanks…

String of Hearts Care

Last Updated: March 17, 2023

Basic String of Hearts Care

One of the most popular plants out there, the String of Hearts is a fairly low-maintenance and fast-growing plant. However, the best thing about it is actually the ease with which you can propagate it. Pop a few vine cuttings in water and they will root within days.

There are a few things to note when caring for your String of Hearts and that is that they don’t like low-light areas but also dry out if hit with too much direct sunlight. So a balance is key here. The second thing to know is that they hate their potting mix being soggy so make sure to use a well-draining mix and water only when the soil is dry.

Below you will find our full String of Hearts care guide with all the information you need for your plant to thrive.

Detailed String of Hearts Care

String of Hearts love sunlight

Your String of Hearts loves bright areas of your home. They can deal with a few hours of direct sunlight each day but prefer to be in a spot with indirect light so their leaves don’t burn. Your String of Hearts may struggle a little in the darker winter months (this can result in leggy growth) so you might want to move them a little closer to the window during winter.

They don’t like sitting in water

The String of Hearts is a type of succulent meaning that they don’t do so well in damp soil. When caring for a String of Hearts plant is very important that you let them dry out between waterings otherwise this will very quickly lead to root rot.

String of Hearts prefer average humidity

String of Hearts plants thrive best in 40-50% humidity which is what most households should be naturally. This means you don’t need to worry about misting or increasing humidity levels for your String of Hearts which makes them a pretty easy plant to take care of. Read our houseplants guide to humidity if you want to find out more.

String of Hearts plants prefer warmer temperatures

When caring for a String of Hearts plant, we recommend keeping it in a slightly warmer area of your home. They don’t do so well in cooler temperatures so make sure your plant isn’t sat next to drafty windows or doors.

String of Hearts plants are easy to propagate

The String of Hearts may just be one of the easiest plants to propagate. Cut off a piece of the vine just above the node (where two heart leaves are) and place in water or soil. Roots should grow within a few weeks! We have written a whole guide on how to propagate your String of Hearts if you want to know more.

String of Hearts don’t need regular fertilisation

To encourage new growth on your String of Hearts, you may want to give it some fertiliser. However, make sure you only feed it once a month during the growth periods of Spring and Summer, and not at all during winter. We also recommend fertilising your String of Hearts at half-strength.

Only ever repot during the growth period

String of Hearts plants don’t need constant repotting as their roots are delicate and won’t become root bound very often. If you do want to repot your String of Hearts, try to only do it during the growth months of Spring and Summer as this will minimise shock.

Don’t worry about pruning your String of Hearts

String of Hearts plants don’t need to be pruned like other houseplants. As long as you cut off the odd dead stem, and propagate cuttings if it gets too long for your space, there isn’t really any need for pruning your String of Hearts. Just another reason why String of Hearts are so easy to care for! If your String of Hearts has a few leggy vines, then you may also choose to prune these for aesthetic reasons.

String of Hearts plants are safe for pets

Another reason why we love the String of Hearts plant is because they are non-toxic to pets and humans. This means you don’t need to worry about putting it out of reach of your furry friends or children.

String of Hearts Care FAQs

Common Issues for String of Hearts

Although the String of Hearts are relatively easy plants to care for, it’s still important to look out for any warning signs that might suggest it is struggling in its current conditions. The most common issues are yellowing leaves and dry, crispy stems.

Fiddle and Thorn is a participant in the Amazon Services LLC Associates Program, an affiliate advertising program designed to provide a means for sites to earn advertising fees by advertising and linking to Amazon.com

Take our houseplant survey!

Quickly respond to our 30 second houseplant survey and get 75% off our Complete Houseplant Care eBook!

Take the Survey

No thanks…

Sticky Schefflera leaves – what it means and how to fix it

Last Updated: September 10, 2023

One problem Schefflera parents sometimes have is finding the leaves to be a little sticky to touch. It can be quite unusual and confusing as it’s not one of the more common problems so it’s important to know what it means and how to fix the issue.

Sticky Schefflera leaves are caused by a pest infestation on your plant. This is definitely something to take seriously as the problem can very quickly spread to the whole plant and cause more issues than sticky leaves.

The most common pests found on Scheffleras are aphids, spider mites and mealybugs. If they make your plant their home then they will start sucking and feasting on the leaves. The bugs leave behind a honeydew on the plant’s leaves which is what causes the stickiness.

The reason why pests are so harmful to your houseplants is they will slowly exhaust the plant and kill the leaves one by one. First causing little holes and yellowing leaves and then eventually making the leaves fall off the plant and killing the plant entirely.

Is there a way to stop the pests?

Luckily, there are several things you can do to get rid of the pests. However, this is never a guarantee. If the pests have spread throughout the plant then it can be really difficult to get rid of them entirely. We have had to say goodbye to several plants because the problem was just too far gone. But if you have caught it early and there are no other signs apart from sticky Schefflera leaves then you should have a good chance of returning your plant to full health.

The first thing to do when you spot pests is to move the infected plant well away from any of your other houseplants. Pests can spread from one plant to another pretty easily if they are close so you want to isolate the plant immediately. Then check over the plants that were close to the infected plant to see if there are any visible pests or signs of an infestation on those too.

Then you want to trim off the worst affected leaves and stems. This will help to curb the growth of the infestation in the short term by cutting the number of pests on the plant right down. Be careful with those trimmings though as you want to dispose of them properly and not leave them near any uninfected plants.

Then you want to give your plant a good shower and blast with the hose. This will wash down a lot of the pests on the leaves. Leave the plant to dry off so the excess water doesn’t cause root rot. Now that you have significantly reduced the number of pests on your plant you can begin to treat it with insecticide or need oil.

Another great thing to do is to replace the potting mix. There are probably pests or eggs in the soil too so you want to replace that with fresh soil and dispose of the old carefully.

After treating the plant with insecticide for several weeks you should begin to win the fight against the pests. You want to now assess the damage done to the plant and cut away any lifeless leaves, stems and roots. This will encourage new healthy growth. It may take a while for your plant to grow properly again as it has gone through a lot – be patient!

So pests are the evil cause of Sticky Schefflera leaves. No matter how experienced you might be as a plant parent, pests are the number 1 enemy and you won’t always win against them. Propagating your Schefflera might also be a good option to save some of the healthy and uninfested parts of your plant.

You can find out more about identifying, treating and most importantly preventing pests in our downloadable ebook.

Fiddle and Thorn is a participant in the Amazon Services LLC Associates Program, an affiliate advertising program designed to provide a means for sites to earn advertising fees by advertising and linking to Amazon.com

Take our houseplant survey!

Quickly respond to our 30 second houseplant survey and get 75% off our Complete Houseplant Care eBook!

Take the Survey

No thanks…

The Ultimate Staghorn Fern Care Guide

Last Updated: October 16, 2023

Introduction to Staghorn Ferns

These unique and exotic plants have an unusual growth habit and mesmerizing leaf patterns. They hang on trees in their natural habitat, mimicking the way they grow in the wild adds a dramatic touch to your indoor decor. But, their uniqueness comes at a price as Staghorn Ferns require particular attention and care to flourish.

The name ‘staghorn fern’ comes from the plant’s unique fronds that resemble the antlers of a stag. This plant can exhibit two types of fronds. The sterile fronds, also known as the shield fronds, are round and flat, which curl around the base of the plant and help in absorbing nutrients. The fertile fronds, on the other hand, are the ones that resemble antlers and are responsible for the plant’s photosynthesis.

Staghorn Fern Characteristics

The Staghorn Fern, or Platycerium, is an epiphytic plant, This means that instead of growing in soil, Staghorn ferns grow on and around other plants or structures, much like orchids or bromeliads.

In terms of size, Staghorn Ferns can vary quite a bit. In their natural habitat, they can grow up to several feet across. But as houseplants, they tend to be more modest in size, usually a couple of feet in width and height.

The spores of Staghorn Fern are borne on the undersides of the foliar fronds. When mature, these spores can be harvested and propagated to create new plants.

Another notable characteristic is the Staghorn Fern’s resilience. They are tough and can endure a range of conditions, including varying levels of light and humidity. However, they do have their preferences, tending to thrive in bright, indirect light and a humid environment. We’ll cover all of this in more detail below.

Displaying Your Staghorn Fern

The location and method of display not only impact the aesthetic appeal of your Fern but these two factors also play a vital role in its overall health and growth.

There are a few important factors to consider when deciding on the perfect spot for your Staghorn Fern:

  • Light: Staghorn ferns thrive in bright, indirect light. A spot near a window that gets plenty of filtered sunlight would be ideal. Direct sunlight, however, can scorch the leaves and cause damage.
  • Temperature: These ferns prefer warm, humid environments. Normal indoor temperature, between 55°F-85°F, suits them fine. Avoid placing them near air vents, heating units, or cold drafts.
  • Humidity: As tropical plants, Staghorn ferns love humidity. Bathrooms or kitchens, where humidity levels are typically high, would be great locations.
  • Mounting vs Potting: In their natural habitat, Staghorn Ferns grow as epiphytes, meaning they grow on other plants or objects instead of in soil. To mimic this, consider mounting your fern on a wooden board or hanging basket. If you prefer to keep it in a pot, ensure it has excellent drainage.

Displaying these plants is so different to most other houseplants which can make caring for a Staghorn Fern intimidating. Here are a few display ideas to inspire you:

  1. Hanging Basket: Fill a hanging basket with moss and bark, and place your fern in it, allowing the fronds to cascade beautifully. It’s an excellent method for displaying Staghorn Ferns and also provides excellent drainage.
  2. Mounted on a Wooden Board: This mimics the natural environment of the fern and creates a stunning visual display. Attach your fern to a wooden board using fishing line or nylon stockings. Be sure to incorporate some sphagnum moss for added moisture retention.
  3. Freestanding in a Pot: If you’re not keen on mounting, a freestanding pot can work, too. Opt for a pot with good drainage, filled with a fast-draining potting mix, ideally a blend of bark, peat moss, and perlite.

Staghorn Fern Light Requirements

When it comes to the light requirements of a Staghorn Fern, they thrive in bright, indirect sunlight. As inhabitants of tropical rainforests, they’re acclimated to being shielded from the intense direct sunlight by the overhanging tree canopy.

It’s important to avoid placing your Staghorn Fern in direct sunlight. The harsh rays can scorch the plant’s delicate fronds, causing damage to the leaves.

However, if a suitable source of natural light isn’t available in your home, artificial light can serve as a substitute or to supplement it. A fluorescent light bulb placed close to the fern can provide an adequate light source. Staghorn Ferns are quite adaptable and will generally do well given sufficient artificial light.

Watering Your Staghorn Fern

When it comes to watering your Staghorn Fern, it’s important to recognize that these unique plants have different watering needs compared to your traditional potted plant. Their growth in nature, commonly on tree trunks, means they are adapted to absorb water in a distinct way.

While they do appreciate a good soak, overwatering can lead to root rot and other health complications. Their watering routine should strike a balance – providing ample moisture without waterlogging the plant.

How Often to Water

The frequency of watering your Staghorn Fern largely depends on the environment in which it’s kept. In general, watering once a week is usually sufficient during the warmer months, and every two weeks during colder months.

Key factors such as humidity, temperature, airflow, and light exposure can influence this schedule so adjust accordingly if your Fern seems to dry out too quickly or remain wet for too long.

Watering Method

Staghorn Ferns prefer a good soaking. Here is a simple and effective method:

  1. Remove the fern from its hanging position.
  2. Submerge the entire plant in a basin of room-temperature water.
  3. Soak it for about 20 minutes to ensure that both the plant and the medium get thoroughly saturated.
  4. Drain well and let any excess water drip off before rehanging.

Note that if your fern is large and difficult to remove, you can opt to mist the plant thoroughly, ensuring the water reaches the root ball.

Humidity Requirements

When it comes to the humidity needs of a Staghorn Fern, understand that these plants have a tropical origin which means they thrive when the humidity is high, typically over 50%.

Ways to Maintain Humidity

  • Misting: Regularly misting your Staghorn Fern with a spray bottle can effectively increase the humidity around the plant. However, be cautious not to over-mist as it can lead to fungal diseases on the leaves.
  • Humidifier: Utilizing a humidifier nearby can ensure a more stable humid environment, particularly in dry climates or during winter months when indoor air tends to be drier.
  • Water-filled trays: Positioning your plant above a tray filled with water and pebbles is another way to increase humidity. As the water evaporates, it creates a moist microclimate around the fern.

Signs of Low Humidity

  1. Browning or crispy fronds: This is often the first sign of insufficient humidity. The fronds lose their vibrant green color and start to turn brown at the tips, gradually extending inwards if conditions do not improve.
  2. Slow growth: If your Staghorn Fern is not growing as quickly or robustly as it should, it could be a sign of low humidity.
  3. Wilting: A wilting Staghorn Fern could be suffering from more than just low humidity, but it can be part of the problem.

Temperature Considerations

Natively found in the jungles of Australia, Southeast Asia, and Africa, Staghorn Ferns prefer a temperature range of 55-85°F (13-29°C).

They’re not particularly frost-tolerant and can suffer damage in environemnts below 55°F (13°C). Hot temperatures can also be damaging so try to avoid any temperature-induced stress. Keep your Staghorn away from direct sources of heat like radiators or heating vents in the winter, and direct air conditioning drafts during summer months.

Maintaining Optimal Temperature

  1. Positioning: Position your Staghorn Fern in a spot where it can get plenty of indirect light and stay within the recommended temperature range. Avoid placing it near windows or doors that are frequently opened and closed, as this can lead to sudden temperature drops or increases.
  2. Adjust Heating/Cooling: In the winter, try to maintain a consistent temperature inside your home, avoiding any sudden spikes in heat. During hotter months, ensure your air conditioner is not directly blowing onto the fern, as this can cause it to dry out and become distressed.

Fertilizing Your Staghorn Fern

This Staghorn Fern feeds differently than most other houseplants as it absorbs nutrients through its fronds.

Fertilizer application should not be a rigorous routine, but a simple monthly task that ensures your Staghorn Fern thrives optimally.

Typically, you should use a balanced water-soluble fertilizer diluted to half strength. This prevents the risk of burning the plant with excess chemicals, which could be detrimental to its health.

Steps to Fertilize Your Staghorn Fern

  1. Prepare the fertilizer solution: Begin by diluting your chosen water-soluble fertilizer. Remember to stick to a half-strength solution to prevent any potential harm to your plant.
  2. Application: Apply the fertilizer directly to the fronds, ensuring all parts receive the solution. This step is crucial since the Staghorn Fern absorbs nutrients through the fronds, not through the roots like most other plants.
  3. Frequency: Repeat this process once a month. Regular fertilization promotes healthy growth and ensures your Staghorn Fern remains vibrant and flourishing.

Pruning Your Staghorn Fern

This essential maintenance step not only helps to promote healthy growth but also keeps the fern looking its absolute best.

So, how do you go about pruning your Staghorn fern? Here are some steps to guide you:

  1. Firstly, inspect your fern regularly. The key to effective pruning is catching any issues early. Notice if the fern’s leaves are starting to turn brown or if there’s any damage. This could be an early sign it’s time for a pruning session.
  2. Secondly, make sure you use clean and sharp pruning shears. This helps to prevent the spread of disease and will ensure a clean cut that won’t harm the plant. You can simply sterilize your shears with a bit of rubbing alcohol before starting.
  3. Next, remove any dead or dying fronds from the plant. These are usually brown or yellow and may be shrivelled up. Removing these allows more energy to go to the healthy parts of the plant. However, be careful not to remove the brown shield fronds that protect the roots of the fern.
  4. Afterwards, trim back any overly long or unruly fronds. Your Staghorn fern should have a balanced, symmetrical look. Trimming it back will help maintain this and promote new growth.
  5. Finally, keep an eye on your fern after pruning. It should start to show signs of new growth within a few weeks. If not, it might need additional care like more water or light.

Propagating Your Staghorn Fern

When it comes to propagating your Staghorn Fern, it is not as simple as it may seem, and it requires a careful understanding of the plant’s needs and lifecycle.

Method of Propagation: The most common method of propagating Staghorn Ferns is through division, which involves separating a mature plant into several smaller ones. This method is advantageous as it preserves the genetic characteristics of the parent plant and is relatively quicker than other methods of propagation. However, patience is key, as the new plants will take some time to establish and grow fully.

Steps for Propagation:

  1. Identify a healthy, mature Staghorn Fern: Look for a plant that is robust, with several pups or offsets. These will be the smaller ferns growing from the base or back of the main plant.
  2. Separate the pups: Using a sharp, clean knife, carefully cut the pups away from the parent plant. It is important to ensure that each pup has some of the parent’s shield fronds, as these will provide nutrients for the new plant.
  3. Mount the pups: Attach each pup to a new mounting board using non-copper wire or nylon stockings. It’s important to ensure the pup is securely fastened, as it will need to attach itself to the board to grow properly.
  4. Proper care: Place the new plants in a location that receives bright, indirect light and maintains a high level of humidity. Water regularly, but do not let the plant sit in water, as this can lead to root rot.

The success of propagation largely depends on the health of the parent plant and the care provided to the new plants.

Note: Propagation is best done in the spring or early summer, when the plant is actively growing. It’s important to wait until the pups are large enough before attempting to separate them from the parent plant.

Staghorn Fern Toxicity

Staghorn Ferns are generally recognized as non-toxic to pets and humans. However, while staghorn ferns are generally recognized as non-toxic, individual reactions to the plant can vary. Precaution should always be exercised, especially around pets and young children.

While these ferns do not produce any toxic sap or residue, ingesting their fronds or spores might cause mild discomfort, such as nausea or skin irritation, particularly to those with sensitive skin or allergies. Therefore, it is important to keep these plants out of reach of young children and pets prone to chewing foliage.

Staghorn Fern Care FAQs

Fiddle and Thorn is a participant in the Amazon Services LLC Associates Program, an affiliate advertising program designed to provide a means for sites to earn advertising fees by advertising and linking to Amazon.com

Take our houseplant survey!

Quickly respond to our 30 second houseplant survey and get 75% off our Complete Houseplant Care eBook!

Take the Survey

No thanks…

Spider Plant: A Comprehensive Care Guide

Last Updated: October 16, 2023

Spider Plant Leaves

Healthy Spider Plant

Introduction to Spider Plants

Native to tropical and southern Africa, Spider Plants (scientifically known as Chlorophytum comosum) are resilient, adaptable and easy to care for! They are a really great beginner houseplant if you don’t have any experience caring for indoor plants (they were actually one of our first back in the day).

Characteristics of Spider Plants

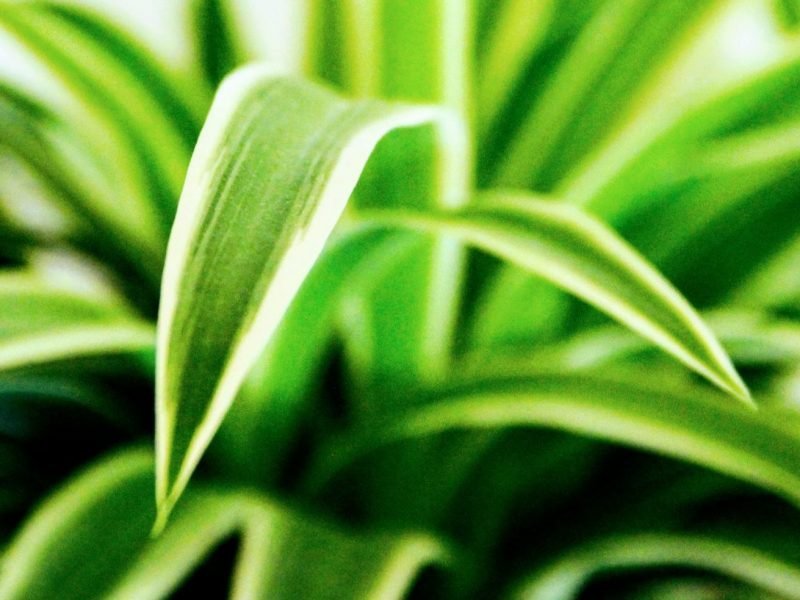
Spider Plants are often associated with a cascade of green-and-white variegated leaves. They are also loved because of their tiny plantlets or ‘spiderettes’ that dangle from the mother plant, much like a spider on its web. During spring and summer, these appealing houseplants can also boast small delicate white flowers.

Benefits of Spider Plants

Spider Plants are also celebrated for their air-purifying properties. According to NASA’s Clean Air Study, they are capable of filtering out formaldehyde, xylene, and toluene from the air, contributing to a healthier indoor environment.

Understanding the Different Types of Spider Plants

Spider Plants come in an array of delightful variations and while they all share common traits, each type has unique characteristics.

Variegatum

The Variegatum is arguably the most popular type of Spider Plant. It’s characterised by its striking green leaves with white edges. This variety is particularly beloved for its resilience and easy care requirements.

Vittatum

Next, we have the Vittatum. This Spider Plant variation flips the variegation around with its vibrant green leaves adorned with a central white stripe. It’s a fantastic option for those seeking a dash of contrast in their foliage.

Bonnie

The Bonnie offers a curly twist on the classic Spider Plant aesthetic. Its leaves curl and twist around which is a great way to add a bit of fun to your plant collection.

Hawaiian Spider Plant

Finally, the Hawaiian Spider Plant. It distinguishes itself with its variegated leaves that have a cream colour. This variety can add a lovely softness and warmth.

The Ideal Light Level for Spider Plants

Spider plants thrive best in bright, indirect light conditions. Direct sunlight, particularly the harsh midday rays can cause the leaves to lose a lot of their color and in extreme cases can burn and scorch the leaves. This can leave irreversible brown patches across your plant. In contrast, too little light can stunt the plant’s growth and inhibit its characteristic variegation but they can still survive in lower light areas if needed.

Artificial Light for Spider Plants

Spider plants are also tolerant of artificial lighting conditions, making them ideal for office spaces or rooms without sufficient natural light. They respond well to fluorescent lighting, which can supplement or even replace natural light. A few hours under these lights each day can keep your spider plant healthy and vibrant.

Watering Spider Plants: How Often and How Much?

There isn’t really a one-fits-all way of watering Spider Plants as the water quantity and frequency can depend on a variety of factors such as the plant’s size, the pot’s size, and the surrounding environment.

Start with a basic rule of thumb: water your Spider Plant thoroughly once a week during the growing season (spring and summer). In the dormant season (autumn and winter), reduce the frequency to once every 2-3 weeks.

Here are some additional watering tips:

  • Water in the morning: This gives the plant ample time to absorb the water and any excess to evaporate before the cooler night temperatures set in (and the risk of leaf and root rot increases)
  • Use room-temperature water: Cold water can shock the plant, while hot water can damage the roots.
  • Avoid wetting the leaves: Wet leaves can lead to leaf rot or other fungal diseases.

Fertilizing Spider Plants: Tips and Tricks

Spider plants are loved for their hardiness, but to achieve a vibrant, lush appearance, a little fertilisation added to your care routine can go a really long way.

The Perfect Fertilizer:

A balanced houseplant fertilizer, typically a 10-10-10 or 20-20-20 NPK solution is generally recommended for spider plants. This implies it contains equal parts of nitrogen, phosphorus, and potassium, which are essential nutrients for plant growth.

Frequency of Fertilization:

During the growing season (spring and summer), you should fertilize the plant once a month. In the dormant phase (autumn and winter), reduce the frequency to once every 2 months.

Tips for Fertilizing Spider Plants:

  1. Water before fertilizing: Always drench the soil with water before applying fertilizer. This prevents the roots from getting burned by the concentrated nutrients.
  2. Follow instructions: Always adhere to the recommended dosage on the fertilizer packaging. Over-fertilization can do more harm than good.
  3. Observe your plant: If the leaves turn brown or yellow despite regular fertilization, it may indicate an issue with water or light rather than a lack of nutrients.

Remember, over-fertilizing is a common mistake. Spider plants prefer to be under-fertilized rather than over-fertilized so we often use less than the recommended amount.

The Ideal Temperature for Spider Plants

Spider Plants are resilient but prefer cooler environments. They thrive best when the temperature is between 13-27°C (55-80°F).

Low Temperatures: While Spider Plants can withstand low cool temperatures, anything below 7°C (45°F) may result in leaf and root damage.

High Temperatures: On the other side of the spectrum, Spider Plants may wilt and dry out if exposed to temperatures above 32°C (90°F). Ensure your plant isn’t exposed to direct sunlight during peak summer months to avoid potential heat damage.

Indoor Temperature Regulation for Spider Plants

  • Use a Thermostat: This will help maintain a consistent temperature within your home.
  • Avoid Hot or Cold Drafts: Keep your plant away from open windows, air conditioners, heaters, or other sources of sudden temperature changes.
  • Consider Room Location: Rooms on the south side of your home usually get more sunlight, hence they are warmer. North-facing rooms, on the other hand, tend to be cooler. Choose the location based on your local climate and season.

Humidity Requirements for your Spider Plant

While Spider Plants can tolerate a wide range of humidity levels, they truly flourish when the humidity is between 40% and 60%. This level mimics their natural native habitat and allows them to maintain optimal leaf health.

Methods to Increase Humidity

  • Misting: A daily spritz of water on the leaves can significantly boost the humidity level. Just remember, Spider Plants don’t like to sit in water, so a light misting will suffice.
  • Pebble Trays: If your home is particularly dry, you might consider making a pebble tray. Simply place your Spider Plant in a tray filled with water and pebbles. Over the course of the day, the water will evaporate, creating a humid microclimate around your Spider Plant.
  • Grouping Plants: Placing your Spider Plant near other houseplants can also increase humidity. Plants naturally release moisture, creating a more humid environment.

However, be careful not to overdo it. While Spider Plants appreciate humidity, too much can lead to root rot or fungal diseases. Always keep an eye for signs of distress, such as yellowing leaves or wilting and adapt your care and the environment accordingly.

Controlling Excess Humidity

If your home is too humid for your Spider Plant then you can use a dehumidifier or an air conditioner to control excess humidity. It’s also beneficial to ensure your Spider Plant’s soil has proper drainage and that the plant is not overwatered. Remember, Spider Plants prefer their soil to dry out between waterings.

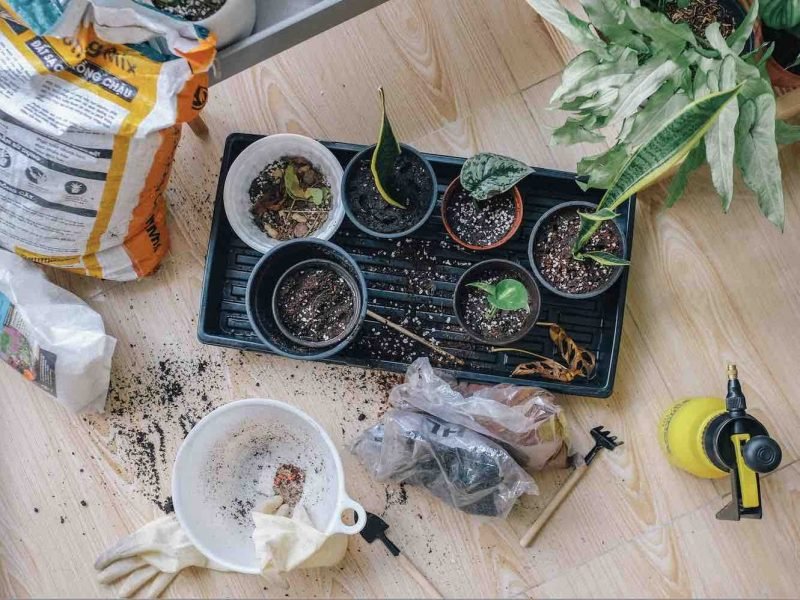
Choosing the right Soil for your Spider Plant

Soil selection is a very important part of the care routine but is so often forgotten. The right soil provides the perfect blend of aeration, drainage, and nutrition.

Components of the Ideal Soil Mix

  • Peat Moss or Coconut Coir: These constituents add a lightweight structure to the soil, enhancing its water-holding capacity and aeration.
  • Perlite or Sand: These inorganic components ensure proper drainage, preventing waterlogging and root rot.
  • Compost: Providing a natural source of nutrients, compost promotes the lush growth of your Spider Plant.

A good rule of thumb is to use a ratio of 1:1:1 for these components. This creates a balanced soil mix that caters to the unique needs of the Spider Plant.

Commercial Soil Mixes

If you don’t want to prepare your own soil mix from scratch, commercial soil mixes are an excellent alternative. A high-quality, well-draining potting mix designed for houseplants will suffice.

Soil pH

The Spider Plant prefers slightly acidic to neutral pH levels, between 6.0 and 7.2. Use a soil pH tester to ensure the soil is within this range. Adjusting the pH, if needed, can be done by adding lime to raise the pH or sulphur to lower it.

Choosing the best Pot for your Spider Plants

Choosing the right pot for your Spider Plant is a crucial step towards ensuring your plant’s long-term health. The pot plays a significant role in the overall well-being of the plant, affecting everything from root health to water management. Below are a few factors to consider when choosing the right pot:

Pot Size

Spider Plants have a robust root system that can quickly outgrow a small pot. As a general rule, a pot with a diameter of 6-8 inches is a good starting point for young plants. For mature plants, you might want to go for a 10-12 inch pot to give the roots plenty of room to grow.

Pot Material

Pots can be made of various materials, each with its unique pros and cons. Ceramic or terracotta pots are great for Spider Plants as they allow the soil to breathe and help prevent overwatering. However, they can be heavy and may break if dropped. Plastic pots, on the other hand, are lightweight and durable, but they retain water more, which can lead to root rot if not carefully managed.

Drainage is Key

Regardless of size or material, every good pot should have adequate drainage holes. This allows excess water to escape, preventing the soil from becoming waterlogged and keeping your Spider Plant’s roots healthy and happy.

Visual Appeal

Last but not least, don’t forget to consider the aesthetic aspect! Your pot should not only be functional but also fit in with your home’s decor and personal style.

Spider Plant Growth Rate

With the right care and attention, Spider Plants can grow quite quickly, especially when it comes to growing new spiderettes in spring and summer. A healthy plant can typically achieve a growth rate of 6-12 inches per year. These growth spurts are usually seen in the warmer seasons, specifically in spring and early summer.

Optimising Spider Plant Growth

To ensure your Spider Plant achieves its best possible growth, consider the following tips:

  • Rotate your plant occasionally to ensure all sides receive equal light exposure.
  • Prune any brown or yellow leaves to encourage new, healthy growth.
  • Repot your plant every 1-2 years to provide fresh soil and room for roots to expand.

Pruning Spider Plants: When and How to Do It

Pruning is an essential part of Spider Plant care that ensures your plant maintains its lush, vibrant appearance. Not only does it boost the overall health of the plant, but it also prevents it from becoming overcrowded and facilitates growth.

When to Prune a Spider Plant

Pruning should be a regular part of your care routine for a Spider Plant. However, the optimal time is typically during the late winter or early spring. This is when the plant is preparing for the upcoming growth season and can benefit the most from pruning.

How to Prune a Spider Plant

Pruning a Spider Plant doesn’t require any specialised tools – a pair of sharp, clean scissors or pruning shears will do the trick. It’s important to ensure that the tools are sterilised to prevent any potential infection.

  1. Inspect the plant: Begin by examining your spider plant. Look for browning, yellowing, or damaged leaves or stems. These are the parts that you’ll want to remove.
  2. Trim the affected areas: Using your scissors or shears, cut off the unhealthy parts at the base. This enables the plant to redirect its energy to the healthy parts, promoting robust growth.
  3. Prune the babies: If your spider plant has “babies” or offshoots, consider pruning them as well. This can help the parent plant retain more nutrients and grow more vigorously. Spiderettes are super easy to propagate so it can be a nice way to grow new plants for free!
  4. Dispose of the cuttings: Discard the pruned parts properly to prevent any disease from spreading to other plants.

Propagation Techniques for Spider Plants

There are two main methods of Spider Plant propagation: division and through offsets. Both of these methods have high success rates and are also super simple.

1. Propagate through Division

The simplest method of Spider Plant propagation involves division. Essentially, this means separating the plant into smaller parts, which can each grow into a new, independent plant. Here’s how you do it:

  1. Firstly, remove the entire plant, including the roots, from its pot.
  2. Next, gently separate the plant into two or more sections. Ensure each section has a healthy chunk of roots attached.
  3. Finally, plant each section into a new pot filled with fresh potting mix.

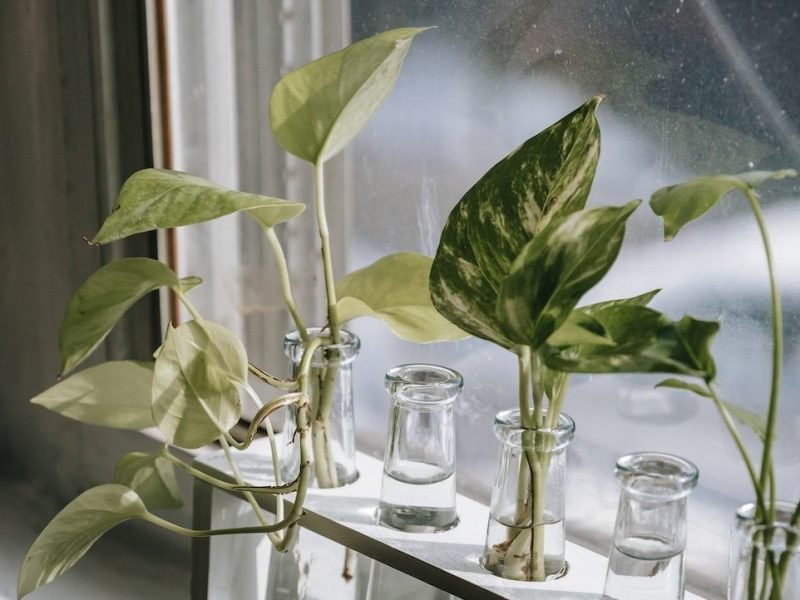
2. Propagate through Offsets

Spider Plants often produce baby plants or ‘offsets’ at the ends of their long, arching stems. These offsets can be easily propagated too. The step-by-step process is as follows:

  1. Firstly, cut the stem just below the baby plant.
  2. Next, place the baby plant in a pot with fresh potting mix or suspend it in a glass of water until roots form.
  3. Finally, once a robust root system has developed (usually after a few weeks), plant it in soil.

Flowers on a Spider Plant

Understanding the Blooming Phase

Spider Plants can bloom at any time of the year, but they’re most likely to do so during late spring or early summer. When they bloom, they send out long, arching stems adorned with clusters of small, white flowers.

Encouraging Your Spider Plant to Flower

To increase their likelihood of producing those charming flowers, ensure an appropriate balance of light and water. Too little light can hamper blooming, while over-watering can lead to root rot. So the best way to encourage your Spider Plant to bloom is to keep it happy as a struggling plant won’t grow any flowers.

Managing the Spiderettes

Post-bloom, Spider Plants often produce ‘spiderettes’, tiny plantlets dangling from the mother plant’s stems like spiders hanging from a web. These spiderettes can be left attached to the mother plant or cut off and rooted in water or soil to grow a completely new plant.

Spider Plant Toxicity to Pets and Humans

Are Spider Plants Toxic to Humans?

Fortunately, the Spider Plant is considered non-toxic to humans. They are perfectly safe to touch and handle, even for young children, making them an excellent choice for households with curious toddlers. Ingestion might result in minor gastrointestinal upset but poses no severe health risks.

Are Spider Plants Toxic to Pets?

Good news for pet owners, the Spider Plant is generally regarded as safe for pets. The American Society for the Prevention of Cruelty to Animals (ASPCA) lists it as non-toxic to both dogs and cats. However, it’s still wise to keep an eye on your furry friends around any plant.

Note: Some pets may experience some mild digestive upset if they ingest large amounts of Spider Plant leaves.

Cleaning your Spider Plant

As a proud owner of a Spider Plant, you’ll be pleased to know that they are one of the easiest houseplants to clean. This simple task, often overlooked, can significantly improve the health and appearance of your Spider Plant.

The main reason why you should regularly clean your Spider Plant is to prevent a build up of dust that can actually reduce the amount of sunlight that is hitting the leaves. Think of the dust as a small curtain pulled across the leaf that keeps some of the sun out.

Cleaning your Spider Plant also has aesthetic reasons as it will become more vibrant in colour!

Cleaning Basics

  • Start by gently dusting the leaves with a soft brush or cloth to remove any accumulated dust. This helps the plant to better absorb sunlight.
  • For stubborn dirt, lightly moisten a cloth and carefully wipe each leaf. Be sure not to oversaturate the leaves as this can lead to rot.
  • Remember to clean the underside of the leaves. This is where insects and dust are most likely to accumulate.

Deep Cleaning

Occasionally, your Spider Plant may benefit from a deeper clean. This is especially true if it’s been a while since the last cleaning, or if the plant has been subjected to an unusually dusty environment eg. building works.

  1. Fill a sink or large bowl with lukewarm water. Avoid hot or cold water as it can shock and burn the plant.
  2. Gently swish the plant around in the water. This will loosen and wash away any stubborn grime.
  3. Drain the water and gently pat the plant dry. Make sure to drain any excess water from the pot to avoid waterlogging the roots.

Common Pests and Diseases that Affect Spider Plants

Spider Plants, despite their hardiness, are not entirely immune to pests and diseases. They can occasionally fall victim to a few common houseplant pests and conditions. Let’s delve into some of the most common issues you may encounter and how to deal with them effectively.

Spider Mites

Spider mites can be a nuisance as they can cause the leaves to become discoloured and stippled. If left unchecked, the plant may lose vigour, dry out and potentially die.

Treat these pests with neem oil and an insecticide, or use a mild soapy water spray. Always isolate the infected plant to prevent the mites from spreading to your other indoor plants.

Mealybugs

Another common pest is the mealybug. These small, soft-bodied insects feed on plant sap, damaging the plant and causing yellowing or curling of the leaves. In severe cases, the plant may become distorted and stunted.

Mealybugs can be controlled by wiping the plant with an alcohol-soaked cotton swab or using an insecticidal soap. Again, isolate the infected plant to contain the infestation.

Root Rot

Root rot is a disease often caused by overwatering. The excess water creates an environment conducive to fungus, which attacks the roots. The leaves may turn yellow or brown and the plant can wilt and die if not treated promptly.

Make sure to water your spider plant properly. If you suspect root rot, repot the plant in fresh soil, cutting away any visibly damaged roots. Provide good drainage and avoid overwatering.

Troubleshooting: FAQs about Spider Plant Care

Fiddle and Thorn is a participant in the Amazon Services LLC Associates Program, an affiliate advertising program designed to provide a means for sites to earn advertising fees by advertising and linking to Amazon.com

Take our houseplant survey!

Quickly respond to our 30 second houseplant survey and get 75% off our Complete Houseplant Care eBook!

Take the Survey

No thanks…

Snake Plant Care

Last Updated: September 5, 2022

Basic Snake Plant Care

The Snake Plant was actually one of our very first houseplants as their easy care routine and striking leaves make them great for everyone! When it comes to keeping your Snake Plant healthy it’s important that you let the soil dry out fully between waterings. Snake Plants are sensitive to root rot and as they have very tall leaves, their roots are crucial to keeping them upright and healthy.

Below you will find all the information you need to care for a Snake Plant, including basic care tips and diagnosing common issues.

Detailed Snake Plant Care

Snake Plants prefer bright, indirect light

They will also tolerate more direct sunlight or shadier corners. Imperfect light conditions will mean your Snake Plant will grow slower than in brighter environments but it will not kill it.

Snake Plants need very infrequent watering

Although they may not look like it, snake plants are actually a succulent so it can be very easy to accidentally over-water them. They like to dry out in between waterings and during winter, they only need to be watered around once a month.

Snake Plants prefer warmer environments

Being native to warmer countries, Snake Plants thrive in warmer conditions. In colder months, make sure your snake plant is not near drafty windows or doors.

Natural humidity is fine for your Snake Plant

One thing you don’t need to worry about when caring for a Snake Plant is humidity. They grow well in the natural level of your home, and don’t need any additional misting.

Use a well draining soil

Snake Plants need dry conditions so make sure that you use well-draining soil. Snake plants are one of the best plants at air purification. They filter out toxins at night which makes them great for the bedroom too.

Snake Plants can be propagated by division or leaf cutting

Try to divide and repot in the spring so that it can adjust to its new environment during the warmer months. To propagate a Snake Plant by division, cut a section of both leaves and roots and transfer into a separate pot. To propagate your Snake Plant by leaf cutting, slice 5-7cm of a leaf and place it either in water or a well-draining potting mix.

Snake plants are mildly toxic

Snake Plants can be harmful to cats and dogs if ingested and cause diarrhoea or vomiting. They also have quite tough and sharp leaves so make sure to keep out of reach of pets and young children.

Snake Plants survive well when pot-bound

Don’t feel you need to re-pot your Snake Plant as soon as possible as they quite enjoy having their roots packed in tight. But if you want to rehome your plant just make sure you don’t bury it any deeper than it had been in its previous pot.

Snake Plant Care FAQs

Common Issues for Snake Plants

Snake plants are very resilient and low maintenance. They adapt to most environments and will reward you for pretty much leaving them alone.

Fiddle and Thorn is a participant in the Amazon Services LLC Associates Program, an affiliate advertising program designed to provide a means for sites to earn advertising fees by advertising and linking to Amazon.com

Take our houseplant survey!

Quickly respond to our 30 second houseplant survey and get 75% off our Complete Houseplant Care eBook!

Take the Survey

No thanks…

Signs you are Over-Fertilising your Houseplant and how to fix it!

Last Updated: August 6, 2022

Over-fertilising your houseplants can actually have quite damaging effects but it’s quite a difficult issue to diagnose. This is because once you’ve over fertilised, there aren’t so many ways to actually confirm the issue compared to watering problems where the soil and root system will give you a few hints.

This is why the issue of too much fertiliser often gets overlooked so we are bringing you this article to go through the different symptoms of over-fertilisation and how you can fix it.

Symptoms of over-fertilising your houseplants

Yellow leaves can indicate over-fertilisation

The most common symptom of too much fertiliser is yellow leaves. Depending on the severity of the problem this can show up as yellow spots, patches or entire yellow leaves. This is described as fertiliser burn which means the problem has been going on for a little while. Usually, it is the root system that is first impacted, then the problem will soon become visible across the plant.

It’s important to note, however, that yellow leaves are a common symptom of a variety of issues so don’t use this as the only confirmation that you are over-fertilising. Overwatering, sunburn and natural ageing can also have a similar effect.

To know whether the yellow leaves on your plant are caused by fertiliser burn, check over your plant for any of the below-mentioned issues and check the soil moisture, light levels and any changes in the environment that might indicate something else is wrong.

Brown leaf tips can also mean over-fertilisation

Another common symptom of over-fertilisation is brown leaf tips and edges. Similarly, with yellow leaves, this is also caused by watering and humidity issues so it’s important to do some further investigating to fully make your diagnosis.

Usually, brown leaf tips and edges are one of the earlier signs of fertilisation and can often mean the issue hasn’t fully taken over your plant and can be solved fairly simply. This is why it’s very important to get to the bottom of whether or not fertiliser is causing the brown tips so you can treat your plant accordingly.

There is visible excess fertiliser on the soil

If you notice a white crust or powder forming on top of the soil then this can indicate you are over-fertilising and the excess minerals have clumped together. This can be quite damaging to your plant as the excess fertiliser can form around the roots, suffocating them and severely impacting the health of your plant.

Your houseplant is losing leaves

Another symptom of overfertilisation is actually a loss of leaves. This happens when the root system is so badly damaged from the fertiliser that it cannot sustain that level of healthy growth anymore.

If your plant is losing leaves due to fertiliser issues it means the problem has been slowly developing for a while so it may be more difficult to revive your plant and bring it back to full health. Acting quickly is crucial here and we have written the steps to solving over-fertilisation below.

Too much fertiliser can cause stagnant growth

Another sign of too much fertiliser is if your plant has stopped growing during the growth season. It’s quite an ironic issue as most of the time plant parents fertilise their plants to get more luscious growth but too much fertiliser actually does the opposite.

Note that during winter and autumn, growth levels in houseplants drop as they become dormant. So don’t mistake this lack of new leaves for an issue – it’s totally normal!

How to fix an over-fertilised houseplant

Now that you have diagnosed the issue and confirmed that your plant is suffering from too much fertiliser, we’re here to tell you how to fix the issue and get your plant back to full health.


Remove fertiliser sticks from the soil

If you are fertilising your plants through fertiliser sticks, then remove these from your plant immediately. This will prevent your plant from getting any more fertiliser and should be enough to solve the issue. Monitor your plant and make sure all other environmental factors are giving your plant what it needs.

Flush the soil

If you have used fertiliser pellets mixed into the soil or liquid fertiliser diluted into the water, then one way to remove the excess is to flush the soil. The best way to do this is to place your plant in the sink or shower (depending on size) and run water through it for several minutes. Make sure that you leave your plant to drain for a few minutes afterwards so that you aren’t returning your plant to its planter with super soggy soil.

Replace the potting mix with fresh mix

If the issue has severely impacted your plant’s health then it’s probably best to replace the potting mix. This ensures that there isn’t any lingering fertiliser pellets or liquid fertiliser in the soil that could continue to harm your plant. Discard the old potting mix as you don’t want to re-use it again for other plants if it’s full of fertiliser.

How to prevent over-fertilisation from harming your plant

Adjusting your fertiliser schedule

Make sure that you hold off fertilising an over-fertilised plant for about 6 months or in the following spring, whatever comes second. This way you are giving your plant enough time to recover from the shock and stress.

Then moving forward, you want to reduce the frequency or amount that you are fertilising your plant to prevent the same issue from reoccuring. Remember, a lot of plants will still reward you with plenty of new growth without any fertiliser at all. Having the right environment will have a lot stronger effect on new growth than additional fertiliser so it’s optional.

We hope this guide has been useful for you to help spot the signs of over-fertilisation as well as fix and prevent the issue as well. It’s definitely not an easy problem to diagnose but if not treated can cause some aesthetic and problematic problems for your houseplants.

Fiddle and Thorn is a participant in the Amazon Services LLC Associates Program, an affiliate advertising program designed to provide a means for sites to earn advertising fees by advertising and linking to Amazon.com

Take our houseplant survey!

Quickly respond to our 30 second houseplant survey and get 75% off our Complete Houseplant Care eBook!

Take the Survey

No thanks…