Why are my Schefflera’s leaves turning brown?

Last Updated: June 21, 2022

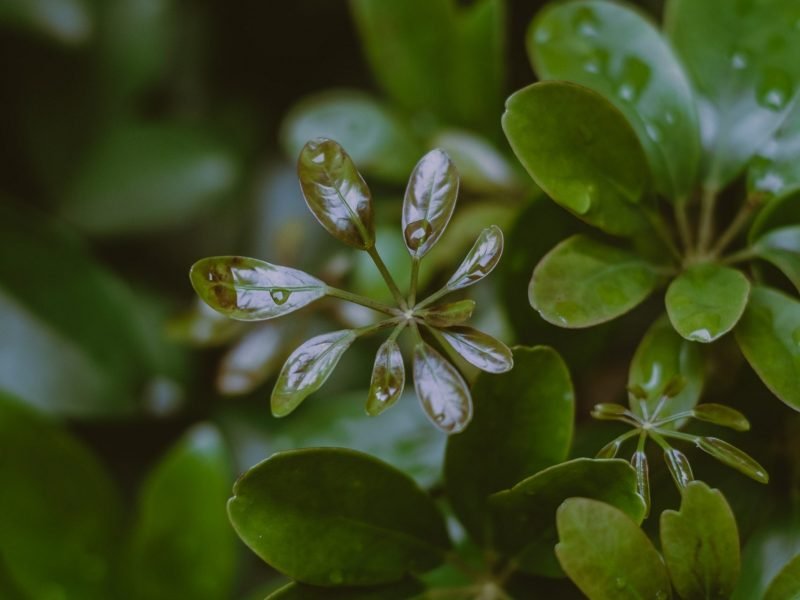
Schefflera plants (also known as Umbrella plants due to their unique leaves) are becoming more and more popular in the houseplant world as they are fairly easy to take care of.

However, if you find that your Schefflera’s leaves are turning brown/yellow, this is usually a sign of unhappiness in either their environment or care routine. The most common reasons why your Schefflera is turning brown or yellow are: overwatering, underwatering, extreme temperatures or chemical sensitivity.

Overwatering could be causing brown leaves

Schefflera are pretty hardy plants and won’t die on you suddenly if overwatered every once in a while. However, consistent overwatering will mean their roots will start to rot and their leaves will start to turn brown, mushy and fall off. Schefflera need to be watered no more than twice a week in the hottest months of the year, and less frequently in autumn and winter.

Consistent overwatering will lead the main root system to rot which is very harmful to your Schefflera. It will cause the plant to become unstable, the individual leaves will droop, turn brown and eventually fall off completely as your Schefflera will not be able to get nutrients from the soil to maintain healthy leaves or new growth.

If you think that you may have overwatered your Schefflera it is best to replace the soil straight away rather than just sit and wait for it to dry up over time. Make sure to replace it with something fresh and nutrient rich, like this one from Miracle Gro. Be careful when removing the soil from the roots as you don’t want to cause any further damage.

Before watering your Schefflera, make sure to always check the moisture in the soil. There are two really easy ways to make sure that it definitely needs water. First check the moisture in the top 2cm of the soil, if it is still damp then wait a few days before watering again. You can also lift up your Schefflera to check the weight of the plant before and after watering. You will then start to be able to gauge how heavy the soil is when it is in need of water.

Handle your Schefflera gently when picking it up to prevent any leaves from breaking away from the main stem.

If you want to take all of the guess work out you could use a moisture meter to keep an eye on the moisture level, these affordable little gauges are a great way to make sure you’re not overwatering and damaging your plants. You could even invest in self-watering pots, like these ones from Amazon, that make sure your plants are always getting just what they need.

Drainage issues could be the problem

Sometimes it may not be your watering schedule that is causing your Schefflera’s leaves to turn brown but the poor water drainage of the soil and pot. You can very easily increase the amount of drainage in the pot by mixing in a small amount of perlite, this will make it far easier for water to flow through and out of the drainage holes of your pots (you should also check to make sure your pots have drainage holes). Another easy step is to add a few small stones or pebbles to the bottom of your pots, this helps in making sure that the drainage holes don’t get blocked by soil or any loose debris.

Although clay or terracotta pots can be a little bit more expensive and breakable than plastic ones, their upsides are much more than just the aesthetic. The clay they’re made of is permeable which means that some of the water in your soil can evaporate through the sides of the pot. This isn’t the case for the plastic pots that our plants often come in, which instead hold in all of that moisture. So sometimes it is worth investing a little more to make sure that the roots of your Schefflera are not sitting in too much moisture.

Complete Houseplant Care eBook

Our comprehensive (and rather good looking) eBook that will teach you everything you need to know to successfully care for, and maintain your houseplants!

Buy on

Underwatering your Schefflera can also cause brown leaves

Like overwatering, too little water can also be harmful to your Schefflera. Although it won’t die on you suddenly if you forget to water it every once in a while, or make it go a little longer without water whilst you are on holiday, consistent underwatering will start to have an impact on your Schefflera’s health. If you notice that you Schefflera’s leaves are turning brown and crisping up, it may be due to underwatering, as it prioritises new healthy growth over its older leaves.

Stick a finger in the top few centimetres of the soil to check the moisture. You can also try lifting your Schefflera as we mentioned earlier to see it if feels particularly light. If you find that your Schefflera feels very dry, water it a little every other day for a week. Your first instinct might be to give it loads of water straight away but this can actually be harmful to your Schefflera if the soil goes from one extreme to the other. Instead, you want to reintroduce frequent watering for a week or two and this should solve the problem.

If you find yourself forgetting to water your Schefflera regularly, try creating a calendar of when all your houseplants need watering. You can then set reminders on your phone on specific days to remind you. That way you can keep track of your watering habits and make sure you don’t under or overwater any of them too often!

This is another problem that can be easily resolved by investing in an affordable self-watering pot, these handy pots take all of guess work out of watering and make everything so much easier!

Low humidity levels cause brown leaves

Alongside watering habits, low humidity can also be a cause of brown leaves on a Schefflera. Often our homes can have quite dry air, especially in the winter months where we often have the heating on for most of the day. A lack of humidity in the air can cause the leaves to be a little limp, droop down, and turn dry, brown and crispy (usually starting from the tips of the leaves).

But luckily for you, it can be pretty simple to increase the humidity for your Schefflera, these are our top tips:

  • Misting the leaves

    One of the simplest ways to increase the humidity for your Schefflera is to mist them with a spray bottle a couple of times a week. Make sure the water is fresh and at room temperature as you don’t want to cause temperature shock.

  • Pebble tray

    Place your Schefflera over a tray of pebbles with fresh water over the top. Over the day water from the tray will evaporate giving your plant exactly what they’re looking for.

  • Give your Schefflera a shower

    To quickly raise the humidity and wash down your plant of any long-standing dust, you can always give them a quick shower. Simply pop them in the shower and wash them down with lukewarm water, this will clean off the leaves and give the soil a good soaking.

    You do want to be quite careful when doing this with your Schefflera as their stems are not always super sturdy. Keep the water pressure low and the shower head fairly close to the leaves and you should be alright.

  • Move your Schefflera to the bathroom

    If you’re lucky enough to have great lighting in your bathroom you can move your Schefflera in there to increase the humidity. The running water from your showers means your bathroom is probably one of the most humid in your home.

  • Buy a humidifier

    They’re relatively affordable little devices and they make keeping a consistent humidity level so much easier.

    Most will allow you to place them on a timer so they run on a fixed schedule, and some will even have a built-in monitor so they automatically turn on and off to keep the humidity exactly where you want it. This one is our favourite, and it actually looks nice too!

Extreme temperatures can lead to brown leaves

Schefflera Plants don’t like rapid changes in temperature, so you should make sure you keep them out of areas that are often have a draft, for example drafty doors, windows or air conditioning vents.

You should also keep them away from heating vents and radiators as the hot dry air that is produced can quickly turn your Schefflera’s leaves brown. Try moving your Schefflera to a spot with a consistent temperature and keep an eye on any changes for a few weeks.

Chemical sensitivity

If you notice that the tips of your Schefflera are starting to turn brown and dry it may be due to sensitivity to chemicals in the water. The salts, chlorine and fluoride found in tap water can build up in the soil. Over time, this may be causing harm to the roots which often shows itself in brown leaves.

There are two ways to make sure that the water you give them has reduced levels of these chemicals. Firstly you can leave a jug of tap water for around 24 hours to allow for a lot of the chemicals to evaporate.

Another method is leaving a tray outside to collect rainwater to give to your houseplants to make sure chemical levels are lower than the treated water that comes out of your tap. Note that this will be more common if you live in a hard water area.

Too much fertiliser at once

Schefflera Plants don’t need regular fertilisation, in fact, they will thrive without being fertilised at all. However, if you do want to, we recommend giving your Schefflera a water-based fertiliser no more than once a year, in the growing period.

If you are fertilising your Schefflera more regularly, it may be causing damage to the main root system which over time could kill your plant. If you have over-fertilised your Schefflera, we recommend changing out the soil and washing down the roots to get rid of any excess that has built up over time.

There are quite a few reasons why your Schefflera’s leaves may be turning brown, so it is important that you diagnose the right problem and solve it as soon as possible. If there are only a few brown leaves or tips on the plant then you should have caught it early enough and your plant should resume healthy growth after you have identified the problem.

Don’t expect the brown leaves to all of a sudden turn luscious green, what’s done is done, unfortunately. But you can carefully trim away the brown parts of the leaves to get your plant to focus its energy on new healthy growth. You might also want to propagate your Schefflera to save some of the healthy sections of your plant.

Fiddle and Thorn is a participant in the Amazon Services LLC Associates Program, an affiliate advertising program designed to provide a means for sites to earn advertising fees by advertising and linking to Amazon.com

Take our houseplant survey!

Quickly respond to our 30 second houseplant survey and get 75% off our Complete Houseplant Care eBook!

Take the Survey

No thanks…

Why are my Satin Pothos’ leaves curling?

Last Updated: May 2, 2022

Curling leaves can sometimes be a tricky problem for a plant parent to have because there are quite a few possible causes. In this post, you will find all of the most common reasons why your Satin Pothos has curling leaves. It’s important you go through one by one to find out what is causing it so you can fix the problem as soon as possible.

Underwatering can cause curling leaves

Issues with watering are the number one cause of plant problems, and curling leaves are no different. Consistent underwatering will mean your Satin Pothos’ leaves will begin to curl as they go into shock and shrivel up. Although Satin Pothos plants don’t like to have really soggy soil, they aren’t drought tolerant. Curling leaves is often one of the earlier signs of trouble when it comes to a lack of water. It’s your plant’s first defence against water loss through its leaves which means if you act now, you’ll have quite a good chance at solving the issue before it starts to cause any real damage.

Before you go and drown your Satin Pothos with water to make up for the lack of it, you want to be certain that this is the problem. Watering a plant when it really doesn’t need it will cause a whole range of other issues. To confirm the diagnosis, take your Satin Pothos out of the pot to inspect how the potting mix feels. If underwatered, the potting mix will fall apart and feel very sandy. We also recommend that you take a look at the root system on your plant as if the roots have started to crisp up, then this tells you that the problem has been going on for a while.

To fix the issue of curling leaves (and prevent more problems from developing) slowly reintroduce water to your plant rather than drowning it. Any dramatic and sudden changes in their environment can cause your Satin Pothos to go into shock (they can be a little bit sensitive so just be cautious).

To avoid curling leaves in future, use a moisture meter to monitor how moist the soil is before you water it. Although you want to give the potting mix time to dry out between waterings, you don’t want it going too long without a drop. Moisture meters are super affordable and will help with your other houseplants too so are a great investment.

Overwatering and root damage can also be causing the leaves to curl

Much like underwatering, too much water can also make your Satin Pothos curl up. Whilst they can often deal with the occasional overwatering as they have quite robust root systems, they will start to struggle if the potting mix is really waterlogged. Curling leaves is also one of the earlier signs of overwatering so it’s best to treat the issue now before it progresses into something a lot more serious.

If your Satin Pothos’ roots begin to rot they won’t be able to take up any water or nutrients from the soil. This starves the plant of vital resources for growth and the leaves may begin to curl. They will also likely turn soft and yellow so watch out for these signs too.

Like with underwatering, you want to be sure of the problem before changing how much you water. Waterlogged soil can be pretty easy to diagnose so just using the finger or chopstick method should help you to figure it out. Overly soggy soil also gives off a really bad smell so this is also something to watch out for.

If you have been overwatering your Satin Pothos then it is important that you act quickly to stop the problem from causing more permanent problems beyond curling leaves. Replace any waterlogged soil with fresh dry mix and trim away all rotten roots. They can’t be saved so it’s best to remove them entirely.

The next thing you need to think about is stopping the issue from causing more curling leaves in future. You either need to cut back on how frequently you are watering your Satin Pothos, or give it less water each time you do. Either of these options works so figure out what works best for your plant and your routine. You also need to take into account changes in environmental factors that might affect how much water your Satin Pothos needs. Cut back on watering during winter months for example.

Curling leaves can indicate overfertilisation

Another cause of curling leaves on a Satin Pothos is over fertilisation. We recommend fertilising using a water-soluble fertiliser at lower than recommended strength every month or so during spring and summer. Every single houseplant is different and there are a lot of factors that play into the decision of how much to fertilise; size, maturity, location are just a few. This is why there could never be a one-fits-all amount to feed each plant like it often suggests on the bottle. Using less than the recommended amount can help to avoid overfertilisation.

You also want to hold off giving any fertiliser during the winter months as your Pothos will not be producing any new growth.

If you are fertilising more often, then it may be the cause of the curling leaves. Replace the potting soil and reduce how much you are fertilising. You can even leave it out completely if you want to – it’s sort of an added extra and better to skip it than cause more harm.

Light levels can be a factor in curling Satin Pothos leaves

The wrong amount of light is also a cause of curling leaves in Satin Pothos plants. Both too much and too little light will make the leaves curl but luckily there is a simple way to find out which it is.

If your Satin Pothos is receiving too much light, the leaves will curl inwards. This is how the plant protects itself against the intense light. By curling inwards it is reducing the surface area that the sun is hitting. Direct sunlight will also very quickly scorch and burn the leaves of your Satin Pothos which is, unfortunately, irreversible so look out to see if you can see any burnt spots on the leaves that might indicate sun stress.

If you think that direct sunlight is the cause of the curling leaves on your Satin Pothos, move your plant to a slightly shadier spot in your home and monitor any changes.

However, if your Pothos plant is not getting enough light then the leaves will also curl up but this time they will curl upwards in the direction of the light source. This is how the plant tries to increase the amount of sunlight hitting the leaf. If this is happening to your Satin Pothos then you want to find a spot that receives a little bit more light to aid with healthy growth.

Be careful of temperature fluctuations

Even if your Satin Pothos isn’t getting direct sunlight, if the temperature is too hot, your Satin Pothos may start to curl its leaves. This is called heat stress. Hotspots in rooms caused by sunlight, radiators or cookers can mean that the temperature is a lot hotter in a small spot of the room. It makes it difficult to notice as you may find the overall room temperature to be perfectly fine!

Make sure you move your plant at least 1 metre away from any radiators, heating vents or cookers to prevent overheating and curling leaves. We also recommend using a digital thermometer to monitor any extreme temperatures or any fluctuations. This will help you decide if you need to relocate your Satin Pothos to solve the issue of curling leaves.

Curling Pothos leaves can also indicate pests

This is quite a rare cause as Satin Pothos plants don’t often get attacked by pests but an infestation of scale insects, spider mites or mealybugs may be causing the leaves to curl. Get up close to your Satin Pothos’ leaves using a magnifying glass and inspect the tops and undersides of the leaves to see if you can spot any insects. If you do spot any insects, or any signs of them, then you want to isolate your plant from all of your other houseplants immediately. Pests can jump across plants through leaves that are close so give all of your plants a look over to see if the infestation has spread.

You then want to remove the worst affected leaves to cut the size of the infestation as this stops it from growing as rapidly and makes it a little easier to treat. Shower your plant regularly and treat with neem oil and insecticide to fight the infestation.


These are the most common reasons why your Satin Pothos may have developed curling leaves. We always start by checking the soil’s moisture as watering issues are often the reason, before eliminating the rest one by one.

If you want to find out more about how to care for your plant, check out our Satin Pothos care guide.

Fiddle and Thorn is a participant in the Amazon Services LLC Associates Program, an affiliate advertising program designed to provide a means for sites to earn advertising fees by advertising and linking to Amazon.com

Take our houseplant survey!

Quickly respond to our 30 second houseplant survey and get 75% off our Complete Houseplant Care eBook!

Take the Survey

No thanks…

Why are my Rubber Plant’s leaves curling?

Last Updated: March 19, 2023

Rubber Plants are fairly hardy plants that can be really easy to care for. However, if you do start to notice that your Rubber Plant’s leaves are curling or wrinkling, this may be a symptom of incorrect care or environment. There are quite a few different causes that can all mean your plant starts to curl some of its leaves so it’s important to make the right diagnosis before changing anything.

The main reasons why your rubber plant’s leaves are curling and/or wrinkled are: over- or underwatering, dry air, cold temperatures, pest infestation, a sudden change of environment or simply natural wrinkling. In this article, we will cover all of the reasons in more detail along with how to treat the problem and stop it from harming your Rubber Plant again in future.

Overwatering may be causing curling leaves

Improper watering is one of the biggest issues for most houseplants and Rubber Plants are no different. Whilst they are definitely a lot less sensitive than other plants, overwatering them can cause some real issues over time. One of the most common issues caused by overwatering your Rubber Plant is curling or wrinkled leaves, so we recommend this as the first issue to check out when trying to diagnose the problem.

Curling leaves are also one of the earlier warning signs when it comes to overwatering. So if your plant isn’t showing any other signs of distress then it hopefully means you have caught the issue early. With the right methods you should be able to get your Rubber Plant back to full health and avoid any more permanent issues such as brown/yellow leaves, leaves falling off your plant and even plant death altogether.

Rubber Plants hate it when their soil is too damp and overwatering will cause their leaves to start curling upwards. During the warm growth months, you should not be watering your Rubber Plant more than once a week. During the colder months, once a month is definitely enough.

It is really good to get to know your plants as each and every one is ever so slightly different. As well as checking the moisture at the top of the soil before watering, we also recommend picking up your Rubber Plant before and after watering so you get an idea of much your plant will weigh when it needs water. Using a moisture meter is also a great way to take the guessing out of watering your Rubber Plant. You just pop them in the soil and it’ll tell you how dry or damp the soil is. If your Rubber Plant’s soil is waterlogged, we recommend replacing it and adjusting your watering pattern. This should hopefully stop your Rubber Plant’s leaves from wrinkling drastically.

If you’re particularly worried that you might overwater your Rubber Plant it could be worth investing in a good quality self-watering plant pot, these take all of the trouble out of the process and will make sure that your plant isn’t resting in stagnant water – eliminating the risk of root rot or other watering based issues. They are also super useful if you find yourself forgetting to water your plants, or needing to be away from home for long periods of time. They give you a lot of peace of mind and mean you don’t have to rely on others to pop over and water your beloved plants.

Underwatering can also cause leaf curl in Rubber Plants

Too little water can also cause your Rubber Plant’s leaves to start curling. Although they hate their soil being too soggy as we leant above, they also cannot deal with dry soil for too long. It dries out the root system, making it crisp up and means your plant is unable to take up vital nutrients and moisture from the soil. As with overwatering, curling leaves tends to be an early sign that your plant needs more water as this is often their initial defence against water loss through the leaves.

Before you go changing anything about how much you water your plant, you need to confirm the issue is caused by a lack of water. It would be pretty harmful to give your plant more water if it didn’t need it.

Confirm the issue by checking the moisture levels in the soil. You can do this easily using a moisture meter. However, if you don’t have one then the finger/chopstick method works great. If your plant is quite young then you can also try lifting it up to gauge how soggy the soil is but as Rubber Plants can grow quite tall, we don’t recommend this for bigger plants as you don’t want to hurt yourself in the process.

If you find that your Rubber Plant’s soil is bone dry, then underwatering is probably what is causing the curling/wrinkled leaves. Make sure to either increase how frequently you are watering your plant, or how much water you are giving it each time. Either option will help prevent the roots from crisping up and the leaves from curling or wrinkling again in future.

Be slow when reintroducing water though so we recommend a little once a day for a few days. This will slowly moisten the soil and avoids any shock.

If the air is too dry, your Rubber Plant’s leaves will curl

Rubber Plants like quite humid environments and can struggle in homes with dry air. This can be especially damaging in winter months when we often have the heating on for several hours a day. A lack of humidity in the air can cause your Rubber Plant’s leaves to curl, and eventually maybe even fall off. If you feel you have quite dry air, make sure to mist your Rubber Plant every few days with a spray bottle, this should help prevent the plant from drying out.

If you want an even easier solution to humidity issues, consider investing a humidifier. These affordable little devices make it super easy to keep a more consistent increased humidity level.

Check out our houseplant humidity guide for more information on humidity levels and how you can really easily raise or lower the humidity depending on your plant’s needs.

Cold temperatures are also a cause of wrinkling leaves

Another cause of curling or wrinkled leaves that you need to monitor is temperature extremes, particularly cold temperatures. If your Rubber Plant is being exposed to drafts it can cause shock and distress and mean the leaves curl up in response.

Make sure that your plant isn’t too close to any drafty external windows or doors as you might not realise it but even the smallest crack can lead to some pretty chilly drafts in winter. If your plant is curling its leaves in summer, then check that it isn’t standing too close to any air conditioning vents. Although the cool breeze might be a nice break from the heat for you, it can be pretty damaging to your Rubber Plant.

We strongly recommend using a digital thermometer if you don’t already to keep track of any changes in temperature around your plant. It can help you figure out if you need to relocate your plant and ensure it is growing in the right temperature range.

A pest infection may also be causing your Rubber Plant’s curling leaves

Whilst it is pretty rare for your Rubber Plant to be suffering from a pest infestation, it is vital that you check the leaves every so often, even if your plant looks super healthy as pests can be a cause of curling or wrinkling leaves in Rubber Plants! If your plant spends any time outdoors then this is definitely a potential cause and you should always give your plant a good once over before bringing indoors to minimise the risk to your other houseplants.

Use a magnifying glass to inspect your plant and if you find bugs isolate your plant from all others in the room to stop the pests from spreading across your urban jungle.

To treat the pests, wipe each leaf with warm soapy water to try and remove as many as possible. We also recommend giving your plants a shower but make sure the water pressure isn’t on full or this could damage your Rubber Plant’s leaves. Depending on the scale of the infestation, you might also want to treat your plant with neem oil and an insecticide.

Curling leaves can also indicate too much light

If your Rubber Plant is wrinkling its leaves during the height of summer, then it might be receiving too much intense light. They tend to thrive best with indirect sunlight and can curl up their leaves to protect themselves against direct sun rays.

If your Rubber Plant is in a spot that receives several hours of intense direct light then you probably want to move your plant to a slightly shadier spot. Luckily, if there aren’t any other issues such as brown or yellow patches on the leaves, then you have caught the problem early before it has caused any irreversible damage to your Rubber Plant!

In future, to prevent the leaves from curling due to light stress, ensure that your plant isn’t getting any direct sunlight during summer. It’s OK for it to receive more light in winter as the sun is weaker and the days are shorter. So it might simply be a case of moving your plants around a bit depending on the season.

Sudden changes in environment can often cause curling leaves

Much like humans, houseplants can get pretty stressed out if any changes occur. Things like repotting, propagating or moving to a new spot can cause your Rubber Plant to get a little shocked and the leaves may start curling. It is nothing to worry about and it will just take some time for it to return to normal and for the leaves to naturally uncurl.

One thing to make sure of if you have moved your Rubber Plant to a new spot is that the conditions are the same, if not better than the one it was previously in. Your Rubber Plant will probably survive if the conditions are less suited to its requirements but it may just grow a little slower than before. The best way to determine if the environment is right is by using a light meter, as well as a thermometer and humidity gauge.

New Rubber Plant leaves tend to curl at first

If it is only the new leaves on your Rubber Plant that are curling or wrinkling then this is natural. As new leaves grow they will shoot up from the main stalk very tightly curled. As the leaf matures it will slowly uncurl. As long as the leaf gradually uncurls, and all of the other leaves look healthy then you have absolutely nothing to worry about and it is just your plant maturing!

Curling Rubber Plant leaves isn’t a problem that you need to get overly stressed about. Rubber plants won’t die on you suddenly if something isn’t right so just make sure to keep an eye on its environment and your care for a few weeks to spot any glaring problems. Check out our Rubber Plant care guide for more information on other common problems as well as general care tips to help your plant thrive!

Fiddle and Thorn is a participant in the Amazon Services LLC Associates Program, an affiliate advertising program designed to provide a means for sites to earn advertising fees by advertising and linking to Amazon.com

Take our houseplant survey!

Quickly respond to our 30 second houseplant survey and get 75% off our Complete Houseplant Care eBook!

Take the Survey

No thanks…

Why are my Prayer Plant’s leaves curling?

Last Updated: May 31, 2022

We love Prayer Plants as they are one of the most unique houseplants around! Their incredible patterned leaves really stand out in a crowd. But it can be really frustrating when their leaves start curling and we can’t see their beautiful patterns. Below we will go through the most common reasons why Prayer Plant leaves curl inwards to help you diagnose the issue.

Underwatering can cause curling leaves

One common reason why Prayer Plants curl inwards is due to a lack of water. You want to be a little careful with this one because it is easy to overwater a Prayer Plant. So you want to be 100% sure this is the problem, and then make sure you don’t go the other way and give it too much water.

Take the plant out of the pot and check the moisture in the potting mix. If the soil feels very dry then underwatering may be the issue as there is just not enough water getting up to the plant. The worst thing to do at this point is to give your plant loads of water because it will shock it (yes, plants get shocked too by a sudden change of environment). You want to water your Prayer Plant a little bit each day for one week to prevent your Prayer Plant’s leaves from curling. This will slowly moisten the soil and won’t cause any shock.

After a week you should see the leaves stop curling. You then want to make sure that you water a little more than you were doing previously to stop the problem happening again. But monitor the moisture in the soil using a water meter to avoid overwatering.

Temperature extremes can also cause curling leaves

Hotspots and cold drafts can also cause your Prayer Plant to start curling. Hotspots can occur when your plant is too close to a window which gets a lot of direct light each day. Curling leaves can also happen if your plant is near a radiator or heating vent. It can be difficult to notice hotspots because the heat disperses around the room quite quickly so the room won’t feel particularly warm. Make sure you are ventilating the room well and avoid putting your Prayer Plant closer than 1m away from any radiator.

Cold drafts also aren’t great for Prayer Plants and will cause their leaves to curl upwards. A consistent stream of cold air coming in from outside through cracks in doors and windows can be quite harmful to your plant. Especially during winter when temperatures drop down significantly at night. Make sure you draft proof any doors or windows that your Prayer Plant is near and this should stop the leaves from curling. You may also want to invest in a digital thermometer to keep track of how the temperature changes throughout the seasons and make sure your Prayer Plant is in its ideal range.

Curling leaves can also indicate a lack of humidity

Dry air is also a cause of curling leaves in Prayer Plants (and other houseplants too!). Although we can never reach the humidity level found in greenhouses or the tropics, we can do a few things to increase it just a little and our houseplants will love us for it. Here are our top tips:

Mist the leaves regularly

You want to be doing this a few times a week in the morning using a spray bottle to prevent curling leaves. We love these amber glass ones from Amazon!

Shower your plant

Washing down the leaves of your Prayer Plant will not only increase the humidity, but it also gets rid of dust and any pests that might be secretly living on your plant. So it’s good to do regularly if the leaves are curling or not!

Buy a humidifier

This is the long term solution to humidity issues and one of the best things you can buy for your Prayer Plant. We recommend this humidifier from Amazon – we have used it for years and our plants love it!

Water sensitivity can also be causing your Prayer Plant to curl

If none of the above issues really fit with why your Prayer Plant is curling, then it might be a reaction to the tap water. If you live in a particularly hard water area, there is more fluoride and chlorine in the water which might be making your Prayer Plant unhappy. Over time, fluoride might have built up around the roots. To solve this issue, you can either replace the current potting mix of flush it through with purified water. Then to prevent more curling leaves from happening again we recommend using rainwater or purified water as the levels of chemicals such as fluoride are a lot lot lower.

It may simply be natural praying

One of the other reasons why Prayer Plants are so unique is that their leaves curl up overnight and unfold during the day. It almost looks as though the plants are praying (hence the name). Sometimes the rhythm of praying can get a little mixed up and they may still be curled during the day. This is nothing to worry about and is just a natural part of the plant’s routine. It can be easy to mistake the natural praying for a problem with your plant so just monitor the changes in the leaves to see whether or not they naturally uncurl.

Those are the main reasons why Prayer Plants have curling leaves. Make sure to rule out natural praying before making any changes to your care routine or your plant’s environment.

If you want to learn more about how to care for your plant check out our Prayer Plant care guide.

Fiddle and Thorn is a participant in the Amazon Services LLC Associates Program, an affiliate advertising program designed to provide a means for sites to earn advertising fees by advertising and linking to Amazon.com

Take our houseplant survey!

Quickly respond to our 30 second houseplant survey and get 75% off our Complete Houseplant Care eBook!

Take the Survey

No thanks…

Why are my Pilea leaves curling inwards?

Last Updated: March 19, 2023

It’s always concerning to see that one of your houseplants isn’t thriving quite as much as you’d like it to be.

If you find that your Pilea leaves are curling inwards or cupping the likely causes are overwatering, pests or light/temperature stress. All of these conditions can be easily fixed — we just need to start off by figuring out what the root of the problem is for your Pilea.

The key reasons why Pilea leaves curl inwards

By looking at your Pilea and the environment that it’s in, you should find it easy to determine which of the following reasons are to blame for your Pilea’s leaves curling, wrinkling or cupping. Each of these issues is described in depth later in this post, with solutions to get your Pilea back into perfect shape.


  1. Overwatering

  2. Poor Drainage

  3. Low Humidity Levels

  4. Too much Light or Heat

  5. Nutrient Deficiencies

  6. Root Crowding

Complete Houseplant Care eBook

Our comprehensive (and rather good looking) eBook that will teach you everything you need to know to successfully care for, and maintain your houseplants!

Buy on

Overwatering your Pilea

As with a lot of things in the houseplant world, proper watering can be one of the biggest issues. Overwatering is the key concern when it comes to Pilea, and it can be a major reason why leaves are starting to curl or wrinkle — which is odd as for most houseplants it’s normally the other way around.

We always go for a little and often view towards watering, but really it’s good to get to know what your plants like most as each and every one is ever so slightly different. We’d recommend picking up your Pilea when it needs watering and after you’ve watered it. This should give you a feel for when your Pilea might need a little more water in future, simply by giving it a lift. The best method to figure out how much moisture is in the potting mix is by using a moisture meter. You just pop them in the soil and it’ll tell you how damp or dry the soil is.

If you’d like to know more about proper houseplant watering, checkout our complete guide to watering.

Poor Drainage

A Pilea planted in a pot with poor drainage is bound to run into problems with curling, wrinkled or cupping leaves, just the same as one that is being overwatered. When a pot has poor drainage it can’t allow any of the excess liquid to escape, and so each time you water it the problem mounts up. This can ultimately result in root rot, a condition that is pretty difficult to escape from, though we have written a guide full of tips to avoid and resolve root rot if you think this could be a problem you’re facing.

You can very easily increase the amount of drainage in your Pilea soil by mixing in a small amount of perlite, this will make it far easier for water to flow through and out of the drainage holes of your pots (you should also check to make sure your pots have drainage holes). Another easy step is to add a few small stones or pebbles to the bottom of your pots, this helps in making sure that the drainage holes are never blocked by soil or any loose debris.

We also recommend using terracotta pots instead of plastic ones. These let some of the water escape from the sides of the pot, whereas plastic pots keep every drop of moisture in. These pots from Amazon are great!

By having proper drainage in the pot, you should hopefully start to notice your Pilea’s leaves curling less.

Low Humidity Levels

Pilea prefer a more humid environment, so if your home tends to have dry air it’s worth your time to try and increase the humidity a little as this may be causing your Pilea to have curling, wrinkling or cupping leaves. There are a few really simple techniques to keep the humidity higher than normal for your Pilea; you can spray down the leaves with a mist bottle every few days, or maybe sit your plant in a tray with water and some pebbles. The simplest way to increase the humidity for your Pilea is to buy a humidifier. They are really affordable gadgets which help to keep a nice constant humidity level for your plants. We recommend this one from Amazon.

You can always pick up a good humidity monitor to keep track of everything if you’re more concerned. Make sure to also move your Pilea away from any air conditioning units as these create very dry air, causing wrinkled leaves. If you’re interested in making sure you get the humidity just right, check out our full guide to humidity.

Light & Heat Stress

Your Pilea‘s leaves might also be curling due to the plant being in an area where it’s getting a little too much light, or it’s getting too hot. The perfect spot is just a touch further inside a bright room, potentially an east-facing window if there’s a good spot free.

If you’re not already, make sure to open your windows every now and then to make sure that the air in your room is circulating properly. This reduces the risk of hotspots forming in the room where your Pilea is sat. The ideal temperature for Pilea is between 18°C – 24°C, so it shouldn’t be too difficult to keep in a good range. You can always pick up a digital thermometer or a light meter to check the spot your Pilea is sat for peace of mind.

Nutrient Deficiency

Some leaf curling, wrinkling and cupping in a Pilea can be down to nutrient deficiencies. Make sure that you are correctly feeding (or fertilising) your Pilea year round so that they’re getting all of the key nutrients they need to continue thriving. Once a month feeds will be more than enough at half the strength that the bottle recommends. Our plants love this liquid fertiliser.

Root Crowding

With the possibility of causing multiple other issues, root crowding in your Pilea is worth checking every so often. Let your plant dry out for a couple of days after watering and then gently lift it from it’s pot, if all you can see are roots then it seems likely that overcrowding could be the source of your Pilea’s curling leaves. Grab a bigger pot, some more nutrient-rich soil (this potting mix from Miracle Gro is great) and gently dig through the roots with a chopstick to separate them out a little before repotting your plant with a little bit more room to grow.

If you find that when you take you Pilea from it’s pot that some of the roots have turned brown and soft then you could be in for the far bigger problem of root rot. In this case make sure to repot as soon as you can, removing as many of the infected (brown) roots as possible. You can read all about how to prevent, spot and fix root rot in our guide.

So overall we’ve found that there’s a wide range of reasons that your Pilea could be developing some curling, cupping or wrinkles in the leaves, but all of these problems can be easily solved with a little care and attention to how your Pilea is doing. Keeping up good habits and making sure that you know the warning signs should help in fending off leaf curling from happening to your Pilea again.

Fiddle and Thorn is a participant in the Amazon Services LLC Associates Program, an affiliate advertising program designed to provide a means for sites to earn advertising fees by advertising and linking to Amazon.com

Take our houseplant survey!

Quickly respond to our 30 second houseplant survey and get 75% off our Complete Houseplant Care eBook!

Take the Survey

No thanks…

Why are my Philodendron Birkin’s leaves curling?

Last Updated: April 1, 2022

Philodendron Birkin plants are the next big thing! Their incredible white and green pinstripe leaves are definitely one of a kind. But if you notice that your Philodendron Birkin’s leaves are curling then this may be signalling that something isn’t quite right.

Underwatering

If the leaves on your Philodendron Birkin have turned brown as well as curling, then it may be due to underwatering. Birkin plants like to have some moisture in the soil and are definitely not drought tolerant. Because of this, we tend to take a little but often approach when it comes to watering.

If you think your Philodendron Birkin has been underwatered and this is causing the curling leaves then check the soil before you change anything! You want to make sure the soil definitely is dry before giving it more water as otherwise, this can cause more issues than the curling leaves. The most reliable way to check the moisture levels in the soil is by using a moisture meter. They are really affordable little devices that you pop into the soil and it’ll you how damp or dry the soil is. We always recommend this one from Amazon.

Your first reaction to an underwatered Philodendron Birkin might be to drown it in water in hope it will suddenly recover. But plants can get quite shocked by a sudden and dramatic change in their environment. This means that we need to slowly reintroduce water over the course of about a week. After that, you can go back to a normal watering routine. Going forward make sure to monitor how dry the soil is getting to avoid more curling leaves and potentially even other more serious issues.

Overwatering

As with underwatering, too much water can also be very bad for your Philodendron Birkin and cause curling leaves. Consistent overwatering will mean that the roots start to rot and become damaged. This stops them being able to deliver water and vital nutrients to the plant which causes the leaves to curl.

To figure out if overwatering is definitely the cause of your Pilea’s brown leaves, check how soggy the soil is with a moisture meter. If it is waterlogged then replace it with fresh potting mix (we love this one from Miracle Gro as it will give your plant all the right nutrients) to allow your plant and its roots to recover.

It’s best to cut away the rotten roots so that your Philodendron Birkin can focus on growing new healthy growth and doesn’t waste any energy trying to keep the dying or dead roots alive.

Quick tip: waterlogged soil also gives off quite an unpleasant damp smell so this is a great way to spot the problem before it has really affected the roots/ leaves.

Cold temperatures

This is quite a common cause of curling Philodendron Birkin leaves. As they are native to the tropics, Philodendron Birkins thrive in warm temperatures. If they are placed next to a drafty window or door or are in a cool room in your home then they will struggle and the leaves will begin to curl. Use a digital thermometer to make sure your Birkin is in the right spot.

Move your Philodendron Birkin to the warmest room in your home and the leaves should begin to uncurl.

Lack of humidity

For similar reasons to with cold temperatures, Philodendron Birkin plants need high humidity to thrive. Although slightly dry air won’t immediately kill your Philodendron Birkin plant it can cause curling leaves and brown leaf tips.

Below are some of the cheapest and easiest ways to raise the humidity for your Philodendron Birkin (and other houseplants).

Mist the leaves

This is something you should build into your regular Philodendron Birkin plant care routine as it’s really great for their overall health Mist the leaves a few times each week with a spray bottle. Avoid misting the leaves in the evenings as the leaves are more susceptible to rotting when the temperatures are lower. We love using these amber glass spray bottles from Amazon.

Shower your Philodendron Birkin

One simple trick that raises the humidity in an instant is showering your plant. It’s also a super easy way to get rid of dust or pests that might be secretly living on your plant without paying rent! Shower your Philodendron Birkin with lukewarm water so you don’t shock or burn the plant.

Pick the right room

If you have good levels of natural sunlight in your kitchen or bathroom then we always recommend moving your Philodendron Birkin in there if it’s struggling with a lack of humidity. The humidity level in those rooms is naturally higher than in other areas of your home because of showering and cooking which will get rid of the curling leaves in no time. If you aren’t sure which spots in your home have a good humidity level, pick up a humidity monitor.

Invest in a humidifier

Humidifiers are a must-have for any plant parent! They keep the room nice and humid which is not only great for your plants but also for you. They help with getting a good nights sleep as well as clear skin so what’s not to love!

We always recommend this one from Amazon our plants love it!

Those are the most common reasons why your Philodendron Birkin has developed curling leaves. Hopefully, if there aren’t too many other problems along with the curling leaves then you should have caught the problem fairly early and after a few simple changes, your Birkin should be back to full health in no time. If you want to find out more about Birkin care visit our plant care guide here.

Fiddle and Thorn is a participant in the Amazon Services LLC Associates Program, an affiliate advertising program designed to provide a means for sites to earn advertising fees by advertising and linking to Amazon.com

Take our houseplant survey!

Quickly respond to our 30 second houseplant survey and get 75% off our Complete Houseplant Care eBook!

Take the Survey

No thanks…

Why does my Monstera have yellow leaves? Causes and Solutions

Last Updated: April 1, 2022

Known for their large luscious split leaves, Monstera plants will always be one of our favourite houseplants. And there is nothing more devastating than realising that one of the leaves is slowly turning a strange shade of yellow. Below you will find the different causes of yellow Monstera leaves, as well as how to fix the problem and prevent any more from dying too!

Overwatering can cause yellow Monstera leaves

If you notice that your plant is developing yellow patches on its leaves, the problem may be too much water. This is quite a common issue as it can be difficult to know until the problem has really developed. We recommend a little and often approach to watering your Monstera. Always check back 30 minutes after watering and pour away any excess water that is in the saucer or at the bottom of the planter. This will stop your plant’s roots sitting in a puddle of water for days.

The reason why overwatering is so dangerous as it can very quickly lead to root rot. Not only can the leaves turn a weird shade of yellowy brown but it can also mean the plant becomes droopy and unstable. If not caught quickly, it can mean your plant will not be able to survive.

If you fear you may have overwatered your Monstera it’s important to check the soil right away and replace it if it is waterlogged. The easiest way to check the moisture level is by digging your finger into the top two centimetres of the soil to see how damp it is. We also recommend picking up your plant before and after watering. This should give you a feel for when your plant might need a little more water, simply by giving them a lift. However, only do this if your Monstera is no bigger than 1/1.5 metre tall as they can get quite heavy if tall – so be careful!

Underwatering can also cause yellow Monstera leaves

Although underwatering most commonly causes dry brown leaves, it can occur that it turns the leaves yellow too so it is something to watch out for. Although they don’t like sitting in water, they also don’t like their soil being too dry for long periods of time. The easiest way to tell if the yellow leaves on your Monstera are caused by underwatering is to again check the soil.

If you find the soil to be very very dry then slowly reintroduce watering over the next few days. You don’t want to immediately drown your plant as this can cause shock so you want to gradually water it a small amount twice a day for a few days.

Yellow Monstera leaves can indicate dry air

If the yellow leaves on your Monstera plant started out as dry brown edges, then dry air may be the culprit. They prefer a humid environment as they originate from tropical forests. They will struggle in homes with dry air. Particularly in winter when we tend to have the heating on for a lot of the day and open our windows less which causes dry stagnant air.

There are few really simple techniques to keep the humidity higher than normal; you can spray down the leaves with a mist bottle every few days, sit your plant in a tray with water and some pebbles or put your plant in the bathroom and leave the shower on hot for 5 minutes. You can pick up a cheap humidity monitor to keep track of everything if you’re more concerned. Make sure to also move your Monstera away from any air conditioning units or radiators as these create very dry air!

Leaf burn can also cause yellow patches

If the yellowing on your Monstera’s leaves is quite patchy and looks scorched then it may be due to too much direct sunlight which has burnt the leaves.

Your plant like areas with bright light, but it needs to be indirect so try to avoid placing right next to a window. You need to also watch out a little more in summer when the sun is a lot stronger for more of the day. It is best to move your Monstera a metre or so further away from the window in warmer months to avoid any leaf burn.

Yellow spots on your Monstera can indicate pests

Whilst rarer than some of the other factors, your plant’s leaves may be turning yellow due to a pest infestation. Insects like spider mites damage your plants and leave behind yellow patches or holes in the leaves. Get up close to your plants using a magnifying glass and inspect the tops and undersides of the leaves to see if you can spot any insects.

There are a few ways to get rid of spider mites and other pests, including showering, neem oil and insecticide sprays. You can find out more about identifying, treating and preventing pests in our downloadable ebook.

Yellow leaves on your Monstera might just be natural ageing

If you have gone through all of the above but none of it really fits what is going on with your plant then it may simply be natural ageing. Over time it is totally normal for your Monstera to drop some of its oldest leaves as it focuses on new bigger growth. These old leaves will first turn yellow before falling off the plant.

If the rate of yellowing is quite slow (1 or 2 of the oldest, lowest leaves every few months) then it probably is nothing to worry about and is simply part of the natural shedding process. Do keep an eye on how often they are turning yellow though as if the rate speeds up then it is worth checking the plant over again for the problems we outlined above.

Should I cut away the yellow leaves on my Monstera?

After hopefully rectifying and solving the problem of your yellow Monstera leaves, you may be wondering if it is best to keep them on the plant or trim the dead ones away. We always recommend pruning the yellow leaves off the plant. Not only will it make your plant look better and healthier but it will also mean it doesn’t waste any energy trying to keep the dying (or dead) leaves alive. It can focus its energy and nutrients on new healthy (and hopefully green) leaves.


If you want to find out more about caring for your plant, check out our Monstera Care Guide for all the tips and tricks you need to keep your plant happy and healthy.

Fiddle and Thorn is a participant in the Amazon Services LLC Associates Program, an affiliate advertising program designed to provide a means for sites to earn advertising fees by advertising and linking to Amazon.com

Take our houseplant survey!

Quickly respond to our 30 second houseplant survey and get 75% off our Complete Houseplant Care eBook!

Take the Survey

No thanks…

Why are my Monstera leaves turning brown?

Last Updated: March 22, 2023

Monstera plants, also known as Swiss Cheese plants, have become very popular over the last decade and we can totally understand why. With their unique split heart-shaped leaves, they instantly become the focus of a room.

However, if your Monstera isn’t in its optical environment or something in the care routine isn’t quite right, you may find that its leaves start to turn brown. This can appear in many forms, either as brown spots, tips and patches or entire leaves turning brown. The difference helps to diagnose the issue so take a good look at how the brown leaves are developing and that can help to give an indication of what the issue is.

In this article, we will be covering all of the most common reasons why Monstera plants develop brown leaves, including watering issues, lighting and humidity problems and also issues with nutrition and fertilizing. We will also give you information on how to diagnose the issue correctly, treat it quickly and prevent it from causing more harm to your Monstera in future.

Common causes of brown leaves on a Monstera

Overwatering your Monstera can cause dark brown spots

If you notice that your Monstera is developing dark brown spots on its leaves, the most common cause of this is overwatering. We tend to go for a little and often approach towards watering with most of our houseplants, and this is especially the case with our Monsteras. They hate their roots sitting in puddles of water, so you need to make sure that you have good drainage setup (perlite in the soil and drainage holes) and don’t give them too much water at once.

Overwatering can very quickly lead to root rot which is extremely harmful. Alongside browning leaves, root rot can also cause the plant to become unstable and have trouble picking up nutrients through its root structure.

If it isn’t caught quickly, it can mean your plant will not be able to survive for very long. If you think you might have overwatered your Monstera it’s important to check the soil moisture right away and change the potting mix out completely if necessary.

Make sure to check the moisture in the soil before you water. The easiest way to check this is by digging your finger into the top two centimetres of the soil to see how damp it is. We also recommend picking up your Monstera before and after watering. This should give you a feel for when your Monstera might need a little more water, simply by giving them a lift and feeling the weight. However, we only recommend this if your Monstera is no bigger than 1/1.5 metre tall as they can get quite heavy quite quickly, so be careful!

If you aren’t really sure about how to know if your Monstera needs watering, we recommend picking up a moisture meter. They are super affordable and tell you how much moisture is in the soil.

Underwatering your Monstera causes light brown crispy edges

If you notice that your Monstera is developing light brown spots or dry crispy edges on the leaves, then it may be that you’re under-watering your plant.

Although Monsteras don’t like sitting in water, they also don’t like their soil being too dry for longer periods of time. The easiest way to tell is again just by checking the moisture in the soil using a moisture meter and adjusting your watering schedule accordingly.

With underwatering, the leaves will turn quite light brown, in contrast to overwatering which causes darker brown patches. These will also start off from the edges and move throughout the leaf afterwards.

Your Monstera could be getting too much direct sunlight

Brown leaves may also be because your Monstera is getting too much direct sunlight. This can cause the leaves to burn, from which they will not be able to recover.

Monsteras do like areas with bright light, but it needs to be indirect. South-facing windows can give your Monstera too much direct light so try moving them to a different window.

You need to also watch out a little more in summer when the sun is a lot stronger for more of the day. It is best to move your Monstera a metre or so further away from the window in warmer months to avoid any leaf burn.

To figure out how much light your Monstera is getting throughout the day, you can use a light meter. It may be that your Monstera is getting a lot of direct sunlight in the morning, or is in too much shade in the afternoon.

Low humidity levels cause brown edges on Monstera leaves

Monsteras prefer a humid environment as they originate from tropical forests. If you find that the edges of your Monstera leaves are turning brown, then it may be because the air in your home is too dry for it.

There are a few really simple techniques to keep the humidity higher than normal for your Monstera; you can spray down the leaves with a mist bottle every few days, sit your plant in a tray with water and some pebbles or put your monstera in the bathroom and leave the shower on hot for 5 minutes.

The best way to consistently increase the humidity for your plant is by using a humidifier. They help to increase the water vapour in the air around your plants and will lead to a lot of happy and healthy plants which will keep the dry leaves away.

You can also pick up a good humidity monitor to keep track of everything if you’re more concerned. Make sure to also move your Monstera away from any air conditioning units as these create very dry air!

There may be a pest infestation

Another rarer cause of brown leaves on a Monstera is a pest infestation. There are a variety of pests including spider mites, mealybugs and scale insects that might make your Monstera their new home.

The issue with a pest infestation is that the pests slowly suck on the leaves, exhausting your plant and causing brown spots and holes across the leaves.

If your Monstera is suffering from a pest infestation don’t think you need to say goodbye to it straight away. If treated properly, you can get rid of the infestation.

Firstly, you should trim off the worst affected leaves and stems to curb the infestation from growing quickly and then begin treating your Monstera with neem oil and an insecticide.

If you have caught the infestation fairly early and are rigorous in your methods to stop it, then you can be successful at getting rid of it. However, pests are a nightmare for plant parents and there does reach a point where you may need to say goodbye to your plant. There is also the risk of the infestation spreading to other houseplants so be wary of that and isolate any infected plants.

Lack of nutrients could be the cause

A less obvious cause of your Monstera’s leaves turning brown is a lack of nutrients. If you haven’t repotted your monstera in new soil in a year or two it is definitely a good idea to swap out some of the soil in the pot with a good rich potting mix or compost. 

It is also a good idea to feed your plant every few months in the growing seasons (spring and summer) just to make sure is it getting enough nutrients to grow. You can either use a liquid fertiliser which you dilute into the water, or fertiliser spikes which you pop into the soil and nutrients are released over time.

How to treat brown leaves on a Monstera

Prune any brown leaves away

If the entire leaves have turned brown, then the best thing to do is remove them from your Monstera. They will eventually fall off naturally once completely dead but removing them now means that your plant will focus on developing new, healthy growth.

If some of the leaves only have a small brown patch or a few brown leaf tips here and there, then we don’t recommend moving these. Although you might think that aesthetically it looks better, you don’t want to remove too much of the plant. This will limit its ability to photosynthesise and produce more foliage.

Replace any waterlogged soil

If there are watering issues that have been the cause of the brown leaves on your Monstera, then replace any waterlogged soil immediately. Whilst you may be tempted to wait for the potting mix to naturally dry out over the next few days, this does risk more damage being done to the root system.

By replacing any waterlogged soil straight away, you allow the root system to recover as soon as possible. It’s also a good idea to trim away any rotten roots whilst you’re replacing the soil as once they have turned soft, there is no going back, unfortunately.

Adjust your watering routine

If overwatering or underwatering is causing the brown leaves on your Monstera, then it’s important that you adjust your watering routine. There are two things you can adjust to make sure you are watering your Monstera the right amount; frequency and depth.

If you are overwatering your Monstera then you either want to cut back on the frequency, or not give your Monstera as much water each time. This will allow your Monstera’s potting mix to dry out between waterings.

If you are underwatering you then either want to increase how often your water your plant, or water it more deeply each time.

How to prevent brown leaves on a Monstera

Now that you’ve taken the steps to stop the current issue causing brown leaves on your Monstera, there are a few things you should be doing throughout the year to prevent them. Once part of the leaf has turned brown, there is no returning it to green which is why prevention is crucial.

Monitor soil moisture

Staying on top of your watering habits is will be key to not only preventing brown leaves on your Monstera but also other issues. You want to find the right balance of letting the soil dry out enough to not cause root rot, but watering frequently enough not to dry out your plant.

There will be lots of factors involved in how quickly the soil dries out (light level, temperature, pot size just to name a few), so a rigid watering routine won’t work very well.

Instead, you need to monitor your plant’s moisture and respond to changes in the environment by adjusting your watering routine.

Adjust positioning throughout the year

Another way to prevent brown leaves from developing on your Monstera is to actually move it around throughout the year. If your Monstera is getting too much sunlight in summer where it currently is, then it might need to move to a slightly shadier spot. However, when winter comes that new spot might be too dark and you may need to relocate your Monstera back to the window.

Monitor the environment

Aside from monitoring soil moisture, you should also be keeping tabs on the temperature around your plant. This will help you detect hotspots and cold drafts that might be impacting your plant throughout the year.

Spotting these early will help you to rectify the issue before it’s started to cause brown spots, tips or leaves on your Monstera.

Get into a misting routine

Because they are native to tropical areas, keeping the humidity high is crucial for the long-term health of your Monstera. Getting into the habit of misting your plant several times a week will go a long way to preventing brown leaf tips.

Misting frequently also has the added bonus of helping to remove dust from the leaves (which can be an issue with Monstera plants as they have such large flat leaves). This helps them look fresh and aids photosynthesis too!

Frequently Asked Questions

Still unsure about fixing and preventing brown leaves on your Monstera? Hopefully, these FAQs can help you figure out the next steps needed to solve and avoid the issue.

These are the most common reasons why your Monstera’s leaves may be turning brown. Once the leaf has started to turn brown there is often no going back for that leaf so we recommend pruning the dark parts of the leaf, or removing entirely if the whole leaf has turned brown.

Catching the issue as early as possible will give you the best chance at reviving your Monstera and preventing more brown leaves. This is why we recommend giving your Monstera (and other houseplants) a monthly check-up which gives you the opportunity to inspect your plants and spot any early warning signs.

To learn more about how to keep your plant thriving, check out our Monstera care guide.

Fiddle and Thorn is a participant in the Amazon Services LLC Associates Program, an affiliate advertising program designed to provide a means for sites to earn advertising fees by advertising and linking to Amazon.com

Take our houseplant survey!

Quickly respond to our 30 second houseplant survey and get 75% off our Complete Houseplant Care eBook!

Take the Survey

No thanks…

Why are my houseplant’s leaves turning yellow? Causes and Solutions

Last Updated: February 8, 2022

The main reasons houseplants leaves turn yellow:

There’s nothing worse than getting home and finding one of your houseplants’ leaves has started turning yellow. We’ve always wondered why it happens so we did the research and curated a list of things to check before you start getting worried. Houseplant leaves can turn yellow for a variety of reasons such as; nutrient deficiency, watering problems, too little light or even just plain old ageing.

Watering issues can cause yellow leaves

As with a lot of things in the houseplant world, proper watering is an integral part of the puzzle. You should start off by looking into if you’re over or under-watering the plant that has started showing signs of yellowing leaves. One of the simplest ways to do this is the finger rule. Press one of your fingers around 1″ into the soil. If the soil is completely dry then you’re under-watering. If it’s super soggy, then you might be giving it a little too much water.

We’ve always gone for a little and often view towards watering, but really it’s good to get to know what your plants like most. We’d recommend picking up your plants when they’re in need of watering and after you’ve watered them, this way you get a feel for when your plants might need a little more simply by giving them a little lift. This will really help you get a better watering routine and prevent more yellow leaves on your plants.

Yellow houseplant leaves can indicate nutrient deficiencies

Some yellowing can occur in leaves because of nutrient issues, too much or too little as always! It’s a safe bet to swap out some of the soil in the pot (that isn’t filled with roots) with a good rich potting mix or compost.

From there it’s good to consider the water you’re giving to your plants, if you’re from an area with particularly hard water your plants could be getting too much calcium. It’s rare that this causes any real issues such as yellow leaves, but if you’re concerned make sure to replace your soil a little bit more often as calcium toxicity can reduce the uptake of other nutrients.

Improper lighting can also cause yellow leaves

A tell tale sign that lighting is causing the yellowing is that the leaves will change colour and then drop from the plant, luckily it’s an easy one to fix. Your plant will just need a little more light, so move them to a brighter location for a little while and see if that solves the problem of yellow leaves.

Finding the perfectly lit spot for your plant can be tricky but remember the three simple rules. Plants labeled with needing bright light should be seeing the sun for most of the day, a south or west facing window will suit just fine. Indirect light is just a touch further inside a bright room, potentially an east facing window if there’s a spot free. Low light is most other places in your home and even most of the indirect areas in winter, if you find it hard to read in the spot it’s likely to be low light.

Yellow leaves can be a sign of natural ageing

One reason for yellowing leaves that we can’t put aside is simply that your plant is getting older. If the issues are towards the bottom of the plant then it’s not too much of a concern to the overall health, it’s just growing up and losing some of its older leaves to grow new, fresh ones.

It could be worth looking into how you can trim your plant to encourage new growth and reduce the chance of it growing stragely leggy in future.

Root crowding can sometimes cause yellow leaves

With the possibility of causing multiple other issues, root crowding is worth checking every so often as it can lead to some yellow leaves. Let your plant dry out for a couple of days after watering and then gently lift it from it’s pot, if all you can see are roots then it seems like crowding could be the source of the problem. Grab a bigger pot, some more nutrient rich soil and gently dig through the roots with a chopstick to separate them out a little before repotting your plant with a little bit more room to grow.

Pests are a more worrying cause of yellow leaves

If the yellowing is not so consistent on the leaves and showing up slightly blotchy then pests could be the problem. Take a quick look over the plant for any unwanted insects, the most likely case is spider mites — the best technique for removing them that we’ve found is taking your plant for a shower. Just pop them in the shower, rinse down the leaves and stems with water and let them dry off, after a few of these the spider mites should be gone for good.

You might also want to treat your plant with an insecticide if you’re having trouble getting rid of them as this can help prevent yellow leaves.

Viral infection is a rarer cause of yellow leaves

Infection is the worst and rarest case scenario. If your plant has any deformation in the leaves, branches or stems, it’s likely infected. Unfortunately there’s no good treatment in this situation and it’s best to get rid of the plant as soon as possible as they can infect others around them.

Never reuse any of the soil used on this plant as it can cause the infection to spread and more yellow leaves to develop on other plants. It’s also a good idea to clean any tools used on this plant.

Cold drafts can cause yellow leaves to develop

If the plant in question is a more tropical species it’s worth checking if there’s any notable temperature problems, especially any cold drafts that are causing the yellow leaves. If that’s the case then it’s definitely time to have a bit of move around and get it into a more consistently warm, temperate area. Make sure to double check the area if you have any air conditioners running as that will shift the air flow in your room.

Most of the time leaves will go from yellow to brown and then drop if temperature is the core issue.

So there’s quite an array of reasons that your houseplants could be developing yellow leaves, but the most important things come down to getting the basics right. Having your plant in the correct location for good lighting, making sure it has the right amount of water and keeping up with routine maintenance of soil changes and feeding.

Fiddle and Thorn is a participant in the Amazon Services LLC Associates Program, an affiliate advertising program designed to provide a means for sites to earn advertising fees by advertising and linking to Amazon.com

Take our houseplant survey!

Quickly respond to our 30 second houseplant survey and get 75% off our Complete Houseplant Care eBook!

Take the Survey

No thanks…

Why are my houseplant’s leaves turning brown? Causes and Solutions

Last Updated: May 31, 2022

It’s heartbreaking getting home to one of your beloved houseplants leaves starting to turn brown, we know there’s nothing worse. We always wondered why leaves were turning brown so we did the research and curated a list to check before you start getting too worried. Houseplant leaves can turn brown for a variety of reasons, mainly; Watering Problems, Overheating or Nutrient Deficiencies.

Too much water can cause brown leaves on your houseplant

The most common cause of browning leaves is root rot, as a result of overwatering. It’s important to start off checking the moisture levels of the soil, try pushing your finger an inch into the soil. If it’s very wet it’s best to leave your plant for a couple of days to dry out a little before testing again. Ideally, you’re looking for the soil to be moist (hate that word) but not too wet, if you can’t even break the soil the opposite could be the problem.

If you’re confident that it’s too late and your plant has developed root rot, then it’s time to repot. Bin the old soil and trim down the dead looking roots. Keep on top of your watering and you’ll be good to go from there.

Overheating and humidity issues can also cause brown leaves

Heating is always a difficult one, it’s worth checking out the temperature where you’ve placed your plant throughout the day. As the sun moves around your plant could be getting direct, hot sun for too long whilst you’re away. Remember that the spot you keep your plants throughout winter might not be so great for them year round!

With some species, like tropicals or ferns, humidity is of big importance. There are a few simple techniques to keep the humidity a little higher than normal; you can spray down the leaves with a mist bottle every few days, or maybe sit your plant in a tray with water and some pebbles. These little tricks will help in maintaining more regular humidity, definitely worth giving a try if you’re running any AC.

Brown houseplant leaves can indicate overfertilisation

Sometimes you might need to fertilize or feed your houseplants so that they can continue to grow healthy and green. Your houseplant will let you know when you’re overdoing it with brown leaf tips, really most houseplants will only need feeding during their blooming periods. If you’re spotting these colour changes maybe consider halving the amounts next time you go to give them a feed.

Chemical build up can cause brown leaf tips on your houseplant

Over time build up of excess fertiliser, chlorine or fluoride from tap water can cause issues leaves to start turning brown or black. There’s two really simple ways to fix this. The first is to run water through the pot for a little while to flush out all of the chemical build up. If that doesn’t seem to fix the problem you can always re-pot with fresh soil to fix it up.

Complete Houseplant Care eBook

Our comprehensive (and rather good looking) eBook that will teach you everything you need to know to successfully care for, and maintain your houseplants!

Buy on

Fungal diseases could also be why your houseplant has brown leaves

If your houseplant is showing a number of small brown spots on the leaves that are progressively increasing in size, the issue might be fungal leaf spot. This can be pretty common in new plants so it’s worth keeping newbies away from your existing plants for a few weeks to check for symptoms as the infection can spread pretty quickly.

Bacterial diseases can also cause brown leaves

Another reason your leaves could be turning brown is bacterial infection. Bacterial Leaf Spot or Leaf Tip Burn will show initially as yellow spots over the whole leaf which will, with time, then start turning brown or black. If you think that bacterial infection might be the problem you’re having it’s best to move the plant away from all others and clean any tools used before using elsewhere, otherwise it can quickly spread around the rest of your plants.

So there’s quite an array of reasons that your houseplants could be developing brown or black leaves, but the most important things come down to getting the basics right. Having your plant in the correct location for good lighting, making sure it has the right amount of water and keeping up with routine maintenance of soil changes and feeding correctly.

Fiddle and Thorn is a participant in the Amazon Services LLC Associates Program, an affiliate advertising program designed to provide a means for sites to earn advertising fees by advertising and linking to Amazon.com

Take our houseplant survey!

Quickly respond to our 30 second houseplant survey and get 75% off our Complete Houseplant Care eBook!

Take the Survey

No thanks…