Why are the leaves on my Polka Dot Begonia curling?

Last Updated: October 25, 2022

Polka Dot Begonias can be pretty fussy when it comes to their care and environmental requirements so it can often happen that their leaves start curling if something isn’t right. There are quite a few different factors that can all cause your Polka Dot Begonia to develop curling leaves so it’s important to make sure you are only changing things once you’ve confirmed the right diagnosis.

In this article, we will go through each of the most common factors that can cause curling leaves on a Polka Dot Begonia so you’re able to treat the issue and prevent it from harming your plant again in future.

Underwatering is a common cause of curling leaves

One of the more common factors when it comes to curling leaves on a Polka Dot Begonia (and a lot of other houseplants too) is consistent underwatering and a lack of moisture in the soil.

Before you go and pour a bucket of water over your plant to make up for lost time, you need to confirm that this is the issue. Watering a plant when it really doesn’t need more water will cause a whole range of other issues.

To confirm if underwatering is causing the curling leaves on your plant, take your Polka Dot Begonia out of the pot to inspect how the potting mix feels. If underwatered, the potting mix will fall apart and feel very sandy. You may also see that some of the roots on your Polka Dot Begonia have started to crisp up if the problem has been going on for a while.

Once you have determined that your Polka Dot Begonia is curling its leaves due to a lack of water, slowly reintroduce water to your plant rather than drowning it. Any dramatic and sudden changes in their environment can cause them to become a little stressed (this can show up as leaves falling off or your plant drooping). Instead, water your plant a little once every other day for a week.

Now that you’ve solved the initial issue of underwatering, it’s important to prevent the problem from happening again. To do this, use a moisture meter to check in with your plant and establish a good watering routine. Note though that you will have to alter your habits depending on the season to ensure you cut back watering in winter.

Cold temperatures may also be to blame

Outside of underwatering, there are a few other issues that can cause the leaves on your Polka Dot Begonia to start curling. Cold temperatures and drafts are a regular one. Whilst you might not notice them, even small cold streams of air coming in from the outside right by your plant can be very damaging in the long term.

Whilst it won’t cause issues from one day to the next, persistent drafts can not only cause curling leaves but also brown leaves and leaf drop if not caught quickly.

Make sure that you draft-proof any windows/ doors that are close to your Polka Dot Begonia (and other tropical or heat-loving houseplants) as well as move them at least one meter away from any air conditioning vents as these can be quite damaging to your plants during summer.

Luckily cold temperatures are fairly easy to diagnose as a digital thermometer will be able to tell you if something isn’t right. They will also help you spot hotspots too so a great investment all around.

Low humidity could be to blame

For similar reasons to cold temperatures, Polka Dot Begonia plants need high humidity to thrive. Although slightly dry air won’t immediately kill your Polka Dot Begonia plant it can cause curling leaves and brown leaf tips if a problem for an extended period of time. The problem can become worse in winter as the central heating really dries out the leaves on top of less ventilation which can lead to stale air in your home.

However, boosting the humidity is pretty easy and affordable; below are our best methods:

  1. Get into a misting routine

    It’s really great for their overall health as it can remove dust as well as boost the humidity. Mist the leaves of your Polka Dot Begonia a few times each week with a spray bottle. Avoid misting your plant in the evenings as the leaves are more susceptible to rotting when the temperatures are lower. Polka Dot Begonia plants have very delicate leaves so this is even more of a concern compared to plants with thicker leaves and stems.

  2. Move to the bathroom or kitchen

    If you have good levels of natural sunlight in your kitchen or bathroom then we always recommend moving your Polka Dot Begonia in there if it’s struggling with a lack of humidity. The humidity level in those rooms is naturally higher than in other areas of your home because of showering and cooking. By doing this you can raise the humidity for your plant just by going about your day-to-day routine!

  3. Invest in a humidifier

    Humidifiers are a must-have for any plant parent and go a long way to preventing and solving issues such as curling leaves. They will raise the humidity for your plant without having to lift a finger and some even have timers so that they automatically turn on and off throughout the day. They are also really beneficial to people as well so a win-win!

Those are the most common reasons Polka Dot Begonias start to develop curling leaves. It’s important you work to diagnose and treat the issue as early as possible to give you the best chance at reviving your curling plant and preventing permanent damage that can happen if these issues continue. Curled leaves may straighten back once the issue has been solved, but even if this doesn’t happen, any new foliage will return to its normal appearance. We don’t recommend removing any of the curled up leaves unless they have turned brown or yellow.

To learn more about how to best care for your plant, check out our Polka Dot Begonia care guide.

Fiddle and Thorn is a participant in the Amazon Services LLC Associates Program, an affiliate advertising program designed to provide a means for sites to earn advertising fees by advertising and linking to Amazon.com

Take our houseplant survey!

Quickly respond to our 30 second houseplant survey and get 75% off our Complete Houseplant Care eBook!

Take the Survey

No thanks…

Why are the leaves on my Money Tree turning brown? (Causes and Solutions)

Last Updated: May 28, 2022

Although a lot of trees shed their leaves in autumn, you don’t want your Money Tree developing brown leaves and dropping them at any point. Brown Money Tree leaves mean something is definitely wrong so it’s important you get to the bottom of it so you can fix the issue as soon as possible.

In this post, we will cover all the various factors that might be causing the brown leaves as well as how to fix and prevent the problem.

Underwatering can often cause brown Money Tree leaves

One of the more common factors when it comes to brown leaves on a Money Tree is consistent underwatering. Money Trees will forgive you if you forget to water them occasionally, however, they won’t cope very well if not given anything for weeks on end.

It’s important to ensure that your plant is actually being underwatered before you change anything about your care routine. You don’t want to start watering it more if it doesn’t need it as too much water can almost be more damaging. To confirm the diagnosis, take your plant out of the pot to inspect how the potting mix feels. If underwatered, the potting mix will fall apart and feel very sandy. You will also see that some of the roots have started to crisp up if you have been underwatering for a while.

Once you have determined that your Money Tree is suffering from a lack of water, slowly reintroduce water to your plant rather than drowning it (they get shocked by a sudden change in environment). A little bit once a day for a week should get your plant back on track.

Overwatering also causes brown leaves

Too much water is also a very common reason behind brown leaves on Money Trees so it’s a good idea to inspect the potting soil closely to see what’s going on. Money Trees don’t like sitting in puddles of water for long periods of time and it will slowly cause the roots to rot. This will cause damage to the root system and mean your plant will often develop brown leaves which will eventually droop and become soft.

To figure out if overwatering is the reason your Money Tree is turning brown, check the moisture levels in the soil immediately. If the soil is quite waterlogged and clumpy then replace it with fresh dry mix. Never wait for the potting mix to dry out naturally as this risks more damage to the root system which decreases the chances that you’ll be able to revive your plant. Trim away the soft, rotten roots and adjust your watering schedule so you aren’t watering your Money Tree as much as you were before.

Depending on the damage caused to the root system, your Money Tree may take a little while to fully recover and grow new healthy leaves. But be patient and use a moisture meter to keep an eye on the soil levels and your plant should recover soon.

Too much sunlight

Intense, direct sunlight can also cause brown leaves on Money Trees. Though a lack of light can also cause several issues for them, they don’t do well in harsh direct sunlight at all.

Direct sunlight will very quickly scorch and burn the leaves of your Money Tree which is, unfortunately, irreversible. It will dry out and burn the leaves, causing brown patches throughout the affected areas.

If you think that direct sunlight is the cause of the brown leaves on your Money Tree, remove the worst affected leaves and move your plant to a slightly shadier spot in your home. If you are unsure how much light your plant is getting throughout the day/year, it can be useful to use a light meter to keep track of how the light level fluctuates throughout the day and across the seasons.

Lack of humidity

If your Money Tree has brown dry leaf tips or edges, then a lack of humidity may be the cause. Money Trees will struggle in homes with quite dry air, especially in winter where heating and less ventilation can often makes this problem worse.

But don’t worry, brown tips aren’t the end of the world and often don’t go any further than that. Here are a few simple ways to increase the humidity for your Money Tree to prevent brown tips:


  1. Mist the leaves regularly

    This is one of the easiest ways to increase the humidity for your Money Tree and avoid further brown leaf tips. Mist the leaves several times per week with a spray bottle. We recommend that you mist the leaves in the morning so that there’s enough time for the water to evaporate off the leaves before the temperature drop. If the leaves are still wet when in cold temperatures, the risk of leaf rot gets quite high.

  2. Give your plant a shower

    One simple thing you can do to instantly boost the humidity is showering your Money Tree. Washing it down with water also gets rid of dust and potential pests that might be on your plant so we recommend doing it every few months regardless of any brown leaves or other issues. Shower your Money Tree with temperate water so you don’t shock or burn the plant. Keep the water pressure relatively low to avoid breaking any of the leaves or stems.

  3. Placement

    If you have sufficient light levels (and space) in your kitchen or bathroom then we recommend moving your Money Tree in there. The humidity level in those rooms is often naturally higher than in other areas of your home because of the steam released when showering and cooking. Just be careful not to put your plant too close to the cooker or the intense heat may burn the leaves pretty quickly!

  4. Invest in a humidifier

    If you want to take all the worries away from keeping a steady humidity level, then buying a humidifier is the best option for you. Some humidifiers even have features that mean you can put it on a repeating schedule or turn itself off once the rooms reach the desired humidity level.

    If you want to know more about how to raise the humidity for your Money Tree then check out our humidity guide.

Pests

Although quite rare with Money Tree plants, they can begin to show brown leaves if infested by pests. Insects such as mealybugs or spider mites might be living on your plant and feeding on their nutrients which will cause the leaves to turn brown and will eventually fall off completely.

Most of the time you can spot the pests crawling on the leaves which makes confirming the problem fairly easy (using a magnifying glass really helps here. Pay extra attention to the undersides of leaves or near the leaf and stem joints as they love to hang out there. Other signs of pests include small brown spots, white webbing or small holes in the leaves.

Although pests can be quite difficult to treat, it doesn’t mean it’s game over entirely. Shower down your plant, treat with neem oil and a natural insecticide. Oh and isolate your plant so that the pests don’t jump onto any of your other beloved houseplants.

So those are the most common reasons why your Money Tree has developed brown leaves. Hopefully, you have noticed the problem in the early stages as this will give you the best chance at bringing your plant back to full health. Keep a close eye on your plant over the next few weeks and months to make sure that the changes you are making positively impacting your plant.

To find out more about caring for your plant, as well as propagation tips and common problems, check out our full Money Tree care guide.

Fiddle and Thorn is a participant in the Amazon Services LLC Associates Program, an affiliate advertising program designed to provide a means for sites to earn advertising fees by advertising and linking to Amazon.com

Take our houseplant survey!

Quickly respond to our 30 second houseplant survey and get 75% off our Complete Houseplant Care eBook!

Take the Survey

No thanks…

Why are the leaves on my Devil’s Ivy turning yellow?

Last Updated: June 5, 2022

Loved for their cascading vines and heart-shaped leaves, Devil’s Ivy plants aren’t the hardest to look after. But one of the most common problems plant parents face with them is yellow leaves. But don’t panic, in this post, we will show you all the reasons why your plant may be developing yellow leaves and you can hopefully bring your plant back to full health in no time.

Too much natural sunlight

Intense, direct sunlight can be quite a common reason why Devil’s Ivy plants start to have yellow leaves. Though a lack of light can also cause several issues for them, they don’t do well in harsh direct sunlight.

Direct sunlight will very quickly scorch and burn the leaves of your Devil’s Ivy which is, unfortunately, irreversible. It will dry out and burn the leaves, causing brown and yellow patches throughout the affected areas.

If you think that direct sunlight is the cause of the yellow leaves on your Devil’s Ivy, remove the worst affected leaves and vines and move your plant to a slightly shadier spot in your home. If you are unsure how much light your plant is getting throughout the day/year, it can be useful to use a light meter to keep track.

Overwatering

Too much water is a very common reason behind yellow leaves on Devil’s Ivy plants so it’s a good idea to inspect the potting soil closely. Devil’s Ivy plants don’t like sitting in puddles of water for long periods of time. This will cause damage to the root system and mean your plant will develop yellow leaves, as well as become soft and fall off.

To figure out if overwatering is the reason your Devil’s Ivy is turning yellow, check the moisture levels in the soil immediately. If the soil is quite waterlogged and clumpy then replace it with fresh dry mix. Don’t wait for the potting mix to dry out naturally as this risks more damage. Trim away the rotten roots and adjust your watering schedule so you aren’t watering your Devil’s Ivy as much as you were before.

Due to the damage to the root system, your Devil’s Ivy may take a little while to fully recover and grow new healthy leaves. But be patient and use a moisture meter to keep an eye on the soil levels and your plant should recover soon.

Underwatering

If the leaves are turning quite dry and crispy all over as well as yellow then it may be due to a consistent lack of water. Devil’s Ivy plants like to have moist but never soggy potting mix. This means you have to get the right balance when watering which can be difficult. We always recommend a little but often approach to avoid any watering issues.

If you think that your Devil’s Ivy has been underwatered then check the soil before you do or change anything! You want to be sure that this is the cause otherwise you may very quickly be overwatering and causing a whole wealth of other problems. Once you are sure that the soil is bone dry, then slowly reintroduce watering. Your first instinct might be to drown your Devil’s Ivy in water but this can actually cause more damage and more yellow leaves. This is because plants get shocked by a sudden change in environment.

Water your Devil’s Ivy a little bit once a day for about a week. After then you want to go back to a more normal care routine, making sure to check the moisture in the soil frequently to avoid any yellow leaves from developing again!

Pests

Although quite rare with Devil’s Ivy plants, they can begin to show yellow leaves if infested by pests. Insects such as mealybugs or spider mites might be living on your plant and sucking their nutrients which will cause the leaves to turn yellow. Over time these leaves will begin to fall off the plant.

Most of the time you can spot the pests crawling on the leaves which makes confirming the problem fairly easy. We also recommend using a magnifying glass to try and spot the pests on the plant if you can’t see any with the naked eye. They like to hang out on the undersides of leaves or near the leaf and stem joints so look extra carefully there. Other signs of pests include small brown and yellow spots, white webbing or holes in the leaves.

Although spotting pests isn’t always difficult, treating them can be a bit of a pain. Shower down your plant, treat with neem oil and a natural insecticide.

Natural ageing

If it’s only the oldest top leaves on your Devil’s Ivy that are turning yellow then this may be simply natural ageing. Over time, your Devil’s Ivy will drop some of its oldest leaves in favour of growing bigger healthier new ones at the end of the vine. This is completely natural and isn’t something you did wrong. The rate of natural ageing should be about 1 or 2 of the oldest leaves every few months. Monitor the rate of yellowing to see if it is speeding up or well above this rate as there might be another cause you need to look out for.

Should I trim away the yellow leaves on my Devil’s Ivy?

We always recommend getting rid of the yellow leaves on your Devil’s Ivy. Unfortunately, once the leaf has turned yellow, there is no going back to their usual green or variegation. So trimming away the yellow leaves means your plant can begin to focus all the energy on growing new healthy leaves and vines.

When trimming the leaves off, always cut them with a sharp pair of scissors rather than ripping them off as this risks damaging the vines.

So those are the most common reasons why your Devil’s Ivy has developed yellow leaves. If you have caught the issue early then you shouldn’t have any problem getting your plant back to full health. Take a close look at the environment and your care routine to spot the main cause of the yellow leaves.

To find out more about caring for your plant, as well as propagation tips and common problems, check out our full Devil’s Ivy care guide.

Fiddle and Thorn is a participant in the Amazon Services LLC Associates Program, an affiliate advertising program designed to provide a means for sites to earn advertising fees by advertising and linking to Amazon.com

Take our houseplant survey!

Quickly respond to our 30 second houseplant survey and get 75% off our Complete Houseplant Care eBook!

Take the Survey

No thanks…

Why are the leaves on my Croton Plant turning yellow?

Last Updated: September 5, 2023

Although Croton Plants are loved for their unique and colourful leaves, what you don’t want is the entire leaf turning yellow. This usually signals that something isn’t quite right – either with the care that your Croton Plant is receiving, or the environment that it’s in. It’s important that you investigate the cause of the yellow leaves early as over time, this problem will only escalate and it might become too late to revive your plant.

Below we will be going through each of the different causes of yellow leaves on Croton Plants, guiding you through how to diagnose the issue, fix it and prevent it from happening again in future.

Before we get into it, there are quite a few different reasons why Croton Plants develop yellow leaves so we recommend going through each one whilst inspecting your plant and its environment to best diagnose the problem.

Too much water

Croton Plants love moisture but there is definitely such thing as too much! If the soil becomes soggy and waterlogged for a long period of time, it can mean the roots start to rot. Croton Plants don’t have as sensitive and delicate roots compared to some other plants, but they are still susceptible to root rot if you are consistently giving your plant too much water. Once the roots have started to rot, it means they can’t transport vital nutrients, oxygen and water to your plant, which not only causes yellow leaves, but the plant will droop down and lose leaves too.

Before altering how much you are watering your Croton Plant, it’s important to be sure that overwatering is the cause as you don’t want to hold back water if something else is causing the yellow leaves. Take your plant out of its pot and take a look at the root system and the potting soil. If the soil is soggy and clumpy then replace it immediately with fresh, dry soil.

Once you have confirmed that too much water is the culprit behind the yellow leaves on your Croton Plant, then you need to trim away the dead roots and worst affected leaves. Once the potting mix is switched out, your plant will begin the recovery process so you don’t want it to waste energy on dying leaves. It may take a few weeks before you see any sign of new growth as your Croton Plant has gone through a lot. But over time, with the right amount of sunlight and warmth, your Croton Plant should be back to its full health – with no yellow leaves in sight!

Too little water

If the leaves on your Croton Plant have gone quite yellow but are also dry to touch, then too little water might be the issue. As with overwatering, you want to check the soil to make sure this is the cause of the yellow leaves before increasing how much you water your Croton Plant. There isn’t much that would be more damaging than giving your plant more water when it doesn’t need it. If the soil is very powdery and dry then underwatering is most probably the cause of the yellow leaves on your Croton Plant.

To fix the issue you want to slowly reintroduce watering over the next week or so and in future, make sure you are watering more than before to avoid the same problem happening again. Once you have trimmed away all of the dry crispy leaves you should start to see normal healthy colourful growth starting to grow.

Low Temperatures

Another cause of yellow Croton Plant leaves is extreme temperatures. Whilst your plant will forgive you for the odd bit of heat or chill if your plant is exposed to the extremes for a long period of time, it’ll start to develop some issues, including yellow leaves that will eventually fall from the plant.

Your Croton Plant could be in an area where it’s getting a little too much light, or it’s getting too hot. The perfect spot for your Croton Plant is a little away from a window during summer but during winter it can be a little closer as the sun isn’t as strong.

If you’re not already, make sure to open your windows every now and then to make sure that the air in your room is circulating properly. This reduces the risk of hotspots forming in the room where your Croton Plant is.

It is also important to keep your Croton Plant away from AC vents or doors/windows that are drafty as the cold air will cause stagnant growth and yellow leaves. The ideal temperature for your Croton Plant is between 18°C – 24°C, so it’s important to keep it in a good range. You can always pick up a digital thermometer to check the spot your Croton Plant is sitting for peace of mind.

Stress

This is something that isn’t really talked about much it’s not just humans that get stressed out by change, plants do too and it might be what is causing the yellow leaves. Environmental stress is caused when there is a sudden change in the environment. This could be going from bone dry soil to really soggy soil, or moving to a new spot in your home where the temperature or light level is different. It can also happen when moving house and the knocks and bumps just cause it to be a little stressed.

Whilst environmental shock won’t often kill your Croton Plant, it will result in a few yellow leaves that will eventually also fall off your plant. Using a digital thermometer, light meter and moisture meter can help you keep track of your Croton Plant’s environment so you can respond to any major changes.

Too much direct sunshine

Croton Plant plants need bright but indirect light to really thrive. They can adjust to lower and medium levels of light but you’ll see less variegation in their leaves which is always a shame. Solid yellow leaves can be caused by sunburn if your plant is getting too much direct and intense sunshine during summer. This shows up as burnt patches across the side of the plant that is facing the sun.

Although there is nothing that can be done about the scorched leaves, this is quite an easy fix as you just need to find a spot in your home that has a little bit less sunshine. During winter, you can get away with placing your plant back where it was as the sun is weaker and out for less of the day (so you want to maximise the sunlight) but during summer, it’s a no-no for Croton Plants.

Pests

A more worrying cause of yellow leaves on Croton Plants is a pest infestation. This is quite rare for plants that don’t spend any time outdoors, but it can still happen.

Most pests are visible to the human eye so we can catch the problem by properly inspecting the leaves using a magnifying glass. Check the undersides of the leaves carefully as this is where the unwanted visitors like to hang out! If you spot pests lurking on your plant the first thing to do is isolate your Croton Plant from all of your other houseplants to prevent the spread of the pests.

The next step is to then trim off all badly affected leaves to curb the growth of the infestation and give your Croton Plant a wash in the sink or shower and treat with an insecticide or neem oil. A pest infestation isn’t always a death sentence for your Croton Plant as long as you have caught the problem early!

Those are the most common reasons why Croton Plants develop yellow leaves, some of which are easier to treat than others. We like to get into the habit of giving our plants a quick once over when watering them to check for any signs of unhappiness. This way, you’re able to catch any problems early and solve them before they take control of your plant. You might also find that it’s losing the odd leaf to natural ageing so only be alarmed if the rate of yellowing is quicker than the rate of new growth.

Check out our Croton Plant care guide for everything you need to know about caring for your plant, as well as propagation tips and how to spot and solve other common problems.

Fiddle and Thorn is a participant in the Amazon Services LLC Associates Program, an affiliate advertising program designed to provide a means for sites to earn advertising fees by advertising and linking to Amazon.com

Take our houseplant survey!

Quickly respond to our 30 second houseplant survey and get 75% off our Complete Houseplant Care eBook!

Take the Survey

No thanks…

Why are the leaves on my Bird of Paradise turning brown?

Last Updated: March 17, 2023

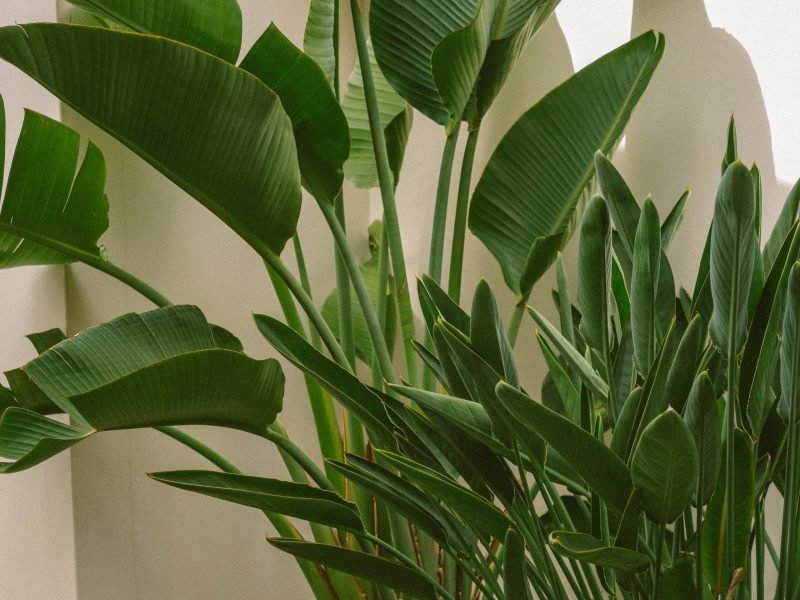
Whether it’s the incredible bird-like flowers or the luscious tropical leaves, there are so many reasons to fall in love with the Bird of Paradise plant. Although they are native to the tropics, this doesn’t mean they can’t thrive in your home if things are right.

If you notice that your Bird of Paradise has started to develop brown leaves, this is a sign that your plant is a little unhappy. But don’t fret, we will be going through the different reasons why Bird of Paradise plants develop brown leaves so you can figure out what is wrong with your plant and fix the issue before it’s too late.

We will also be giving tips on how to prevent brown leaves from developing again in future so you’ll want to keep these tips handy moving forward.

Causes of brown leaves on Bird of Paradise Plants

Consistent underwatering

If your Bird of Paradise has developed dry, crispy brown leaves it is often due to a lack of water. Although Bird of Paradises don’t like frequent watering and hate sitting in puddles of excess water, this doesn’t mean that they can survive for long periods of time with really dry soil. If you think you may have underwatered your Bird of Paradise, take your plant out of the pot and inspect the potting mix.

It’s important to inspect the health of the root system at this stage as well to see if there is any damage so you know how long the issue has been going on. If there are any dead roots, trim them away so your Bird of Paradise can start to grow healthier ones.

Lack of Humidity

If the edges and leaf tips of your Bird of Paradise are turning brown, then dry air may be the culprit. During winter, our homes can be especially dry as the heating is on and the windows are closed so it’s something we need to be more conscious of during that time.

Although we could never reach tropical levels of humidity in our home (as it would be really uncomfortable to live in), there are a few things we can do to help raise the humidity and stop any more brown leaf tips on our Bird of Paradise plants. You’ll find these detailed further down the article.

Chemical Sensitivity

Over time a build-up of excess fertiliser, chlorine or fluoride from tap water can cause issues for your plant and your Bird of Paradise plant’s leaves might start turning brown or black as a result.

There are two really simple ways to fix this. The first is to run water through the pot for a little while to flush out all of the chemical buildups. You’ll want to either do this outside on the lawn or in the bathtub so that excess water can escape through the drainage holes.

If that doesn’t seem to fix the problem you can always re-pot with fresh soil and this will solve the issue very quickly. When doing this, make sure to remove as much of the old potting mix from the roots without damaging them. A good way to do this is by rinsing down the root system before adding in the fresh soil.

Temperature extremes

Make sure that you draft proof any windows/ doors that are close to your Bird of Paradise (and other tropical or heat-loving houseplants) as well as moving them away from any air conditioning vents as these can be quite damaging to your plants during summer and cause brown leaves pretty quickly.

Using a digital thermometer is an easy way to monitor the temperature in your home and allow you to check for any cold drafts.

If your Bird of Paradise is in quite a cool room, this can also increase the risk of overwatering and root rot (which can cause a whole range of problems such as brown leaves).

Your Bird of Paradise won’t need as much water as the soil will take a lot longer to dry out in cooler temperatures. This can be the perfect place for root rot and leaf rot to occur so be extra cautious when it comes to caring for your Bird of Paradise in winter or in colder rooms in your home.

Warm temperatures and hotspots can also commonly occur next to windows that receive direct sunlight and this can also dry out your Bird of Paradise and cause brown leaves.

Using a temperature monitor can also help you avoid this extreme (they really are a lifesaver). It’s also important to make sure your Bird of Paradise is at least 1 meter away from radiators, stoves and heating vents.

Not enough sunlight

Although Bird of Paradise plants can grow in a variety of light conditions (note that you won’t see many flowers in medium light levels), not enough sunlight can cause brown leaves.

You want to find a spot in your home that gets ample indirect sunlight. The number 1 thing you must not do if your Bird of Paradise is suffering due to a lack of light is put it somewhere that gets more direct sunlight. The leaves are too delicate and will scorch and burn during summer as the sunlight becomes very intense and will cause more issues than a few brown leaves.

Pests

A slightly less common reason why your Bird of Paradises leaves are turning brown is a pest infestation. It can happen that pests such as spider mites and scale insects take hold of your plant and the infestation can spread pretty quickly.

Take a close look at your plant to spot any insects on the leaves, using a magnifying glass can help with this. We recommend looking at the undersides of the leaves as well as the stem joints as this is where you’re more likely to find pests.

Solutions for brown leaves on Bird of Paradise Plants

Adjust your watering habits

Issues caused by incorrect watering can develop quickly which is why it’s so crucial to amend how much you’re watering as soon as you diagnose the issue.

The way in which you want to treat an underwatered vs an overwatered Bird of Paradise does differ slightly so make sure you know which your plant needs.

Your first instinct to solve an underwatered Bird of Paradise and its brown leaves, might be to give your plant lots of water. But this will actually just cause further issues and instead, you want to gradually reintroduce watering in small amounts to prevent any shock (yes plants get shocked by a change of environment too!)

Water your plant a little every day for a few days and then space your watering out to once a fortnight during the growing season and once a month over winter.

For an overwatered Bird of Paradise, remove any waterlogged soil and trim away any rotten roots. Then hold off watering for a few days before starting a much- watering routine. You need to make sure that the potting mix has time to dry out so reducing either how deeply you water each time, or how frequently you water can prevent overwatering.

Raise the humidity levels

If your Bird of Paradise is suffering from dry air, it’s important that you take needed steps to increase the humidity level around your plant. Here are a few great ways…

  • Mist the leaves

    This is a great habit to get into for your Bird of Paradise as they need a little boost to their humidity to avoid drying out and developing brown leaves. Mist the leaves using a spray bottle a few times a week. But never mist in the evening as the cold air at night will mean the leaves are a lot more likely to rot if damp.

    Misting is also a great way to get rid of dust and pests that might be living on your plant without you knowing.

  • Shower your plant

    Another super simple way to boost the humidity for your Bird of Paradise and stop brown leaves, is by giving your plant a shower.

    This will also rid your plant of any pests that might be lingering. Pop your Bird of Paradise in the shower and wash down the leaves. As they have quite sturdy leaves, you can get away with medium water pressure but we recommend keeping it low to avoid breaking the plant.

  • Pick the right room

    Some rooms in your home will have a naturally higher humidity level than others. The kitchen and bathroom are the main ones as steam from showering or cooking will increase the level of water vapour in the air.

    If you have good lighting in those rooms then move your Bird of Paradise in there if it is suffering from a lack of humidity. This should avoid any further brown leaf tips!

  • Invest in a humidifier

    If you are looking for a more long-term solution for your Bird of Paradise’s brown leaf tips then buying a humidifier is the option for you. Some humidifiers even have settings in them that will keep a constant level or turn on and off on a set schedule. They are also thought to help with getting better sleep and clearer skin so it’s not just a good investment for your plants.

    This is the humidifier we use from Amazon and our plants love it!

Fighting a pest infestation

If you find pests on your Bird of Paradise, there are a few steps that you’ll need to take to have any chance of fighting the infestation. First of all you need to remove the worst affected leaves. This will simply bring the size of the infestation down, making it easier to tackle.

Secondly, we recommend giving the whole plant a long shower. Make sure the shower isn’t on full pressure wash down the leaves and the soil with room temperature water.

Then you should start treating your Bird of Paradise with an organic insecticide and neem oil to fight the infestation.

Make sure to check over your other plants in the room to see if any other plants have pests. Keep your Bird of Paradise (and other infected plants) a good distance away from any of your other houseplants as you don’t want the pests to spread.

How to prevent brown leaves on a Bird of Paradise Plant

Avoid watering extremes

To prevent any more brown leaves from developing, we strongly recommend investing in a moisture meter. These handy devices are pretty cheap and remove all of the guesswork that comes with watering plants, this is our favourite one from Amazon and it does a great job of keeping our plants happy!

We aren’t strong believers in rigid watering schedules because there are so many ever-changing environmental factors that have an impact on how much water your Bird of Paradise plant needs. For example, temperature, pot size and light level just to name a few.

This is why regularly checking the soil moisture will help you determine whether or not your plant needs water, rather than sticking to a schedule.

Get into a habit of misting your plant

Bird of Paradise plants need a good humidity level and the best thing to do is form a habit of misting your plant. You want to do this ideally 3-4 times per week and this can make a huge difference to the health of the leaves.

Not only will it prevent brown leaf tips and edges but it can also help to get rid of dust on the leaves, making them look fresher and photosynthesise more effectively.

Avoid any environmental extremes

It’s not just the soil moisture that you need to measure to avoid issues such as brown leaves. It’s important that you stay on top of environmental factors such as temperature and light level to ensure your Bird of Paradise is in ideal conditions.

Give your plant a regular check-up

We recommend giving your Bird of Paradise plant a more thorough check-up around once a month. Check over the leaves, clean your plant and just generally check that everything is ok. This can help you spot any early warning signs that something isn’t right and it can make solving the issue so much easier.

You also want to look out specifically for pests as well as once the infestation has grown, it can be very difficult to treat.

Frequently Asked Questions

Those are the most common reasons why Bird of Paradise plants may develop brown leaves or brown leaf tips. Some of these won’t necessarily cause your plant to die if untreated, but watering issues and pests must be dealt with immediately as these can very quickly cause your Bird of Paradise to die.

After making changes to your plant’s environment or care routine, keep a close eye on your plant to make sure the changes are making a positive difference.

To find out more about caring for your plant, as well as other common issues or propagation advice, check out our Bird of Paradise care guide.

Fiddle and Thorn is a participant in the Amazon Services LLC Associates Program, an affiliate advertising program designed to provide a means for sites to earn advertising fees by advertising and linking to Amazon.com

Take our houseplant survey!

Quickly respond to our 30 second houseplant survey and get 75% off our Complete Houseplant Care eBook!

Take the Survey

No thanks…

Why are the flowers on my Peace Lily green?

Last Updated: December 31, 2021

Luckily green flowers on a Peace Lily doesn’t mean your plant is unhealthy or will die on your suddenly so aren’t something to be super super concerned about. Below you will find the 3 main reasons why Peace Lilies develop green leaves as well as ways to fix the problem.

Overfertilisation

One cause of green Peace Lily flowers is using too much fertiliser. We recommend using a water-soluble fertiliser at less than the recommended strength for your Peace Lily. Fertilise a few times during the spring and summer months and hold off completely during autumn or winter. This is because your Peace Lily will go quite dormant and not produce any growth during this time.

If you are fertilising more than this then it’s probably the reason behind your Peace Lily’s green flowers. If you fear the problem has been going on for a while, or you have mixed slow-release fertiliser into the soil then replace the potting mix entirely. If you use a soluble one then the fix is pretty easy – just don’t do it as much or as often.

Too much direct sunlight

Direct light is also a common cause of green Peace Lily flowers. Peace Lilies actually quite like shady spots in your home and will really struggle if they receive a lot of direct sunlight. This is especially the case in summer where the sun is a lot stronger. This coincides with when Peace Lilies will produce most of their flowers which is why they might be coming out as green.

If yous Peace Lily gets too much sunlight then it increases the rate of photosynthesis which shows the green pigments a lot more. If you want to stop this then we recommend moving your Peace Lily to a shadier place in the room, at least over summer and you should start to see white flowers popping up.

New flowers

The above are the main two problems which cause green Peace Lily flowers but there is also one more reason which isn’t a problem at all. When the flower is just starting to grow and show through it may be a tint of green as it is still very underdeveloped.

This is nothing to worry about at all and after a day or two as the flower matures it should turn white. If it continues to stay green the check the lighting and fertiliser to see whether these are the cause of the issue.

Green flowers on a Peace Lily aren’t a major thing to worry about if the rest of the plant looks healthy. Just watch out for any changes in the leaves which may indicate a more serious problem. You can find out more about Peace Lily care in our plant guide or learn more about caring for your houseplants in our downloadable ebook.

Complete Houseplant Care eBook

Our comprehensive (and rather good looking) eBook that will teach you everything you need to know to successfully care for, and maintain your houseplants!

Buy on

Fiddle and Thorn is a participant in the Amazon Services LLC Associates Program, an affiliate advertising program designed to provide a means for sites to earn advertising fees by advertising and linking to Amazon.com

Take our houseplant survey!

Quickly respond to our 30 second houseplant survey and get 75% off our Complete Houseplant Care eBook!

Take the Survey

No thanks…

Why are my Watermelon Peperomia’s Leaves Soft and Drooping

Last Updated: May 17, 2022

You might be quite worried when you first notice that the leaves on your Watermelon Peperomia have turned quite soft, limp and droopy. However, if you’ve caught the issue early, and there don’t seem to be any other warning signs such as brown or yellow leaves, then you should be able to fix the problem once diagnosed.

Below you’ll find the most common reasons why your Watermelon Peperomia has soft and drooping leaves.

The most common cause of soft, drooping leaves on Watermelon Peperomia plants is a lack of water.

Consistent underwatering can lead to a variety of serious issues if not solved in time, but even just the occasional underwatering can result in drooping leaves. The lack of moisture in the soil means the leaves will be quite soft to touch and feel much thinner than usual.

Before you start watering more frequently, we recommend taking your plant out of the pot and seeing how dry the potting mix feels. The worst thing would be assuming that your Watermelon Peperomia has soft, drooping leaves because it needs more water but it’s actually the opposite, or even caused by changes in temperature.

When lifting up the plant, if it feels quite light and the potting mix is bone dry, then underwatering is the most likely culprit. Your first instinct to solve the issue, might be to drown your plant to overcompensate for the lack of water, but this can actually cause more damage and shock your plant.

Instead, the best way to bring your underwatered Watermelon Peperomia back to full health is to water your Watermelon Peperomia plant a little bit once a day for a week. After a week you want to go back to a more normal care routine, making sure that you don’t forget any of your routine waterings. We recommend buying a moisture meter to help you keep an eye on when your Watermelon Peperomia needs more or less water. If you want to take all of the worry out of watering your Peperomia it could be worth investing in a self-watering pot like this one, these just make everything super easy!

Overwateringcan also cause drooping in Watermelon Peperomia

Although the most common cause of drooping and soft leaves on a Watermelon Peperomia is a lack of water, overwatering can also have the same effects. This is because the roots will start to rot in waterlogged soil and cut off the plant from much-needed water and nutrients. It also means the stems become quite weak and can’t physically hold up the plant. This is what causes them to droop down and become quite soft and thin.

If you suspect that your Watermelon Peperomia might be suffering from overwatering and root rot take your plant out of its pot immediately and inspect the root system. Carefully trim away any rotten roots. These won’t come back to full health and removing them can encourage new healthy roots to grow. If the potting mix is still clumpy and soggy, it’s really important that you replace it straight away with fresh mix. Don’t wait for it to naturally dry out as this risks causing more harm to your Watermelon Peperomia.

Over the next few weeks, only water your Watermelon Peperomia when the potting mix feels dry and hopefully your plant can begin to recover. Again, getting a moisture meter can really help you avoid overwatering again in future.

Lack of humidity can be a real problem!

If you don’t think that your Watermelon Peperomia has soft leaves due to watering issues, then it may be caused by a lack of humidity. Really dry air can mean the plant transpires a lot more, which is when it loses moisture through the leaves. This can cause them to droop down and feel much softer.

This problem is a lot more common in winter as heating and less ventilation can mean the air in your home dries out a lot quicker.

Here are a few ways to increase humidity for your Watermelon Peperomia to prevent drooping leaves:

Mist the leaves

This is one of the easiest ways to increase the humidity for your Watermelon Peperomia and can stop the leaves from drooping. We recommend misting the leaves a couple of times a week with a spray bottle. (We love these amber glass onesfrom Amazon).

Top tip: mist the leaves in the morning to allow time for the moisture to evaporate off the leaves. If the leaves are still moist as the temperatures drop at night, they are a lot more likely to rot and droop.

Build a pebble tray

This requires a little DIY but it’s a great solution for Watermelon Peperomia plants that are drooping due to a lack of humidity. Fill up a tray with small stones and fill it up halfway with water. Place your Watermelon Peperomia on top of the stones. Throughout the day the water will slowly evaporate around your plant increasing the humidity.

The number 1 thing to look out for when making a pebble tray is that the water doesn’t reach high enough so that the roots are sitting in water which will risk root rot.

Placement

If you have good lighting in your kitchen or bathroom then we recommend moving your Watermelon Peperomia in there. The humidity level in those rooms is naturally higher than in other areas of your home because of showering and cooking. Just be careful not to put your plant too close to the cooker or this will burn the leaves pretty quickly and you’ll have a few more problems than just drooping soft leaves!

Buy a humidifier

If you’re worried about the lack of humidity becoming a real problem, then buying a humidifier is probably the best way to go. It keeps the humidity in the room at a consistent level so you don’t have to worry about a thing. It will avoid the leaves on your Watermelon Peperomia drooping, turning soft and can even help to prevent dry brown leaves too. But the benefits of humidifiers doesn’t stop at your houseplants, they are even great at clearing our skin and helping us get a better nights sleep.

We always recommend this humidifier from Amazon as a great place to start.

If you want to know more about how to raise the humidity for your Watermelon Peperomia or any of your other houseplants then check out our humidity guide.

Cold temperatures

Another potential cause of soft drooping leaves on a Watermelon Peperomia plant is cold temperatures. Watermelon Peperomia need warm environments to really thrive and can get quite shocked and damaged by cold air and drafts.

Whilst you might not notice the cold air coming through cracks in doors and windows, if your Watermelon Peperomia is right next to them then the constant stream of cold air from outside can really shock and damage the plant over time, causing drooping leaves as well as brown spots or leaves falling off completely.

Make sure that you draft-proof any windows or doors that are close to your Watermelon Peperomia as well as moving them away from any air conditioning vents as these can be quite damaging to your plants during summer. Through the winter months, consider investing in a heat pad like this one, this just makes things super easy and you can group a few plants on there to make the most of the warmth!

So those are the most common reasons why Watermelon Peperomia plants might start to develop drooping or soft leaves. If underwatering is the issue, the problem usually fixes itself a day or two after watering, but the other issues may take a few weeks to solve. Keep a close eye on your Watermelon Peperomia after changing anything about the environment or your watering routine just to see how it gets on as plants (like humans) can be a little fussy when things change.

If you want to find out more about caring for your Watermelon Peperomia, as well as how to diagnose and fix other common issues, check out our Watermelon Peperomia care guide.

Fiddle and Thorn is a participant in the Amazon Services LLC Associates Program, an affiliate advertising program designed to provide a means for sites to earn advertising fees by advertising and linking to Amazon.com

Take our houseplant survey!

Quickly respond to our 30 second houseplant survey and get 75% off our Complete Houseplant Care eBook!

Take the Survey

No thanks…

Why are my Snake Plant’s leaves turning yellow?

Last Updated: April 1, 2022

Snake Plants are often regarding as an easy houseplant. However, this doesn’t mean they don’t come with their own issues. Yellowing leaves occur when your Snake Plant is unhappy about either temperature or watering. Below you can find out more about the top 3 reasons why your Snake Plant may have yellow leaves.

Overwatering can cause yellow leaves

More often than not, overwatering is the cause of your Snake Plant’s yellow leaves. They really don’t require much water meaning their soil can very quickly become waterlogged. This will cause the roots to rot and become mushy. The first sign of this is yellow leaves so thankfully you should have caught the problem quite early on.

If you think that your Snake Plant has been overwatered then you must check the moisture levels in the soil immediately. Another way to tell is by smelling the soil as it gives off quite a damp, musty and unpleasant smell when it is waterlogged.

If there is too much moisture in the soil then there are a few things you must do straight away. Start off by taking the plant out of the pot and removing the soil from the roots. Trim away the dead mushy roots and replace the entire potting mix. One added tip is to put in some small pebbles at the bottom of the pot as this will stop the drainage holes getting blocked by clumps of soil. Check out our guide to handling root rot if you need more information.

Yellow Snake Plant leaves can also indicate underwatering

Over- and underwatering often cause the same problems and it’s really important that you find out which one is happening. (The last thing you want to do is give your overwatered plant more water!) One easy way to tell if the plant is being underwatered is if the yellowing on the leaf of your Snake Plant starts from the tip and edges inwards.

If you suspect it is underwatering then you must again check the moisture levels in the soil before making any changes to your care routine. When watering your underwatered Snake Plant it is important you do it gradually. Like humans, Snake Plants get shocked by a sudden change of environment. Therefore, you don’t want to simply drown the plant straight away. Stagger small waterings every day for a week and adjust your schedule going forward.

Top tip: always check the moisture in the soil before watering using either the finger, chopstick or lifting method. It is very common for plant parents to go the other way and overwater their plant when compensating for a lack of water.

Cold air can lead to yellow leaves

Another cause of yellowing leaves in Snake Plants can be cold temperatures and drafts. Snake Plants really dislike cold air so it is important that you put your plant in the warmest room in the house over winter.

Also, avoid placing them near doors or windows that may be drafty. Even though the temperature of your home may be perfect for your Snake Plants, the drafts coming in from outside may be colder and harm your plant’s health. You can always pick up a digital thermometer to check the temperatures across your home if you are unsure.

Those are the 3 main reasons why Snake Plants develop yellow leaves. We would always start by checking the moisture in the soil as watering problems are the most common cause.

Learn more about how to care for your plant in our Snake Plant care guide.

Fiddle and Thorn is a participant in the Amazon Services LLC Associates Program, an affiliate advertising program designed to provide a means for sites to earn advertising fees by advertising and linking to Amazon.com

Take our houseplant survey!

Quickly respond to our 30 second houseplant survey and get 75% off our Complete Houseplant Care eBook!

Take the Survey

No thanks…

Why are my Snake Plant’s leaves falling over? Causes and Solutions

Last Updated: August 25, 2022

Also known as the Mother-In-Law’s-Tongue plant due to their sharp pointy leaves, the Snake Plant has become a staple of every plant lover’s home. Their easy care needs and striking variegated leaves make this no surprise.

However, if your Snake Plant has become quite unstable and the leaves are starting to become soft and are falling over, then there is most likely something wrong. It can happen that the odd leaf starts to fall over due to natural ageing (more on that below) but if this is a regular issue, or if several leaves have started to fall over at the same time, then something in the care or environment needs to change.

In this post, we will be going through the various reasons why Snake Plant leaves begin falling over to help you establish what is happening to your plant.

Overwatering can cause your Snake Plant to start falling over

With any houseplant, a good rule to remember is that limp leaves can often signify overwatering and it is the first port of call whenever diagnosing this issue. Snake Plant plants don’t like sitting in puddles of water for long periods of time, in fact, they don’t really like much moisture in their soil at all as this will slowly cause the roots to rot.

Once the roots have become damaged, they can’t transport nutrients or oxygen to the rest of the plant and the leaves will slowly start falling over.

You want to be sure that overwatering is the cause of your limp droopy Snake Plant as holding back water when your plant actually needs it will cause a range of other issues! To figure out if overwatering is the reason your Snake Plant has started falling over, it’s important to check the moisture levels in the soil immediately after spotting the issue.

To do this, remove your Snake Plant from its pot and if the soil is quite waterlogged and clumpy then replace it with fresh dry mix. Trim away any rotten roots and limp dying leaves y so your Snake Plant can focus its energy on producing new, healthy and sturdy growth.

You might be tempted to wait for the potting mix to dry out by itself and hope that it solves the issue, however, this risks damaging the root system even further which makes reviving your plant even more difficult.

Moving forward, to prevent your Snake Plant from becoming limp and falling over, you want to adjust your watering schedule, either watering less frequently or cutting back on how much water you give your Snake Plant each time. Using a moisture meter can also really help you keep track of the moisture levels in the potting mix to ensure you’re not overwatering and causing more soft leaves to develop.

Lack of drainage can also cause your Snake Plant to start falling over

Although waterlogged soil might be the direct cause of your Snake Plant falling over, it might not be how much or how frequently you are watering your Snake Plant that’s problematic, but rather the lack of drainage. It’s important to make sure that the pot your Snake Plant is in has sufficient drainage holes that aren’t blocked up and any decorative pots they’re sitting in aren’t holding excess water.

You can very easily increase the amount of drainage in your pot by mixing a little perlite with the soil. This helps not only with drainage but also with aeration of the soil which is a bonus!

If you are growing your Snake Plant in a plastic pot then we also recommend switching to a terracotta pot. As these pots are permeable, some of that excess water can escape out of the sides. We love these from Amazon. Whilst they are more expensive than plastic pots, their benefits far outweigh the extra cost and it will be a lot cheaper than replacing your plants if the consequences of overwatering take over.

Your Snake Plant might be in the incorrect position

One thing we commonly see with Snake Plants that are falling over is that the leaves and roots are perfectly healthy. This suggests that it’s not actually anything to do with the environment or care that your plant is receiving but actually just because the plant isn’t grounded in the pot.

If your Snake Plant’s roots are not deep into the pot, then it may be hard for them to hold up the leaves straight. This can happen if you have recently repot your Snake Plant and placed it too high up in the pot. Although it might feel like you are giving your Snake Plant lots of space to grow into, they actually like their roots to be a bit pot-bound as it gives them that stability.

To solve this issue and prevent your Snake Plant from falling over again in future, carefully remove your plant from its pot and repot it deeper into the soil. Then make sure to press down slightly on the soil to make sure your plant is firmly in the pot. You might also need to downsize the pot if your Snake Plant’s root system isn’t filling most of the pot.

Those are the most common reasons why Snake Plant leaves begin falling over. Although fixing the issue should mean that no more leaves droop down and fall over, it won’t save the ones that already have. You have two options here, either removing the leaves from the plant or propping them up with a support.

If the leaves have turned very soft to touch and perhaps also have brown or yellow patches, then we recommend carefully trimming them off the plant at the base. If the leaf still feels and looks very healthy then prop it up using a support stake and see if it can regain some stability.

Check out our Snake Plant care guide to learn more about keeping your plant happy, healthy and upright!

Fiddle and Thorn is a participant in the Amazon Services LLC Associates Program, an affiliate advertising program designed to provide a means for sites to earn advertising fees by advertising and linking to Amazon.com

Take our houseplant survey!

Quickly respond to our 30 second houseplant survey and get 75% off our Complete Houseplant Care eBook!

Take the Survey

No thanks…

Why are my Snake Plant’s leaves curling?

Last Updated: October 24, 2022

Snake Plants are pretty hardy plants that can be really easy to care for once you’ve got the environment right. But although they can adjust well to a range of environments, they aren’t immune to all problems. If you do start to notice that your Snake Plant’s leaves are curling, this may be a symptom of incorrect care or an issue with one (or more) of the environmental factors.

We have put together this guide to go through all of the different reasons why Snake Plants might develop curling leaves as well as how to spot, treat and prevent the problem so you can get your plant back on track in no time.

Underwatering is a common cause of curling leaves

One of the most common reasons why Snake Plants start curling their leaves is due to a lack of moisture in the soil. Although they don’t need frequent watering and thrive in dry potting mix, they can’t go for months and months without any water, particularly in the warmer months of the year.

You do want to be a little careful with this one because it is easy to overwater a Snake Plant. This is why it’s important you are 100% sure this is the problem, and then make sure you don’t go the other way and give it too much water.

Take the plant out of the pot and check the moisture in the potting mix. If the soil feels very dry then underwatering may be the issue as there is just not enough water getting up to the plant. You also want to look out for crispy roots as this is a telltale sign of underwatering.

To solve the issue, you want to water your Snake Plant a tiny little bit each day for one week. This will slowly moisten the soil and won’t cause any shock.

If the issue has progressed quite far then the impacted leaves may not return to normal and you may have to trim those off. However, if the leaves are only slightly curling inwards then these may uncurl as you solve the issue.

Now that you have treated the issue, it’s equally important that you prevent it long-term. Make sure that you either increase how frequently you are watering your Snake Plant or how deeply. This ensures that the potting mix isn’t completely dry for long extended periods of time.

Heat stress can also cause leaves to curl

Another factor that can cause curling leaves on a Snake Plant is high temperatures. If your plant is exposed to a lot of warm or hot air, it will dry up quickly and your plant will curl its leaves to save moisture.

Luckily this is quite an easy problem to diagnose as you should use a digital thermometer and place it next to your plant. This will help you spot fluctuations that might be because your plant is too close to a window that gets the afternoon sun and is therefore sitting in a hotspot for half of the day for example.

Other causes could include your plant being close to your oven, a radiator or a heating vent.

A curling Snake Plant could indicate cold drafts

On the other end of the temperature spectrum, cold air can also cause curling leaves (which is why a digital thermometer will be your best friend and is a great investment). Make sure that you draft-proof any windows/ doors that are close to your Snake Plant as any cracks can cause a small stream of really cold air to hit your plant in winter.

But it’s not just the colder months that cause havoc with your plants as air conditioning units can be quite damaging as well. The constant flow of cold air might be refreshing to you but it can actually freeze the leaf tissue in your plant if the issue isn’t solved quickly.

Alongside freezing your plant and causing a range of issues, if your Snake Plant is in quite a cool room, this can also increase the risk of overwatering and root rot. These plants really don’t need much water and potting mix takes a bit longer to dry out in cold environments so this is the perfect combination for root rot. So just be extra cautious when it comes to caring for your Snake Plant in winter or in colder rooms in your home.

Direct sunlight might be to blame

Snake Plants are pretty adaptable when it comes to sunlight and thrive in dark corners and bright rooms. However, it can happen that too much intense sunlight can damage the leaves on your plant and cause them to curl up. This primarily happens in the height of summer if your plant is right next to the window.

Curling leaves can occur because the leaves dry out in the hot direct sunlight (and use this as a mechanism to reduce moisture loss) but also because the leaves curl up to protect themselves against the sun.

If the issue progresses for a while, it can also cause irreversible damage such as brown or yellow patches.

Curling leaves are often reversible and we recommend placing your Snake Plant in a slightly shadier spot to allow it to recover. Burnt patches are unfortunately irreversible.

Pests could be a worrying cause of curling Snake Plant leaves

Whilst it’s pretty rare for your Snake Plant to be suffering from a pest infestation if it doesn’t spend any part of the year growing outdoors, it can still happen.

Check your plant over for bugs or signs of them (these signs include small spots on the leaves, holes, white powder or webbing across the leaves).

If you find bugs, wipe each leaf with warm soapy water to try and remove as many as possible. We recommend giving your plants a shower and as Snake Plants are pretty hardy you can get away with a stronger water pressure compared to most other plants which is helpful. If this doesn’t get rid of the pests, you can treat your Snake Plant with neem oil to fight the infestation.

Make sure to check over your other plants in the room to see if any other plants have pests. It is vital that you keep your infected Snake Plant (and other infected plants) a good distance away from any of your other houseplants as you don’t want the pests to spread.

Those are the most common reasons why Snake Plants develop curling leaves. It can be a little bit of a tricky issue to diagnose because there are quite a few subtle problems that can have that effect. This is why we recommend going through each one whilst inspecting your plant and its environment to best figure out what is causing the curling leaves.

To learn more about how to keep your plant thriving, check out our Snake Plant care guide.

Fiddle and Thorn is a participant in the Amazon Services LLC Associates Program, an affiliate advertising program designed to provide a means for sites to earn advertising fees by advertising and linking to Amazon.com

Take our houseplant survey!

Quickly respond to our 30 second houseplant survey and get 75% off our Complete Houseplant Care eBook!

Take the Survey

No thanks…