Why is my Aluminium Plant drooping?

Last Updated: September 14, 2022

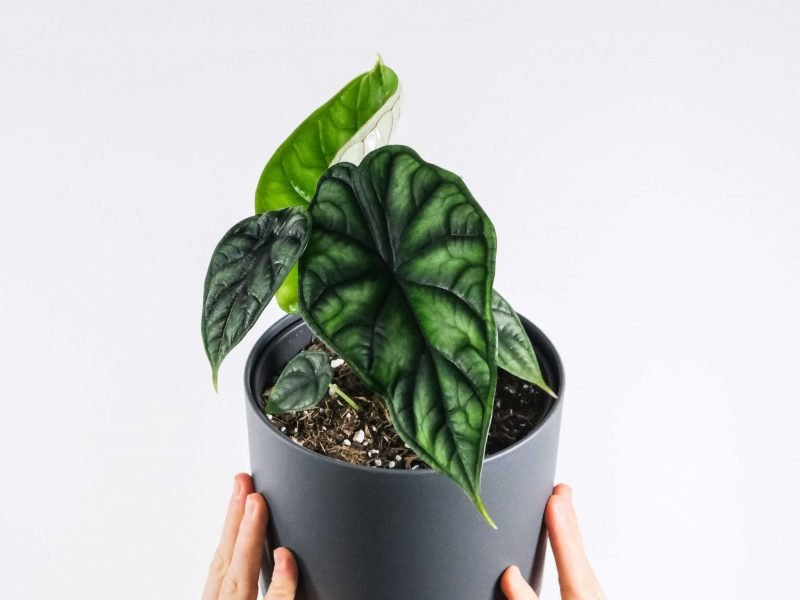
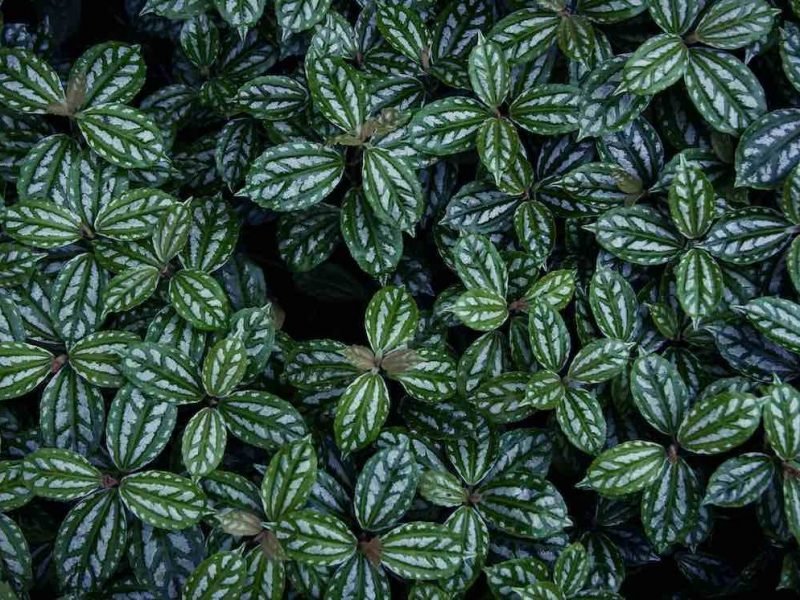
Loved for their dark green and white leaves, Aluminium Plant are one of the fastest houseplants out there when it comes to outgrowing their pots! This can make them a little tricky to care for and issues such as drooping leaves and stems may crop up from time to time.

However, you’ll be pleased to know that if you don’t spot any other signs of trouble other than the drooping stems, it means you have probably caught the issue early which makes it easier to fix. Below we will go through each of the main causes of a drooping Aluminium Plant as well as tips to make the right diagnosis and how to treat the issue in the long term.

Underwatering can cause a drooping Aluminium Plant

Too little water can harm your Aluminium Plant in quite a few ways but one of the earlier signs of trouble is drooping leaves and stems. If you find that the stems and leaves look a little lifeless, it could be because the soil has been dry for too long.

The best way to confirm if underwatering is the cause is by checking the soil moisture. There are a few ways you can do this including the chopstick method or lifting your plant. But the best way to know for sure whether your Aluminium Plant needs watering is by using a moisture meter. You just pop them into the soil and it’ll tell you how damp or dry the potting mix is. We recommend this one from Amazon.

To solve the issue, water your drooping Aluminium Plant once a day for a week. This is a lot better than just pouring a whole bucket of water over your plant as not only does it avoid shock, but it also ensures the soil is becoming moist, rather than the water just running straight out o the drainage holes.

Moving forward, try to increase either how frequently or how deeply you are watering your Aluminium Plant to ensure that the potting mix doesn’t dry out fully for extended periods of time.

If you find yourself often forgetting to water your Aluminium Plant, then a self-watering pot might be the thing for you. It will water your Aluminium Plant for you and avoid any risk of under or overwatering. We have found this one from Amazon to work really well!

A drooping Aluminium Plant can also indicate overwatering

But it’s not just the underwatering extreme that can be damaging for your Aluminium Plant because overwatering can also cause your plant to start drooping.

If drooping leaves is the only sign of unhappiness, then hopefully the problem shouldn’t be too advanced yet. You may find that the drooping leaves are fairly soft which is another sign of overwatering.

The problem with overwatering is that it causes waterlogged soil which then causes the roots of your Aluminium Plant to rot. This will only start to cause visible issues on the leaves once the issue has progressed quite a bit which can make it a challenging problem to solve.

If you think your drooping Aluminium Plant might be suffering from overwatering and root rot take your plant out of its pot immediately and inspect the root system. If the potting mix feels soggy and clumpy replace it straight away after trimming off any rotten roots. Don’t wait for the potting mix to naturally dry out as this risks causing more harm to your plant.

Over the next few weeks, only water your Aluminium Plant when the potting mix feels dry and hopefully your plant can begin to recover. To avoid the problem from reoccurring, get into the habit of checking the moisture in the potting mix before watering your Aluminium Plant. We recommend buying a moisture meter to make sure you are only watering your plant when it needs it.

Direct sunlight can also cause your Aluminium Plant to start drooping

If your Aluminium Plant is receiving too much sunlight this can cause the leaves to become quite scorched and droop down. You might also start to notice dry patches throughout your plant.

If this is happening to your plant then move it to a slightly shadier location during the sunniest months of the year and this should stop your Aluminium Plant from drooping down so much. You might also need to think about moving your plant depending on the seasons so that you maximise on the light level during winter, but avoid intense direct light in summer.

Low humidity could also be to blame

Humidity issues are quite a common problem for all types of houseplants, including Aluminium Plants. It is often forgotten about as people tend to focus on light and water requirements. Although dry air won’t actually often kill your plant, it can lead to drooping leaves and stems.

Luckily, dry air is quite easy to fix. Here are some great and cheap ways to increase the humidity in your home:

  1. Mist the leaves regularly

    This is something that you should build into your houseplant care routine. Misting the leaves with a spray bottle a few times a week is a great way to increase the humidity. It also gets rid of any dust on the leaves so your plant can get more of the sunlight which is a nice little bonus!

  2. Make a pebble tray

    This one requires a little bit more work to put together but it’s definitely worth it and will go a long way to stopping your plant from drooping down. Gather a load of pebbles and fill up a tray or plate before adding water. You want the water to reach about halfway up the pebbles with the top ones staying dry. Then place your Aluminium Plant on top of the pebbles and the water will begin to evaporate around the plant.

  3. Buy a humidifier

    The number one thing we recommend to plant parents is a humidifier. They create a nice stable humditiy level without you having to do anything other than turn it on! They are pretty small and affordable too so a great investment for all plant parents.

Those are the most common factors behind drooping Aluminium Plants. We recommend going through each of them one by one whilst inspecting your plant and its soil to figure out what is causing the issue.

To learn more about how to best look after your plant, check out our Aluminium Plant care guide.

Fiddle and Thorn is a participant in the Amazon Services LLC Associates Program, an affiliate advertising program designed to provide a means for sites to earn advertising fees by advertising and linking to Amazon.com

Take our houseplant survey!

Quickly respond to our 30 second houseplant survey and get 75% off our Complete Houseplant Care eBook!

Take the Survey

No thanks…

Why does my Aloe Vera have brown leaves | Causes and Solutions

Last Updated: May 31, 2022

There is a bit of a myth that Aloe Vera Plants are the easiest houseplant to take care of. If placed in the right environment, they will definitely thrive without much care. However, sometimes the smallest mistakes or changes in the environment can mean it is game-over. The main causes why your Aloe Vera has brown leaves are overwatering, underwatering, temperature and light issues and pest infestation.

Overwatering can cause brown Aloe Vera leaves

If you notice that your Aloe Vera’s leaves are turning brown and mushy, it is most likely due to overwatering. This tends to be the most common reason why plant will die, and we will hold our hands up and say this has happened to us in the past. It can be difficult to leave your plant alone, but too much love can very quickly be harmful to your plant. They don’t need to be watered very often, we go for once every 10-14 days in summer and even less in winter. They prefer dry soil so it is better to steer on the cautious side when watering, making sure that it definitely needs a top up.

Overwatering can very quickly lead to root rot which is very harmful to your Aloe Vera, causing brown leaves quite easily. Not only does it cause the leaves to turn brown, but it will also mean that the plant is unable to take up water or nutrients meaning your plant may begin to die pretty quickly. If you think that you may have overwatered your plant it is best to replace the soil straight away rather than just sit and wait for it to dry up over time.

There are two really easy ways to make sure that it definitely needs water. First check the moisture at the top of the soil, if it is still damp then wait at least a week before watering. You can also lift up your plant to check the weight of the plant before and after watering. You will then start to be able to gauge how heavy the soil is when it is in need of water.

Your watering schedule should change throughout the year depending on the growing seasons. Aloe Vera really don’t need much water at all during autumn and winter, once every month or two should be plenty and will help you avoid brown leaves!

Brown leaves can indicate poor drainage

Sometimes it may not be your watering schedule that is killing your plant and causing brown leaves on your Aloe Vera, but the poor draining of the soil and pot. You can very easily increase the amount of drainage in your plant’s soil by mixing in a small amount of perlite, this will make it far easier for water to flow through and out of the drainage holes of your pots (you should also check to make sure your pots have drainage holes and punch some in/replace the pot if it doesn’t). Another easy step is to add a few small stones/pebbles to bottom of your pots, this helps in making sure that the drainage holes are never blocked by soil.

Although clay or terracotta pots can be a little bit more expensive or breakable, their upsides are much more than just the aesthetic. The clay they’re made of is permeable which means that some of the water in your soil can evaporate through the sides of the pot. This isn’t the case for the plastic pots that most use, which instead hold in all of that moisture. So sometimes it is worth investing a little more to make sure that the roots of your Aloe Vera are not sitting in too much moisture.

Underwatering can also lead to brown Aloe Vera leaves

Like overwatering, too little water can also be harmful to your Aloe Vera. Although it won’t die on you suddenly if you forget to water it every once in a while, or make it go a little longer without water whilst you are on holiday, consistent underwatering will start to have an impact on your plant’s health and cause brown leaves. If you notice that you plant’s leaves are turning try and crispy (usually starting from the tips) it may be due to underwatering, as it prioritises new healthy growth over its older leaves.

Stick a finger in the top few centimetres of the soil to check the moisture. You can also try lifting your Aloe as we mentioned earlier to see it if feels particularly light. If you find that your plant feels very dry, water it a little every other few days over the course of a few weeks. Your first instinct might be to give it loads of water straight away but this can actually be harmful to your plant if the soil goes from one extreme to the other. Instead, you want to reintroduce frequent watering for a few weeks and this should solve the problem.

Make sure your Aloe Vera isn’t exposed to cold air

Cold temperatures and drafts can also be very harmful to your Aloe Vera. Make sure your plant is not placed near doors or windows that may be drafty. Even though the temperature of your home may be perfect for your plant and it is receiving a lot of sunlight, the drafts coming in from outside may be colder and harm your plant’s health and cause the leaves to turn slightly brown. You can always pick up a digital thermometer to keep track of the different temperatures in your home.

It may also be experiencing heat shock if moved to a new spot. Make sure that you do not move your plant to a particularly sunny spot, if it was previously in a more shady area of the room. This intense heat for longer periods of the day can cause browning of the leaves.

Intense sunlight can cause brown leaves

Your Aloe Vera may also be turning brown due to it getting too much direct sunlight. Aloe Vera plants do like areas with bright light, but it needs to be indirect. South-facing windows can give your plant too much direct light so try moving them to a different window. You need to also watch out a little more in summer when the sun is a lot stronger for more of the day. It is best to move your plants a little further away from the window in warmer months to avoid any leaf burn.

You can tell if your Aloe Vera is receiving too much sunlight if it is showing sights of sunspots. These are brown spots that start to show up across each leaf. Unfortunately, once the leaves have been burnt by the sun, there is no going back. Relocating your plant should however mean it starts to produce healthy new growth.

You might be over-fertilising your Aloe Vera

Aloe Vera Plants don’t need regular fertilisation, in fact they don’t need fertilising at all if you don’t want to. Once a year, in Springtime, is around what we recommend if you do want to fertilise your plant. Make sure that you don’t at all during the dormant months.

If you are fertilising your plant more regularly, it may be causing damage to the main root system which over time could kill your plant. As well as reducing the frequency of fertilisation, try to use a diluted water-soluble fertiliser on your plant to ensure that it does not cause any shock or damage to the plant. Remember you can also skip the fertiliser part altogether, we don’t tend to add anything to the water for our Aloe Vera and they still produce a lot of healthy growth whilst avoiding brown leaves.

Check for a pest infestation on your Aloe

A slightly less common reason why your Aloe Vera may be turning brown is a pest infestation. It can happen that pests such as mealybugs, spider mites and scale insects take hold of your plant.

If you find pests on your plant we recommend giving the whole plant a shower. Keep the shower pressure quite low so not to damage the leaves any further. Alternatively, wash down each leaf with soapy warm water and replace all of the soil to get rid of the pests. You should also treat your plant with an organic insecticide to fight the infestation.

Make sure to check over your other plants in the room to see if any other plants have pests. Keep your Aloe Vera (and other infected plants) a good distance away from any of your other houseplants as you don’t want the pests to spread. if the leaves are quite close then they can jump and crawl between the leaves and infest your entire urban jungle.

Aloe Vera plants can be quite sensitive to their environment and care and are by no means the ‘easiest’ houseplant. Whilst overwatering is usually the main issue, it is important to go through the list and double-check nothing else is causing your Aloe Vera to get brown leaves. Once you have found the perfect spot for your plant, and get into a good watering routine, you should have no problems keeping it alive!

Those are the most common reasons why Aloe Vera plants develop brown leaves. It’s important to diagnose the issue as soon as you spot the warning signs as if not treated, it could lead to your Aloe Vera being unsavable.

You might choose to propagate your Aloe Vera just to make sure that you can save at least some of the healthy parts.

Check out our Aloe Vera care guide for more information on how to keep your plants thriving.

Fiddle and Thorn is a participant in the Amazon Services LLC Associates Program, an affiliate advertising program designed to provide a means for sites to earn advertising fees by advertising and linking to Amazon.com

Take our houseplant survey!

Quickly respond to our 30 second houseplant survey and get 75% off our Complete Houseplant Care eBook!

Take the Survey

No thanks…

Why is my Aloe Vera soft?

Last Updated: April 1, 2022

Aloe Vera plants are a great, easy-to-keep succulent that needs very little attention. But this doesn’t mean they don’t come with their own set of unique problems and sensitivities. Soft, mushy and drooping Aloe Veras is quite a common issue among plant parents and it can be pretty heartbreaking. But don’t worry, we have looked into what you can do to help your Aloe Vera get back to full health, as well as prevent it from going soft again in future.

Overwatering is the most common cause of soft Aloe Veras

Aloe Vera’s are a species of succulent that is very used to desert conditions. They store water in their roots and leaves so don’t require frequent watering at all. Too much water can cause the leaves and roots to rot which you’ll notice in the form of soft mushy leaves. This is because your plant is trying to store too much water and the leaves can sometimes even burst. Overwatering is the first place to start when diagnosing a soft Aloe Vera plant because it’s very easy to do (even by the most experienced plant parents). We recommend watering your Aloe Vera once every 3-4 weeks in summer and every other month during the cooler darker months.

Regardless of the time of year, you must let your Aloe Vera’s potting mix dry out fully before watering again. There are a few simple ways to figure out if it’s time to water your Aloe Vera or if there is still some moisture in the pot:

Finger/Chopstick Method

Stick a finger into the soil to see how much moisture is still in the potting mix. If there is still moisture, you’ll notice soil sticking to your finger when you take it out. If the soil is bone dry then it will just be like dust which will fall off your finger. This is when you know it’s safe for you to water your Aloe Vera again and reduce the risk of root rot and soft leaves. If you don’t want to get your hands dirty then you can also use a chopstick where the same rule applies. If the chopstick comes out clean then it’s time for you to water.

Do I risk damaging the root system if I stick my finger in the soil?

As long as you are careful and don’t prod around too much, then you shouldn’t cause too many issues. If you notice a large root in your way, try and pick a different spot rather than forcing the chopstick in as this will break the root and can harm your plant.

Picking up your Aloe Vera

Another way you can check the moisture levels in the soil is by regularly picking up your Aloe Vera (before and after watering). This is a great method to get to know your plants and over time you’ll have a really clear gauge as to when they need watering. The lighter the plant is, the less water there is in the soil – pretty simple! Luckily, Aloe Vera plants are very light as they don’t have thick stems or roots but don’t try this with bigger plants as you don’t want to cause injury.

Use a moisture meter

If you don’t want to rely on estimations and want to know for certain if your Aloe Vera needs watering, then a moisture meter is the way to go. You simply pop it in the soil and it will give you a reading of the moisture in the soil. They are super affordable little gadgets that are a great investment for every budding plant parent!

Take your Aloe Vera out of its pot

If your Aloe Vera is really suffering from soft leaves all over, then the potting mix is probably very waterlogged. In this case, you want to take the plant out of its pot to inspect the root system and replace the potting mix entirely. This isn’t a great method for checking moisture levels each and every time you water but is useful for checking for any major issues.

Drainage issues can also cause soft leaves

Sometimes it may not be your watering schedule that is killing your Aloe Vera, but poor (or a lack of) drainage in the pot. But don’t worry, this is a really simple problem to fix and there are a few great ways to do it:

Add perlite into the potting mix

You can very easily increase the amount of drainage for your Aloe Vera by mixing in a small amount of perlite, this will make it far easier for water to flow through and out of the drainage holes of your pots. Perlite is a lightweight, white material that not only helps drainage but also allows for more aeration in the soil which delivers more oxygen to your plants.

Ensure your pot has drainage holes

It’s very important that all of your plant pots have drainage holes so that any excess water can flow out of the pot into either the planter or onto the saucer. This is a great step to preventing root rot and soft Aloe Vera leaves as your plant won’t be sat in waterlogged soil.

Add pebbles to the bottom of your pot

Another easy step to help with drainage is to add a few small stones or pebbles to the bottom of your pots, this helps to make sure that the drainage holes are never blocked by soil or any loose debris which may stop excess water flowing out.

Use clay/ terracotta pots

Although clay or terracotta pots can be a little bit more expensive and breakable, their upsides are much more than just the aesthetic. The clay they’re made of is permeable which means that some of the water in your soil can evaporate through the sides of the pot. This isn’t the case for the plastic pots that most use, which just hold in all of that moisture. So sometimes it is worth investing a little more to make sure that the roots of your Aloe Vera aren’t sitting in too much moisture as this will help avoid soft mushy leaves.

Incorrect watering technique can lead to soft Aloe leaves

Watering the right amount, and making sure your pot has good drainage will only stop soft leaves if you are actually watering in the right way. You can choose to water your Aloe Vera from the top or bottom, but it’s really important that if you are watering from the top down that you don’t get the leaves wet. Soggy leaves can cause leaf rot, especially if they are still damp overnight when temperatures drop. When watering, make sure you water as close to the soil as possible, avoiding the leaves.

Not enough light can cause mushy leaves

As we’ve mentioned before, Aloe Vera plants are made for the desert so can struggle sometimes indoors. With that in mind, it’s important that they get enough bright sunlight during the day. If you notice that your Aloe Vera’s leaves are bending in half, folding or wrinkling in places and generally becoming quite soft, then a lack of light may be the cause. If you can’t spot any issues with the potting mix/watering routine, and your Aloe Vera is sat in a fairly dark spot then your plant may need more light.

To solve this issue, place your Aloe Vera nearer to a bright window. If you’re in the Northern Hemisphere, this is preferably a south facing window (and the reverse if you live in the Southern Hemisphere). This will mean your Aloe Vera is getting a good amount of light each day. During winter, when the sun is weaker and the days are shorter, you should place your Aloe Vera right up to the window. There is a reduced risk of sunburn during winter so maximise on the sunlight during these months.

If you aren’t sure about what light levels are best for your plant, or even how much light there is in different areas of your home, then we recommend getting a light meter. These affordable gadgets are life-savers when it comes to worrying about a lack of / or too much sunlight and are also great for finding what new plants will fit into your space. We couldn’t recommend them enough!

Sunburn is also a possible cause of soft Aloe leaves

Although Aloe Vera plants do love high levels of sunlight, there is such thing as too much light – especially in summer! The moisture in the leaves can actually make them quite susceptible to burning when exposed to intense direct light for long periods of time. This is especially common when the plants are on window sills and are maybe touching the hot glass as it’s been heated throughout the day.

Sunburn will show up as large soft patches which are sometimes brown or discoloured. It will show up as quite patchy on your plant, starting with the leaves closest to the light. If you suspect sunburn is the cause of your Aloe Vera’s soft, mushy leaves then we recommend moving your plant a little further away from the window or to a slightly shadier spot. It’s all about getting the right balance as too little light isn’t good for your plant either.

Should I trim off my Aloe Vera’s soft, mushy leaves?

We do recommend trimming away the worst affected soft leaves on your Aloe Vera as this will encourage your plant to produce new healthy growth. If you keep them attached, your plant will waste a lot of energy trying to keep these dying leaves alive. So prune off the soft leaves and roots to give your plant the best shot at survival!

Those are the most common reasons why your Aloe Vera has soft and mushy leaves. If you have caught the problem early and adjusted its environment/care there is no reason why you can’t bring your plant back to full health. If the problem has spread widely across the plant then propagation may be a good way to save some of the healthy plant. However, if your whole Aloe Vera has turned soft/ mushy then there may not be a way you can save it at this stage.

To find out more about general care, other common problems and propagation methods, visit our complete Aloe Vera care guide.

Fiddle and Thorn is a participant in the Amazon Services LLC Associates Program, an affiliate advertising program designed to provide a means for sites to earn advertising fees by advertising and linking to Amazon.com

Take our houseplant survey!

Quickly respond to our 30 second houseplant survey and get 75% off our Complete Houseplant Care eBook!

Take the Survey

No thanks…

Why is my Aloe Vera dying? Causes and Solutions

Last Updated: April 1, 2022

Most people will tell you that Aloe Vera plants are the easiest houseplant to take care of, but this can actually often be deceiving. If placed in the right environment, aloe veras will thrive without much care. However, sometimes the smallest mistakes can mean it is game-over. The main causes why your Aloe Vera might be dying are overwatering, drainage issues, cold temperatures and leaf burn.

Overwatering might be why your Aloe Vera is dying

If you notice that your Aloe Vera’s leaves are turning brown and mushy, it is most likely due to overwatering. This is actually the most common reason why aloe vera will die, sometimes it is difficult to just leave your plants alone, we don’t want to feel as though we are neglecting them but sometimes too much love is harmful! Aloe Vera plants don’t need to be watered very often, we go for once every 10-14 days in summer and even less in winter. They prefer dry soil so it is better to steer on the cautious side when watering.

Overwatering can very quickly lead to root rot which is very harmful to your Aloe and cause it to die. Not only does it cause the leaves to turn yellow and brown, but it will also mean that the plant is unable to take up water or nutrients meaning your plant may begin to die pretty quickly. If you think that you may have overwatered your Aloe Vera, in order to revive it, it’s best to replace the soil straight away rather than just sit and wait for it to dry up over time.

Make sure to check the moisture in the soil before you water your aloe vera. There are two really easy ways to make sure that it definitely needs water. First check the moisture at the top of the soil, if it is still damp then wait at least a week before watering. You can also lift up your aloe plant to check the weight of the plant before and after watering. You will then start to be able to gauge how heavy the soil is when it is in need of water.

Your watering schedule should change throughout the year depending on the growing seasons. Aloe vera really don’t need much water at all during autumn and winter, once a month should be plenty!

Drainage issues can also harm your Aloe Vera

Sometimes it may not be your watering schedule that is killing your aloe vera, but the poor draining of the soil and pot. You can very easily increase the amount of drainage in your aloe soil by mixing in a small amount of perlite, this will make it far easier for water to flow through and out of the drainage holes of your pots (you should also check to make sure your pots have drainage holes). Another easy step is to add a few small stones or pebbles to bottom of your pots, this helps in making sure that the drainage holes are never blocked by soil or any loose debris. This will help avoid waterlogged soil and can go a long way to reviving your dying Aloe Vera.

A dying Aloe Vera can indicate cold temperatures

Cold temperatures and drafts can also be very harmful to your aloe vera. Make sure your aloe is not placed near doors or windows that may be drafty. Even though the temperature of your home may be perfect for your aloe and it is receiving a lot of sunlight, the drafts coming in from outside may be colder and harm your aloe’s health. You can always pick up a digital thermometer to keep track of the different temperatures in your home and prevent your Aloe Vera from dying.

Leaf burn might be why your Aloe is dying

If your aloe vera’s leaves are turning brown, it may also be because it is getting too much direct sunlight. This can cause the leaves to burn, from which they will not be able to recover.

Aloe vera plants do like areas with bright light, but it needs to be indirect. South-facing windows can give your aloe too much direct light so try moving them to a different window. You need to also watch out a little more in summer when the sun is a lot stronger for more of the day. It is best to move your plants a little further away from the window in warmer months to avoid any leaf burn.

Aloe veras can be a little sensitive to their surroundings and are by no means the ‘easiest’ houseplant. Whilst overwatering is usually the main reason these plants die, it is important to go through the list and double-check nothing else is causing your aloe vera to get brown leaves or wilt. Once you have found the perfect spot for your aloe, and get into a good watering routine, you should have no problems reviving it!

Learn more about how to keep your plant happy in our Aloe Vera care guide.

Fiddle and Thorn is a participant in the Amazon Services LLC Associates Program, an affiliate advertising program designed to provide a means for sites to earn advertising fees by advertising and linking to Amazon.com

Take our houseplant survey!

Quickly respond to our 30 second houseplant survey and get 75% off our Complete Houseplant Care eBook!

Take the Survey

No thanks…

Why is my Alocasia Dragon Scale plant losing leaves?

Last Updated: April 1, 2022

Alocasia Dragon Scale can be pretty hard to come by so when they start losing some of their leaves, it can be pretty worrying! If your Alocasia Dragon Scale is losing the odd leaf here and there then it might just be caused by the natural ageing process, where plants lose some of their oldest leaves in favour of growing new larger ones. However, if the rate of leaf drop is quite rapid, or is increasing, then there is definitely something wrong with the care or environment.

Below we will go through each of the main reasons why Alocasia Dragon Scale plants lose their leaves, so you can figure out what is wrong with your plant and how to go about treating the issue and preventing it from damaging your plant any further.

Shock and Stress can cause temporary leaf drop

You may think that only cold temperatures can shock your Alocasia Dragon Scale but there are some other factors that can cause them stress. In fact, moving your plant to a new spot in your home (or a new home), as well as repotting and propagation can all cause your plant to be a little stressed. They are a little bit like humans in that respect!

If your Alocasia Dragon Scale is a bit stressed out then this might be causing them to lose a few leaves. It shouldn’t be a major leaf drop, only a few depending on the size and maturity of the plant. This shock should wear off after a few days and as long as the environment is right for your plant, you shouldn’t see any continuous leaf drop. Keep an eye on the rate of leaves falling off your plant to check that it’s not increasing.

If the problem persists for a few weeks after moving or repotting your Alocasia Dragon Scale and your plant is still losing leaves, then you may need to check the soil for any damaged roots and monitor how much light it is getting throughout the day to find another reason.

Overwatering can cause leaves to fall off

As with a lot of things in the houseplant world, proper watering can be one of the biggest issues and it is one of the most common reasons why Alocasia Dragon Scale plants lose their leaves.

We always tend to go for a little and often view towards watering and this is especially the case with Alocasia Dragon Scale plants as they like to have some moisture in the soil. It’s a real balance between not over or underwatering and it can be quite tricky to get right.

If your Alocasia Dragon Scale is getting too much water consistently, then this will eventually cause the roots to rot. This means the leaves will start to fall off and the whole plant becomes quite unstable and soft.

If you suspect overwatering, take your plant out of its pot and see how much moisture is in the soil. If your suspicions are right and your Alocasia Dragon Scale is suffering from waterlogged soil, replace it immediately with fresh, dry, well-draining potting mix. You can also use a moisture meter to see when your Alocasia Dragon Scale needs watering. You just pop them into the soil and it’ll show you how damp or dry the potting mix is.

Another thing you can do to avoid overwatering is use a self-watering pot or self-watering globes. They release water to your Alocasia Dragon Scale only when it needs it. They are great for going on holiday too so a good investment for every plant parent.

Underwatering can also cause leaf drop

On the other scale to overwatering, if your Alocasia Dragon Scale has consistently bone dry soil, then the roots will crisp up and the leaves will fall off your plant. Once the root system is damaged (whether that be too much or too little water), it means your plant can’t sustain its healthy growth and it will need to lose leaves to stay alive. Alocasia Dragon Scale plants will forgive you if you occasionally forget to water them but they will struggle with dry soil for weeks and weeks.

It’s important to ensure that your Alocasia Dragon Scale is actually being underwatered before you change anything about your care routine. As you’ve seen above, overwatering can also cause leaves to fall off your plant (and spoiler alert, it can cause a whole range of other issues beyond that too) so you don’t want to start watering it more if it doesn’t need it.

To confirm that underwatering is causing your Alocasia Dragon Scale to lose leaves, take your Alocasia Dragon Scale out of the pot to inspect how the potting mix feels. If underwatered, the potting mix will fall apart and feel very sand-like. If the problem has been going on for a while (which leaf drop suggests), then you should also be able to see some of the roots crisping up.

If this is the case, slowly reintroduce water to your plant rather than drowning it (as you now know, they can go into shock if there is a sudden change in environment). A little bit of water once a day for a week should get your Alocasia Dragon Scale back on track and prevent it from losing any more leaves. In future, adjust your watering schedule so you are watering your plant more frequently!

Natural ageing

If it’s only the oldest bottom leaves on your Alocasia Dragon Scale that are falling off, then this may be natural ageing. As your plant matures, your Alocasia Dragon Scale will drop the occasional leaf to prioritise its efforts on growing new bigger leaves. This is a natural process and happens to most houseplants so is nothing to be concerned about.

We do recommend keeping track of how many leaves your Alocasia Dragon Scale is losing. It should only be a couple every few months. If your plant is losing more than this, or the rate of leaves falling off is increasing, then this suggests there is something wrong with your Alocasia Dragon Scale, most likely watering issues. We would revisit the issues listed above to see what is wrong with your plant.

Those are the most common problems that can cause your Alocasia Dragon Scale to lose leaves. Luckily, a little bit of stress of natural ageing is nothing to worry about but it’s important that you treat any watering issues immediately before they kill your plant completely.

If the issue has progressed as far as leaves falling off then it does mean the problem has been going on for quite a while and getting your plant back to tip-top health might be quite a challenge. But don’t give up, we have seen plants bounce back from having just one leaf, sometimes even just a node so, with the right care and environment, you should be able to revive your Alocasia Dragon Scale.

Check out our Alocasia Dragon Scale care guide for more information on how to best care for your plant.

Fiddle and Thorn is a participant in the Amazon Services LLC Associates Program, an affiliate advertising program designed to provide a means for sites to earn advertising fees by advertising and linking to Amazon.com

Take our houseplant survey!

Quickly respond to our 30 second houseplant survey and get 75% off our Complete Houseplant Care eBook!

Take the Survey

No thanks…

Why is my Alocasia Dragon Scale dying?

Last Updated: August 26, 2022

One of the rarer Alocasia plant types, the Alocasia Dragon Scale can be an expensive one to replace so it’s all the more concerning when it starts to show signs it’s dying. You want to make the right diagnosis quickly so that you can start treating the issue as soon as possible. The longer the problem goes on, the trickier it can be to successfully revive it.

Below you’ll find an outline of all the most common reasons why your Alocasia Dragon Scale might be dying, as well as treatment methods and how to prevent it in future.

A dying Alocasia Dragon Scale can indicate overwatering

If the leaves on your Alocasia Dragon Scale have turned yellow and are quite limp then your plant might be dying due to overwatering. Too much moisture in the soil will mean that the roots will have started to rot and become damaged. This stops your plant from getting any water or nutrients which is why it has started to die.

Alocasia Dragon Scale plants like some moisture in the soil but hate it when it’s waterlogged and soggy. This means that getting the right balance can be tricky as you don’t want the soil to be bone dry for extended periods of time as it can cause the roots to crisp up (more on that below).

Before making any changes to how you water, check the soil to see if you are right in thinking your Alocasia Dragon Scale is dying due to being overwatered. If the soil is clumpy and waterlogged replace it immediately with new fresh and dry potting mix. This will give the roots the best chance at survival and help to revive your dying plant as waiting for it to naturally dry out simply risks more damage.

Too little water can also cause your Alocasia Dragon Scale to start dying

Like overwatering, too little water can also be harmful to your Alocasia Dragon Scale. Although it won’t die on you suddenly if you forget to water it every once in a while, if the problem goes on for several weeks, then this will start to have an impact on your plant. Underwatering will cause the roots to become crispy which prevents your plant from getting the needed oxygen, moisture and nutrients from the potting mix, which is why it will start dying, unfortunately.

The signs to look out for to suggest your Alocasia Dragon Scale is dying due to underwatering are; light brown spots, patches or entire leaves, leaves falling off your plant, bone dry potting mix and crispy roots and the soil coming away from the pot at the sides.

To solve the issue and revive your dying plant, your first instinct might be to give it loads of water straight away but this can actually be harmful to your Alocasia Dragon Scale if the soil goes from one extreme to the other. Yes, plants get shocked too if there is a sudden and dramatic change in their environment! Instead, you want to reintroduce frequent watering for a week or two and this should solve the problem.

Then moving forward, it’s important that you increase the frequency of your waterings to ensure the soil doesn’t fully dry out for long periods of time.

Direct sunlight might also be to blame

Another problem that may be causing your Alocasia Dragon Scale to start dying on you is too much direct sunlight. They thrive in bright but indirect light and if they are placed close to a window during summer, the intense sunlight can scorch their beautiful leaves. This is unfortunately irreversible so we recommend trimming away any burnt leaves to help revive your dying Alocasia Dragon Scale.

To solve this issue and revive your dying Alocasia Dragon Scale, move your plant a little further away from the windows during the summer so it gets less of that intense light directly falling onto its leaves. It’s a good habit to get into to move your plants around a bit depending on the seasons so that they are getting the right light level. However, just make sure that other factors such as humidity and temperature are still in the ideal ranges.

Low sunlight levels can also cause a dying Alocasia Dragon Scale

Although (as we’ve just been through) direct light can cause leaf burn, not enough sunlight can also be really damaging to your Alocasia Dragon Scale and might be why it’s dying.

If you think that your Alocasia Dragon Scale isn’t getting enough sunlight then move it to a brighter spot in the home and monitor how it reacts. You might also need to watch out for other environmental demands as a result of moving your plant to a spot with more light as the soil may dry out quicker meaning they need more frequent watering and maybe more misting too.

Low humidity levels might be to blame

Another reason why your Alocasia Dragon Scale is dying could be a lack of humidity as they struggle in homes with dry air. This can be especially damaging during the winter months when we often have the heating on for several hours each day.

Dry air will cause the leaves to go crispy, become limp and droop down. Here are a few ways you can increase the humidity and revive your dying Alocasia Dragon Scale:

  1. Misting the leaves regularly

    We recommend getting into the habit of misting your Alocasia Dragon Scale a few times per week to boost the humidity. In winter it’s important that if you do mist that it’s done mid-morning so that you allow enough time for the water droplets to evaporate before temperatures drop at night. Wet and cold leaves are the perfect combo for leaf rot.

  2. Build a pebble tray

    Place your plant over a tray of pebbles with fresh water over the top. Over the day water from the tray will evaporate giving your dying plant a good humidity boost.

  3. Move your Alocasia Dragon Scale to a different room

    The running water from your showers and the steam from cooking make bathrooms and kitchens the perfect place for humidity-loving houseplants like the Alocasia Dragon Scale. Just make sure there is enough sunlight and your plant will love it.

  4. Buy a humidifier

    They’re relatively affordable little devices which keep a consistent humidity level in your home. Some humidifiers have features built-in so you can put it on a schedule or make it automatically turn off once it has reached a certain level.

A dying Alocasia Dragon Scale can also indicate pests

Although fairly rare on plants that don’t spend any of the year outdoors, Alocasia Dragon Scales can begin to die if they are infested with pests. Insects such as mealybugs or spider mites can take hold of the plant and suck on their nutrients which will cause leaf damage. Over time these leaves will begin to fall off the plant.

Most of the time you can spot the pests crawling on the leaves which makes confirming the problem fairly easy (though using a magnifying glass will help confirm the issue). Other signs of pests are brown or yellow spots, small holes in the leaves and white webbing/powder across the stems.

Although spotting pests isn’t always difficult, treating them can be a bit of a pain. Check out our guide on how to treat and prevent spider mites on your plant.

Those are the most common reasons why an Alocasia Dragon Scale might begin dying. Once you have made the right changes to the care or environment of your plant, it’s crucial to keep a close eye on it to ensure things aren’t getting worse.

Take a look through our Alocasia Dragon Scale care guide for more details on how to keep your plant from dying in future!

Fiddle and Thorn is a participant in the Amazon Services LLC Associates Program, an affiliate advertising program designed to provide a means for sites to earn advertising fees by advertising and linking to Amazon.com

Take our houseplant survey!

Quickly respond to our 30 second houseplant survey and get 75% off our Complete Houseplant Care eBook!

Take the Survey

No thanks…

Why is my Alocasia Dragon Scale Drooping? Causes and How to Fix it!

Last Updated: April 1, 2022

If you have noticed that the leaves and stems on your Alocasia Dragon Scale have started to droop, then this means there is definitely something wrong with your plant. Drooping is usually accompanied by signs of another problem, such as brown or yellow leaves but if drooping is the only sign of unhappiness, it may just mean that you have caught the issue early. This would be ideal as it means fixing the issue should be a lot easier.

Below we will go through each of the different factors that lead to your Alocasia Dragon Scale starting to droop. We will also cover how to treat the issue and prevent it from causing any more drooping leaves in future.

Too much water is the most common cause of drooping Alocasia Dragon Scale leaves

One of the main reasons why Alocasia Dragon Scale plants start to droop is too much moisture in the potting mix. It’s super easy to accidentally overwater your plants as it can be difficult to know how much and how often to water them.

If you have been overwatering your Alocasia Dragon Scale it can cause quite severe problems fairly quickly, this usually begins with drooping leaves but they can develop brown or yellow leaves or drop them altogether. If drooping leaves are the only thing that seems to be wrong with your Alocasia Dragon Scale, then this is good news – it means that the problem is in the early stages and should be easier to fix.

The reason why overwatering is so harmful to your Alocasia Dragon Scale is that it causes waterlogged soil which cuts off air circulation in the potting mix. This rots the roots as they can’t breathe and it prevents your plant from taking in any oxygen and nutrients. It also means that the roots can’t physically support the plant anymore. The combination of these two issues is why overwatering will often cause your Alocasia Dragon Scale to droop its leaves and stems.

How do I know if overwatering is the cause of the droopy leaves?

Before you take any drastic measures, you need to be 100% sure that overwatering is the cause of the drooping leaves. The first thing to do is to take your plant out of its pot which will allow you to closely inspect the potting mix and root system. If the potting mix feels soggy and clumpy, then this means your plant has been overwatered. If the roots are soft and mushy it suggests that this issue has been going on for a while and might take a bit longer for your plant to return to normal.

If your plant is very droopy and soft and you worry about damaging it further if you take it out of the pot, then use a moisture meter or the chopstick method to check the moisture.

How do I fix an overwatered Alocasia Dragon Scale?

  1. The first step is to replace the potting mix.

    It’s crucial that you switch out any waterlogged potting mix with fresh, high-quality soil. Don’t wait for the soil to dry out on its own as this risks causing more damage to an already rotting root system and resulting in your Alocasia Dragon Scale drooping even more.

  2. Then trim off any soft and mushy roots/ leaves.

    If your Alocasia Dragon Scale is trying to keep rotting leaves and roots alive, it will be wasting valuable energy that it could be using to recover and produce new growth. Use clean, sharp scissors to cut away dying growth. Never pull the roots or leaves from the plant as this risks damaging the plant further.

  3. Adjust your watering schedule

    It’s important to take a look at how often you were watering your Alocasia Dragon Scale, and how much water you were giving it each time. Cut back on one of these factors to ensure the problem doesn’t happen again. We also recommend checking the moisture level in the soil before you water to ensure it actually needs it. Moisture meters are great for this but you can also use the chopstick method or start lifting your plant to get a sense of how much it weighs when it needs water.

Underwatering can also cause droopy Alocasia Dragon Scale leaves

Another common reason why Alocasia Dragon Scale’s leaves droop down is consistent underwatering. Whilst your Alocasia Dragon Scale will forgive you for the odd time you forget to water it, over time if it doesn’t receive enough water then your Alocasia Dragon Scale will droop down and develop other issues. Drooping leaves tend to be the first sign of unhappiness so if you have caught the problem at this stage it’s good news as reviving your Alocasia Dragon Scale will be a lot easier.

How do I know if underwatering is the cause of the droopy leaves?

There are a few methods you can use to get an idea of how much moisture is in the soil of your Alocasia Dragon Scale:

  1. Chopstick Method

    Firstly one method we often use is the chopstick method where you stick a chopstick into the soil. If the soil is still soggy, some will stick to the chopstick as you pull it out. If the potting mix is dry, then your chopstick will come out pretty clean.

    A lot of plant parents ask us if this method won’t cause too much damage to the root system but as long as you are careful and don’t prod around too much, it should be absolutely fine. If you notice a large root in your way, try and pick a different spot rather than forcing the chopstick through as this will break the root which you want to avoid.

  2. Lifting your Alocasia Dragon Scale

    Another way you can check the moisture levels in the soil of your Alocasia Dragon Scale is by regularly picking up your plant. After doing this before and after watering a few times, you’ll get an understanding of how heavy/light your plant is when it needs water and when it doesn’t. We do only recommend this for fairly small plants though as you don’t want to hurt your back.

  3. Use a moisture meter

    If you want to take the guesswork out of knowing when to water your Alocasia Dragon Scale (and prevent any more drooping leaves) we recommend you use a moisture meter. They are super affordable little gadgets that you pop into the soil and they will tell you how moist the soil is.

How to fix an underwatered Alocasia Dragon Scale

If your Alocasia Dragon Scale’s leaves are drooping due to a lack of water, then you need to make sure to reintroduce watering in the right way. You might be tempted to drown your plant in lots of water to compensate for the lack of it. However, plants can get quite stressed when their environment changes very suddenly so we recommend giving your Alocasia Dragon Scale a bit of water once a day for a week.

A drooping Alocasia Dragon Scale can also be caused by low humidity levels

If there aren’t any issues with how much you are watering your Alocasia Dragon Scale, and the root system looks healthy, then the drooping leaves on your Alocasia Dragon Scale could be due to a lack of humidity.

Alocasia Dragon Scales are native to the tropics of Borneo so they like quite humid environments and can struggle in homes with dry air. Although we could never reproduce the humidity levels found in the tropics (and if we could, it would be very uncomfortable for us to live in), there are a few things we can do to boost the humidity and prevent more drooping leaves and stems.

  1. Misting your Alocasia Dragon Scale

    One of the simplest ways to increase the humidity for your Alocasia Dragon Scale is to mist them with a spray bottle a couple of times a week. We recommend you do this in the morning as it leaves enough time for the water to evaporate throughout the day. If the leaves are still soggy when it gets colder at night, it can lead to the leaf rotting.

  2. Give your Alocasia Dragon Scale a shower

    To quickly raise the humidity for your Alocasia Dragon Scale, you can always give them a quick once over in the shower. This is quite a short term solution but is also great at removing dust that has built up on the leaves.

  3. Buy a humidifier

    They’re relatively affordable little devices and they make keeping a consistent humidity level so much easier. They are a great investment for every plant parent!

Drooping Alocasia Dragon Scale leaves can also indicate temperature issues

Alocasia Dragon Scale plants are native to the tropics so thrive in warm temperatures meaning they’ll struggle in homes with cold drafts. Although the temperature might feel fine for you, if your Alocasia Dragon Scale is close to any doors or windows that are drafty, or if they are close to an AC vent, then this stream of cold air can be quite harmful to your Alocasia Dragon Scale and cause it to droop.

Cold air causes a few different problems for your Alocasia Dragon Scale. Firstly, it slows down the rate at which the potting mix dries out (which makes root rot a more serious issue). And secondly, cold air slows down the rate of enzyme activity which means your Alocasia Dragon Scale will start to droop.

Make sure that you draft proof any windows or doors that are close to your Alocasia Dragon Scale (and other heat-loving houseplants) as well as move them away from any air conditioning vents as these can be quite damaging to your plants during summer.

Those are the main reasons why your Alocasia Dragon Scale has become quite droopy. It’s important to act quickly once you notice your plant is drooping as this is commonly an early warning sign. The quicker you take measures to stop the issue, the quicker and more successful you will be at bringing your beloved Alocasia Dragon Scale back to its usual self.

To learn more about how to best care for your plant, check out our Alocasia Dragon Scale care guide.

Fiddle and Thorn is a participant in the Amazon Services LLC Associates Program, an affiliate advertising program designed to provide a means for sites to earn advertising fees by advertising and linking to Amazon.com

Take our houseplant survey!

Quickly respond to our 30 second houseplant survey and get 75% off our Complete Houseplant Care eBook!

Take the Survey

No thanks…

Why is my Air Plant turning brown? 6 Causes and Solutions

Last Updated: May 29, 2022

Although Air Plants are pretty unique compared to the usual houseplants, as they don’t need soil to grow in, this doesn’t mean they are exempt from the usual problems. Brown leaves, and brown leaf tips are quite common on Air Plants as their sensitive nature makes them react quite dramatically to their environment.

In the post below, we will be going over the different causes of brown leaves and brown leaf tips on Air Plants.

Too much sunlight

Your Air Plant may be developing brown leaves due to it receiving too much direct sunlight. Air Plants do like areas with bright light, but it needs to be indirect. South-facing windows can give your Air Plant too much direct light during the warmest summer months, so try moving them to a different window. In those hottest months, it’s also a good idea to move your Air Plant a little further away from the window to avoid any leaf burn.

You can tell if your Air Plant is receiving too much sunlight if it is showing sights of sunspots. These are brown spots that start to show up across each leaf, rather than the base of the plant turning brown, for example. Unfortunately, once the leaves have been burnt by the sun, there is no going back. Relocating your Air Plant should however mean it starts to produce healthy new growth.

Underwatering – increased concave of the plant

This is another common cause of brown leaves on an Air Plant and can be spotted by an increased concave in your plant’s overall shape. Although Air Plants don’t need soil to grow, they do need water so must be misted and bathed regularly. If your Air Plant dries out, the leaves will start to turn brown and crispy.

Your initial thought might be to submerge your Air Plant in water for ages immediately to compensate for the lack of it. However, plants get shocked by rapid and sudden changes in their environment. Therefore drowning them in water is actually the wrong this to do. Instead, you want to mist the leaves twice a day for a few days, and then bathe your plant.

Overwatering

As with underwatering, too much water can also cause a whole range of issues for your Air Plant, including brown leaves. However, the appearance and feel of the leaf will be different from underwatering. The leaves will turn dark brown/black and look and feel a little softer, rather than dry and crispy.

Trim away all of the soggy leaves and let your plant recover. Hold off misting or bathing your Air Plant and after a few weeks, you should start to see your plant look a little healthier.

Make sure to adjust your care in the long term to avoid the problem happening again. Hold of the misting and bathing in winter as the risk of root rot is so much higher.


Over-fertilisation

Most generic plant foods and fertilisers will recommend a dosage for your plants, but it’s often far too much for an Air Plant and can result in the leaves turning brown. The best thing to do here is to try out feeding at half the recommended dosage and see how your Air Plant reacts. You may also be able to pick up some Air Plant specific fertiliser. If you notice any browning, remove the affected leaves, wash your Air Plant and hold off fertiliser for several months. Once you are ready to start fertilising again, do it carefully with a well-balanced fertiliser. Our plants have always liked the liquid fertiliser from Miracle Gro which is available on Amazon here.

Chemical Sensitivity

Air Plants can sometimes be sensitive when it comes to using tap water. If you live in an area with hard water then it means there is a higher level of fluoride, chlorine, salts and minerals in the water. Over time this can cause your plant to develop brown leaves or leaf tips.

If you don’t want to invest in a water purifying system (we don’t blame you as they are very expensive) then there are two free and easy ways you can solve this problem.

Leave the water 24 hours before watering

If you leave your watering can full of water out for a full day then most of the chemicals should evaporate leaving your tap water pure for your Air Plant.

Rainwater

Another method is to collect rainwater as the chemicals are much lower than the treated water that comes out of your tap.

It may take a little bit of time for the effects of this change to come through but it should prevent any further leaves on your Air Plant from turning brown.

Stress

Another potential cause of brown leaves on Air Plants is stress caused by a sudden change in the environment. If you have recently changed the care you are giving your Air Plant, or the environment it is in, this might be the reason why your Air Plant has brown leaves. As long as the care/environment is still right for your Air Plant, the initial shock will fade after a week or two and you shouldn’t see too many more brown leaves.

Those are the most common reasons why Air Plants develop brown leaves. If you have caught the problem early, then you should have quite a good chance of bringing it back to full health. However, if most of the plant has already turned brown, then reviving Air Plants at this stage can become more difficult.

Check out our Air Plant care guide for more information about how to care for your plant, as well as propagation tips and how to spot other common problems.

Fiddle and Thorn is a participant in the Amazon Services LLC Associates Program, an affiliate advertising program designed to provide a means for sites to earn advertising fees by advertising and linking to Amazon.com

Take our houseplant survey!

Quickly respond to our 30 second houseplant survey and get 75% off our Complete Houseplant Care eBook!

Take the Survey

No thanks…

Why is my African Milk Tree (Euphorbia Trigona) losing leaves?

Last Updated: May 18, 2022

These unique succulent plants (yes, they look like cacti but are actually succulents) are becoming more and more popular in the houseplant world and we are seeing them in houseplant shops a lot more regularly than a few years ago. African Milk Trees aren’t the hardest plant to look after but they can often suffer from leaf drop which is their most common way of saying something is wrong.

If you have noticed leaves falling off your African Milk Tree, then don’t worry because below we will be going through all of the different causes. We will also help you understand if and how to treat the problem and prevent it from happening again in future.

Natural leaf cycle can result in leaf drop

If you have noticed that your African Milk Tree is starting to lose leaves during autumn and winter, then this might simply be part of the natural growth cycle. African Milk Trees commonly drop quite a lot of their leaves during the dormant period to preserve energy. This is totally normal and is absolutely nothing to worry about. The leaves will start to grow back as spring appears.

You want to make sure, however, that no other factors are causing your African Milk Tree to lose leaves as if anything goes undiagnosed, it can lead to serious problems for your plant. Give your plant a good check-up to see if you spot any other signs of unhappiness, disease or anything else that might mean your plant is suffering.

Underwatering will lead to your plant losing leaves

If your African Milk Tree is losing leaves in the height of spring or summer, then it suggests that something else is wrong, in particular, to do with the watering. Funnily enough both over- and underwatering can lead to your African Milk Tree losing leaves. So it’s really important you figure out which is the cause as you don’t want to be adjusting your watering schedule in the wrong way.

Here’s how to spot if your African Milk Tree is underwatered:

  • Leaves are dry and crispy

    If the leaves that are falling off are very dry and crispy to touch and look quite dehydrated, then the problem is probably a lack of water.

  • The potting mix feels very dry

    An easy way to see if your African Milk Tree is losing leaves due to underwatering is by (very carefully) taking the plant out of its pot whilst inspecting the potting mix. It’s important you use gloves to do this as it can cause skin irritation and serious problems if accidentally ingested. If the soil feels very dry to touch, almost like dust, then your plant needs more water.

  • The soil is coming away from the sides of the pot

    This is a great method to be able to tell if your African Milk Tree is being underwatered just by looking at it. If you notice that the soil has compacted and is actually coming away from the sides of your pot, then it indicates that you need to increase watering and this may be the cause of your African Milk Tree losing leaves. This is a great tip to keep in mind for all of your plants as it can help to figure out when your plants are being underwatered.

  • Use a moisture meter

    This will help figure out how dry the potting mix is and if you need to water more to stop your African Milk Tree from losing any more leaves.

How do I fix an underwatered African Milk Tree?

Once you have figured out that your African Milk Tree is losing leaves due to underwatering, it’s important that you solve the issue properly and don’t cause any more damage to an already suffering plant. You might think that the best way would be to drown your African Milk Tree in water but this can actually cause your plant to go into shock if its environment suddenly changes.

Instead, to help your plant recover from the underwatering and prevent any more leavings from falling off your African Milk Tree, we recommend slowly reintroducing water by giving it a little bit once a day for a week. This will slowly dampen the potting mix.

Too much water can also cause leaves to fall off

If you notice your African Milk Tree is a little softer than usual, it might indicate that your plant is suffering from overwatering. This can also result in the entire plant being a little bit unstable so watch out for that too!

To figure out if overwatering is the cause of the loss of leaves on your African Milk Tree, check the moisture levels in the soil immediately. If the soil feels very waterlogged then replace it with fresh dry mix which will allow the plant to start to recover. Trim away the rotten roots and hold off on watering as much as you did before.

Top tip: waterlogged soil tends to smell quite damp and musty so get up close to your plants every once in a while to check as this can help you spot overwatering before it has severely impacted your plant.

Those are the most common reasons why African Milk Trees lose their leaves. We recommend establishing whether or not it is simply the natural shedding process, or if something else is causing the leaves to fall off. You should also consider if you want to take a section from your plant to propagate it as this can help you save at least some of the plant.

In future, we recommend giving your plants a regular check-up to spot any early signs that they are unhappy with something. This doesn’t just apply to your African Milk Tree, but to all of your houseplants as spotting and fixing the issues early, means it’s easier to treat them and gives you the best chance at reviving them.

Check out our African Milk Tree care guide for more information on how to look after your plant and treat any other issues that might arise.

Fiddle and Thorn is a participant in the Amazon Services LLC Associates Program, an affiliate advertising program designed to provide a means for sites to earn advertising fees by advertising and linking to Amazon.com

Take our houseplant survey!

Quickly respond to our 30 second houseplant survey and get 75% off our Complete Houseplant Care eBook!

Take the Survey

No thanks…

Why is my African Milk Tree dying?

Last Updated: September 1, 2022

Being a succulent type, the African Milk Tree has quite specific care requirements which can make it a little tricky sometimes and cause your plant to start dying! They don’t thrive in the same conditions as many other houseplant types and will start to show signs of unhappiness if things aren’t right.

Luckily, you have come to the right place if your African Milk Tree has started dying as below we will go through each of the factors that can be harmful to your plant. We will also cover how to diagnose the issue, treat it and prevent it from harming your African Milk Tree in future.

A dying African Milk Tree can suggest overwatering

If your African Milk Tree is dying and developing soft leaves, then overwatering might be to blame. As African Milk Trees are succulents (that look like Cacti), they really don’t need much water to thrive and prefer a dry potting mix. This is why too much water will very quickly start to rot the root system and cause a whole range of issues for your plant.

To establish if overwatering is what is causing your African Milk Tree to die, take the plant out of the pot and take a look at the soil. If the potting mix is very waterlogged and clumpy then this is the most probable cause of your dying African Milk Tree.

If the soil is waterlogged replace it straight away and trim away the rotten roots. This will allow your plant to start to recover rather than waiting for the soil to naturally dry out as this risks more damage.

In the future, to prevent the issue from happening again, make sure to monitor the moisture levels in the soil so that it has time to properly dry out between waterings. You also want to adjust your watering routine so that you cut back on how much you water during winter as the cold darker months mean your plant will go dormant and not produce any new growth. This is when root rot and waterlogged soil become higher risk factors.

Alongside overwatering, it might also be a lack of drainage that is causing the potting mix to become waterlogged (and your African Milk Tree to start dying). If you haven’t been watering your African Milk Tree more than once or twice a month in summer, then this could be the case. Make sure your pot has plenty of drainage holes and add some extra perlite to the potting mix to aid drainage. You might also want to look into to switching for a terracotta pot if your African Milk Tree is growing in a plastic one as these let some of the excess water evaporate out of the sides.

Consistent underwatering might also be to blame

Too little water can also cause a lot of problems for your African Milk Tree and it may start to develop dry crispy leaves and if the problem continues long-term the whole plant could shrivel up. As these plants don’t like soggy soil, this is only really going to become an issue if you withhold water for several months at a time.

If you suspect that your African Milk Tree is dying due to underwatering then you must again check the moisture levels in the soil before making any changes to your care routine. Then when reintroducing watering, it’s super important you do it gradually. Like humans, houseplants sometimes get shocked by a sudden change in their environment.

Therefore, instead of drowning your plant and hoping for the best, try to stagger your waterings and give a little bit of water each time to gradually moisten the potting mix. Then make sure you adjust your schedule going forward so you are either watering more deeply each time or watering more frequently.

Top tip: always check the moisture in the soil of any houseplant before watering using either the finger, chopstick or lifting method.

A dying African Milk Tree can also indicate lighting issues

If your dying African Milk Tree has yellow patches all over the leaves then they may be scorched by the sun. This happens when your plant receives too much intense direct sunlight. Although they can deal with some level of direct light, during summer this can become a little much and can burn the leaves.

If leaf burn is why your African Milk Tree is dying, you’ll notice the burnt patches on the side facing the sun as they are receiving the most light exposure.

Although the leaf burn that has already taken place is irreversible, moving your African Milk Tree to a slightly shadier spot will prevent the issue from happening again in future.

Cold temperatures can impact your plant massively

African Milk Trees can tolerate super high temperatures so you never need to worry about hotspots. However, your plant might be dying due to exposure to cold drafts. This can be either from cracks in windows and external doors or if your plant is too close to an air conditioning unit.

It’s best to pick up a digital thermometer to check the temperature around your African Milk Tree and either draft proof the window/door it is close to or find a new warmer spot for your plant.

It may just be natural ageing

As your African Milk Tree matures, it is normal for it to start corking and losing leaves to prioritise new growth. This can often be mistaken as signs your African Milk Tree is dying when that’s really not the case. In fact, when your plant loses some of its older leaves, it’s a sign it’s maturing in the right way rather than dying.

The best thing to do is check over your plant, its soil and its environment to make sure that nothing else is wrong. Then moving forward, monitor the rate at which new signs are appearing and leaves are being lost and compare this to the rate of new growth. If this is just natural ageing, then new growth will always be faster.

Those are the most common reasons why your African Milk Tree looks as though it is dying. It’s important that you catch these types of problems early as it makes them easier to successfully treat. This is why it’s a good habit to get into to check your plants regularly for any early warning signs of trouble. Then once you have caught the issue and have changed something in either your care routine or its environment, keep a very close eye on your African Milk Tree over the next few weeks to ensure things are improving and your plant is no longer showing new signs that it is dying.

To find out more about how to look after your plant and keep it healthy and happy, check out our detailed African Milk Tree care guide.

Fiddle and Thorn is a participant in the Amazon Services LLC Associates Program, an affiliate advertising program designed to provide a means for sites to earn advertising fees by advertising and linking to Amazon.com

Take our houseplant survey!

Quickly respond to our 30 second houseplant survey and get 75% off our Complete Houseplant Care eBook!

Take the Survey

No thanks…