Why is my Bunny Ear Cactus turning yellow? Causes and Solutions
January 30, 2022
Last Updated: January 30, 2022
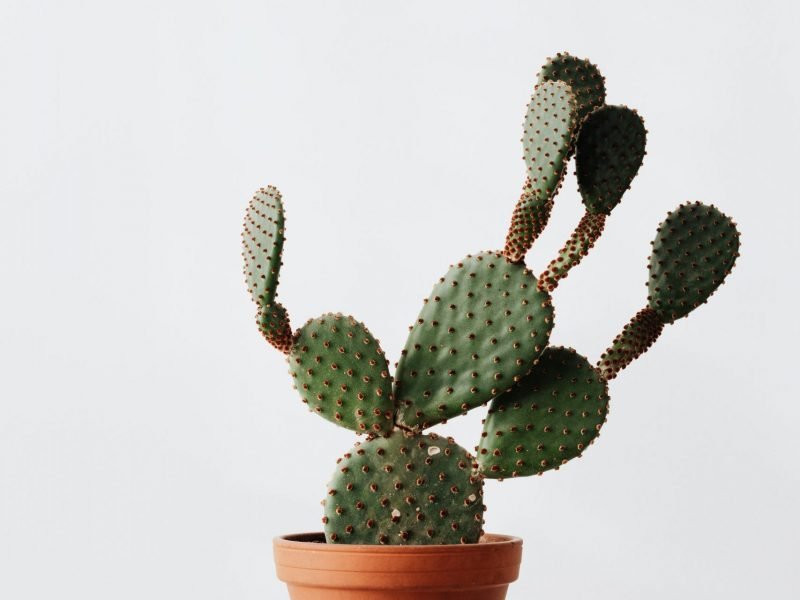
Probably one of the cutest houseplant names, the Bunny Ear Cactus (Opuntia microdasys), is loved globally for its flat and relatively non-prickly pads. Like most Cacti types, however, they are quite prone to developing yellow leaves, whether that develops as small yellow spots or patches across the plant. Yellow leaves signal that something isn’t quite right but luckily diagnosing the issue is actually quite simple as there are only two real main causes. One will lead to the pads feeling and looking quite soft, the other will lead to crispy, dry leaves. Below you’ll find a full explanation on both of the causes so you can figure out which is leading to the yellowing of your beloved Bunny Ear Cactus.
Overwatering can cause yellowing in Bunny Ears Cacti
As with any other Cactus type, Bunny Ear Cacti are super sensitive to overwatering and really don’t need much moisture to thrive. They like coarse and dry potting mix otherwise their roots will begin to rot. If the potting mix is too soggy, it can cause yellowing throughout your Bunny Ear Cactus. One way to tell whether it is too much water is if the pads are very droopy and soft.
If you’re still unsure whether or not overwatering is the cause of your Bunny Ear Cactus developing yellow leaves, remove your plant out of the pot to check the moisture in the potting mix. Replace the potting mix if waterlogged. You don’t want to wait for it to naturally dry out as this can cause more damage to the root system. Trim away all of the rotten roots and soft yellow leaves to encourage new growth.
Moving forward, you want to be very careful with how much you water your Bunny Ear Cactus as you want to avoid this problem reoccurring and causing more yellow foliage.
Sunburn is another cause of yellow leaves for Bunny Ears Cacti
If the yellowing on your Bunny Ear Cactus’s leaves is at the top or the side which is facing the window, then this may be caused by too much sunlight which has burnt the leaves. Whilst Bunny Ear Cacti do like bright light but there is still a thing as too much. This usually happens in summer when the sun is a lot more intense. You can tell if the yellowing is caused by sunburn as the yellow areas will feel and look very dry.
Although you won’t be able to bring the yellow patches back to green, too much sunlight is an easier problem to solve. All you need to do is find a better spot for your plant so that it doesn’t get as much direct sunlight.
Should I cut away my Bunny Ear Cactus’s yellow leaves?
We get this question a lot when it comes to yellow houseplant leaves. You may be wondering if it is beneficial or damaging to your plant in any way to get rid of them. We always recommend trimming off the leaves. Not only will it make your Bunny Ear Cactus look better and healthier, but it will stop it from wasting any precious energy trying to revive parts that are too far gone. By carefully slicing off the yellow pads, your Bunny Ear Cactus can focus on producing new healthy green growth!
To learn more about how to best care for your Cactus and avoid any more problems developing, take a look through our Bunny Ear Cactus care guide.
Fiddle and Thorn is a participant in the Amazon Services LLC Associates Program, an affiliate advertising program designed to provide a means for sites to earn advertising fees by advertising and linking to Amazon.com
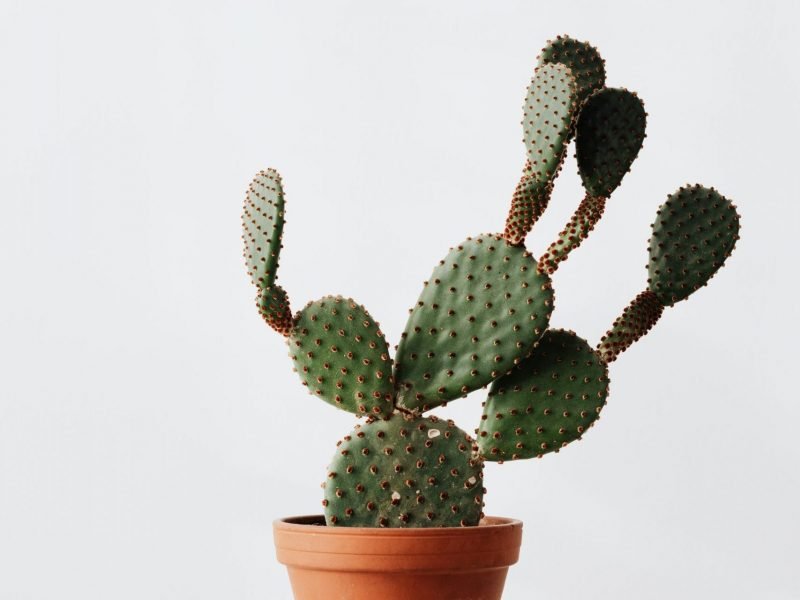
Loved for their flat pad-like leaves, and lack of long sharp spikes, the Bunny Ear Cactus is one of the best plants and cacti types around. However, although they don’t need as much tending to as a lot of other plant types around, this doesn’t mean that they are super adaptable to different environments and care routines. In fact, Bunny Ear Cacti need quite specific conditions to properly thrive and will start dying if things aren’t right.
But don’t worry, we’ve got you covered as in this article we will go through each of the most common reasons why your Bunny Ear Cactus is dying. We will also detail the ways to confirm each issue, treat it effectively and stop it from causing too much damage in future.
Overwatering can cause a dying Bunny Ear Cactus
Overwatering is the main cause of problems across all houseplant types but especially for Cacti. This is why we always start with it as the first port of call when looking to diagnose an unknown issue. Bunny Ear Cacti don’t like sitting in puddles of water for long periods of time as their delicate roots will start to rot. This can very quickly cause your Bunny Ear Cactus to start dying, unfortunately. Not only will the root system be damaged and rotten, but the leaves will turn soft and the pads will often fall over.
To figure out if overwatering is the reason your Bunny Ear Cactus is dying, check the moisture levels in the soil immediately. If the soil is quite waterlogged and clumpy then replace it with fresh dry mix which will allow your Cactus to start the recover process. Letting the potting mix dry out naturally only risks more damage to an already dying plant. Trim away the rotten roots (these will be black and dark brown in colour and feel soft to touch) and hold off on watering as frequently as you did before.
Due to the damage to the root system, your Bunny Ear Cactus may take a little while to fully recover and grow new healthy leaves. But be patient and you should start to see your Bunny Ear Cactus looking fresher in a few weeks.
To prevent the issue from happening in future, you want to cut back on the frequency of watering. Cacti are great water storers so like to be watered deeply but infrequently. Once a month during summer and every 3 months during winter will suffice but you may need to adjust depending on your specific Bunny Ear Cactus and its environment.
A dying Bunny Ear Cactus can indicate drainage issues
Sometimes it may not be your watering schedule that is causing your Bunny Ear Cactus to begin dying on you, but the poor draining of the soil and pot. If any excess water can’t escape from the pot then it can begin to rot the roots.
You can very easily increase the amount of drainage in your Bunny Ear Cactus by mixing in a small amount of perlite, this will make it far easier for water to flow through and out of the drainage holes of your pots (you should also check to make sure your pots have drainage holes). Most cacti and succulent potting mixes will have perlite in them so just check the packaging. Alternatively, you can purchase it separately and add it to the soil yourself.
Another easy step to aid drainage and prevent your Bunny Ear Cactus from dying is to add a few small stones or pebbles to bottom of your pots, this helps in making sure that the drainage holes are never blocked by soil or any loose debris.
Although clay or terracotta pots can be a little bit more expensive or breakable, they are great for cacti and a lot of other plant types. Because they are permeable, excess water can escape out of the sides of the pot. So sometimes it is worth investing a little more to make sure that the roots of your Bunny Ear Cactus are not sitting in too much moisture causing them to start dying.
Cold temperatures may also be to blame
Bunny Ear Cacti don’t so so well with constant streams of cold air. Whilst they can deal with cold nights due to their native environments, constant drafts from outside or air conditioning vents can start to cause real havoc.
The best thing to do to revive your dying Bunny Ear Cactus is to move it to a warmer area of your home and monitor how the temperature changes throughout the day and throughout the various seasons using a digital thermometer. You are looking to reach their ideal range of 72 degrees Fahrenheit (22 Celsius) during the day (of course it will drop a little at night). Make sure to measure the temperature next to your plant as what it says on your home thermostat isn’t always reflective if there are small drafts.
A dying Bunny Ear Cactus can also mean high humidity
In the houseplant world, you will often hear of issues being caused by low humidity levels. However, with the Bunny Ear Cactus, it is actually the opposite that might be causing it to die. If the humidity level is too high, then the pads might start to rot and become quite soft.
The best thing to do here is to use a humidity monitor to check the level around your Bunny Ear Cactus and relocate it if necessary. Places such as bathrooms and kitchens often have a higher humidity level that isn’t ideal for your Bunny Ear Cactus and might be why it is dying.
Those are the most common reasons why your Bunny Ear Cactus is dying. Regardless of which is causing problems with your plant, the main thing is to act quickly.
If you are already seeing visible signs of your Cactus dying, then it means the issue has been progressing for some time. Don’t wait for waterlogged potting mix to dry or think it won’t be long until the temperature in the room increases in summer as this extra time might mean your Bunny Ear Cactus can’t be revived.
Once you’ve made some changes to the care or environment, then it’s important to keep a close eye on your Cactus over the next few weeks to make sure things are progressing in the right direction.
Fiddle and Thorn is a participant in the Amazon Services LLC Associates Program, an affiliate advertising program designed to provide a means for sites to earn advertising fees by advertising and linking to Amazon.com
Why does my Boston Fern have yellow leaves? Causes and Solutions
January 29, 2021
Last Updated: May 31, 2022
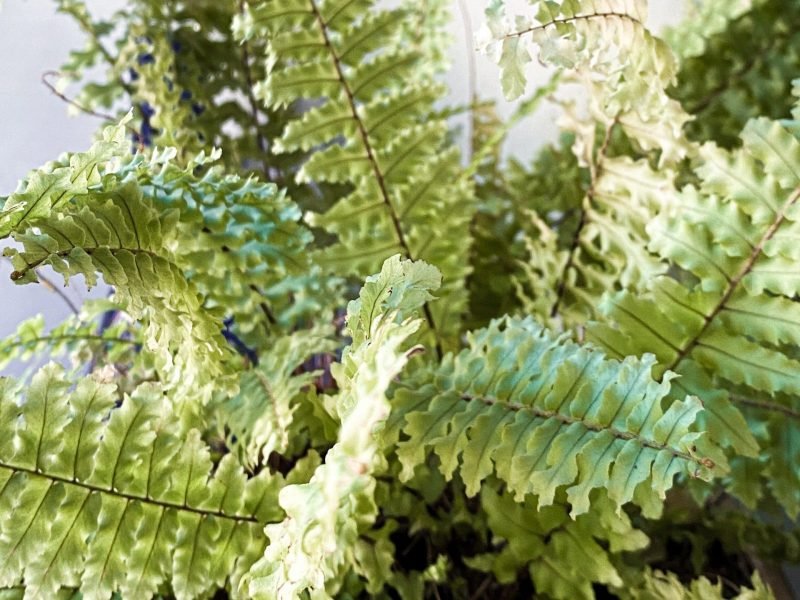
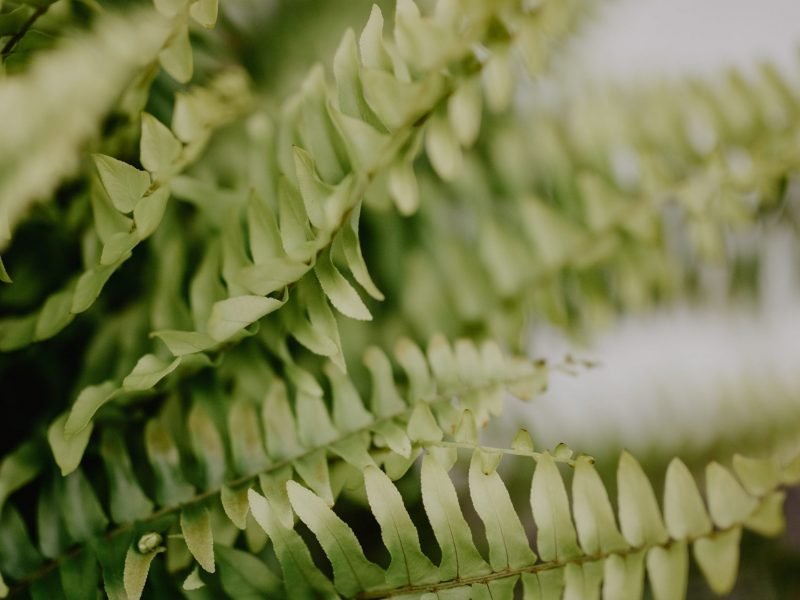
Boston Ferns bring a real bit of the wilderness into your home which is why we are so obsessed with them. However, it can be a little worrying if you notice your Fern is turning yellow as this is usually a sign that something is wrong. But you have come to the right place as below you will find all the common causes of yellow Boston Fern leaves!
Low humidity is normally the problem!
Boston Ferns love humidity, if you find that the leaves of your fern have turned yellow but not completely dry then this is probably the issue you’re facing. Raising the humidity for your houseplants is a pretty simple and straight forward process that shouldn’t take long for you to solve.
The first recommendation that we’d make is to spray your Boston Fern with a misting bottle every couple of days. This raises the local humidity around the plant and helps to maintain a more stable moisture level, we love these amber glass bottles from Amazon.
If that sounds like a bit too much work then you could also try out making a simple pebble tray. Using a dish or plastic tray, add a layer of gravel or small pebbles and pour over some water. Then you simply sit your plant on top, over time the water in the dish will evaporate and the humidity will start to raise.
Finally, the best and most effort free way of increasing the humidity is just to get yourself a small humidifier. Most homes have pretty dry air and one of these handy little gadgets will help fix that issue for good. We find these to be especially useful in the summer months when AC units are running, as they tend to dry out the air even more!
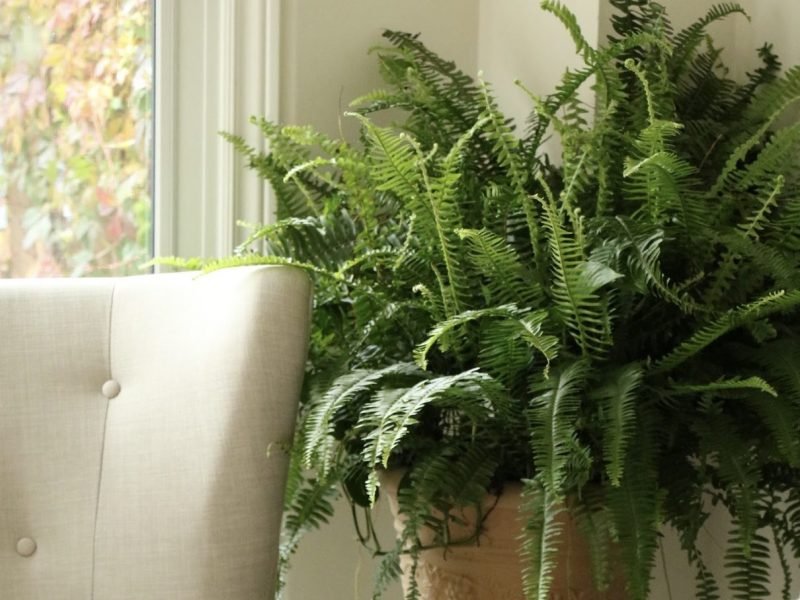
Keep the humidity high for your Boston Fern!
Overwatering can cause yellow leaves on your Boston Fern
If the soil becomes soggy and waterlogged for a long period of time, it will cause the roots to rot. This stops the plant being able to take up any water or nutrients from the soil and will turn the leaves yellow. They will also start to droop down and fall off if the plant is being overwatered.
You want to check the level of moisture in the soil before you make any changes to how you water your Boston Fern. Carefully lift the plant out of the pot and check if there is any damage to the root system. If the soil is waterlogged then we recommend replacing it immediately. You don’t want to wait for it to dry out naturally as you risk damaging the roots and fern even more.
Trim away the dead roots and leaves so your Fern can start to recover. It may take a few weeks before you see any sign of new growth as your Fern has gone through a lot. But over time, with the right amount of sunlight and warmth, your Boston Fern should be back to its full health – with no yellow leaves in sight!
If you’re finding it difficult to maintain good watering habits for your ferns, it might be worth looking into some other options that can make the whole process significantly easier.
Our first suggestion would be to make sure that the pots you’re using are allowing some of the excess moisture out of the soil.
This can be done in a couple of main ways. The first is by ensuring that you have drainage holes in the base of the inner pots, and that these drainage holes aren’t blocked by any large soil debris (this happens more than you might think!).
If that isn’t solving your problem then we would highly suggest investing in either self-watering or terracotta/ clay pots.
Self-watering pots (like these ones) offer a super easy way to get the correct moisture levels all of the time, and can also be great for holidays/ vacations when you’re not around to water your plants.
Terracotta or clay pots are fantastic because, unlike plastic pots, the materials they’re made of are permeable. This means that any of the excess moisture in the soil will wick through the sides of the pot and evaporate away.
Underwatering can also cause yellow leaves
If the leaves on your Boston Fern have gone quite yellow but dry, then too little water might be the issue. Again, you want to check the soil to make sure before increasing how much you water your Fern. If the soil is very powdery and dry then this is most probably the cause of the yellow leave. They like moisture in the soil so don’t let them dry out for long periods of time.
If your Boston Fern has been underwatered then slowly reintroduce watering over the next week or so. Going forward you want to make sure you are watering more than before to avoid the same problem happening again. Once you have trimmed away all of the dry crispy leaves you should start to see normal healthy green growth starting to come up. This is yet another place where a self watering pot can make your life so much easier!
Yellow leaves can indicate overfertilisation
Another common cause of yellow leaves in Boston Ferns is overfertilisation. Boston Ferns really don’t need much fertiliser and you can even skip it altogether. At most, you want to be fertilising a couple of times throughout the growth period of spring and summer and not at all during winter. If you are fertilising more than this then it could be the causes of the yellow leaves.
If you have been using slow-release fertiliser within the soil then remove the spikes or replace the potting mix if it is mixed in. If you have been using water-soluble fertiliser then it’s easier to solve as you just have to stop. Wait a few months before fertilising again (if at all). Trim away the worst affected leaves and over time the new growth should be relatively unaffected.
Pests can cause yellow leaves on your Boston Fern
Another rarer cause of yellow leaves on a Boston Fern is a pest infestation. Scale insects can cause yellow leaves on a Boston Fern so these are the ones to look out for if your plant is showing this symptom. Scale insects are quite a bit larger than some of the other main houseplant pests so are easier to spot and can be removed by picking them off the plant. We recommend also trimming off the worst affected plants to curb the infestation from growing quickly and then treating your Fern with neem oil. If the infestation hasn’t taken over your whole plant then these tricks should help stop the pests from killing your Fern.
Do yellow leaves mean my Boston Fern is dying?
Not at all! It does however mean that it isn’t liking something at the moment. Most of the time your Boston Fern can be saved from turning completely yellow by fixing the humidity and watering schedule.
The important thing is to start trying to fix the problem before it becomes big enough to kill the rest of the plant!
Can yellow Boston Fern leaves turn green again?
If the leaves are only starting to turn yellow and still have some green in them then it might not be too late!
However if they are completely yellow and starting to dry out then it might be time to trim them off and move one. Unfortunately those leaves won’t become green again.
Should I trim away the yellow leaves on my Boston Fern?
The simple answer is, yes!
Removing these yellow leaves will make sure that your plant isn’t trying hard sending nutrients to leaves that are already dying. This means that it can concentrate this energy on new growth.
Those are the most common reasons why a Boston Fern has yellow leaves. Act quickly once you know what the issue is as this will give your plant the best chance at bouncing back. If you want to learn more about how to care for your plant check out our Boston Fern care guide.
Fiddle and Thorn is a participant in the Amazon Services LLC Associates Program, an affiliate advertising program designed to provide a means for sites to earn advertising fees by advertising and linking to Amazon.com
Why is my Boston Fern turning brown? Causes and Solutions
December 17, 2021
Last Updated: April 7, 2023
Causes of brown leaves on Boston Ferns
Intense direct sunlight can cause brown leaves
Lighting is always an important element to take into consideration when caring for your houseplants and things are no different with the Boston Fern. In fact, Ferns in general are one of the most sensitive houseplant types when it comes to light as they often have such thin delicate leaves.
If your Boston Fern is getting too much bright light you’ll start to notice brown patches throughout your plant but primarily on the side that is facing the window. This is due to the sunlight burning the delicate leaves on your ??Boston Fern which is unfortunately irreversible.
Even a few hours of intense direct sunlight during summer can be enough to dry out your Boston Fern so it’s crucial that you don’t take any chances when it comes to finding the right placement for your fern.
Extreme temperatures
Another factor that can harm your Boston Fern is really high or low temperatures. It can happen that your Boston Fern gets exposed to cold drafts coming in from outside, cold streams of air from AC vents or on the other extreme, warm air from radiators or cookers can dry out the plant.
Either of these extremes may cause your ??Boston Fern to develop brown crispy leaves so make sure to check your plant’s environment for any hotspots or cold drafts.
A consistent lack of water
If the leaves on your Boston Fern have gone quite brown but dry, then too little water might be why your ??plant is struggling. Boston Ferns in particular are quite heavy drinkers so will require more frequent watering compared to a lot of your other plants.
The best way to determine if dry soil is causing the leaves on your Boston Fern to turn brown is by picking up your plant. Because they have such delicate thin stems, leaves and roots, they will be extremely light if there is no water in the soil. This is why picking them up is a simple way to know just how much water is in the soil. Alternatively, you can use a moisture meter or the chopstick method.
Low humidity levels can also cause dry brown leaves
If you’re confident that you’re keeping your watering habits in check, then low humidity could be the cause of your Boston Fern’s leaf browning. It’s a very common issue with Boston Ferns as they require quite a high and constant level of humidity.
A common telltale sign of a lack of humidity is dry leaf edges before the whole leaf turns brown so take a close look at the leaves across your plant.
Humidity is a tricky one to test for without a humidity monitor so we highly recommend picking up one of these.
Cold temperatures can cause brown foliage on your Boston Fern
Solutions for brown leaves on Boston Ferns
Find the most suitable spot for your Boston Fern
To avoid issues caused by too much sunlight, we recommend moving your Boston Fern into a slightly shadier place, and if there’s no improvement move it a little further again until you find it’s the perfect spot.
And to avoid any extreme temperatures, ventilate the room well and keep all plants at least 1 metre away from radiators, heaters or cookers. You may also want to invest in a digital thermometer to keep track of how the temperature changes throughout the seasons and make sure your Boston Fern is in its ideal range to avoid brown leaves.
You may be wondering what to do with the brown leaves that have already developed. Our recommendation is to carefully trim away the brown leaves so your Boston Fern can focus all of its energy on new healthy growth. Once a leaf or a stem has turned brown, there is no reversing this unfortunately so it’s best to remove it altogether.
Adjust your watering habits
If the soil is very powdery and dry and underwatering is causing your Boston Fern to turn brown, then you should slowly reintroduce water to raise the moisture levels in the soil. You may think that the best way to solve underwatering is simply by pouring a bucket of water over your Boston Fern. However, if their environment goes from one extreme to the other very quickly, it can actually cause them to become shocked and stressed. This is why gradually increasing the moisture in the soil over the course of a week is the best way.
Give the humidity a boost
If a lack of humidity is causing the brown leaves on your Boston Fern then it’s super easy to solve! There are several ways you can really quickly (and cheaply) raise the humidity level for your Boston Fern:
Mist the leaves daily
Use a spray bottle to mist the leaves once a day during summer and a few times per week during winter. This also helps to clean the plant (as Boston Ferns can be a little tricky to clean as they are so delicate) so it’s a win-win! Regular misting also has the benefit of keeping the humidity level stable over time.
Showering your Boston Fern
If you’re looking for a quick fix, washing down the leaves is a great way to boost the humidity for your ??Boston Fern. Showing in the normal way isn’t that suitable for a Boston Fern as they are just so delicate and even low water pressure can cause issues.
Instead, you can either submerge your plant in water, or dunk parts of the plant in a bucket full of water to moisten the plant.
Move to a more humid room
If you have good lighting in your bathroom then we recommend moving your Boston Fern in there. The humidity level in those rooms is naturally higher because of showering and your ??Boston Fern will love it in there!
Buy a humidifier
If you’re worried about the lack of humidity becoming a real problem, then buying a humidifier is probably the best thing for you. It keeps the humidity in the room at a consistent level so you don’t have to worry about any more dry brown leaves developing on your plant. But the benefits of humidifiers don’t stop at your houseplants, they are even great at clearing our skin and helping us get a better night’s sleep.
Intense light can cause brown leaves on a Boston Fern
How to prevent brown leaves on a Boston Fern
Monitor the environment
The best way to prevent brown leaves from developing on your Boston Fern is to monitor your plant’s environment to spot any issues before they impact your plant. There are a few main things to be checking; temperature, light level and humidity.
When it comes to temperature, one of the best things we did was to buy a digital thermometer for every room. This way we can monitor the temperature around our home, moving it to different spots to make sure that there are no hotspots or drafts affecting your plants.
Try to buy one that has a setting whereby you can see the highest and lowest temperature over the past 24 hours. This will help you know if there are any sudden fluctuations in temperature overnight or during the day when you aren’t home.
Light level is also an important one to monitor not only throughout the day but throughout the year as the sun’s position changes dramatically. Areas that might not get much light during winter can receive intense sunlight during summer so make sure to always be checking in with how much light your Boston Fern and other houseplants are receiving.
Don’t let soil dry out
This is our number one rule when it comes to caring for Boston Ferns and preventing issues such as brown leaves. Boston Ferns are thirsty plants and require frequent watering.
We also don’t believe in a rigid watering schedule so you should be monitoring your plant’s soil frequently to see how changes in the environment (season for example) impact how much water your Boston Fern needs.
Get into long-term habit of misting
During spring and summer (and early autumn if it’s still warm), we strongly recommend misting your Boston Fern at least 3-4 times per week to prevent dry brown leaves. Forming this habit will be invaluable to your plant’s overall health!
Why are the leaves on my Boston fern turning brown?
Brown leaves on a Boston Fern are often caused by either underwatering or a lack of humidity. However, they can also be caused by intense sunlight and temperature extremes.
Is it normal for Boston ferns to develop brown leaves?
Whilst some brown leaves can be a sign of natural ageing, if your Boston Fern is rapidly turning brown, then this is likely caused by underwatering, a lack of humidity or hotspots drying out the leaves. Check the soil moisture as well as the temperature and humidity level around your plant to determine the most likely cause.
Can too much sunlight cause Boston Ferns to turn brown?
Yes, if your Boston Fern is receiving several hours of intense sunlight during summer, this can dry out the leaves and cause them to turn brown. Direct sunlight during winter though won’t cause much of an issue as the sun is a lot weaker and is out for less of the day. This is why moving your Boston Fern (and other houseplants) around throughout the year can be really beneficial.
Should I prune my Boston fern if it has brown leaves?
We recommend removing the brown leaves on your Boston Fern so that your plant can focus its energy on producing new healthy, and green, leaves.
How can I prevent brown leaves on my Boston Fern?
Consistently monitoring your plant’s environment (temperature, light level and humidity) alongside the soil moisture will help you spot any issues before they damage your plant’s health. Make sure that you avoid your plant drying out as much as possible as dry soil can very quickly lead to brown leaves throughout your Boston Fern.
How do I fix a brown Boston Fern?
Start by removing any dead brown leaves and trim away any dead crispy roots so that your Boston Fern can focus on regenerating healthy growth. Then adjust your watering schedule if you have been underwatering or fix any environmental issues such as light level, temperature or humidity level if they have been causing issues with your plant.
Those are the most common reasons why ??Boston Fern plants develop brown leaves. It can be quite a common issue for ??Boston Ferns as they are very sensitive and have super delicate leaves so just make sure you are staying on top of watering and boosting the humidity and this will go a long way to avoiding brown dry leaves.
It’s important to note here though that some brown foliage is normal for Boston Ferns and if the rate is lower than the rate of new healthy growth, then it can be nothing to worry about. Thoroughly checking up on your plant every few weeks can go a long way to spotting any issues before they have had time to cause brown leaves or any other problems.
To find out more about how to best care for your fern, as well as how to spot and treat other common problems that might arise with your plant, check out our ??Boston Fern care guide.
Fiddle and Thorn is a participant in the Amazon Services LLC Associates Program, an affiliate advertising program designed to provide a means for sites to earn advertising fees by advertising and linking to Amazon.com
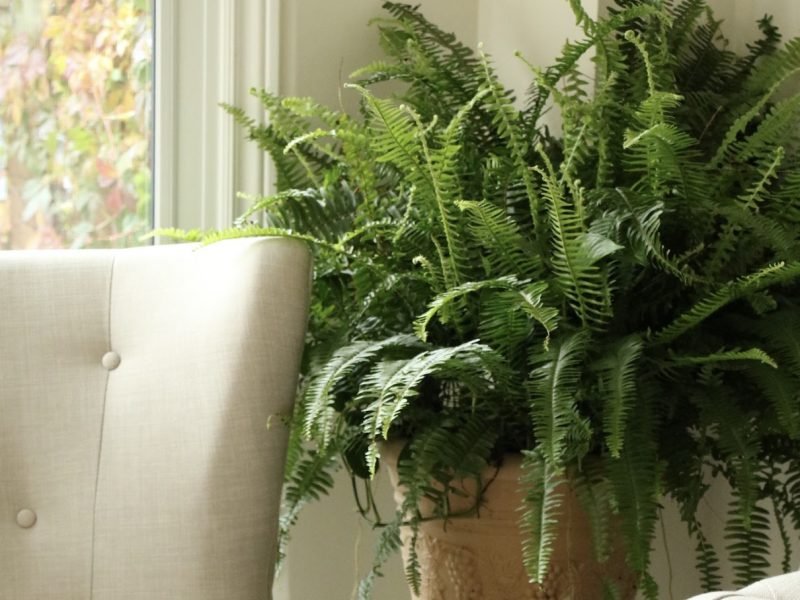
The most popular and famous of the Fern family, the Boston Fern is a great way to bring some of the tropics to your home. However, if your Boston Fern has started losing some leaves, then this could be a sign that your plant is unhappy with either the care it’s receiving or the environment in which it’s growing. In this post, we will go through each of the individual factors for leaf drop in Boston Ferns, guiding you through how to diagnose the issue, treat it and then prevent it from causing any more leaves to drop from your Fern.
Don’t mistake it for natural shedding
Boston Ferns naturally lose a lot of their leaves. This isn’t always because something is wrong but is just a characteristic of their delicate and thin leaves. This means that even if your Boston Fern is losing quite a few leaves, it can still be absolutely nothing to worry about.
The main thing here is ensuring that the leaves that are falling off are the oldest and smallest leaves and that the new leaves and stems are healthy. Another factor that will help you establish whether or not your Boston Fern is losing leaves due to natural shedding is whether your Boston Fern is growing more new fronds and leaves than it is losing.
If you are still concerned about the number of leaves your Boston Fern is losing and you find yourself constantly sweeping up after your Fern, this might signal something more serious, in which case read on…
Underwatering can also cause your Boston Fern to start losing leaves
One of the more common factors when it comes to Boston Fern plants losing their leaves is consistent underwatering. Boston Ferns need a lot of moisture to properly thrive and hate it when their soil gets too dry. They have very delicate stems and leaves so you need to keep the moisture levels up. If their roots become crispy due to underwatering, this will lead your Fern to lose leaves to conserve energy.
Before you start changing anything about your watering routine, whether it’s how frequently you water, or how much you give it each time, it’s important to confirm that underwatering is causing your plant to be losing leaves often.
To confirm whether underwatering is causing your Boston Fern to lose leaves, take your Fern out of the pot to inspect how the potting mix feels. If underwatered, the potting mix will fall apart and feel very sandy to touch. You will also see that some of the roots have started to crisp up if you have been underwatering your Boston Fern for a while. This level of dryness is a no-no for Boston Ferns and is almost definitely the reason why your plant is losing so many leaves.
To solve the problem and stop the leaf drop from progressing any further, slowly reintroduce water to your plant rather than drowning it (they can go into shock if there is a sudden change in the environment). A little bit of water once a day for a week should get your Boston Fern back on track and prevent it from losing any more leaves.
Moving forward, to prevent your Boston Fern from losing any more leaves in future, make sure to prevent the potting mix from drying out for extended periods of time. Using a moisture meter can really help with this and you’ll be able to get into a regular watering routine. Just be sure to adjust your routine throughout the year, as temperature and light levels can have a real impact on how quickly the soil dries out.
A lack of humidity could also be to blame for your Boston Fern losing leaves
Alongside frequent watering, Boston Ferns need a high level of humidity to be happy and not crisp up. Unfortunately, their ideal level of humidity tends to be a little higher than the average home which means you will have to give the humidity a boost to stop it from losing leaves. This will become a bigger problem over winter when we have the heating on throughout the day which dries out the air. If the leaves on your Boston Fern have gone dry, crispy and brown in colour before falling off your plant then this may be the cause.
There are two methods we recommend to boost the humidity for your Boston Fern and stop your plant from losing so many leaves. Firstly, misting your Fern daily, even twice a day if the air is super dry. But if you don’t have time to do this then you should really invest in a humidifier to keep a nice stable humidity level. These will really help stop your Boston Fern from losing too many leaves.
When it comes to misting your Boston Fern, avoid doing this in the evening as if the leaves are still moist when the temperature drops overnight, it can cause the leaves to rot. This can happen to most houseplants but because Boston Ferns have such thin delicate leaves, it’s even more of a concern. Misting in the mid-morning is best as it allows enough time for the water droplets to evaporate off your plant. You also want to make sure you are using temperate water, as any extremely hot or cold water can shock or burn the leaves on your Boston Fern, causing further issues.
You can also make a pebble tray for your Boston Fern. All you need for this is a tray or deep plate and a good few handfuls of stones. Fill the bowl up with water but just make sure that the water level doesn’t reach the plant as this will mean the roots are constantly sitting in a puddle of water. Instead, you want the water to evaporate around your Boston Fern, preventing the leaves from drying out and crisping up and eventually falling off.
You might also want to move your Boston Fern to the bathroom if you have great natural lighting in there. Because of showering, bathrooms often have a little higher humidity than the rest of the room which makes the perfect environment for your Boston Fern without having to do anything extra.
Chemical sensitivity might also be why your Boston Fern is losing leaves
Most generic plant foods and fertilisers will recommend a dosage for your plants. However, there are so many factors that play into how much fertiliser your plant needs. From size, age, light levels, temperature etc. Because of this, it’s impossible for there to be one standard amount for every plant.
Boston Ferns can be quite sensitive to fertiliser so the recommended amount is almost always too much and can result in your Fern losing leaves. This is because they have such delicate leaves which can be a bit oversensitive at times.
The best thing to do here is to try out feeding at half the recommended dosage and see how your Boston Fern reacts. Try also decreasing the number of times you fertilise your Boston Fern each year. A few times during the growth period of spring/summer will definitely be enough.
Those are the four most common reasons why your Boston Fern has started losing its leaves. It’s definitely one of the more common problems that plant parents face when it comes to Ferns and there does always tend to be a degree of natural shedding no matter if the care and environment are what your Boston Fern needs.
However, it’s important to recognise the difference between your plant losing a few leaves, and there being a real issue. Keeping a close eye on your plant, and checking in with it every time you water is a great way to monitor any changes and allows you to catch any problems early, before they have really taken hold of your Fern, giving you the best chance at bringing your plant back to full health.
Fiddle and Thorn is a participant in the Amazon Services LLC Associates Program, an affiliate advertising program designed to provide a means for sites to earn advertising fees by advertising and linking to Amazon.com
We have a love-hate relationship with Boston Ferns because although they bring a little bit of the wilderness to your home, they are actually quite fussy to take care of. Even if there is a slight change in environment or something isn’t quite right your Boston Fern can begin dying pretty quickly.
Whether your issue is brown leaves, leaf loss, stagnant growth or a wilting plant, we’ve got you covered. In this article, we will go through each of the main reasons why your Boston Fern might be dying, alongside tips to diagnose it and how to go about treating the problem effectively.
A dying Boston Fern can indicate low humidity
If your dying Boston Fern has developed brown spots or edges on the leaves then dry air is usually the case as they have such thin delicate leaves. Boston Ferns thrive in conditions like the tropics and although we could never reach a humidity level anything like the tropics (and even if we could, we definitely wouldn’t want to live in it), we can increase the humidity a little and your plant will love you for it.
Here are a few simple ways to increase the humidity and revive your dying Boston Fern:
Mist the leaves regularly
Use a spray bottle to mist the leaves a few times a week. This also gets rid of any dust on the leaves which is a bonus. During winter, you want to be careful about misting during the late afternoon and evening as you want there to be enough time for the water to evaporate before the temperatures drop at night. Cold wet leaves are the perfect combination for leaf rot which is especially damaging to an already dying Boston Fern.
Make a pebble tray
Fill up a tray of pebbles and fill halfway with water. Place your plant on top and the water will evaporate around it, increasing the humidity level.
Shower your plant
Although this is a fairly short-term fix, it is a great way to boost the humidity instantly. Wash down the leaves, keeping the water pressure fairly low so you don’t damage the delicate leaves and stems. Not only will this up the humidity but it may get rid of any pests that are secretly living on your plant.
Move your dying Boston Fern to the bathroom/ kitchen
These rooms have naturally higher humidity levels because of steam from showering and cooking. Your Boston Fern will love it so long as the light levels are enough. Also just make sure that you don’t place your Fern too close to the cooker as this can dry out the plant quickly.
This is the long-term solution to humidity issues and the best thing you can invest to properly revive your dying Boston Fern. They create a nice stable humidity level and removes all the worry.
Underwatering could also be causing your Boston Fern to start dying
Another common reason that your Boston Fern is dying is a lack of moisture in the soil. Although your Boston Fern may forgive you for occasionally forgetting to water, consistent underwatering can lead to a variety of serious issues if not solved in time. The most common signs of an underwatered Boston Fern are dry leaves, light brown spots on the leaves and drooping stems.
To diagnose the issue, take your Boston Fern out of its pot to see how dry the potting mix feels. The worst thing would be assuming that your Boston Fern is dying because it needs more water but it’s actually a totally different reason.
When lifting up your plant, if it feels quite light and the potting mix is bone dry, then underwatering is the most likely culprit. The leaves and stems on your Boston Fern are very light so you will be able to notice an underwatered Boston Fern pretty quickly just by picking it up. It’s also a great way to know if your Fern needs water before it shows signs of dying.
To solve the issue, we recommend watering your plant a little bit once a day for a full week. This will help to moisten the soil without shocking the plant (which can happen if their environment changes suddenly). A moisture meter can help with knowing when to water here too!
Direct sunlight can also cause severe issues
Whilst it’s true that Boston Ferns love sunshine, direct light can actually scorch the leaves on your plant pretty quickly as they are very thin and delicate. This is especially common in summer when the sun is a lot stronger and is out for most of the day.
Although there is no reversing the sunburn that’s already been caused, solving the issue is easy. All you have to do is relocate your Boston Fern to a spot in your home that doesn’t receive any or as much direct light.
A dying Boston Fern can also suggest heat stress
Hotspots caused by radiators/cookers and draughts caused by cracks in windows or doors can also be really damaging to your Boston Fern. You might find that the overall temperature in the room is perfect, but are not detecting the hot spot or cold draft in the room which is causing your Boston Fern to start dying on you.
Use a digital thermometer to check the spot in which your Boston Fern is living and adjust the environment or move it to a new spot to prevent it from dying.
Those are the most common factors that might explain why your Boston Fern is dying. It’s important to catch these problems quickly which is why we always recommend taking the time to look over your plants properly to spot any early warning signs that something might be wrong. Then after making some changes, check in with your Boston Fern once a day to ensure that things are moving in the right direction and the problem isn’t deteriorating even further. No matter how bad your dying Boston Fern is, persevere with it and you should be able to get it back to full health with some TLC.
To learn more about your plant’s care requirements, check out our detailed Boston Fern care guide.
Fiddle and Thorn is a participant in the Amazon Services LLC Associates Program, an affiliate advertising program designed to provide a means for sites to earn advertising fees by advertising and linking to Amazon.com
These Ferns definitely won’t be winning the award for the easiest houseplant to care for anytime soon as they can be a little temperamental. If you’ve noticed signs that your Bird’s Nest Fern is dying then it’s important you diagnose what’s going on as soon as possible. The earlier you catch what’s causing your Fern to start dying, the sooner you can get to treat it and revive your plant.
In this article, we will go through each of the causes of a dying Bird’s Nest Fern as well as how to treat the problem and prevent it from impacting your Fern again in future.
A dying Bird’s Nest Fern can indicate overwatering
Bird’s Nest Ferns are quite sensitive to overwatering and need their potting mix to dry out between waterings to prevent root rot.
If you think you may have overwatered your plant then you must inspect the soil first before making any changes to your routine. You want to make sure that this is definitely the problem as the same symptoms can occur for various things. Carefully take your plant out of the pot and inspect the roots and soil. If the potting mix is soggy and clumpy then it is most likely overwatering that is causing your Bird’s Nest Fern to start dying. Another thing to look out for is if the roots have started to rot as these will appear very dark brown or black in colour and be soft to touch.
To solve the issue and revive your dying Bird’s Nest Fern, remove and replace all of the potting mix. You might want to downsize the pot as less soil means it’ll dry out quicker in future. Carefully remove as much of the old potting mix from the root system so that it can start to recover. If the roots are badly damaged then trim away the worst affected areas. This will encourage your plant to grow new roots and not waste precious energy trying to keep the rotting ones alive.
Outside from watering too much or two frequently, there is one other thing around watering to consider when diagnosing a dying Bird’s Nest Fern. It’s very important that you don’t get the leaves on your Bird’s Nest Fern wet when watering your plant. This can mean the leaves will actually start to rot, especially during the colder months of the year. Instead, use a long spouted watering can to ensure you can water very close to the soil.
Low humidity can also cause a dying Bird’s Nest Fern
As they are native to tropical areas, humid environment is vital for a healthy Bird’s Nest Fern and they can really struggle if your home has dry air. This problem usually intensifies during winter as the heating and lack of ventilation will lead to much drier air. If the leaves have begun to go a little dry from the tips and edges inward or are curling inwards then a lack of humidity may be the problem.
Here are a few ways to increase humidity for your plant:
Mist the leaves on your dying Bird’s Nest Fern
This is one of the easiest ways to increase the humidity for your plant. Use a spray bottle to mist the leaves a few times a week. It’s important that you mist your Bird’s Nest Fern in the middle of the day so that there is enough time for the water droplets to evaporate before nightfall. Cold temperatures and damp leaves are the perfect mix for root rot.
Use a pebble tray
Fill up a tray with small stones and fill it up halfway with water. Place your Bird’s Nest Fern on top of the pebbles and over the course of the day the water will evaporate under your plant. Always make sure the plant is not sitting in the water though as this will cause waterlogged soil and root rot and cause more issues to your already dying Bird’s Nest Fern.
You might want to find a new spot
If you have good lighting in either your kitchen or bathroom then we recommend moving your Bird’s Nest Fern in there. The natural humidity from showering and cooking makes them a great spot for your plant.
These affordable little devices keep the humidity in the room at a consistent level so are great for houseplants. It takes all of the worry away and will do wonders for plants with long thin leaves where brown leaf tips are common.
Temperature extremes might also be to blame
Another potential factor that may be causing your Bird’s Nest Fern to begin dying is extreme temperatures, in particular cool air and drafts. They need warm environments to really thrive and can get quite shocked and damaged by drafts coming in from outside. But it’s not just cold air from outside during winter that you need to be concerned about as air conditioning units can wreak havoc with your Bird’s Nest Fern’s health.
Make sure that you draft-proof any windows or doors that are close to your dying Bird’s Nest Fern (as well as any heat-loving tropical plants) and move them 1 meter away from air conditioning or heating vents.
Pests can also cause a Bird’s Nest Fern to die
One thing to look out for when trying to diagnose your dying Bird’s Nest Fern is pests. Although it’s not that common in plants that don’t spend any time growing outdoors, it can still happen that insects such as mealybugs, spider mites, scale insects use your plant as their new home.
Take a thorough look over your dying Bird’s Nest Fern looking for signs of pests including yellow or brown spots, holes in the leaves, white webbing or powder on the leaves and of course visible pests themselves. Whilst some of the bigs and signs are visible to the naked eye, use a magnifying glass just to be sure to catch anything.
Your first port of call to reviving your Bird’s Nest Fern and getting rid of the pests is to remove the worst affected leaves. This will help to curb the infestation initially and make the infestation easier to tackle. Then you want to wipe down the leaves with warm water as well as wash them down in the sink.
If the infestation continues, you might need to replace the potting mix as this is where some pests lay their eggs. Alongside these methods, you should also treat your Bird’s Nest Fern with neem oil or another insecticide to fight the infestation.
Make sure to isolate your Bird’s Nest Fern from other houseplants whilst it is undergoing treatment as pests can move across leaves that are close or touching.
Those are the most common factors that can cause a Bird’s Nest Fern to start dying. Once you’ve properly diagnosed the issue, it’s important to keep a very close eye on your Fern over the next few weeks to ensure that the changes you’ve made are reviving it.
Take a look through our Bird’s Nest Fern care guide to learn more about how to keep your plant thriving for years to come
Fiddle and Thorn is a participant in the Amazon Services LLC Associates Program, an affiliate advertising program designed to provide a means for sites to earn advertising fees by advertising and linking to Amazon.com
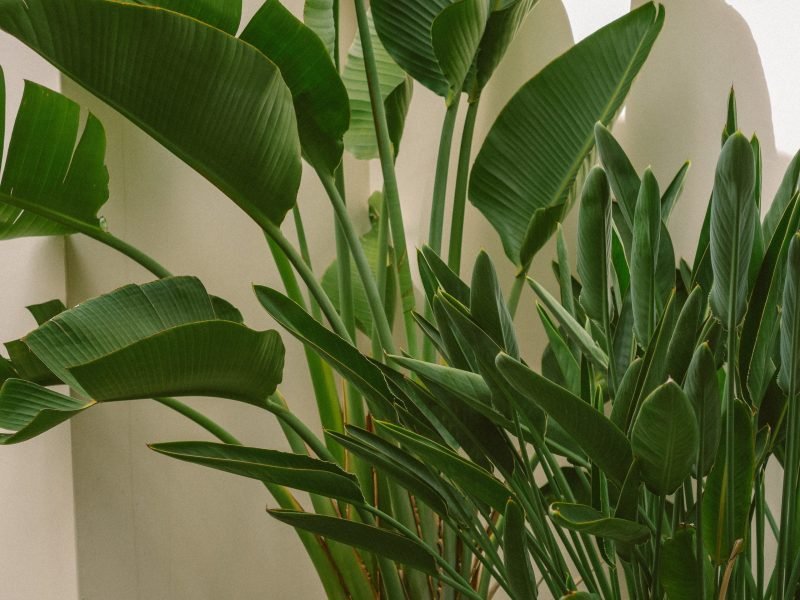
It’s always a bit disheartening when you see your Bird of Paradise plant starting to turn yellow. But don’t worry, this change in color doesn’t necessarily mean your tropical friend is headed for the plant graveyard.
Whether it’s due to environmental factors like lighting, irritating pests, overwatering, or just natural aging, there’s plenty you can do to help your plant bounce back.
So let’s dive in and help you figure out why your Bird of Paradise is turning yellow and what you can do about it.
Common Reasons for Yellowing Bird of Paradise Leaves
If you’re noticing that your Bird of Paradise plant is turning yellow, don’t panic.
This is a common issue that many plant owners face. Understanding the potential reasons behind this problem can help you diagnose the issue and take the appropriate measures to restore your plant’s health.
In this section, we’ll explore some of the most common causes and provide quick solutions.
Reason
Quick Solution
Overwatering
Reduce watering frequency and ensure your pot has proper drainage.
Under-watering
Water your plant more frequently. Remember, this plant prefers to stay moist but not soggy.
Too much sunlight
Move your plant to a location with indirect sunlight.
Not enough sunlight
Place your plant in a brighter location, but avoid direct sunlight.
Nutrient deficiency
Feed your plant with a balanced fertilizer during the growing season.
Remember, it’s crucial to monitor your plant closely after making these changes, as it might require a combination of solutions.
Low light levels can cause yellow leaves
Proper lighting is an essential factor in maintaining the healthy growth of your Bird of Paradise plant, and it’s important not to underestimate its impact.
If your Bird of Paradise is turning yellow, one of the most likely reasons could be low light levels. These tropical plants are accustomed to bright, but indirect sunlight, mimicking their natural habitat under the sun-dappled canopy of the rainforest.
Low light levels can stress the plant and lead to yellowing leaves as it struggles to perform photosynthesis.
When it comes to light levels, it’s all about balance. While your Bird of Paradise needs plenty of light, also keep in mind that direct, strong sunlight can be damaging.
This can lead to sunburn, which can also cause yellowing and browning of leaves. It’s a little like humans in this respect – just enough sun is beneficial, too much without protection can be harmful.
Here’s what you can do to address low light issues:
Position your plant right: Place your Bird of Paradise in a spot that gets plenty of bright, indirect sunlight. East or north facing windows are often ideal.
Use artificial light: If you don’t have a spot with enough natural light, consider using a grow light. These are special bulbs that simulate sunlight and can provide your plant with the light spectrum it needs to thrive.
Rotate your plant: To make sure all sides of your plant get equal exposure to light, rotate it every few weeks. This can help avoid overexposure on one side and underexposure on the other.
Remember, changes should be made gradually. Sudden changes in light levels can stress your plant.
Monitor your Bird of Paradise carefully after making any changes, and be patient – it may take some time for your plant to adjust and recover.
A pest infestation causes yellow leaves
Unfortunately, your Bird of Paradise plant may be playing host to unwanted guests.
Various pests such as spider mites, aphids, and mealybugs are known to target these exotic plants. These tiny invaders feed on the plant’s sap, causing damage which often results in yellowing leaves.
Spider mites are tiny arachnids that are almost invisible to the naked eye. They especially flourish in dry, warm conditions. If you notice small, yellow spots on your plant’s leaves, it could signal a spider mite infestation.
Aphids are small, green insects that are notorious for infesting house plants. They suck sap from the plant, leading to yellow, distorted leaves. They’re often found on the underside of leaves or near new growth.
Mealybugs appear as tiny, white, cottony spots on the leaves and stems of your plant. They feed by sucking sap from the plant, causing yellowing and wilting leaves.
To confirm the presence of pests, you’ll need to do a little detective work.
Check the undersides of the leaves and the joints where the leaves meet the stem. Spider mites leave behind a telltale webbing, while aphids and mealybugs are visible as small, discolored spots.
If you discover that pests are the cause of your Bird of Paradise’s yellow leaves, don’t panic.
There are several effective methods for dealing with these common plant pests. Insecticidal soaps or a solution of water and mild dish soap can be used to wash your plant, effectively removing and killing the pests.
For more severe infestations, you might need to use a stronger pesticide. Always remember to isolate the infested plant from your other plants to prevent the pests from spreading.
Overwatering can also cause yellow leaves
One of the most common mistakes plant owners make, especially with the lush Bird of Paradise, is overwatering. Overwatering can lead to yellowing leaves, a clear sign of distress in your plant.
When a Bird of Paradise receives too much water, the roots become waterlogged and oxygen-starved. This lack of aeration can lead to root rot, a dangerous condition that can harm the plant’s overall health.
The first visible symptoms of this condition often appear on the leaves, turning them a sickly yellow color.
If the roots are consistently waterlogged, the leaves may not only turn yellow but could also become limp or wilted.
So, how can you tell if overwatering is the problem? Well, besides yellow leaves, another tell-tale sign is the presence of brown spots, generally surrounded by a yellow halo. This is a symptom of a fungal infection, a common result of overwatering.
The best way to prevent overwatering is to follow a strict watering regimen. The Bird of Paradise prefers its soil to dry out a little between waterings.
This doesn’t mean wait until the soil is bone dry, but rather until the top inch or so of the soil feels dry to the touch. Then, when you do water, ensure the water drains out the bottom of the pot.
This will help to prevent water from sitting in the pot, which can lead to root rot.
How to fix overwatering
If you suspect your Bird of Paradise has been overwatered, don’t despair!
There are ways to remedy this situation. Firstly, allow the plant’s soil to dry out completely before watering again. If the plant is severely overwatered, you may need to repot it into fresh, dry soil.
Prune away any yellow leaves to encourage new growth. Over time, with careful watering, your Bird of Paradise should return to its vibrant, healthy self.
Natural ageing of your plant
It’s entirely normal for older leaves to turn yellow, then brown, before finally falling off.
This is the plant’s natural way of cycling out older growth to make way for fresh, new leaves. Don’t if panic you see a few yellow leaves here and there – it’s a natural process that occurs over time.
However, it’s important to keep an eye on the pattern of the yellowing. If the yellowing begins on older, lower leaves but eventually spreads upward to newer growth, that typically indicates a natural ageing process.
On the other hand, if the newer, upper leaves are turning yellow first, this might be a sign of a different problem such as-overwatering, inadequate lighting, or a pest infestation.
You don’t need to do anything about the natural yellowing associated with age. But, it’s a great opportunity to assess the overall health of your plant.
Make sure it’s getting the care it needs in terms of light, water, and nutrients. If you’re unsure, review the earlier sections of this article where we covered these aspects in detail.
Also, remember to gently remove the yellowing leaves once they’ve completely turned brown. This not only keeps your plant looking its best, but also helps prevent the potential spread of disease or pests.
Avoiding Overcrowding and Choosing the Right Pot
If your Bird of Paradise plant has begun to turn yellow, one of the issues could be overcrowding or not having the right pot size.
Both of these issues can stunt the growth of your plant and cause the leaves to turn yellow. Let’s consider each problem in turn and provide some solutions.
Avoiding Overcrowding
When a Bird of Paradise plant is placed too close to other plants, it can suffer from a lack of necessary nutrients, water, and light, leading to yellowing leaves.
This plant is known to spread its leaves wide to capture sunlight, and when it’s crowded, the leaf spread is limited. Additionally, crowded roots can limit the plant’s ability to absorb water and nutrients from the soil.
It’s like being at a crowded party where there isn’t enough food to go around – your plant ends up hungry, thirsty, and stressed.
Tip: Make sure your Bird of Paradise plant has plenty of space. It should be positioned far enough away from other plants that its leaves can spread out fully in every direction.
Choosing the Right Pot
The pot you choose plays a significant role in the health of your Bird of Paradise plant.
A pot that’s too small can cramp the plant’s roots, leading to poor water and nutrient absorption, ultimately causing the leaves to yellow. On the other hand, a pot that’s too large can lead to overwatering, as the soil will hold onto more water than the plant can use.
Your pot should also have proper drainage holes. Without them, excess water cannot escape, leading to waterlogged soil and, you guessed it, yellow leaves.
Tip: Choose a pot that is just slightly larger than the root ball of your plant. This gives the roots enough room to grow, but not so much that your plant risks being overwatered. Make sure your pot has drainage holes at the bottom to allow excess water to escape.
Flowering Bird of Paradise
Pruning and Removing Yellow Leaves
Pruning and removing yellow leaves from your Bird of Paradise plant is an essential part of maintaining its health and vibrancy.
This practice not only helps to improve the overall appearance of the plant but also prevents the spread of disease and enables the plant to focus its energy on new growth.
But how do you go about this without causing further harm to your beloved plant?
How to Prune your Bird of Paradise Plant
Pruning a Bird of Paradise is not as intimidating as it may seem. First, you’ll need a pair of sharp, clean pruning shears. Ensure they’re sterilized to prevent introducing any unwanted diseases.
Follow these steps:
Identify the leaves that are yellowing or brown. These are the leaves you’ll want to remove. Leaves that are just beginning to yellow at the tips can be trimmed to remove only the yellowing portion.
Cut the leaf at the base where it emerges from the main stem. Make your cut at an angle, as this allows water to drain off and not pool, which can promote disease.
Dispose of the removed leaves properly to prevent any possible disease spread.
When to Remove Yellow Leaves
Timing is crucial when it comes to removing yellow leaves from your Bird of Paradise. If a leaf is just starting to turn yellow, you might not have to remove it entirely.
Sometimes, the plant can recover if the issue causing the discoloration is resolved quickly. However, if a leaf is mostly yellow or brown, it’s best to remove it to prevent further stress on the plant.
Remember, always be gentle when pruning your Bird of Paradise. The plant’s health is paramount, so avoid causing unnecessary damage.
With the right approach, your Bird of Paradise will be back to its vibrant self in no time.
Tips for Reviving a Yellowing Bird of Paradise Plant
Now that we’ve covered the common issues causing your Bird of Paradise plant to turn yellow, it’s time to discuss some actionable tips to help revive your plant to its former glory.
Remember, patience and consistent care are key when it comes to nurturing your plant back to health.
Balance the Light
First off, ensure your plant is getting the right balance of light. Too much direct sunlight can scorch the leaves, causing them to yellow and curl, while too little light will lead to slow growth and yellowing leaves. A spot that offers bright, indirect light is ideal for your Bird of Paradise.
Regulate Watering
Next, regulate your watering routine. Overwatering is a common cause of yellowing leaves. It’s best to water your plant when the top inch of soil is dry.
Make sure to empty the saucer of any standing water to prevent root rot. Conversely, underwatering can also cause leaves to yellow.
So, it’s essential to find a watering balance that suits your specific plant.
Inspect for Pests
Do a regular pest inspection. If you find pests, treat your plant immediately. Neem oil is a natural solution that can deter a wide range of common indoor plant pests.
Remember to isolate the affected plant to prevent the pests from spreading to your other plants.
Check the Pot Size
Check if your plant has outgrown its pot. A pot that’s too small can impede your plant’s growth and cause yellowing leaves.
When repotting, choose a pot that’s 2-3 inches larger in diameter than the current one. Ensure the new pot has sufficient drainage holes to prevent waterlogging.
Provide Proper Nutrition
Lastly, provide your plant with proper nutrition. If your Bird of Paradise isn’t getting enough nutrients, its leaves might turn yellow.
A slow-release, balanced fertilizer applied during the growing season can help provide the necessary nutrients to your plant.
Conclusion
The Bird of Paradise plant can be a bit demanding, but it’s well worth the effort.
Yellowing leaves can be a sign of various issues, from low light levels and pest infestations to overwatering, overcrowding, or even just natural aging.
The key is to keep an eye on your plant and respond to any changes as soon as you spot them.
Remember to provide your Bird of Paradise with enough light, but not too much direct sunlight. Water it regularly but avoid overwatering. Be vigilant about pests and take action at the first sign of infestation.
And don’t forget about the importance of the right size pot and proper nutrition for your plant’s wellbeing.
And if you’re still having trouble figuring out why your Bird of Paradise’s leaves are turning yellow, don’t hesitate to seek professional advice.
With the right care, your Bird of Paradise can thrive and keep your space looking tropical and vibrant.
Fiddle and Thorn is a participant in the Amazon Services LLC Associates Program, an affiliate advertising program designed to provide a means for sites to earn advertising fees by advertising and linking to Amazon.com
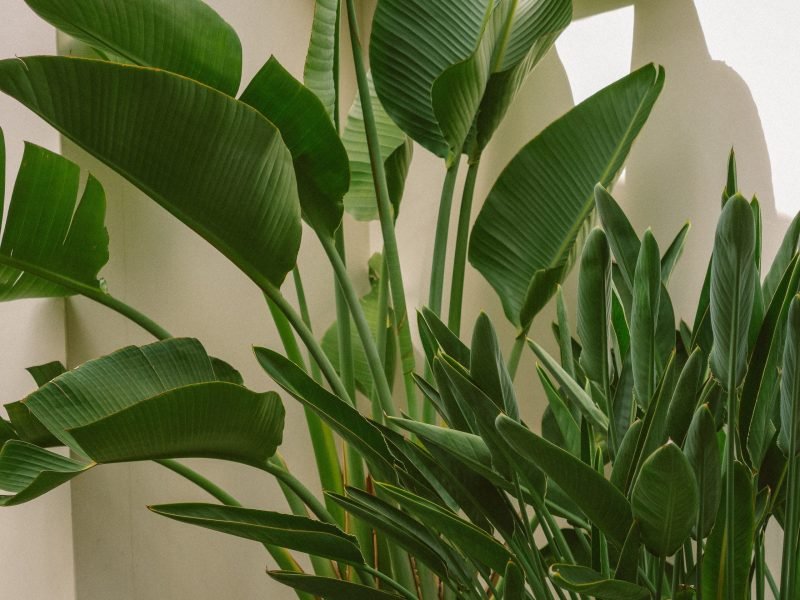
These tall glossy plants are great at bringing a piece of the tropics right to your home. However, if you’ve noticed that your Bird of Paradise is dying, then it’s important to get to the bottom of what’s going on straight away.
There are quite a few different factors that might be causing your Bird of Paradise to die so below we will go through each of them alongside tips on how to diagnose and treat the issue properly.
Overwatering is a common cause of issues with Bird of Paradise plants
If your Bird of Paradise is dying and developing yellow leaves then watering issues may be the cause. You’ll often find that overwatering causes large yellow sickly patches across the leaves of your plant and they may be softer than usual to touch.
To establish if watering issues are what is causing your Bird of Paradise to begin dying, take the plant out of the pot and take a look at the soil. If the potting mix is very dry and powdery or waterlogged and clumpy then watering is causing the problem. You just need to be a bit careful as these plants can get pretty large so in order not to hurt yourself, lie your plant on its side and remove it from the pot that way.
If the soil is waterlogged replace it straight away and trim away any rotten roots. These will be dark brown/black in colour as well as soft and mushy to touch. Hold back from watering as much as before and you should see healthy new growth eventually appearing.
In the future, make sure to monitor the moisture levels in the soil to avoid any watering issues. You want to hold back watering as much during winter as the cold darker months mean your plant will go dormant and not produce any new growth. This is when root rot and waterlogged soil become higher risk factors.
A dying Bird of Paradise can also indicate underwatering
Like overwatering, too little water can also be harmful to your Bird of Paradise, causing it to begin dying on you. Although it won’t die on you suddenly if you forget to water it every once in a while, if the problem persists for several weeks and months, then it will start to lead to issues.
Signs that your Bird of Paradise is dying due to underwatering include light brown leaves, leaf loss, stagnant growth, crispy stems and very light soil that is coming away from the edges of the pot.
Stick a finger in the top few centimetres of the soil to check the moisture. You can also try lifting your plant as we mentioned earlier to see it if feels particularly light (though be careful with this).
If you find that your plant feels very dry, water it a little every other day for a week. Your first instinct might be to give it a bucket of water straight away but this can actually be harmful to your dying Bird of Paradise if the soil goes from one extreme to the other. Instead, you want to reintroduce frequent watering for a week or two and this should solve the problem.
Moving forward, use a moisture meter to monitor how quickly the soil is drying out and adjust your watering habits accordingly. There are a lot of factors that can lead to the potting mix drying out quickly including high temperatures, more light, pot size and time of year.
A dying Bird of Paradise can also suggest low light
If your Bird of Paradise has been growing in darker areas of your home, then you probably need to adjust the light levels to revive it. Leggy or stunted growth is a classic sign of a lack of sunlight but symptoms can also include leaf loss and brown leaves on your dying plant.
When finding a new spot for your Bird of Paradise, be careful not to move it to direct sunlight as this will cause a whole range of other issues such as leaf burn and brown leaves.
Moving forward, to properly revive your dying Bird of Paradise it’s important that you monitor the light levels and how they change throughout the day. Your plant might be getting the right amount of light in the morning, but much too much in the evening for example. To monitor the light level, and to be sure your plant is getting the right amount, use a light meter.
If you are struggling to find a better spot to revive your dying Bird of Paradise, then you might need to buy an LED grow light to supplement light levels. These are particularly useful in winter or when propagating plants.
Low humidity might also be causing your dying Bird of Paradise
Another reason why your Bird of Paradise is dying could be a lack of humidity as they struggle in homes with dry air. This is most commonly an issue during winter when we have the heating on for a lot of the day and ventilate a lot less, causing really dry air.
Although we can’t reach the tropical humidity levels that Bird of Paradise plants love (and even if we could, it wouldn’t be very pleasant to live in for us), there are several things you can do to easily boost the humidity.
Mist the leaves on your Bird of Paradise
One of the simplest ways to increase the humidity for your dying Bird of Paradise is to mist it with a spray bottle a couple of times a week. This is a really good habit to get into for your other tropical and humidity-loving houseplants.
Give your Bird of Paradise a shower
Another easy method which will instantly increase the humidity is giving your plant a shower. Although this is a short-term solution, it’s a great way to boost the humidity and also allows you to get rid of dust on the leaves which is a bonus!
They’re relatively affordable little devices which keep a consistent humidity level in your home. This is the long-term solution (showering your plant will only increase the humidity for a little while) and will do all the hard work without you having to lift a finger!
A dying Bird of Paradise can also indicate pests
A slightly less common reason why your Bird of Paradise might be dying is pest infestation. If your plant spends any time outside then this risk is definitely increased so you want to inspect each of your plants thoroughly when moving them indoors to prevent the pests from spreading throughout your urban jungle.
Although it is rarer than the other issues, it can happen that mealybugs take hold of your plant. The best thing to do is wipe down the leaves on your plant, remove the worst affected leaves and flush the soil through. This will help initially curb the size of the infestation.
Once you’ve done this, we recommend treating your dying plant with an organic insecticide to fight the infestation. You also want to check over your other plants in the room to see if any other plants have pests. Make sure to keep your Bird of Paradise (and other infected plants) a good distance away from any of your other houseplants as you don’t want the infestation to spread.
Overfertilization could also be to blame for your Bird of Paradise dying
If none of the other causes seem to match up with what your plant is suffering from, then it may be due to over-fertilisation.
Make sure you aren’t fertilising at all during autumn and winter as this is a more dormant growth period so your Bird of Paradise won’t need any feed. When you are fertilising during spring and summer, make sure you are using less than the recommended amount on the bottle about every 4 weeks is enough.
To solve the issue of over-fertilisation on your dying Bird of Paradise, remove any fertiliser spikes or replace the potting mix if you’ve used pellets in the soil. If you have been using a water-soluble fertiliser then it’s easier to solve as you just have to stop and flush through the soil once or twice in the shower. Moving forward, hold back fertilising for at least 6 months.
Those are the most common reasons why Bird of Paradise plants begin dying. As there are quite a few possible factors, we recommend going through each of them one by one whilst inspecting your plant’s leaves and soil. This will help you eliminate factors that don’t fit with what’s going on with your plant and hopefully you can come to the right diagnosis.
After making changes to solve the issue, it’s vital that you keep a close eye on your Bird of Paradise to ensure its health is moving in the right direction and you’re able to revive your dying Bird of Paradise.
Take a look through our Bird of Paradise care guide for more information on how to keep your beautiful plant thriving!
Fiddle and Thorn is a participant in the Amazon Services LLC Associates Program, an affiliate advertising program designed to provide a means for sites to earn advertising fees by advertising and linking to Amazon.com
Also known as the Signature Tree or Apple Fig, the Autograph Tree is known for such sturdy leaves you could carve your name into them (hence the name). However, their sturdiness doesn’t mean that they are immune to issues and if you do find that your Autograph Tree is dying, then it means something needs to change immediately.
To figure out why your Autograph Tree is dying, we have outlined the potential factors below as well as what to look for to diagnose the issue. You’ll also find tips on how to treat the issue and steps to take to prevent it from reoccurring.
Underwatering can cause a dying Autograph Tree
If your dying Autograph Tree is showing signs of drying out such as light brown leaves and crispy stems, then it may be underwatering that is causing it to die. You want to be 100% sure this is causing your plant to die before you increase how much you water your Autograph Tree. To confirm the issue take your Autograph Tree out of its pot and check if the potting mix is bone dry. It will start to feel very powdery if there is no moisture.
You also want to look at the root system if the issue has been going on for a while, it may have started to turn the root crispy.
To start to revive your dying Autograph Tree you need to be very careful about introducing water again. Plants can get quite shocked if their environment suddenly changes (yes they are pretty sensitive just like humans) so you need to give them little bits of water once or twice a day to get some moisture into the soil.
To prevent the issue from causing a dying Autograph Tree in future, adjust your watering schedule so that you are either watering your plant more deeply or more frequently. Using a moisture meter can also really help to ensure you are watering your Autograph Tree properly.
A dying Autograph Tree can also indicate overwatering
Overwatering can also be a real concern for Autograph Trees and might be why your plant is dying. If your plant’s pot doesn’t have good drainage or you are simply watering too much, this will often lead to waterlogged soil. Once this happens, the roots on your Autograph Tree will begin to rot and your plant will begin to die.
If you think you may have overwatered your plant then you must inspect the soil first before making any changes to your routine. You want to make sure that this is definitely the problem as there are several other reasons why your Autograph Tree might be dying.
Carefully take your plant out of the pot and inspect the roots and soil. If the potting mix is soggy and clumpy then it is most likely overwatering that is causing your Autograph Tree to die.
To solve the issue and revive your dying plant, remove and replace all of the potting mix. You might want to downsize the pot as less soil means it’ll dry out quicker in future. This very much depends on the size of the root system compared to the pot.
Carefully remove as much of the old potting mix from the root system so that it can start to recover. If the roots are badly damaged then trim away the worst affected areas. This will encourage your plant to grow new roots and not waste precious energy trying to keep the rotting ones alive.
To prevent overwatering from causing your Autograph Tree to start dying again in future, make sure that you leave enough time between waterings so that the potting mix has time to dry out. This will really help to avoid waterlogged soil and root rot.
Like with solving underwatering, a moisture meter will be your best friend here as it will tell you when the soil is still moist. You can also use other methods such as the chopstick method to check the moisture levels in the soil.
Low humidity can also cause issues for your Autograph Tree
If your Autograph Tree has developed brown spots or edges on the leaves then dry air could be the culprit. Autograph Trees love high humidity levels so it’s important that you make sure to give it a boost every now and again to prevent it from dying.
Here are a few simple ways to increase the humidity for your dying Autograph Tree:
Mist the leaves regularly
Use a spray bottle to mist the leaves a few times a week or even daily if the issue doesn’t seem to be improving. This also gets rid of any dust that might be lingering on the leaves which is a bonus. This is a really great habit to get into and your dying Autograph Tree will love you for it!
Build a pebble tray
Fill up a tray of pebbles and fill halfway with water. Place your plant on top and the water will evaporate around it, increasing the humidity level.
Move to the bathroom/ kitchen
These rooms have naturally higher humidity levels because of steam from showering and cooking. Your Autograph Tree will love it if the light levels are right. You just want to make sure that you aren’t putting your dying Autograph Tree too close to the cooker if moving to the kitchen as that can dry out your plant pretty quickly.
This is the long-term solution to humidity issues and the best thing you can invest in for your dying Autograph Tree. They create a nice steady humidity boost without you having to lift a finger!
Those are the most common reasons why your Autograph Tree might be dying. It’s important to act quickly once you have correctly diagnosed the issue as the more damage is caused, the more difficult it becomes to revive your plant. After making any changes, it’s important to keep a very close eye on your Autograph Tree for the upcoming weeks so that you can ensure the problem isn’t progressing further.
To learn more about how to best care for your plant and keep it from dying in future, check out our Autograph Tree care guide.
Fiddle and Thorn is a participant in the Amazon Services LLC Associates Program, an affiliate advertising program designed to provide a means for sites to earn advertising fees by advertising and linking to Amazon.com