Why does my Dragon Tree have brown leaves? Causes and How to Fix it!

Last Updated: May 28, 2022

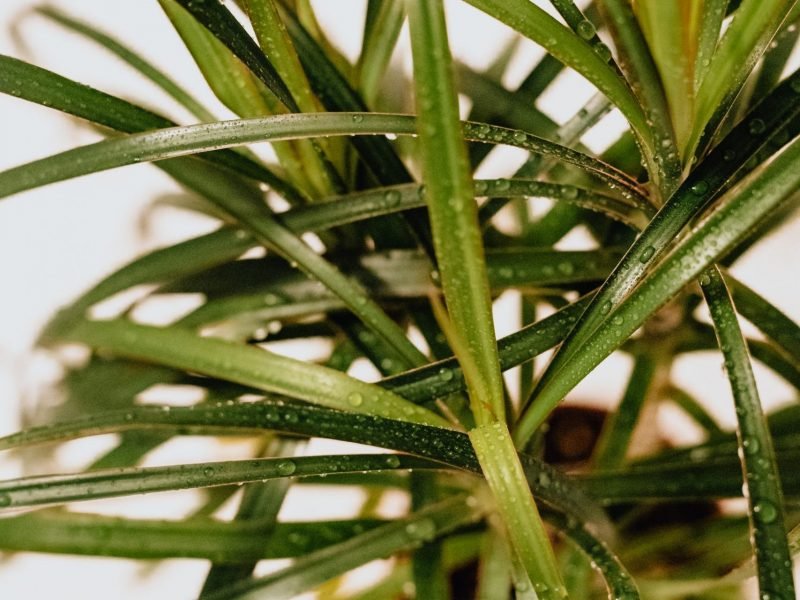
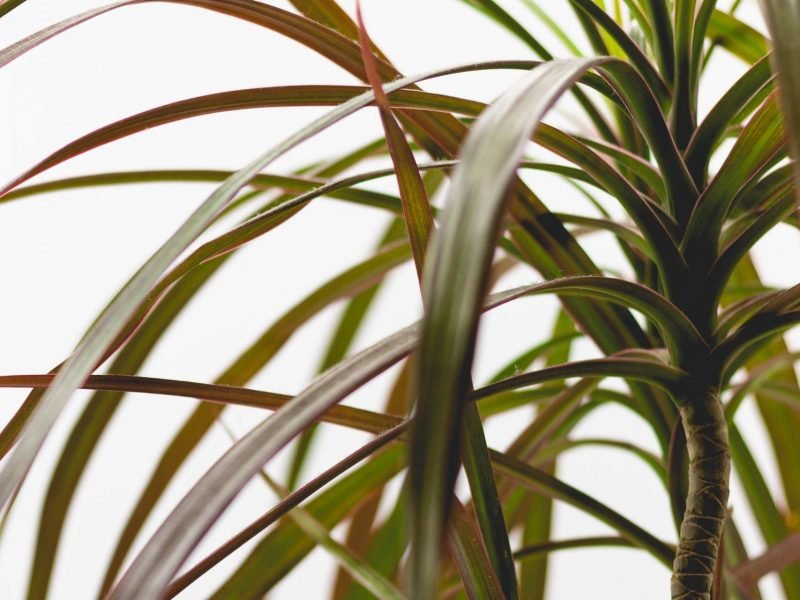
Dragon Tree plants aren’t the most difficult houseplant to take care of, but they sure do still have their issues. It often occurs that your Dragon Tree develops brown leaf tips or even brown leaves throughout the plant. This is a sign that something isn’t quite right so look through all of the causes below and hopefully this will help you diagnose and fix the problem.

Brown Dragon Tree leaves can indicate cold temperatures

Dragon Trees don’t like cold air and will struggle if exposed to temperatures below 64 degrees Fahrenheit (18 degrees Celsius) for long periods of time. Of course, your home will always drop below this during winter and at night but try and keep this to a minimum.

Drafts that come through cracks in windows or doors can be the most harmful to your Dragon Tree and will cause brown leaves among other issues such as leaves falling off. This is because you may not realise the temperature is so low in that small spot because the average room temp is normal. Make sure to draft-proof any windows or doors that are within 1 metre of your Dragon Tree or any other houseplants.

We also recommend getting a thermometer to measure how the temperature changes throughout the day and across the year.

Water sensitivity can lead to brown leaf tips

Another common cause of brown leaf tips on Dragon Tree plants is too much fluoride. Dragon Trees are particularly sensitive to fluoride compared to most other houseplants so it is an important one to look out for. If you live in a hard water area, your plant may be suffering from a flouride build up in the soil. This is where the minerals suffocate the roots over time which stops them getting the right nutrients from the soil. It can also be caused by an excess of perlite in the soil or from phosphate-rich fertiliser. Check the soil and fertiliser and replace if necessary.

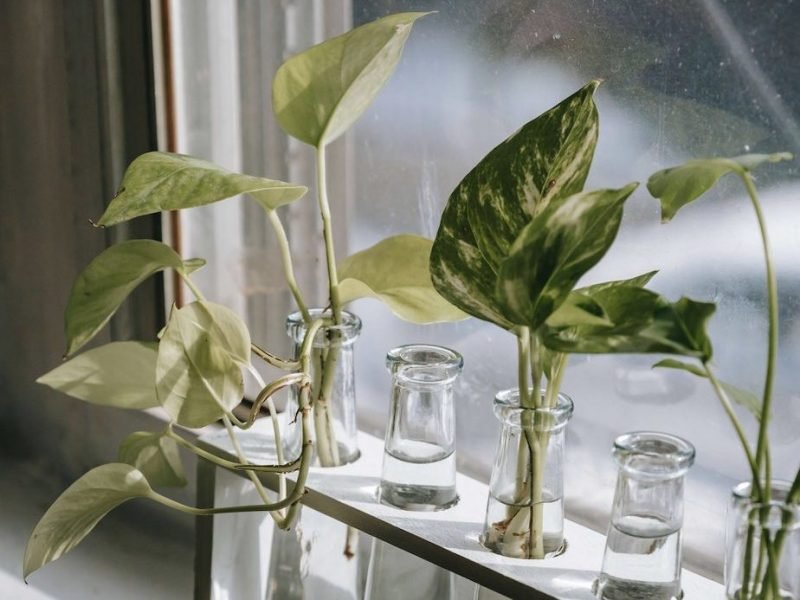
If you are worried that hard water is the cause then there are a few free and easy ways you can fix it. Firstly, collecting rainwater to give to your plants as it contains a lot fewer chemicals than the treated water out of your tap. Secondly, you can leave a jug of water out overnight and let the fluoride and chlorine evaporate.

Lack of humidity can harm your Dragon Tree

Dry air might also be the cause of your Dragon Tree’s brown leaves. It usually starts at the tips and works its way up the leaf. Although the current brown tips are irreversible, there are quite a few simple ways to up the humidity to stop any more from occurring.

Misting the leaves

This is our top method to increase the humidity for your Dragon Tree. Mist the leaves using a spray bottle 3-4 times a week. Not only will this increase the humidity but it will also get rid of any dust that has formed on the leaves. We recommend misting in the mornings as it leaves enough time for the water droplets to evaporate before it gets cold during the night. Cold damp leaves are more susceptible to root rot so you want to be careful here.

Put your Dragon Tree in the shower to avoid brown leaves

By rinsing down your plant you can instantly increase the humidity. Put your plant in the bath or sink and wash down the leaves. Use lukewarm water at low pressure so you don’t damage, shock or burn the plant.

Use a pebble tray

This one requires a little bit of DIY. Fill up a tray with small pebbles and add water so it reaches about halfway up the tray. Place your Dragon Tree on top and throughout the day the water will evaporate around the plant. You need to make sure that the roots of your plant are not touching the water (which is why we say to fill up the tray halfway). If the roots are sitting in the water then it will very quickly lead to root rot and a whole range more problems!

Invest in a humidifier

These portable and affordable gadgets are a real game-changer when it comes to increasing the humidity for your plants and your Dragon Tree will love you for it.

We recommend this humidifier from Amazon. We’ve been using it for years and our plants really love it!

Those are the most common reasons why your Dragon Tree plant has developed brown leaves or brown leaf tips. Hopefully, if you have caught the problem early you should be able to fix it pretty easily and your plant will be producing new healthy growth in no time. If you want to find out more about how to care for your plant then visit our Dragon Tree care guide for everything you need to know to keep your plant happy AND healthy!

Fiddle and Thorn is a participant in the Amazon Services LLC Associates Program, an affiliate advertising program designed to provide a means for sites to earn advertising fees by advertising and linking to Amazon.com

Take our houseplant survey!

Quickly respond to our 30 second houseplant survey and get 75% off our Complete Houseplant Care eBook!

Take the Survey

No thanks…

Why is my Dragon Tree dying?

Last Updated: October 25, 2022

Although often known as one of the hardier houseplant types, the Dragon Tree is by no means immune to the same issues that we commonly face with so many of our beloved plants. There are several different causes that can each cause your Dragon Tree to start dying, some more worrying and fast-developing than others.

Whilst some factors in the care we give our plants or the environment they live in can have a very fast negative impact on your plant’s health, others build up over time and could have been going on for a while before you can spot any visible issues on your plant.

This is why it’s crucial that you make a fast but proper diagnosis as to why your Dragon Tree is dying. This will then allow you to start treating it as soon as possible to revive your dying plant.

Below we will go through each of the most common reasons as well as detailing how to treat the problem effectively and prevent it from happening again in future.

A dying Dragon Tree can indicate overwatering

Overwatering is the main cause of problems across all houseplant types and it’s one you want to catch as soon as possible. This is why it’s always our first port of call when looking to diagnose a problem. Dragon Trees don’t like sitting in puddles of water for long periods of time and prefer their soil to dry out between waterings. Consistent overwatering and soggy soil will cause damage to the root system and mean your plant will lose leaves and become droopy and soft.

To figure out if overwatering is the reason your Dragon Tree is dying, check the moisture levels in the soil immediately. If the soil is quite waterlogged and clumpy then replace it with fresh dry mix which will allow the plant to start to recover. Trim away the rotten roots (these will be black and soft).

To solve and prevent the issue, you want to adjust how you are watering your Dragon Tree. You either want to cut back on how frequently you water or how much water you give your plant each time. Both of these solutions will allow the potting mix to dry out and prevent root rot.

When a plant becomes damaged due to overwatering, it can mean they take a little while to fully recover because their root system started to rot. But be patient and you should start to see your Dragon Tree looking fresher in a few weeks.

Underwatering could also be killing your Dragon Tree

On the opposite side of the moisture spectrum, your Dragon Tree could be dying due to a lack of water. Although the plant will forgive you for occasionally forgetting to water, consistent underwatering can lead to a variety of serious issues if not solved in time. The most common signs of an underwatered Dragon Tree to look out for are dry leaves, light brown spots on the leaves and drooping stems.

Before you change anything about how you water your plant, it’s important to be sure that underwatering is the cause. Take your plant out of its pot to see how dry the potting mix feels. The worst thing would be assuming that your Dragon Tree is dying because it needs more water but it’s actually the opposite or caused by another environmental issue.

Your first instinct to reverse and revive your dying plant might be to drown your Dragon Tree to make up for the lack of water, but this can actually cause more damage and shock your plant. They don’t really like it when there are sudden and quick changes in their environment. If their soil goes from bone dry to super soggy, this can cause your plant to go into shock. The impact of this can be drooping stems and your plant might even lose a leaf or two.

Instead, the best way to revive your dying Dragon Tree is by watering your plant a little bit once a day for a full week. Then moving forward, adjust your watering routine so that you only let the potting mix dry out for a little while but not extended periods of time.

Cold temperatures could be harming your Dragon Tree

Another thing that these plants hate is cold air and consistent cold drafts and this can over time cause some real issues for your plant.

There are a few different causes of cold drafts harming your plant, the most common is cracks in doors and windows that your plant is near to them. But it’s not just cold winter air that you need to be wary of as air conditioning can be your plant’s worst enemy if they are too close to the unit.

The best thing to do to revive your dying Dragon Tree is to move your plant to a warmer area of your home and monitor how the temperature changes throughout the day and throughout the various seasons using a digital thermometer. You are looking to reach their ideal range of 72 degrees Fahrenheit (22 Celsius) during the day (of course it will drop a little at night but it can deal with this to some extent).

Inspect your plant for pests

Whilst rarer than some of the other reasons we went through above, your Dragon Tree might be dying due to a pest infestation. They can be susceptible to gnats, mealybugs and scale insects that will be more than happy to make your plant their home. The reason pests are so damaging is because they suck on the plant’s leaves which exhausts them and leaves behind yellow patches and holes across your plant.

Most pests can be visible just by looking closely but get a magnifying glass if you can’t see any as this will also help you look out for signs they are there (holes in the leaves, small brown dots and white powder). Another top tip is to closely inspect the undersides of the leaves as that’s often where they hang out.

If you do spot pests then isolate your infected Dragon Tree and remove the worst affected leaves and potting mix. This reduces the size of the infestation for a while and will make it easier to tackle. The next step is to treat it rigorously with neem oil and insecticide.

Those are the most common reasons why your Dragon Tree is dying. It’s important to go through each of them whilst closely inspecting your plant and its potting mix so that you can eliminate factors that don’t apply and hopefully make the right diagnosis. Then once you have made changes to either the environment or your care routine, you want to closely monitor your plant to ensure things are improving.

To learn more about caring for your plant and preventing more common issues from arising, check out our Dragon Tree care guide.

Fiddle and Thorn is a participant in the Amazon Services LLC Associates Program, an affiliate advertising program designed to provide a means for sites to earn advertising fees by advertising and linking to Amazon.com

Take our houseplant survey!

Quickly respond to our 30 second houseplant survey and get 75% off our Complete Houseplant Care eBook!

Take the Survey

No thanks…

Why is my Dragon Tree drooping?

Last Updated: September 29, 2022

If your Dragon Tree looks a little limp and has started to droop down then this definitely suggests that there is something wrong. However, you’ve come to the right place as below we will not only be going through all the different causes of a drooping Dragon Tree but will also guide you through how to fix and prevent the issue so you can keep your plant thriving.

A drooping Dragon Tree can often mean overwatering

Overwatering is one of the biggest and most common problems in the houseplant world as it can cause a whole range of issues that some plants can not recover from. It’s also tricky because by the time it shows up as a visible issue on your plant, the issue has been slowly rotting the root system without you even knowing. However, if the leaves are drooping but are still quite green and healthy then the problem should not have advanced enough so that your plant is unsalvagable.

The reason that overwatering is so damaging is that it can very quickly lead to root rot which means the plant is unable to take up nutrients and water from the soil. This leaves your Dragon Tree quite droopy and unstable.

If you think your Dragon Tree might be suffering from overwatering and root rot replace the potting mix right away and trim away any rotten roots. Moving forward, adjust your watering schedule to either water less deeply or less frequently. It can take a little longer for the plant to recover from overwatering than some other issues due to the damage to the root system so don’t give up straight away!

Underwatering can also cause drooping stems and leaves

The strange thing about drooping leaves on a Dragon Tree is that as well as too much water, they can also be caused by not enough water. Consistent underwatering can lead to a variety of issues but the first of which will tend to be a drooping plant. Underwatering won’t kill your plant as quickly as overwatering but still needs to be treated quickly to prevent the root system from crisping up.

Before you start watering more frequently, we recommend taking your plant out of the pot and seeing how dry the potting mix feels. You want to be sure that underwatering is causing the drooping plant as you don’t want to increase watering if that isn’t the issue.

Once you are sure that the soil is bone dry and it’s underwatering that is causing your Dragon Tree to droop, then slowly reintroduce watering. Your first instinct might be to drown the plant in water but this can actually cause more damage and more brown leaves. This is because plants get shocked by a sudden change in the environment.

Instead, the best way to solve the underwatering issue is to water your Dragon Tree plant a little bit once a day for a week. After a week you want to go back to a more normal care routine, making sure to check the moisture in the soil frequently to avoid the leaves drooping again. Picking up a moisture meter will make this easier to monitor and help you establish a better watering routine.

Poor drainage could also be the issue

It might not be the amount or frequency of water that is harming your plant but actually the lack of drainage in the pot that is impacting the root system and causing drooping leaves. If not enough of the water is draining, then waterlogged soil can very quickly start causing issues.

You can very easily increase the amount of drainage in your soil by mixing in a small amount of perlite. This will make it far easier for water to flow through and out of the drainage holes of your pots (you should also check to make sure your pots have drainage holes).

If your Dragon Tree is in a plastic pot, we also recommend switching this out to a terracotta or clay pot. These allow some of the excess water to evaporate out of the sides of the pot. We love these terracotta pots from Amazon. 

By increasing the drainage, it ensures that your plant won’t start dying if you just overwater it a little here and there.

Pests are a worrying cause of a drooping plant

A rarer but equally important cause of drooping leaves on Dragon Trees (and most other houseplants), is a pest infestation. It can be worrying for plant parents to think that pests might be making a home on their plants but if you catch the problem early, there are several ways you can combat the issue. The reason that pests cause drooping leaves and stems is that they suck the nutrients from your plant, exhausting it.

Pests don’t tend to be common on plants that don’t spend any of the year outdoors, but it can still happen. The first thing to do is isolate your infected plant away from your other houseplants to stop any spread of the pests (they can jump around close hanging leaves). T

Then inspect your plant closely to spot any further signs, beyond drooping leaves, that indicate bugs are living on your Dragon Tree. The most common signs include yellow or brown spots on the leaves, holes in the leaves and white webbing across the stems. Using a magnifying glass will really help you spot any crawling around on the leaves.

If you do spot any signs of pests, cut away the worst affected leaves and replace the potting mix entirely to curb the growth of the infestation. Then wash down the leaves and soil in the shower using warm water and wipe over them with a clean cloth. We also recommend treating your Dragon Tree with neem oil and showering every few days.

Those are the most common reasons why Dragon Trees start drooping down. The key to quickly and painlessly solving the issue is to catch it as soon as possible. This is why we highly recommend that all plant parents give their plants quick check-ups every now and again to spot any early warning signs. We like to do this each time we water and then give more thorough check-ups once a month.

To learn more about how to keep your plant thriving, check out our Dragon Tree care guide.

Fiddle and Thorn is a participant in the Amazon Services LLC Associates Program, an affiliate advertising program designed to provide a means for sites to earn advertising fees by advertising and linking to Amazon.com

Take our houseplant survey!

Quickly respond to our 30 second houseplant survey and get 75% off our Complete Houseplant Care eBook!

Take the Survey

No thanks…

Why does my Dragon Tree have yellow leaves?

Last Updated: May 3, 2022

Dragon Trees are great, low maintenance houseplants but it can be worrying when their leaves start to turn yellow as this usually indicates that there is something wrong. Luckily, we have learnt the hard way and figured out all of the reasons why your Dragon Tree may be developing yellow leaves. You’ll find out everything you need to know below so you can fix the issue.

Overwatering often causes yellow Dragon Tree leaves

Too much water can quickly turn your Dragon Tree’s leaves yellow and it can be quite a worrying issue if not solved fast. Waterlogged soil means that the root system on your Dragon Tree will be damaged and your plant won’t be able to get the nutrients it needs. This will cause the leaves on your Dragon Tree to turn yellow and they may start to fall off. You want to make sure that your Dragon Tree’s potting mix has fully dried out before watering again.

How do I know if overwatering is the cause of the yellow leaves?

Luckily, there are a lot of ways you can figure out if overwatering is harming your Dragon Tree:

Leaves are soft

If you notice that the leaves on your Dragon Tree are a little softer than usual, as well as yellow, then overwatering is the most probable cause.

The potting mix is waterlogged

If you notice the potting mix is soggy and clumpy, overwatering is probably the cause of your Dragon Tree’s yellow leaves. To check the moisture either take the plant out of its pot, or use the finger/chopstick method. Stick a chopstick in the top few inches of the soil, if it comes out with potting mix stuck to it, there is still moisture in the soil.

The potting mix will smell musty

We always recommend getting up and close to your houseplants on a regular basis as waterlogged soil will smell quite unpleasant, musty and damp.

Use a moisture meter

To be sure that overwatering is the cause, you may also choose to use a moisture meter. These affordable little devices can tell you with certainty how dry or soggy the soil is and make watering a stress-free routine.

How do I fix an overwatered Dragon Tree?

Once you have determined that overwatering is causing your Dragon Tree’s leaves to turn yellow, then you must act quickly to prevent any more damage. Take your Dragon Tree out of its pot to check if the potting mix is waterlogged. Inspect the root system and trim away any rotten or damaged roots as well as the worst affected leaves as this will help produce new healthy growth. If the potting mix is waterlogged, replace it with fresh high-quality mix so that your plant can start to recover.

In future, make sure to only water your Dragon Tree when the potting mix has dried out to avoid overwatering again.

Underwatering also often causes yellow Dragon Tree leaves

Yellow leaves can be a tricky one to diagnose because they are also caused by a consistent lack of water. Dragon Trees can be quite forgiving if you forget to water them occasionally, but if the problem goes on for several months you’ll start to notice issues including dry yellow leaves which will eventually fall off the plant.

How do I know if underwatering is the cause of the drooping leaves?

Leaves are dry and crispy

Along with yellowing, if the leaves on your Dragon Tree are also very dry, crispy or break easily if touched, then you are probably underwatering your plant.

The potting mix is dry

An easy way to see if the drooping leaves are caused by underwatering is by taking the plant out of its pot and inspecting the potting mix. If the soil feels very dry to touch, almost like dust, then your plant needs more water.

The soil is coming away from the sides of the pot

This is a great method to be able to tell if your Dragon Tree is being underwatered just by looking at it. If you notice that the soil has compacted and is actually coming away from the sides of your pot, then it indicates that you need to increase watering and this may be the cause of the yellow leaves on your Dragon Tree.

Use a moisture meter

If you aren’t sure about how much moisture is good for your Dragon Tree, then we recommend using a moisture meter as this takes the guessing part away. They conclusively tell you how damp the soil is and if it’s time for water. They are super affordable too so we definitely recommend picking one up.

How do I fix an underwatered Dragon Tree?

Now that you have established that your Dragon Tree needs more water, you need to fix it in the right way. Initially, you may think that you should drown your plant to compensate for the lack of water. However, this may actually shock your plant as its environment has suddenly and drastically changed. Instead, you want to slowly reintroduce watering by giving it a little twice a day for one week. This will slowly dampen the soil and help your plant recover. In future, make sure to give yourself a better watering routine so you don’t underwater your plant and cause any more yellow leaves.

Temperature extremes may be causing yellow leaves

Dragon Trees don’t like rapid changes in temperature and will struggle if exposed to really cold drafts or hotspots, causing yellow leaves. Keep them away from drafty windows/ doors, air conditioning vents, radiators and any spots where heat may build up during the day (right next to windows).

It can be difficult to determine if the temperature is causing the yellow leaves on your Dragon Tree as whilst you may feel as though the temperature is fine in the room, drafts and hot spots may still exist. The only way you’ll be able to know is by using a digital thermometer to check the temperature next to your plant throughout the day and night. We recommend popping the thermometer there for several days throughout the year to pick up on any changes throughout the seasons. This will help you know if you need to move your Dragon Tree around a little throughout the year.

Fluoride toxicity can cause yellow leaves

Fluoride poisoning is quite common in Dragon Trees as they’re particularly sensitive to chemicals found in tap water/ potting mix/ fertiliser. Here are a few things you can do to avoid fluoride sensitivity:

Avoid using perlite

Although perlite is great to aid drainage and aeration in the soil, Dragon Trees can be a little sensitive to fluoride contained in perlite which can cause yellow leaves so it’s better to use a mix that doesn’t contain it.

Check the fertiliser you’re using

If you regularly feed your plant, check to make sure that it doesn’t contain superphosphate as this can cause yellow leaves to develop on your Dragon Tree.

Avoid using hard water

Although the fluoride levels in tap water should be fine for watering your Dragon Tree, if you live in a particularly hard water area you may need to take some extra steps to reduce the level. You can do this by using filtered water, collected rainwater or by letting your tap water sit for a day before using. The fluoride will sink to the bottom so just remember not to use the last few inches of the water.

Yellow leaves can indicate a pest infestation

If the yellowing occurs as patches on the leaf, rather than entire leaves at a time, then pests may be the cause. Spider mites are the most common pests found on Dragon Trees so take a good look over your entire plant to spot any unwanted insects. Look especially close at the underside of the leaf as this is where pests like to hang out.

The best technique for removing them that we’ve found so far is taking your Dragon Tree for a shower. Just rinse down the leaves and stems with water and let them dry off. Keep the water pressure on medium as high pressure can damage the leaves. After a few showers, the spider mites should be gone for good. We also recommend treating your Dragon Tree with neem oil to curb the infestation.

Natural ageing

If it’s only the lower leaves on your Dragon Tree that are turning yellow then this may be simply natural ageing. Over time, your Dragon Tree will drop some of its oldest leaves in favour of growing bigger healthier new ones. This is completely natural and isn’t something you did wrong or anything to worry about. The rate of natural ageing should be 1 or 2 of the oldest leaves every few months. Monitor the rate of yellowing to see if it is speeding up or well above this rate as there might be another cause you need to look out for.

Should I trim away the yellow leaves?

We always recommend getting rid of the yellow leaves on your Dragon Tree. Unfortunately, once they have turned yellow there is no going back to their usual green colour. So trimming away the leaves means that your Dragon Tree can focus all of its energy on producing new leaves, rather than wasting energy trying to keep the dying yellow leaves alive.

When trimming the leaves off, always cut them with a sharp pair of scissors rather than ripping them off. Ripping them can damage the plant further.

So those are the most common reasons why your Dragon Tree has developed yellow leaves. If you have caught the issue early then your Dragon Tree should recover quickly with a few changes here and there to your plant care routine and its environment.

To find out more about caring for your plant, as well as propagation tips and common problems, check out our full Dragon Tree care guide.

Fiddle and Thorn is a participant in the Amazon Services LLC Associates Program, an affiliate advertising program designed to provide a means for sites to earn advertising fees by advertising and linking to Amazon.com

Take our houseplant survey!

Quickly respond to our 30 second houseplant survey and get 75% off our Complete Houseplant Care eBook!

Take the Survey

No thanks…

Why is my Dragon Tree losing leaves?

Last Updated: June 13, 2022

Dragon Tree, or Dracaena if you want to use their Latin name, tend to be one of the easier houseplants to take care of. This also means that if you do spot a problem, it is usually fairly easy to diagnose and correct the issue before it damages your plant’s health too much. There are not many causes of leaves dropping for Dragon Plants, the main ones being overwatering, low light levels, or cold temperatures/drafts.

Overwatering can cause your Dragon Tree to start losing leaves

If you find that your Dragon Tree is losing leaves from the bottom up, then it may be a problem with the roots that is causing the issue. The most common one is overwatering. Giving them too much water too often is one of the main killers of Dragon Trees so you need to act quickly if you suspect this is the problem.

Dragon Trees absolutely hate sitting in water as this can easily lead to root rot meaning the plant becomes unstable and also cannot get needed nutrients from its root system. Waterlogged soil also gives off quite a damp and musty smell so get up close to all of your houseplants every so often to check for any smells.

If you think that your Dragon Tree is waterlogged (and this is why it’s losing leaves), check the moisture of the soil immediately and adjust watering accordingly. We also recommend replacing the potting soil straight away (rather than waiting for it to naturally dry out) so that the roots can begin to recover and resume healthy growth.

If you decide to wait for the soil to naturally dry out, you risk causing more damage to your Dragon Tree, causing it to maybe start losing even more leaves. Take a look at our guide to handling root rot for more information on how to diagnose, treat and prevent the issue.

In future, to avoid your plant losing any more leaves, try to regulate your watering and always check that the top of the soil is dry before giving your Dragon Tree any more water. You need to also water according to the seasons; in the spring and summer (growth period) your Dragon Tree will require water about every 5-6 days. However, in winter (dormant period) about once every few weeks is enough.

Using a moisture meter can really help establish when it is time to water your plant, and when it might need a few more days to dry out a bit further.

We also recommend removing any excess water from the saucer, tray or planter about 20 minutes after watering. This will allow your Dragon Tree to take in as much as it needs but will prevent the soil from becoming too waterlogged.

Leaf drop can also indicate drainage issues

It’s worth checking the drainage of the soil and pot that you’re using for your Dragon Tree as even if you are watering the correct amount, without proper drainage your plant may still be waterlogged. Having the root system soaked in water for long periods of time is likely to bring about a whole host of problems, not just your plant losing leaves.

There are a few ways you can increase the drainage for your Dragon Tree and other houseplants to prevent them from losing any more leaves.

Drainage holes

Firstly, make sure that the pot has several drainage holes and that they are unblocked. These will allow excess water to flow out of the pot into a saucer, tray or planter and it keeps the roots from sitting in waterlogged soil. If your Dragon Tree’s pot doesn’t have any drainage holes, then repot it to a pot of a similar size.

Add perlite to the soil

Another way to increase drainage is to add some perlite to the soil. This not only helps the soil drain better but perlite also increases aeration in the potting mix. This will go a long way to preventing your Dragon Tree and other houseplants from losing leaves due to waterlogged soil.

Switch to terracotta pots

If you are using a plastic pot for your Dragon Tree, then you might want to consider switching it to a terracotta pot to prevent it from losing any more leaves. Terracotta pots are permeable which means some of that excess water can evaporate out of the sides of the pot, whereas plastic pots retain every single drop of moisture. This can mean even the occasional overwatering or blocked drainage holes can have serious consequences for your Dragon Tree, losing leaves being one of them.

Dragon Trees can start losing leaves due to lighting issues

Dragon Trees like bright, indirect light and if they spend too long in a shady spot, they may start losing some of their leaves. Make sure you place your Dragon Tree in a spot that receives several hours of bright light. You might also need to think about moving your Dragon Plant around depending on the seasons. In the winter months, when the sun isn’t as strong (and out for less of the day) it might be necessary to move your plant a little closer to the window to make use of the limited sunlight as best as possible. Because the sun is weaker during winter, there isn’t so much of a risk that the leaves will burn or dry out compared to direct light in summer.

If you can’t find a sunnier spot in your home for your Dragon Plant, don’t worry. They are pretty resilient plants so they can cope in a range of environments. Your Dragon Plant will adjust to the light levels and should stop losing as many leaves as it begins to adapt. It may drop one or two every few months but this shouldn’t be anything to worry about, it is just prioritising new growth over its older leaves (more on that below).

Cold temperatures/drafts may also be to blame for your Dragon Tree losing leaves

Another cause of leaf drop in Dragon Tree plants can be cold temperatures and drafts. They dislike cold air so make sure that you do not place your plant near doors or windows that may be drafty. Even though the temperature of your home may be perfect for your Dragon Tree and feel fine to you, the cold drafts coming in from outside may be colder and harm your plant’s health.

This won’t cause too many issues from one day to the next (unless there is a substantial drop in temperature) but if exposed to cold air over a longer period of time, this is when your Dragon Tree can start losing leaves in response.

A lack of tolerance of cold air is actually the case for most houseplants so try and avoid placing any near drafty windows or doors that are often open to the outside. It can be a really good idea to pick up a digital thermometer to check the spot your Dragon Plant is in as it will help you spot any fluctuations in temperature before they start negatively impacting its health.

Natural ageing can cause some leaves to fall off

As your Dragon Plant matures, it may occasionally start losing a lower leaf as a natural sign of ageing. This is absolutely nothing to worry about but make sure that you keep track of how many leaves have dropped off your plant and how often this is occurring. If you feel it is losing too many leaves, more than a few each month, double-check the environment around your Dragon Tree as it could be a sign of one of the issues detailed above. There is no harm in giving the soil and roots a once over to check for signs of root rot and keep an eye on any changes in light or temperature that may be affecting its health.

Another important thing to monitor when it comes to diagnosing natural leaf drop is how many new healthy leaves your Dragon Tree is growing compared to the ones it is losing. If it’s dropping a lot more than it is growing, this also signals something isn’t quite right.

Leaf drop isn’t always something to be alarmed about, but it is good to double-check the care you are giving your Dragon Tree to see if it may be a sign of a more serious issue. Thankfully there aren’t too many reasons you need to check through and a small adjustment to your care routine or its environment should have your Dragon Tree back in full health pretty quickly.

Check out our Dragon Tree care guide for more information on how to best look after your plant and prevent any further problems from arising.

Fiddle and Thorn is a participant in the Amazon Services LLC Associates Program, an affiliate advertising program designed to provide a means for sites to earn advertising fees by advertising and linking to Amazon.com

Take our houseplant survey!

Quickly respond to our 30 second houseplant survey and get 75% off our Complete Houseplant Care eBook!

Take the Survey

No thanks…

Why is my Devil’s Ivy plant losing leaves?

Last Updated: April 1, 2022

Wherever there is a bookcase, there should always be a Devil’s Ivy plant that hangs off it. The way their heart-shaped leaves cascade out of their pot brings that little bit of drama and elegance to every space. However, if your Devil’s Ivy is starting to lose a lot of leaves, then there is something wrong and it’s important that you act quickly to stop the issue.

In this post, we will be going through each of the different reasons why Devil’s Ivy plants might start to lose their leaves. We recommend you first check if it is natural ageing before worrying about anything else.

Overwatering is a common cause of leaf drop

Devil’s Ivy plants are fairly hardy plants and won’t die if you overwater them once in a while. In fact, they quite welcome moisture in the soil and don’t really like being underwatered too often. However, if they are sitting in waterlogged soil for weeks and weeks then the roots will begin to rot. Once this has started to happen, then your plant will be starved of nutrients, oxygen and moisture. Your Devil’s Ivy will then not be able to keep all of its leaves alive so will drop some to conserve energy.

If your plant is overwatered, you might also notice the leaves and vines becoming quite soft and drooping down. It might also be paired with yellowing on the leaves before they fall off the plant entirely.

If you think that you may have overwatered your Devil’s Ivy it is best to replace the soil straight away rather than just sit and wait for it to dry up over time as you risk more damage being done to the already damaged root system. Using a moisture meter can also really help to prevent overwatering in future- we love this one from Amazon.

Consistent underwatering

Funnily enough both over- and underwatering can lead to your Devil’s Ivy losing leaves. So it’s really important you figure out which is the cause as you don’t want to be adjusting your watering schedule in the wrong way. There are a few ways to tell if your Devil’s Ivy is being underwatered:

Firstly, if the leaves and vines feel dry and crispy. Secondly, as with overwatering, it’s a good idea to check how the potting mix feels. If it’s dry to touch, almost like dust, then your plant needs more water. You can also use a moisture meter to help figure out how dry the potting mix is and if you need to water more to stop your plant from losing any more leaves.

If you are sure that your Devil’s Ivy is losing leaves due to a consistent lack of water, you need to make sure to reverse the issue in the right way. Your first instinct may be to drown your plant in water but this can actually cause your Devil’s Ivy to go into shock due to a sudden change of environment. To prevent this from happening, we recommend slowly reintroducing water by giving it a little bit once a day for a week. This will slowly dampen the potting mix and hopefully, stop any more leaves from falling off your Devil’s Ivy or cause any shock to your plant.

Drafts and cold temperatures

Another reason why your Devil’s Ivy plant is losing some of its leaves is fluctuations in the temperature around your plant. If your Devil’s Ivy is getting too much sunlight, it may cause a hotspot which means your plant overheats, causing shock and leaf drop. This often happens if your plant is sitting directly by a south-facing window so be careful that it is not receiving too much direct sunshine.

If you’re not already, make sure to open your windows every now and then to make sure that the air in your room is circulating properly. This reduces the risk of hotspots forming in the room where your Devil’s Ivy is sat. The ideal temperature for Devil’s Ivy plants is between 18°C – 24°C, so it shouldn’t be too difficult to keep in a good range for most of the year. During winter and the height of summer is where you need to be most careful.

Cold drafts can also damage the health of your Devil’s Ivy and cause it to lose leaves. Make sure your Devil’s Ivy isn’t placed next to a particularly drafty window or door or within 1 metre of an air conditioning vent during summer. Any stream of cold air can damage your plant over time so be careful! You can always pick up a digital thermometer to check the temperature around your Devil’s Ivy.

Overfertilisation

A harder issue to spot is too much fertiliser which can also cause your plant to shed leaves. Most generic plant foods and fertilisers will recommend a dosage for your plants, but it’s often far too much for your Devil’s Ivy and can result in leaves being dropped. Remove any fertiliser spikes or replace the soil if you’ve used a water-soluble fertiliser or small pellets that are mixed into the soil.

Moving forward, to avoid fertiliser burn in future, the best thing to do here is to try out feeding at half the recommended dosage and see how your Devil’s Ivy reacts. Try also decreasing the number of times you fertilise your Devil’s Ivy each year. A few times during the growth period of spring/summer will definitely be enough. You can also get away with not fertilising at all, with the right environment you should still see plenty of luscious growth during spring and summer.

Natural ageing

If you have gone through all of the above but none of it really fits what is going on with your Devil’s Ivy then it may simply be natural ageing. Over time it’s totally normal for your Devil’s Ivy to drop some of its oldest leaves as it focuses on new bigger growth. These old leaves will often turn yellow before falling off the plant. You will find that the leaves that fall off with natural ageing are the top leaves, closest to the root system. If lower leaves are falling off, then it usually means something else is wrong.

There you have the most common causes of leaves falling off Devil’s Ivy plants. If it is natural ageing then you have absolutely nothing to worry about. In fact, it’s almost a good sign as it means your plant is maturing and ageing well. However, if watering issues or other environmental factors are causing your Devil’s Ivy to lose leaves then it’s something that needs attention as soon as possible. If your Devil’s Ivy is already at the stage of losing leaves, then it means the problem has progressed quite far so acting quickly will help prevent your plant from dying altogether.

To discover more about caring for your plant, including our general top tips, propagation advice and how to diagnose and treat other common issues, check out our Devil’s Ivy care guide.

Fiddle and Thorn is a participant in the Amazon Services LLC Associates Program, an affiliate advertising program designed to provide a means for sites to earn advertising fees by advertising and linking to Amazon.com

Take our houseplant survey!

Quickly respond to our 30 second houseplant survey and get 75% off our Complete Houseplant Care eBook!

Take the Survey

No thanks…

Why is my Devil’s Ivy dying?

Last Updated: February 8, 2023

One of our favourite houseplants, the Devil’s Ivy is such an incredible cascading houseplant. However, although it can adapt to a range of environments slightly better than a lot of other houseplant types, it’s still very susceptible to the same common problems we so often face.

Below we will take you through each of the potential causes of a dying Devil’s Ivy plant so you can diagnose the issue and start reviving your Pothos.

Overwatering can kill a Devil’s Ivy plant

Too much water in the soil of your Devil’s Ivy can quite quickly cause the roots to rot which prevents the plant from getting the needed moisture and nutrients. The most common signs of your plant dying due to overwatering are yellow leaves, soft leaves and stems, and drooping leaves. As the problem progresses it can also cause the damaged leaves to fall off your plant.

To check if your plant is suffering from overwatering and root rot, the best thing to do is to take your plant out of its pot immediately and inspect the root system. You are looking for two things here; firstly, if the soil is waterlogged and secondly if the roots have started to rot.

Carefully trim away any rotten roots (these will be soft to touch and appear very dark in colour) as these won’t come back to life. Removing them from your plant encourages new healthy roots to grow.

If the potting mix is still quite soggy and waterlogged, replace it immediately instead of waiting for it to naturally dry out as this risks causing more harm to your Devil’s Ivy. This will help to revive your dying plant and help it perk up a little.

Over the next few weeks, make sure that you are cutting back on either how much or how frequently you watered your Devil’s Ivy to ensure the soil has time to dry out. You want to also make sure you are removing any excess water that has run out of the drainage holes so that your plant isn’t sitting in water for days on end. A good habit to get into is removing the excess water 15 minutes after watering as this allows your plant enough time to take in what it needs.

Moving forward, using a moisture meter is a great way to know when it’s time for more water. These can really help prevent both underwatering and overwatering and help you adjust your watering schedule depending on the seasons and other external factors.

Underwatering can also cause your Devil’s Ivy to die

Like overwatering, too little water can also be harmful to your plant. Although the issue progresses a bit slower, if the soil is consistently dry then it will start to have an impact on your Devil’s Ivy’s health. If you notice that your plant is losing some of its lower leaves, it may be due to underwatering, as it prioritises new healthy growth over its older leaves. Other signs to look out for on your dying plant are dry brown leaves, leaf tips and leaf edges as well as a drooping plant and stagnant growth.

Stick a finger in the top few centimetres of the soil to check the moisture or remove your plant from the pot. If you find that your Devil’s Ivy is very dry, water it a little every other day for a week and this should solve the problem.

In future, as with overwatering, it’s important that you adjust your watering schedule so that the potting mix isn’t dry for extended periods of time.

Low humidity levels could be harming your Pothos

If your Devil’s Ivy has developed brown spots or edges on the leaves then dry air is a common cause. Luckily this is quite a simple issue to both diagnose and treat. We recommend picking up a humidity monitor to check the level. These often come in a humidity and temperature combo which is great for plant care.

To treat the issue, here are a few simple ways to increase the humidity for your Devil’s Ivy:

  1. Mist the leaves regularly

    Use a spray bottle to mist the leaves a few times a week. This also gets rid of any dust on the leaves so it’s a great habit to get into whether your plant is dying or not.

  2. Use a pebble tray

    Fill up a tray of pebbles and fill halfway with water. Place your plant on top and the water will evaporate around it, increasing the humidity level. It requires a little initial DIY but once you’ve got it set up the maintenance is fairly low.

  3. Wash down your plant

    This is a great way to instantly boost the humidity but it is a shorter-term solution.

  4. Move to the bathroom/ kitchen

    Pothos plants thrive in bathrooms with great light because the humidity level is naturally higher because of steam released when showering. It can be a great idea to move your dying Devil’s Ivy in here to give it a natural humidity boost.

  5. Buy a humidifier

    This is the long-term solution to humidity issues and the best thing you can invest in if your plant is really struggling.

A dying Devil’s Ivy can indicate a lack of sunlight

Although Devil’s Ivy plants are great low-light houseplants, there is a limit and if your plant isn’t getting enough light then it can start dying as a result. You will often see the vines become quite leggy as the first sign of trouble but other symptoms include droopy vines, small leaves and leaf drop.

To solve the issue make sure you place them somewhere they receive several hours of bright light. They shouldn’t be directly next to a window, as direct light will cause other issues for your Pothos so it is about finding the right balance.

It can be a good idea to move your Devil’s Ivy around depending on the seasons. In the winter months, when the sun isn’t as strong it might be necessary to move your plant a little closer to the window to make use of the limited sunlight as best as possible. But come summer, you want to avoid it being exposed to high levels of direct sunshine.

Too much sunlight can also be an issue

As we just mentioned, too much sunlight can really damage your Devil’s Ivy. If there are yellow scorched patches on the leaves then one possible cause is sunburn. They can cope with a little direct sunlight but not high levels during the height of summer.

Unfortunately, any sunburn occurred is irreversible but you can prevent further scorching by moving your plant to a different spot in your home. Luckily this shouldn’t have damaged too much of the overall plant as the root system will still be healthy so your plant shouldn’t die on you.

Over-fertilization can cause your Devil’s Ivy to start dying

If none of the other causes seem to match up with why your Devil’s Ivy is dying, then it may be due to over-fertilisation. These plants really don’t need regular feeding, in fact, we often don’t fertilize them at all because they are such fast growers anyway!

Over-fertilization can be a little tricky to diagnose but symptoms include yellow scorched patches on the leaves, stunted or very small growth and fertilizer build-up on top of the soil and around the roots.

Make sure you aren’t fertilising at all during autumn and winter as this is a more dormant growth period so your Devil’s Ivy won’t need any feed.

When you are fertilising during spring and summer, make sure you are using less than the recommended amount on the bottle. Every houseplant is different, not just the type of plant, but also the size and maturity which means there is no one-fits-all recommended amount and you’ll need to adjust for each plant.

To solve the issue, replace the potting mix or if you have used fertilizer spikes, remove those. Then moving forward hold off fertilizing your plant for at least a year.

Pests are a worrying cause of a dying Devil’s Ivy

Although fairly rare, Devil’s Ivys can begin to die if they are infested with pests. Insects such as mealybugs or spider mites can make your plant their home, sucking on and exhausting the leaves. Over time these leaves will begin to fall off the plant.

Other than actually spotting pests on your plant, other symptoms to look out for include small yellow or brown spots, holes in the leaves and white webbing or white powder across the stems.

Although spotting pests isn’t always difficult, treating them can be a bit of a pain. Remove the worst affected leaves or vines on your dying plant and replace the potting mix entirely.

This will initially curb the size of the infestation making it easier to treat. Then shower your plant and treat it with neem oil and an insecticide.

Those are the most common causes of a dying Devil’s Ivy plant. It’s important that once you’ve made any changes to either your plant’s environment or the care routine, that you keep a close eye on your plant for the next few weeks. This will make sure that you spot any other signs of trouble and ensure things are moving in the right direction.

To learn more about your plant’s care requirements, check out our Devil’s Ivy care guide.

Fiddle and Thorn is a participant in the Amazon Services LLC Associates Program, an affiliate advertising program designed to provide a means for sites to earn advertising fees by advertising and linking to Amazon.com

Take our houseplant survey!

Quickly respond to our 30 second houseplant survey and get 75% off our Complete Houseplant Care eBook!

Take the Survey

No thanks…

Why is my Croton Plant losing leaves?

Last Updated: June 26, 2022

Whether your Croton Plant is red, yellow, orange, pink or any of the other incredible colours, it’s equally devastating if your plant starts losing leaves. If more leaves are falling off than are growing on the plant, then it definitely signals that something is wrong with your Croton Plant. There are quite a few causes of leaf drop on Croton Plants so it’s important that you go through each of the issues to see which aligns with your plant.

In this post, we will go through each of the different causes of Croton Plants losing leaves, as well as how to fix the issue and prevent it from happening to your plant again in future.

Low temperatures can cause leaf drop

Extreme temperatures and drafts can also be very harmful to your Croton Plant as they thrive in warm environments and if your plant is in a really cold room, then there is a good possibility that this is why your plant is losing leaves. Even though the temperature in the room may feel perfect for your Croton Plant, any drafts coming in from the outside may be colder and harm your plant’s health so keep them away from windows or doors that aren’t draft proof.

This is particularly damaging during the long cold nights so we recommend picking up a digital thermometer to check the temperature across the day and night in various spots in your home. This will help you spot when the temperature is dropping too low for your plant and it’ll prevent more your plant from losing more leaves in future.

A consistent lack of sunlight might be why your plant is losing leaves

Croton Plants thrive in bright, indirect light and if they are in a lower light area, then they may start losing their leaves as they aren’t getting the energy they need to sustain that much healthy growth. It’s just a process of prioritisation as your plant will want to continue growing and developing even if the light levels aren’t high enough. Your Croton Plant won’t instantly begin losing leaves if there is a particularly cloudy day, but over time if your plant is in the dark corner of the room, it will start to cause issues, leaf drop being one of those.

To fix the issue and stop your Croton Plant from losing more leaves, move it to a slightly sunnier area in your home. If you aren’t able to find a good spot with ample sunshine, then you might want to think about investing in a grow light to supplement light levels and prevent your Croton Plant from losing any more leaves.

Overwatering can cause your Croton Plant to begin losing leaves

Overwatering can also be a common factor when it comes to your Croton Plant losing leaves. If your Croton Plant is losing leaves from the base upwards, and the stems/ leaves are a little softer than usual this may be because the roots are beginning to rot.

To figure out if overwatering is the cause of the loss of leaves, check the moisture levels in the soil immediately. If the soil is quite waterlogged and clumpy then replace it with fresh dry mix which will allow the plant to start to recover. It’s a good idea to cut away the rotten roots and soft leaves as you don’t want your plant to waste valuable energy on dying or dead leaves/roots.

Top tip: waterlogged soil can give off a damp, musty smell so get up close to your plants every once in a while to check and it might allow you to spot the issue of overwatering before it’s causing your plant to lose leaves.

Too little water can also be a cause of leaf drop

Another common cause of Croton Plants losing leaves is a lack of water that is causing the roots to crisp and shrivel up. Similarly to overwatering, when the root system is damaged, your plant cannot get the needed nutrients and it’ll start to lose leaves. Check the potting mix, or lift up your plant to see if it’s a lot lighter than usual (this would indicate underwatering). You can also use a moisture meter to check the moisture levels of the soil.

You can tell if your plant is too dry by looking at the way in which the dry parts have developed on the leaf. If the brown spots are at the edge of the leaf, rather than in the middle, this is a sign of a dry plant. Another thing to look out for is which leaves are turning brown. If you find there are dry spots on leaves throughout the plant, from top to bottom, this also points to dry soil being the reason why your Croton Plant is losing leaves.

Environmental shock can also cause your plant to lose leave

It’s not just cold temperatures that can shock your Croton Plant but other dramatic or sudden changes to your plant’s environment can also cause your Croton Plant to start losing leaves. This can include moving to a new spot (or a new home altogether), sudden changes in weather or even knocks and bumps that your plant might have endured. Any initial shock should wear off over a few days so make sure your Croton Plant is getting enough light and water and things should improve. Your Croton Plant will also only ever lose a few leaves due to environmental shock so keep an eye on the number and rate of leaves falling off.

Those are the main reasons why Croton Plants begin losing their leaves. As there are quite a few really damaging causes that might cause more harm than leaves falling off your plant, it’s important that you diagnose the problem immediately. If the problem progresses much further, it can be too late to bring your Croton Plant back to full health. Spotting the issue early is also key, so keep a close eye on your Croton Plant (and other houseplants) to spot any early warning signs that something might be wrong.

Check out our Croton Plant care guide for everything you need to know to best care for, propagate and treat issues with your plant.

Fiddle and Thorn is a participant in the Amazon Services LLC Associates Program, an affiliate advertising program designed to provide a means for sites to earn advertising fees by advertising and linking to Amazon.com

Take our houseplant survey!

Quickly respond to our 30 second houseplant survey and get 75% off our Complete Houseplant Care eBook!

Take the Survey

No thanks…

Why is my Croton Plant dying?

Last Updated: October 24, 2022

There can be quite a few different reasons that can cause a Croton Plant to start dying which can often make plant parents frustrated and anxious when they don’t know what’s causing it. However, each individual problem will show itself quite uniquely on your plant so once you know what problems cause what symptoms, it’s a lot easier to diagnose the issue.

Below we will go through each of the most common causes of a dying Croton Plant as well as guide you through the diagnostic and treatment processes.

Overwatering can kill a Croton Plant

If your Croton Plant is developing yellow leaves and is looking and feeling quite soft, droopy and limp, then watering issues may be why it is dying, particularly overwatering. This can be due to either you giving your plant too much water each time, or you are watering too frequently and not allowing the potting mix to dry out.

To establish if overwatering is what is causing your Croton Plant to die, take the plant out of the pot and take a look at the soil. If the potting mix is waterlogged and clumpy then this indicates overwatering. Alongside this, if the problem has been going on for a while then the roots may have started to rot.

If the soil is waterlogged replace it straight away and trim away the rotten roots. This will allow your plant to start the recovery process. We also recommend removing any of the leaves that have gone completely yellow as they will soon fall off your plant.

In the future, to prevent the issue from harming your plant, make sure to monitor the moisture levels in the soil to ensure it has had time to dry out between waterings. You also want to hold back watering as much during winter as the cold darker months mean your plant will go dormant and not produce any new growth. This is when root rot and waterlogged soil become higher risk factors.

A dying Croton Plant can indicate drainage issues

If the roots have started to die but you don’t seem to be watering your plant too much, then it might be drainage issues that is the real culprit. If the excess water isn’t draining well from the pot it can cause the soil to become waterlogged.

You can very easily increase the amount of drainage in your soil by mixing in a small amount of perlite into the potting mix. This will make it far easier for water to flow through and out of the drainage holes of your pots (you should also check to make sure your pots have drainage holes). Perlite is also great to aid with aeration in the soil so it’s a must-do to help revive your dying Croton Plant.

Another way to increase drainage for your dying plant is to swap to terracotta pots. They are permeable which means some of the excess water can evaporate out of the sides of the pot. Most houseplants come in plastic pots when you buy them (the reason for this is they are better for plant shops as they are lighter and less breakable). However, they aren’t the best for drainage and accidental overwatering can be a bigger issue.

Underwatering might be killing your Croton Plant

If your plant has developed really crispy leaves, then you may have been underwatering it for a while which is why it’s dying. Croton Plants will really struggle if they have to go a long time between waterings but will forgive you for the odd time you forget to water. It’s also a slower issue to develop in comparison to overwatering but still equally important to treat quickly.

If you think your plant is underwatered then check the moisture levels in the soil before making any changes to your care routine. When solving the issue, it’s super important you do it gradually as drowning it in water will actually cause the plant to get quite shocked and this could lead to more problems. This is why we recommend you water a little bit once a day for a week to revive your dying Croton Plant.

The other issue with pouring a bucket full of water over your plant is that when it is super dry it can simply run off the top of the soil, down the edges of the pot and straight out of the drainage holes without even getting to the root system. By gradually reintroducing water you avoid this issue.

Moving forward always remember to check the moisture levels in the soil using either the finger, chopstick or lifting methods. This will mean you can keep an eye on how much water it needs and avoid the problem recurring.

Cold temperatures may be to blame

Another potential factor that may be causing your Croton Plant to die is extreme temperatures, in particular, cool air and consistent cold drafts.

Whilst you might not feel the cold air coming through cracks in doors and windows (as it can disperse throughout the room quite quickly), if your plant is right next to a small stream of cold air it can really shock and damage the plant during winter, causing it to freeze and start dying.

But it’s not just cold air from outside in winter that can cause your Croton Plant to freeze as they don’t really get on well with air conditioning vents. Ensure that your plant isn’t in the direct line of the vent to avoid damage.

Lack of sunlight can also cause a dying Croton Plant

Although they can tolerate some medium light, if you find the leaves are drooping a little then your Croton Plant might be dying because it’s not getting enough light. Other symptoms include less variegation on the leaves, stagnant growth and small new growth.

This can often happen in winter when the sun is a lot weaker and isn’t around as much during the day. In this case, you should either move to a sunnier spot in your home or use an LED light to supplement the natural light. These can be a real gift to get your houseplants through the darker months.

If you do choose to move your Croton Plant nearer to the window, just make sure to relocate them in summer if they are now receiving a lot of direct light as the intense sun can burn and scorch the leaves.

Those are the most common causes of a dying Croton Plant. We strongly recommend going through each of them one by one whilst inspecting your plant, its root system and potting mix. This will help you eliminate issues and make the right diagnosis.

To learn more about how to properly take care of your plant, check out our Croton Plant care guide.

Fiddle and Thorn is a participant in the Amazon Services LLC Associates Program, an affiliate advertising program designed to provide a means for sites to earn advertising fees by advertising and linking to Amazon.com

Take our houseplant survey!

Quickly respond to our 30 second houseplant survey and get 75% off our Complete Houseplant Care eBook!

Take the Survey

No thanks…

Why is my Croton Plant drooping?

Last Updated: January 31, 2022

Famous and loved for their incredible coloured leaves, the Croton Plant brightens up every room. However, if you have spotted that your Croton Plant has started to become quite droopy, then this means something isn’t quite right. There are a few different reasons why your Croton Plant might be drooping, from watering issues to other environmental factors. If the drooping leaves have cropped up all by themselves, and there are no other issues with your plant, then you may have caught the issue quite early which would be great. However, even if there are other problems with your plant, it doesn’t mean that you can’t fix them.

Below we will go through each of the common causes of a droopy Croton Plant, so you can figure out what is wrong with your plant and take the right steps to solve the problem.

Underwatering is a common cause of drooping Croton Plant leaves

A consistent lack of moisture tends to be one of the most common causes of a droopy Croton Plant. Although they don’t like to be sitting in super soggy soil, it’s important that there is some moisture in the potting mix. Underwatering can cause some real problems for your plants, especially if consistent as their roots will crisp up which means they can’t aerate and your plant won’t be able to get what it needs to thrive.

Whilst there are some more serious issues caused by a lack of water, the first sign is usually your Croton Plant starting to droop. This indicates that you have caught the issue early and you should be able to fix it pretty easily.

How do I know if underwatering is the cause of the droopy leaves?

To figure out if underwatering is the cause of your Croton Plant’s drooping leaves, take the plant carefully out of its pot and check the moisture in the soil. If the soil is very dry and powdery then underwatering is probably the main cause. You can also check the moisture levels in the soil using a moisture meter, but we recommend taking a good look at the root system to check how far the issue has progressed.

How do I fix an underwatered Croton Plant?

You want to be careful when reintroducing water to your Croton Plant as a sudden change of environment can cause the plant to go into shock. This can actually mean your plant loses some leaves in response. To avoid this, give your plant a little bit of water once a day for a week. This should gradually moisten the potting mix and your Croton Plant should stop drooping so heavily. After a week of daily watering, return to a more normal schedule, making sure not to forget any watering from here on out!

Overwatering can also cause droopy Croton Plant leaves

What is strange about drooping Croton Plant leaves is that the problem can be caused by both overwatering and underwatering. This is because too much water can rot the roots, meaning they are unable to aerate just the same as if they crisp up. This starves your plant of nutrients, oxygen and moisture.

If the leaves are also turning quite soft and dark brown in colour, then you are likely overwatering and the issue has been going on for a while. However, if droopy leaves are the only sign of unhappiness it usually means you have caught the problem early, which is important when trying to revive an overwatered Croton Plant.

How do I know if overwatering is the cause of the droopy leaves?

As with underwatering above, the best way to know if the droopy leaves on your Croton Plant are caused by overwatering is to remove the plant from its pot. This will allow you to feel the potting mix to see if it is waterlogged and to see if the roots have started to rot. They will feel soft to touch and be black in colour if they are rotting.

How do I fix an overwatered Croton Plant?

If you think your Croton Plant might be suffering from overwatering and subsequent root rot replace the potting mix right away and trim away any rotten roots. This will allow your Croton Plant to start to recover and grow new roots.

Now that the initial problem has been fixed, it’s important to take a look at how often and how much you are watering your Croton Plant. Cut back on one of the

A drooping Croton Plant can also be caused by low humidity levels

If there don’t seem to be any issues with your watering routine, and the root system feels and looks super healthy, then the droopy plant might be caused by a lack of humidity. Really dry air can mean the plant transpires a lot more, which is when it loses moisture through the leaves. This can cause them to droop down and look quite limp and lifeless.

Luckily, fixing the issue is super easy so here are some ways you can increase the humidity for your Croton Plant to prevent drooping leaves:

  1. Mist the leaves regularly

    This is one of the easiest ways to increase the humidity for your Croton Plant and can stop the leaves from drooping. Mist the leaves a few mornings per week and this should help boost the humidity. (We love these amber glass ones from Amazon).

  2. Build a pebble tray for your Croton Plant

    Fill up a tray with small stones and fill it up halfway with water. It’s really important that when you place your Croton Plant on the pebbles, the water isn’t reaching the bottom of the pot as you don’t want the roots to be sitting in a pool of water. Throughout the day the water will slowly evaporate around your plant increasing the humidity.

  3. Invest in a humidifier

    If you tend to forget to mist the leaves, or the other methods aren’t working for you then we recommend buying a humidifier. It keeps the humidity in the room at a consistent level without you needing to do anything! They will stop your Croton Plant drooping and go a long way to stopping brown leaf tips on all of your houseplants – so definitely a wise purchase. Oh and they’re super affordable too,, we always recommend this humidifier from Amazon as a great place to start.

Those are the main three reasons why your Croton Plant has begun to droop. Watering issues are the most serious problems so it’s important you get any problems sorted as soon as possible before they cause too much damage to your Croton Plant.

To learn more about how to care for your plant, check out our Croton Plant care guide.

Fiddle and Thorn is a participant in the Amazon Services LLC Associates Program, an affiliate advertising program designed to provide a means for sites to earn advertising fees by advertising and linking to Amazon.com

Take our houseplant survey!

Quickly respond to our 30 second houseplant survey and get 75% off our Complete Houseplant Care eBook!

Take the Survey

No thanks…