Why is my Fern turning brown? Causes and Solutions

Last Updated: June 19, 2022

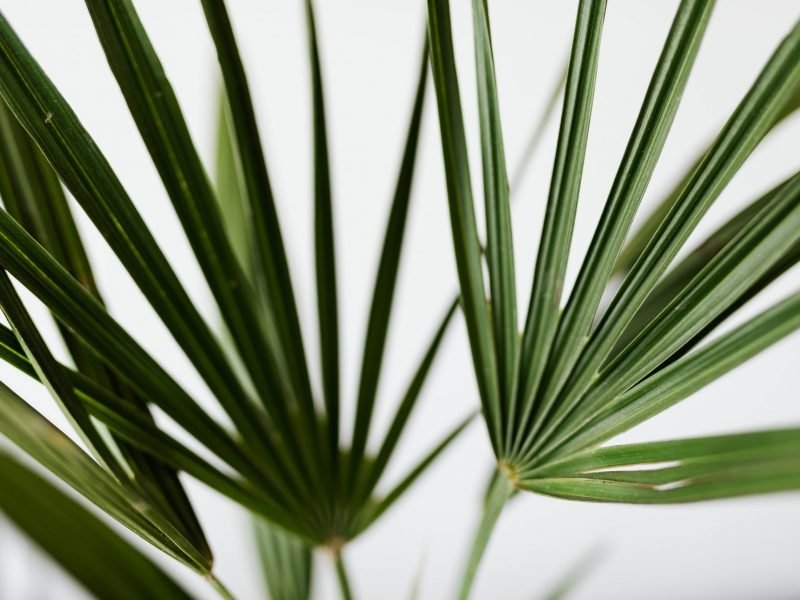
It’s always concerning when you see that the leaves of your houseplants are starting to turn brown as this is often an indication that something isn’t quite right. It’s important to diagnose the issue early as if there is an issue going on that isn’t solved in time, then this can start to kill your Fern pretty quickly. In this article, we will go through each of the main causes of brown leaves on a Fern as well as give tips on how to treat it and prevent that issue from causing more damage in future.

The most common reasons for ferns turning brown are; a lack of humidity, too much bright light, watering issues and over fertilisation. The first of which by far is the most common problem, and easiest to fix. There is one cause of brown Fern leaves, however, that isn’t always a cause for concern as some browning on the foliage can be normal. This is just a sign that your plant is maturing. Below we will go through exactly how to know and what to look for to suggest that it’s natural or a worrying cause.

Lack of humidity can cause brown leaves

Ferns love a more humid environment, so if your home tends to have dry air it’s worth your time to try and increase the humidity a little. Dry air will very quickly dry out the leaves on your Fern as they have such thin and delicate leaves. On houseplants with bigger leaves, a lack of humidity will only often cause the tips or edges of the leaves to turn brown. However, because Ferns have such thin and often small leaves too, dry air can impact your Fern quite drastically so it’s important to act quickly when this is happening.

There are a few really simple techniques to keep the humidity higher than normal for your plant and it’s a good idea to start to get into the habit of carrying out these methods on a regular basis. This will prevent any more of your plant’s leaves from turning brown.

Firstly, the method we recommend the most is misting your Fern using a spray bottle. You want to be doing this every day when trying to solve the issue, and then every few days once the brown leaves are under control. This will help to give a nice boost to your plant and prevent the leaves and stems from drying out.

The second method which is a really great one is to use a pebble tray. This requires a little bit more DIY before getting started but your Fern will love you for it. Place your plant over a tray of pebbles that is half full with water. Over the day, the water will evaporate around your plant and prevent the leaves from drying out. It’s super important with this method though that you don’t overfill the container with water. The last thing you want to do is have your Fern sitting in water for long periods of time.

If you find yourself forgetting to mist your Fern and don’t fancy building a pebble tray, then there are a few methods that require a lot less work. If your bathroom has good natural light levels, then you might want to place your plant in there. The humidity level of bathrooms tends to be a little higher than a lot of other rooms due to the steam released when showering. This means your Fern can thrive in a nice humid environment without you having to add anything extra to your daily routine.

Another very passive way of making sure that the humidity level is high enough for your Fern is to invest in a humidifier. These affordably little gadgets are great at reaching and maintaining a good humidity level and will do wonders in preventing your Fern from developing any more brown leaves. Our Ferns really love this humidifier which is available on Amazon and is super affordable too! If you want to go a little fancier you can also get humidifiers that work on timers so you don’t even need to remember to turn them on!

If you’re unsure about whether humidity is a problem for your Fern, or if you are struggling to know when you’ve reached a good humidity level, then you can always pick up a good humidity monitor like this one from Amazon to keep track of everything and make sure the air isn’t too dry.

A good first move is to relocate your Fern away from air conditioning units or radiators as these create really dry air in your home.

Intense light can also cause brown leaves on your Fern

Lighting is always important to your houseplants and ferns are no different. If anything, due to their super thin and delicate leaves, your Fern is very quickly affected by changes in light.

If your plant is getting too much bright light you’ll start to notice the tips of the fronds turning brown, this is because Ferns are pretty prone to burning and drying out in intense light.

Although the brown leaves are now irreversible, preventing any more from developing is pretty simple. All you need to do is find a slightly shadier spot for your plant. You don’t want to make a drastic change and all of a sudden place your Fern in the darkest corner of your home (as that REALLY won’t help things), but you want to move it away from the direct light. Make sure that your plant is still getting plenty of indirect sunlight each day, just stay away from direct sun rays.

During winter, you can get away with placing your plant a little closer to the window and it won’t matter so much if it receives any direct sunlight. This is because the sun is a lot weaker during winter and out for less of the day.

If you aren’t sure how much light your Fern is getting in its current spot (or any alternative spots in your home) then we highly recommend using a light meter. They’ll tell you what level of light is in your home throughout the day and you’ll be able to monitor how it varies across the year.

Brown leaves can indicate watering problems

As with a lot of things in the houseplant world, proper watering is an integral part of the puzzle and if you are watering your Fern too much, too frequently, or too little, this can all lead to problems including brown leaves.

The first thing to do if you suspect any watering issues is to inspect the soil. Carefully remove your Fern from its pot and check to see if the potting mix is waterlogged or super dry. Ferns hate really dry soil but can also start to rot if the potting mix is waterlogged for a long time so finding the right balance is key. Another thing to look at once you have taken your Fern out of its pot is the root system. If the rots have started to crisp up then it suggests you have been underwatering for a while. If, however, the roots have turned quite dark in colour and are soft to touch then this suggests your Fern is suffering from root rot in overly soggy soil.

If your Fern is too delicate to be removed from its pot then you can also use the finger/chopstick method to see how soggy the soil is. Press a chopstick or one of your fingers around 1? into the soil. If it comes out clean then the potting mix is very dry. If it comes out covered in the potting mix then you may be overwatering. You can also use a moisture meter to check the soil for a more accurate reading and know for certain when it’s time to water.

How to fix the watering issues and prevent more brown leaves?

If you find the soil is extremely dry, you should soak your plant for about 15 minutes. You don’t want to drown it in water as this can cause shock so giving it a quick soak will let it pick up some of the water. Then water a little once a day for a week to avoid a sudden shift in the environment.

Most Ferns will come with a good amount of peat moss in the pot and tend to have pretty dense root systems, this makes it very difficult for water to get through when they’ve dried out.

To prevent underwatering from causing more issues such as brown leaves in future, you need to ensure you are watering frequently enough to prevent the soil from drying out for too long. If you always find yourself forgetting to water your Fern then a self-watering pot is the thing for you. It will give your plant the right amount of water without you needing to even be home! We love this one which is available from Amazon.

However, if overwatering has been the problem and your Fern is sitting in waterlogged soil then you need to fully replace that potting mix. Remove as much of it from the roots as you can without damaging the root system further. Replace with fresh dry mix to allow the plant to start its recovery process and prevent more brown leaves. You also want to trim away any rotten roots. There is no way to save these and trimming them off will encourage your plant to grow new ones.

We’ve always gone for a little and often view towards watering our Ferns to get nice even moisture in the soil. They don’t like going from one extreme to the other which can be another cause of brown leaves. We’d recommend picking up your Fern when it’s in need of watering and after you’ve watered it, this way you get a feel for when your fern might need a little more simply by giving them a little lift.

There are also a few other things you can do to prevent watering issues and subsequent brown leaves, particularly when it comes to waterlogged soil and drainage. Often, when we buy houseplants they come in plastic pots. These are great for plant shops and nurseries as they are lightweight, cheap and unbreakable. However, they aren’t always the best for our beloved plants as they keep in every drop of moisture. This means if you accidentally overwater without realising or the drainage holes are blocked by something, it can be really easy for the roots to start to rot.

Instead, if you are using terracotta pots for your Fern, they will allow some of the excess water to evaporate out of the sides of the pot. They can be a real lifesaver when it comes to watering issues so although they cost a bit more to buy, they are definitely an investment worth making.

Watch out for over-fertilisation

Most generic plant foods and fertilisers will recommend a dosage for your plants, but it’s often far too much for a Fern and can result in browning in the fronds.

Each and every houseplant is different and there are so many factors that determine how much fertiliser your plant will need. Everything from size, location, maturity, and variety as well as environmental issues such as light and temperature levels can affect how much feed your plant needs. This is why it is impossible to have a one-fits-all amount that so many fertiliser bottles suggest.

We often recommend going with less than the recommended amount for most plants but it is especially crucial for Ferns as they have such delicate leaves and stems. Even the slightest overfertilisation can result in browning.

The best bet here is to try out feeding at half the recommended dosage and see how your Fern reacts. If you notice any browning you can flush the feed out with more water and try again the next time you water with a quarter of the dosage. Our plants have always liked the liquid fertiliser from Miracle-Gro which is available on Amazon here.

You can also choose to remove fertiliser from your care routine altogether if you don’t want to risk any damage to your Fern. In fact, we recommend this for a few months just to let your plant recover but it’s completely up to you if you choose to go back to it in future. You can have plenty of healthy new growth without any use of fertiliser!

Some brown leaves on your Fern can be normal

Whilst all of the issues above have been problems causing your Fern to develop brown leaves, there is one more factor to consider that isn’t so worrying at all; natural ageing.

As your Fern matures (and this goes for most other houseplants too), it will prioritise growing new growth over some of its older growth. This is because as it matures it will want to create bigger leaves to add more photosynthesis.

As this process takes place, some of the older leaves will drop off your plant but will often turn brown before doing so. This is a totally natural process and happens a lot with Ferns.

But you might be wondering, how do you know if it’s natural ageing or a more serious problem? Well, firstly we recommend ruling out any of the above issues. Check the soil and monitor all environmental factors to see if you can spot something that might not be right. Then the next thing to do is look at your plant to see if it is growing new growth. If your Fern is popping out plenty of new healthy stems and leaves, whilst losing a few of its oldest and lowest leaves, then this suggests natural ageing. As long as your Fern is growing more leaves than it is losing, you shouldn’t need to worry!

We hope that this guide to diagnosing and treating brown leaves on a Fern has been useful and you have been able to spot what is wrong with your plant. Overall the issues with browning ferns are easy to spot, and not that difficult to start to fix. The key to reviving your Fern though is catching the issues early before they have really taken a hold of your plant. This is why we always recommend giving your plants regular checkups to spot any issues early.

To find out more about how to care for your plant and prevent any other common problems from occurring, check out our plant index where you can find detailed care guides for more than 100 plants, including many Fern varieties.

Fiddle and Thorn is a participant in the Amazon Services LLC Associates Program, an affiliate advertising program designed to provide a means for sites to earn advertising fees by advertising and linking to Amazon.com

Take our houseplant survey!

Quickly respond to our 30 second houseplant survey and get 75% off our Complete Houseplant Care eBook!

Take the Survey

No thanks…

Why is my Fan Palm dying?

Last Updated: October 4, 2022

Although these Palms can be pretty hardy and adjust well to a range of environments, they aren’t totally immune to the common problems we often face as plant parents. If you have started to notice that your Fan Palm is dying, then it’s important to correctly diagnose the issue as soon as possible. Catching problems early is the key to saving your Fan Palm.

In this article, we will go through each of the main causes of a dying Fan Palm as well as methods to solve and prevent the problem in future.

Overwatering can kill a Fan Palm

If you notice that your Palm’s leaves are developing brown or yellow patches and are drooping down, then this is most likely caused by too much moisture in the soil. This is actually the most common problem that leads to dying houseplants or all kinds as it can very quickly damage the root system.

Too much moisture can lead to root rot which is very harmful to your plant. Not only does it cause the leaves to develop yellow and brown spots or patches (or in some cases the entire leaves can go yellow or brown), but it can also mean that the plant is unable to take up water or nutrients meaning your plant may begin to droop and die pretty quickly.

If you think that you may have overwatered your Fan Palm, check the moisture in the soil to confirm the issue. It’s also a good idea to check the root system to see if it has started to rot. Rotten roots will be soft to touch and black/dark brown in appearance.

To solve the issue, replace any waterlogged soil so that your plant can begin to recover. Waiting for the soil to dry naturally only risks more damage. You also should remove any rotten roots.

To prevent the issue in future, make sure to check the moisture in the soil before you water your Fan Palm. There are two really easy ways to make sure that it definitely needs water. First check the moisture at the top of the soil, if it is still damp then wait at least a week before watering. You can also use a moisture meter for a more accurate reading of the soil moisture and these will help you develop and adjust your watering routine.

Your watering schedule should change throughout the year depending on the growing seasons. Fan Palms really don’t need much water at all during autumn and winter, once a month should be plenty!

A dying Fan Palm can suggest underwatering

Like overwatering, too little water can also be harmful to your Fan Palm. It is a slower-to-progress problem in contrast to overwatering but can be equally as damaging if not solved. Consistent underwatering over a few months will really start to have an impact on your plant’s health, causing it to dry up, turn brown, droop down and lose some of its lower leaves.

To diagnose the issue, check the soil moisture immediately using the finger/chopstick method, the lifting method or a moisture meter for a more accurate reading.

If you find that your Fan Palm feels very dry, water it a little every other day for a week. Your first instinct might be to give it a watering can full of water straight away but this can actually be harmful to your plant if the soil goes from one extreme to the other (plants get shocked and stressed too!). Instead, you want to reintroduce frequent watering for a week or two and this should solve the problem.

In future, adjust your watering schedule so that you are either watering your Fan Palm more deeply than before or more frequently.

Too little sunlight can cause a dying Fan Palm

If your Fan Palm’s growth has recently become quite leggy or stagnant and your whole plant looks a bit lifeless than it might not be getting enough sunlight. This is commonly an issue during winter as the sun is weaker and out for less of the day.

If you suspect that a lack of natural sunlight is the cause, start by placing your Fan Palm nearer to a window to help revive it. If this happens during winter, you can get away with placing it right by the window as the direct sun rays won’t be as intense as in summer. However, if this is happening during the height of summer, you’ll want to be a little more cautious as intense light can cause a whole host of issues of its own.

If you aren’t able to find a sunnier spot for your dying Fan Palm, then you might opt to use an LED grow light to supplement light levels. They are great to help your plants through winter and can also be used when propagating seeds and cuttings. So a great investment all around!

Low humidity could be causing your Palm to die

Another reason why your Fan Palm is dying could be a lack of humidity as they can struggle in homes with dry air. Whilst this won’t cause a sudden problem from one day to the next, it can develop slowly over time. You’ll often spot dry brown leaf tips as the first sign of trouble but this can also develop into entire brown leaves and limp droopy stems.

Luckily, if you have caught the problem early then this is quite an easy fix and you should be able to revive your plant in only a few days. Here are a few ways you can increase the humidity:

  1. Misting your Palm regularly

    One of the simplest ways to increase the humidity around your Fan Palm is to mist it with a spray bottle. You want to get into the habit of doing this a few times per week.

  2. Build a pebble tray for your Palm

    Place your Fan Palm over a tray of pebbles with fresh water over the top. Over the day water from the tray will evaporate giving your plant exactly what it’s looking for. Just make sure that the water level in the tray doesn’t reach your plant as this can cause some issues related to root rot.

  3. Move your Fan Palm to the bathroom

    If you’re lucky enough to have great lighting in your bathroom you can move your Fan Palm in there to increase the humidity.

    The running water from your showers means your bathroom is naturally one of the most humid in your home.

    Another great room for high humidity is the kitchen due to the steam from cooking. Just be sure not to put your plant too close to the cooker or it may cause the leaves to burn and dry out.

  4. Buy a humidifier

    They’re relatively affordable little devices which keep a consistent humidity level in your home. This is the long-term and most reliable solution so are great if the issue has progressed quite far or you find yourself forgetting to mist enough.

Pests might be to blame

A slightly rarer issue that might be causing your Fan Palm to die is a pest infestation. Check over your plant to see if you can spot actual insects or signs of them (you want to be looking for brown or yellow spots, holes in the leaves or white webbing across the stem).

Whilst an infestation is more common in a plant that is struggling due to the wrong environment or one that has spent some of the year growing outdoors, it can happen to a houseplant in good health too so it’s an important one to rule out if your Fan Palm looks like its dying.

If you spot pests lurking on your plant (or signs that they might be there) the first thing to do is isolate your plant from all of your other houseplants to prevent the infestation from spreading. The next step is to trim off the worst affected leaves and replace the potting mix to curb the growth of the infestation. Then give your plant a wash down in the sink and treat it with an insecticide/neem oil.

A pest infestation isn’t always a death sentence to the infected plants, especially if you have caught the problem early. But if you are struggling to stop the infestation after treating it several times with an insecticide and neem oil, then it may be best to say goodbye to your plant. As much as this can be heartbreaking, it prevents the problem from spreading to your other beloved houseplants so is often better in the long run.

Those are the main causes of a dying Fan Palm. It’s important once you’ve diagnosed the issue and made changes to its environment and care routine, that you keep a very close eye on your plant. You want to make sure that you’ve not only figured out what is causing it, but also that things are getting better and not worse.

To learn more about how to keep your plant happy and healthy for years to come, check out our Fan Palm care guide.

Fiddle and Thorn is a participant in the Amazon Services LLC Associates Program, an affiliate advertising program designed to provide a means for sites to earn advertising fees by advertising and linking to Amazon.com

Take our houseplant survey!

Quickly respond to our 30 second houseplant survey and get 75% off our Complete Houseplant Care eBook!

Take the Survey

No thanks…

Why is my Fan Palm drooping?

Last Updated: September 27, 2022

Although we often recommend Fan Palms to beginner plant parents, they are definitely still susceptible to the same common problems that you’ll find with most other plant types.

One of these issues is a drooping plant and this can often mean there are issues with watering or temperatures. In this article, we will go through each of the most common causes of a drooping Fan Palm as well as how to effectively treat and prevent the issue long-term.

A droopy Fan Palm can indicate overwatering

It’s super easy to do accidentally but overwatering can cause quite severe problems fairly quickly and can cause plant death if consistent.

However, if drooping leaves are the only thing that seems to be wrong with your Fan Palm, then this is good news – it means that the problem is in the early stages and should be easier to fix. Other signs of overwatering include soft leaves, brown or yellow leaves, leaf drop and musty-smelling potting mix.

The reason that overwatering is so harmful to your Fan Palm is that it causes waterlogged soil which cuts off air circulation in the potting mix. This can lead to root rot which prevents the plant from taking in any oxygen and nutrients. It also means that the roots can’t physically support the plant anymore. The combination of these two issues is why overwatering will often cause your Fan Palm to droop its leaves and stems.

To confirm that this is the issue, take your plant out of its pot which will allow you to closely inspect the potting mix and root system. If the potting mix feels soggy and clumpy, then this means your plant has been overwatered. You should also check over the roots as if they are soft and dark brown in colour, then they have started to rot.

How to fix an overwatered Fan Palm

  1. Replace any waterlogged potting mix straight away.

    Don’t wait for the soil to dry out naturally as this only risks there being more damage to the root system. By refreshing the soil it allows the roots to begin to recover.

  2. Trim off any rotten roots and leaves

    If your plant is trying to keep rotting leaves and roots alive, it will be wasting valuable energy that it could be using to recover and produce new healthy growth. Use clean, sharp scissors to cut away dying growth. This includes any roots that are dark brown and soft in colour and any leaves that have started to turn brown and sickly.

How to prevent overwatering in future

Now that you’ve fixed the issue for the time being, let’s flip the attention to the things you can do to ensure you won’t overwater your Fan Palm again and cause any more drooping leaves (and other more serious issues as well)

  1. Only water when the potting mix is dry

    The most accurate way of determining soil moisture is using a moisture meter. They are affordable little devices that you pop into the soil and they will give you a moisture reading.

  2. Increase drainage in the pot

    This will help solve the occasional accidental overwatering as it allows some of the water to escape. Add some perlite to the pot, ensure that the drainage holes aren’t blocked and switch to terracotta pots instead of plastic ones.

  3. Downsize the pot size if necessary

    One major factor when it comes to overwatering is the pot size as the more soil in the pot, the longer it will take to dry out. When inspecting the potting mix and root system, if you find there is a lot of soil compared to the root system then you might want to decrease the size of the pot.

  4. Adjust your watering schedule depending on external factors

    Although watering calendars can help us remember to water our plants, they aren’t actually the best thing for our green friends. It’s important to adjust how much and how often you water your Fan Palm depending on the time of year, temperature fluctuations, sunlight levels and maturity of your plant. There’s no one fits all timeline which is why moisture metres are such a great tool.

Underwatering can also cause drooping leaves on a

As well as too much water, too little can also cause your Fan Palm to start drooping. This is because of the damage to the root system that is done by both extremes.

If you find that the stems and leaves look a little lifeless and droopy, it is most probably because the soil has been too dry for too long. Stick a finger or a chopstick in the top few centimetres of the soil to check the moisture levels. You can also remove your plant from its pot to check the soil moisture and see if the issue has progressed far enough so that the roots have started to crisp up.

How to fix an underwatered Fan Palm

You might be thinking that the best way to fix an underwatered Fan Palm is to simply drown it in water but this can actually be harmful to your Fan Palm if the soil goes from one extreme to the other (yes plant’s can get stressed by change too!)

Instead, you want to reintroduce frequent watering for a week or two and this should solve the problem and stop your plant from drooping down. Over time keep an eye on how much you are watering your Fan Palm by checking the moisture in the soil frequently and adjusting your watering routine. You may want to increase how frequently you are watering or increase how much water you give your Palm each time.

Cold temperatures may also be to blame

If you have inspected the potting mix of your Fan Palm, and analysed your watering schedule and just can’t be sure that watering issues is the cause of the drooping leaves, then it may be extreme temperature fluctuations that are the problem.

Make sure that you draft-proof any windows or doors that are close to your Fan Palm (and other tropical houseplants) as well as move them away from any air conditioning vents as these can be quite damaging to your plants during summer.

Our number one tip is to buy a digital thermometer that you can place next to your plants. This will allow you to spot any extreme fluctuations and adjust the placement of your plants throughout your home.

If your Fan Palm is living in a cool room or exposed to cold drafts, it’s also more at risk from root rot. This is because it will take longer for the potting mix to dry out which increases the chances you are overwatering. This is the perfect mix for problems such as root rot to occur which is why you should be extra cautious when it comes to caring for your plants in winter or in colder rooms in your home.

Those are the most common reasons why your Fan Palm may have started drooping. Once you have diagnosed the issue and started making changes to treat it, it’s important that you keep a close eye on your Palm over the next month or so. This is to ensure that the changes you’ve made are properly solving the issue and things are moving in the right direction.

To find out more about how to care for your plant, check out our Fan Palm care guide.

Fiddle and Thorn is a participant in the Amazon Services LLC Associates Program, an affiliate advertising program designed to provide a means for sites to earn advertising fees by advertising and linking to Amazon.com

Take our houseplant survey!

Quickly respond to our 30 second houseplant survey and get 75% off our Complete Houseplant Care eBook!

Take the Survey

No thanks…

Why is my English Ivy losing leaves? Causes and Solutions

Last Updated: June 26, 2022

Although they are loved for being both a great indoor and outdoor plant, this post will focus only on having an English Ivy as a houseplant. If you notice that your beloved English Ivy has started losing some of its leaves then this is a sign that something isn’t quite right. There are a few reasons why English Ivy plants tend to shed or drop some of their leaves so it’s important that you make the right diagnosis.

In this post, we will be going through each of the individual causes for English Ivy plants losing leaves, as well as guiding you through how to best treat the issue and stop it from causing any more leaves to fall off the plant

Underwatering can cause leaf drop

One of the most common causes of English Ivy plants losing leaves is insufficient watering and dry soil. Although they don’t like to be swimming in water, it’s not great to let the soil fully dry out so it’s important to get the right balance here. The best way to check whether or not you are underwatering your English Ivy is by taking your plant outs of its pot and inspecting the potting mix and root system. If the potting mix feels like sand and the roots have turned quite light brown and crispy, then you are probably underwatering.

You can also tell if your English Ivy is too dry by looking at the leaves that have fallen off your English Ivy and seeing if they have light brown leaf edges as this can also indicate underwatering.

Hot temperatures can also mean your English Ivy begins losing leaves

If your English Ivy is getting too much sunlight, it can cause a hotspot to form which can lead to your plant losing leaves. The perfect spot for your English Ivy is just a touch further inside a bright room, potentially an east-facing window if there’s a good spot free.

You also want to avoid your plant being too close to radiators, heating vents or cookers as the warm air can mean your plant dries out quicker and will start to lose leaves. You can always pick up a digital thermometer to check the spot your English Ivy is sitting for peace of mind to prevent your plant from losing even more leaves.

Your English Ivy might be losing leaves due to pests

A slightly more worrying cause of your English Ivy losing leaves is a pest infestation. Get up close to your plant and use a magnifying glass to spot any pests. If you are unlucky and find them making your English Ivy their home then isolate your plant immediately to stop them from spreading to any of your other plants. Then pop your plant in the shower to rinse down and treat with neem oil to fight the infestation. Make sure to check over your other plants in the room to see if any other plants have pests.

Those are the 3 most common reasons why English Ivy plants start losing their leaves. It’s important that you act quickly once you have determined the cause as you don’t want to be left with a load of leafless vines. If the leaves have fallen off the top section of the plant, then you do have the option of propagating the bottom bits of the vines and popping them back in the pot. You can read more about this in our English Ivy propagation guide. If your plant is losing leaves from the end of the vines, then we recommend trimming the vines back to encourage new healthy growth.

Check out our English Ivy care guide for more tips on how to best look after your plant.

Fiddle and Thorn is a participant in the Amazon Services LLC Associates Program, an affiliate advertising program designed to provide a means for sites to earn advertising fees by advertising and linking to Amazon.com

Take our houseplant survey!

Quickly respond to our 30 second houseplant survey and get 75% off our Complete Houseplant Care eBook!

Take the Survey

No thanks…

Why is my English Ivy dying?

Last Updated: November 30, 2022

Although English Ivy plants can be somewhat forgiving when it comes to their care and environment, this doesn’t mean they are immune to the issues that we are all so familiar with when it comes to caring for our houseplants.

If your English Ivy is showing signs that it might be dying, then it’s vital you act quickly to correctly diagnose the issue and make the needed changes. Catching the issue early means it won’t have taken a complete hold over your plant and makes solving it a lot quicker and painless

Below we will be going through each of the potential reasons why your English Ivy is dying, alongside tips on how to make the right diagnosis, treat the issue and also prevent it from happening again in future.

A dying English Ivy can suggest underwatering

One of the most common causes of a dying English Ivy is dying is a lack of water. Although they can adapt well to a range of environments, including their soil moisture, consistent underwatering can cause some real damage. This can happen for one of two reasons. Either you have totally forgotten to water your plant for the last few weeks or months or your plant is suffering because it is consistently being watered slightly less than it needs.

Regardless of the cause, underwatering most commonly shows up through the following symptoms: dry leaves, light brown spots on the leaves and drooping stems. It can also happen that your plant loses a few leaves if the issue doesn’t get solved in time. These leaves are often crispy and dry before they call off your dying English Ivy.

Before you start watering your plant more frequently, it’s important to be sure that underwatering is the cause of the trouble. Take your plant out of its pot to see how dry the potting mix feels. This also gives you an opportunity to inspect the root system. Crispy roots will suggest underwatering.

Your first instinct to reverse this issue and revive your dying plant might be to drown your English Ivy to make up for the lack of water, but this can actually cause more damage and shock your plant.

Instead, we recommend watering your plant a little bit once a day for a full week. This will help to moisten the soil without shocking the plant (which can happen if their environment changes suddenly). A moisture meter can help with finding a better watering routine moving forward.

Overwatering could also be killing your English Ivy

If you notice that your English Ivy has started drooping, looking quite limp and sickly then overwatering might be the cause. Other symptoms include soft leaves and stems as well as yellow patches across the leaves.

If you think that you may have overwatered your English Ivy it is best to replace the soil straight away rather than just sit and wait for it to dry up over time. The reason for this is that it will take many days and maybe even a week for the potting mix to dry out and in that time you risk more damage being done to your already dying English Ivy. This can make it trickier to solve the issue as it kills more of your plant.

To combat the issue long-term, make sure to check the moisture in the soil before you water it. There are two really easy ways to make sure that it definitely needs water depending on how you water it.

If you use a top-down watering approach, check the moisture at the top of the soil, if it is still damp then wait a few days before watering. However, if you use a bottom-up watering approach then use the chopstick method, the lifting method or a moisture meter to figure out how dry the soil is.

Moving forward, your watering schedule should change throughout the year depending on the growing seasons. English Ivy plants go dormant in winter so don’t be alarmed if there is not much growth happening. This also means that the amount of water needed dramatically increases so it becomes a lot easier to accidentally overwater in these darker months.

A dying English Ivy could be caused by low light

If your plant looks very leggy (the new stems aren’t growing many leaves on the vine) or if the new leaves are very small and solid green, then this is likely caused by a lack of sunlight.

This tends to be a lot more common in winter as the sun is weaker and out for less of the day, but can also happen in summer if they are in a dark corner of the room.

If you suspect that a lack of natural sunlight is the cause, start by placing your plant nearer to a window to help revive it. If this happens during winter, you can get away with placing it right by the window as the direct sun rays won’t be as intense as in summer.

However, if this is happening during the height of summer, you’ll want to be a little more cautious as to how much direct light is hitting the leaves (more on that below).

Too much sunlight could also be to blame

The reason we just warned you about giving your dying plant too much intense direct sunlight is that it can really dry out the leaves, turning them brown and crispy.

There is often a misconception that there is no such thing as too much light for a houseplant. But this couldn’t be further from the truth.

Direct sunlight will very quickly scorch and burn the leaves of your English Ivy which is irreversible. It will leave yellow or brown patches on the leaves as well as very dry leaf tips and vines which make the plant look as though it is dying – and over time it will!

If this has already happened to your English Ivy, trim away the scorched leaves and move your plant to an area of your home with indirect light. You might also need to think about moving your plant around depending on the seasons. You want to ensure that you are maximising on the light in winter, whilst not giving it intense summer sunlight. It can be a bit of a balancing act.

Check your plant for signs of a pest infestation

A slightly less common reason why your English Ivy may be dying is a pest infestation. It can happen that pests such as mealybugs, mites, aphids, whiteflies and scale insects make themselves a little too cosy at home on your plant.

Pests are often more common on plants that have either spent some of the year growing outdoors or are already suffering from another issue.

Check your plant thoroughly for pests and don’t forget to check the potting mix as well. If you find pests on your English Ivy we recommend removing the worst affected parts of the plant before giving the whole plant a shower. Then you want to start rigorously treating your plant with neem oil and insecticide.

Those are the most common factors that can cause your beautiful and beloved English Ivy to start dying. Moving forward, we recommend that you build regular check-ups into your care routine for all houseplants. This will help you spot any very early warning signs and you can begin to treat any problems before they have really fully developed. A quick check-up and a monthly intense check-up can really help the fight against these common problems.

Check out our English Ivy care guide to find out more about how to keep your plant happy and healthy.

Fiddle and Thorn is a participant in the Amazon Services LLC Associates Program, an affiliate advertising program designed to provide a means for sites to earn advertising fees by advertising and linking to Amazon.com

Take our houseplant survey!

Quickly respond to our 30 second houseplant survey and get 75% off our Complete Houseplant Care eBook!

Take the Survey

No thanks…

Why is my English Ivy drooping?

Last Updated: October 4, 2022

Known and loved for their evergreen trailing vines, one of the most common problems that happen with them is that their vines and leaves start drooping. However, you’ll be happy to know that this tends to be one of the earliest signs of trouble so if there are no other signs of trouble then this hopefully means the problem will be easier to fix.

Below we will detail each of the main causes of a droopy English Ivy as well as how to treat the problem and prevent it from causing more harm to your plant in future.

A drooping English Ivy can suggest overwatering

English Ivy plants are pretty hardy and won’t die suddenly if you overwater them once in a while or if their environment isn’t exactly how they like it. However, consistent overwatering will mean your English Ivy’s leaves will start to droop as their roots begin to rot and turn mushy.

If the roots start to turn mushy, the individual leaves will droop and may even eventually fall off completely as your English Ivy will not be able to get nutrients from the soil to maintain healthy leaves or new growth.

If you think that you may have overwatered your English Ivy, check the soil moisture to confirm. It’s also a good idea to check over the root system as rotten roots will be soft to touch and very dark in colour.

Replace any waterlogged soil straight away rather than just sit and wait for it to dry up over time. This avoids further damage being caused.

To prevent the issue long-term, make sure to check the moisture in the soil before you water your English Ivy. There are two really easy ways to make sure that it definitely needs water. First check the moisture at the top of the soil, if it is still damp then wait a few days before watering again. You can also lift up your English Ivy to check the weight of the plant before and after watering. You will then start to be able to gauge how heavy the soil is when it is in need of water. Make sure to handle your English Ivy gently when picking it up to prevent any leaves from breaking away from the main stem.

If you want to be 100% sure about how much moisture is in the potting mix, and whether it’s actually time to water your English Ivy, then we recommend using a moisture meter. You simply pop them in the soil and it will tell you how soggy the soil is – it’s really that simple. We use this one from Amazon.

Underwatering can also cause your English Ivy to start drooping

The strange (and often frustrating) thing about drooping leaves on an English Ivy (and a lot of other plant types) is that as well as too much water, the issue can also be caused by not enough moisture in the soil.

This is a slower issue to take hold of your plant and English Ivys can be forgiving for the odd time when you forget to water. However, if the issue persists for several weeks and months at once, it can lead to a variety of issues if not sorted; the most serious of which is plant death. However, if the leaves have only just begun to droop down on your English Ivy, then it suggests you have caught the problem early. Other signs of underwatering include brown leaf tips and edges, crispy leaves and your plant feeling super light when you lift it so look out for those when diagnosing the problem.

If the leaves of your English Ivy are quite dry as well as drooping down and may have even started turning brown, then we suspect that a lack of water is the culprit. However, before you start pouring buckets of water over your plant, you need to make sure that this is really the cause of the drooping leaves on your English Ivy. Check the soil moisture and see if the roots have started to crisp up.

How to fix an underwatered English Ivy

  1. Give your plant a soak.

    Fill up a container with fresh temperate water and place your plant in there for about 10 minutes. This will allow the water to soak into the potting mix and your plant will take up only what it needs.

  2. Slowly reintroduce watering.

    Sudden changes in the environment can be quite stressful for plants and if the potting mix goes from really dry to soggy super quickly, it can cause your plant to go into shock. After doing a quick soak, water your plant a little bit every other day for a week.

  3. Adjust your watering schedule.

    To prevent the issue moving forward, make sure that you are increasing either how much water you give your plant each time, or how frequently you water.

Cold temperatures may also be to blame

A much less common reason why your English Ivy might start to droop is temperature changes. This is normally very easy to diagnose and solve as a digital thermometer can tell you very quickly whether you need to relocate your plant.

If your English Ivy is too close to a draft door or window or is next to an air conditioning vent, this can cause your plant to become stressed and droop down. Cold temperatures also increase the risk of root rot so something you really want to avoid.

Shock or stress can cause drooping leaves

If you have recently moved house or moved your English Ivy to a new spot, then this change may be causing the leaves to droop. Plants can be a little bit like humans and get quite stressed if their environment changes from one day to another and will show this in a variety of ways. One of which is drooping their leaves and vines.

As long as the new environment meets the needs of your plant, the drooping leaves and vines should be temporary and your English Ivy should return to normal in a few weeks.

Those are the most common reasons why your English Ivy has become droopy. It’s important that once you’ve made any changes to either the care or environment of your English Ivy, then you keep a close eye on it for the next few weeks. This is to make sure that you have successfully diagnosed the issue and that things are progressing in the right way.

Check out our English Ivy care guide to learn more about how to keep your plant happy!

Fiddle and Thorn is a participant in the Amazon Services LLC Associates Program, an affiliate advertising program designed to provide a means for sites to earn advertising fees by advertising and linking to Amazon.com

Take our houseplant survey!

Quickly respond to our 30 second houseplant survey and get 75% off our Complete Houseplant Care eBook!

Take the Survey

No thanks…

Why is my Elephant Ear Plant dying?

Last Updated: September 27, 2022

Loved for their large heart-shaped leaves, the Elephant Ear Plant is a real centrepiece of the room. This can make it even more devastating once you start to notice signs that your plant might be dying.

There are several different factors that might be causing issues for your plant and below we will go through each one in detail. We recommend going through the list whilst inspecting your plant, its root system and potting mix so that you can make the right diagnosis.

A dying plant can indicate overwatering

Too much moisture in the soil of your Elephant Ear Plant is one of the quickest killers. Not only will it rot the roots, but it often won’t show up as an issue above the soil until significant damage has already been done.

Once the roots have started to rot, your plant can become unstable and also cannot get needed nutrients from its root system.

Signs that your Elephant Ear Plant is dying due to overwatering include brown or yellow patches on the leaves, drooping stems, soft leaves and the lowest leaves falling off your plant entirely.

Check the soil moisture to confirm the issue. If you find that the soil is waterlogged, replace the potting soil straight away (rather than waiting for it to naturally dry out) so that the roots can begin to recover.

To prevent the issue from causing more harm to your plant in future, adjust your watering schedule so that you are either watering less frequently or not giving your plant as much water each time you do. Essentially you want to make sure that the soil has enough time to dry out between waterings to prevent root rot.

Drainage issues may be to blame

Sometimes you might not be giving your plant too much water but the lack of drainage still means the roots start to rot.

Luckily, there are several really easy ways to increase the amount of drainage and allow for excess moisture to flow out of the pot. Firstly, we recommend mixing a small amount of perlite into the potting mix. This will make it far easier for water to flow through and out of the drainage holes of your pots and also helps with the aeration of the soil, which is a bonus.

You also want to make sure the pot has sufficient drainage holes and that they aren’t blocked by anything. Another easy step is to add a few small stones or pebbles to bottom of your pots, this helps in making sure that the drainage holes are never blocked by soil or any loose debris.

If your Elephant Ear Plant is growing in a plastic pot then you should also consider switching this to a terracotta pot. This is because the clay they’re made of is permeable which means that some of the water in your soil can evaporate through the sides of the pot. This reduces the harmful effect of accidental overwatering.

A dying Elephant Ear Plant can suggest underwatering

Another common reason that your Elephant Ear Plant is dying is a lack of water. Although the plant will forgive you for occasionally forgetting to water, consistent underwatering can lead to a variety of serious issues if not solved in time.

The most common signs of an underwatered Elephant Ear Plant are dry leaves, light brown spots on the leaves and drooping stems. You can also look at the soil for signs of underwatering as it will be very light brown in colour and may be coming away from the sides as it has compacted without moisture.

Before you start watering your plant more frequently, it’s important that you confirm the issue is underwatering. You don’t want to increase how much water you are giving your plant if it doesn’t need it as this can cause even more problems.

Take your plant out of its pot to see how dry the potting mix feels. You also want to check out the root system to see if it has started to crisp up.

To solve the issue, we recommend watering your plant a little bit once a day for a full week. This will help to moisten the soil without shocking the plant (which can happen if their environment changes suddenly). A moisture meter can help with knowing when to water here too and can be a really useful tool to adjust your watering schedule in future.

Direct sunlight might be killing your plant

Another problem that may be causing your Elephant Ear Plant to die is too much direct and intense sunlight. This only really happens in summer though as the sun is a lot stronger and out for a lot of the day which can be really harmful to plants near windows.

Intense sunlight can dry out the leaves very quickly causing them to turn brown and it can also burn them causing yellow patches. This is unfortunately irreversible so we recommend trimming away any burnt or dry leaves to help revive your dying Elephant Ear Plant.

To solve this issue and revive your dying Elephant Ear Plant, move your plant a little further away from the windows during the summer so it gets less of that intense light directly falling onto its leaves. You might need to move your plant around depending on the seasons so that you are maximising on the winter sunshine but protecting it from the intense summer light.

Check your Elephant Ear Plant for pests

Although rarer than other factors (especially if your plant spends the entire year growing indoors), another reason why your Elephant Ear Plant might be dying is a pest infestation.

If you spot pests lurking on your plant the first thing to do is isolate it from any of your other houseplants. Pests can jump across plants if they are close so you want to avoid the problem spreading to any of your other plants. Check over your other plants to check for pests and keep them far away from non-infested plants.

You also want to check for signs of pests which include brown or yellow spots, small holes in the leaves, droopy stems, white powder or webbing across the stems and leaves falling off your plant.

To stop the infestation from growing, you want to trim off any badly affected leaves or stems. This will initially curb the growth of the infestation by cutting the actual number of pests. You then want to shower your plant down and replace the potting mix to try and get rid of as many pests from the plant and soil before treating with an insecticide and neem oil.

Those are the most common reasons why Elephant Ear Plants start dying. Moving forward, we recommend conducting regular checkups of all of your houseplants so that you can start to spot any issues early on. This is key to reviving your dying Elephant Ear Plant.

To learn more about keeping your plant thriving, take a look through our Elephant Ear Plant care guide.

Fiddle and Thorn is a participant in the Amazon Services LLC Associates Program, an affiliate advertising program designed to provide a means for sites to earn advertising fees by advertising and linking to Amazon.com

Take our houseplant survey!

Quickly respond to our 30 second houseplant survey and get 75% off our Complete Houseplant Care eBook!

Take the Survey

No thanks…

Why is my Dumb Cane / Dieffenbachia turning yellow?

Last Updated: December 31, 2021

Dieffenbachia plants get a bit of a bad rep as they are quite toxic to humans and pets. However, if you look past this, they have some of the most incredible foliage (as well as flowers if you’re lucky). However, if the care or environment isn’t right for your Dumb Cane plant, then your plant might start to develop yellow leaves. There are several factors that might cause yellow leaves on your plant, so it’s important to figure out what is happening to your plant. Below we will be going through each of the different reasons in detail, so you can diagnose the issue, fix it and even prevent it from happening again in future.

Consistent overwatering

Let’s start with probably the most common cause of yellow leaves on Dumb Cane plants – overwatering. Although your plant likes to have some moisture in the soil, they don’t do so well if it becomes quite waterlogged as their roots will begin to rot. Once the root system becomes damaged, your plant will struggle to take in enough nutrients, water and oxygen which will impact overall plant health and cause the leaves to turn yellow. You might also notice the stems and leaves going quite soft and droopy.

Before changing anything in your watering routine for your Dumb Cane you want to be 100% sure that overwatering is the issue. To do this, take your plant out of its pot and see if the potting mix is waterlogged and clumpy! You can also check the soil using a moisture meter to determine if it’s waterlogged. They are a great investment for all plant parents – a lot cheaper than having to buy new plants! If there is a lot of moisture in the soil then this is most probably why your Dumb Cane plant has yellow leaves. Replace the potting mix straight away if it is waterlogged so your plant can begin to recover.

After a few weeks, you should start to see your Dumb Cane becoming stronger and maybe even producing new healthy growth. Be patient though as your plant has been through a lot and will need time to recover. Make sure to adjust your watering schedule going forward, allowing time for the potting mix to fully dry out before watering again.

Temperature extremes

Another factor that can harm your Dumb Cane and cause yellow leaves is really high or low temperatures. If your Dumb Cane is too close to a window that gets a lot of direct sunlight or if it’s closer than a meter from a radiator/ heating vent then the hot air can dry out the plant. To avoid this, ventilate the room well and keep all plants away from radiators, heaters or cookers as this can really dry out the leaves and turn the leaves yellow.

Cold air can also be harmful to your Dumb Cane and may also be why your plant has developed yellow leaves. Make sure there are no drafts coming through the windows or doors that your Dumb Cane (or any other houseplants for that matter) is near. It is also a good idea to buy a digital thermometer to keep track of how the temperature changes throughout the seasons and you will be able to spot any cheeky drafts or hotspots that might be damaging to your plants (extreme temperatures can cause a whole range of issues beyond yellow leaves).

Too much direct sunlight hitting the leaves

Another cause of yellow leaves on Dumb Cane plants can be sunburn caused by high levels of direct sunlight. This is most common during summer as not only is the sun out for more of the day, but it’s a lot stronger too which can cause problems for the relatively thin leaves on a Dieffenbachia plant.

Unfortunately, once the leaves on your Dumb Cane have turned yellow there is no reversing it so your best option is to remove the most affected leaves and find a new spot for your Dumb Cane. Ideally, you want somewhere will bright but indirect light.

A lack of nutrients can cause yellow spots

Yellowing leaves on Dumb Cane plants can also be caused by a lack of nutrients. This is more common in older, more mature plants as over time the potting mix will become nutrient deficient if not given any fertiliser. Intense watering can also flush out the nutrients so that’s also something to be wary of.

There are two methods that will help to increase the level of nutrients in the potting soil and prevent any more yellow leaves. Firstly, remove all of the old soil in the pot and replace it with new nutrient-rich houseplant potting soil. (Remember to make sure it is also well-draining to avoid waterlogging). You can also use a well-balanced houseplant fertiliser at half strength. Our houseplants have always liked the liquid fertiliser from Miracle Gro which is available from Amazon here.

Pests are a rarer but worrying cause of yellow leaves

Pests such as aphids, spider mites or scale insects may be hiding on your plant and sucking on the leaves. This exhausts the leaves and causes them to develop yellow patches or small yellow spots. If you suspect that pests might be behind the yellow leaves on your Dumb Cane, use a magnifying glass to inspect the plant (remember to look at the undersides of the leaves as this is where they particularly like to hide). If you do spot unwanted visitors on your plant, isolate it from all of your other houseplants to stop the infestation from spreading. Also, it’s a good idea to check over the plants in the same room just to make sure that none of your other plants has pests.

Then trim off the worst affected leaves on your Dumb Cane to curb the infestation a little before showering your plant and treating with neem oil.

So those are all of the various reasons why your Dumb Cane plant has developed yellow leaves. It’s important that you act quickly after diagnosing the problem as any more damage could be the difference between being able to save your plant and having to say goodbye to it. If you do change your watering schedule, or relocate your plant to another spot in your home, make sure to keep a close eye on it to see if any other problems develop or if the yellow leaves continue.

To learn more about how to care for your plant, spot and solve other common problems as well as the different propagation methods, check out our Dumb Cane care guide.

Fiddle and Thorn is a participant in the Amazon Services LLC Associates Program, an affiliate advertising program designed to provide a means for sites to earn advertising fees by advertising and linking to Amazon.com

Take our houseplant survey!

Quickly respond to our 30 second houseplant survey and get 75% off our Complete Houseplant Care eBook!

Take the Survey

No thanks…

Why is my Dumb Cane / Dieffenbachia losing leaves?

Last Updated: December 31, 2021

Known for being adaptable to different environments, Dumb Cane plants are great for most homes, however, this doesn’t mean that they aren’t susceptible to the same problems as all other plant types. One of the most common issues is your Dumb Cane losing leaves as this usually means that something isn’t right. It’s important to monitor the rate at which your plant is losing leaves. If it’s only a few leaves every few months (and this is less than the rate of new growth), then it can sometimes be just natural ageing which isn’t anything to worry about.

But if your plant is losing more than this, then it could mean that something is wrong with the care your Dumb Cane is getting, or the environment that it’s growing in.

Low temperatures

Extreme temperatures and drafts can be quite harmful to your Dumb Cane as they thrive in warm environments and this can definitely be why your Dumb Cane is losing leaves. Make sure your plant is not placed near doors or windows that may be drafty. Even though the temperature of your home may feel perfect for your Dumb Cane, any drafts coming in from the outside may be colder and harm your plant’s health.

This is particularly damaging during the long cold nights so we recommend picking up a digital thermometer to check the temperature across the day and night in various spots in your home. This will make sure that you don’t place your Dumb Cane in a spot that is too cold as this should fix the issue and you shouldn’t see any more leaves falling off. AC vents are another no-no for Dumb Cane plants as this constant stream of cold air can cause temperature stress and leaf drop.

Too much water

If you find that your Dumb Cane is starting to lose leaves from the bottom up, then it indicates that there is an issue with the root system, most commonly root rot. This is caused by consistent overwatering. Whilst your plant will 100% forgive you for the occasional overwatering, over time if the potting mix never gets an opportunity to dry out then it will cause the roots to turn soft and mushy.

Once the root system is damaged, your plant won’t be able to take up needed nutrients, water or oxygen which causes the leaves to drop as well as a lack of new growth and often yellow leaves.

If you think that your Dumb Cane is waterlogged, check the moisture of the soil immediately using a moisture meter and adjust watering accordingly. We also recommend replacing the potting soil straight away (rather than waiting for it to naturally dry out) so that the roots can begin to recover and resume healthy growth. Going forward, it’s important that you adjust your watering schedule and it’s a good idea to use the moisture meter to make sure you are only watering your Dumb Cane when it needs it.

Drainage Issues

Sometimes it may not be your watering schedule that is causing your Dumb Cane to lose its leaves, but the poor draining of the soil and pot. You can very easily increase the amount of drainage in your Dumb Cane by mixing in a small amount of perlite. This will not only help with the flow of water through the pot, but it also aids the aeration of the soil which is a bonus.

Terracotta pots are also great at helping with the drainage as the clay they’re made of is permeable which means that some of the water in your soil can evaporate through the sides of the pot. This isn’t the case for the plastic pots that you will usually buy your houseplants in, which instead hold in all of that moisture.

Overfertilisation

Most generic plant foods and fertilisers will recommend a dosage for your plants, but it’s often far too much for your Dumb Cane and can result in leaves being dropped. A lot of factors such as plant age, size and variety will impact how much and often you need to fertilise your houseplants and so one amount will never be suitable for every plant.

The best thing to do here is to try out feeding at half the recommended dosage and see how your Dumb Cane reacts. Try also decreasing the number of times you fertilise your Dumb Cane each year and this should help prevent more leaves from falling from your plant. You can also take a look at the root system to see if you can spot any fertiliser build up around the roots that might be affecting your plant.

Those are the three most common reasons why Dumb Cane / Dieffenbachia plants lose their leaves. It’s important that you find the issue that’s affecting your plant quickly to prevent the issue from progressing any further as it might then be too late to bring your plant back to full health and you might have to say goodbye to it.

Check out our Dumb Cane care guide for more information on how to best take care of your plant!

Fiddle and Thorn is a participant in the Amazon Services LLC Associates Program, an affiliate advertising program designed to provide a means for sites to earn advertising fees by advertising and linking to Amazon.com

Take our houseplant survey!

Quickly respond to our 30 second houseplant survey and get 75% off our Complete Houseplant Care eBook!

Take the Survey

No thanks…

Why is my Dumb Cane (Dieffenbachia) drooping?

Last Updated: September 14, 2022

Loved for their hardy nature and gorgeous leaves, the these plants is slowly becoming a favourite in the houseplant world despite its dangers. However, if you start to notice your Dumb Cane has begun drooping down then this isn’t a good sign.

In this article we will go through the main reasons why Dumb Cane plants begin drooping as well as how to diagnose each of them, treat them and prevent the problem from causing more damage to your plant in future.

Underwatering is the most common cause of drooping Dumb Cane leaves

Too little water can harm your Dumb Cane plant in quite a few different ways. It can cause dry brown leaves and a lack of growth. But one of the earlier signs of underwatering is drooping stems and leaves. This is because the root system will be slightly damaged and you plant won’t be able to stand upright.

How do I know if underwatering is the cause of the drooping leaves on my Dumb Cane?

If you find that the stems and leaves look a little lifeless, it is most probably because the soil has been too dry for too long. Stick a finger in the top few centimetres of the soil to check the moisture levels. You can also try lifting your Dumb Cane if your plant is not that mature to see how light the pot feels. It can also be a good idea to remove your plant from its pot to inspect the root system and see if it has started to turn crispy already. This will give you a good indication of how long the issue has been going on.

How do I fix an underwatered Dumb Cane plant?

Often you might think that drowning your underwatered plant is the best way to resolve the issue but this can actually cause your plant to go into shock. This can be pretty damaging to an already sensitive and drooping Dumb Cane plant so you want to avoid this as much as possible.

Instead, you want to water your plant a little bit once a day for a week. Moving forward, keep an eye on how much you are watering your plant by checking the moisture in the soil frequently. You will want to increase the frequency of watering or how much you water each time to prevent your Dumb Cane from drooping again in future because of a lack of moisture.

Overwatering can also cause droopy Dumb Cane leaves

Dumb Cane are pretty hardy plants and won’t die suddenly if you overwater them once in a while. However, consistent overwatering will mean your Dumb Cane’s leaves will start to droop as their roots begin to rot and turn mushy. It’s strange that the opposite watering extremes can have the same impact on your plant but this is because the root system also becomes damaged.

Consistent overwatering will lead to root rot which is very harmful to your Dumb Cane. It will cause the plant to become unstable, the individual leaves will droop and may even eventually fall off completely.

How do I know if too much water is causing my drooping Dieffenbachia?

Make sure to check the moisture in the soil before you adjust anything about your Dumb Cane care routine. First check the moisture at the top of the soil, if it is still damp then wait a few days before watering again. You can also lift up your Dumb Cane to check the weight of the plant before and after watering. You will then start to be able to gauge how heavy the soil is when it is in need of water. Make sure to handle your Dumb Cane gently when picking it up to prevent any leaves from breaking away from the main stem.

If you want to be 100% sure about how much moisture is in the potting mix, and whether it’s actually time to water your Dumb Cane, then we recommend using a moisture meter. You simply pop them in the soil and it will tell you how soggy the soil is – it’s really that simple. We use this one from Amazon.

How do I fix an overwatered Dumb Cane plant?

Once you have confirmed that overawtering is the cause of your drooping Dumb Cane, it is best to replace the soil straight away rather than just sit and wait for it to dry up over time. Make sure to use a fresh, nutrient rich soil when you do this.

Our recommendation is this one from Miracle Gro. Be careful when removing the soil from the roots as you don’t want to cause any further damage as the root system will be quite delicate. You also want to remove any mushy roots and leaves at this stage to encourage new healthy growth.

A drooping Dumb Cane can also be caused by cold temperatures

A much less common reason why your Dumb Cane might start to droop is temperature changes. This can be both hot and cold temperature extremes so be careful that your plant isn’t too close to an air conditioning vent, radiators, cookers or cold drafts coming in from outside.

These areas can have really big changes in temperature over the course of a day or year and your Dumb Cane simply won’t be able to adapt properly to stay happy and healthy.

Use a digital thermometer to check for any temperature extremes or fluctuations and move your plant to a more suitable spot if needed.

Drooping Dumb Cane leaves can also indicate a lack of sunlight

Although watering and temperature issues tend to be the most common causes of limp drooping leaves on Dumb Canes, it’s important to also consider some other causes if the others don’t seem to fit with what is happening to your plant.

Dumb Canes need bright but indirect sunshine to really thrive and produce new strong leaves and stems. A lack of sunlight (which is common during winter) can cause your plant to struggle and develop brown leaves, discolouration of the plant, small leaves, slow growth, drooping stems or leaves falling off. So all in all, low light can be pretty damaging to the health of your plant.

If you suspect a lack of sunlight is causing the leaves on your Dumb Cane to droop down and become quite limp, then we recommend moving it to a slightly sunnier spot in your home.

Just make sure that you keep it away from too much direct sunlight (especially in summer) as this can become quite intense and scorch the leaves. Too much direct sunlight can also cause hotspots near windows which falls back to the issue of temperature extremes!

Those are the most common reasons why Dumb Cane plants start drooping down. It’s important that you fix the issue early and quickly to give yourself the best chance at fully reviving your plant. Drooping stems and leaves are often one of the earlier signs of unhappiness so hopefully, with the right care and attention, you can reverse the issue fairly quickly.

To learn more about how to keep your plant thriving, check out our Dumb Cane care guide.

Fiddle and Thorn is a participant in the Amazon Services LLC Associates Program, an affiliate advertising program designed to provide a means for sites to earn advertising fees by advertising and linking to Amazon.com

Take our houseplant survey!

Quickly respond to our 30 second houseplant survey and get 75% off our Complete Houseplant Care eBook!

Take the Survey

No thanks…