Why is my Peperomia turning yellow? Causes and How to Fix it!

Last Updated: December 31, 2021

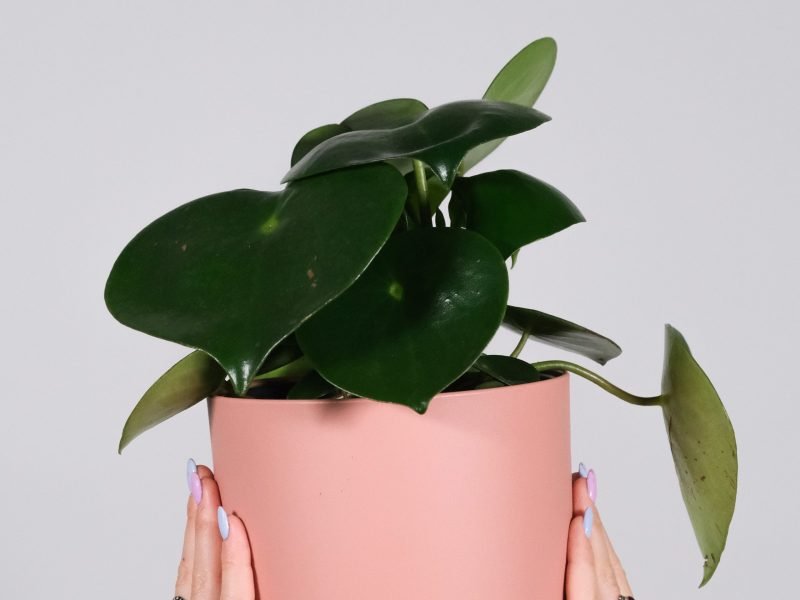
If there’s one thing that Peperomia plants are known for, it’s incredible foliage. If you have started to notice that your Peperomia has started to develop yellow leaves then this could definitely be a sign that something isn’t quite right. Hopefully, you have caught the issue early, before all of the leaves on your Peperomia have turned yellow as this gives you the best chance at reviving your plant and bringing it back to full health.

Overwatering is the most common cause of yellow leaves

With any houseplant, a good rule to remember is that yellow leaves can often signify overwatering and it is the first port of call whenever diagnosing this issue. Peperomia plants don’t like sitting in puddles of water for long periods of time and this will slowly cause the roots to rot. This means that the root system on your Peperomia can’t transport any nutrients or oxygen to the rest of the plant and the leaves will slowly turn yellow, usually from the base upwards.

You want to be sure that overwatering is the cause as holding back water when you plant actually needs it will cause a range of other issues! To figure out if overwatering is the reason your Peperomia has yellow leaves, it’s important to check the moisture levels in the soil immediately after spotting the issue. Take your Peperomia out of its pot and if the soil is quite waterlogged and clumpy then replace it with fresh dry mix. Trim away any rotten roots and yellow leaves so your Peperomia can focus its energy on producing new healthy growth.

You might be tempted to wait for the potting mix to dry out by itself and hope that it solves the issue, however, this risks damaging the root system even further which makes reviving your plant even more difficult.

Moving forward, you want to adjust your watering schedule, either watering less frequently or cutting back on how much water you give your Peperomia each time. Using a moisture meter can also really help you keep track of the moisture levels in the potting mix to ensure you’re not overwatering and causing more yellow leaves to develop.

Insufficient drainage

Sometimes it may not be your watering schedule that is causing the yellow leaves Peperomia, but the poor draining of the potting mix and pot itself. Here are a few things you can do to increase the drainage and help prevent waterlogged soil.


  • Add perlite to your Peperomia’s potting mix

    You can very easily increase the amount of drainage in your Peperomia’s soil by mixing in a small amount of perlite, this will make it far easier for water to flow through the potting mix and out of the drainage holes.

  • Ensure your pot has drainage holes

    It’s vital that all of your houseplant’s pots have drainage holes so that any excess water can flow out of the pot into either the planter or the saucer. This is a great step to preventing root rot and yellow leaves as your Peperomia won’t be sitting in waterlogged soil.

    Another easy step is to add a few small stones or pebbles to the bottom of your pots, this ensures that the drainage holes don’t get blocked by soil or any loose debris.

  • Use terracota pots

    Although terracotta pots can be a little bit more expensive and are easier to break, their upsides are much more than just the aesthetic. The clay they’re made of is permeable which means that some of the water in your soil can evaporate through the sides of the pot. This isn’t the case for the plastic pots that most of your houseplants will come in when bought, which instead hold in every drop of water. So sometimes it’s worth investing a little more for your plants to make sure that the roots of your Peperomia plant aren’t sitting in too much moisture as this will help avoid yellow leaves.

Lighting Issues

Too much or too little light can also be a cause of yellow leaves in Peperomia plants. Lighting is actually a difficult one with these plants as they need exactly the right balance – they can’t handle direct sunlight, but also get very leggy, droopy and yellow if not given enough light.

Yellow leaves can be a sign that you’re Peperomia is getting too much direct sunlight which is causing the leaves to burn and become scorched. This will often look like burnt patches across the side of the plant that faces the sunlight.

Too little light can also cause the leaves to turn yellow and this will be accompanied by stunted growth and droopy stems.

Environmental Shock

This is something that isn’t really talked about much but plants get stressed, and Peperomia plants can be especially sensitive to this sometimes. Environmental stress is caused when there is a sudden change in the environment, usually going from bone dry soil to really soggy. But this can also be the case when light levels dramatically change or when temperatures soar or drop.

It’s important to bring in any changes gradually to avoid this stress. Whilst environmental shock won’t often kill your Peperomia, it will result in a few yellow leaves that will eventually also fall off your plant. Using a digital thermometer, light meter and moisture meter can help you keep track of your Peperomia’s environment so you can respond to any major changes.

Pests

Although quite rare in plants that don’t spend any of the year outside, another cause of yellow leaves on a Peperomia can be a pest infestation. Spider mites, mealybugs and scale insects can cause yellow leaves on a Peperomia so these are the ones to look out for if your plant seems unhappy. Signs of pests are white webbing on the leaves and stem joints, brown or yellow dots on the leaves, holes in the leaves and of course visible pests (use a magnifying glass to help spot them).

If your Peperomia does have a pest infestation then don’t think you need to say goodbye to it. If treated properly, you can get rid of the pests entirely and bring your Peperomia back to full health. Firstly, you need to isolate your affected Peperomia from your other beloved houseplants so the infestation cannot spread, Then should trim off the worst affected leaves and stems to curb the infestation from growing quickly and begin treating your Peperomia with neem oil.

Nutrient Deficiency

Another potential cause of yellow leaves on your Peperomia plant is a lack of nutrients or a nutrient imbalance. Yellow leaves show that your plant doesn’t have enough chlorophyll which can be a sign of nutrient deficiency, in particular a lack of either nitrogen or potassium.

The best thing to do to solve the issue and prevent any more yellow leaves on your Peperomia is to treat it with a nutrient-rich fertiliser. Look out for ones that include higher levels of nitrogen and potassium.

Natural Ageing

If it’s only the oldest bottom leaves on your Peperomia that have turned yellow then this may be natural ageing. As your plant matures, your Peperomia will drop some of its oldest, lowest leaves to focus its energy on growing new healthy and often bigger growth.

This is completely natural and isn’t because of anything you are doing wrong. The rate of natural ageing should be about 1 or 2 of the oldest leaves every few months but no more as this is an indication that something is wrong. Monitor the rate of yellowing to see if it is speeding up.

So those are the most common reasons why your Peperomia may have developed yellow leaves. We recommend going through each of the issues one by one to determine what cause best fits the symptoms and environment that your Peperomia is in. The earlier you have caught the issue, the easier it should be to bring your Peperomia back to full health and prevent any further yellow leaves from developing.

To find out more about how to care for your Peperomia plants, as well as other common issues, propagation advice and general care tips, check out our Plant Index where you’ll find specific care guides for each of your Peperomia varieties.

Fiddle and Thorn is a participant in the Amazon Services LLC Associates Program, an affiliate advertising program designed to provide a means for sites to earn advertising fees by advertising and linking to Amazon.com

Take our houseplant survey!

Quickly respond to our 30 second houseplant survey and get 75% off our Complete Houseplant Care eBook!

Take the Survey

No thanks…

Why is my Peperomia losing leaves? Causes and How to Fix it!

Last Updated: June 16, 2022

Peperomia plants have really grown in popularity over the past few years and we can totally see why; their incredible foliage, ease of propagation and small size make them a perfect fit for every plant lover. However, it’s quite common for Peperomia plants to start losing their leaves as a sign that something isn’t quite right. This can have several causes so we have put together this post to go through the various factors to help you figure out why your Peperomia is losing leaves.

Overwatering can cause your Peperomia to start losing leaves

Too much water is the most common reason why Peperomia plants begin losing their leaves. This is why it’s always our first port of call to diagnose the issue and it’s a good idea to inspect the potting soil closely to see what’s going on before doing anything else.

Peperomia plants don’t like sitting in puddles of water for long periods of time and their roots will begin to rot. Once the root system becomes damaged, it can’t provide oxygen and nutrients to your plant and cannot keep your plant stable anymore so the leaves will droop and eventually fall off.

It’s important that you properly diagnose the issue of overwatering before amending anything about your watering routine as holding off water when it’s actually another issue causing your Peperomia to lose leaves would be damaging.

To figure out if overwatering is the reason your Peperomia is losing leaves, check the moisture levels in the soil immediately. If the soil is quite waterlogged and clumpy then replace it with fresh dry mix. You might be tempted to wait for the potting mix to naturally dry out but this just risks even more damage to your plant and may mean you can’t revive it.

To accurately check the moisture levels in the soil there are a few different methods, two of which are more reliable than others. Firstly, you can use a moisture meter to determine how so damp the soil is. These are great affordable little devices that will save you a lot of headaches when it comes to watering your plants.

The other method to discover if your Peperomia is losing leaves due to soggy soil is to remove your plant from its pot and inspect the potting mix. This will also allow you to inspect the root system to see if the issue has been going on long enough to damage the roots.

Trim away the soft, rotten roots when replacing the soil as this focuses your plant’s energy on growing new healthy roots.

To prevent your Peperomia from losing any more leaves in future adjust your watering schedule moving forward, so you aren’t watering your Peperomia as much or as often as you were before to prevent it from losing any more leaves. Make sure to check the potting mix before watering to ensure it has had time to dry out properly.

Peperomia Plants can begin losing leaves due to drainage issues

Sometimes it may not be your watering schedule that is causing your Peperomia to start losing its leaves, but the poor draining of the potting mix and pot itself. This means that you might actually be watering your Peperomia the right amount, but there are reasons why that moisture is still rotting the roots and causing issues with your plant.

Here are a few things you can do to increase the drainage and help prevent waterlogged soil.

Add perlite to your Peperomia’s potting mix

You can very easily increase the amount of drainage in your Peperomia’s soil and stop it losing more leaves by mixing in a small amount of perlite. This aids not only drainage but aeration of the soil too which is a win-win.

Ensure your Peperomia’s pot has drainage holes

It’s vital that your Peperomia’s pot (and all of your houseplant’s pots) have drainage holes so that any excess water can flow out into either the planter or the saucer. This is a great step to preventing root rot and leaves from falling off as your Peperomia won’t be sitting in waterlogged soil.

You may also want to add a few small stones or pebbles to the bottom of your pots, this ensures that the drainage holes don’t get blocked by soil or any loose debris.

Use terracotta pots

Although terracotta pots can be a little bit more expensive and are easier to break, their upsides are much more than just the aesthetic. The clay they’re made of is permeable which means that some of the water in your soil can evaporate through the sides of the pot. This isn’t the case for the plastic pots that most houseplants come in when bought, which instead hold in every drop of water. So sometimes it’s worth investing a little more for your Peperomia to make sure that the roots of your Peperomia plant aren’t sitting in too much moisture as this will help prevent your plant from losing any more leaves in future.

Your Peperomia might be losing leaves due to underwatering

One of the more common factors when it comes to Peperomia plants losing their leaves is consistent underwatering. Peperomia plants will forgive you if you occasionally forget to water them but they will struggle with dry soil for weeks and weeks.

It’s important to ensure that your Peperomia is actually being underwatered before you change anything about your care routine. You don’t want to start watering it more if it doesn’t need it as too much water can actually damage your Peperomia a lot quicker. To confirm that underwatering is causing your Peperomia to lose leaves, take your Peperomia out of the pot to inspect how the potting mix feels. If underwatered, the potting mix will fall apart and feel very sandy to touch. You will also see that some of the roots have started to crisp up if you have been underwatering your Peperomia for a while.

Once you have determined that your Peperomia is suffering from a lack of water, slowly reintroduce water to your plant rather than drowning it (they can go into shock if there is a sudden change in environment). A little bit of water once a day for a week should get your Peperomia back on track and prevent it from losing any more leaves.

Moving forward, get into the habit of checking the moisture levels in the soil regularly so you can adjust your watering schedule accordingly. You’ll want to increase watering a little in the warmer and sunnier months of the year as the potting mix will dry out a lot quicker than in winter, where you won’t need to water so much. Other factors such as size, maturity and environmental factors will also impact how much water your Peperomia needs.

Lack of sunlight might also be causing leaves to drop

Too little sunlight can also cause your Peperomia to start losing some leaves. Lighting is actually a difficult one with these plants as they need exactly the right balance – they can’t handle direct sunlight, but also are quite fussy about a lack of light.

When the leaves are falling off due to a lack of sunlight, it is also often accompanied by stunted growth and drooping stems. You might also notice that your Peperomia is starting to reach for the light and become unstable. This is also a sign that your plant needs more light and is losing leaves due to a consistent lack of it.

To solve the issue and prevent your Peperomia from losing more leaves in future, move your Peperomia to a slightly sunnier spot, whilst avoiding any direct light during summer.

Cold temperatures might be why your Peperomia is losing leaves

Extreme temperatures and drafts can also be very harmful to your Peperomia as they thrive in warm environments and this can definitely be causing your Peperomia to lose leaves. Make sure your plant is not placed near doors or windows that may be drafty. Even though the temperature of your home may feel perfect for your Peperomia, any drafts coming in from the outside may be colder and harm your plant’s health.

This is particularly damaging during the long cold nights so we recommend picking up a digital thermometer to check the temperature across the day and night in various spots in your home. This will make sure that you don’t place your Peperomia in a spot that is too cold as this should fix the issue and you shouldn’t see any more leaves falling off.

But what if your Peperomia is losing leaves in summer? Surely that can’t be due to cold temperatures? Well sometimes, yes it can. Make sure that your Peperomia isn’t too close to any air conditioning vents or units. Although the cool air might be a nice break from the heat for you, it can actually be damaging to your Peperomia over time.

Your Peperomia may be losing leaves due to natural ageing

If it’s only the oldest bottom leaves on your Peperomia is losing, then this may be natural ageing. As your plant matures, your Peperomia will drop some of its oldest, lowest leaves to focus its energy on growing new healthy and often bigger growth.

This is completely natural so you don’t need to worry about this at all. The one thing you do need to keep an eye on though is the rate of ageing. On average your Peperomia should lose 1-2 leaves every few months. If your Peperomia is losing more than this then it’s a sign that something isn’t quite right and I would consult the reasons we have listed above to find the cause.

Another thing to monitor when it comes to natural ageing is that your Peperomia is growing more new healthy leaves than it is losing. As soon as your plant is dropping more leaves than it is growing, you know something is definitely wrong.

Those are the most common reasons why your Peperomia is losing its leaves. Some causes are easier to diagnose, and others are easier to fix. It may feel overwhelming at first as there are quite a few potential causes but go through each one by one and eliminate any that don’t fit your plant. To prevent the issue (and others) from occurring again in future, make sure to check over your plant regularly to spot issues early. This will give you the best chance at fixing it and getting your Peperomia back to full health.

To find out more about caring for your Peperomia, as well as other common problems and propagation advice, check out our various Peperomia care guides in our Plant Index.

Fiddle and Thorn is a participant in the Amazon Services LLC Associates Program, an affiliate advertising program designed to provide a means for sites to earn advertising fees by advertising and linking to Amazon.com

Take our houseplant survey!

Quickly respond to our 30 second houseplant survey and get 75% off our Complete Houseplant Care eBook!

Take the Survey

No thanks…

Why is my Peace Lily drooping? Causes and Solutions

Last Updated: May 2, 2022

It’s always a little sad to see that one of your houseplants isn’t doing so well, with Peace Lilies the change can be very dramatic. The leaves and stems will droop very low until they’re almost resting down by the sides of the pot, sometimes even the flowers will follow along. At this point it would be easy to think that your plant is dyeing — but that is certainly not the case for the Peace Lily.

We’ve listed below all of the most common reasons that your Peace Lily might start to droop and how to fix them fast. For the most part all your plant will need is a good watering, though it is definitely worth checking out the other causes to make sure there’s not going to be any long term issues for your Peace Lily.

A lack of water can cause drooping leaves

The first and most common issue that will cause your Peace Lily to droop is a lack of water. When it comes to watering we normally recommend a little and often view that should keep your houseplants happy in general. Make sure to give your Peace Lily plenty of water and you’ll see it spring back to life in as a little as a few hours. Consider amending your watering schedule if drooping is a common occurrence with your specific plant, especially as you come out of winter and into the growing season as your Peace Lily will start to need a more water through the warmer months.

Overwatering can also cause drooping leaves

If you’re confident that underwatering isn’t the cause of the drooping leaves on your Peace Lily, the next thing to check is overwatering. Check the soil to see if it is soggy or holding onto too much excess water. It should be moist but not completely soggy, so you might have to amend your watering so that it isn’t getting too much.

If your plant is in a reasonably warm environment you can just leave it for a couple of days to dry out a little more — or if you’re more concerned about it you can remove some of the wet soil and replace it with dry for a quicker fix to the drooping stems, just make sure not to damage the root system.

A drooping Peace Lily can also indicate drainage issues

As we’ve mentioned earlier in this post, a build-up of excess water can be a cause for your Peace Lily to droop, and a quick way to fix that is to make sure that your pot has good drainage. Start by checking if your pot has holes in its base, if not you can quickly make some with a corkscrew. If you find your pots drainage holes are getting clogged up with debris from the soil you can simple add a few small stones in the bottom of the pot to keep them nice and clear and prevent your Peace Lily from drooping.

From that point onwards, it’s as simple as making sure that you empty any water in the saucer or planter after you have finished watering to avoid overwatering causing drooping leaves. This will also minimise the risk of odours from stagnant water and the vastly minimise the chances of root rot becoming a problem for your Peace Lily in the future.

Drooping leaves might also be due to cold air

A much less common reason why your Peace Lily might start to droop is temperature changes. This is normally very easy to diagnose and solve however so it’s certainly not a major issue. If your Peace Lily is near an outlet for a cooling system, close to a radiator or could catch a cool draft, you might want to move it to a different spot. These areas can have large changes in temperature over the course of a day and your plant simply won’t be able to adapt quickly enough to stay happy and healthy which is why it’ll start to droop.

These are all of the main reasons that you might find your Peace Lily is drooping — and really it’s not as big of a deal as it may seem, they’re just a very dramatic plant. If you would like to learn more about your plant do check out our Peace Lily care guide.

Fiddle and Thorn is a participant in the Amazon Services LLC Associates Program, an affiliate advertising program designed to provide a means for sites to earn advertising fees by advertising and linking to Amazon.com

Take our houseplant survey!

Quickly respond to our 30 second houseplant survey and get 75% off our Complete Houseplant Care eBook!

Take the Survey

No thanks…

Why is my Nerve Plant turning brown? Causes and How to Fix it!

Last Updated: June 21, 2022

Available in a range of red, pink and green varieties, the Nerve Plant is known and loved for their striking veined leaves. So it is even more devastating than normal to find your Nerve Plant’s incredible leaves are starting to turn brown as this means something isn’t quite right in either your plant’s environment or care routine.

But don’t worry, we will go through all the different causes of brown leaves on Nerve Plants to help you diagnose the issue before fixing and preventing it.

Too much direct sunlight causes brown leaves

Sunlight is one of the main factors that cause Nerve Plants to develop brown leaves. There is often a misconception that there is no such thing as too much light for a houseplant. But this couldn’t be further from the truth and intense light can cause brown leaves on many houseplant types, including Nerve Plants.

Though a lack of light can also cause several issues, the main problem when it comes to brown leaves often lies with direct sunlight. If your Nerve Plant is getting hit with direct sun rays throughout the intense summer period, it can quickly scorch and burn the leaves of your Nerve Plant which will turn them brown and is, unfortunately, irreversible. The direct sunlight will dry out and burn the leaves, causing brown patches across the plant.

If this is the cause of the brown leaves, trim away the scorched areas and move your Nerve Plant to an area of your home with indirect sunlight. If you are unsure of how much sunlight your Nerve Plant is getting, we recommend using a light meter to keep track of how the light level changes across your home throughout the day/year.

A lack of humidity often leads to brown leaf tips

If your Nerve Plant has brown dry leaf tips or edges, rather than whole brown leaves, then a lack of humidity is most likely the cause. Nerve Plants will struggle in homes with quite dry air, especially in winter where heating and less ventilation makes this problem worse.

Although a lack of humidity won’t often kill your plant (unless things are REALLY bad), there are a few really simple things you can do to increase the humidity for your Nerve Plant and avoid any more brown leaf tips:


  1. Mist the leaves regularly

    This is one of the easiest ways to increase the humidity for your Nerve Plant and avoid any more brown leaf tips. Misting the leaves also helps with preventing dust build up so is a really good habit to get into for a lot of your houseplants too. Mist the leaves several times per week with a spray bottle. We recommend misting in the mornings so there’s enough time for the water to evaporate off the leaves before temperatures drop. Cold air and damp leaves often leads to leaf rot.

  2. Make a pebble tray

    This requires you to do a little DIY but it’s a great solution for when dry air causes brown leaves on your Nerve Plant. Fill up a tray with small stones and fill it up halfway with fresh water. Place your Nerve Plant on top and slowly the water will evaporate around your plant increasing the humidity. Don’t let the water level touch your plant’s roots as this can cause the roots to rot.

  3. Give your Nerve Plant a shower

    Another simple thing you can do to instantly boost the humidity and prevent more brown leaves is giving your Nerve Plant a shower. Washing it down with water also gets rid of dust and any pests that might be on your plant without you noticing. Shower your Nerve Plant with temperate water so you don’t shock or burn the plant and keep the water pressure low to avoid breaking any of the leaves or stems.

  4. Placement

    If you have sufficient light levels and an empty space in your kitchen or bathroom then we recommend moving your Nerve Plant in there. The humidity level in those rooms is often naturally higher than in other areas of your home because of the steam released when showering and cooking. Just be careful not to put your plant too close to the cooker or this will burn the leaves pretty quickly and you’ll have more than just brown leaf tips!

  5. Invest in a humidifier

    This is a great idea for when you want to keep a really steady humidity level for your Nerve Plant which will avoid brown leaf tips. Some humidifiers even have features that mean you can put it on a repeating schedule or turn itself off once the rooms reach the desired humidity level.

    If you want to know more about how to raise the humidity for your Nerve Plant then check out our humidity guide.

Underwatering can also cause brown leaves

If the leaves on your Nerve Plant are turning quite dry and crispy as well as brown then it may be due to underwatering. Nerve Plants like to have moist soil but don’t like it when it’s soggy. This means you have to get the right balance when watering which can be difficult. We always recommend a little but often approach to avoid over or underwatering.

If you think your Nerve Plant has been underwatered then check the potting mix before you do anything! You want to be sure that this is the cause of the brown leaves on your Nerve Plant otherwise you may very quickly be overwatering a plant that doesn’t actually need any more water.

Take your plant out of its pot to inspect the potting mix to ensure it’s dry and then slowly reintroduce watering. Your first instinct might be to drown the plant in water to make up for the lack of it, but this can actually cause more damage and more brown leaves on your Nerve Plant. This is because plants get shocked by a sudden change in its environment.

Water your Nerve Plant a little bit once a day for a week. After a week you want to go back to a more normal care routine, making sure to check the moisture in the soil frequently to avoid the brown leaves from developing again!

So those are the most common reasons why your Nerve Plant may be developing brown leaves. As long as you have caught the problem early, you should have absolutely no problem fixing it and bringing your Nerve Plant back to full health. However, even if there is just a small section of your plant that is still alive, don’t give up on your plant. Trim away the dead parts and with the right care, you might be able to revive it.

To find out more about how to care for your plant, as well as other common issues, propagation and top tips, check out our Nerve Plant care guide.

Fiddle and Thorn is a participant in the Amazon Services LLC Associates Program, an affiliate advertising program designed to provide a means for sites to earn advertising fees by advertising and linking to Amazon.com

Take our houseplant survey!

Quickly respond to our 30 second houseplant survey and get 75% off our Complete Houseplant Care eBook!

Take the Survey

No thanks…

Why is my Nerve Plant leggy?

Last Updated: April 1, 2022

Nerve Plants are slowly becoming one of the most popular houseplants around. Their strong veined leaves are incredible and contrary to what their name might suggest, they are totally pet friendly! But they aren’t always the easiest houseplant to look after and it can be concerning when you notice that the growth is becoming quite leggy and straggly. Below are the main reasons why your Nerve Plant has become leggy.

Not enough light

This is quite common for a lot of houseplant types but Nerve Plants will start to develop leggy growth if they aren’t getting enough sunlight. Although they can survive in low light areas, it’s about finding the right balance that will leave you with healthy bushier growth.

Leggy growth doesn’t mean the plant is going to die and can probably survive for a long time in the low light. However, if you are after a bushier look, then move your plant somewhere with more sunlight. You want to make sure, however, that your Nerve Plant doesn’t get any direct sunlight as this can very quickly scorch and burn the leaves.

Time of year

It’s also important to consider the time of year as your Nerve Plant will produce a lot more leggy growth over winter. This links in with the section above as there isn’t as much light over winter which is causing this leggy growth. The temperature is also a factor and you plant will struggle a little with the cooler temperatures.

We suggest leaving the leggy growth over winter and pruning it just before spring. This will hopefully encourage your Nerve Plant to grow new leaves during spring which will give the plant a much fuller look.

Natural growth

One thing to keep in mind with Nerve Plants is that they can naturally grow a little leggy. This isn’t because they are unhappy with their environment, or your care routine isn’t right. This is simply how the plants are sometimes.

Trimming the growth

If you don’t want to keep the leggy growth on your Nerve Plant, then prune away the long stems. This will encourage your plant to produce new growth on those stems which should hopefully be a little less leggy.

We always recommend propagating the stems which you trimmed off. Place them in water and after a few weeks, you should start to see some roots popping out. Make sure to change the water in the jar regularly (every other day or so) as you won’t have as much success with old stagnant water.

Once the roots have come out on your propagated stems you can either pot them into a new pot to form a new Nerve Plant or carefully pot them back into the mother plant. This will give your original plant a much fuller look.

Those are the most common reasons why Nerve Plants can become quite leggy. If you want to find out more about caring for your plant check out our Nerve Plant Care Guide for everything you need to know to keep your plant happy and healthy!

Complete Houseplant Care eBook

Our comprehensive (and rather good looking) eBook that will teach you everything you need to know to successfully care for, and maintain your houseplants!

Buy on

Fiddle and Thorn is a participant in the Amazon Services LLC Associates Program, an affiliate advertising program designed to provide a means for sites to earn advertising fees by advertising and linking to Amazon.com

Take our houseplant survey!

Quickly respond to our 30 second houseplant survey and get 75% off our Complete Houseplant Care eBook!

Take the Survey

No thanks…

Why is my Nerve Plant dying? Causes and Solutions

Last Updated: April 1, 2022

There are several reasons why your Nerve Plant might be struggling to survive and is starting to die. The main things to look at are watering issues, light levels and pests. Below you will find all the information you need to figure out what’s wrong with your Nerve Plant as well as fix the problem and hopefully bring your plant back to full health!

Your Nerve Plant might be dying due to underwatering

If your plant has developed really crispy leaves, then you may have been underwatering it for a while which is why it’s dying. Nerve Plants like their soil to be slightly moist and will really struggle if they have to go a long time between waterings.

We always recommend a little but often approach to watering Nerve Plants. This ensures that it keeps the soil most but not waterlogged. If you think your plant is underwatered then check the moisture levels in the soil before making any changes to your care routine. When watering an underwatered Nerve Plant it’s super important you do it gradually. Drowning it in water will actually cause the plant to get quite shocked and this could lead to more problems.

Moving forward always remember to check the moisture levels in the soil using either the finger, chopstick or lifting methods. This will mean you can keep an eye on how much water it needs and avoid the problem recurring.

Overwatering might also be causing your Nerve Plant to die

If the leaves on your Nerve Plant have turned yellow and are quite limp then your plant might be dying due to overwatering. Too much moisture in the soil will mean that the roots will have started to rot and become damaged. This stops your plant getting any water or nutrients which is why it has started to die.

Again before making any changes to how you water, check the soil to see if you are right in thinking it’s been overwatered. If the soil is clumpy and waterlogged replace it immediately for new fresh dry potting mix. This will give the roots the best chance at survival and help to revive your dying plant. Shake as much of the old soil off the roots and trim away any rotten ones.

Due to the damage to the root system, your plant may take a little while to fully recover and grow new healthy leaves. But be patient and you should start to see the leaves looking fresher in a few weeks.

A dying Nerve Plant can indicate a lack of humidity

A humid environment is vital for a healthy Nerve Plant and they can really struggle if your home has dry air. This happens during winter a lot more as the heating and lack of ventilation will lead to much drier air. If the leaves have begun to go a little dry from the tips and edges inward or are curling inwards then a lack of humidity may be the problem.

Here are a few ways to increase humidity for your plant:

Mist the leaves

This is one of the easiest ways to increase the humidity for your plant. Use a spray bottle to mist the leaves a few times a week. We recommend misting in the mid-morning to allow enough time for the water to evaporate. If the leaves are wet when the temperatures drop at night then it may cause the leaves to rot.

Use a pebble tray

This requires a little DIY but it’s a great solution. Fill up a tray with small stones and fill it up halfway with water. Place your plant over the top and over the course of the day the water will evaporate under your plant. Always make sure the plant is not sitting in the water though as this will cause root rot.

Showering

One simple method that raises the humidity instantly is showering your Nerve Plant. It also gets rid of dust and potential pests that might be hiding underneath the leaves so it’s a great way to keep your plant healthy. Wash your plant down with lukewarm water as you don’t want to shock or burn the plant. Keep the water pressure relatively low as you don’t want to damage the plant.

Placement

If you have good lighting in your kitchen or bathroom then we recommend moving your Nerve Plant in there. The natural humidity from showering and cooking makes them a great spot for your plant. Just make sure to keep them away from the cooker as you don’t want to burn the leaves.

Buy a humidifier

These affordable little devices keep the humidity in the room at a consistent level so are great for houseplants. Some humidifiers even have built-in features that allow you to put it on a schedule or turn itself off once it has reached a specific humidity level in the room!

We always recommend this humidifier from Amazon as a great place to start.

Want to know more about how to raise the humidity for your Nerve Plant and other houseplants? Check out our detailed humidity guide.

Leaf burn could be why your Nerve Plant is dying

If your Nerve Plant has yellow patches all over the leaves then they may be scorched by the sun. This happens when your plant receives too much direct sunlight.

These plants like medium light, at most bright indirect light, so avoid placing them right next to windows. Watch out even more during summer as the sunlight is a lot stronger which means the leaves will burn a lot quicker. If leaf burn is why your Nerve Plant is dying, you’ll notice the burnt patches on the side facing the sun.

Your Nerve Plant might be dying due to pests

Whilst rarer than some of the other reasons, your Nerve Plant might be dying due to a pest infestation. They can be susceptible to gnats, mealybugs and scale insects. They suck on the plant’s leaves which damages them and leaves behind yellow patches and holes.

Most pests can be visible just by looking closely but get a magnifying glass if you can’t see any – better to be safe than sorry! They like to hang out on the undersides of the leaves so make sure to check closely there.

Each type of pest needs to be treated a little differently, including showering, neem oil and insecticide treatment. We have written a whole chapter about identifying, treating and preventing pests in our downloadable ebook.

Those are the most common reasons why your Nerve Plant is dying. If you want to find out more about the care routine needed, check out of Nerve Plant Care Guide.

Fiddle and Thorn is a participant in the Amazon Services LLC Associates Program, an affiliate advertising program designed to provide a means for sites to earn advertising fees by advertising and linking to Amazon.com

Take our houseplant survey!

Quickly respond to our 30 second houseplant survey and get 75% off our Complete Houseplant Care eBook!

Take the Survey

No thanks…

Why is my Nerve Plant drooping? Causes and Solutions

Last Updated: May 31, 2022

Drooping and limp leaves are quite a common problem that Nerve Plant parents face. There are several causes so it’s important to find out pretty quickly what the exact problem is so you can reverse it. If there are no other problems with your Nerve Plant apart from droopy leaves then it should mean you have caught the issue early. With a few changes to your routine or your plant’s environment, the leaves should start to bounce back.

Not enough water can cause droopy leaves

The most common cause of drooping Nerve Plant leaves is underwatering. Nerve Plants like to have some moisture in the soil and will struggle if they are consistently underwatered. A lack of water can also cause other issues such as dry brown leaves so you want to avoid this as much as possible.

To figure out if underwatering is the cause of your Nerve Plant’s drooping leaves, take the plant carefully out of its pot and check the moisture in the soil. If the soil is very dry and powdery then underwatering is probably the main cause.

You want to be careful when reintroducing water to your Nerve Plant as a sudden change of environment can cause the plant to go into shock. Instead of drowning your plant in water you want to water it a little once a day for about a week. This should be enough to give the soil a good soaking. After a week you want to go back to a more usual watering routine, making sure you are watering more frequently than before to avoid the problem reoccuring.

Not enough light can also cause a drooping Nerve Plant

Another cause of drooping Nerve Plant leaves is a lack of sunlight. Nerve Plants can grow in medium light conditions so are more tolerant to shady corners than other houseplants. However, there is a limit and especially during the winter months, your Nerve Plant will struggle with a severe lack of light.

The best thing to do is move your Nerve Plant to a spot in your home that gets bright but indirect light. Avoid anywhere too close to windows as your plant will struggle with intense direct sunlight. After a few weeks, you should start to see the leaves bounce back.

Drooping Nerve Plant leaves can indicate cold temperatures

Droopy Nerve Plant leaves can also be caused by shock from cold temperatures. Nerve Plants thrive in warm climates and will struggle in homes with cold drafts. You may not notice the cold air coming through cracks in doors and windows but if your Nerve Plant is right next to them then the constant stream of cold air from outside can really shock and damage the plant.

Alongside the drooping leaves, you may notice frosty leaves or a lack of growth. Try to draft-proof the windows and doors that your houseplants are near or move your Nerve Plant into a slightly warmer room in your home.

If your Nerve Plant is living in a room with cold air, it is also more at risk from overwatering and root rot. Your plant won’t need as much water and the soil will take a lot longer to dry out. This is the perfect mix for problems such as root rot to occur which is why you should be extra cautious when it comes to watering in winter.

Lack of humidity can result in a drooping Nerve Plant

Humidity issues is quite a common problem for all types of houseplants, including Nerve Plants. It is often forgotten about as people tend to focus on light and water above everything. However, a lack of humidity can cause your Nerve Plant’s leaves to droop down. But luckily, dry air is quite easy to fix. Here are some great and cheap ways to up the humidity in your home:

Mist the leaves regularly

This is something that you should build into your houseplant care routine. Misting the leaves with a spray bottle a few times a week is a great way to increase the humidity. It also gets rid of any dust on the leaves so your plant can get more of the sunlight which is a nice little bonus!

Bathe your Nerve Plant

A great method to instantly raise the humidity for your Nerve Plant and stop it drooping so much is to give it a bath. Pop your plant in the shower or sink and wash all the leaves down giving the plant a soaking. Make sure the water is lukewarm as cold or hot water will shock and burn the plant. You also don’t want to have the pressure on full blast as this can damage the leaves.

Move to the bathroom/ kitchen

If you have good lighting in your bathroom or kitchen then we recommend moving your Nerve Plant in there to prevent it from drooping. Both rooms have slightly higher levels of water vapour in the air due to steam from cooking and showering. You do want to be careful not to put your plant too close to the cooker or it will burn the leaves.

Buy a humidifier

The number 1 thing we recommend to plant parents to stop their Nerve Plant drooping is a humidifier. They really up the plant game and can make a big difference your health too! Humidifiers keep a good consistent humidity level in your home which is said to boost sleep and clearer skin (as well as countless benefits for your plants too!)

We recommend this humidifier from Amazon. We’ve been using it for several years and our plants are thriving because of it!

Want to know more about how to raise the humidity for your Nerve Plant and other houseplants? Check out our humidity guide.

So those are the most common reasons why your Nerve Plant’s leaves are drooping. If you have caught the problem fairly early then a few tweaks to the care routine or spot that it’s in will solve the issue quickly. It may take a few days or weeks for the leaves to start to look normal again so be patient.

If you want to learn more about how to care for your plant then check out our Nerve Plant care guide which has everything from basic care advice, to propagation tips and solving common problems.

Fiddle and Thorn is a participant in the Amazon Services LLC Associates Program, an affiliate advertising program designed to provide a means for sites to earn advertising fees by advertising and linking to Amazon.com

Take our houseplant survey!

Quickly respond to our 30 second houseplant survey and get 75% off our Complete Houseplant Care eBook!

Take the Survey

No thanks…

Why is my Monstera losing leaves? 6 Causes and How to Fix it!

Last Updated: May 27, 2022

Probably the most popular houseplant in the world, the Monstera is known and loved for its thick, dark green split leaves. There isn’t much more iconic than the Monstera leaf, which makes it pretty worrying when your plant starts to lose them. Unlike a lot of other houseplants, Monsteras don’t actually have that many leaves, but what they lack in quantity they sure as hell make up in beauty. If your Monstera is losing leaves frequently then there is definitely something wrong with either the environment that your plant is in or the care it’s receiving.

To properly diagnose why your Monstera is losing leaves, we have created this post which goes through each of the factors in detail so you can see what fits with your plant and get right to solving and preventing the problem.

Overwatering is the most common cause of leaves falling off Monstera plants

If your Monstera’s leaves have yellow patches before they fall off then overwatering is most likely to blame here. It can be really easy to accidentally overwater your Monstera because it’s difficult to see what’s really happening in the soil. Monstera plants have quite thick roots compared to a lot of other more delicate houseplants which means they can withstand the odd overwatering or lack of drainage. However, if the problem is frequent, and the soil never has a chance to dry out, the roots will start to turn mushy and rot. This leaves the plant unable to get the needed nutrients, oxygen and moisture and your Monstera will start to lose leaves to conserve the energy that it does have.

It’s important before you go changing anything about how you care for your Monstera that you are sure overwatering is the cause of the problem. Luckily, there are a few simple ways to find out if your Monstera’s soil is waterlogged and causing your plant to lose leaves:

Carefully take your Monstera out of its pot

If your Monstera plant is losing a lot of leaves then you need to inspect the potting mix immediately. You’ll be able to tell very quickly if the soil is waterlogged and clumpy. If it is then replace it with fresh potting mix immediately so your Monstera can begin to recover straight away.

Finger/Chopstick Method

Another way to tell if your potting mix is waterlogged is by putting a finger or chopstick into the soil and seeing if it comes out clean. If there is soil stuck then there is still moisture in the soil. But if the soil is bone dry then it will just be like dust which will fall off your finger.

Use a moisture meter

These are affordable little devices that make it super easy to tell how much moisture is in the soil. They are great for all of your houseplants too, so the perfect investment for every houseplant.

Do I risk damaging the root system if I stick my finger in the soil?

As long as you are careful and don’t prod around too much, then you shouldn’t cause too many issues. Monstera plants have quite a robust root system so can deal with a little bit of prodding. Even if you break the odd root with your moisture meter, it shouldn’t be anything to lose sleep over.

How do I fix an overwatered Monstera?

If overwatering is the cause of your Monstera losing leaves then you must act quickly to fix the problem. Replace the potting mix straight away instead of letting it dry out naturally and trim away the worst affected roots and leaves. This stops your Monstera from wasting any energy trying to revive them and allows your plant to fully focus on new healthy growth.

In future, to prevent any more leaves from falling off your Monstera, try to hold off watering as much and make sure that the potting mix has fully dried out before watering again. Using a moisture meter can really help to gauge when to water.

Underwatering can also cause leaves to fall off

Although too much water can mean your Monstera loses leaves, not enough can also have exactly the same outcome. The main difference here though is that the leaves will most commonly turn brown, dry and crispy before falling off (rather than yellow and soft with overwatering).

If it’s not immediately obvious, here are some other indicators that your Monstera is losing leaves due to a lack of water:

Leaves are dry and crispy to touch

If the leaves that are falling off are very dry, crispy, shrivelled and look dehydrated, then the problem is probably consistent underwatering.

The potting mix feels very dry

An easy way to see if your Monstera is losing leaves due to a lack of water is by taking the plant out of its pot and inspecting the potting mix. If the soil feels very dry to touch (almost like dust) then there is a good chance your Monstera needs more frequent watering.

The soil is coming away from the sides of the pot

This is a great method to be able to tell if your Monstera is being underwatered without needing to even take it out of the pot. If you notice that the soil has compacted and is actually coming away from the sides of your plant’s pot, then it indicates that you need to increase watering and this may be the cause of your Monstera losing leaves.

Use a moisture meter

Just like with overwatering above, using a moisture meter will help figure out how dry the potting mix is and if you need to water more to stop your plant from losing any more leaves. It’s the most reliable method as you can monitor how the moisture levels change and make sure you are watering your plant enough.

How do I fix an underwatered Monstera?

To revive an underwatered Monstera, you might think all it needs is a bucket full of water. However, houseplants can get stressed by sudden changes in their environment. This can be sunlight, temperature and moisture levels. To avoid your Monstera getting stressed, you want to slowly reintroduce water by giving it a little bit once a day for a week. This will also ensure that the water is being taken up by the plant. When you water really dry soil, often most of that will run straight through the drainage holes and won’t be taken up by the roots.

Extremely low temperatures

If you can’t seem to find a problem with the amount of water that your Monstera is getting then cold temperatures may be what also be causing your Monstera to lose leaves. Cold air coming in through air conditioning vents or drafty windows can shock your plant and your Monstera might shed some of its leaves as a result. It can be difficult to notice drafts as often the average room temperature will feel fine, so it’s best to pick up a digital thermometer so you can keep an eye on how the temperature fluctuates.

Environmental Stress

Much like humans, Monstera plants can get pretty stressed out if any changes occur. We mentioned this a little above with watering but it can also happen after things like repotting, propagating or moving to a new spot in your home (or an entirely new home for that matter).

As long as the environment and care are what your Monstera needs, the initial shock will wear off after a few weeks and your Monstera shouldn’t lose too many leaves. Using a light meter and digital thermometers are a great way to check the environment and ensure that nothing is wrong.

Lack of nutrients can also be damaging

One issue that is slightly harder to diagnose but still might be causing your Monstera to drop leaves is a lack of nutrients. This usually occurs in more mature plants when you haven’t switched the soil out in a while so we recommend repotting with a good rich potting mix or compost. We also use a liquid fertiliser during summer to help with growth.

Natural ageing

If you have gone through all of the potential issues above but none of it really fits what is going on with your Monstera then it may simply be natural ageing. Over time it’s totally normal for your Monstera to drop some of its oldest leaves as it focuses on new bigger growth. The leaves that fall off due to natural ageing will usually turn a very vibrant, solid yellow colour. Once they are completely yellow they will fall from the plant. If natural ageing is the cause, then the rest of the plant should look and feel completely healthy.

To be sure that it is natural ageing, it’s also a good idea to monitor the rate at which leaves are falling off your Monstera. Ensure that your plant is growing more new leaves than it is losing old ones. If it’s the other way around then there is probably something wrong.

Those are the main reasons why Monstera plants lose their leaves. The number 1 thing to do when you notice your Monstera is losing leaves is to act quickly. If the problem has progressed this far, then it means it has been going on for a while (unless it is natural shedding of course). The sooner that you fix the problem, the better chance you have at getting your plant back to its normal self. Keep a close eye on other changes in your plant to give you the best shot at diagnosing the issue.

To learn more about how to best care for your beloved plant, as well as the different methods you can use to propagate it and how to spot and treat other common problems, check out our Monstera care guide.

Fiddle and Thorn is a participant in the Amazon Services LLC Associates Program, an affiliate advertising program designed to provide a means for sites to earn advertising fees by advertising and linking to Amazon.com

Take our houseplant survey!

Quickly respond to our 30 second houseplant survey and get 75% off our Complete Houseplant Care eBook!

Take the Survey

No thanks…

Why is my Monstera drooping? Causes and Solutions

Last Updated: May 17, 2022

Why are my Monstera Deliciosa leaves drooping?

Swiss Cheese Plants, also often known by their Latin name Monstera, are one of the most popular houseplants at the moment. Their striking split leaves really do make them something special. However, it can be frustrating if your luscious plant starts to droop and you don’t know why!

The main causes of monstera leaves and stems drooping are: underwatering, low humidity and drainage issues. Drooping leaves are fixable and if you deal with the issue sooner rather than later, your monstera should return to full health.

Underwatering can cause drooping Monstera leaves

Too little water can harm your Monstera in more ways that one. It can cause dry leaves, lack of growth and nutrient deficiency. But one of the earlier signs of underwatering is drooping leaves. If you find that the stems and leaves look a little lifeless, it could be because the soil has been dry for too long. Stick a finger in the top few centimetres of the soil to check the moisture. You can also try lifting your monstera if your plant is not that mature to see how light the pot feels. 

However, be careful with this as if your monstera is a few metres tall this can severely hurt your back. One way to know for sure whether your Monstera needs watering is by using a  moisture meter.  You just pop them into the soil and it’ll tell you how damp or dry the potting mix is. We recommend  this one from Amazon. 

If you find that your monstera feels very dry, water it a little every other day for a week. Your first instinct might be to give it loads of water straight away but this can actually be harmful to your monstera if the soil goes from one extreme to the other. Instead, you want to reintroduce frequent watering for a week or two and this should stop your Monstera from drooping so much!

If you find yourself often forgetting to water your Monstera, then a  self-watering pot  might be the thing for you. It will water your Monstera for you and avoid any risk of under or overwatering and consequent drooping leaves. We have found  this one from Amazon  to work really well!

Drooping leaves can also indicate drainage issues

Drooping leaves on your Monstera can also be caused by drainage issues in your pot. Although you could be watering the correct amount, if your pot isn’t draining the water in the right way, it could cause the soil to become waterlogged. You can very easily increase the amount of drainage in your soil by mixing in a small amount of  perlite, this will make it far easier for water to flow through and out of the drainage holes of your pots (you should also check to make sure your pots have drainage holes). 

Another easy step is to add a few small stones or pebbles to the bottom of your pots, this helps in making sure that the drainage holes are never blocked by soil or any loose debris.

If your Monstera is in a plastic pot, we also recommend switching this out to a terracotta or clay pot. These allow some of the excess water to evaporate out of the sides of the pot which helps avoid drooping leaves caused by root rot. We love  these terracotta pots from Amazon. 


Low humidity can also cause your Monstera to droop

If the soil isn’t particularly dry, it could be a lack of humidity that is causing your monstera’s leaves to droop. Swiss Cheese Plants like quite humid environments and can struggle in homes with dry air. This can be especially damaging in winter months when we often have the heating on for several hours a day. A lack of humidity in the air can cause the leaves to be a little limp and droop down. There are several ways you can increase the humidity for your monstera:

Misting the leaves

One of the simplest ways to increase the humidity for your Monstera and prevent drooping stems is to mist it with a spray bottle a couple of times a week. We love these  amber glass bottles from Amazon.  

Pebble tray

Place your Monstera over a tray of pebbles with fresh water over the top. Over the day water from the tray will evaporate giving your plant above exactly what it’s looking for.

Give your Monstera a shower

To quickly raise the humidity and wash down your monstera of any long-standing dust, you can always give them a quick shower. Simply pop them in the shower and wash them down with lukewarm water, this will clean off the leaves and give the soil a good soaking.

Move your Monstera to the bathroom

If you’re lucky enough to have great lighting in your bathroom you can move your monstera in there to increase the humidity. The running water from your showers means your bathroom is probably one of the most humid in your home. This can go a long way to preventing drooping leaves without having to do anything on a regular basis!

Buy a humidifier

They’re  relatively affordable little devices  and they make keeping a consistent humidity level so much easier. Most will allow you to place them on a timer so they run on a fixed schedule, and some will even have a built-in monitor so they automatically turn on and off to keep the humidity exactly where you want it.

Want to know more about how to raise the humidity for your monstera and other houseplants? We have written a  detailed guide  on this.

Lack of Proper Lighting

When Monsteras grow and develop new leaves, they stretch out towards their light source. If your Monstera is in a position where it isn’t getting enough natural light then it will likely develop longer and longer stems to try and reach for more. 

As you can imagine this then leads to longer, thinner, more top heavy stems that are much more likely to droop down. If you find that the last few new leaves from your Monstera are looking a little bit leggy and long, try moving it into a position where it will get more natural light throughout the day.

If more natural light isn’t an option for you at them moment then you can also consider some artificial options like LED grow lights, these are great for those of us who don’t have a lot of large windows or have particularly long dark winters.

Stability Issues + Training

Most of the time when you buy a young Monstera plant it won’t come with anyway to support it as it grows and matures. With Monsteras growing quite quickly sometimes, the additional height and weight of the new leaves and stems can cause the plant to droop or slump over.

This is where we find that it’s really important to arrange a good way to provide support for the new growth, this will also help you keep your Monstera under control as it matures. Our favourite, and probably the most common method is by using a moss pole.

These are simply a pole/stick (normally covered in coconut husk or dried moss) that you bury into your Monsteras pot. You can then tie your Monstera’s leaves and stems to the pole and train it to stop it from drooping.

Environmental Stress

Monstera’s can be, and mostly are some of the more forgiving houseplants to keep. But just like any other houseplant big changes in the environment can cause significant stress on the system.

If you’ve recently moved, repotted or propagated your plant you need not worry as this stress is expected and your Monstera should return to it’s normal non-drooping self in no time. 

However, if you haven’t made any drastic changes it could be worth looking at the less obvious issues of humidity or changes in temperature (sometimes caused by drafts or AC units!) as these can have a big effect on your plants.

Root Rot

The absolute worst case scenario for your Monstera is root rot, if you’ve been consistently over watering or over fertilising the root system may have garnered quite a bit of damage. As you can imagine any damage caused by root rot will degrade the ability of the roots to keep your Monstera stable and standing upright. 

Unfortunately root rot isn’t the easiest problem to solve in any houseplant as it’s irreversible and often hard to catch before it’s too late. Our first step would be to just let the soil completely dry out, in mild cases this can stop the rot from spreading. 

If you think your Monstera has a worse case of root rot then we highly recommend repotting your plant as soon as you can, making sure to trim back the infected and damaged roots whilst you do so. 

Check out our complete guide to preventing, diagnosing and fixing root rot here!

Those are the main reasons why your monstera might have drooping leaves. It tends to be a solvable problem if caught early so I wouldn’t worry too much. Keep an eye on how the leaves are changing once you have changed the location or care of your monstera to check that it is starting to look a little healthier.

To find out more about how to care for your plant, check out our Monstera care guide. There you will find everything you need to know to keep your Swiss Cheese Plant healthy and thriving as well as tips and tricks around propagation, fertilisation and repotting.

Fiddle and Thorn is a participant in the Amazon Services LLC Associates Program, an affiliate advertising program designed to provide a means for sites to earn advertising fees by advertising and linking to Amazon.com

Take our houseplant survey!

Quickly respond to our 30 second houseplant survey and get 75% off our Complete Houseplant Care eBook!

Take the Survey

No thanks…

Why is my Money Tree losing leaves? Causes and How to Fix it!

Last Updated: June 26, 2022

If your Money Tree has started losing leaves, then you’re probably pretty concerned. However, you have come to the right place. In this post, we will be going through each of the potential causes for the leaf loss on your Money Tree so that you can not only diagnose the issue but can properly treat it and stop any more leaves from falling off your beloved plant. Plus, we will also give you some tips on how to prevent the issue from happening again.

Overwatering is the most common cause of Money Trees losing leaves

If you find that your Money Tree is losing leaves from the bottom up, then it may be a problem with the roots that is causing the issue, the most frequent of which is too much moisture. Giving them either too much water each time, or simply watering too frequently so that the soil doesn’t get a chance to dry out can very quickly cause leaves to fall from your Money Tree.

If you think that your Money Tree is waterlogged, check the moisture of the soil immediately using a moisture meter and adjust your watering habits accordingly to solve the issue in the long term.

If you find that the potting mix is still very soggy, then it’s best to replace it with fresh dry mix. This will allow your Money Tree to begin the recovery process and stop losing leaves. Letting the potting mix dry out naturally however, risks more damage to the roots and therefore more leaves falling from your Money Tree.

In future, try to regulate your watering and always check that the top of the soil is dry before giving your Money Tree any more water. You need to also water according to the seasons; in the spring and summer (growth period) your Money Tree will require more water than in the colder darker months of the year.

Underwatering could also be the cause of the leaf drop

On the other end of the scale to overwatering, if your Money Tree is losing leaves then it may also be because of too little water. Yes, too much and too little of something can have the same impact! Money Tree plants will forgive you if you occasionally forget to water them but they will struggle with dry soil for weeks and weeks so be mindful of this if you are going on holiday or are unable to tend to your plants regularly.

It’s important to ensure that your Money Tree is actually being underwatered before you change anything about your care routine. You don’t want to start watering it more if it doesn’t need it as too much water can actually damage your Money Tree a lot quicker as we outlined above

To confirm your suspicions that your Money Tree is losing leaves because of underwatering, check the moisture levels in the soil. If your plant still feels quite strong, take it out of the pot. However, if the issue has been going on for a long time, and your plant is droopy and feels breakable, then use a moisture meter or the chopstick method to check the soil. This will prevent any more leaves breaking off your plant.

If underwatered, the potting mix will fall apart and feel very sandy to touch. You will also see that some of the roots have started to crisp up if you have been underwatering your Money Tree for a while.

Once you have determined that your Money Tree is suffering from a lack of water, slowly reintroduce water to your plant rather than drowning it (they can go into shock if there is a sudden change in environment). A little bit of water once a day for a week should get your Money Tree back on track and prevent it from losing any more leaves

Leaf loss can be caused by a lack of sunlight

Money Trees like bright, indirect light and if they spend too long in a shady spot, they may start losing some of their leaves. This is because your plant can’t keep the level of foliage alive with such low light levels.

You need to make sure that your Money Tree is placed somewhere they will receive several hours of bright light, but still indirect. If it gets too much direct light then this can scorch the leaves and cause further issues.

It’s also worth thinking about whether you need to move Money Tree around depending on the seasons. In the winter months, when the sun isn’t as strong (and out for less of the day) it might be necessary to move your plant a little closer to the window to make use of the limited sunlight as best as possible.

Dry air can cause some leaves to fall off your Money Tree

Money Trees prefer a slightly more humid environment, so if your home tends to have dry air it’s worth your time to try and increase the humidity a little as this can often be a reason why your Money Tree is losing its leaves.

More often than not, the average humidity levels we have in our homes can be enough but during winter the air tends to become too dry. This is a mixture of having the heating on as well as less ventilation.

Luckily, raising the humidity for your Money Tree and stop it from losing more leaves isn’t a large task. We recommend misting the leaves with a spray bottle every few days (we love these amber glass bottles from Amazon). You can also build a pebble tray or regularly shower your plant. However, if these don’t seem to work, or you can’t always find the time to do them enough, then the most consistent way to increase the humidity is to use a humidifier near your Money Tree.

You can also always pick up a good humidity monitor to keep track of everything if you’re more concerned.

Money Trees lose leaves due to environmental stress

Money Trees are a little sensitive when it comes to their comfort zone and if things change suddenly, or they are a little bit stressed out by their environment, then they can start losing a few leaves as a result. Stress or shock can be caused by moving to a new spot, being bumped and knocked a lot, low temperatures, rapid changes in potting mix moisture and being repotted or propagated.

This stress often results in a couple of leaves being shed, most commonly the lower, older leaves are dropped in this scenario.

Don’t worry too much if your Money Tree is losing some leaves after being moved to a new spot, it is totally natural. As long as the new environment caters for its light and warmth requirements, it should adjust nicely and grow new healthy leaves in no time.

It could simply be natural ageing

If it’s only the oldest (and most often the smallest) leaves on your Money Tree that are falling off, then this may be the natural ageing process at work. As your plant matures, your Money Tree will begin losing some of its oldest, lowest leaves to focus its energy on growing new healthy and often bigger growth.

This is a completely natural process and isn’t a result of any wrong care or environmental factors. The one thing you do need to keep an eye on though is the rate of leaf loss. On average your Money Tree should lose a couple of leaves every year but no more. If your Money Tree is losing leaves at a pace more rapid than this, then consult the reasons we have listed above to find the cause.

Those are the most common reasons why Money Trees start losing their leaves. There are quite a few reasons which makes diagnosing the problem a little trickier so if you do change anything about your plant’s care or environment, make sure to check in on your plant daily for a while. This will help you monitor if any more leaves are falling off your plant or if there are any more problems cropping up.

Take a look through our Money Tree care guide to learn more about how to spot and treat common problems as well as our general care tips to keep your plant happy and healthy!

Fiddle and Thorn is a participant in the Amazon Services LLC Associates Program, an affiliate advertising program designed to provide a means for sites to earn advertising fees by advertising and linking to Amazon.com

Take our houseplant survey!

Quickly respond to our 30 second houseplant survey and get 75% off our Complete Houseplant Care eBook!

Take the Survey

No thanks…