Common Sansevieria Fernwood Problems and How To Fix Them

Last Updated: January 17, 2022

Sansevieria-Fernwood 
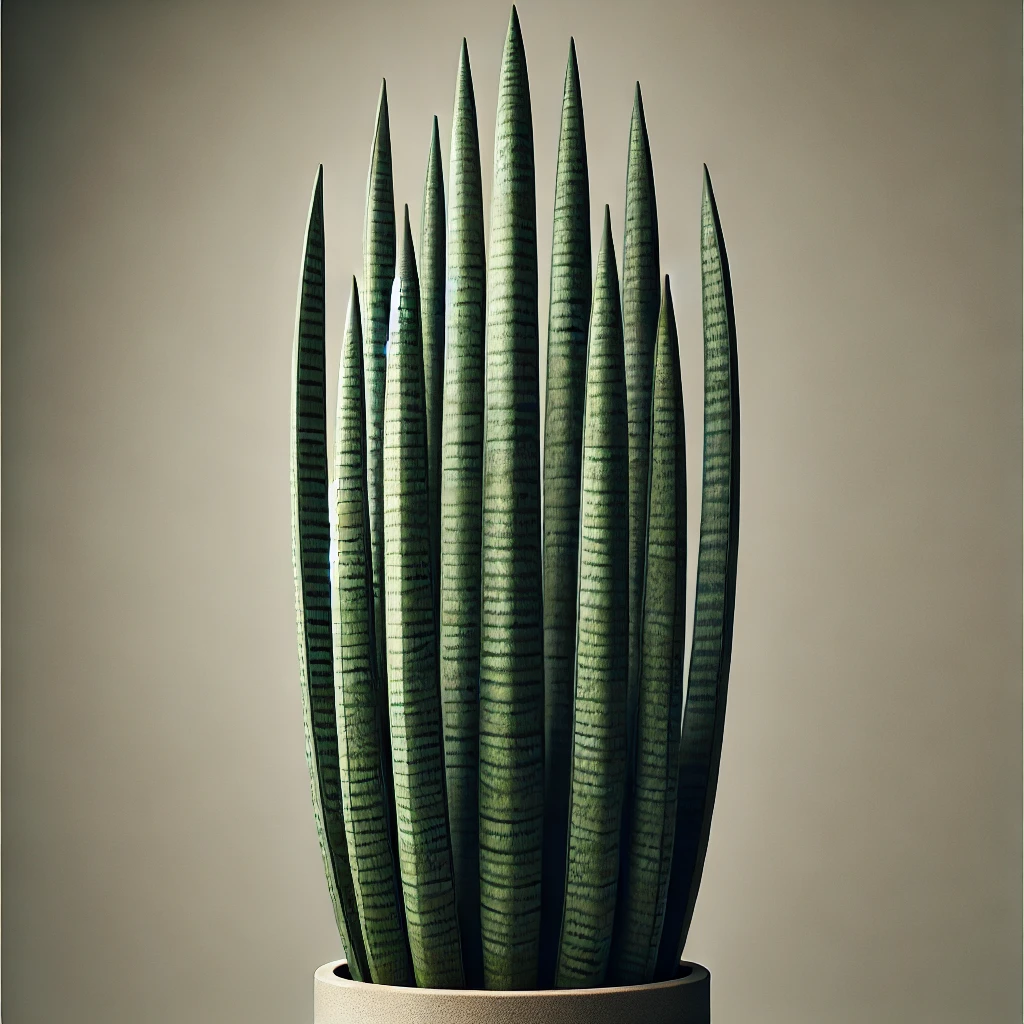
This low maintenance succulent plant is great for beginner or busy plant parents as they don’t need much tending to and will grow in most environments! However, just because Sansevieria Fernwood plants are low maintenance, this doesn’t mean they are immune to the most common problems that most plants face. If the care routine or environment isn’t right then they will start to develop issues from brown or yellow leaves, as well as your Sansevieria Fernwood drooping down entirely. In this post, we will go through some of the most common problems that Sansevieria Fernwood plants suffer from as well as the right ways to fix the issue and tips to stop it from hurting your plant more in future.

Causes of Sansevieria Fernwood brown leaves:

  1. Overwatering.This tends to be one of the most damaging issues as you don’t often realise it’s happening until it’s causing issues with the leaves, at which point the problem will have progressed quite far. Waterlogged soil can very quickly rot the roots of your Sansevieria Fernwood and cause brown soft leaves. To figure out if overwatering is the reason your Sansevieria Fernwood is turning brown, check the moisture levels in the soil immediately and replace it with dry mix if soggy. Use this opportunity to trim away the rotten roots and hold off on watering as much or as often as you did before. Note that Sansevieria Fernwood plants really don’t need much water at all.
  2. Underwatering.Funnily enough, the other extreme can also cause brown leaves on your Sansevieria Fernwood but these will be light brown in colour and feel dry and crispy. Before you start pouring a bucket of water over your Sansevieria Fernwood to make up for the lack of moisture, it’s important to be sure that this is the cause of the brown leaves. Check to see if the potting mix is dry and crumbly and if the roots are starting to crisp up. Sansevieria Fernwood plants love dry soil so this alone won’t signify underwatering, so it’s important to look at the root system to confirm this issue. Water your plant a little bit once a day for a few days rather than all in one go as this can shock your plant and cause a whole range of other issues beyond brown leaves.
  3. Low humidity can cause brown tips.Sansevieria Fernwoods can deal with lower humidity rooms quite well but if the air is very dry for prolonged periods of time this can dry out the tips of the leaves. It’s rare to affect an entire leaf but small brown tips and edges can be caused by low humidity. Sansevieria Fernwoods are sensitive to leaf rot so you want to avoid misting or showering these plants so we recommend using a humidifier in the room every now and again to give it a little boost but nothing major.

Causes of yellow leaves on a Sansevieria Fernwood:

  1. Overwatering.Whenever diagnosing yellow leaves, we always rule out overwatering first as it is the most common reason. Sansevieria Fernwoods really don’t need much water to thrive and actually prefer to have very dry potting mix. This means it can be very very easy to overwater them and cause the leaves to rot and the leaves to turn yellow.If you think that your Sansevieria Fernwood has been overwatered then you must check the moisture levels in the soil immediately. Trim away the dead mushy roots if the issue has progressed this far and replace the entire potting mix if waterlogged. You might want to think about adding some perlite to your mix if you haven’t already as this helps with drainage and preventing more yellow leaves from developing.
  2. Direct sunlight.Intense, direct sunlight can also cause yellow leaves on Sansevieria Fernwood plants. Although they can tolerate some level of direct sun, you need to be careful during summer that this doesn’t burn the leaves as this will lead to burnt yellow patches across your plant. If you think that direct sunlight is the cause of the yellow leaves on your Sansevieria Fernwood, remove the worst affected leaves and vines and move your plant to a slightly shadier spot in your home.
  3. Pests.If you notice yellow spots forming on your Sansevieria Fernwood’s leaves then this might be a pest infestation. Although it’s fairly rare for indoor plants to attract pests, it can happen and is often a real pain to solve as the infestation can grow quite rapidly and all of a sudden the rate of yellowing speeds up. Give your Sansevieria Fernwood a thorough check over to spot any pests or signs of pests and isolate it from other plants to prevent the bugs from jumping across the leaves. To treat the issue, pop your plant in the shower, rinse down the leaves with water and let them dry off. Then treat with neem oil for a few weeks.

Why is my Sansevieria Fernwood losing leaves?

  1. Overwatering.If you find that your Sansevieria Fernwood is starting to lose leaves and become limp, then it may be too much water that is causing the issue. As we outlined above, Sansevieria Fernwood plants really don’t need much water compared to most other houseplants which can make it easy to overwater them. Check the moisture of the soil immediately using a moisture meter before adjusting your watering routine.
  2. Cold temperatures.Another factor that can cause your Sansevieria Fernwood to lose leaves and become quite limp is exposure to cold air. Whilst this won’t happen suddenly, if your plant is near a drafty window or door or is close to an air conditioning vent in summer, this constant flow of cold air can become very damaging. The ideal temperature for Sansevieria Fernwood is between 18°C – 24°C so check the temperature of where your Sansevieria Fernwood is by using a digital thermometer.

Why is my Sansevieria Fernwood drooping?

  1. Overwatering.As you might have gathered by now, a lot of issues with Sansevieria Fernwood plants are caused by overwatering. One of the earlier signs of this however is a drooping plant. This is an indication that the root system is starting to rot but that the problem hasn’t become bad enough to cause brown leaves yet.Luckily, some drooping can be reversible so make sure to switch out any waterlogged soil for fresh soil so that your plant can begin the recovery process. In future, to avoid your Sansevieria Fernwood from drooping due to overwatering, make sure that the potting mix has had time to fully dry out before watering again. Self-watering pots and a good moisture meter will make sure that you don’t run into this issue again.
To learn more about how to keep your plant happy and healthy, take a look at our Sansevieria Fernwood care guide.

Fiddle and Thorn is a participant in the Amazon Services LLC Associates Program, an affiliate advertising program designed to provide a means for sites to earn advertising fees by advertising and linking to Amazon.com

Take our houseplant survey!

Quickly respond to our 30 second houseplant survey and get 75% off our Complete Houseplant Care eBook!

Take the Survey

No thanks…

Are you Propagating your Succulents Properly?

Last Updated: January 17, 2022

Succulents

Why propagate your succulents?

There are so many reasons why you might want to try your hand at propagating your succulents, but every time something seems to be going wrong. Well in this post we’re going to quickly go over the two best ways of propagating your succulents and touch on some key issues for why you might not be getting the successful succulent pups that you want so much.

Propagating by Separation

By far the easiest way to get more succulents fast is by separating succulents that are already dividing. You’ll notice this happening much more in older, more mature plants as small pups growing around the outside of the main plant. This is an indication that your healthy older plant is starting to self divide, and you can just gently remove them at the root and get them potted into their own succulent mix.

What can go wrong?

With separation there aren’t that many issue you can run into. The main thing that comes to mind is trying to separate a succulent pup before it’s really ready. If you spot a pup growing from your parent plant, give it a little time to develop and get stronger before you remove it and set it in it’s own soil. When you’re separating the pup, also make sure that you don’t damage to much of the root system of either plants. Roots grow quite slowly and any damage to them will cause a real issue for the survival of the plant. Just take things nice and slow, and try to untangle, instead of cut, where possible.

Propagating by Leaf Cuttings

Now if you want to get the most possible succulent pups in the least time, this is the way to go for you. You can even give this one a go if you find leaves falling off your older succulent as it should work just the same. All you need to do is remove a few of the leaves that you’re not keen on from your older, mature plant and set them on a paper towel to dry out. These will grow some roots of their own and the cutt end will callous over. Once you’ve got roots you can get them planted in their own pots! As you can imagine, this can produce a lot of plants super quickly.

What can go wrong?

The number one issue we find people have is not letting the leaves dry out properly. It’s key to get them lay on a piece of paper towel just in a open surface (preferably out of the sun for a little while). Doing this lets the paper towel wick up any extra moisture and gets the conditions right for the leaves to start rooting. Another common issue could be not being patient enough. The leaves will likely wilt and start to shrivel up at some point in the process, and that’s exactly what they’re meant to do – don’t throw them out! Just give them some more time until the roots appear. The wilting is caused by the leaf using the water it has stored to start developing the new plant.

Other problems you could be running into are…

If you find that your succulent is starting to go a little yellow in the leaves, it’s telling you it’s not happy with the amount of light it’s getting. Annoyingly it could mean too much or too little, so make a judgment call and move it around until it starts to come back to green (or red!). Drooping could be another problem, and this one is super easy to solve. You just need to water it a little more than you currently are. Don’t drown it, but maybe give it a little more next time and it’ll spring back to the shape it should be. Succulents can be a little dramatic at times with their watering requirements so just see what’s going on and react with it. As the weather and temperatures change throughout the year you might find that it will need more or less water, so just keep an eye on what your succulent is trying to tell you!.

Fiddle and Thorn is a participant in the Amazon Services LLC Associates Program, an affiliate advertising program designed to provide a means for sites to earn advertising fees by advertising and linking to Amazon.com

Take our houseplant survey!

Quickly respond to our 30 second houseplant survey and get 75% off our Complete Houseplant Care eBook!

Take the Survey

No thanks…

Why is my Cactus turning brown? Causes and How to Fix it!

Last Updated: January 17, 2022

why-is-my-cactus-turning-brown There are thought to be around 2,000 different Cacti types found globally, each with their own traits and characteristics. However, no matter what variety of Cactus you have, if you spot brown leaves forming on it then that can be an issue. Although some browning may be due to natural corking (more on that below), there are a couple of more serious reasons issues causing the brown leaves on your Cactus. In this post, we will be going through each of the different reasons why your Cactus has developed brown leaves, as well as how to best treat the issue and prevent it from causing any more brown leaves, patches or spots on your Cactus.

It might just be natural corking

If your Cactus is turning brown from the base upwards, then it might just be the natural corking process. In order to protect themselves from breakages, Cacti develop a corked bottom which sort of resembles bark on a tree. As Cacti mature they become quite top-heavy which makes them susceptible to falling over and breaking so corking is their natural survival tactic. The corked area of your Cactus will appear light brown in colour and be quite sturdy to touch. This is a completely normal process and is not the result of any wrong care or environmental factor. If you don’t like the appearance of the corked area on your Cactus, then you have the possibility of propagating the top and creating a new plant. However, if the brown area of your Cactus is soft, or not formed from the base upwards, then there is an underlying issue that needs to be solved. Below we will go through each of these factors.

Too much water can cause soft brown patches on Cacti

If your Cactus is developing dark brown spots, a common cause of this is too much water and soggy potting mix. Cacti really don’t need much moisture to thrive and need their potting mix to fully dry out before you water again. The best way to water your Cactus is rarely but thoroughly rather than little but often as they don’t like consistent moisture. Overwatering can quickly lead to root rot which is very harmful to your Cactus. Alongside browning leaves, it can also cause the plant to become unstable, soft and droopy. If not caught quickly, this can often be a killer for your Cactus as they don’t have much tolerance for moisture at all. If you think you might have overwatered your Cactus it’s important to check the soil right away and change it out if it’s quite soggy. Never let it dry out naturally as even a few more days in soggy soil can make the difference between being able to save your Cactus, and not! Moving forward, to avoid more brown leaves being caused by overwatering, make sure to check the moisture in the soil every time before watering your Cactus. The easiest way to check this is by digging your finger into the top two centimetres of the soil to see how moist it is. However, if your Cactus has quite large sharp spikes, then you might be better off using a moisture meter to avoid getting hurt. We also recommend picking up your Cactus before and after watering. This should give you a feel for when your plant might need a little more water, simply by giving them a lift.

Your cactus might be sunburnt

Sunlight is one of the main factors that cause Cacti to develop brown leaves. There is a myth that Cacti can withstand any level of sunlight, no matter how intense. However, this isn’t always true and if your Cactus receives too much light and heat then it can lead to the top areas developing dry brown patches. Sunburn usually affects the top of a Cactus, so look out for this as a way to diagnose the issue. It does, however, depend on how the light is hitting your plant so as a good rule of thumb, the area that is exposed to the most intense light will turn brown first. If this is the cause of the brown leaves, cut off the tops of your Cactus to remove the worst affected areas and move to a slightly shadier spot. Your Cactus will then grow new pads out of the top of the sliced off area.

Temperature extremes can also result in brown patches

Cold temperatures and drafts can also be very harmful to your Cactus as they need warmth to thrive. Make sure your Cactus is not placed near doors or windows that may be drafty as the cold air coming in from outside can be very harmful for your Cactus (especially in winter). If the issue is happening in summer, then it can also be cold air coming in through AC vents that is causing your Cactus to develop brown leaves. This is because all cold air will cause the potting mix to dry out slower, cells in your Cactus to freeze and enzyme activity will be slower. It can be a really good idea to pick up a digital thermometer to keep track of any fluctuations in temperature and make sure that your Cactus is getting enough warmth. Those are the most common reasons that Cacti develop brown leaves. Although they are known for being super hardy and low maintenance plants, it doesn’t make them immune to any issues such as brown leaves. It’s important to rule out corking as this can be quite common on Cacti and is completely normal. After all, you don’t want to be changing the care or environment for your Cactus if nothing is actually wrong. To learn more about how to best care for your plant, take a look through our Cactus care guide. 

Fiddle and Thorn is a participant in the Amazon Services LLC Associates Program, an affiliate advertising program designed to provide a means for sites to earn advertising fees by advertising and linking to Amazon.com

Take our houseplant survey!

Quickly respond to our 30 second houseplant survey and get 75% off our Complete Houseplant Care eBook!

Take the Survey

No thanks…

Weeping Fig Care

Last Updated: January 17, 2022

Weeping-Fig

Basic Weeping Fig Care

You’ll be pleased to know that Weeping Fig plants (often also known as Ficus Benjamina) are super easy to care for and adapt well to a real range of environments. Their lack of complicated care requirements means you’ll often find them in offices and schools as they bring a little bit of wilderness to the space, without needing someone to constantly be caring for it. The main things to remember are they love all levels of light (though will produce less growth with low light) and really don’t like their soil to get super soggy, so don’t water it as frequently as you would most of your other plant types. Below you will find our complete Weeping Fig care guide with all the information you need to help your plant thrive.

Detailed Weeping Fig Care

Bright, indirect light is best

Weeping Figs love spots with bright, indirect light. They can deal with some direct light so you don’t need to be too careful about putting it near a window.

Don’t let the soil become waterlogged

Weeping Figs don’t like sitting in water so we recommend watering it with little water but often. This way it keeps the soil moist without ever becoming waterlogged.

Never move your Weeping Fig

One of the most important and unique things to do when caring for a Weeping Fig is keeping it exactly where it is. They hate being moved and this will cause shock so try and find a good spot and leave it be!

Invest in a humidifier

One of the best things you can do for your Weeping Fig is buy a humidifier. This will make sure that the humidity level is high enough for your Weeping Fig as well as at a constant level.

Weeping Figs need to be fertilised often

We recommend fertilising your Weeping Fig once a month during spring and summer using a water-soluble feed. Cut back on the fertiliser during winter though as your plant will be dormant.

Weeping Figs are safe for pets

You don’t need to worry if you have your Weeping Fig around any pets because they are totally safe and non-toxic for them.

Weeping Fig Care FAQs

Common Issues with Weeping Figs

Although Ficus Benjamina plants are pretty fuss-free, this doesn’t mean that you won’t encounter the odd problem from time to time. But don’t worry, as long as you know what to look out for and act quickly, you should be able to get your plant back to full health in no time.

Fiddle and Thorn is a participant in the Amazon Services LLC Associates Program, an affiliate advertising program designed to provide a means for sites to earn advertising fees by advertising and linking to Amazon.com

Take our houseplant survey!

Quickly respond to our 30 second houseplant survey and get 75% off our Complete Houseplant Care eBook!

Take the Survey

No thanks…

Why is my ZZ Plant drooping? Causes and Solutions

Last Updated: January 17, 2022

ZZ-Plant Loved for their elegant and minimalist stems, the ZZ Plant is one of our personal favourites. Although they can be fairly low maintenance, it can happen from time to time that their stems begin to droop down and your ZZ Plant will begin to look limp. To get to the bottom of why your ZZ Plant is drooping, we will go through each of the potential causes below as well as give tips on how to diagnose the issue correctly, treat the problem and stop it from happening again in future.

Overwatering can cause a ZZ Plant to start drooping

One of the most common causes of drooping ZZ Plant leaves is consistent overwatering. If drooping leaves are the only thing that seems to be wrong with your ZZ Plant, then this is good news – it means that the problem is in the early stages and should be easier and quicker to fix. Some other signs of trouble that can indicate overwatering alongside drooping stems are soft, brown or yellow leaves, leaf drop and stagnant-smelling potting mix. The reason why overwatering can be so harmful to your ZZ Plant is that it causes waterlogged soil which cuts off air circulation in the potting mix. This can happen pretty quickly as ZZ Plants prefer their soil to be very dry compared to most other houseplant types. Once the roots have started to rot, it prevents the plant from taking in any oxygen, nutrients and ironically moisture. This is what turns the leaves brown and yellow or causes your plant to lose them. But alongside this, once the roots are damaged, it means it can’t physically support the plant anymore, causing the softer stems to start drooping down. Before you change anything about how much or how frequently you are watering your ZZ Plant, you need to be 100% sure that this is the cause of the drooping leaves. The first thing to do is to take your plant out of its pot which will allow you to closely inspect the potting mix and root system. If the potting mix feels soggy and clumpy, then this means your plant has been overwatered. If the roots are soft and mushy it suggests that this issue has been going on for a while.

How to fix an overwatered drooping ZZ Plant

To solve the drooping stems issue, there are a few important steps you can take. Firstly, replace any waterlogged potting mix with fresh dry mix. Don’t wait for the soil to dry out on its own as this will only make the problem worse over the next few days and you risk causing even more damage to an already rotting root system. Next, you want to trim off any soft and mushy roots. These will be black or dark brown in colour and be soft to touch. Removing these will prevent your ZZ Plant from wasting energy trying to keep them alive.

How to prevent the problem from happening in future

Now that your ZZ Plant should be on the road to recovery, there are a few things you can do to prevent the issue of drooping stems from cropping up again.
  1. Only water when the potting mix is dry.The most accurate way of knowing when to water your ZZ Plant is using a moisture meter. They are affordable little devices that you pop into the soil and it will give you a moisture reading.
  2. Ensure good drainage.This will help solve the occasional accidental overwatering as it allows some of the water to escape. Make sure your pot has drainage holes and you are using a well-draining potting mix that includes perlite. We also recommend switching to terracotta pots as they allow excess water to evaporate out of the sides.
  3. Adjust your watering schedule depending on external factors.Although watering calendars can help us remember to water our plants, they aren’t actually the best thing for our houseplants. There are countless factors that impact how quickly the soil dries out and therefore how much water your ZZ Plant needs such as pot size, plant age, light level, temperature and time of year. There’s no one fits all timeline which is why moisture metres are such helpful devices.

Severe underwatering can also be behind a drooping ZZ Plant

Consistent underwatering and bone dry soil can harm your ZZ Plant in more ways than one. It can cause dry leaves, stunted growth and nutrient deficiency. However, before all this occurs, drooping stems are often one of the earliest warning signs. This means if there aren’t any other visible issues, you’ve probably caught the issue fairly early. When diagnosing underwatering in ZZ Plants we often recommend moving the entire plant from its pot as this allows you to inspect the root system. Because these plants don’t require much water, more often than not the soil will be quite dry. This is why you want to look out for crispy roots as a sign of underwatering. Once you’ve diagnosed the issue, your first instinct might be to give it loads of water straight away. However, this can actually be harmful to your ZZ Plant if the soil goes from one extreme to the other. Instead, you want to reintroduce frequent watering for a week or two and this should solve the problem Moving forward, you should adjust your watering habits so that you are watering either more frequently than before or giving your ZZ Plant more water each time.

Not enough sunlight can cause drooping stems

Another cause of drooping ZZ Plant leaves is a lack of sunlight. ZZ Plants can grow in medium light conditions so are more tolerant to shady corners than other houseplants. However, if there is a severe and consistent lack of sunlight, it can start to cause some issues, drooping stems being one of them. The best thing to do is move your ZZ Plant to a spot in your home that gets bright but indirect light. Avoid anywhere too close to windows as your plant will struggle with intense direct sunlight. After a few weeks, you should start to see the leaves bounce back.

Physical damage can also cause a drooping ZZ Plant

ZZ Plants have pretty long stems which means that they can often droop down if they are damaged in any way. If your ZZ Plant is in a high-traffic area of your home and might get knocked about a bit then this might be why the stems are drooping. If there are no other signs of trouble, drooping stems due to physical damage don’t have to mean the end of your plant. We recommend propping the affected leaves up with support stakes to encourage them to regain their stability. You also want to make sure to move your ZZ Plant to a quieter part of your home (where it’s still getting enough light) so that the risk of damage is minimised. Those are the main causes of a drooping ZZ Plant. As these are fairly hardy plants, it means the issue has probably been going on for a while or is quite extreme for it to be causing visible damage to your plant. Diagnosing it quickly and treating it properly will be key to reviving your ZZ Plant! To learn more about how to keep your plant happy and healthy, read through our ZZ Plant care guide.

Fiddle and Thorn is a participant in the Amazon Services LLC Associates Program, an affiliate advertising program designed to provide a means for sites to earn advertising fees by advertising and linking to Amazon.com

Take our houseplant survey!

Quickly respond to our 30 second houseplant survey and get 75% off our Complete Houseplant Care eBook!

Take the Survey

No thanks…

Calathea Musaica ‘Network’ Care Guide

Last Updated: January 17, 2022

Calathea-musaica-Network

Basic Calathea Musaica Care

Calathea Musaica plants get their ‘Network’ nickname from the intricate detailing on the leaves which makes this plant unique! They are also slightly easier to care for than other Calathea types so a great choice for every plant parent!

Light

Bright Indirect Light

I love the sunshine but too much direct light will damage my leaves.

Water

Water Moderately

I don’t like my soil to be too dry or too soggy. Little and often is what I’m after.

Humidity

High Humidity

I thrive in humid environments so please mist my leaves every so often.

Soil

Potting Soil

I need soil specifically for indoor plants as it retains the right amount of water.

They can deal with a range of light levels

Whilst bright, indirect light is ideal for your Calathea Musaica, they can tolerate quite a range of light conditions compared to other Calathea types. Just avoid intense direct light during summer as this can damage the leaves.

Keep the potting mix slightly damp

Calathea Musaica plants like to have some consistent moisture in the soil so it’s all about finding the right balance when watering. They are somewhat forgiving if you water too much or too little but over time this can cause real issues for the plant.

Avoid temperature extremes

Calathea Musaica like average room temperature to thrive and can struggle in really cool or warm environments. Keep them well away from heaters, drafts or AC vents.

They will benefit from a humidifier

Calathea Musaica plants love a slightly humid environment as they are native to the tropics. We recommend buying a humidifier to keep a nice stable humidity level around your plant. Other great ways to give it a boost is misting, pebble trays and showering.

Only fertilise during the growth period

It’s important that you hold off fertilising your Calathea Musaica during autumn and winter as your plant will be dormant. During the warmer, sunnier months of spring and summer feed your Calathea Musaica every 1-2 months to support growth.

Propagate a Calathea Musaica Network through division

The most successful way of propagating a Calathea Musaica is through division of the mother plant. Divide up the plant so each section has a good amount of the overall root system. This will increase your chances of a successful propagation.

Repot your new sections into fresh well-draining potting mix and resume normal Calathea Musaica care.

Learn more in our Calathea propagation guide.

Calathea Musaica Network plants are non-toxic

Another thing we love about the Calathea Musaica Network is that it is non-toxic and pet friendly. So you don’t need to worry about having one of these in your home around your beloved furry friends!

  Calathea-musaica

Calathea Musaica ‘Network’ FAQs

Quick and simple answers to the most common questions we see about the Calathea Musaica ‘Network’.


Common Problems with your Calathea Musaica ‘Network’

Here are some common issues that you might run into. It’s important to diagnose any issues early to give your plant the best chance of bouncing back.


Fiddle and Thorn is a participant in the Amazon Services LLC Associates Program, an affiliate advertising program designed to provide a means for sites to earn advertising fees by advertising and linking to Amazon.com

Take our houseplant survey!

Quickly respond to our 30 second houseplant survey and get 75% off our Complete Houseplant Care eBook!

Take the Survey

No thanks…

Boston Fern Care

Last Updated: January 17, 2022

Boston Fern

Basic Boston Fern Care

We have a bit of a love-hate relationship with Boston Ferns because whilst their incredible leaves and tropical feel is worth all of the effort, their care routine can be a bit tricky to get right. They need just the right light level (not low light but not direct light) and will crisp up instantly if you aren’t watering enough or boosting the humidity. So the spray bottle will be your best friend when caring for a Boston Fern.

In this care guide, you’ll find all the information you need to help keep your Boston Fern looking and feeling healthy!

Detailed Boston Fern Care

Boston Ferns like bright, indirect light

Boston Ferns can deal with very bright spots but be careful not to expose your fern to too much direct sunlight as their leaves are quite delicate.

Boston Ferns thrive in damp soil

Dry soil is one of the main reasons why Boston ferns do not survive. It is very important to give your boston fern a little more humidity in the cold months as if you have the heating on, they can get very dry very quickly. To increase the humidity try misting your fern every few days.

Boston Ferns prefer cooler temperatures

Boston ferns prefer a slightly cooler environment and will struggle with temperatures above 24C. Try to keep fresh air flowing through the room to prevent heat from building up.

Hold off the fertiliser

Boston ferns don’t really need to be fertilised often. A few times a year or so will do as overfertilisation can harm your plant.

Propagate your Boston Fern using division

Boston Ferns are very easy to propagate as you can divide the plant into several smaller plants which will each flourish and continue to grow.

Make sure to mist your Boston Fern

Boston Ferns love humidity so it’s important that you mist their leaves every so often. This also removes any dust from the plant.

Boston Ferns love moisture

You can increase the humidity around your boston fern  by 70% by placing it on top of a tray of pebbles and water. Make sure to keep the water level below the plant so your fern isn’t sitting in stagnant water.

Boston Ferns are safe for pets

One of the great things about Boston Ferns is that they are non-toxic to pets. So you don’t need to worry about having these in your home if you have dogs or cats. Boston Fern img

Boston Fern Care FAQs

Common Issues for Boston Ferns

Boston Ferns can be quite delicate plants, so it’s important that you take good care of them. It is worthwhile remembering some information about their common issues so you can spot any important early warning signs. The earlier you catch the issue, the easier it will be to bring your Boston Fern back to its usual self.

Fiddle and Thorn is a participant in the Amazon Services LLC Associates Program, an affiliate advertising program designed to provide a means for sites to earn advertising fees by advertising and linking to Amazon.com

Take our houseplant survey!

Quickly respond to our 30 second houseplant survey and get 75% off our Complete Houseplant Care eBook!

Take the Survey

No thanks…

Why are my Peace Lily’s leaves curling?

Last Updated: May 2, 2022

If you notice that your Peace Lily’s leaves are curling then this may be signalling that something isn’t quite right. Luckily, however, curling leaves are often an early sign that something is wrong so it can mean you have caught the issue early which is great. In this article, we will be going through each of the different causes of curling leaves on a Peace Lily so that you can get straight to diagnosing and treating the problem.

Curling Peace Lily leaves can mean underwatering

If the leaves on your Peace Lily are starting to develop brown tips, edges, spots or entire leaves are turning brown as well as curling, then it may be due to underwatering. Peace Lily plants like to have some moisture in the soil and are definitely not drought tolerant. Because of this, we tend to take a little but often approach when it comes to watering. This also prevents them from dramatically drooping down as well. If you think your Peace Lily has been underwatered and this is causing the curling leaves then check the soil before you change anything! You want to make sure the soil definitely is dry before giving it more water as otherwise, this can cause more issues than the curling leaves. The most reliable way to check the moisture levels in the soil is by using a moisture meter. They are really affordable little devices that you pop into the soil and it will tell you how damp or dry the soil is. We always recommend this one from Amazon. Your first reaction to an underwatered Peace Lily might be to drown it in water in the hope it will suddenly recover and stop the leaves from curling. However, this can actually cause your Peace Lily to become quite stressed if its environment suddenly changes so the best thing to do is gradually introduce water over the course of a week. To prevent further underwatering causing the leaves on your Peace Lily to start curling, it’s important that you increase the frequency or amount of watering. You want to prevent the soil from fully drying out for extended periods of time.

Overwatering can also cause curling leaves

As with underwatering, too much water can also be very harmful for your Peace Lily and cause curling leaves. Consistent overwatering will mean that the roots start to rot and become damaged. This means your plant won’t be able to get the needed nutrients and moisture that it needs which ironically leaves your Peace Lily dehydrated. To prevent moisture loss, your Peace Lily will begin curling its leaves. To figure out if overwatering is definitely the cause of your Pilea’s brown leaves, we recommend checking the moisture levels in the soil is with a moisture meter. If it is waterlogged then replace it with fresh potting mix (we love this one from Miracle Gro as it will give your plant all the right nutrients) to allow your plant and its roots to recover. Alongside refreshing the potting mix, you also want to trim off any roots that have started to rot. The best way to tell this is if they have started to turn dark brown or black in colour and are soft to touch. By removing these dying or dead roots, it means your Peace Lily can focus on growing new healthy growth and doesn’t waste any energy trying to keep the dying or dead roots alive.

Curling leaves can indicate cold temperatures

This is quite a common cause of curling Peace Lily leaves and one that is quite easy to diagnose as well. As they are native to tropical areas, Peace Lilies thrive in warm temperatures. They can adapt to normal room temperatures but extreme drafts and cold rooms can really start to impact your plant’s health, causing their leaves to start curling to begin with. Over time, cold temperatures can also cause brown leaves, stagnant leaves and leaf drop so it’s important you catch this one early. To diagnose the problem, use a digital thermometer to check the temperature around your Peace Lily. This will help you keep track of any fluctuations. Treating the issue is also simple as you just need to find a slightly warmer spot for your Peace Lily and the leaves should begin uncurling.

Lack of humidity might also be the cause of the curling leaves

Although slightly dry air won’t immediately kill your Peace Lily plant it can cause curling leaves and brown leaf tips. This is because curling leaves is one of the mechanisms Peace Lilies use to prevent moisture loss.

There are several different methods you can use to increase the humidity for your Peace Lily:

  1. Mist the leavesThis is something you should build into your regular Peace Lily plant care routine as it’s really great for their overall health and can prevent brown leaf tips as well as curling leaves.   Mist the leaves a few times each week with a spray bottle. We love using these amber glass spray bottles from Amazon.
  2. Shower your Peace LilyThis is a more short-term solution but is great for overall plant health as it gets rid of dust and pests that might be secretly living on your plant. Just make sure not to have the shower on full water pressure as this can damage the leaves or stems.
  3. Invest in a humidifierHumidifiers are a must-have for any plant parent and are a great investment in the long-term health of your plant! Our plants love this one from Amazon!
Those are the most common reasons why your Peace Lily has developed curling leaves. Hopefully, if there aren’t too many other problems along with the curling leaves then you should have caught the problem fairly early and after a few simple changes, your Peace Lily should be back to full health in no time. If you want to find out more about Peace Lily care visit our plant care guide here.

If you want to find out more about how to best care for your Peace Lily then visit our Plant Guide or download our How to Care for your Houseplants ebook.


Complete Houseplant Care eBook

Our comprehensive (and rather good looking) eBook that will teach you everything you need to know to successfully care for, and maintain your houseplants!

Buy on

Fiddle and Thorn is a participant in the Amazon Services LLC Associates Program, an affiliate advertising program designed to provide a means for sites to earn advertising fees by advertising and linking to Amazon.com

Take our houseplant survey!

Quickly respond to our 30 second houseplant survey and get 75% off our Complete Houseplant Care eBook!

Take the Survey

No thanks…

Hoya Linearis Care

Last Updated: May 2, 2022

Hoya-linearis

Basic Hoya Linearis Care

These somewhat rarer plants are one of our favourite cascading houseplants and you’ll be pleased to know they aren’t the most difficult plant to care for. There are a few key things to remember though to keep your Hoya Linearis happy. Firstly, keep them away from any direct light during spring and summer. Whilst they can handle some direct light in winter when the sun is weaker, any intense sunlight will dry out and burn the leaves. The next thing to remember is to cut back on watering significantly during the winter darker months as it will take a lot longer for the potting mix to dry out and Hoya Linearis plants are sensitive to root rot. Below you’ll find everything you need to help your Hoya Linearis thrive.

Detailed Hoya Linearis Care

Avoid direct light

You’ll want to put your Hoya Linearis in a spot with bright but indirect light. Too much direct light can dry out the plant.

Cut back watering a lot during winter

During the warmer summer/spring months, you’ll want to water frequently but still allow the top part of the soil to dry out. In winter, water monthly to stop the plant from drying out completely but it won’t need too much more than this.

They can tolerate a large range in temperature

Hoya Linearis plants aren’t super fussy about temperature, just avoid the extremes caused by direct light, radiators, drafty windows or air conditioning vents.

Use a humidifier to boost humidity

Hoya Linearis plants need medium to high levels of humidity to stop them drying out. We recommend investing in a humidifier to keep a nice constant humidity level.

Never fertilise at full strength

Hoya Linearis plants are sensitive to overwatering so you want to make sure to dilute the fertiliser more than the recommended amount. We suggest feeding your Hoya Linearis twice a month during spring and summer to support with growth. Cut back completely during winter as your plant will be dormant.

Hoya Linearis don’t mind being root-bound

One thing you don’t have to worry about too much is repotting your Hoya Linearis. They don’t mind being a little rootbound so only need repotting every few years.

Propagate through stem cuttings

The easiest way to propagate your Hoya Linearis is through stem cuttings. We recommend wearing gloves as the sap that is released when the stems are cut can cause skin irritation.

Keep away from children and pets

Whilst technically Hoya Linearis plants are non-toxic, the sap in the leaves can cause irritation.
Hoya-linearis

Hoya-linearis

Hoya Linearis Care FAQs

Common Issues with Hoya Linearis

If you want to find out more about how to best care for your Peace Lily then visit our Plant Guide or download our How to Care for your Houseplants ebook.


Complete Houseplant Care eBook

Our comprehensive (and rather good looking) eBook that will teach you everything you need to know to successfully care for, and maintain your houseplants!

Buy on

Fiddle and Thorn is a participant in the Amazon Services LLC Associates Program, an affiliate advertising program designed to provide a means for sites to earn advertising fees by advertising and linking to Amazon.com

Take our houseplant survey!

Quickly respond to our 30 second houseplant survey and get 75% off our Complete Houseplant Care eBook!

Take the Survey

No thanks…

Ficus Bonsai Tree Care Guide

Last Updated: May 2, 2022

Ficus-Bonsai-Tree

Basic Ficus Bonsai Tree care

The Ficus Bonsai Tree is definitely the easiest of the Bonsai family to take care of so we recommend this for any Bonsai beginners. Care is a little different for a Ficus Bonsai Tree than other houseplants so it’s important you know the basics.
Light

Bright Direct Light

I thrive in bright areas of your home so am best placed near a window.
Water

Water Moderately

I don’t like my soil to be too dry or too soggy. Little and often is what I’m after.
Humidity

High Humidity

I thrive in humid environments so please mist my leaves every so often.
Soil

Potting Soil

I need soil specifically for indoor plants as it retains the right amount of water.

Ficus Bonsai Trees need bright sunlight

If you have a really bright spot in your home that has too much sunlight for most other houseplants, then this is the perfect spot for your Ficus Bonsai Tree. They thrive in bright sunlight and will really struggle with anything less.

Water once the soil is dry

Ficus Bonsai Trees need a sufficient amount of water and will start to wilt if their soil is dry for too long. It can tolerate the occasional over or underwatering but don’t make too much of a habit out of it as Ficus Bonsai Tree aren’t always that forgiving!

Misting is key

Daily misting of your Ficus Bonsai Tree is the key to its long term happiness! How much you mist each time does depend on the time of year and temperature in the room as they will need less misting during winter as this can leaf to leaf rot and fungal disease.

Warm temperatures are ideal

You want to try and keep your Ficus Bonsai Tree away from cold temperatures and drafts. Average room temperature or above is best.

Ficus Bonsai Trees need regular fertilisation

We recommend feeding your Ficus Bonsai Tree every other week during spring and summer. You will want to decrease this a bit over winter as growth slows to every 1-2 months. If your Ficus Bonsai Tree stops growing during winter then hold off fertilising until spring.

Prune regularly to keep desired shape

Pruning is how Ficus Bonsai Tree parents keep the shape and train their plants. Pruning evens out growth and creates a bushier tree so don’t be afraid to prune your tree often to encourage more leaves to grow.

Propagate a Ficus Bonsai Tree through stem cuttings

Ficus Bonsai Trees can be propagated either by stem cuttings or the air layering method (which is a little more complex). Try to propagate in spring for the best chance of success.

Ficus Bonsai Tree are toxic to pets

Sadly Ficus Bonsai Tree aren’t safe for pets so you will want to keep them out of reach of your furry friends or any small children who might try and nibble on your plants. <Ficus Bonsai Tree1 
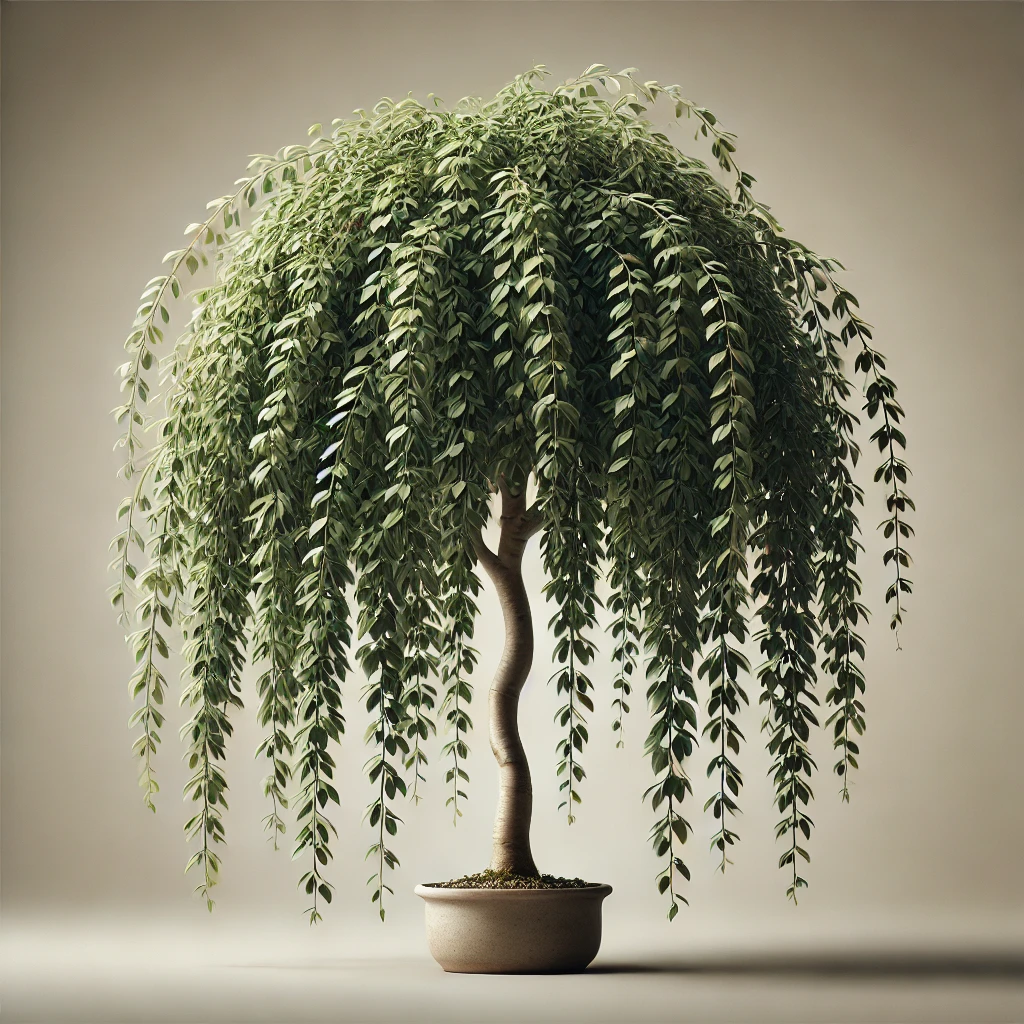
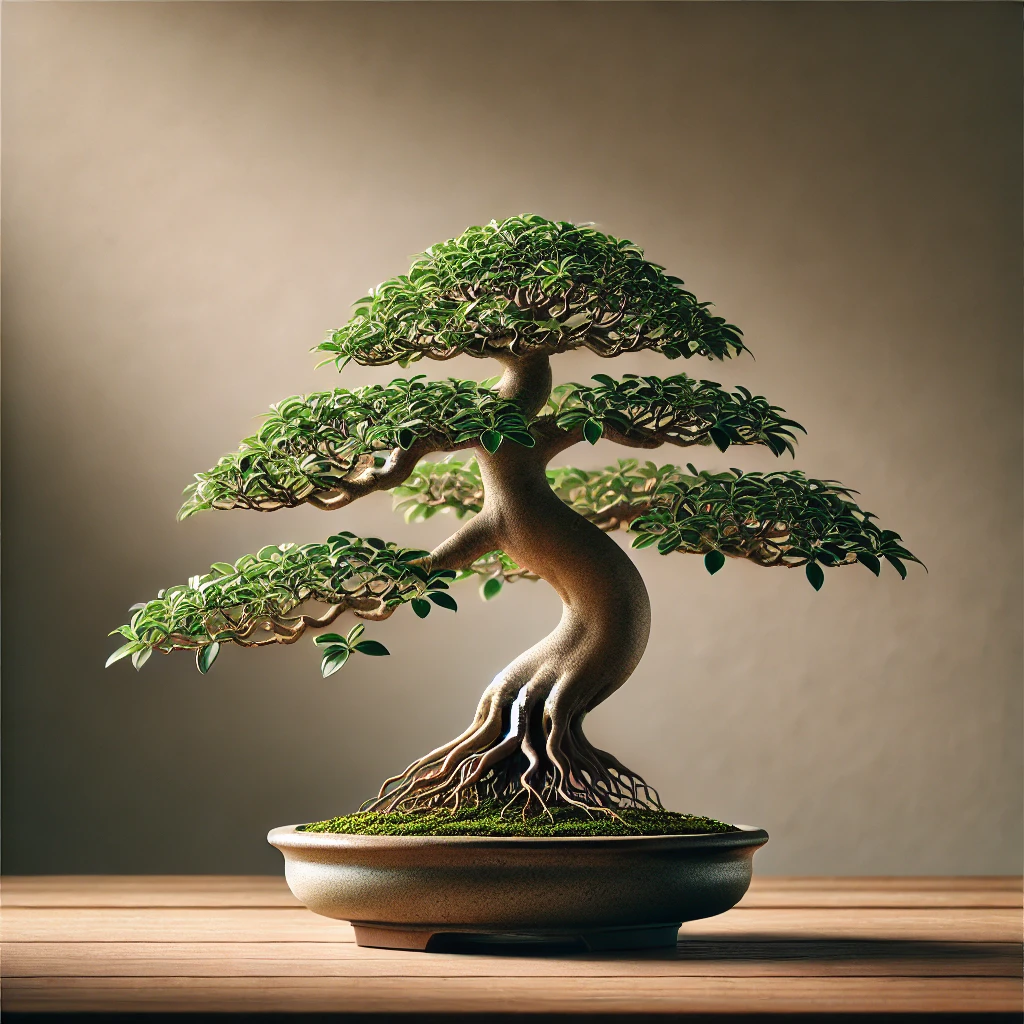
Ficus Bonsai Tree1[/caption]

Ficus Bonsai Tree FAQs

Quick and simple answers to the most common questions we see about the Ficus Bonsai Tree.    

Common Problems with your Ficus Bonsai Tree

Here are some common issues that you might run into. It’s important to diagnose any issues early to give your plant the best chance of bouncing back.  

If you want to find out more about how to best care for your Peace Lily then visit our Plant Guide or download our How to Care for your Houseplants ebook.


Complete Houseplant Care eBook

Our comprehensive (and rather good looking) eBook that will teach you everything you need to know to successfully care for, and maintain your houseplants!

Buy on

Fiddle and Thorn is a participant in the Amazon Services LLC Associates Program, an affiliate advertising program designed to provide a means for sites to earn advertising fees by advertising and linking to Amazon.com

Take our houseplant survey!

Quickly respond to our 30 second houseplant survey and get 75% off our Complete Houseplant Care eBook!

Take the Survey

No thanks…